
Сегодня короткая заметка об одном полезном иструменте под название SCP — утилита для копирования файлов в SSH сессии. Он доступен в Windows 10 как один из инструментов работы с SSH.
Копирование файла с компьютера Windows на удаленный компьютер Linux по SSH:
scp "C:\dir\file.zip" root@192.168.1.1:~/archives
file.zip будет скопирован в каталог archives в домашнем каталоге пользователя root
Можно копировать файлы используя маски в имени:
scp "C:\dir\*.zip" root@192.168.1.1:~/archives
все файлы c расширением zip будут скопированы в каталог archives в домашнем каталоге
С ключем -r можно рекурсивно скопировать файлы и каталоги в каталог назначения:
scp -r "C:\dir\" root@192.168.1.1:~/archives
все файлы и каталоги будут скопированы в каталог archives в домашнем каталоге
Копирование файла с удаленного компьютера Linux на компьютер Windows по SSH:
scp.exe root@192.168.1.1:~/archives/file.zip "C:\dir\"
Файл file.zip будет скопирован в каталог C:\dir
Как копировать и передавать файлы по SSH
В статье мы расскажем, как передать файлы через SSH на разных операционных системах — Windows и Linux.
- Что нужно для подключения
- Как скопировать файл через SSH на Linux
- Как отправить файл по SSH с локального компьютера на сервер
- Как скачать файлы с удаленного сервера на компьютер
- Как скопировать файлы по SSH на Windows
- Как загрузить файл с компьютера на сервер
- Как скачать файл через SSH на локальный компьютер
Для подключения к серверу вам потребуются:
- IP-адрес или имя сервера,
- логин пользователя (в том числе root),
- пароль пользователя,
- порт.
Чаще всего копирование файлов через SSH делают с помощью двух мини-программ:
- scp (Secure Copy) — утилита для Linux. Она позволяет безопасно передать или скачать файл по протоколу SSH. Программа scp входит в комплект OpenSSH и не требует установки.
- pscp.exe — это утилита для Windows. Она используется по тому же назначению, что и scp: подключение к серверу по SSH и работа с файлами. Эта мини-программа входит в состав PuTTY: ее можно скачать на официальном сайте. Процедура настройки SSH-клиента описана в нашей статье.
Важно: если загружаемый файл существует на целевом хосте, он перезапишется.
Работа через SSH предполагает использование консольных команд. Наиболее популярные из них вы можете найти в статье.
Как скопировать файл через SSH на Linux
Копирование файлов по SSH на Linux можно сделать с помощью scp. Эта утилита позволяет:
- передать файл с локального компьютера на удаленный сервер,
- скачать файл с удаленного сервера на локальный компьютер.
Команда scp имеет следующий синтаксис:
scp опция источник получатель
Как отправить файл по SSH с локального компьютера на сервер
Чтобы загрузить файл:
- Подключитесь к серверу по SSH.
- Выполните команду:
scp /home/test.doc username@servername:/directory
Где:
- /home/test.doc — путь к файлу на локальном компьютере;
- username — имя SSH-пользователя;
- servername — имя сервера или его IP-адрес;
- directory — директория на сервере, в которую нужно загрузить файл.
Готово, вы загрузили файл на сервер.
Как скачать файлы с удаленного сервера на компьютер
Чтобы загрузить файл:
- Подключитесь к серверу по SSH.
- Выполните команду:
scp username@servername:/directory/test.doc /home
Где:
- /directory/test.doc — путь к файлу на сервере;
- username — имя SSH-пользователя;
- servername — имя сервера или его IP-адрес;
- home — папка на компьютере, в которую нужно загрузить файл.
Готово, вы скачали файл на компьютер.
Как скопировать файлы по SSH на Windows
Копирование через SSH на ОС Windows выполняется с помощью утилиты pscp.exe из набора PuTTY.
Как загрузить файл с компьютера на сервер
Чтобы загрузить файл:
- Подключитесь к серверу по SSH.
- Выполните команду:
pscp C:/documents/test.doc username@servername:/directory
Где:
- /documents/test.doc — путь к файлу на локальном компьютере;
- username — имя SSH-пользователя;
- servername — имя сервера или его IP-адрес;
- directory — директория на сервере, в которую нужно загрузить файл.
Если название файла или путь содержит пробелы, заключите его в кавычки:
pscp “C:/documents/test 1.doc” username@servername:/directory
Готово, вы загрузили файл на сервер.
Как скачать файл через SSH на локальный компьютер
Чтобы загрузить файл:
- Подключитесь к серверу по SSH.
- Выполните команду:
pscp username@servername:/directory/test.doc C:/documents
Где:
- username — имя SSH-пользователя;
- servername — имя сервера или его IP-адрес;
- directory/test.doc — путь к файлу на сервере;
- /documents — директория на локальном компьютере, в которую нужно загрузить файл.
Если название файла или путь содержит пробелы, заключите его в кавычки:
pscp username@servername:”/directory/test 1.doc” C:/documents
Готово, вы скачали файл на компьютер.
Introduction
While there are various methods available for file transfers from a Windows system to a Linux system, using the Command lines provides a straightforward and reliable approach. In this guide, we’ll walk you through the step-by-step process, highlighting the necessary commands and techniques to seamlessly transfer your files from Windows to Linux.
Prerequisites
Verify Your Remote Linux Server is Ready
If you have ordered one from Database Mart, you will receive an email containing the information of your VPS, including server IP and login credentials. You can also obtain the information on the overview page in the control panel. Please refer to this guide on how to get server credentials if you need assistance.
Steps to Transfer Files from Windows to Linux Using Command Prompt
Step 1. Open the Command Prompt in Local Windows
Search cmd in the search bar, and double-click the Command Prompt to open it. Or press the Windows key + R, then type cmd or cmd.exe in the Run command box, and press Enter.
Then, you should see the command prompt interface as below.
Step 2. Transfer Files between Local Windows and Remote Linux
Before the transfer, we will explain some terms used in the command. When using the command, you should replace these terms with the actual value.
filename.extension: it’s the name of a file and file extension that’s to be transferred. In this case, we may use mydata.txt and website.txt.
folderName: it’s the name of a folder that’s to be transferred. In this case, we may use the Website folder.
customPort: it’s the custom port you use to connect to your remote Linux server.
localFilePath: it’s the path on your local Windows PC.
username: it’s the username used to log into the remote Linux server.
remoteServerAddress: it’s the server IP of the remote Linux server.
remoteFilePath: it’s the path on the remote Linux server. In this case, we use /home/administrator.
2.1 Transfer a File from Local to Remote Server
For demonstration purposes, we have created a file in the desktop>website named «mydata.txt». First, we need to go to the file’s directory by inputting cd, followed by the file path on our local Windows. In this case, the file is located at desktop\website. Therefore, we enter the following command.
After that, you can see that we navigate to the folder where the file is located.
Then, we use the following command to transfer the «mydata.text» from local Window to the remote Linux server.
scp filename.extension username@remoteServerAddress:remoteFilePath
After entering the command, you will be prompted for the password for connecting to the remote server. Input the password and hit the Enter button, the file will be transferred. In this case, we have transferred the local file mydata.txt (located at desktop/website) to the /home/administrator directory on the remote Linux server.
2.2 Transfer a File from Remote Server to Local
You can run the following command to copy a file from the remote server to your local Windows PC.
scp username@remoteServerAddress:remoteFilePath/filename.extension localFilePath
In this case, we have transferred the mydata.txt (located at home/administrator on the remote server) to the desktop directory on the local server.
2.3 Transfer Multiple Files from Local to Remote Server
The SCP command also allows you to transfer multiple files in a single command. Navigate to the file folder and run the following command.
scp localFilePath/filename1.extension localFilePath/filename2.extension username@remoteServerAddress:remoteFilePath
In this case, we have transferred two local files mydata.txt (located at desktop) and mywebsite.txt (located at desktop/website) to the /home/administrator directory on the remote Linux server.
2.4 Transfer a Folder from Local to Remote Server
Besides files, the SCP command also allows you to securely copy folders between the local and remote server. Use the following command to copy a folder from local to the remote server.
scp -r localFilePath/folderName username@remoteServerAddress:remoteFilePath
In this case, we have transferred the local Website folder, which contains two files mydata.txt and mywebsite.txt, to the /home/administrator directory on the remote Linux server.
2.5 Transfer a File Faster
Adding the -c option after the scp command will compress the file while it’s being transferred. Once the file reaches its destination, it returns to its normal size.
scp -c localFilePath/filename.extension username@remoteServerAddress:remoteFilePath
In this case, we have transferred the local Website folder, which contains two files mydata.txt and mywebsite.txt, to the /home/administrator directory on the remote Linux server.
2.6 Transfer a File Using a Custom Port
The scp command uses the 22 port by default. If you have changed to a custom port, please run the following command to transfer a file. Make sure to capitalize the P.
scp -P customPort localFilePath/filename.extension username@remoteServerAddress:remoteFilePath
In this case, we have transferred the local file mydata.txt to the /home/administrator directory on the remote Linux server using a custom port.
Step 3. Verify the File has been Transferred
Then, Use a preferred editor to open the file. Here, we use the «Nano editor.» In this example, the remoteFilePath is /home/administrator, and the filename.extention can be mydata.txt, mywebsite.txt, and myweb.txt.
nano remoteFilePath/filename.extention
We can also check if the folder has been copied to the remote server. Go to the /home/administrator directory and check if the Website folder is there.
cd /home/administrator
ll
Conclusion
In conclusion, transferring files from a local Windows machine to a remote Linux server using the command prompt (CMD) is a powerful and efficient method for managing data. By following the step-by-step guide outlined in this blog, you can establish a secure connection, utilize the SCP (Secure Copy Protocol) command, and successfully transfer files between these two platforms.
Other Methods to Transfer Files between Windows and Linux Server
Are you looking for a way to quickly transfer files from your Windows computer to your Linux computer and back again? The open source PSCP utility makes it easy to transfer files and folders, and of course it’s open source.
Setting your PATH in Windows
Knowing how to set your command path in Windows makes it easier to use a handy utility like PSCP. If you’re unfamiliar with that process, read how to set a PATH on Windows.
Using PSCP
PSCP (PuTTY Secure Copy Protocol) is a command-line tool for transferring files and folders from a Windows computer to a Linux computer.
-
Download
pscp.exefrom its website. -
Move
pscp.exeto a folder in your PATH (for example,Desktop\Appif you followed the PATH tutorial here on Opensource.com). If you haven’t set a PATH variable for yourself, you can alternately movepscp.exeto the folder holding the files you’re going to transfer. -
Open Powershell on your Windows computer using the search bar in the Windows taskbar (type ‘powershell` into the search bar.)
-
Type
pscp –versionto confirm that your computer can find the command.
IP address
Before you can make the transfer, you must know the IP address or fully-qualified domain name of the destination computer. Assuming it’s a computer on your same network, and that you’re not running a DNS server to resolve computer names, you can find the destination IP address using the ip command on the Linux machine:
[linux]$ ip addr show | grep 'inet '
inet 127.0.0.1/8 scope host lo
inet 192.168.1.23/24 brd 10.0.1.255 scope global noprefixroute eth0
In all cases, 127.0.0.1 is a loopback address that the computer uses only to talk to itself, so in this example the correct address is 192.168.1.23. On your system, the IP address is likely to be different. If you’re not sure which is which, you can try each one in succession until you get the right one (and then write it down somewhere!)
Alternately, you can look in the settings of your router, which lists all addresses assigned over DHCP.
Firewalls and servers
The pscp command uses the OpenSSH protocol, so your Linux computer must be running the OpenSSH server software, and its firewall must allow SSH traffic.
If you’re not sure whether your Linux machine is running SSH, then run this command on the Linux machine:
[linux]$ sudo systemctl enable --now sshd
To ensure your firewall allows SSH traffic, run this command:
[linux]$ sudo firewall-cmd --add-service ssh --permanent
For more information on firewalls on Linux, read Make Linux stronger with firewalls.
Transfer the file
In this example, I have a file called pscp-test.txt that I want to transfer from C:\Users\paul\Documents on my Windows computer to my destination Linux computer home directory /_home_/paul.
Now that you have the pscp command and the destination address, you’re ready to transfer the test file pscp-test.txt. Open Powershell and use the dir command to change to the Documents folder, where the sample file is located:
PS> dir %USERPROFILE%\Documents\
Now execute the transfer:
PS> pscp pscp-test.txt paul@192.168.1.23:/home/paul
| Password:
End of keyboard-interactive prompts from server
pscp-test.txt | 0 kb | 0.0 kB/s | ETA: 00:00:00 | 100%
Here’s the syntax, word for word:
-
pscp: The command used to transfer the file. -
pscp-test.txtis the name of the file you want to transfer from Windows. -
paul@192.168.1.23is my username on the Linux computer, and the IP address of the Linux computer. You must replace this with your own user and destination information. Notice thatpscprequires a destination path on the target computer, and:/home/paulat the end of the IP address specifies that I want the file copied to my home folder.
After you authenticate to the Linux computer, the pscp-test.txt file is transferred to the Linux computer.
[ Related read Share files between Linux and Windows computers ]
Verifying the transferred
On your Linux computer, open a terminal and use the ls command to verify that the file pscp-test.txt appears in your home directory.
[linux]$ ls
Documents
Downloads
Music
Pictures
pscp-test.txt
Copying a file off of a Linux system
You aren’t limited to just copying files to your Linux system. With pscp, you can also copy a file from Linux onto Windows. The syntax is the same, only in reverse:
PS> pscp paul@192.168.1.23:/home/paul/pscp-test.txt %USERPROFILE%\Documents\pscp-win.txtHere’s the syntax:
-
pscp: The command used to transfer the file. -
paul@192.168.1.23:/home/paul/pscp-test.txtis my username on the Linux computer, the IP address of the Linux computer, and the path to the file I want to copy. -
%USERPROFILE%\Documentsis the location on my Windows computer where I want to save the file. Notice that in copying the file back to my Windows computer, I can give it a new name, such aspscp-win.txt, to differentiate it from the original. You don’t have to rename the file, of course, but for this demonstration it’s a useful shortcut.
Open your file manager to verify that the pscp-win.txt file was copied to the Windows C:\Users\paul\Documents path from the Linux computer.
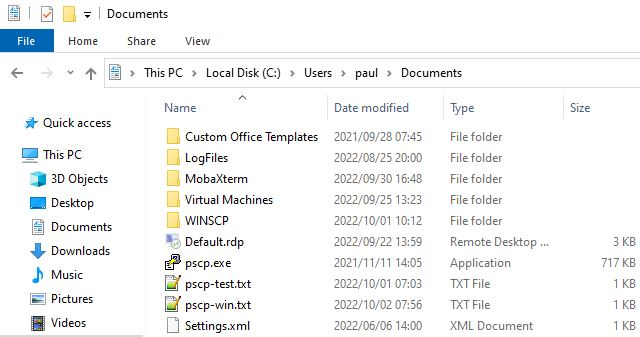
Image by:
(Paul Laubscher, CC BY-SA 4.0)
Remote copying
With the power of the open source pscp command, you have access to any computer in your house, and servers you have accounts on, and even mobile and edge devices.
This work is licensed under a Creative Commons Attribution-Share Alike 4.0 International License.
The fastest way to transfer files and folders over SSH from Windows 10 to Linux is with the SCP tool. It works within the SSH protocol and allows users to quickly and easily transfer data right over the command-line from one computer to another!
In this guide, we’ll show you how to use SCP on your Windows 10. We’ll cover two methods. The first method is using the Windows PowerShell, Microsoft’s equivalent to the Linux command-line. The second method we will cover is WinSCP, a utility that allows Windows users to transfer files using SCP over SSH with a nice GUI.
Note: for SCP to work on Windows 10, the Linux PC you plan to transfer files to must already be running an OpenSSH server. To set up an SSH server on your Linux system, please follow our guide on the subject!
Method 1 – PowerShell
Windows PowerShell is arguably the best way to use SCP on Windows 10. The reason? Windows 10 users all already have access to PowerShell, and there’s no need to configure or tweak anything to use it. Better still, Microsoft has SCP built into PowerShell, so Windows 10 users don’t even have to install it!
To use SCP in PowerShell, start by launching the PowerShell console on your Windows 10 desktop. To do that, press Win on the keyboard, search for “PowerShell” and launch the app with the blue terminal icon. Then, follow the step-by-step instructions below to learn how to SCP files and folders to your Linux box.
Step 1: Open up Windows Explorer and navigate to the location of the file/folder you wish to transfer to the Linux system. So, for example, if there were a file or folder in “Documents,” the location would be C:\Users\EXAMPLE_USERNAME\Documents\. Then, copy the location data to your clipboard using Ctrl + C.
Step 2: Go back to the PowerShell window, and write cd into the command prompt. Then, after writing cd, right-click with the mouse. By right-clicking, you will paste the location you copied to the clipboard.
Once the location is pasted in the PowerShell prompt, it should look like the following command.
cd C:\Some\location\of\files\or\folders\to\transfer\
Press the Enter key to execute the command.
Step 3: After executing the cd command, PowerShell will be in the directory where the files are that you want to transfer. From here, go back to Windows Explorer and look through this same directory for files/folders you want to transfer.
For example, if you wish to transfer example-photo.png to your Linux PC, take note of the filename. Or, if you’d like to transfer a directory, say, “Important-Files“, remember the folder name.
Step 4: In PowerShell, use the SCP command to transfer a file or directory over SSH to your Linux PC.
Note: when attempting to transfer files or folders, PowerShell may say, “The authenticity of host can’t be established. Are you sure you want to continue connecting?” You must select “yes,” or SCP will fail.
Transfer a file
To transfer a file over SCP from Windows 10 to a Linux PC over SSH, customize the command below. Note that you must change example-photo.png to the actual file you wish to transfer, remote_linux_username to the username on the Linux PC, linux_hostname_or_local_ip to the Linux PC’s hostname/LAN IP address, and /remote/directory/on/linux/pc to a real directory on the Linux PC.
scp example-photo.png remote_linux_username@linux_hostname_or_local_ip:/remote/directory/on/linux/pc
Transfer the contents of a directory
Need to transfer the contents of an entire folder? Make use of scp -r. Remember to change C:\Users\EXAMPLE_USERNAME\Documents\Important-Files to the actual file folder on your Windows 10 PC, remote_linux_username to the username on the Linux PC, linux_hostname_or_local_ip to the Linux PC’s hostname/LAN IP address, and /remote/directory/on/linux/pc to an actual directory on the Linux PC.
scp -r 'C:\Users\EXAMPLE_USERNAME\Documents\Important-Files' remote_linux_username@linux_hostname_or_local_ip:/remote/directory/on/linux/pc
Method 2 – WinSCP
If you’re not a huge fan of the command-line but still need to transfer files from Windows 10 to a remote Linux system via SSH, you can use WinSCP. It adds on a beautiful GUI on top of SCP (it also supports other protocols). Here’s how to use it to transfer files and folders.
Step 1: Download and install the WinSCP application on your Windows 10 PC. To download the app, head over to winscp.net, and click on the green “DOWNLOAD NOW” button. Once the installer is done, launch it and install the program on your Windows 10 PC.
Step 2: After WinSCP is installed, launch it on your Windows 10 desktop. Upon launching, you will see a “Login” window. In the login window, look for “File protocol” and change it from “SFTP” to “SCP.”
Step 3: Find “Host name” and write out the hostname of the Linux PC. Can’t figure out the hostname? The LAN IP address also works.
Step 4: Find the “User name” text-box, and write in the name of the user on the remote Linux PC in the box.
Step 5: Find the “Password” box and write in the name of the password to the remote Linux PC. Then, click “Save” to save the information.
Step 6: Select the “Login” button to access your remote Linux PC over SCP/SSH. While logging in, be sure to select “Yes” when WinSCP asks, “Continue connecting to an unknown server and add its host key to a cache?”
Step 7: Open up the Windows Explorer and browse for the file or folder you wish to share over SCP/SSH protocol. Then, drag it into the WinSCP window. It will instantly transfer to the remote Linux PC using SCP!
