
Changing the Java version on Windows 10 can seem like a daunting task, but it’s actually quite straightforward. By following a few simple steps, you can switch to the desired Java version without any hassle. This guide will walk you through the process step-by-step. Whether you’re a developer needing a specific version or just someone looking to update, this tutorial will have you up and running in no time.
In this step-by-step guide, you’ll learn how to change the default Java version on your Windows 10 machine. This process involves downloading the desired version, installing it, and then updating system environment variables.
Step 1: Download the Desired Java Version
First, download the Java version you need from the official Oracle website or any other trusted source.
Make sure you choose the correct version for your system (32-bit or 64-bit). Save the installer to a location you can easily access.
Step 2: Install the Java Version
Run the downloaded installer and follow the on-screen instructions to install the new Java version.
The installation process is straightforward. Just keep clicking «Next» and eventually «Finish.» Make a note of the installation directory.
Step 3: Open System Environment Variables
Press Win + S, type «Environment Variables,» and select «Edit the system environment variables.»
This will open the System Properties window. Click on the «Environment Variables…» button in the lower-right corner.
Step 4: Edit the JAVA_HOME Variable
In the Environment Variables window, click «New» under System variables. Enter JAVA_HOME as the variable name and the path to the new Java installation as the variable value.
This step sets the new Java version as the default Java for your system. Make sure the path is correct.
Step 5: Update the PATH Variable
Find the PATH variable in the System variables section and click «Edit.» Add %JAVA_HOME%bin to the list of paths.
This tells the system where to find the Java executable. Make sure it’s placed at the beginning of the list for priority.
Step 6: Verify the Java Version
Open Command Prompt and type java -version to verify that the new Java version is now the default.
If everything is set up correctly, you should see the new version number displayed. If not, double-check your environment variables.
After completing these steps, your system will use the new Java version by default. You can always switch back or change to another version using the same steps.
Tips for Changing Java Version in Windows 10
- Backup Your System: Always create a system restore point before making changes to system environment variables.
- Use Version Managers: Tools like
jEnvcan help manage multiple Java versions easily. - Check Compatibility: Make sure the new Java version is compatible with your applications.
- Uninstall Old Versions: Remove older Java versions if you don’t need them to free up space.
- Environmental Variables: Double-check your environment variables to ensure they are typed correctly.
Frequently Asked Questions
What is JAVA_HOME?
JAVA_HOME is an environment variable that points to the directory where Java is installed. It’s used by various applications to locate the Java runtime.
Can I have multiple Java versions on Windows 10?
Yes, you can install multiple Java versions, but you need to update the JAVA_HOME and PATH variables to switch between them.
How do I uninstall an old Java version?
You can uninstall an old Java version through the Control Panel under «Programs and Features.»
Why isn’t my new Java version recognized?
Ensure the new Java path is correctly set in the JAVA_HOME and PATH variables, and that they are placed at the beginning of the PATH list.
Do I need administrative rights to change Java versions?
Yes, you typically need administrative rights to modify system environment variables.
Summary
- Download the desired Java version.
- Install the Java version.
- Open System Environment Variables.
- Edit the JAVA_HOME variable.
- Update the PATH variable.
- Verify the Java version.
Conclusion
Changing the Java version in Windows 10 is a straightforward process, but it requires careful attention to detail. By following the steps outlined above, you can switch between different Java versions with ease. This is particularly useful for developers who need specific Java versions for different projects.
Remember, always double-check your environment variables to avoid any mistakes. Feel free to explore tools like version managers if you frequently switch between Java versions. Keep your system and projects running smoothly by staying up-to-date with the latest Java updates and best practices. Happy coding!
Matt Jacobs has been working as an IT consultant for small businesses since receiving his Master’s degree in 2003. While he still does some consulting work, his primary focus now is on creating technology support content for SupportYourTech.com.
His work can be found on many websites and focuses on topics such as Microsoft Office, Apple devices, Android devices, Photoshop, and more.
In this article, I will show you how to install multiple Java versions on Windows and how to change the Java version on the command line and in PowerShell:
To enable these Java version change commands on your system as well, follow this step-by-step guide.
Let’s go…
Step 1: Installing Multiple Java Versions
Installing multiple Java versions in parallel is incredibly easy in Windows. You can download and run the installer for each version, which automatically installs the versions in separate directories.
Download Sources
- Java SE 1.1 – You can no longer install this version on 64-bit Windows.
- Java SE 1.2 – Installed to
C:\jdk1.2.2\andC:\Program Files (x86)\JavaSoft\JRE\1.2\by default – I recommend changing this toC:\Program Files (x86)\Java\jdk1.2.2\andC:\Program Files (x86)\Java\jre1.2.2\for the sake of clarity. - Java SE 1.3 – Installed to
C:\jdk1.3.1_28\by default – I recommend changing this toC:\Program Files (x86)\Java\jdk1.3.1_28\. - Java SE 1.4 – Installed to
C:\j2sdk1.4.2_19\by default – I recommend changing this toC:\Program Files (x86)\Java\jdk1.4.2_19\.
Starting with the following versions, you don’t need to change the default installation directories:
- Java SE 5
- Java SE 6
- Java SE 7
- Java SE 8
- Java SE 9 / OpenJDK 9
- Java SE 10 / OpenJDK 10 (→ The most important new features in Java 10)
Attention – you may use the following Oracle distributions only for private purposes and development:
- Java SE 11 / OpenJDK 11 (→ The most important new features in Java 11)
- Java SE 12 / OpenJDK 12 (→ The most important new features in Java 12)
- Java SE 13 / OpenJDK 13 (→ The most important new features in Java 13)
- Java SE 14 / OpenJDK 14 (→ The most important new features in Java 14)
- Java SE 15 / OpenJDK 15 (→ The most important new features in Java 15)
- Java SE 16 / OpenJDK 16 (→ The most important new features in Java 16)
- Java SE 17 / OpenJDK 17 (→ The most important new features in Java 17)
- Java SE 18 / OpenJDK 18 (→ The most important new features in Java 18)
- Java SE 19 / OpenJDK 19 (→ The most important new features in Java 19)
- Java SE 20 / OpenJDK 20 (→ The most important new features in Java 20)
- Java SE 21 / OpenJDK 21 (→ The most important new features in Java 21)
- Java SE 22 / OpenJDK 22 (→ The most important new features in Java 22)
- Java SE 23 / OpenJDK 23 (→ The most important new features in Java 23)
The following version is currently an early access build. You should use it only for testing purposes:
- JDK 24 Early-Access Build
Step 2: Define Java Environment Variables
The following two environment variables decide which Java version an application uses:
JAVA_HOME– many start scripts use this variable.Path– is used when running a Java binary (such asjavaandjavac) from the console.
These variables should always point to the same Java installation to avoid inconsistencies. Some programs, such as Eclipse, define the Java version in a separate configuration file (for Eclipse, for example, this is the entry «-vm» in the eclipse.ini file).
Manually Setting the Java Environment Variables
The Java installers create various environment variables, which you need to clean up first (see below). The fastest way to change the environment variables is to press the Windows key and type «env» – Windows then offers «Edit the system environment variables» as a search result:
At this point, you can press «Enter» to open the system properties:
Click on «Environment Variables…» and the following window opens:
As the default version, I recommend the current release version, Java 23. Accordingly, you should make the following settings:
- The top list («User variables») should not contain any Java-related entries.
- The lower list («System variables») should contain an entry «JAVA_HOME = C:\Program Files\Java\jdk-23». If this entry does not exist, you can add it with «New…». If it exists but points to another directory, you can change it with «Edit…».
- Delete the following entries under «Path» (if they exist):
C:\ProgramData\Oracle\Java\javapathC:\Program Files (x86)\Common Files\Oracle\Java\javapath
- Insert the following entry instead:
%JAVA_HOME%\bin
The entry should then look like the following (the other entries in the list will probably look different for you since you have other applications installed than I do):
The last entry ensures that Path and JAVA_HOME are automatically consistent.
Attention: this only works for the default setting configured here. If you change JAVA_HOME via the command line, you have to adjust Path accordingly. But don’t worry – the scripts you can download in the next step will do that automatically.
How to Check Your Java Version on Windows
Now open a command line to check the settings with the following commands:
echo %JAVA_HOME%
java -versionCode language: plaintext (plaintext)
Here’s what you should see:
Step 3: Install the Scripts to Change the Java Version
To change the Java version on the command line, I have prepared some batch files that you can copy to your system. Here is the link: scripts-up-to-java24.zip
The ZIP file contains scripts named
java23.bat,java22.bat,java21.bat, etc., for all Java versions,- the corresponding files
java23.ps1,java22.ps1, etc. for PowerShell, - plus two common scripts
javaX.batandjavaX.ps1.
I suggest you unpack the scripts to C:\Program Files\Java\scripts.
The scripts look like this:
java23.bat:
@echo off
call javaX "Java 23" %1Code language: DOS .bat (dos)
java23.ps1
javaX "Java 23" $args[0]
Code language: PowerShell (powershell)javaX.bat:
@echo off

if %1 == "Java 1.2" set JAVA_HOME=C:\Program Files (x86)\Java\jdk1.2.2
if %1 == "Java 1.3" set JAVA_HOME=C:\Program Files (x86)\Java\jdk1.3.1_28
...
if %1 == "Java 21" set JAVA_HOME=C:\Program Files\Java\jdk-21
if %1 == "Java 22" set JAVA_HOME=C:\Program Files\Java\jdk-22
if %1 == "Java 23" set JAVA_HOME=C:\Program Files\Java\jdk-23

if "%~2" == "perm" (
  setx JAVA_HOME "%JAVA_HOME%" /M
)

set Path=%JAVA_HOME%\bin;%Path%

echo %~1 activated.Code language: DOS .bat (dos)javaX.ps1:
param ($javaVersion, $perm)

switch ($javaVersion) {
  "Java 1.2" { $env:JAVA_HOME = "C:\Program Files (x86)\Java\jdk1.2.2" }
  "Java 1.3" { $env:JAVA_HOME = "C:\Program Files (x86)\Java\jdk1.3.1_28" }
  ...
  "Java 21" { $env:JAVA_HOME = "C:\Program Files\Java\jdk-21" }
  "Java 22" { $env:JAVA_HOME = "C:\Program Files\Java\jdk-22" }
  "Java 23" { $env:JAVA_HOME = "C:\Program Files\Java\jdk-23" }
}

if ($perm -eq "perm") {
  [Environment]::SetEnvironmentVariable("JAVA_HOME", $env:JAVA_HOME, [System.EnvironmentVariableTarget]::Machine)
}

$env:Path = $env:JAVA_HOME + '\bin;' + $env:Path

Write-Output "$javaVersion activated."Code language: PowerShell (powershell)
In the files javaX.bat and javaX.ps1, you probably have to adjust some paths to the installed Java versions.
The scripts update the JAVA_HOME environment variable and insert the bin directory at the beginning of the Path variable. That makes it the first directory to be searched for the corresponding executable when you run Java commands such as java or javac.
(The Path variable gets longer with each change. Do not worry about it. This only affects the currently opened command line.)
Step 4: Add the Script Directory to the Path
To be able to call the scripts from anywhere, you have to add the directory to the «Path» environment variable (just like you did with «%JAVA_HOME%\bin» in the second step):
If you have installed the latest releases of all Java versions, you can use the scripts without any further adjustments. Open a new command line or PowerShell and enter, for instance, the following commands:
If one of the commands does not activate the expected Java version, please check if the path in the javaX.bat and javaX.ps1 files corresponds to the installation path of the Java version you want to activate.
Temporary and Permanent Java Version Changes
The commands presented up to this point only affect the currently opened command line or PowerShell. As soon as you open another command line, the default version defined in step 2 is active again (Java 23, if you have not changed anything).
If you want to change the Java version permanently, just add the parameter «perm» to the corresponding command, e.g.
java23 perm
Attention: To set the Java version permanently, you must open the command line or PowerShell as an administrator. Otherwise, you will get the error message «ERROR: Access to the registry path is denied.
What You Should Do Next…
I hope you were able to follow the instructions well and that the commands work for you.
Now I would like to hear from you:
Were you able to follow the steps well – or do you have unanswered questions?
Either way, let me know by leaving a comment below.
Changing the Java version on Windows 10 Command Prompt can be a useful skill for Java developers and enthusiasts. Whether you need to switch to a different version for compatibility reasons or simply want to experiment with different Java versions, knowing how to change the Java version on Command Prompt can come in handy. This blog post will guide you through the process, providing detailed instructions and insights to help you successfully change Java versions on Windows 10.
Video Tutorial:
The Challenge of Changing Java Version on Windows 10 Command Prompt
Many new Java developers may struggle with changing the Java version on Command Prompt for the first time. The Command Prompt is a powerful tool that allows users to execute commands and interact with their computer’s operating system. However, understanding how to navigate and manipulate the Command Prompt to switch Java versions can be confusing.
Things You Should Prepare for
Before you begin changing the Java version on Windows 10 Command Prompt, there are a few things you should prepare:
1. Ensure that you have multiple Java versions installed on your Windows 10 computer. If you have only one version of Java installed, you may need to download and install additional versions from the official Java website.
2. Familiarize yourself with the Command Prompt interface. Understanding basic Command Prompt commands and navigation will make the process of changing Java versions easier.
3. Make note of the location of each Java installation on your computer. You will need this information when specifying the Java version in Command Prompt commands.
Now that you are prepared, let’s explore four different methods to change the Java version on Windows 10 Command Prompt.
Method 1. Changing Java Version Using “java” Command
To change the Java version using the «java» command, follow these steps:
1. Open Command Prompt by pressing the Windows key + R, typing «cmd,» and hitting Enter.
2. Type «java -version» in the Command Prompt and press Enter to check the currently installed Java version.
3. Locate the desired Java version’s installation directory on your computer.
4. In Command Prompt, type the following command to change the Java version:
«`
set PATH=«C:\path\to\desired\java\version\bin»;%PATH%
«`
Replace «C:\path\to\desired\java\version\bin» with the actual path to the desired Java version’s installation directory.
5. Now, type «java -version» again to verify that the Java version has been successfully changed.
Pros:
1. Quick and straightforward method
2. Does not require modifying environment variables
3. Can be easily reversed by closing the Command Prompt window
Cons:
1. Only temporary change for the current Command Prompt session
2. Not suitable for permanently setting the Java version
Method 2. Changing Java Version Using Environment Variables
To change the Java version using environment variables, follow these steps:
1. Right-click the Start button and select System.
2. In the System window, click on «Advanced system settings» on the left.
3. In the System Properties window, click on the «Environment Variables» button.
4. In the Environment Variables window, under «System variables,» locate the «Path» variable and click on «Edit.«
5. In the Edit Environment Variable window, click on «New» and enter the path to the desired Java version’s installation directory.
6. Click «OK» to save the changes.
7. Now, open Command Prompt and type «java -version» to verify that the Java version has been successfully changed.
Pros:
1. Allows for permanently setting the Java version
2. Changes apply to all Command Prompt sessions on the computer
3. Can easily switch between different Java versions by modifying the «Path» variable
Cons:
1. Requires modifying system environment variables, which may be intimidating for some users
2. Changing the «Path» variable incorrectly can cause system-wide issues
Method 3. Changing Java Version Using jEnv
To change the Java version using jEnv, follow these steps:
1. Download and install jEnv from the official jEnv GitHub repository.
2. Open Command Prompt and navigate to the directory where you installed jEnv.
3. In Command Prompt, type the following command to enable jEnv:
«`
jenv enable-plugin exports
«`
4. Next, add the desired Java version to jEnv using the following command:
«`
jenv add /path/to/desired/java/version
«`
Replace «/path/to/desired/java/version» with the actual path to the desired Java version’s installation directory.
5. Finally, set the global Java version using the following command:
«`
jenv global
«`
Replace «» with the desired Java version number.
6. Verify that the Java version has been successfully changed by typing «java -version» in Command Prompt.
Pros:
1. Provides a convenient way to manage multiple Java versions
2. Easy to switch between different Java versions using jEnv commands
3. Works independently of system environment variables
Cons:
1. Requires installing and configuring jEnv
2. May not be suitable for users who prefer native Command Prompt functionality
3. Additional learning curve for using jEnv commands effectively
Method 4. Changing Java Version Using SDKMAN!
To change the Java version using SDKMAN!, follow these steps:
1. Download and install SDKMAN! from the official SDKMAN! website.
2. Open Command Prompt and type the following command to verify the successful installation:
«`
sdk version
«`
3. Install the desired Java version using the following command:
«`
sdk install java
«`
Replace «» with the desired Java version number.
4. Set the installed Java version as the default using the following command:
«`
sdk default java
«`
Again, replace «» with the desired Java version number.
5. Verify that the Java version has been successfully changed by typing «java -version» in Command Prompt.
Pros:
1. Provides a convenient way to manage multiple Java versions
2. Easy installation and management of Java versions with SDKMAN! commands
3. Works independently of system environment variables
Cons:
1. Requires installing and configuring SDKMAN!
2. May not be suitable for users who prefer native Command Prompt functionality
3. Additional learning curve for using SDKMAN! commands effectively
Why Can’t I Change the Java Version?
There can be several reasons why you may be unable to change the Java version on Windows 10 Command Prompt. Here are a few common reasons and their fixes:
1. Reason: Incorrect Java installation path specified.
Fix: Ensure that the correct path to the desired Java version’s installation directory is provided in the Command Prompt commands.
2. Reason: Missing or outdated Java installations on your computer.
Fix: Download and install the desired Java version from the official Java website before attempting to change the Java version on Command Prompt.
3. Reason: Environmental variables not properly modified.
Fix: Check the modification of the «Path» variable or other relevant environment variables and ensure that they accurately reflect the desired Java version’s installation directory.
Additional Tips
Here are some additional tips to enhance your experience when changing the Java version on Windows 10 Command Prompt:
1. Double-check the Java version: Always verify that the Java version has been successfully changed by running the «java -version» command after following any of the methods described above.
2. Use symbolic links: If you frequently switch between different Java versions, consider creating symbolic links to the Java installations and managing them using batch files or scripts.
3. Document your changes: Keep track of the Java version changes you make on Command Prompt by documenting them in a text file or using version control software. This will help you revert any changes or troubleshoot if needed.
5 FAQs about Changing Java Version on Windows 10 Command Prompt
Q1: Can I have multiple Java versions installed on my Windows 10 computer?
A1: Yes, it is possible to have multiple Java versions installed on your Windows 10 computer. This allows you to switch between different Java versions based on your needs.
Q2: Can I permanently set a default Java version on Command Prompt?
A2: Yes, you can permanently set a default Java version on Command Prompt by modifying system environment variables or using third-party tools like jEnv or SDKMAN!.
Q3: Are there any risks involved in changing the Java version on Command Prompt?
A3: Changing the Java version on Command Prompt does not pose significant risks. However, modifying system environment variables incorrectly can cause system-wide issues. Always double-check your changes and follow the provided instructions carefully.
Q4: Can I change the Java version for specific applications only?
A4: Yes, it is possible to change the Java version for specific applications by modifying environment variables or using tools like jEnv or SDKMAN!. These methods allow you to specify different Java versions for different applications.
Q5: Is it necessary to restart my computer after changing the Java version on Command Prompt?
A5: No, you do not need to restart your computer after changing the Java version on Command Prompt. The changes take effect immediately within the Command Prompt session.
In Conclusion
Changing the Java version on Windows 10 Command Prompt is a valuable skill for Java developers and enthusiasts. By following the methods outlined in this blog post, you can seamlessly switch between different Java versions, ensuring compatibility and enabling flexibility in your development projects. Remember to double-check your changes and use additional tools like jEnv or SDKMAN! for a more streamlined Java version management experience. Happy coding!
Last Updated :
02 Jan, 2023
Java is a high-level, robust, object-oriented, and secure programming language that was developed in the year 1995 by Sun Microsystems (which is now part of Oracle group), and James Gosling is known as the father of Java. It is a general-purpose programming language intended to let programmers write once, and run anywhere, meaning that compiled Java code is compatible to run on all platforms that support Java without the need to recompile which is a major advantage.
Java Update
Java Update is a feature that keeps your windows computer up to date with the latest Java releases. You can use Java’s update feature to manually force an available update on windows. But, when you have auto update enabled, your system periodically checks for new versions of Java and updates it automatically.
Auto Update in Java
We can get the auto-update feature in Java
First, you need to check whether the windows check for update automatically you can do this by following the steps:
- Open the start by clicking on the windows logo on the bottom left side of the screen, and the start menu will pop up.
- Now type configures Java and clicks on configure Java option from the list of matching programs, this will open Java control panel.
- Once Java Control Panel is launched click on the update tab to access settings.
- Select the Check for Updates Automatically check box for enabling Java updates to check for updates automatically.
Now, whenever an update is available you will receive a notification asking your permission to download the update, and a tooltip balloon appears on your Windows desktop. To install the new update, click on the notification dialog.
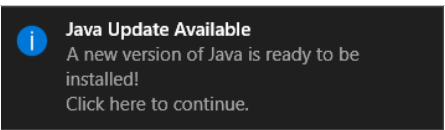
Update Notification for Java
Now an Update Available dialog appears. To start the installation, click Update. Otherwise, you can click Later to install the update at a later time. When the installation is complete a dialog appears where you can click Finish to complete the installation.
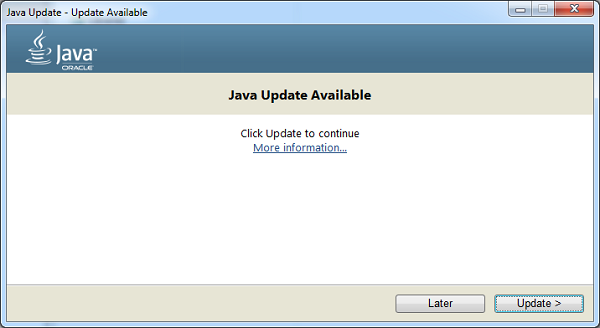
An update Available dialog box
Using the Update Schedule, you can change the frequency for updates accordingly: daily, weekly, or monthly (default). To do this follow the given steps:
- From the Java Control panel click on the Update tab, then select Advanced, now the Automatic Update Advanced Settings dialog will appear.
- Here you can change the frequency and the date and time for the Java Update, finally click OK.
Java Update scheduler will check for newer Java updates and notify you at the scheduled frequency.
Java Manual Update
1. Open the Start option by clicking the Windows logo in the bottom-left corner of the screen. The Start menu will pop up.
.png)
Main Screen with start option
2. Type in configure java in the search box and searches for matching programs will be displayed.
.png)
List of matches
3. Click on configure java option from the list of matching programs and the Java Control Panel will open.
.png)
Java Control Panel
4. Click on the update option in the Java control panel and then click on the Update now option at the bottom-right corner of the window and this initiates the Java to look for new updates.
.png)
Java Control Panel after clicking on the Update tab
5. If Java finds an available update, follow any on-screen prompts that appear to confirm the update, then allow your computer to install the latest version of Java.
You cannot update to a new version of Java if you receive a dialog box saying that you are already running the latest version of Java.
.png)
This notification appears when you are using the latest Java version
Finally, if you are not sure about the Java version then go to the official link to update to the latest version.
Switch Between Java Versions In Windows 10

There are 2 Options to manage multiple java versions in your windows:
- jEnv : I have used this for long in my Ubuntu/Mac laptops. This doesn’t support Windows platform though!
- SDKMan : This one has a workaround for Windows 10 platform (see https://sdkman.io/install) and that leaves me no choice but try this one out.
The SDKMan Way To Switch Between Java Versions in Windows 10
Some good things about SDKMan:
- It supports all platforms Linux/Mac/Windows.
- It is more popular tool over jEnv today, per libhunt.
- It supports great deal of JDKs and SDKs for quick install and use.
Installing SDKMan in Windows has the following pre-requisites:
- Install ConEmu which is an advanced console window (also known as local terminal emulator). This is only an emulator and hence shares the same environment as Windows. Alternatively, you can install CygWin, which is a more popular and pioneer tool in this Linux Terminal on Windows.
- If you have installed Git in Windows it is likely that you have installed Git Bash. If not, please do install Git Bash (that comes bundled with Git installer for windows) with all the default recommended options as the installer suggests.
- The SDKMan makes use of zip command for its installation. So you may need to install GnuWin Zip.
- It may also use the following commands in its installation script, viz., zip, unzip, tar, gzip, curl. According to the SDKMan installation page, MinGW can be used to provide this tooling. But because, I use ConEmu out of personal preference, I had to check for the validity of the following commands in my ConEmu terminal like below:
When all the above commands showed the installation path of the softwares, we can be confident that the commands would work well to install SDKMan from within ConEmu.
Now from within ConEmu terminal, we can go ahead and run installation script for SDKMan like below:
$ curl -s «https://get.sdkman.io» | bash
Next, open a new terminal or enter:
$ source «$HOME/.sdkman/bin/sdkman-init.sh»
Lastly, run the following code snippet to ensure that installation succeeded:
Bingo, you can now go ahead and install your favourite versions of java sdk, Ant, Maven, Groovy, Gradle, etc using your now favorite SDKMan 
Quick Cheatsheet for SDKMan

References
- https://ngeor.com/2019/12/07/sdkman-windows.html
- https://sdkman.io/usage