Changing your NAT (Network Address Translation) type can improve your online experience, particularly for gaming and voice-over-IP apps. A strict or moderate NAT type can lead to network issues in gaming such as frequent disconnections, lagging, and trouble hosting matches. So, here’s how you can change the NAT type in Windows 11/10 to improve network connectivity and enhance performance.
Page Contents
What is NAT and its types?
NAT (Network Address Translation) is a technology in routers that acts as an IP translator, allowing multiple devices to share a single public IP address and access the internet. There are three different types of NAT – Strict, Moderate, and Open.
- Strict NAT – It’s the most secure and restrictive type. It can limit network functionality and may cause issues in online gaming and peer-to-peer connections.
- Moderate NAT – It is the most commonly used NAT type which provides a balance between security and connectivity.
- Open NAT – It is an open type with no restrictions. Any device can send and receive data freely. This is often preferred in online gaming and other apps that require open communication. However, it has no firewall protection and is vulnerable to attacks.
Before you can change the NAT type using any method, you need to configure a static IP address on your computer.
Setup a Static Private IP Address
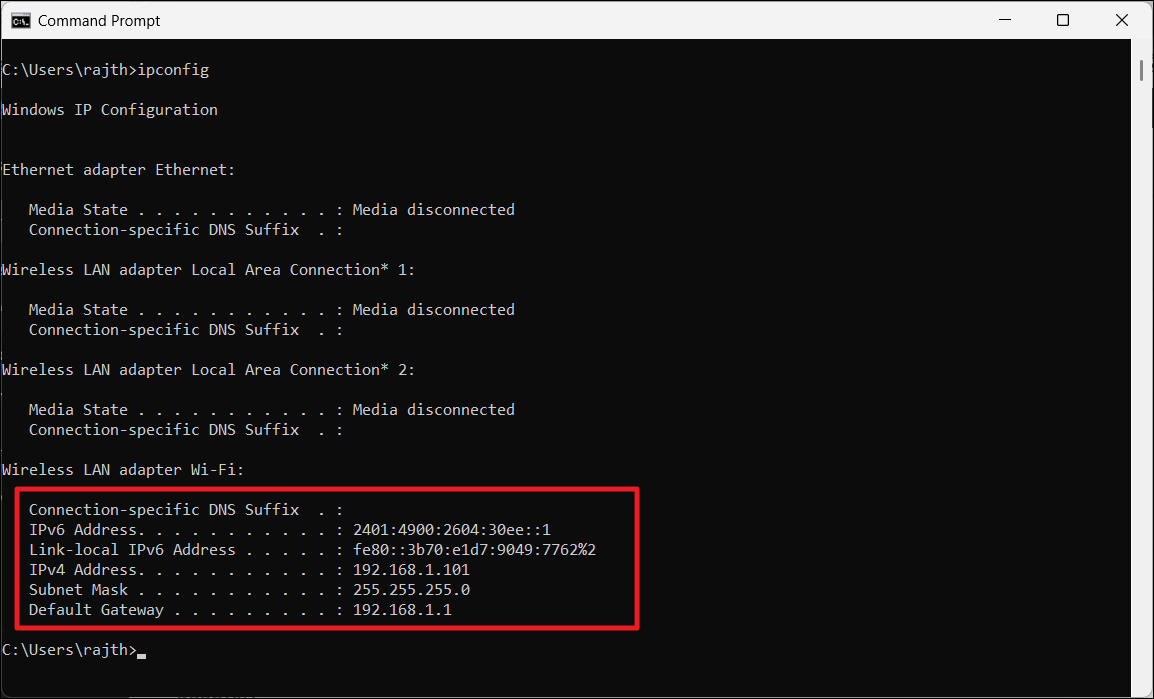
1. Open Command Prompt and run the following command:
ipconfig
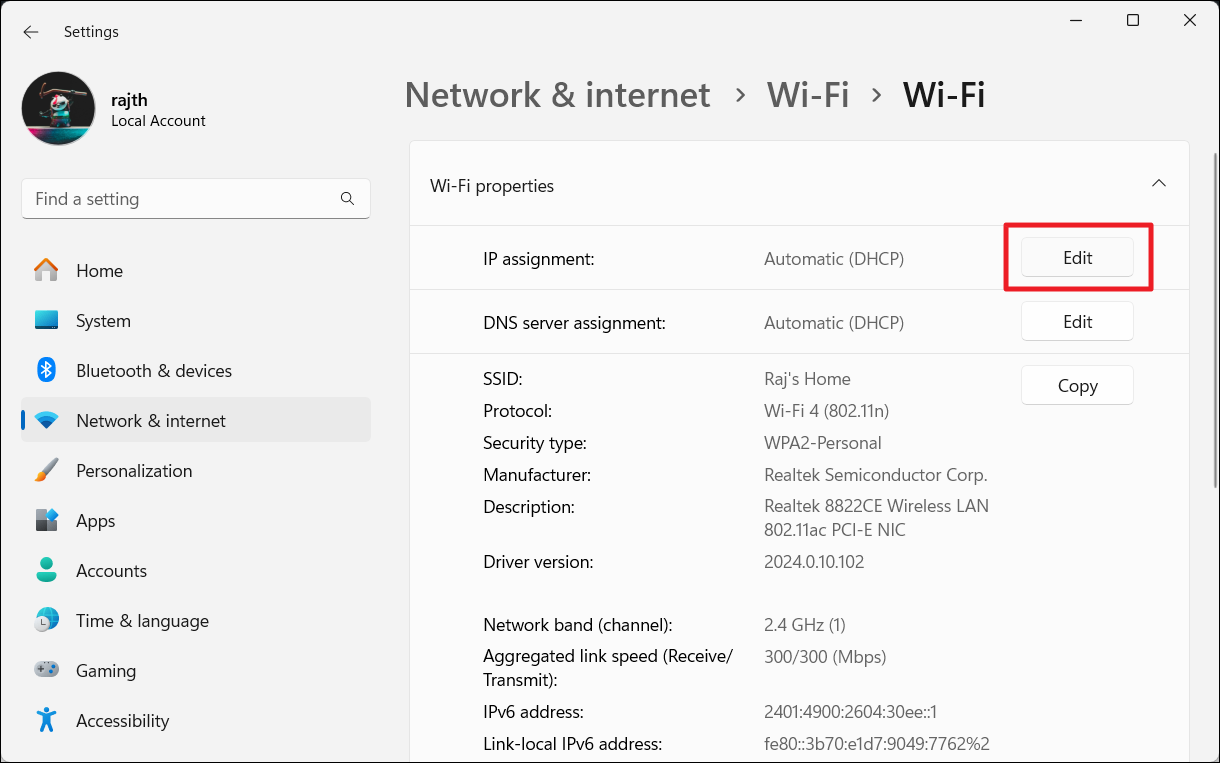
2. Note down the IPv4 Address, Subnet Mask, and Default Gateway of your network adaptor.
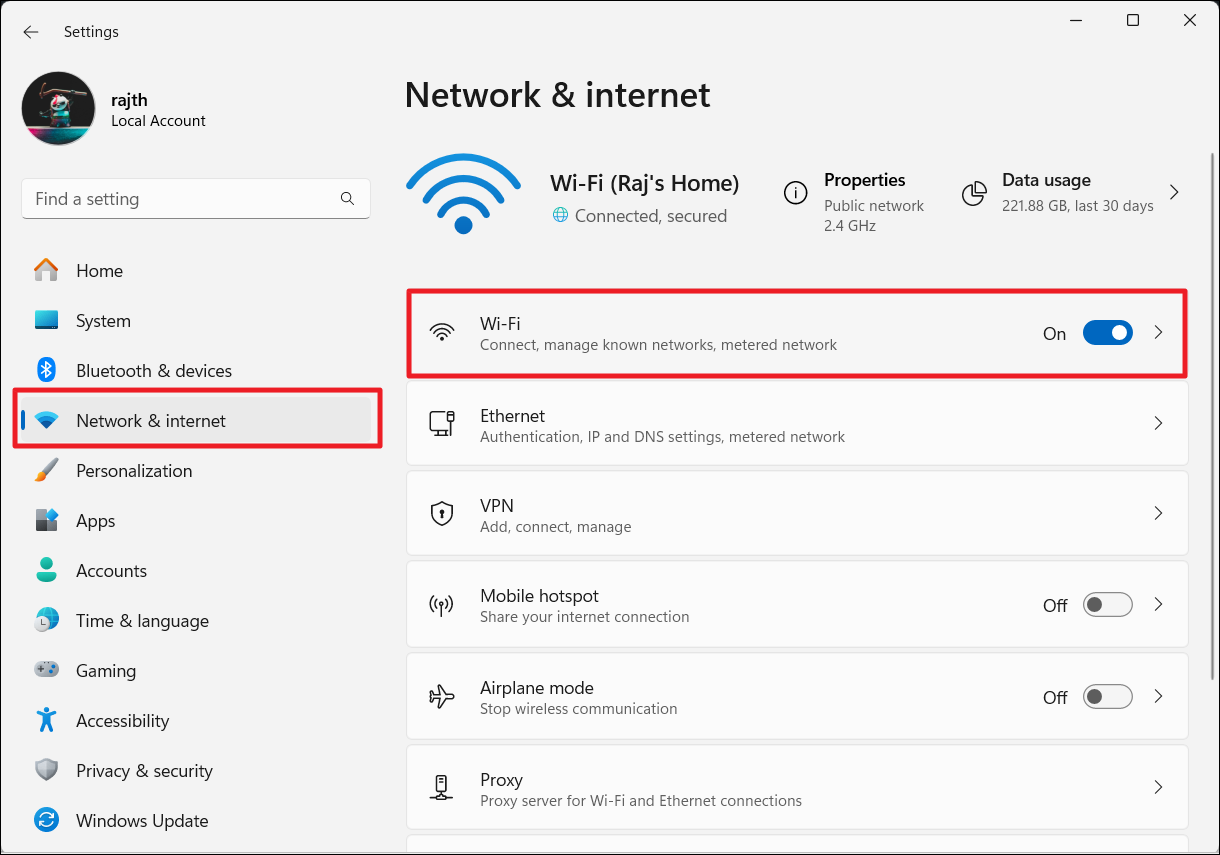
3. Open Settings by pressing Windows + I.
4. Go to the ‘Network & Internet’ section and choose your connection ‘Ethernet’ or ‘Wi-Fi’ to view its properties.
5. Click ‘Hardware Properties‘ or ‘View additional properties’.
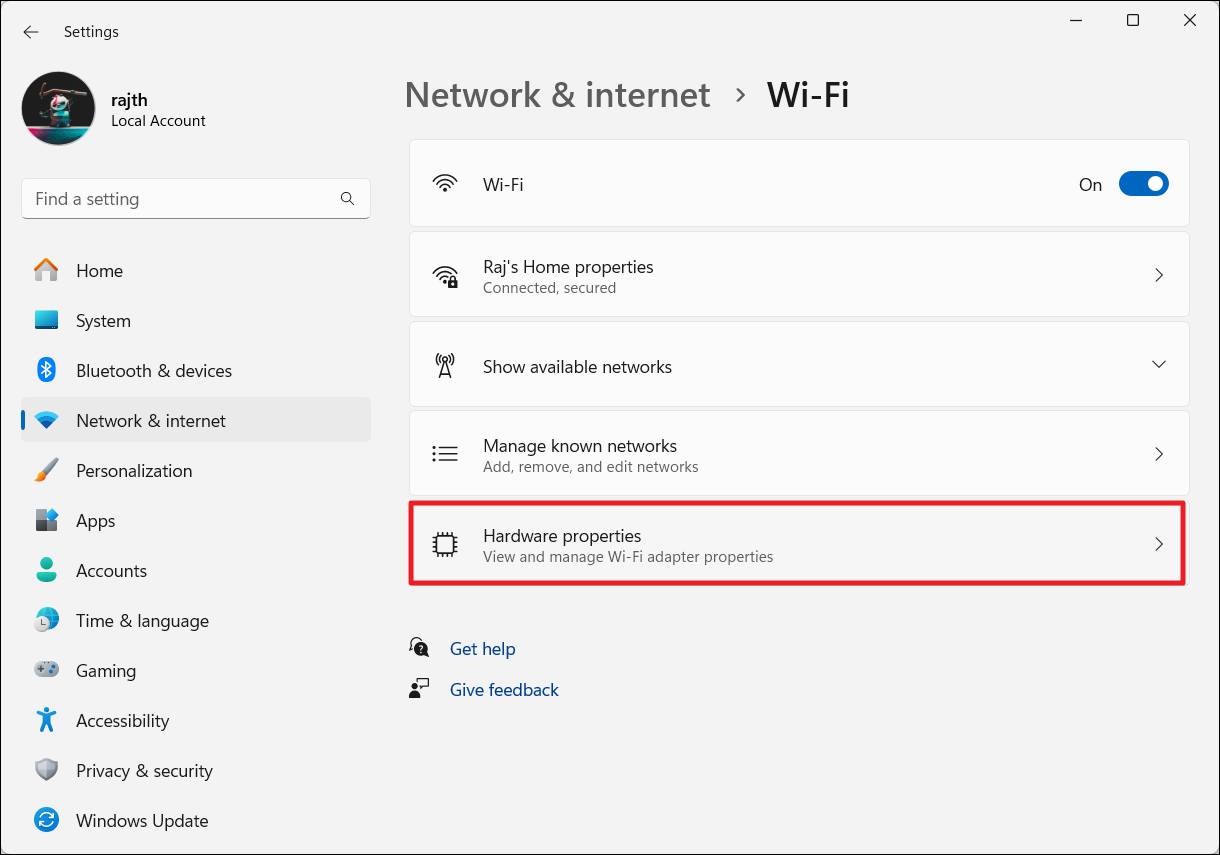
6. Click the ‘Edit‘ button next to the IP assignment.
7. Select ‘Manual’ from the drop-down menu and turn on the ‘IPv4′ toggle.
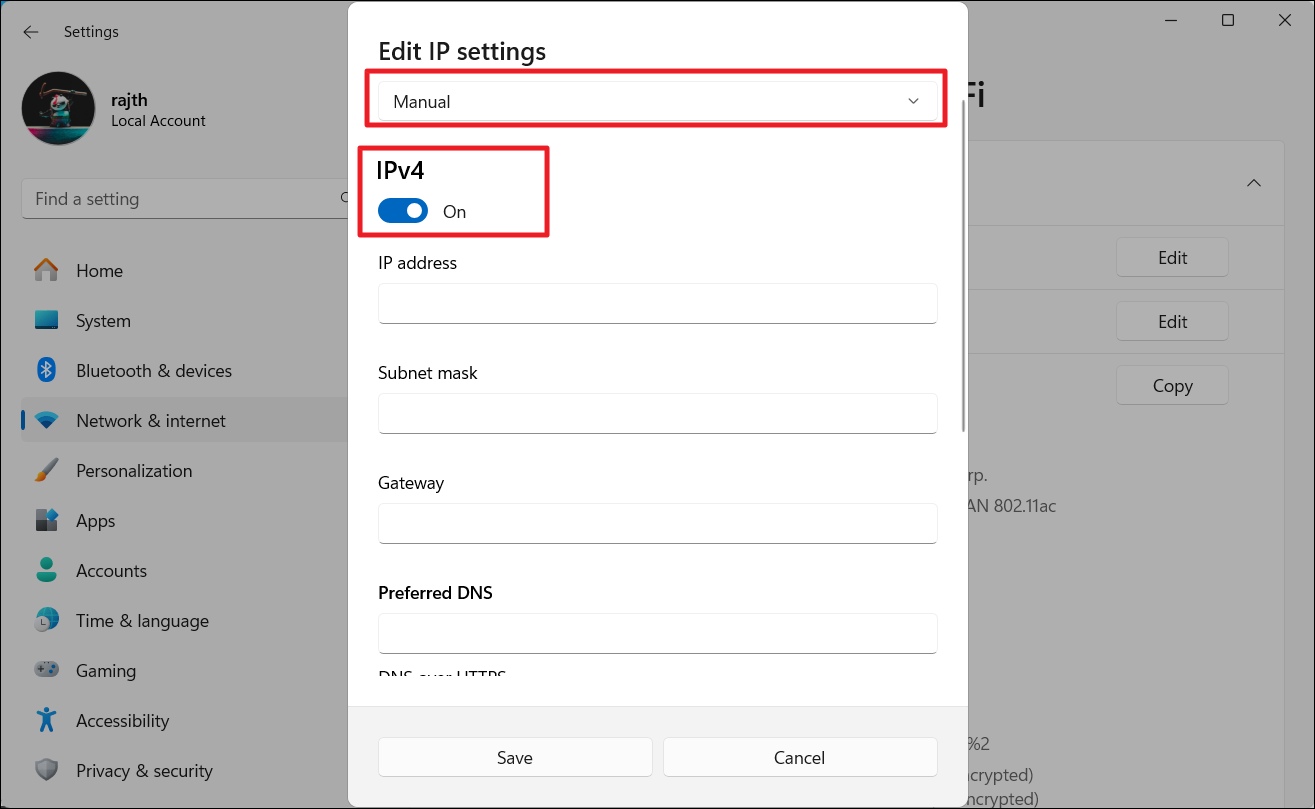
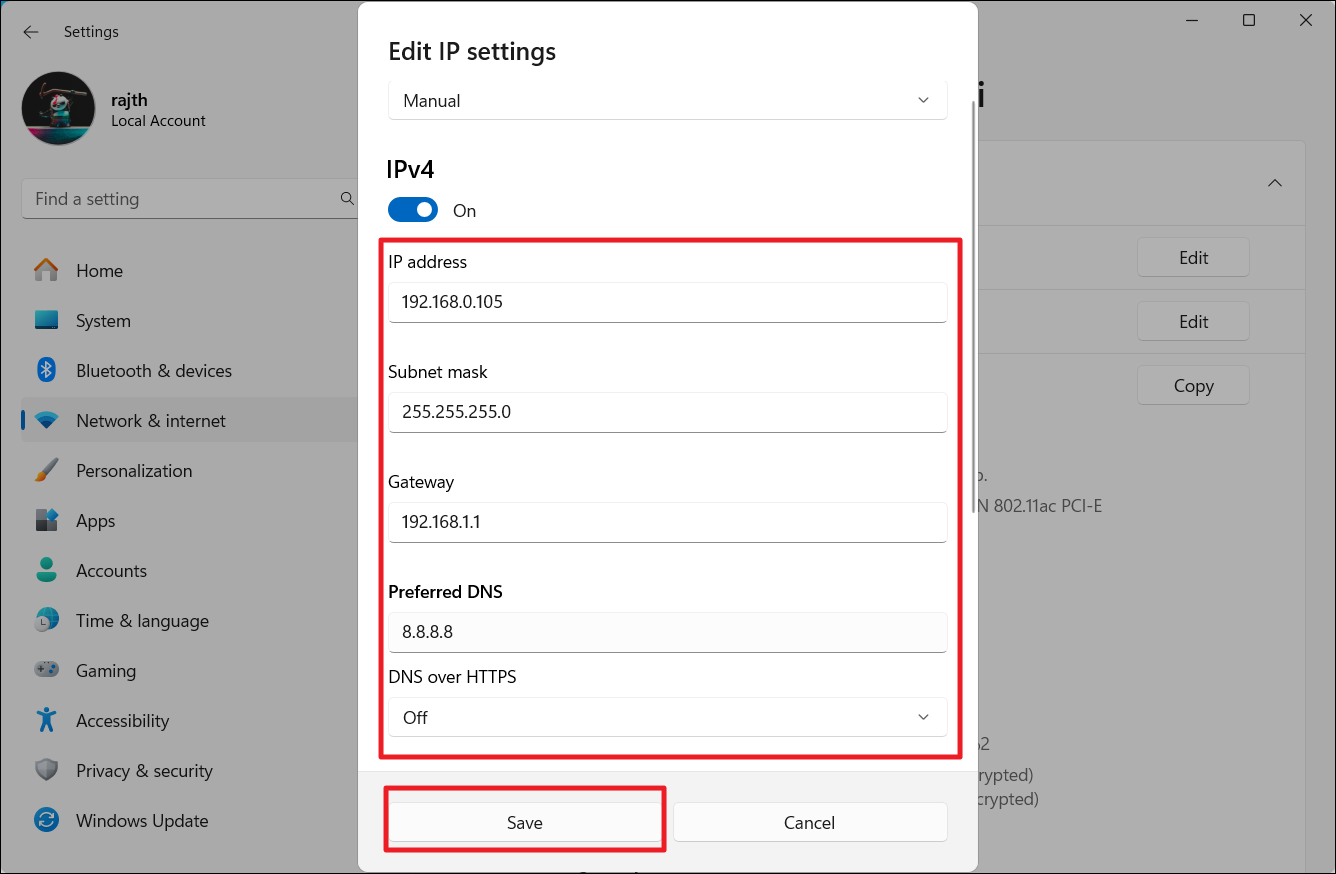
8. Fill in the IP address, subnet mask, gateway, and preferred/alternate DNS servers. Remember to choose a unique IP address within your network’s range (usually 192.168.0.2 – 254).
9. Click “Save” to apply the static IP settings.
After setting up the static IP, you’re ready to change the NAT type.
Change NAT Type in Windows 11/10
Method 1: Enable Network Discovery
Enabling network discovery makes your PC visible to other devices on your network, indirectly improving your NAT type.
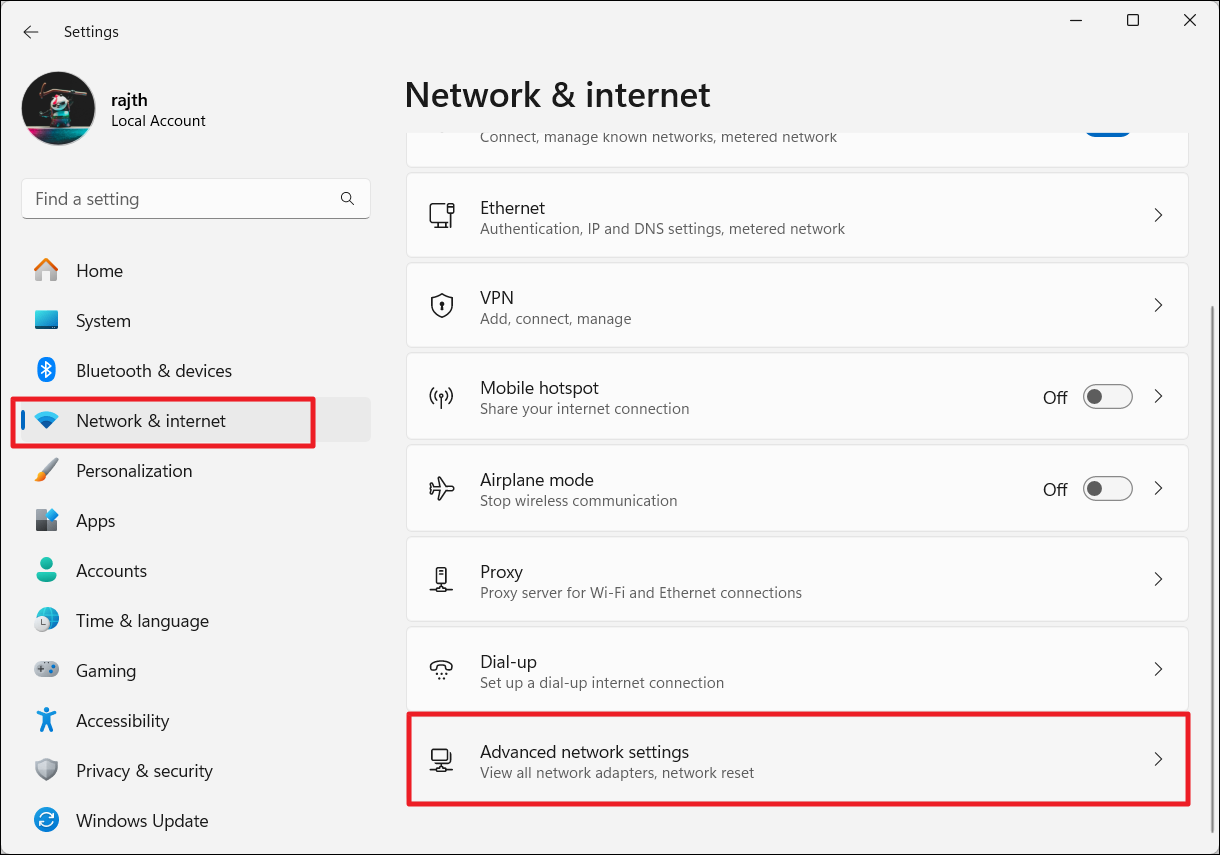
1. Open Settings and select ‘Network & Internet‘ > ‘Advanced network settings‘.
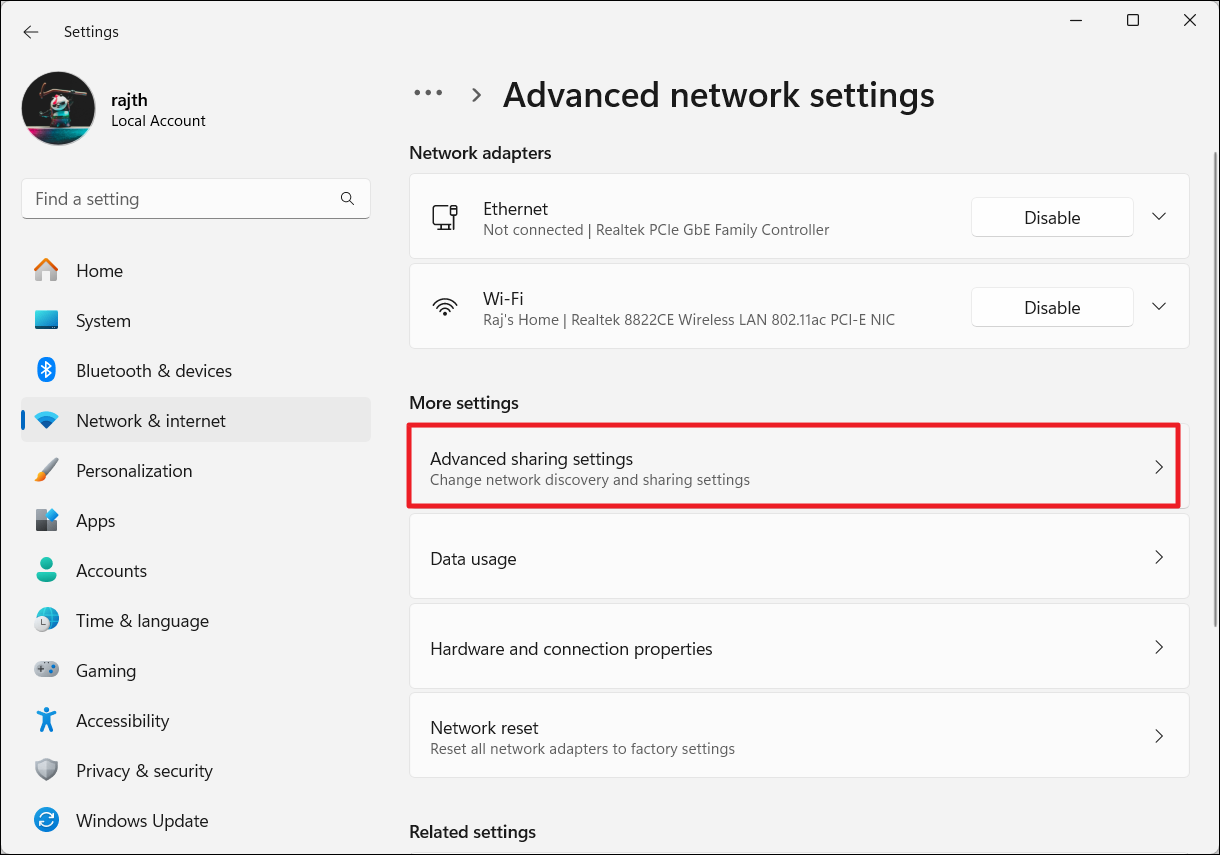
2. Click on ‘Advanced sharing settings‘.
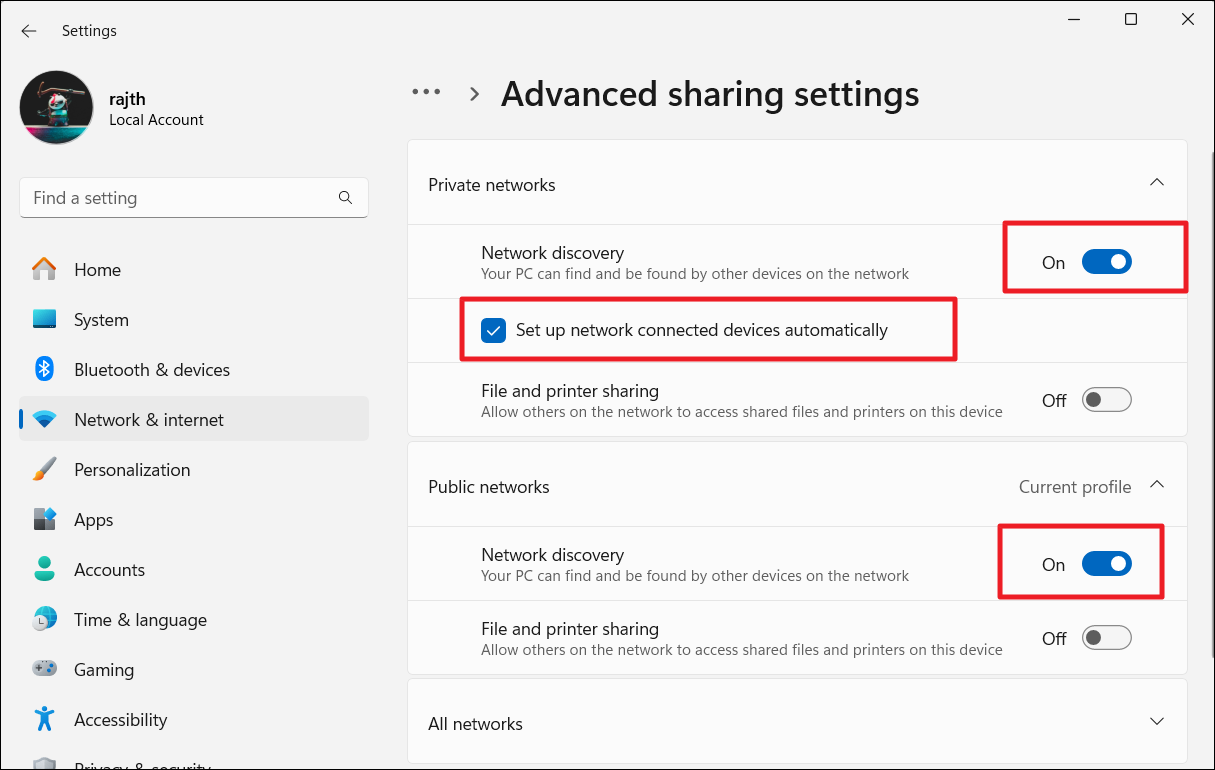
3. Open the Private networks section, toggle the ‘Network Discovery‘ on, and check ‘Set up network connected devices automatically‘.
4. Then, turn on the ‘Network discovery‘ under the Public networks section.
Method 2: Enable UPnP (Universal Plug and Play)
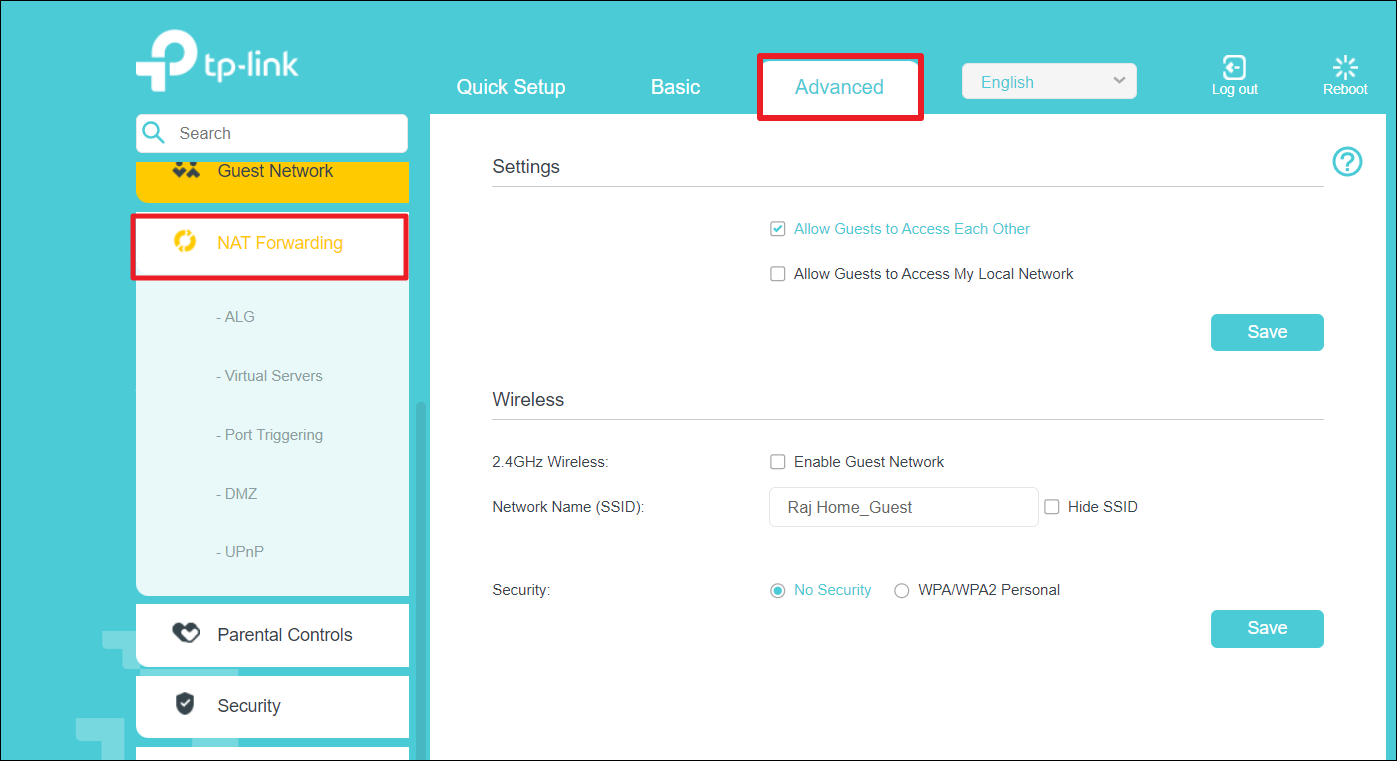
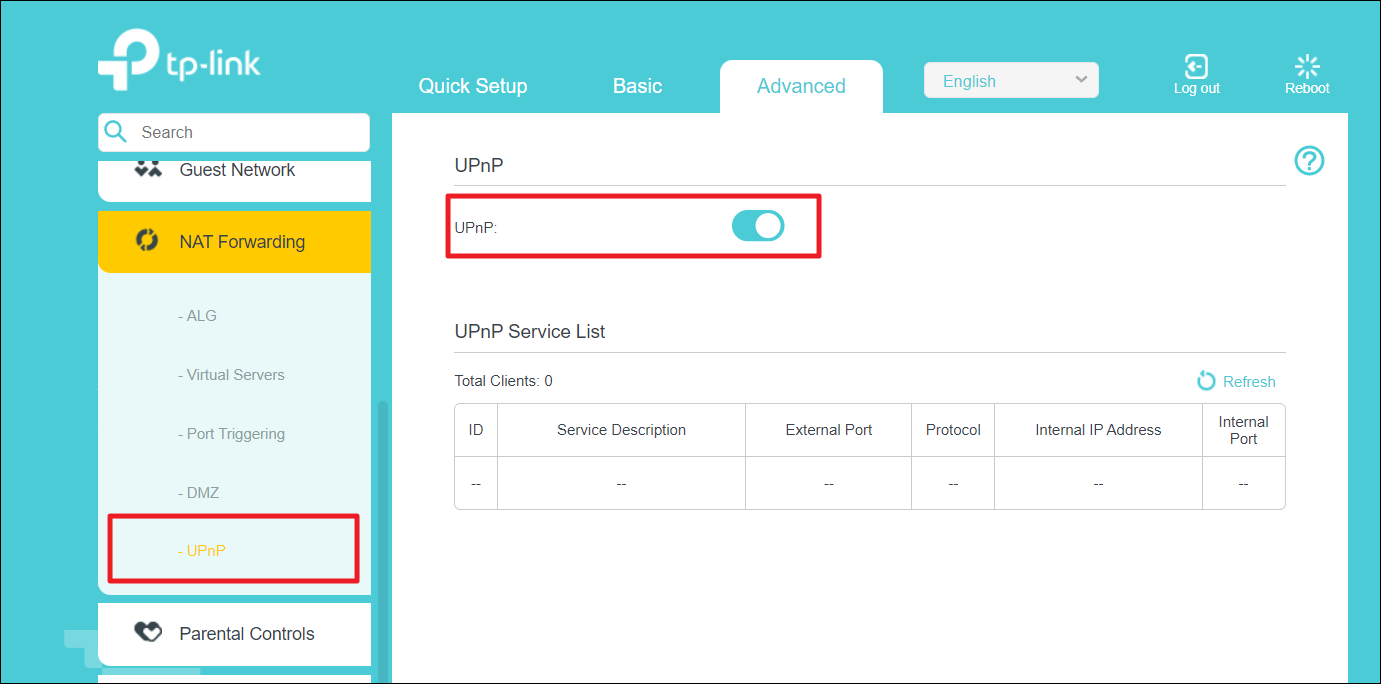
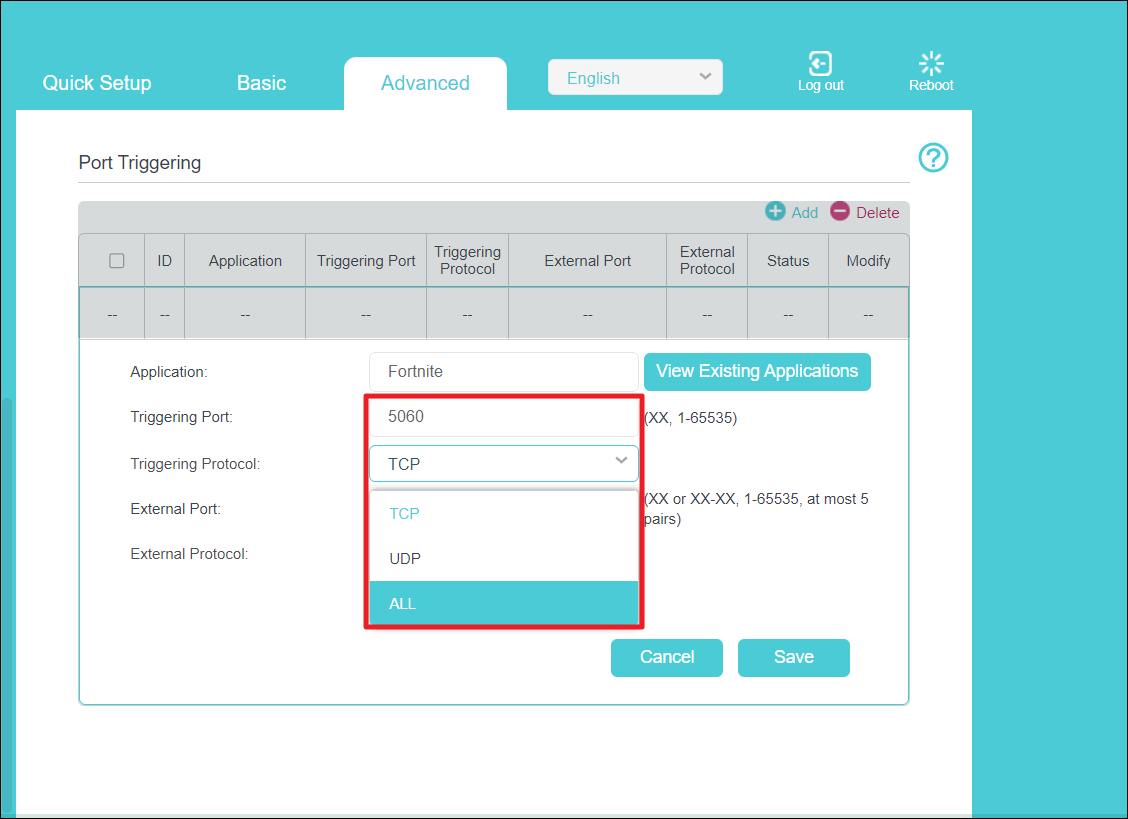
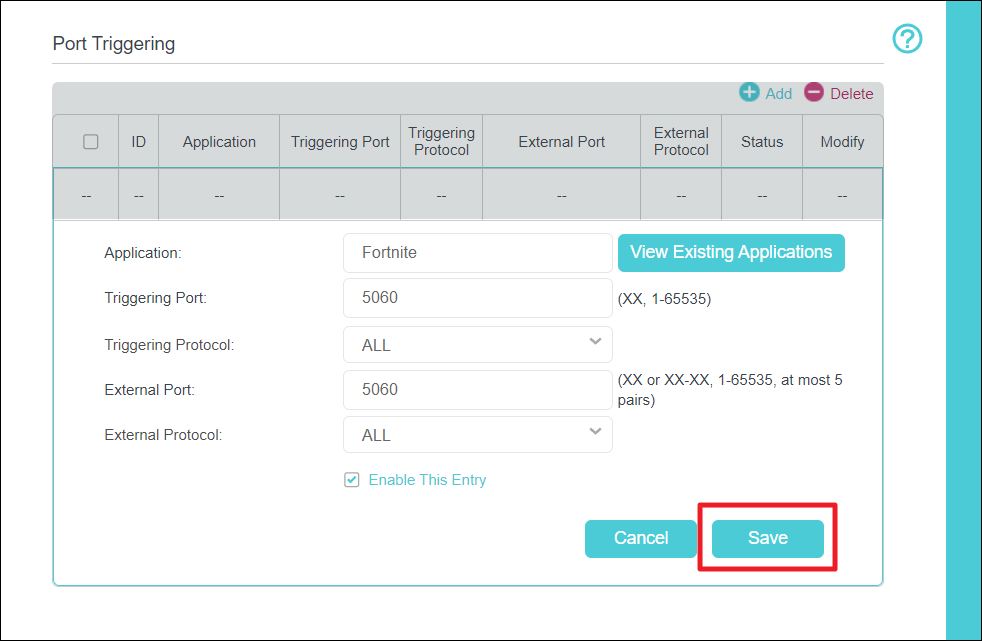
Another easy way to change your NAT type to Open is by enabling Universal Plug and Play (UPnP) in your router settings. Here’s how you can do this:
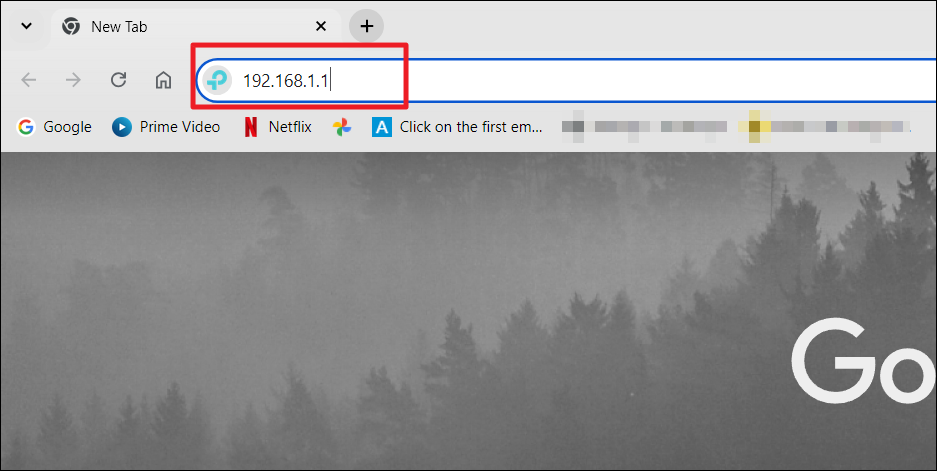
1. Open your web browser and log in to your router’s web interface. To access the web interface, enter the default gateway address (usually 192.168.0.1 or 192.168.1.1) in the address bar. You can use the ipconfig command from above to find your default gateway address.
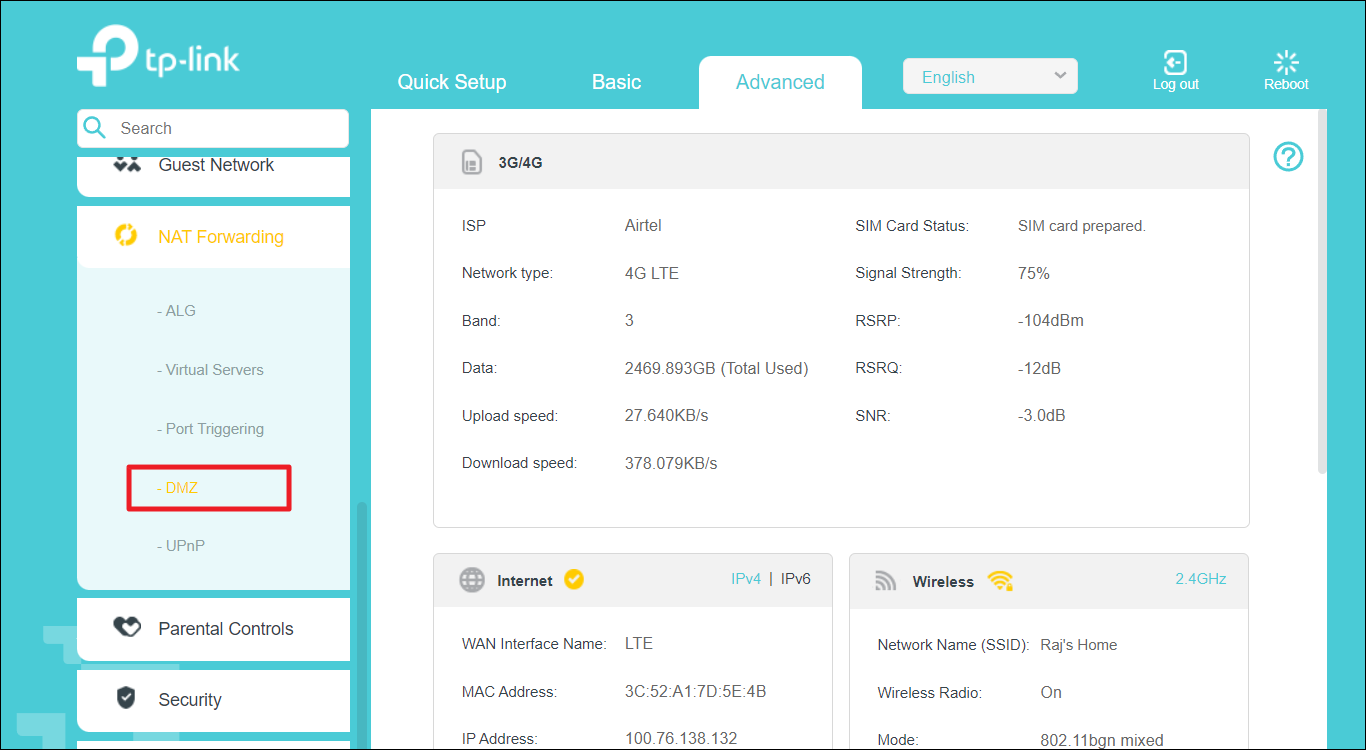
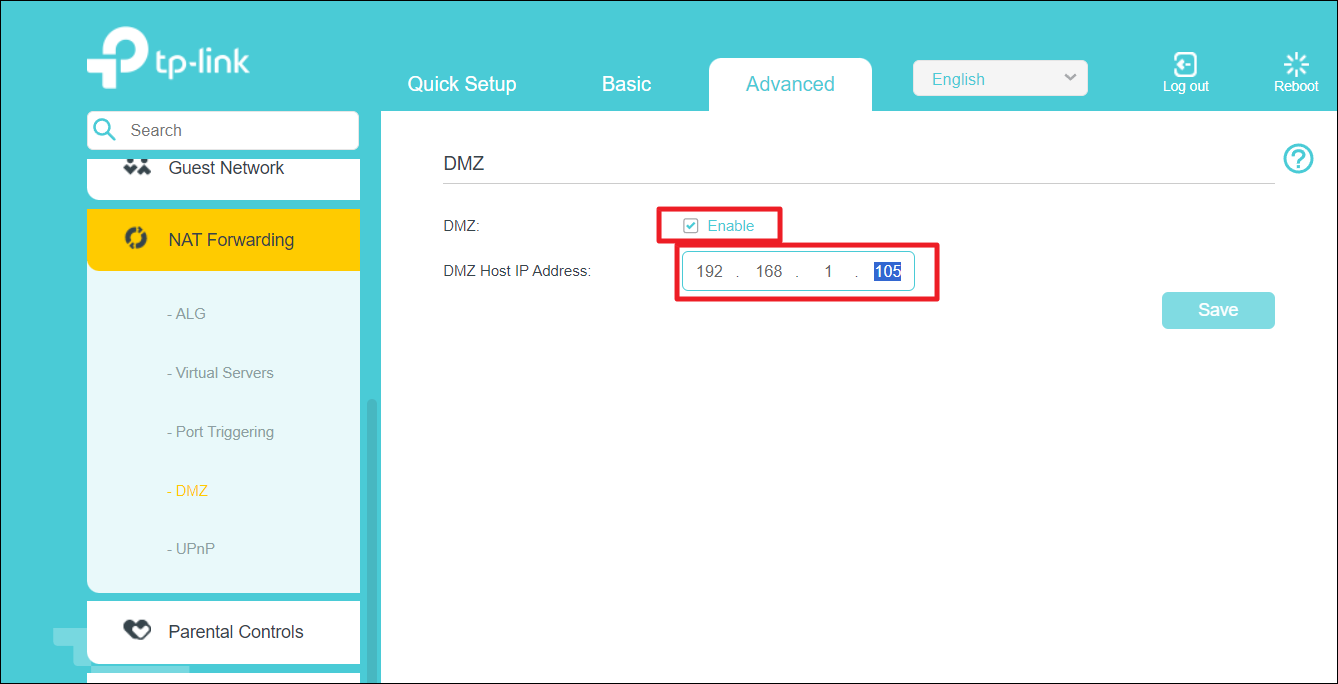
2. Once you log in to your router, find the UPnP settings (usually found under ‘Advanced’ or ‘NAT Forwarding‘).