
Независимо от того, хотите ли вы применить изменения, влияющие на качество, качество и внешний вид вашей фотографии, или вы хотите добавить информацию поверх своих фотографий, приложение Фотографии (Майкрософт) в Windows предоставляет вам все виды вариантов, чтобы ваши фотографии и видео выглядели наилучшим образом.
Изменение фотографии
С помощью приложения «Фотографии» вы можете легко обрезать, поворачивать, настраивать внешний вид, добавлять фильтр, а также писать или рисовать на фотографии, чтобы общаться и предоставлять контекст.
В поле поиска на панели задач введите Фотографии . В списке выберите Фотографии . Затем выберите фотографию, которую вы хотите изменить.
-
Выберите Изменить изображение (CTRL + E) в верхней части экрана.
-
Выберите один из вариантов выпуска, чтобы начать редактирование.
-
Используйте эти функции, чтобы настроить свет, цвет, внешний вид и ощущение фотографии.
Совет: Чтобы отменить все изменения, примененные к фотографии, нажмите кнопку Сброс в левой верхней части экрана.
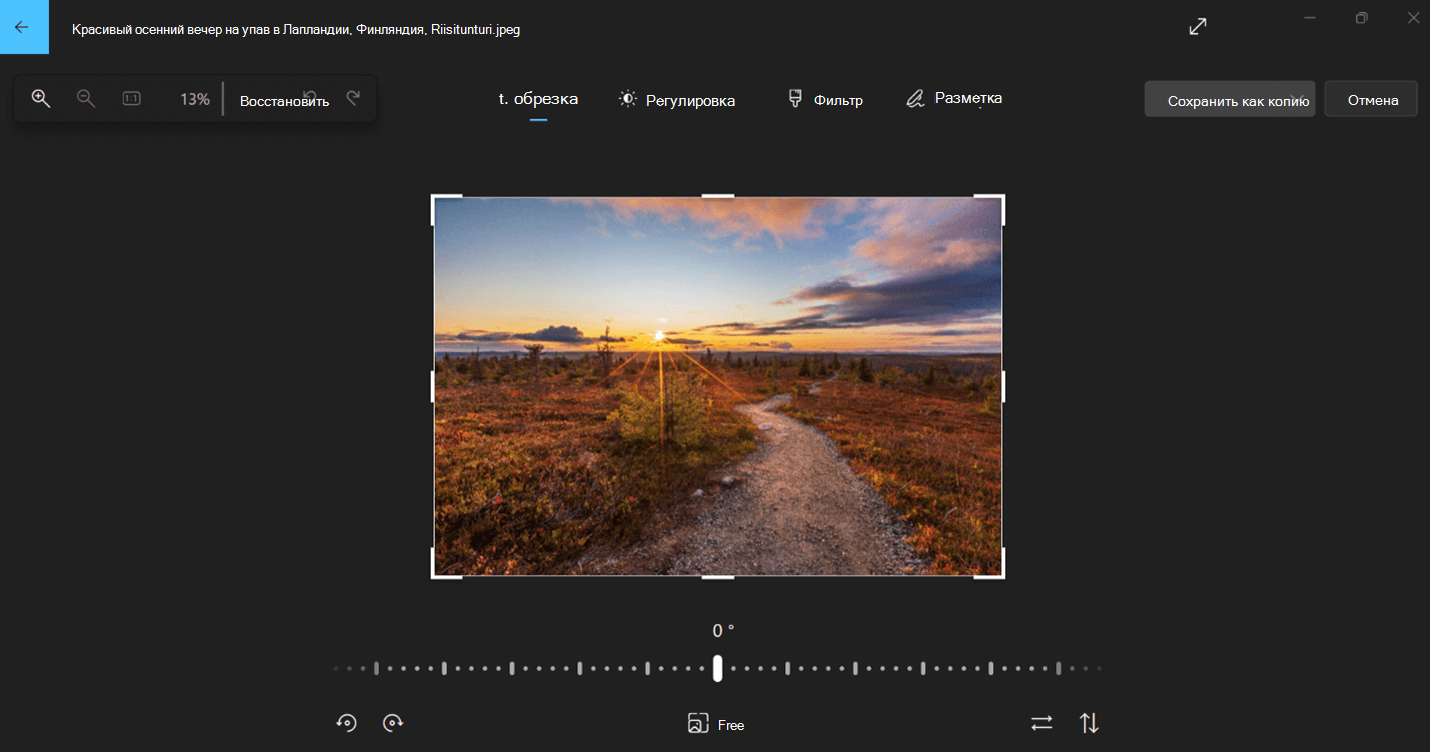
Обрезка, переворачивание или поворот фотографий для обрезки нежелательных частей вручную или использования предустановленных пропорций. Вы также можете повернуть фотографию влево и вправо на 90 градусов или на добавочные градусы или повернуть изображение на 180 градусов.
-
Поворот по часовой стрелке или против часовой стрелки
-
Используйте предустановленную пропорцию
-
Вертикальное или горизонтальное
-
Свободное вращение фотографии с помощью ползунка

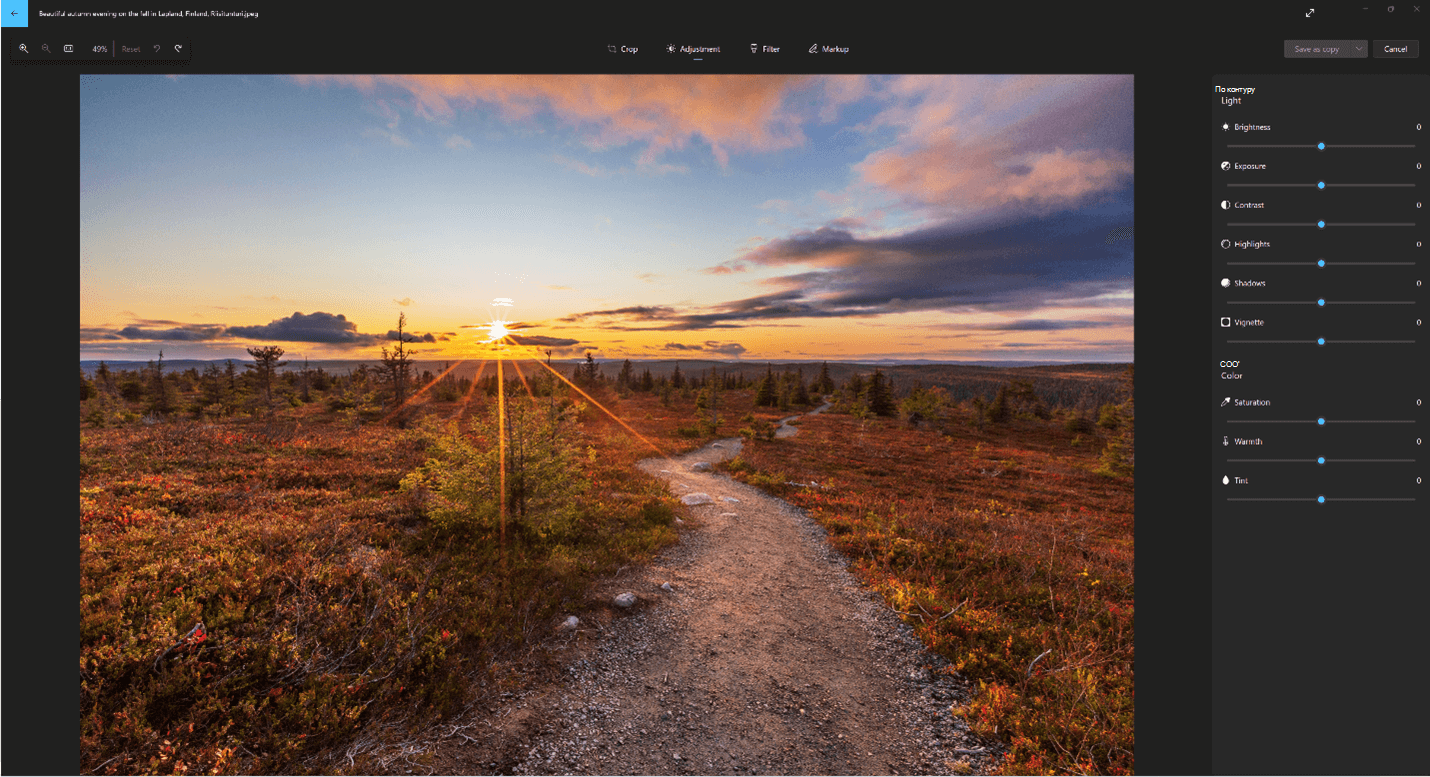
Настройте свет и цвет , чтобы задать настроение и качество фотографий. На панели настройки справа отрегулируйте ползунки света и цвета. Вы можете щелкнуть и удерживать пробел, чтобы просмотреть исходную фотографию.
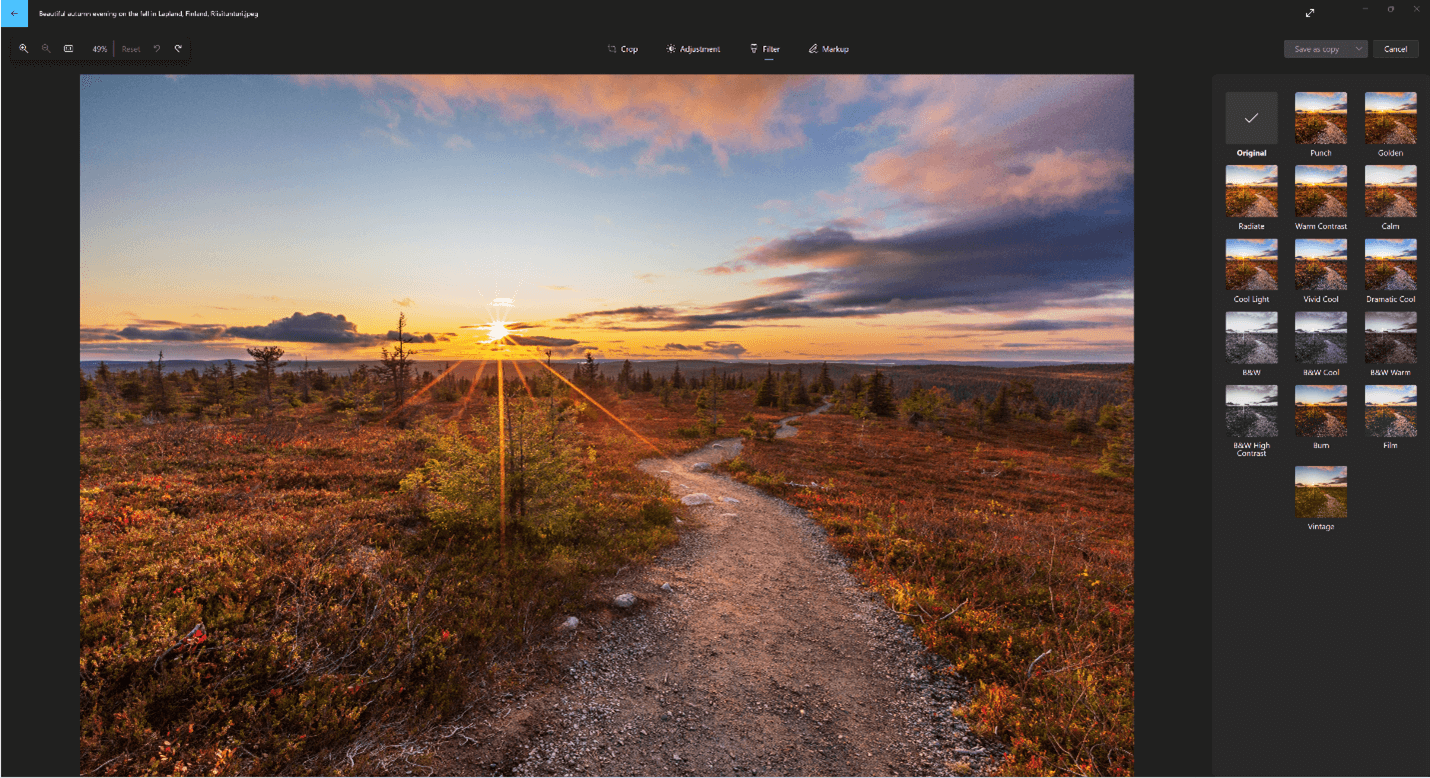
Используйте фильтры , чтобы уточнить тон изображений или добавить специальные эффекты для преобразования фотографий одним щелчком мыши. На панели Фильтр справа выберите один из пятнадцати доступных фильтров. Не беспокойтесь, если вы не хотите применять фильтры. У вас всегда есть вариант Исходный . Вы можете щелкнуть и удерживать пробел, чтобы просмотреть исходную фотографию.
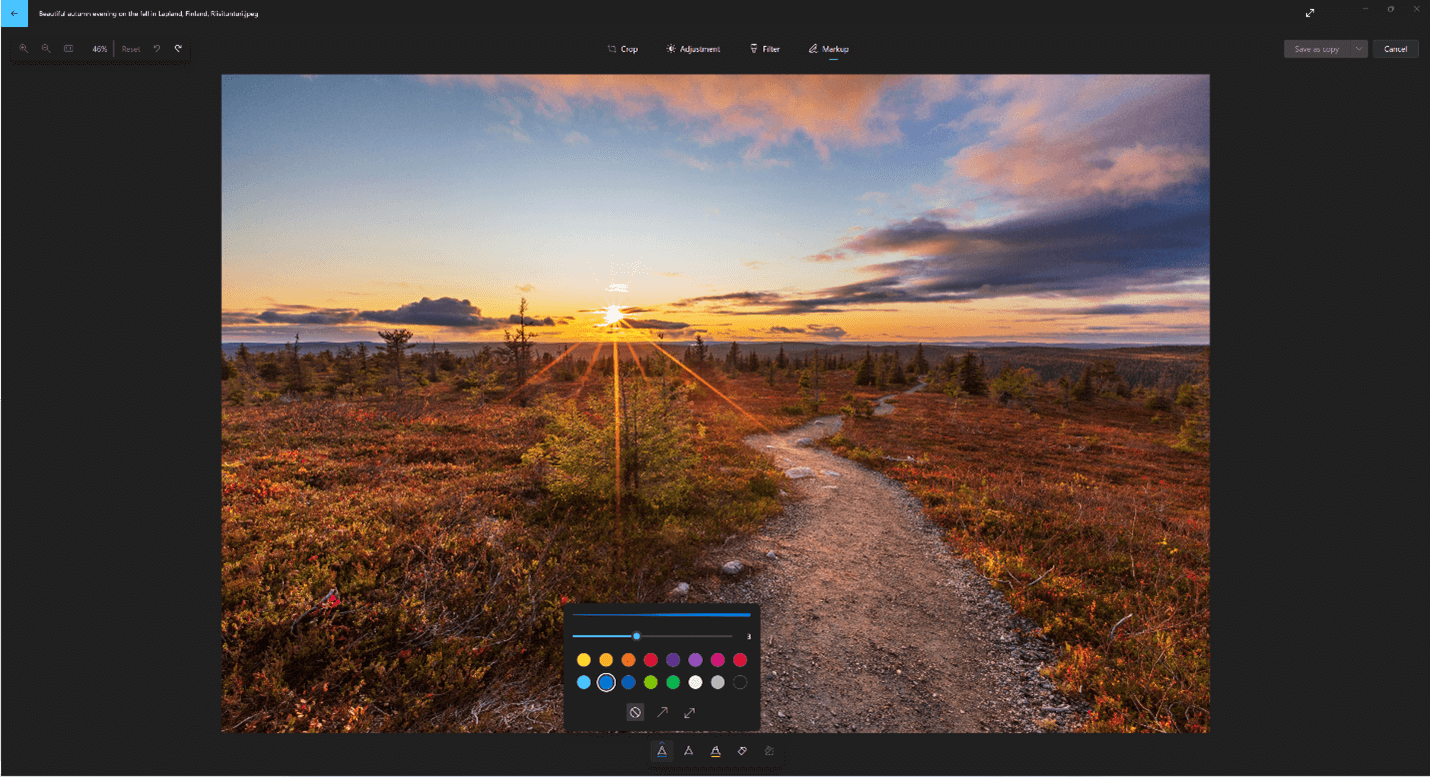
Иногда в истории есть больше, чем то, что фотографии могут передать сами по себе. Добавьте личный штрих к любимым моментам, рисуя на своих фотографиях.
-
На панели инструментов Разметка выберите один из трех инструментов рисования (2 доступных ручки и один маркер).
-
Выберите тип линии (обычная линия, линия с одной стрелкой, линия с двойной стрелкой) и цвет и размер из параметров пера.
-
Идите вперед и рисуйте прямо на своем изображении, и не беспокойтесь, если вы испортите — вы всегда можете стереть маркировку, которую вам не нравится, с помощью средства Ластика . Или очистите весь документ, выбрав Очистить всю разметку рядом с инструментом Ластик.
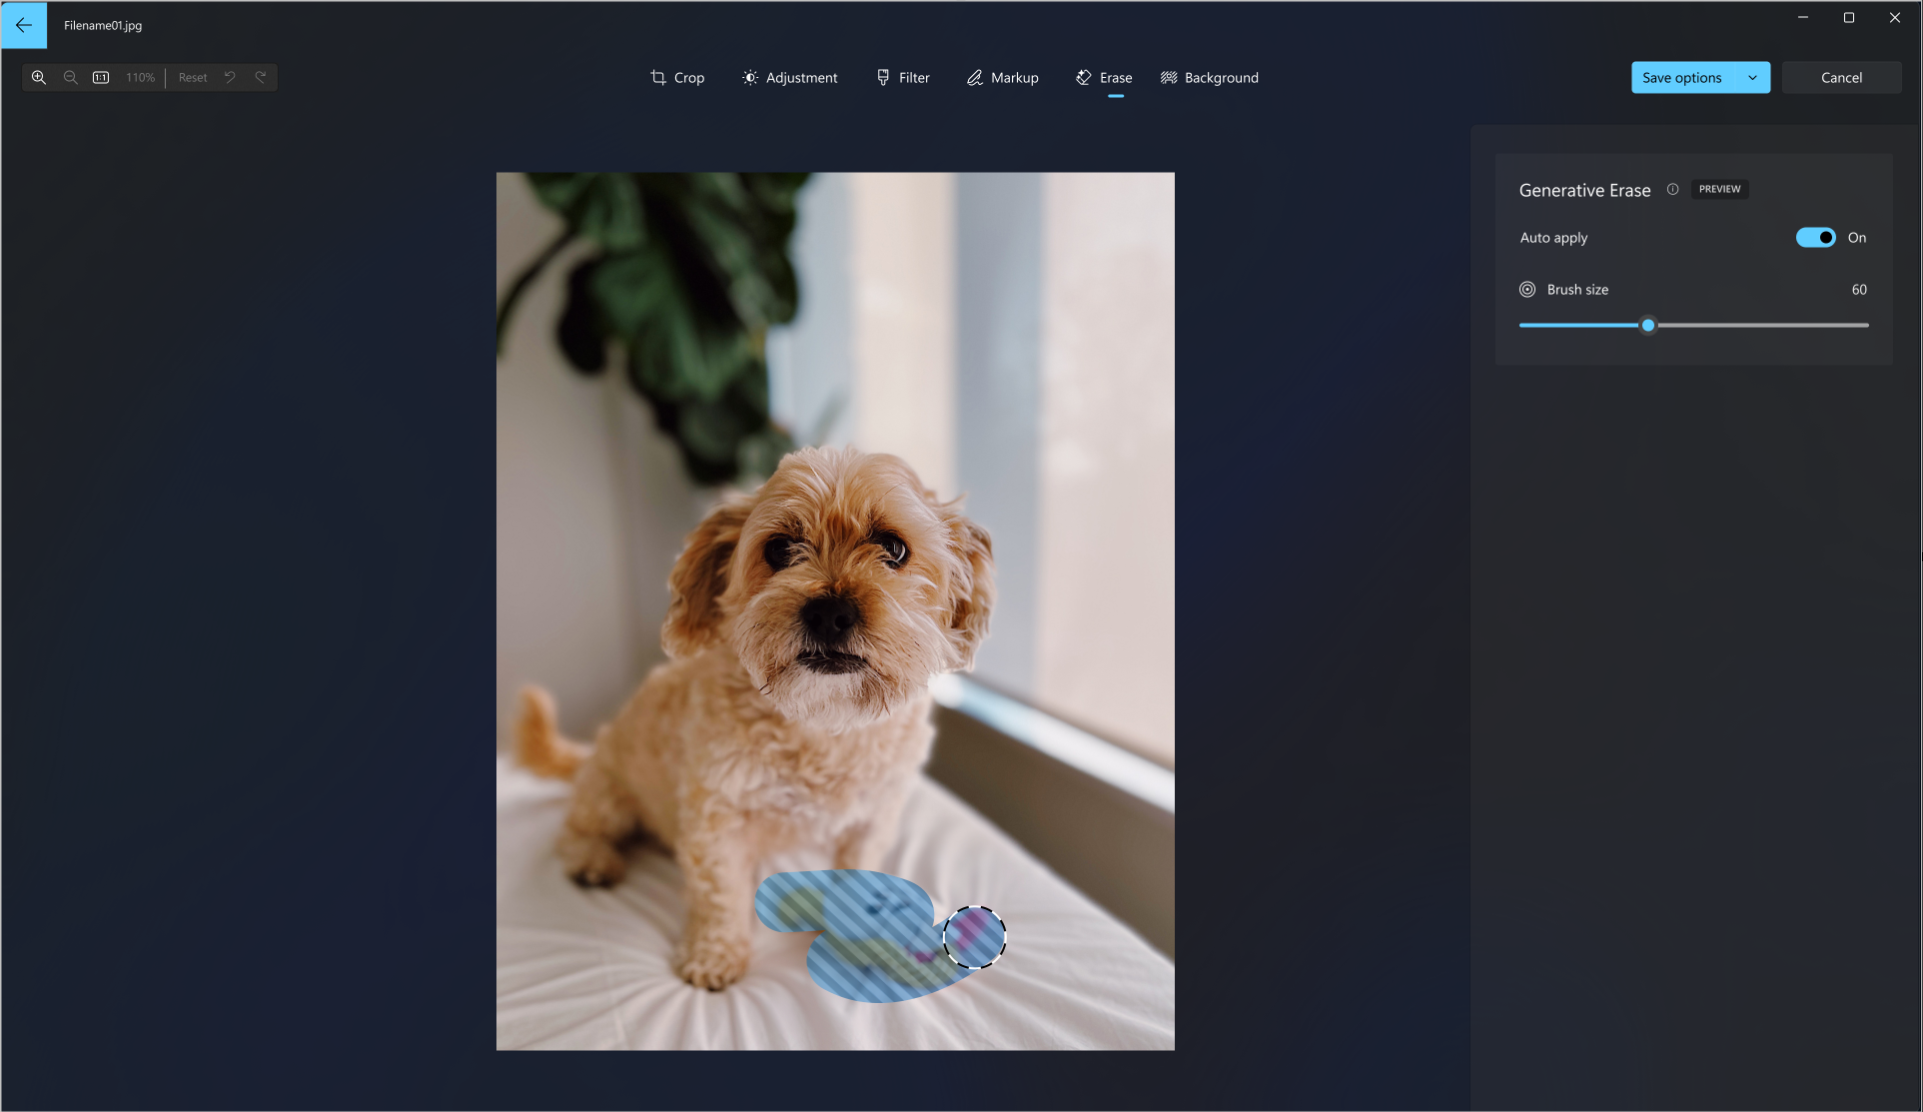
Генеративное стирание позволяет ретушировать фотографии, чтобы удалить пятна или нежелательные части.
Важно: Эта функция использует ИИ для заполнения удаленной области и может быть не идеальной или ожидаемой. Процесс выполняется локально на вашем устройстве. Это означает, что данные никогда не покидают устройство. Дополнительные сведения об ответственном подходе к ИИ, этических принципах, которыми мы руководствуемся, а также о средствах и возможностях, которые мы создали для обеспечения ответственной разработки технологий ИИ, см. в статье Ответственное использование ИИ.
-
Выберите Стереть, а затем перетащите инструмент кисть в область, которую вы хотите исправить.
-
Вы можете настроить размер инструмента в соответствии с размером области, для исправления.
-
Вы можете выбрать, если параметр Автоматическое применение для генеративного стирания имеет значение Выкл . или Включено.
-
Если параметр Автоматическое применение имеет значение Включено, область, выбранная с помощью средства кисти, стирается непосредственно после завершения выбора области.
-
Если параметр Автоматическое применение имеет значение Выкл., у вас есть дополнительные возможности инструментов кисти:
-
Добавление маски позволяет выбрать область или несколько областей для генеративного стирания. Завершив выбор области для удаления, выберите Стереть.
-
Удаление маски позволяет отменить выбор области или нескольких областей из созданной маски. Выберите Стереть, чтобы завершить стирание выбранных областей.
-
Нажмите кнопку Очистить, если вы хотите отменить выбор всех выбранных областей.
-
-
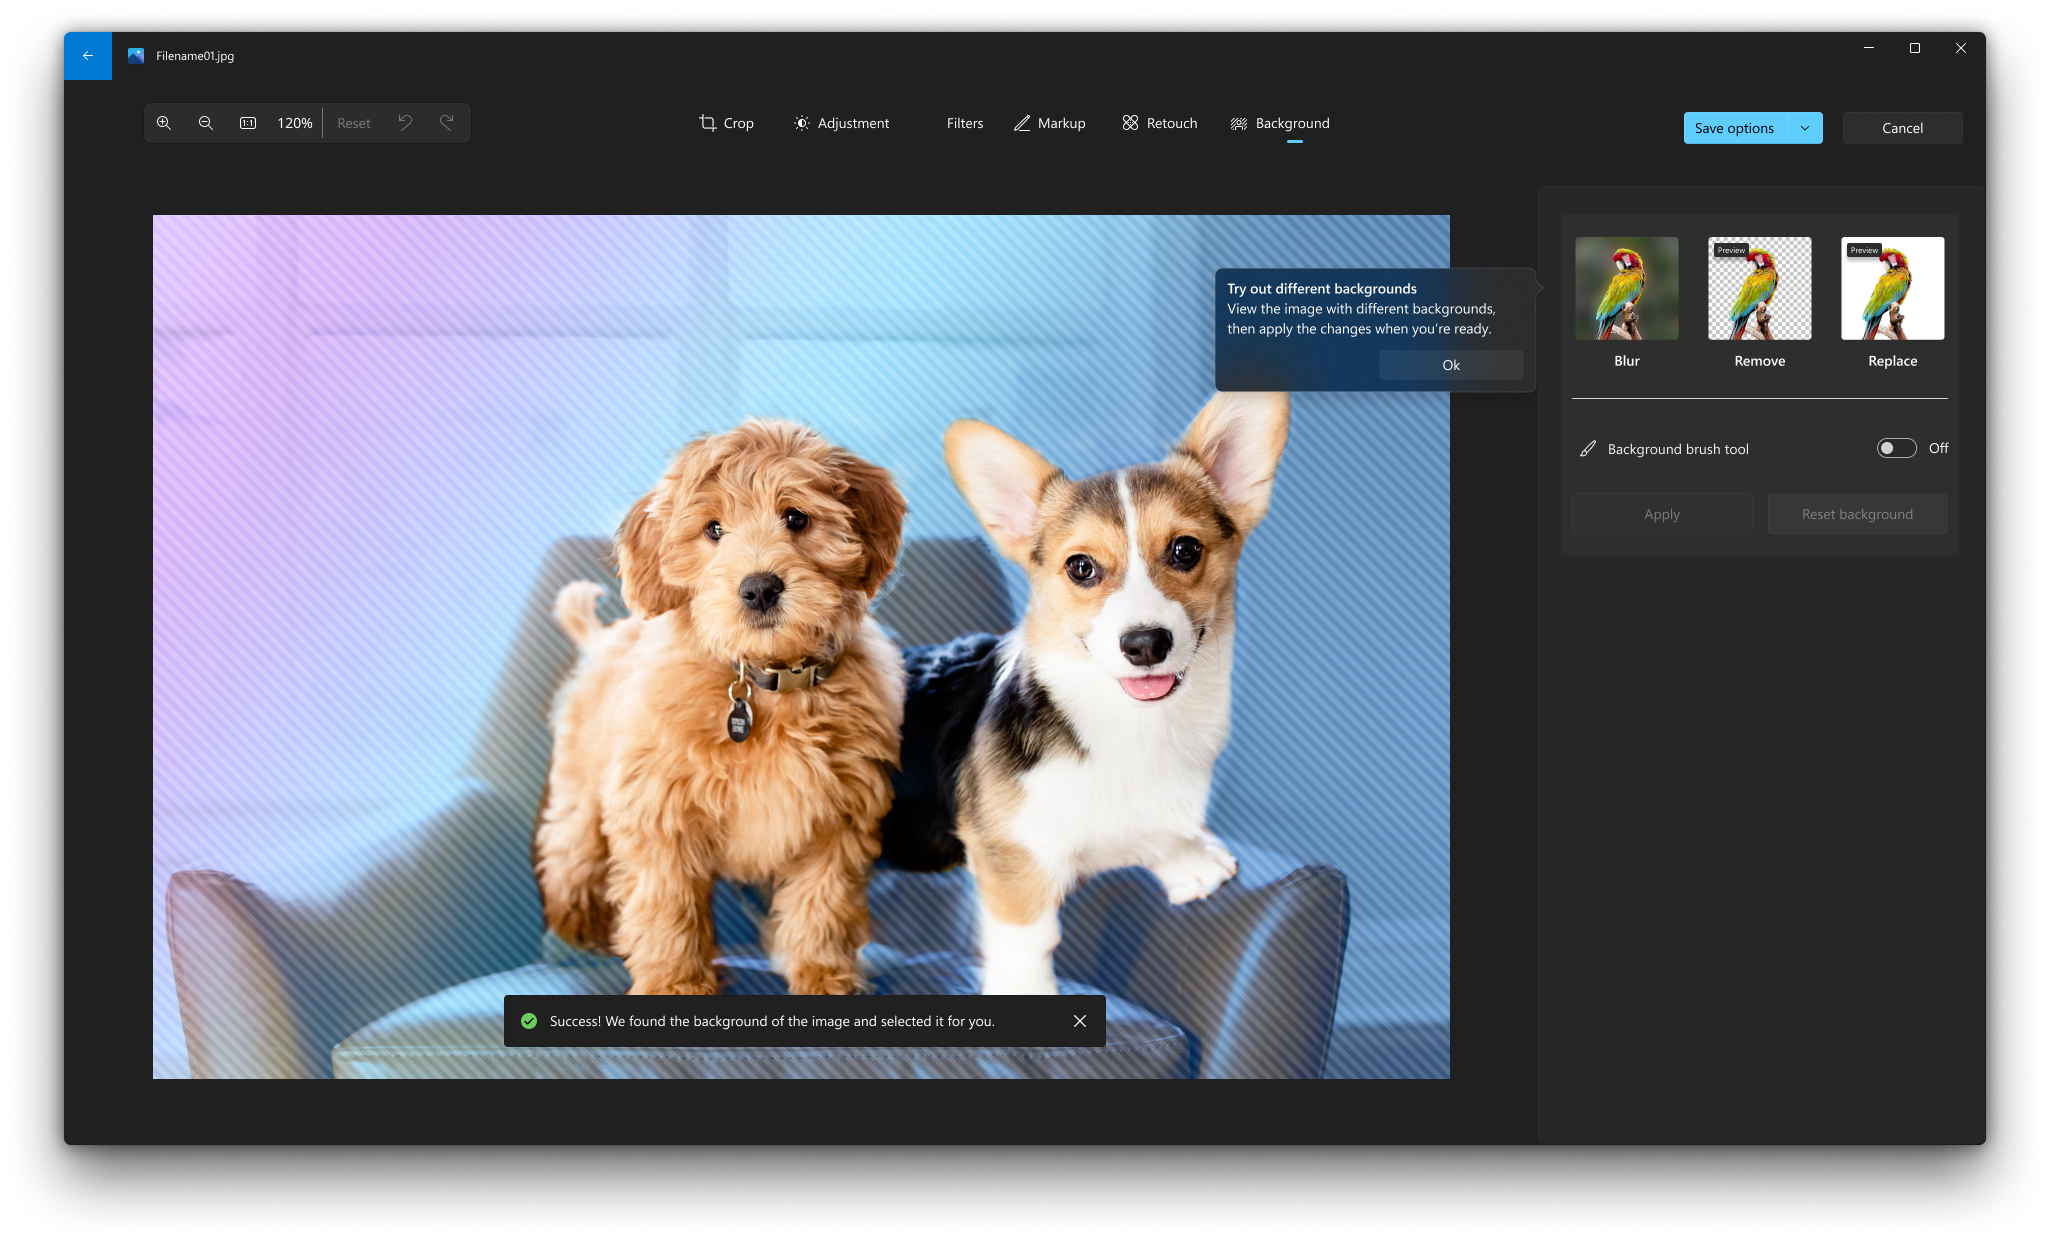
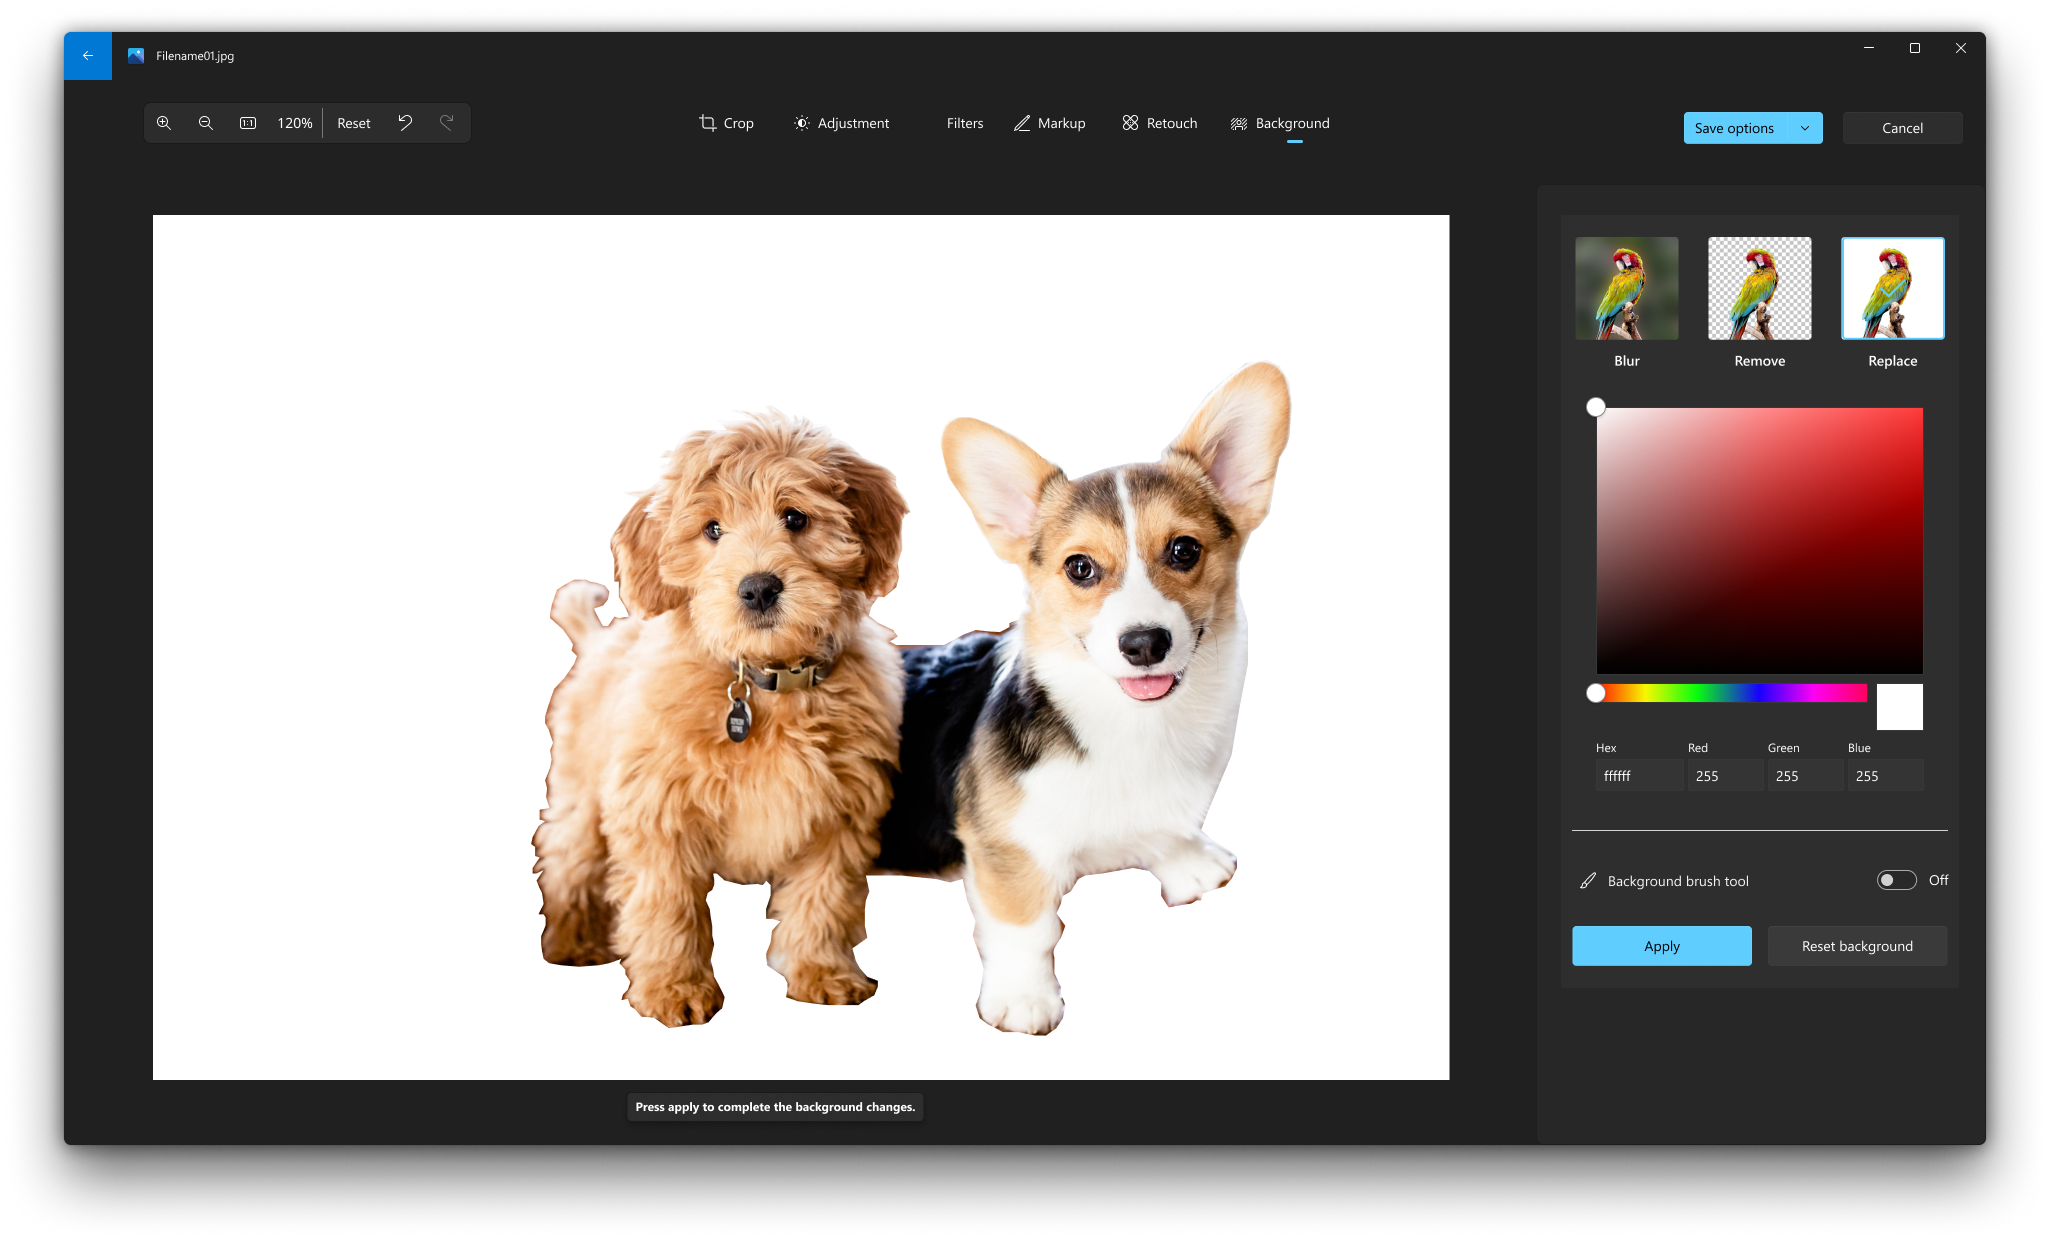
Иногда может потребоваться отделить тему от фона на фотографии, а затем применить эффект размытия на фоне, заменить его или полностью удалить.
Важно: ИИ используется для разделения фона, но процесс разделения выполняется локально на вашем устройстве. Это означает, что данные никогда не покидают устройство. Дополнительные сведения об ответственном подходе к ИИ, этических принципах, которыми мы руководствуемся, а также о средствах и возможностях, которые мы создали для обеспечения ответственной разработки технологий ИИ, см. в статье Ответственное использование ИИ.
-
Выберите Панель Фон . Фон изображения будет выбран автоматически, но вы также можете включить инструмент «Фоновая кисть» для отображения дополнительных параметров.
-
Используйте команду Добавить маску, чтобы добавить дополнительные области в качестве части фона.
-
Используйте команду Удалить маску, чтобы удалить части выделения, которые не нужны в фоновом режиме.
-
Вы также можете изменить размер кисти или мягкость кисти.
-
-
Выберите Размытие, Удалить или Заменить.
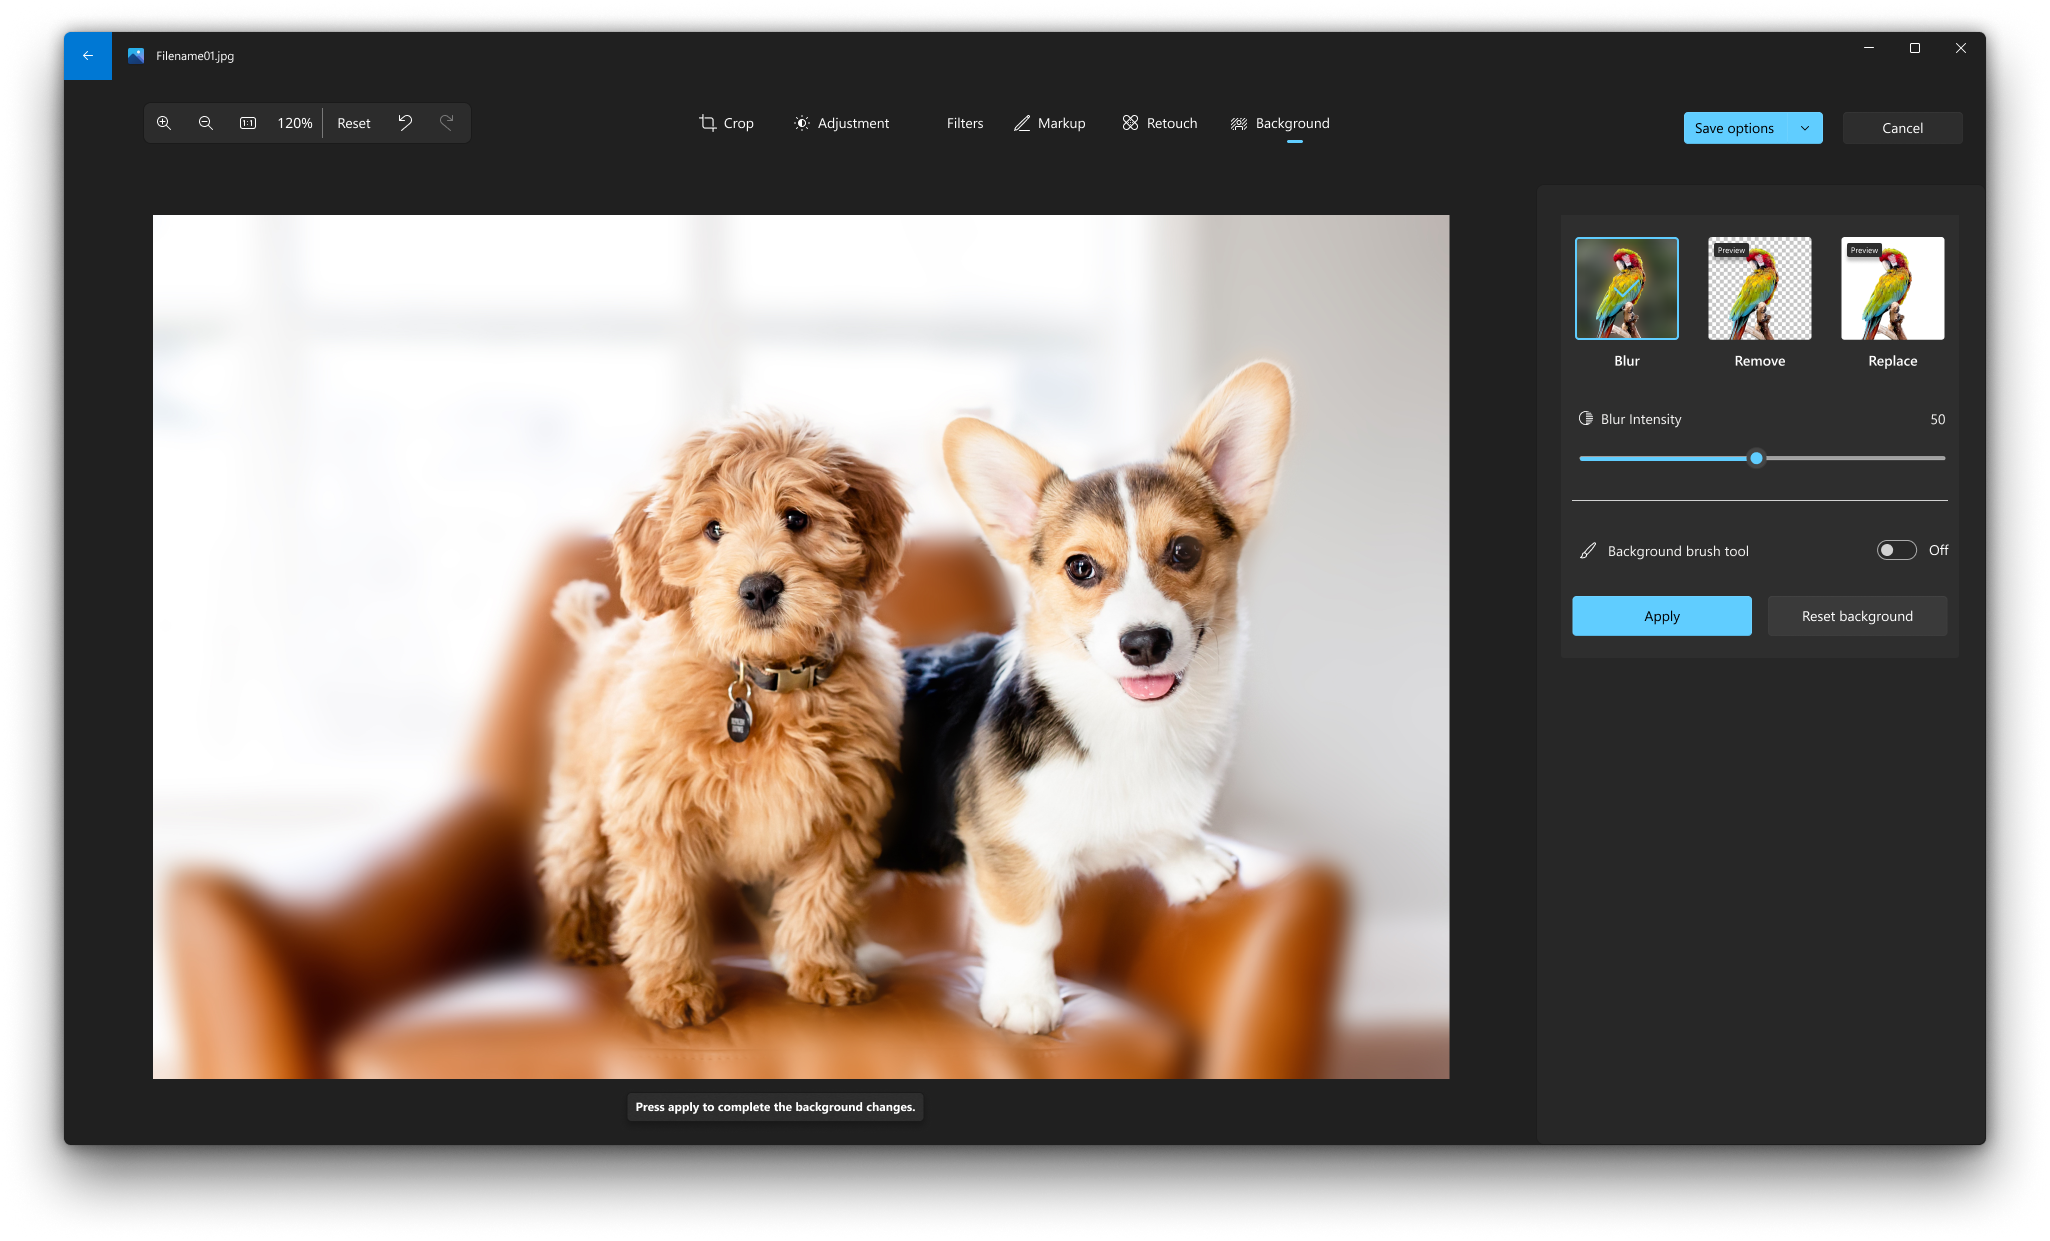
Выберите параметр Размытие , затем используйте ползунок, чтобы настроить интенсивность размытия, а затем нажмите кнопку Применить , чтобы размыть фон.
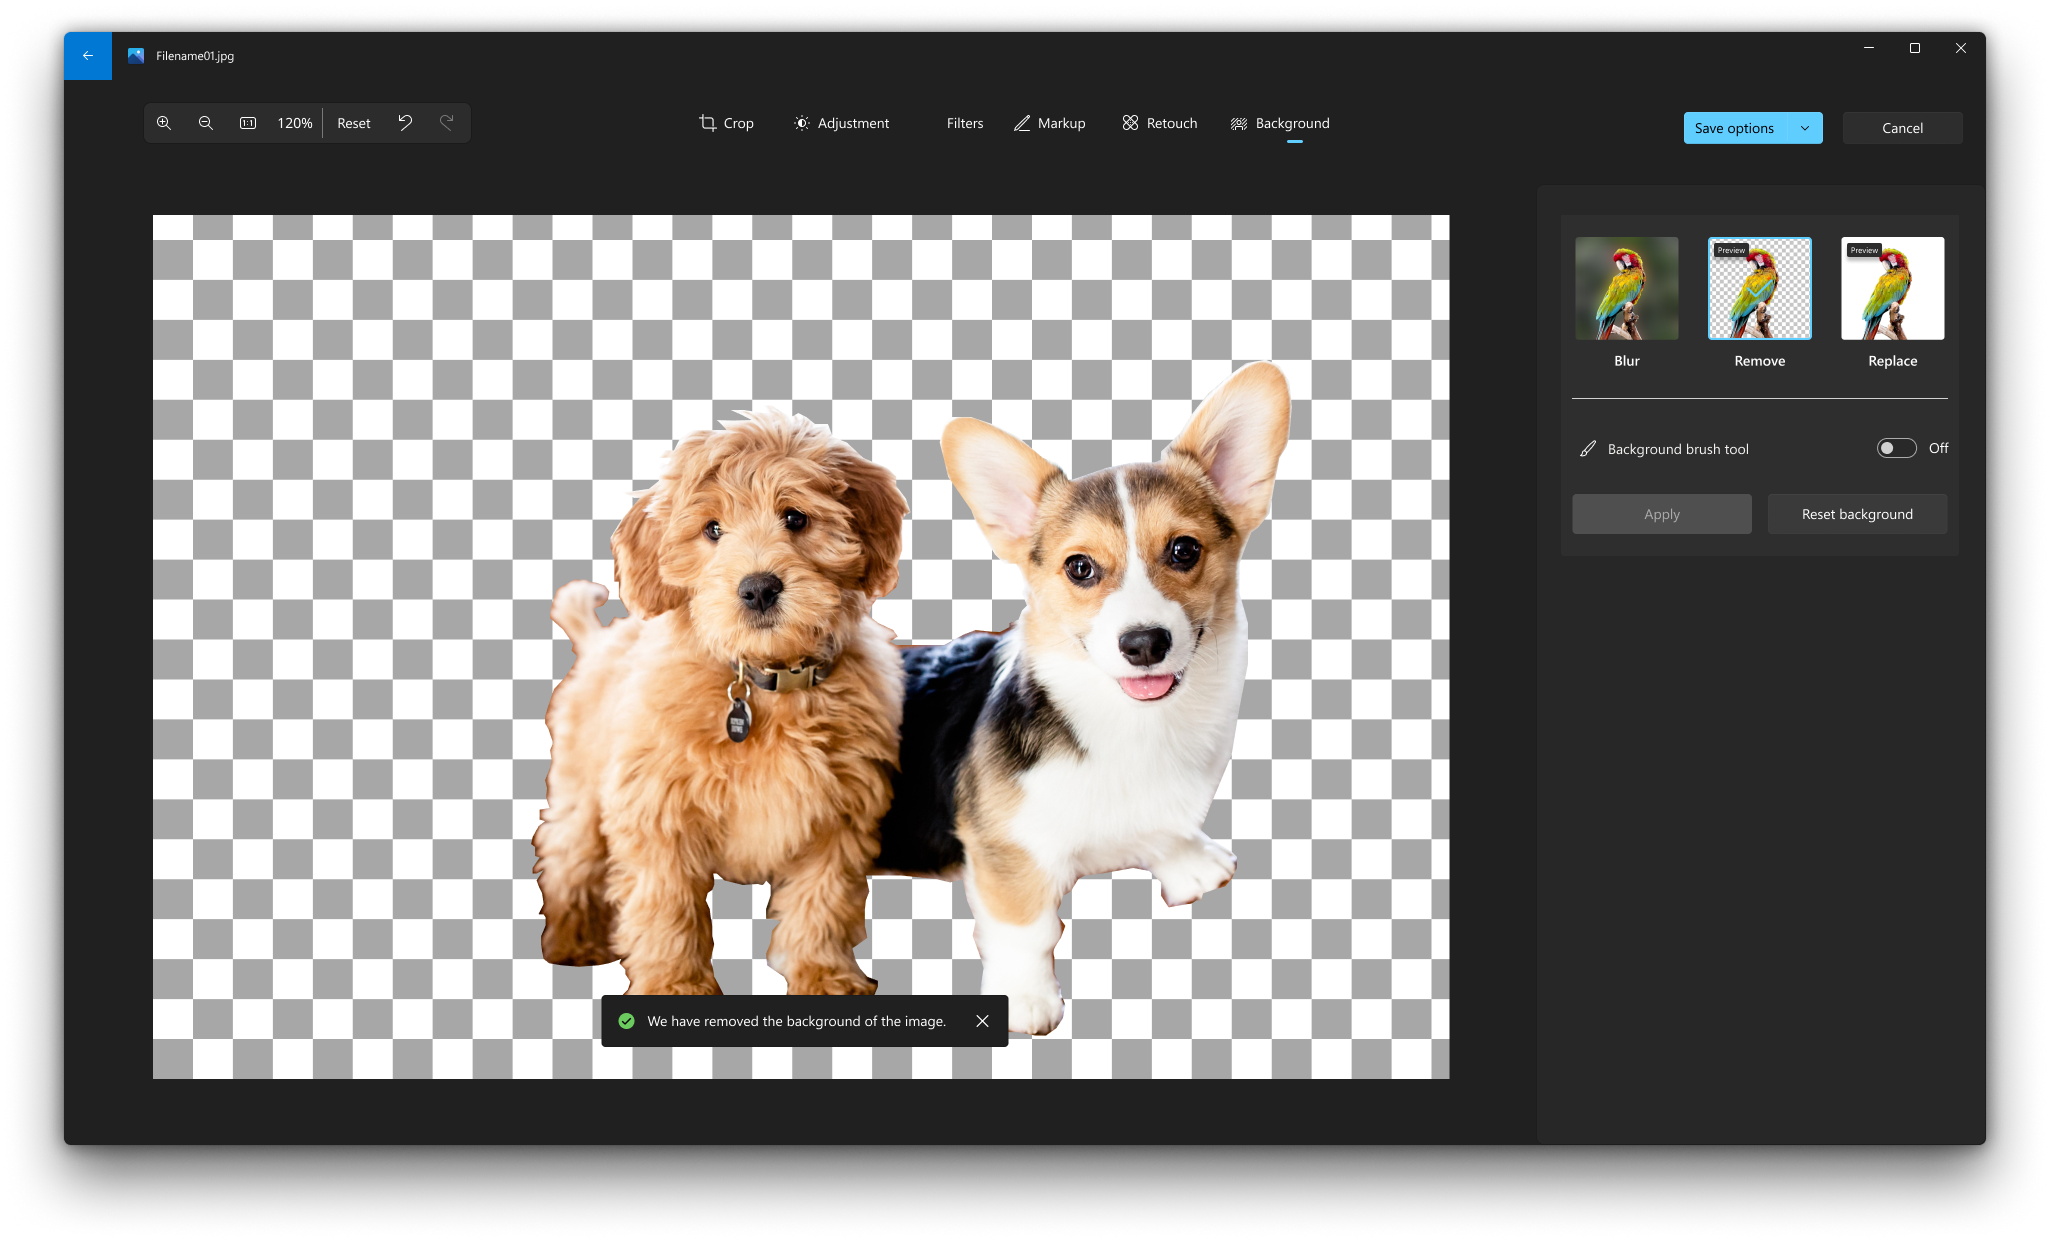
Выберите параметр Удалить , а затем нажмите кнопку Применить , чтобы удалить фон изображения.
Выберите параметр Заменить , а затем используйте цветовую палитру, чтобы выбрать цвет фона. Кроме того, можно указать значения RGB для нужного цвета. Нажмите кнопку Применить , чтобы заменить фон изображения выбранным цветом.
Редактирование видео
С помощью приложения «Фотографии» можно легко обрезать видео. В поле поиска на панели задач введите фотографии. В списке выберите Фотографии. Затем выберите видео, которое вы хотите обрезать.
Совет: Для дополнительных параметров редактирования видео откройте видео, а затем выберите Изменить в Clipchamp редакторе видео. Дополнительные сведения см. в статье Редактирование видео в Clipchamp.
-
Выберите Обрезать (CTRL + E) в верхней части экрана.
-
Настройте ползунки внизу в соответствии с нужными начальными и конечными маркерами.
-
Выберите Сохранить как копировать , чтобы сохранить измененное видео, или выберите раскрывающийся список рядом с ним и Сохраните видео, чтобы перезаписать исходное видео.
Нужна дополнительная помощь?
Нужны дополнительные параметры?
Изучите преимущества подписки, просмотрите учебные курсы, узнайте, как защитить свое устройство и т. д.
When editing pictures, resizing them is almost always necessary. If you want to make an image smaller or bigger, you might think you need special software. But if you use Windows 11 or 10, you can resize your images right from the default Photos app while you’re viewing them, no extra software needed.
The Photos app only gives you a few fixed resizing choices. These choices are in megapixels (MP), not resolution. This means you can only make images smaller, not bigger. If you need to change the size of your images in a very specific way, the Photos app might not be sufficient, and you might need a different software instead.
Also see: How to Resize Multiple Images At Once in Windows 11
How to resize images in Windows 11 or 10 using the default Photos App
To quickly resize an image or photo in Windows 10 or 11 using the Photos app while viewing the image, follow the steps below:
- Right-click on the image or photo that you want to resize and select Open with.
- Select the Photos app from the list of programs to open the image.
- Click on the triple-dotted icon located on the top right corner of the Photos app.
- Select Resize.

The photo can be resized into one of the following fixed sizes, choose one that best suit your needs:
-
- Small 0.25 MP, which is the standard size for thumbnails and best for profile pictures.
- Medium 2 MP, which is the most casual looking size and best for emails and messages.
- Large 4 MP, which is the largest size available and is usually the best option for high-quality viewing.
Note that you can only make an image smaller, not larger than its original size. While the Photos app doesn’t allow for custom sizes, it’s still very useful for quick, standard resizing without needing extra software.
Resizing photos and images using Paint
Another method to resize images in Windows 10 and 11 is by simply using Microsoft Paint. This is probably the most widely used method for resizing photos in Windows without relying on any third-party software, due to it being one of the oldest built-in software in the history of Windows.
Follow the steps below to resize an image or photo in Windows 10 and 11 using Paint:
- Go to the start menu or Cortana.
- Search for Paint and open it.
- In Paint, click on File, then Open to select your desired image or photo.
- Under the Home tab, click on Resize.
- You can then enter a custom size for your image or photo by Percentage or Pixels.
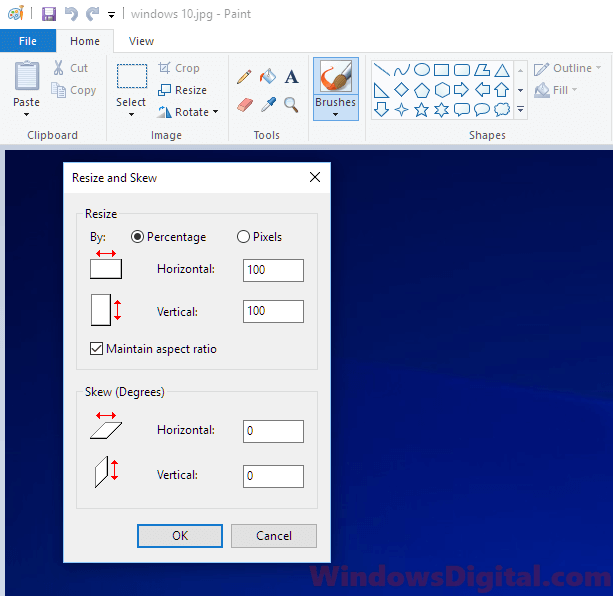
- Click OK to resize the image.
Resizing your images using Paint can sometimes significantly reduce the quality of the resized image. The difference can be so obvious that you will notice the image becomes blurry after being resized. Nevertheless, it’s still one of the most convenient and common ways most users who are not so tech-savvy use when it comes to resizing photos in Windows.
Other things to consider
When resizing images, try to keep the original aspect ratio to avoid distortion. The aspect ratio is the width-to-height relationship of the image, and you can maintain it by simply selecting the “Lock aspect ratio” or “Constrain proportions” option.
If you’re resizing your images for online use, you need to consider their file size and format. For example, you might want to try reducing the file size as much as you can without affecting the quality of the images too much. You might also want to use the PNG file format if your images have a transparent background.
If you need more advanced image resizing features, you might want to use other better third party software such as Adobe Photoshop or GIMP. If you need to bulk resize multiple images at once, you will need different software, like a batch processing tool.
Lastly, if you only need to do simple editing work like cropping, rotating or applying filters while resizing your images, the default Photos app that comes with Windows 11 and 10 should be sufficient.
(Image credit: Windows Central)
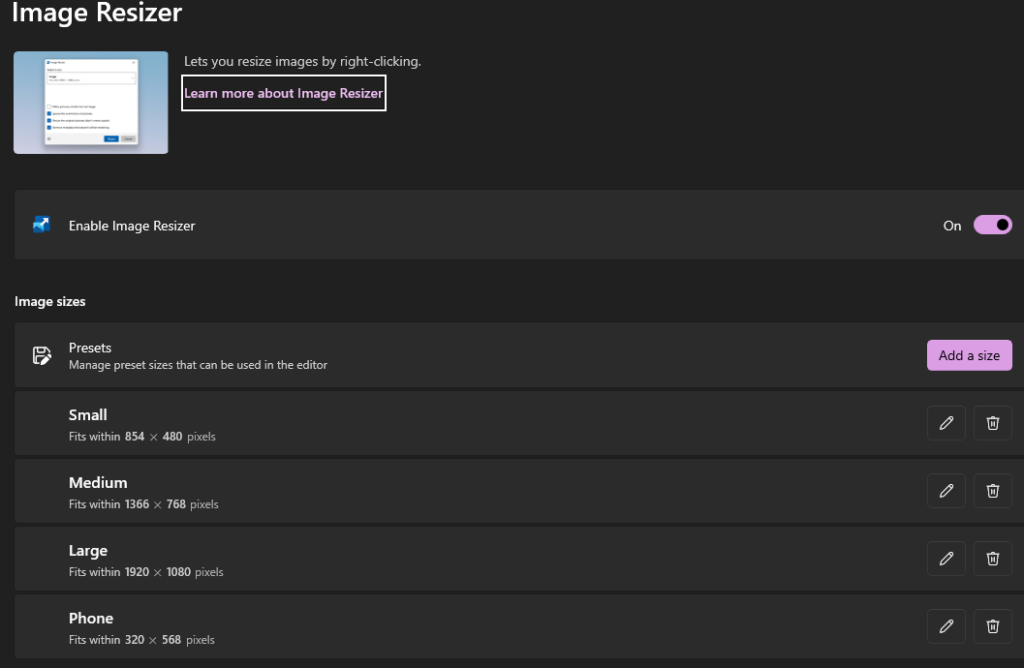
Sometimes you have a photo that’s too large for an email attachment or where you’d like to use it. While you can export images into smaller sizes using many editors, Microsoft’s PowerToys has a simple tool that lets you resize images in bulk that integrates directly with the File Explorer. With just a few clicks, you can resize images to a set of preset sizes or any custom size that you’d like. There are also encoding options and several other options you can select to create images. PowerToys is currently in beta, but it has a collection of handy little tools that make managing images easier.
Products used in this guide
- Handy little toys: PowerToys (Free at GitHub)
Getting PowerToys
PowerToys is currently in beta and distributed in GitHub. To get PowerToys, you just need to go to the app’s releases page and download the latest version.
- Go to the Releases page on GitHub for PowerToys.
- Click the most recent release within assets to download PowerToys. For example, «PowerToysSetup-0.16.1-x64.msi».
- Click on the downloaded file.
- Click Next twice (read through the license before clicking next the second time).
- Tick the boxes to indicate if you want PowerToys to start at launch and if you want to create a shortcut for PowerToys.
- Click Install.
- Click Yes to verify the download.
- Click Finish. At this point, you can also have a box ticked to launch PowerToys.
PowerToys is now running on your PC. If you opted to have it launch at startup, it would run in the background on your PC, and you don’t have to think about it.
How to resize images
Once PowerToys is running on your PC, you can use it within the File Explorer.
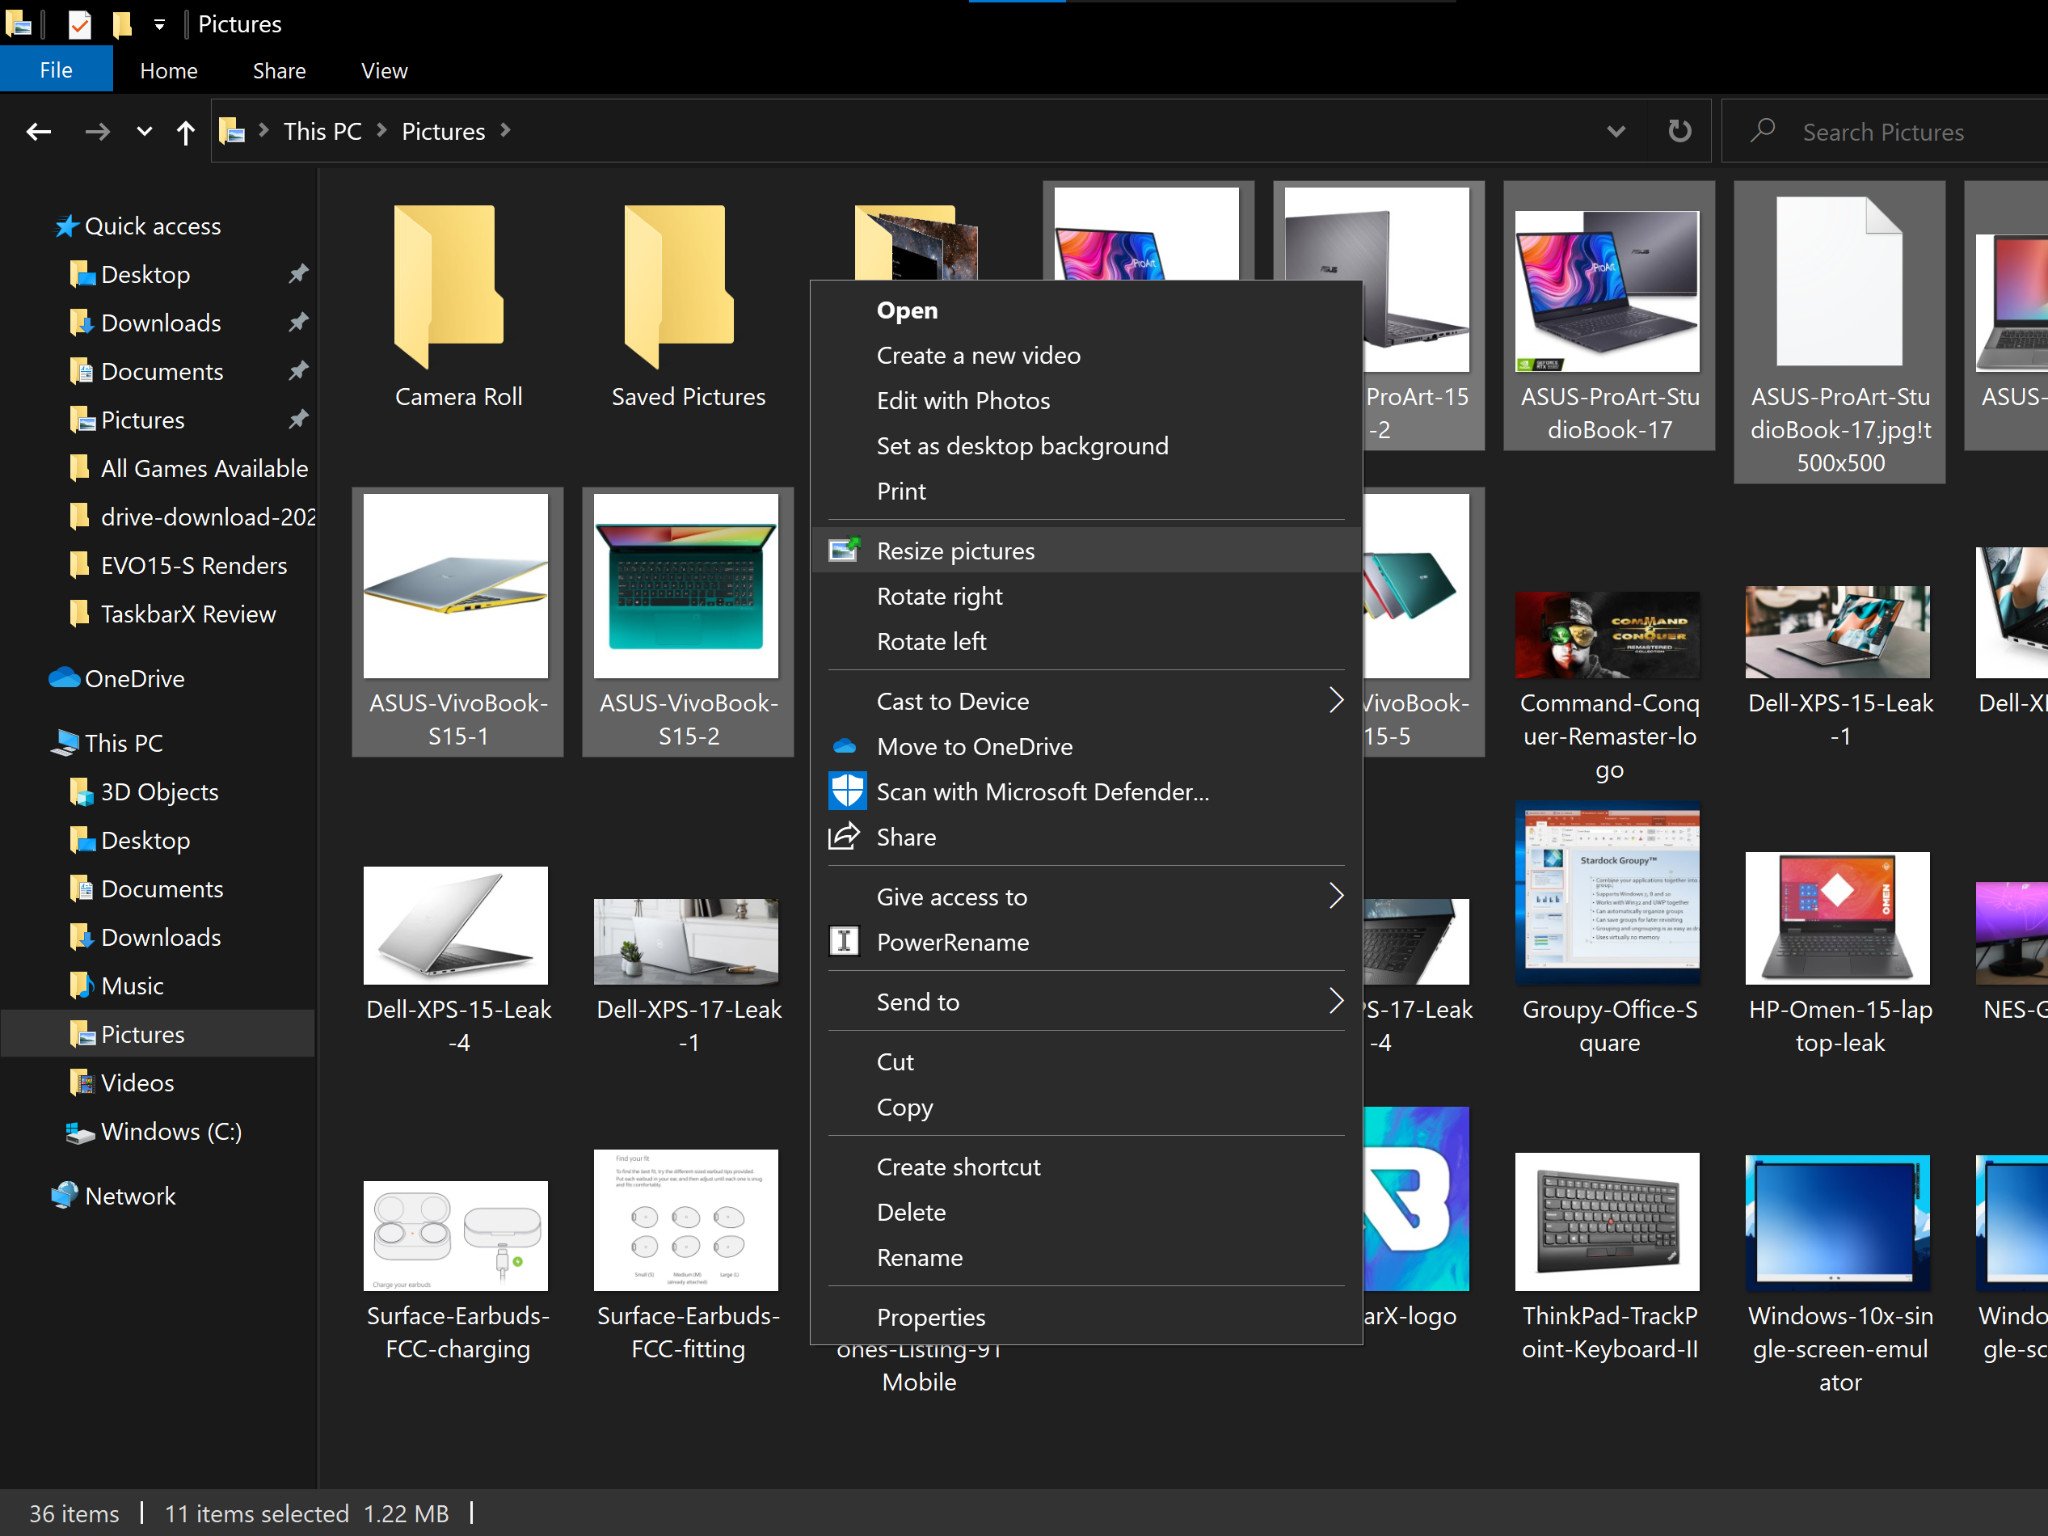
- Open File Explorer.
- Select the images you want to resize.
- Right-click over your selection.
- Select Resize pictures.
- Select the size that you’d like to create.
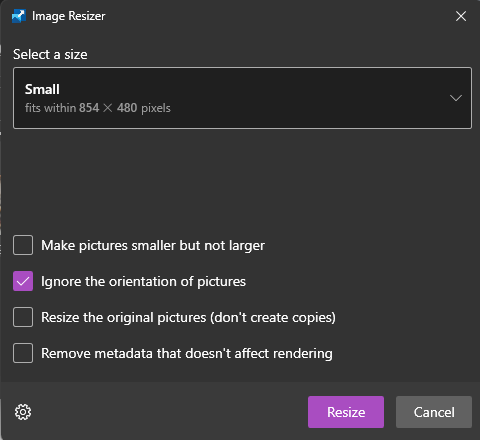
- Pick your additional options using the checkboxes within the Image Resizer.
- Select Resize.
At the bottom of the Image Resizer, there are options to «Make pictures smaller but not larger,» «Resize the original picture (don’t create copies),» and «Ignore the orientation of pictures.» You can choose to turn each option on or off by checking or unchecking its corresponding box. If you click Settings at the bottom of the Image Resizer, you can also change the default sizes, change your encoding preference, and change naming parameters. The Image Resizer within PowerToys is very minimal, so there aren’t a lot of options or sections to dig through.

Handy little toys
PowerToys
Tools that make life just a bit easier
PowerToys has a growing set of useful tools, including file resizer, that makes it easy to resize files in bulk.
All the latest news, reviews, and guides for Windows and Xbox diehards.
Sean Endicott is a tech journalist at Windows Central, specializing in Windows, Microsoft software, AI, and PCs. He’s covered major launches, from Windows 10 and 11 to the rise of AI tools like ChatGPT. Sean’s journey began with the Lumia 930, leading to strong ties with app developers. Outside writing, he coaches American football, utilizing Microsoft services to manage his team. He studied broadcast journalism at Nottingham Trent University and is active on X @SeanEndicott_ and Threads @sean_endicott_.
You can resize an image in two ways: By making it larger or by making it smaller.
Here’s a question for you: What are you planning to accomplish today?
Looking to enlarge your blog post image size from 500px to 1000px? It’s quite easy to pull off in MS Paint or Photos. But if it’s a pixel-based (also called raster-type) image like PNG or JPG, you may end up with a pixelated image that doesn’t look all that great.
But with a neat feature like resampling — on Windows, the feature is available in Adobe Photoshop and Bulk Image Resize (from the MS Store) — you can still end up with a good-quality image.
Reducing the image dimensions means that you end up with a small photo. The perceivable quality will remain the same if the image occupies a smaller area on the screen. However, there is an irreparable loss of information as the pixels are shrunk.
During resizing, there are consequences! So a tip to remember is to always retain the original image before resizing, particularly when going smaller.
What if resizing was without consequences and quality issues? That’s a reality when dealing with a vector-file format such as SVG, where the image is not made of tiny color pixels but constructed from vectors and lines. You can catch up on the differences between SVG and PNG.
Moving on. Let’s examine techniques for resizing images on Windows.
In case you also own Apple devices, you may check our articles about how to resize images on your iPhone or how to reduce an image size on MacOS.
If you’d like to get a quick overview of top Windows methods and see which one is best for you, jump to the Conclusion section to view our comparison table.
Method 1: Use Windows Photo Editing Apps to Resize Your Photos
MS Paint is a raster (i..e pixel-based) image editor included in all Windows ve
rsions since Windows 1.0, which was released in November 1985. You’ve probably used it a couple of times to draw stickman figures, with varying success levels.
Now, Paint can work with the following file formats: Windows Bitmap, JPEG, GIF, PNG, and TIFF.
Follow these steps to resize images with MS Paint:
Step 1: Open Paint. Go to File > Open > Choose the file path.
Step 2: Go File > Image Properties.
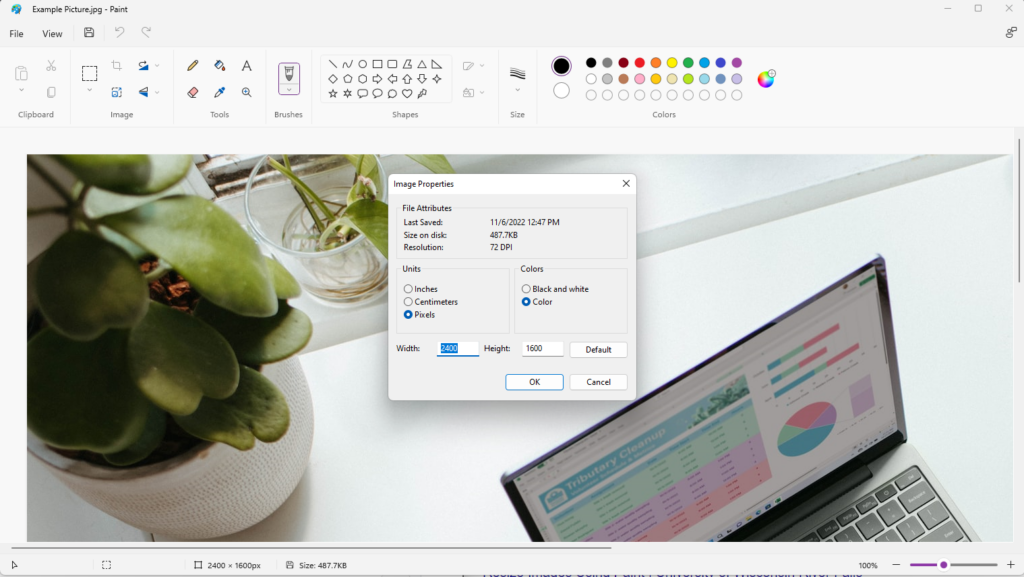
Step 3: In Image Properties, you can change the Width and the Height, for instance, from 2400 x 1600 to 1152 x 648.
Step 4: Save a copy of the image with the new dimensions. Go to File > Save As > Choose the file format (PNG, JPEG, BMP, GIF, or other formats).
That’s all. You’ll have the new file with different dimensions and file size.
One of the main drawbacks of this method is that it doesn’t offer any resampling. In case you’re wondering, we explained what resampling is when we described how to resize images on Mac. The fact that Microsoft Paint doesn’t offer resampling means that if you decrease the size of a large image from 1000px to 500px, its file size won’t be reduced.
| Pros of MS Paint | Cons of MS Paint |
| Free and no download | Doesn’t offer resampling |
| Simple three-step process | May not support as many formats as other image convertors |
| Supports other functions, drawing shapes, flipping, etc. |
How to resize an image on Windows using the Photos app?
MS Photos is a raster graphics editor that comes with many other functions, including image viewing, organizing, and sharing. It can even edit video clips.
The app has been made available since 2012 with the release of Windows 8. When trying to open very large images, Photos may automatically resize them. But it’s similarly possible to resize other images with these steps:
Step 1: Open your image with Photos. If Photos is the default photo viewing app, just double-click to open the image. Or, right-click on the image, and choose Open With Photos.

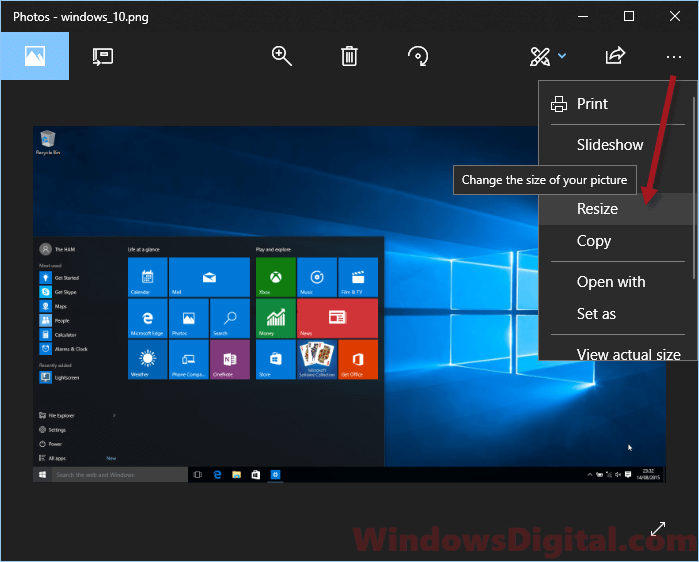
Step 2: Click on the more icon (three dots) and select Resize.
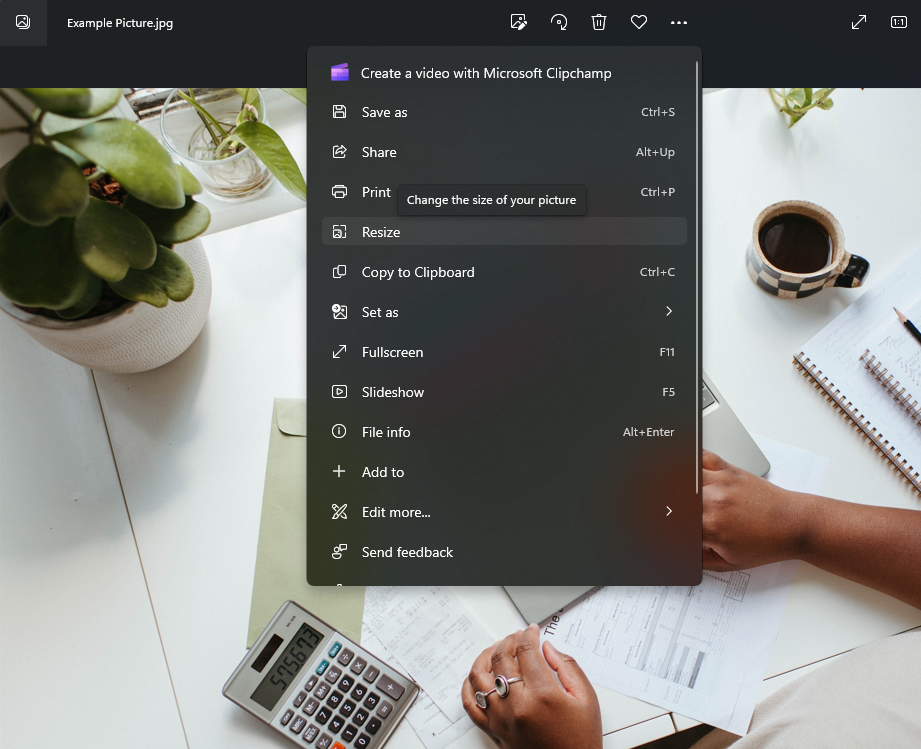
Step 3: Photos recommends some resizing options, for instance, Best for Thumbnails. You can choose the default options, or set custom dimensions.
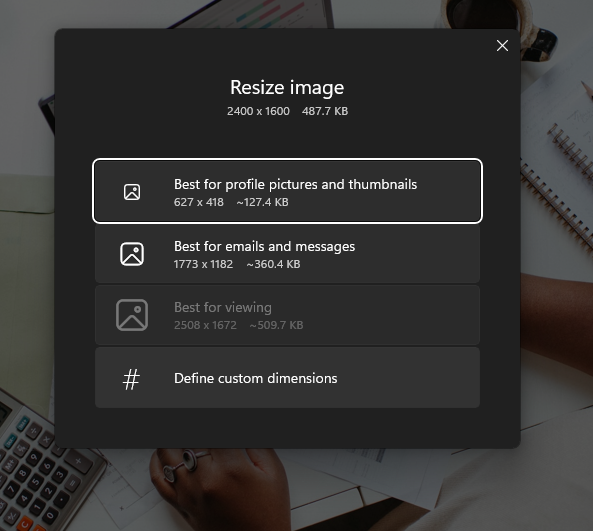
Step 4: Choose the location to save your new resized file.
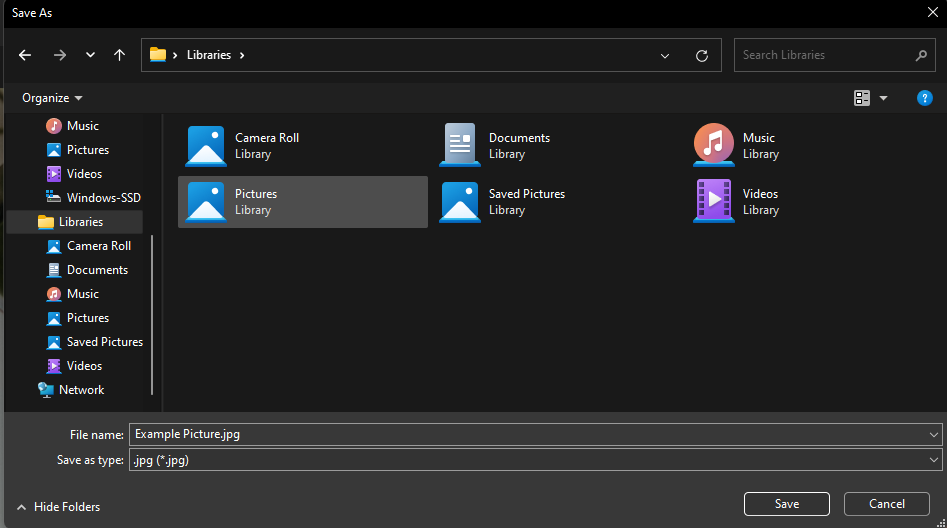
Step 5: You can edit the File name and Save as Type to export the image to different image formats.
Like MS Paint, the Photos app doesn’t allow you to resample the pixels of your photos.
| Pros of using Photos | Cons of using Photos |
| Quick and easy | Doesn’t come with a resampling feature |
| Export image to up to 8 formats | No support for next-gen formats such as WEBP |
| Free and no need for third-party downloads | |
| Recommends appropriate sizes for different uses |
How to resize an image on Windows with Paint 3D
If you’re running on Windows 10, you’ll find that Paint 3D comes installed as part of provisioned programs.
Paint 3D is essentially an improved version of Paint with support for creating 3D objects and pictures. In Windows 11, the app may be installed for free from the Microsoft Store.
It provides a great resizing feature that allows you to lock in the aspect ratio or choose from preconfigured sizes. Use it to make sure your blog images follow a constant image ratio.
Step 1: Launch Paint 3D. Select Open > Open Files.
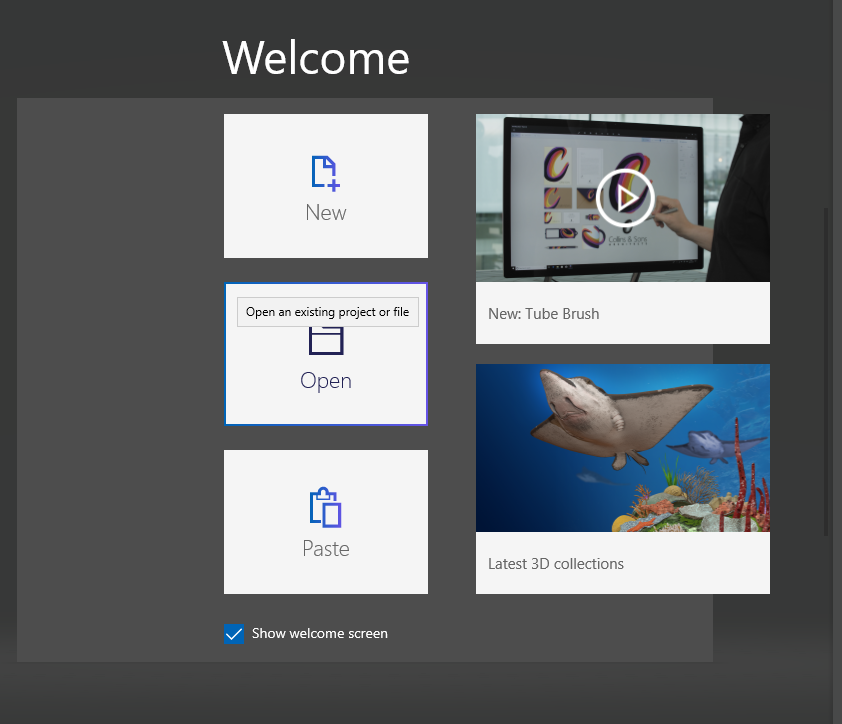
Step 2: Choose the file path in File Explorer.
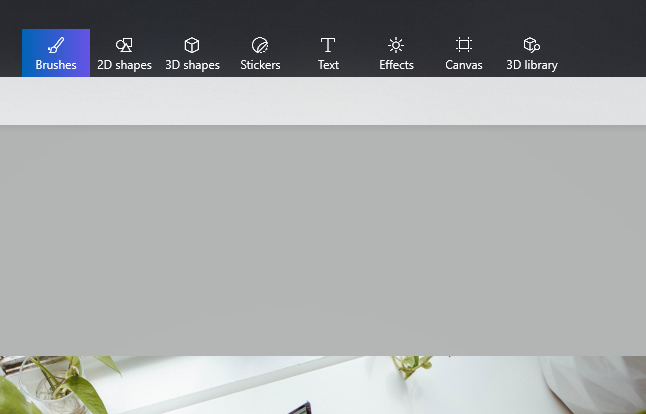
Step 3: From the top menu, choose Canvas.
Step 4: Resize the Canvas from the left-hand panel. Tip: You should lock the aspect ratio and resize the image with canvas.
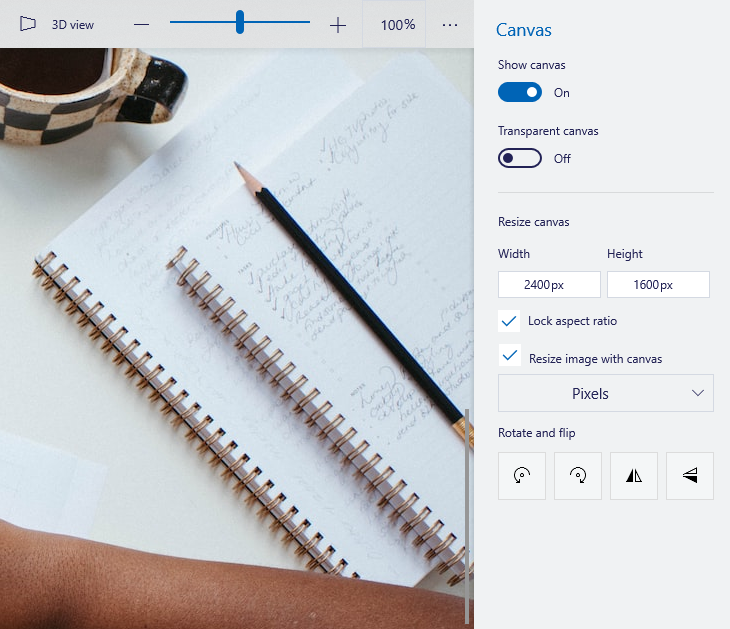
Step 5: Change the width or height, for instance, from 2400px to 1200px, and the changes will be dynamically applied.
Step 6: Save a copy of the resized image. Go to Menu > Save As > Choose the file format and specify a name.
| Pros of using Paint 3D | Cons of Paint 3D |
| Allows you to lock the aspect ratio | Doesn’t provide a resampling feature |
| Resize the image independently of the canvas | No support for next-gen or vector formats |
| Easy to use and no downloads. | |
| Supports more image formats than Paint and Photos |
How to resize an image on Windows using PowerToys
Microsoft PowerToys are a collection of utilities that expand your Windows functions so that you can get the experience you want and obtain more productivity. Most features are designed for developers and power users, but you’ll find an image resizer.
You may have to install Powertoys, and there are two main ways you can do this:
- Get it from the Microsoft Store App, or
- Install it from Github which the most techies of you will enjoy
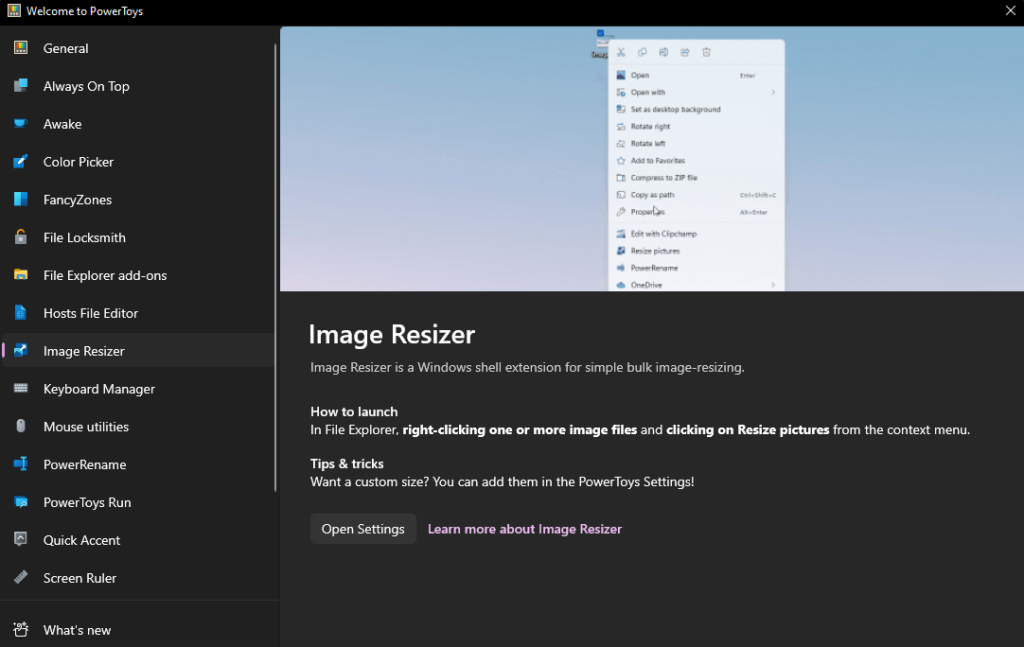
After installing Microsoft PowerToys, just launch it, and select Image Resizer. You can learn how to use it from the quick tutorial. By clicking “Open Settings” you can specify custom sizes.
Using the tool is quite straightforward and unlike other native methods, it supports bulk resizing.
Step 1: Right-click on one or several images, and choose Resize Pictures.
Step 2: Choose the resizing options you want.
Step 3: Finish by selecting Resize.
Method 2: Resize Images on Windows With Chrome Extensions
You can use a couple of extensions on Chrome to resize images to your desired dimensions. Note that you can add extensions from the Chrome Webstore to Microsoft Edge. This is possible because Microsoft Edge is built on Chromium, the same technology used by Chrome.
The featured extensions are free and straightforward to use. So, here are the top three extensions to use::
Extension 1: Resizing App
The Resizing App is a handy Chrome plugin that you can use to quickly resize images.
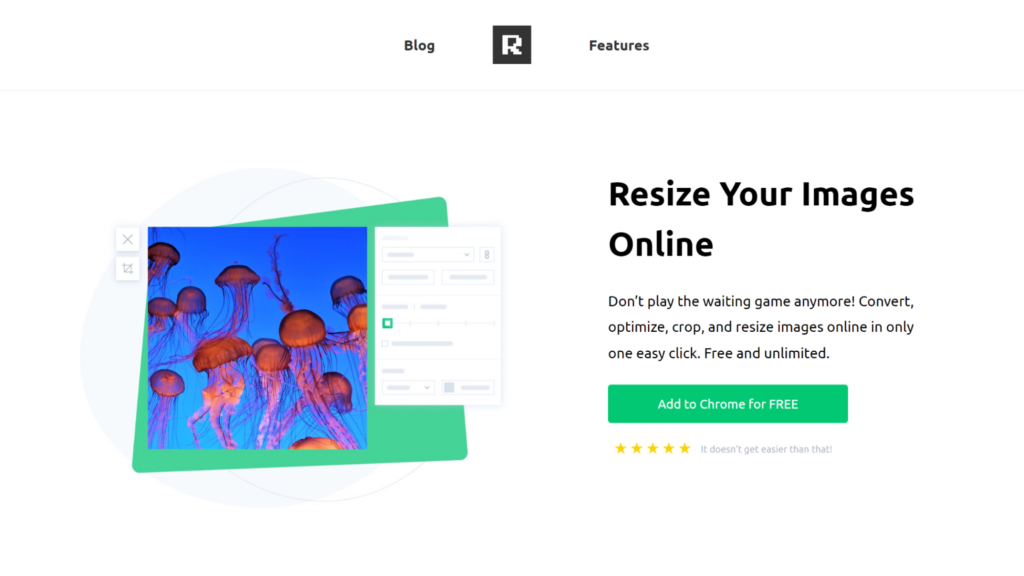
It provides quick functions, for instance, resizing images by Width, Height, Largest Side, Percentage, or custom size settings.
Using the extension is quite intuitive. Click on the Extension icon, and upload your image.
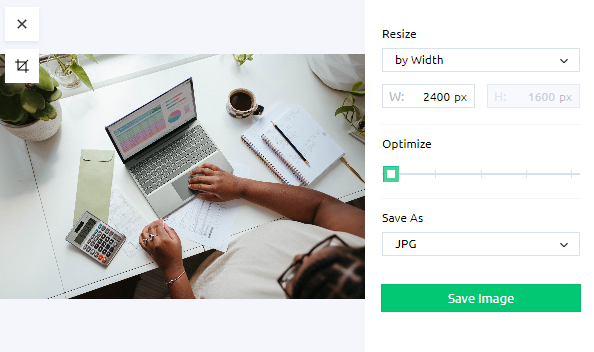
You can optimize the images as well while preserving the image dimensions.
Extension 2: Bulk Resize
The Bulk Resize plugin offers intuitive features to resize many images at once. You can specify custom image dimensions, define values for the width, height, or longest side, or reduce the image sizes by a certain percentage.

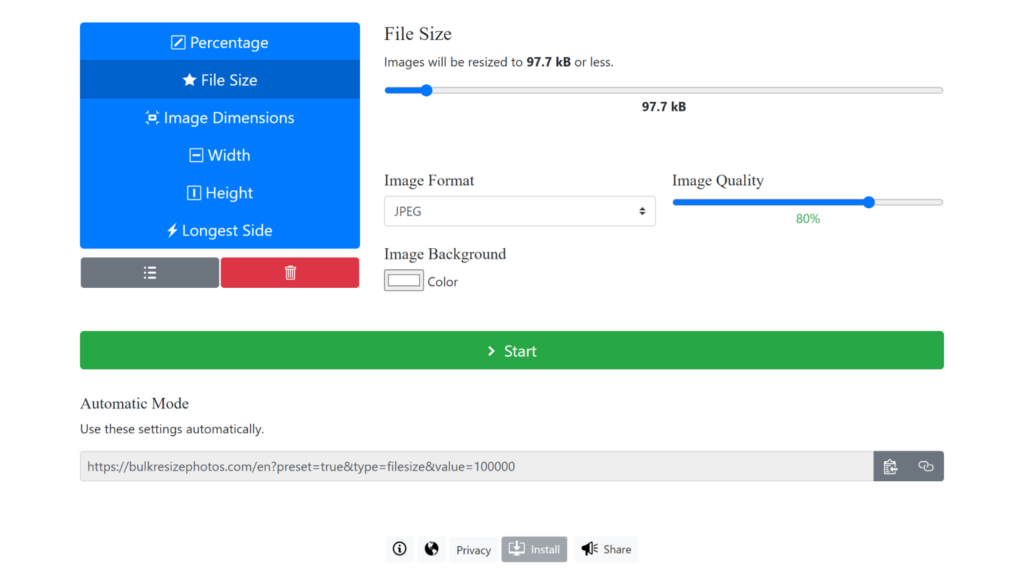
It’s a handy tool to use for reducing the file size too, as you can vary the image quality or even specify a file size that images should be reduced to. For instance, you can state that the image file should be 97.7kb or less.
Extension 3: Bulk Image Resize
The Bulk Image Resize plugin supports popular image formats such as GIF, TIF, JPEG, PNG, and more. It has two output options: download multiple images in one zip file or get each image individually.
Download and pin the Extension to the toolbar for easier access. To start resizing, open the plugin by clicking on the icon.
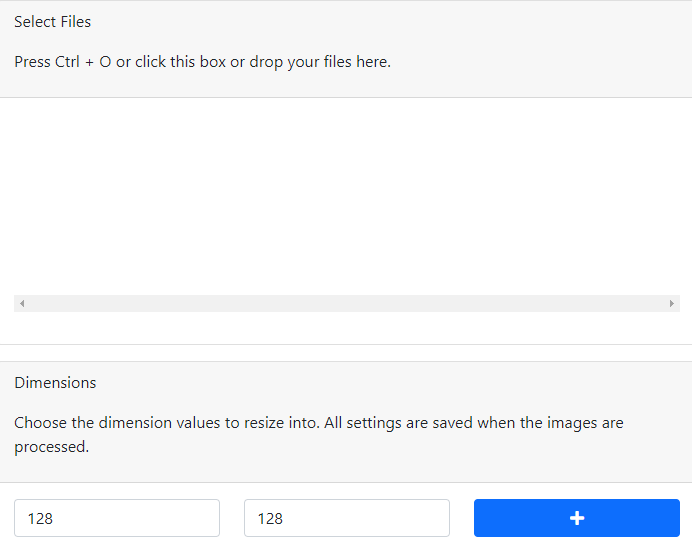
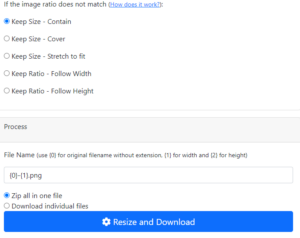
You can choose the dimensions values to resize images into. If you scroll down, there are more settings, for instance, what to do if the image ratio doesn’t match.
Method 3: Resize Images on Windows Using Third-Party Software
The significance of using third-party software is that there is no need to be online to resize photos. Similarly, the tool can process hundreds or even thousands of photos quickly and without a tedious download process.
The following tools can help with resizing images after you download and install them:
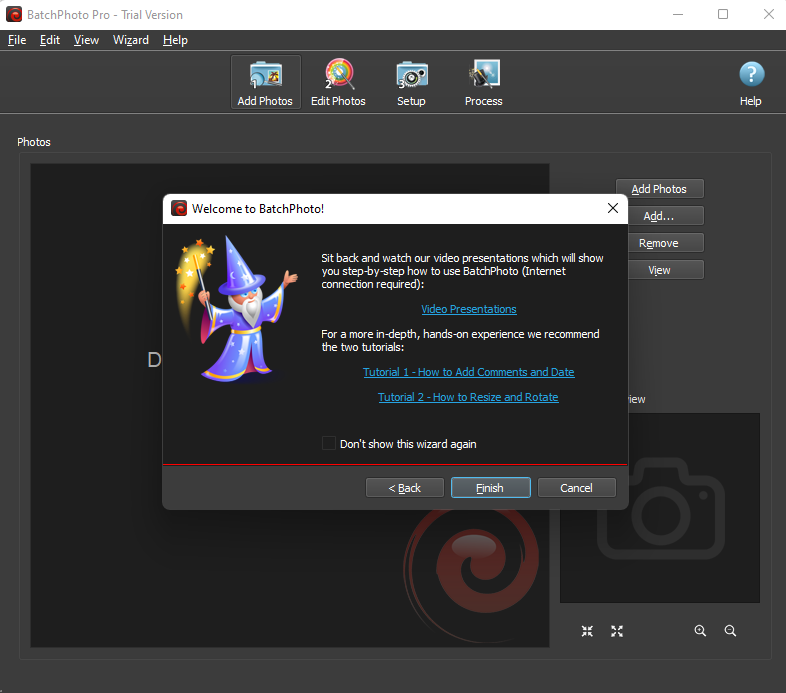
Software 1: Batch Photo
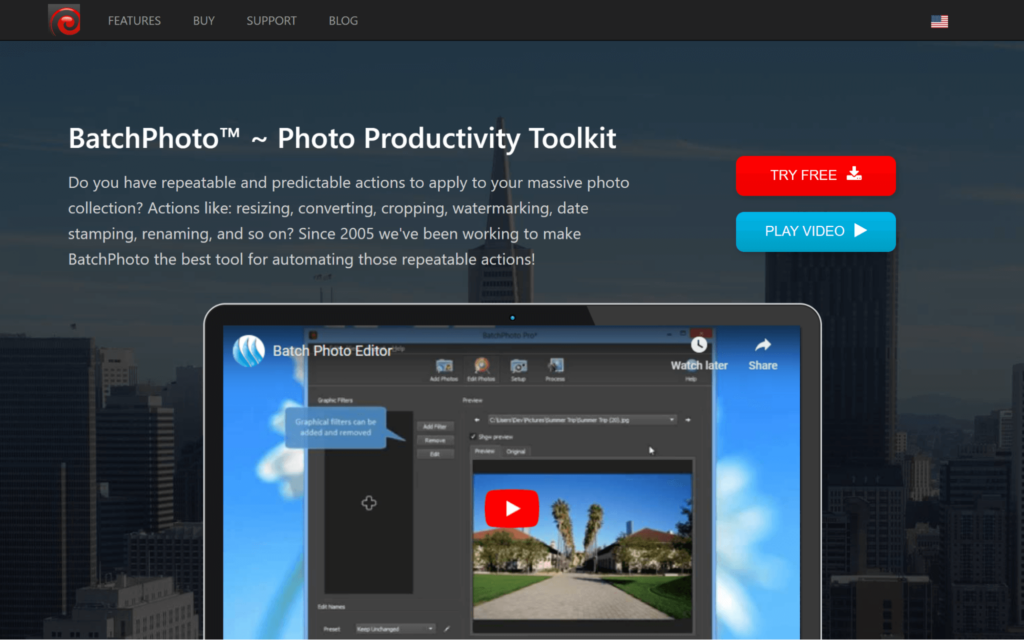
BatchPhoto™ is a professional image manipulation program for Windows and Mac. It allows users to perform a wide range of edits on multiple photos with one process, including adding watermarks, applying special effects, renaming photos, adding time stamps, etc.
You’ll even find intuitive time-saving features such as Folder Watch that monitors for new photos and adds predefined edits. The tool can convert images from 170 formats. So, it’s quite reliable for professional users.
Software 2: Light Image Resizer
The Light Image Resizer offers an advanced resizing feature with the crucial ability to retain the aspect ratio during resizing. You can select from pre-configured resizing profiles even for mobile phone screen sizes.
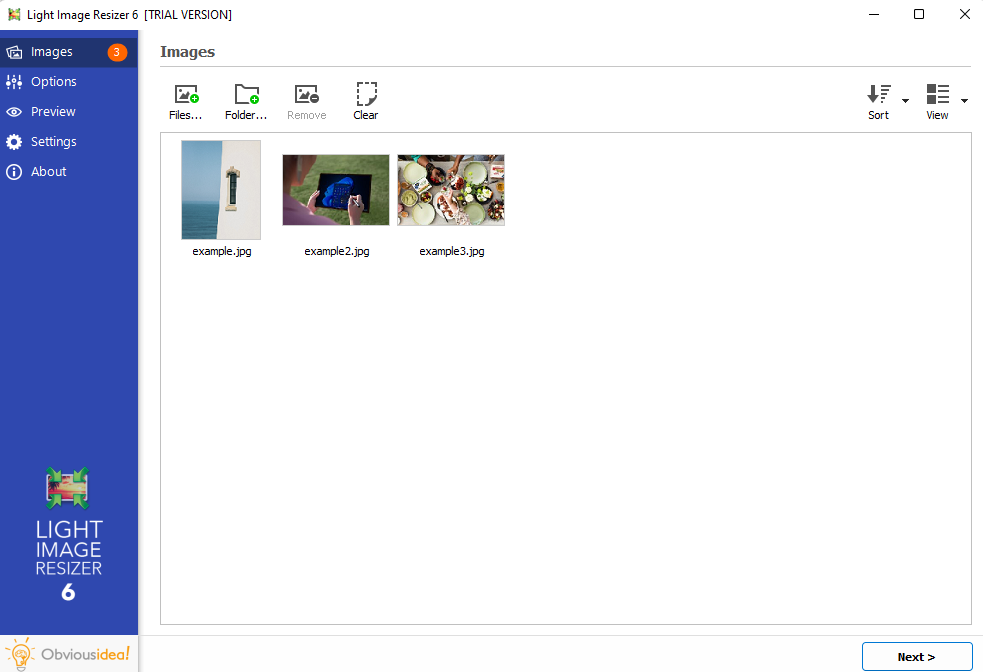
The tool can even remove the background of images as well, but the feature is powered by remove.bg and the images have to be uploaded first.
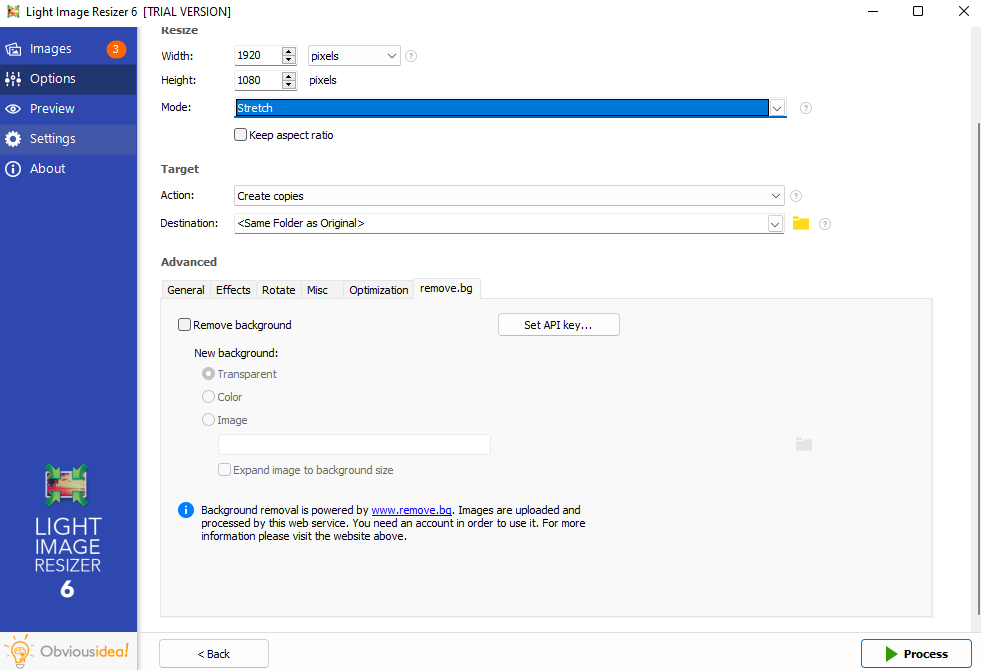
The free version allows users to process up to 100 images.
Software 3: Fotosizer
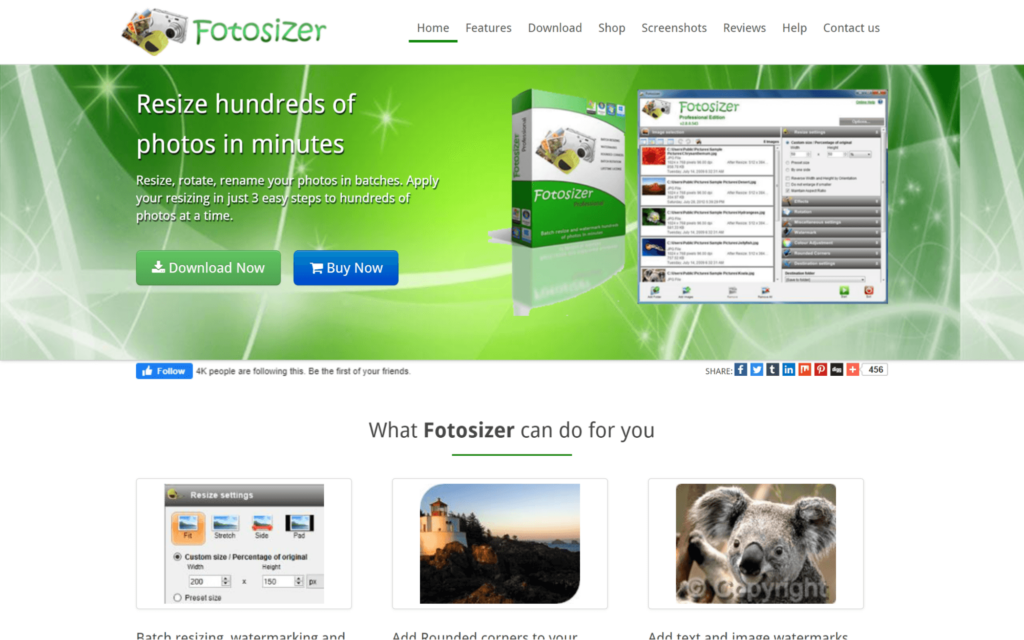
Fotosizer is available in editions. In the Standard Edition, you access basic batch editing features such as resizing, rotation, and changing image formats. The Professional Edition comes with a broader spectrum of features including
- Applying watermarks;
- Adding rounded corners;
- Adjusting image colors with contrast, saturation, hue, shadows, and other settings;
- Applying text on images;
- And more.
Method 4: Resize Images Without Loosing Quality with AI Image Resizers
AI tools are revolutionizing the way we resize images on Windows. They maintain high quality without the loss typically associated with image enlargement. These tools leverage Machine Learning algorithms, where self-taught neural networks, exposed to millions of images, learn to adaptively compress images and enlarge by assigning different bitrates to various parts.
Popular AI image resizers include:
- ON1 Resize AI 2023.5: Functions as a standalone application or as a plug-in for Adobe Photoshop
- Overscale AI: Excels at upscaling low-resolution images.
- Pixelhunter: offers a free solution tailored for social media.
- AI Image Enlarger: Can enlarge images up to 8k resolution, remove faces & backgrounds, and even clarify blurry sections.
Other notable AI resizers are Uploadcare Smart Resize and Spyne.ai, expanding the possibilities for photographers and designers alike.
Now, using AI Image resizers is quite intuitive. For instance, with AI. Image Enlarger, you only need to upload your image, and choose the scaling option from 200% to 800%.

For detailed instructions on how to resize images specifically for passport photos, check out our comprehensive guide on how to convert a picture to passport size.
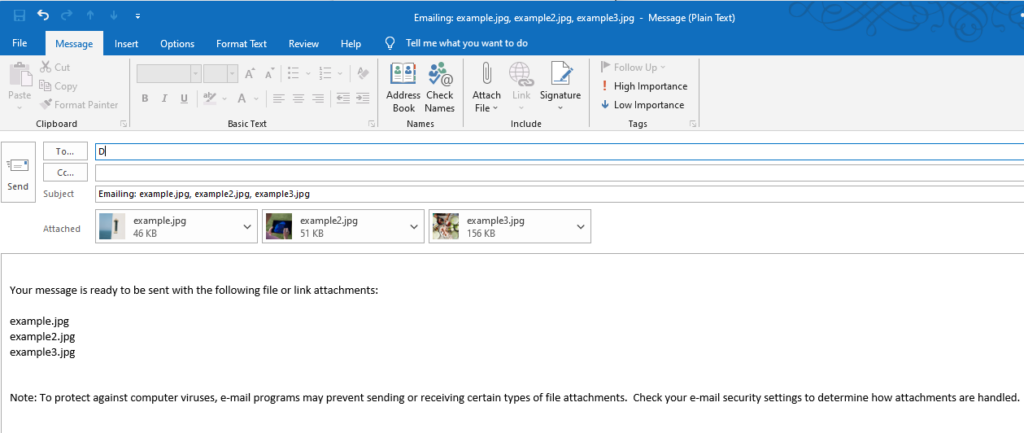
Method 5: Using Send to Mail Recipient Function to Resize Images
Another handy and quick way to resize multiple images in Windows without installing any app is to use the Send to Mail Recipient function. This method is ideal if you plan on sending the images via email.
To use it:
Step 1: Select multiple photos
Step 2: Right-click and select Send to > Mail Recipient (P.S If you can’t see Send to after right-clicking, choose “Show More Options.”
Step 3: Choose the image dimensions in the Attach Files wizard.
Step 4: This will launch Outlook if it’s the default email client. You can proceed to personalize the email as you like.
Method 6: Using Microsoft Store Apps to Resize Images
If you have access to the Microsoft store from your PC or tablet, you can quickly find suitable tools for resizing images. Here are some of the most highly rated apps:
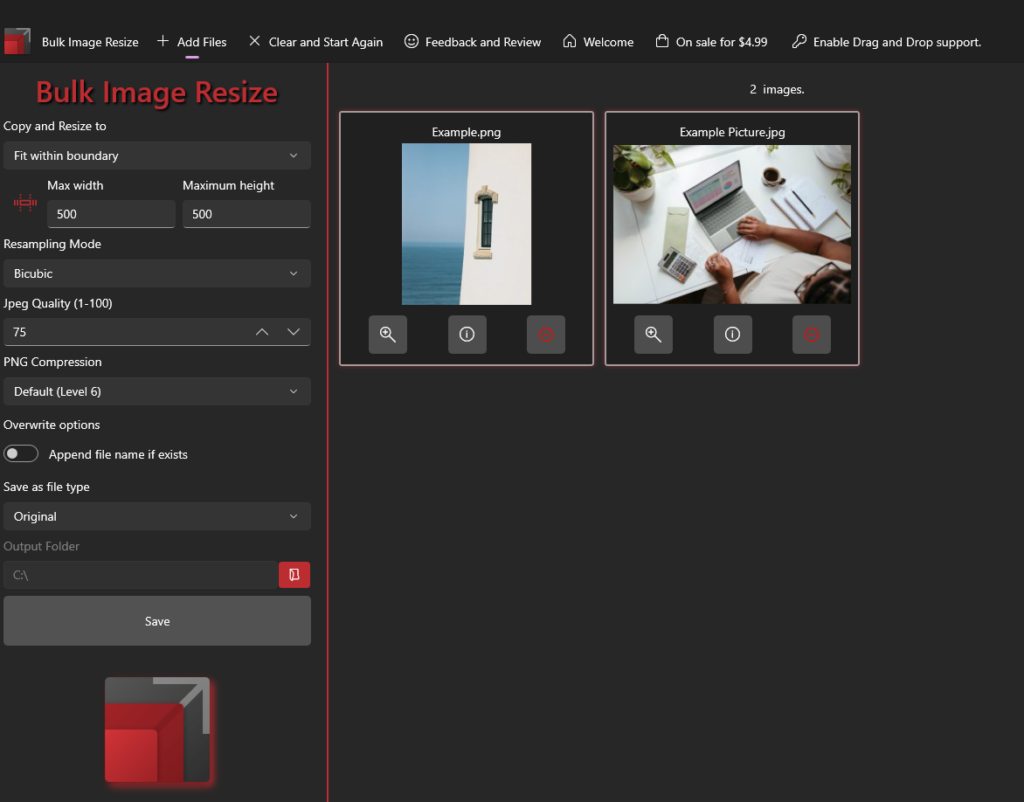
App 1: Bulk Image Resize by Valley Software
One of the best features of Bulk Image Resize is resampling. It provides up to different modes:
- Average
- Bicubic
- Nearest Neighbour
The methods add new information to the image when enlarging, so you can end up with a better quality image.
Bulk Image Resize offers other standard resizing functions. You can add photos from multiple locations, and in different sizes, and aspect ratios. Images may be resized by percentage or with predefined boundaries.
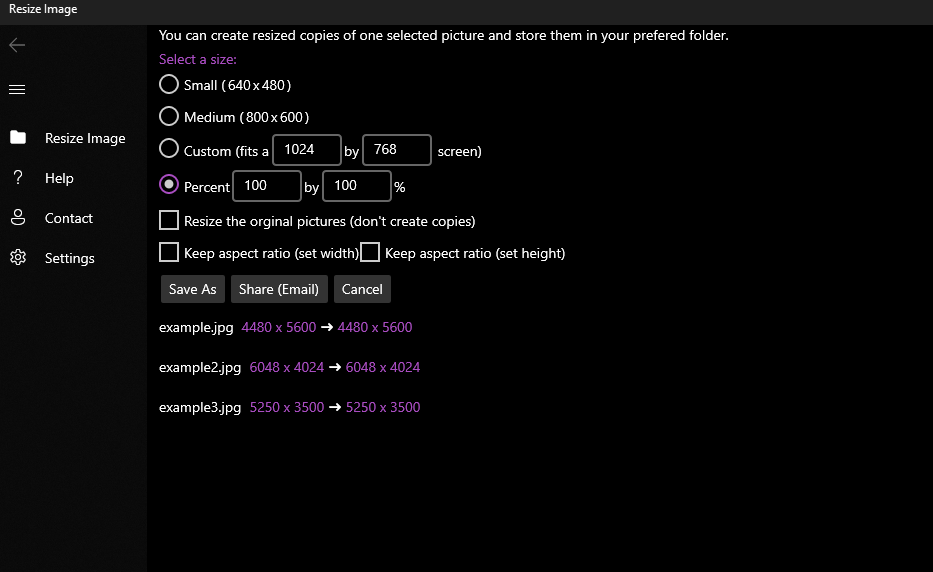
App 2: Resize Image by Get-the-solution
Many users have positively reviewed this app as it performs its core function really well, and that is resizing photos. It includes support for next-gen image formats, including WebP. You can preserve the aspect ratio too.
App 3: Pixillion Image Converter by NCH Software
You can get Pixillion directly from the Store for free. And while it mainly helps with converting image formats, it can resize images as well.
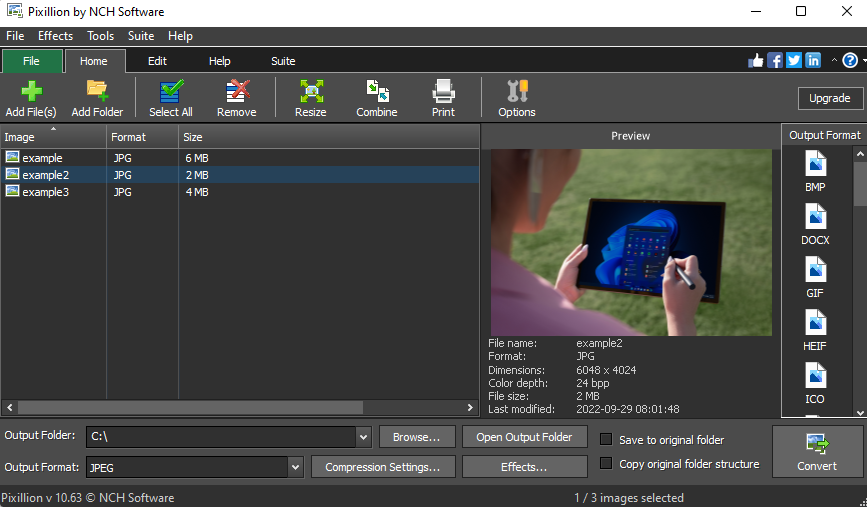
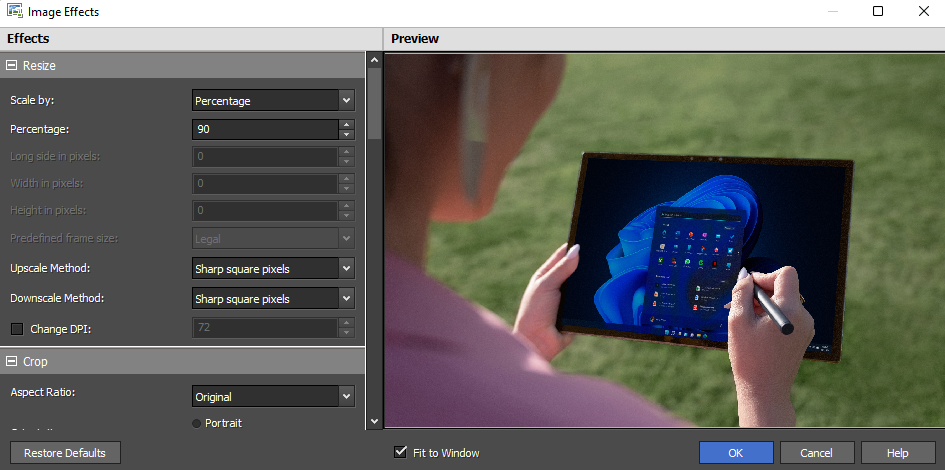
The resizing feature can scale images by percentage, predefined frame size, or with the longest side. It can preserve the original aspect ratio. You also get better control of the final image quality during upscaling or downscaling by choosing from sharp square or smooth blurry pixels:
What’s the Best Way to Resize Images in Bulk on Windows?
You can resize images multiple images at once in Windows in five different ways:
- With a Google Chrome extension such as Bulk Resize
- With Third-party tools such as Batch Photo: Best app (Batch Photo):
- With an app from the Microsoft Store such as Bulk Image Resize
- Using a Windows native app. For bulk resizing, you can use PowerToys.
- Utilizing the Send to > Mail Recipient function that you can access by right-clicking on one or several images from File Explorer.
Wrapping-It Up: The Best Image Resizing Methods Depending on Your Goals
Here is a summary of the top tools you can use to resize an image on Windows:
| Method | Tools | Biggest pros | Biggest cons |
| Native |
Paint Photos Paint 3D PowerToys |
Quick edits No downloads Single edits |
No support for resampling Limited support for bulk resizing (PowerToys) |
| Web browser plugins |
Resizing app Bulk Resize Bulk Image Resize |
Bulk edits Resizing photos on the web Free usage |
Some may need internet access May require uploading photos Depends on browser support |
| Desktop third-party apps |
BatchPhoto™ Light Image Resizer Fotosizer |
Advanced photo manipulations Bulk resizing Offline access |
Many tools may require paid version for full access Few tools offering resampling |
| Send to > Mail Recipient function |
Sending resized image via email No downloads Native method |
Preconfigured image sizes Lack of other photo manipulations |
|
| Windows store apps |
Bulk Image Resize Resize Image Pixillion |
Resampling support on some tools (Bulk Image Resize) Plenty of free options Offline access Advanced photo manipulations Bulk resizing |
Need to purchase ad-free versions Limited to newer versions of Windows with Store App |
Frequently Asked Questions
What is a raster file?
It is a type of image format where the image is defined by pixels. The pixel’s location in the grid, their size, and colors are defined with numbers.
What is image resizing?
Image resizing refers to making an image smaller or larger. During resizing, you can change the image dimensions, quality, and file size.
What is batch resizing?
Batch resizing refers to altering the image dimensions of multiple images at the same time. It’s a good strategy to save time when dealing with many files.
Does resizing affect image quality?
Resizing may not really affect the perceivable image quality as the image will now occupy a small size of the screen. The quality is affected if the photo is magnified.
Does resizing an image change the file size?
Yes. Resizing an image will change the file size. That’s because there will be a loss of information unless the method you’re using allows you to disable resampling.
Why does my image get blurry when I make it smaller?
It’s not typical for an image to get blurry if it’s made smaller. There could be an issue with the resolution settings, or the image resizing tool may be producing smaller and blurry pixels instead of square and sharp pixels.
How can you resize images on Windows without losing quality?
If you need a way to resize images without a loss of quality, use a tool with a resampling feature. Professional users tend to use Adobe Photoshop. However, it’s not suitable for performing bulk functions. A better tool to use is the Bulk Image Resize which you can download from the chrome plugin store for free. It even allows you to choose the resampling mode so you can get the best quality.
Can you reduce file size without losing quality?
You can reduce the file size of an image by using a lossless compression tool. It’s advisable to save the file in a lossless format such as PNG. But if the file size ends up too big, you can use a next-gen format such as Webp.
Conclusion
There are plenty of methods to resize images on Windows. Natively, you can use Photos, Paint, Paint 3D. But apart from PowerToys, they don’t support bulk resizing. You can get this feature by using a third-party tool, online converter, or Microsoft Store App.
Another important thing to remember is that, unless you’re resizing an SVG file, there will be a loss of information during resizing. That’s why it’s important to retain the original file.
Finally, when trying to enlarge a smaller image, you can improve the final image quality by using a tool that supports resampling.