
PAGE CONTENT
Undoubtedly, using dual monitors increases productivity while simultaneously exhibiting a lot more information on the screen. Setting up multiple monitors on a Windows PC isn’t always as simple as it seems and may require fine-tuning before everything is exactly how you want it. Perhaps you want to use a different monitor as your primary display, or maybe you want to relocate one monitor. Whatever your motivation, switching displays on a Windows 11/10 computer is a simple operation that can be completed quickly. This post will show you how to switch between monitors 1 and 2 on a Windows PC.
What are Multiple Monitors? How’s It Beneficial
A multiple monitor arrangement refers to multiple screens connected to a single computer, offering the user more excellent screen real estate and much more control. A machine can be connected to multiple displays by HDMI, DisplayPort, VGA, or DVI cables or wirelessly via a wireless display adaptor.
Multiple monitors provide more screen space. When you connect multiple monitors to a computer, you may navigate your mouse between them, sliding apps between them as if you had an extra-large desktop. Multiple monitors enable users to work on multiple tasks simultaneously without frequently switching between windows. Gamers can use multiple monitors to get a broader field of view for a more immersive gaming experience. Traders can utilize multi-monitors to load several charts and trading platforms simultaneously, among other things.
You may be interested:
Why Switch Monitor Positions on Windows
Not everyone has the same room for two monitors, and Windows may not recognize the monitor arrangement immediately. For example, your setup may include a secondary monitor on the right, but Windows may have identified it as a left monitor. Switching displays give users more control over their work environment and can aid in reducing glare, improving viewing angles, and preventing eye strain.
Suppose you constantly work on different projects or have software components open. In that case, a larger monitor as your primary display may be advantageous because it lets you see more excellent material in one go.
It’s also crucial to evaluate each monitor’s resolution and refresh rate. Adopting that monitor as your primary display may benefit visual quality if one of your monitors has a higher resolution or refresh rate. Finally, your unique needs and usage will determine which monitor should be your primary and which should be your secondary. You can always try different setups to find the best one for you.
Prerequisites
Here’s all you need to know about dual monitor setup and switching positions.
- Two Monitors: To switch between two monitors, you must have at least two displays, which can be two display monitors or a laptop screen and an external monitor.
- HDMI/VGA/DisplayPort Cables: You’ll need the appropriate cables and wires to connect to the secondary monitor. You can acquire them based on your display’s compatibility.
- Compatible Graphics Card: To ensure a successful dual monitor setup, ensure that your graphics card supports the setting; otherwise, you may need to hunt for a graphics card upgrade.
- Drivers: While Windows usually takes care of this, in rare cases, you may need to manually install the secondary monitor drivers on your Windows PC.
- Administrator Privileges: To change the computer settings, you must be logged in with an administrator account.
How to Switch Monitors 1 and 2 on Windows 10
Switching monitors in Windows is only possible if the projection options are set to PC screen only, secondary screen, or extend. Here’s how to toggle between primary and secondary displays in Windows.
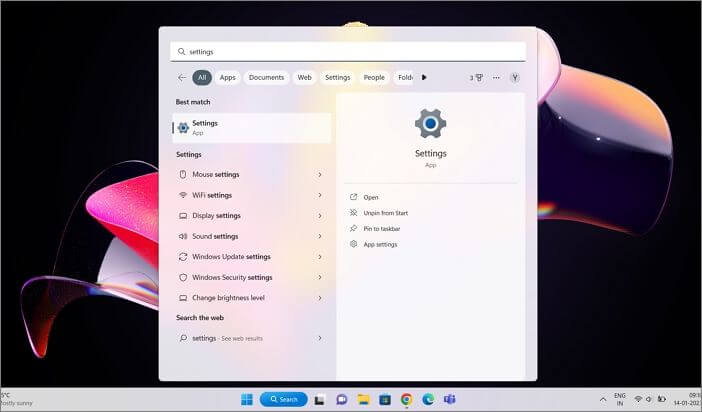
Step 1: First, locate the Settings application on your Windows 11 computer. This can usually be found by clicking the Start button, searching for Settings, or pressing the Win + I keys on your keyboard.
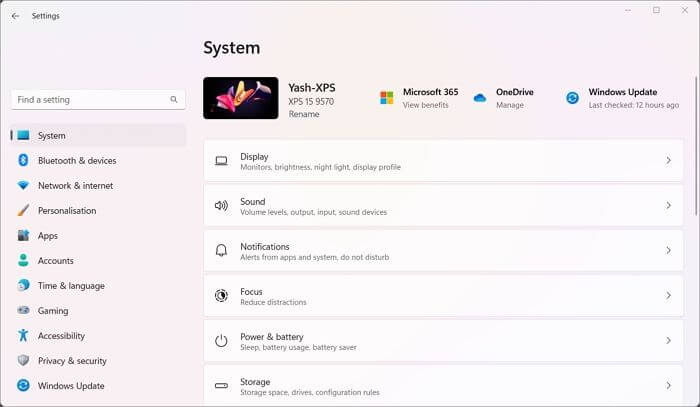
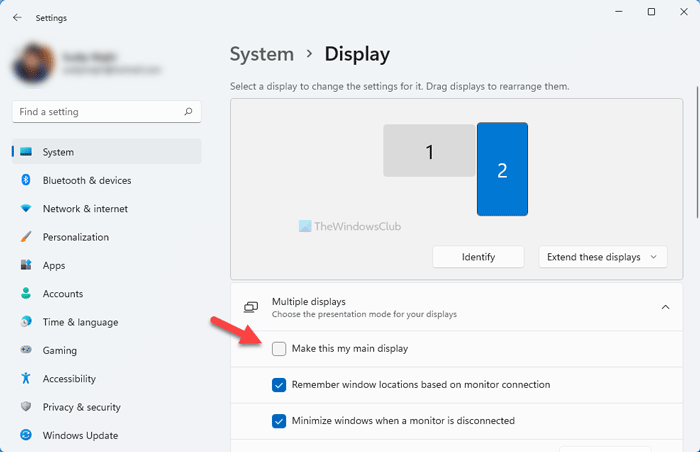
Step 2: Once in Settings, navigate to the System > Display menu to view a list of all the displays connected to your computer. The primary display is labeled 1 by default, and the secondary monitor is labeled 2.
Step 3: If you’re unsure which of your two monitors is 1 and which is 2, you can use the Identify button on this page to find out. This will lead to a large number appearing on the matching monitor, making it easier to determine which one you’re moving.
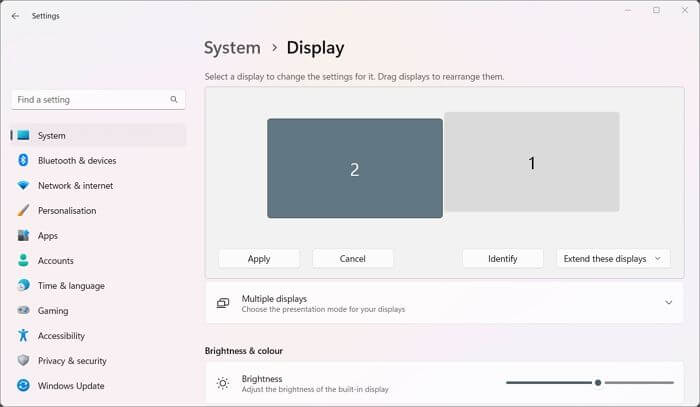
Step 4: To switch monitors, click on the monitor number you want to relocate, then click and drag the monitor’s representation to the desired spot. For example, if you wish to make monitor 1 your primary monitor, click and drag it to the left of monitor 2.
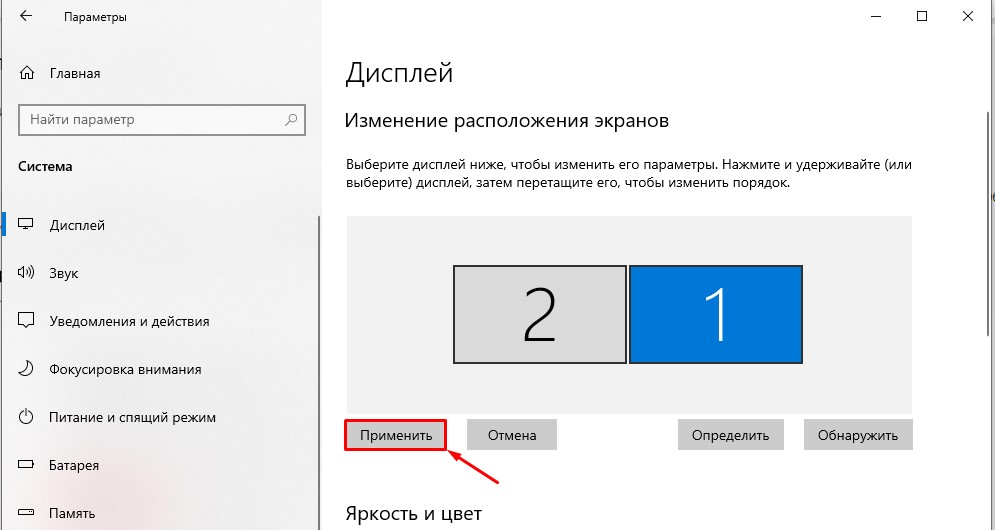
Step 5: Once you’ve done that, finally, click on the Apply button to save your changes, and you’re done.
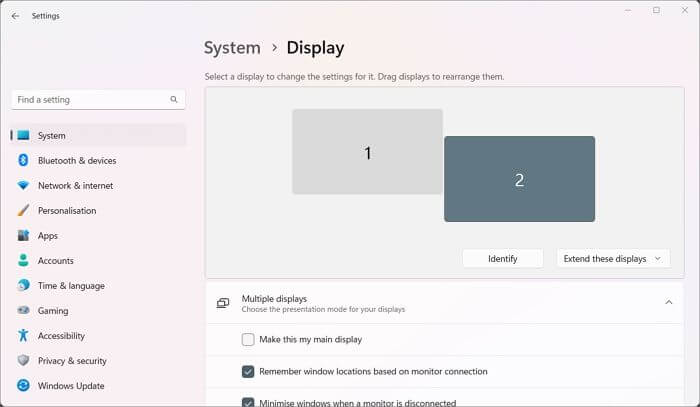
You may also switch between primary and secondary displays by picking the display you want to make primary, tapping on the Multiple Displays sections to expand the available options, and selecting Make this my main display.
It’s crucial to note that the above instructions only apply to computers with two monitors. If you have more than two displays, you can still use the above steps to switch between them; merely make sure you accurately classify which monitors you wish to switch between.
Conclusion
Swapping monitors on a Windows 10 computer is a straightforward process that can be completed in simple steps. This article has presented all of the details you need to customize the settings of your monitors to fit your needs, whether you’re a professional or a home user.
You may easily switch between primary and secondary displays by browsing Settings, identifying the monitors, swiping the monitor locations on the screen, and clicking the Apply button. You can improve your productivity, enhance your gaming experience, tailor your work environment, and multitask more effectively with a dual-monitor configuration.
Readers help support Windows Report. We may get a commission if you buy through our links.
Read our disclosure page to find out how can you help Windows Report sustain the editorial team. Read more
When you have multiple monitors connected to your Windows 11 PC and choose the Extend these displays option, the system will automatically select the display order by default.
However, maybe you want to switch it up and use the best monitor as your default one, which is why we’ve prepared this simple guide.
Speaking of monitors, we can also teach you how to change the primary monitor or how you can duplicate three monitors on Windows 10 PCs.
Why do I need to change the monitor number in Windows display settings?
This isn’t something that you have to do. However, if you bought a new, better monitor, you might want to make that your main one.
There can be many causes that would make you change the number/identity of your display in the Windows display settings, so we are about to show you how.
Go through the steps below, and you will have an easy time accomplishing this task. Remember to be patient and not rush things.
Also, there is a separate guide for those situations in which your external monitor is not detected after Sleep, just in case you need it. So, if you have been trying to find out how to change the monitor number in display settings, here’s all you need to know.
How can I change the monitor number/identity in Windows display settings?
NOTE
You can’t change the monitor number in Windows, but you can easily identify them and set the preferred monitor as the primary display. This section illustrates the process.
-
1. Press Win + I to access Settings.
-
2. Select the System tab, then click on Display.

-
3. Click on Identify to display a number on each screen to identify which screen is primary and which is secondary.
-
4. Now click on the screen number you want to make primary.
-
5. Expand Multiple displays and then check the box next to Make this my main Display.


Changing your monitor number identity can be done very easily from your PC’s built-in settings. All you need to do is navigate to Display settings and then tweak things however you like.
This is all you need to do whenever you want to change the monitor number or set the preferred one as primary in Windows. Of course, the process is the same regardless of how many monitors you have plugged into your PC, so you can rest assured you are covered.
Changing the main monitor number can also help you fix the game opening on the wrong monitor; read this guide to learn more.
- How to Delete Windows 11 Saved Passwords
- How to Download DirectX 12 Agility SDK [Installation Guide]
- Saved Passwords in Edge on Windows 11: How to Manage Them
If you were wondering how to change the monitor identity number in Windows 11, there’s no way to do that. But you can always set any of the connected monitors as the primary one.
Some users also ask, why is my main monitor number 2 in Windows 10? This is because Windows automatically assigns monitor numbers. To be clear, the monitor number doesn’t matter, but it’s their arrangement and the primary display that does.
If you need further assistance, you are always welcome to stop by and pick our brains for whatever answer you are searching for. Before you leave, check some quick tricks to fix display issues in Windows.
Was this guide helpful to you? Be sure to comment in the dedicated section below and share your thoughts and opinions.
Alexandru Poloboc
Tech Journalist
With an overpowering desire to always get to the bottom of things and uncover the truth, Alex spent most of his time working as a news reporter, anchor, as well as TV and radio entertainment show host.
A certified gadget freak, he always feels the need to surround himself with next-generation electronics.
When he is not working, he splits his free time between making music, gaming, playing football, basketball and taking his dogs on adventures.
Морде
[43.6K]
более года назад
Пуск — Параметры — Система — Дисплей.
Или правой кнопкой кликнуть на рабочем столе — Параметры экрана.
Если у вас подключены 2 монитора — будут активны подменю — Несколько дисплеев и Изменение расположения экранов.

Для изменения порядка мониторов — сделайте то, что там написано — поменяйте дисплеи местами, нажмите — Сохранить.
Если дисплеи имеют разное разрешение — возможно придётся корректировать Дополнительные параметры дисплея.
автор вопроса выбрал этот ответ лучшим
комментировать
в избранное
ссылка
отблагодарить
Download Windows Speedup Tool to fix errors and make PC run faster
If you have a dual monitor setup and you want to change the primary and secondary monitor on Windows 11/10, here is what you can do. There is no need to install any third-party software since it is possible to get the job done via Windows 10 Settings panel. It is very easy to set up dual monitors on Windows. From changing the wallpaper to scaling – everything is possible using Windows Settings.
Many people use more than one monitor to increase productivity. If you have a dual monitor set up, you might know that your system can select any monitor as the primary monitor after Windows installation. The primary monitor contains all the icons, etc. If you want to change the priority or primary and secondary monitors on Windows 10, here is what you need to do.
To change the primary and secondary monitors on Windows 11, follow these steps:
- Press Win+I to open Windows Settings.
- Make sure that you are in the System tab.
- Click on the Display option on the right-side.
- Expand the Multiple displays section.
- Click on a monitor you want to set as primary.
- Tick the Make this my main display checkbox.
Change Primary & Secondary monitor on Windows 10

To change the primary and secondary monitors on Windows 10, do follow these steps.
- Open Windows Settings
- Select Syatem> Display tab
- Navigate to Multiple display
- From the drop-down, select the desired monitor you want to be primary
- Check the Make this my main display setting.
Let us see this in more detail.
Press Win + I key together. After that, go to System > Display. On your right-hand side, you should find a button called Identify. You need to use this option to check which one is number 1 and which one is the number 2 monitor.
After that, select a monitor that you want to set as primary and scroll down until you get the option that says Make this my main display.
You need to make a mark in the checkbox to set the selected monitor as your primary monitor.
Once you choose the primary monitor, the other monitor will be set as the secondary monitor automatically.
Related: Windows is not detecting HDMI TV
How do I switch primary and secondary monitors?
To switch primary and secondary monitors in Windows 11, you need to open Windows Settings by pressing the Win+I button. Then, go to System > Display and expand the Multiple displays section. After that, if you see the Make this my main display checkbox is grayed out, it implies that your selected monitor is the primary monitor. If not, you need to select the desired monitor and tick that corresponding checkbox.
How to change Monitor Position in Windows 11?
There is an additional way in the same Display option of Settings app. Drag a display from its current number and drop it to re-arrange it, but that doesn’t change the monitor position actually. It is mainly helpful when using Extend mode with multi-monitors to move the mouse cursor and applications from one display to another.
How do you change which display is 1 and 2 in Windows 11/10?
To change or check which display is 1 and 2 in Windows 11/10, you need to open the Windows Settings panel. For that, press the Win+I button together. Then, go to System > Display and click on the Identify button. It displays the number of your monitor on the screen itself. If you want to change the primary monitor or rearrange them, you can follow the aforementioned guide or select the monitor and tick the Make this my main display checkbox.
That’s all.
Anand Khanse is the Admin of TheWindowsClub.com, a 10-year Microsoft MVP (2006-16) & a Windows Insider MVP (2016-2022). Please read the entire post & the comments first, create a System Restore Point before making any changes to your system & be careful about any 3rd-party offers while installing freeware.
Reader Interactions
Всем привет! Итак, вы подключили два монитора и включили режим расширения экрана. Теперь наша задача правильно установить последовательность экранов и сделать один из мониторов основным дисплеем в Windows 10, а второй второстепенный. В этой главе мы поговорим про то, как правильно это сделать. Мы рассмотрим 2 способа.
В некоторых статьях, с которыми вы будете сталкиваться в интернете, также можно встретить советы по использованию сторонних программ (NirCmd и Monitor Profile Switcher). Не нужно ничего лишнего устанавливать к себе на ПК – не захламляйте систему. Тем более все настройки можно сделать через «Параметры» системы или панель управления вашей видеокарты.
Содержание
- Способ 1: Через параметры системы
- Способ 2: Панель управления NVIDIA
- Видео
- Задать вопрос автору статьи
Способ 1: Через параметры системы

Если вы хотите быстро поменять экраны местами в Windows 10 – то проще всего воспользоваться «Параметрами» ОС. В первую очередь вам нужно подключить и настроить второй монитор – об этом подробно написано в этой инструкции (ссылка). После этого приступаем к шагам, описанным ниже.
- Нажимаем по главной кнопке Windows и заходим в «Параметры».
- Открываем раздел «Система».
- Чтобы поменять экраны местами в Windows 10, нужно просто навести мышь на одну из цифр, зажать левую кнопку мыши – далее просто перетаскиваем его в нужное положение.
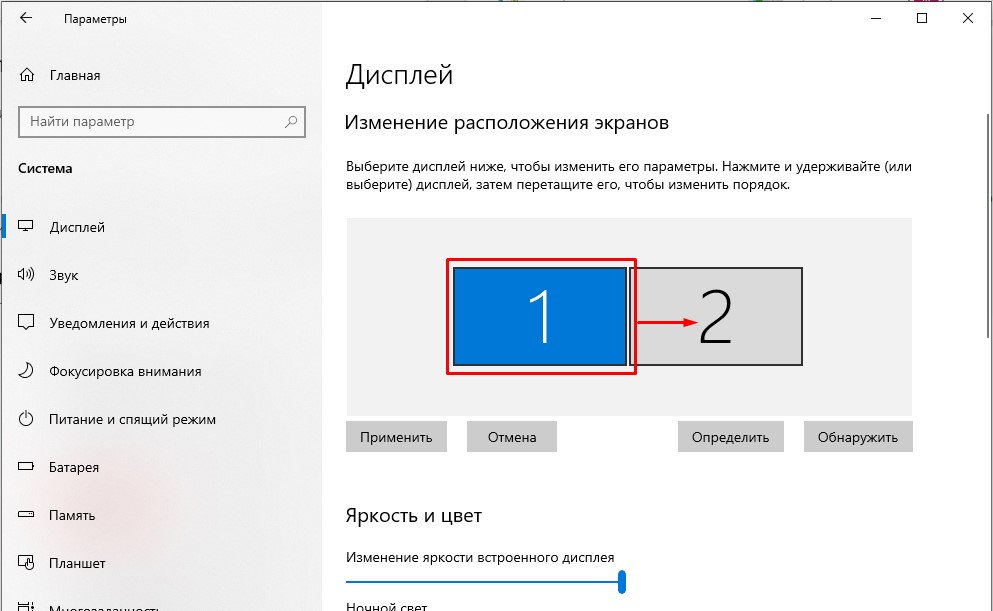
- В конце не забудьте «Применить» настройки.
- Если экраны не перетаскиваются, и вы не можете их выделить – проверьте, что у вас стоит настройка «Расширить эти экраны» в строке «Несколько дисплеев».
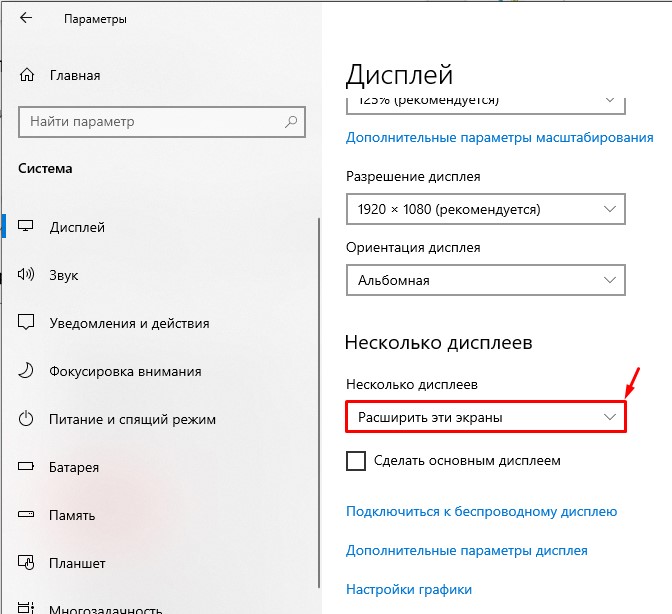
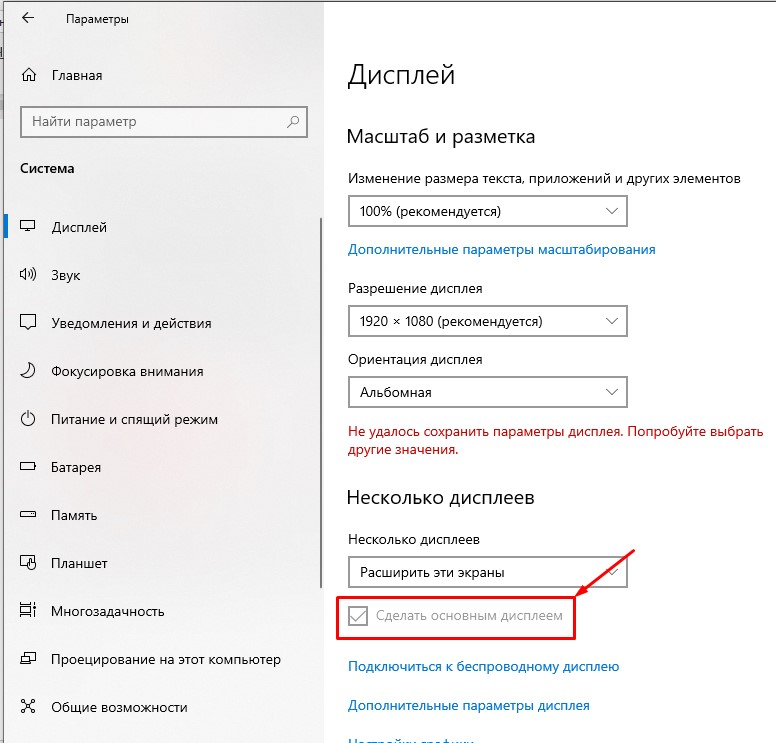
- Теперь нам нужно сделать один из мониторов основным дисплеем в Win 10. Для этого кликаем по одному из номеров.

- Далее листаем вниз и ставим галочку «Сделать основным дисплеем».
А теперь главный вопрос, как переключаться между этими экранами на Windows 10? Переключение между мониторами происходит очень просто. Для того чтобы понять, как это работает – попробуйте вывести курсор в самую левую или правую точку. После этого продолжайте вести стрелку. Вы увидите, как курсор продолжит свое движение на втором дисплее, который будет продолжением первого. Таким же образом вы можете перетаскивать окна программ. Например, в одном окне вы можете открыть браузер или проигрыватель, а во втором работать с документами в Word или Excel.
Вы можете быстро изменять режим работы дисплеев – для этого одновременно зажимаем клавиши:
+ P
После этого выбираем нужный режим. Но будьте аккуратны – если вы постоянно работаете с «Расширенными» экранами, то вам нужно будет повторно их настраивать, как мы это делали в этой главе.
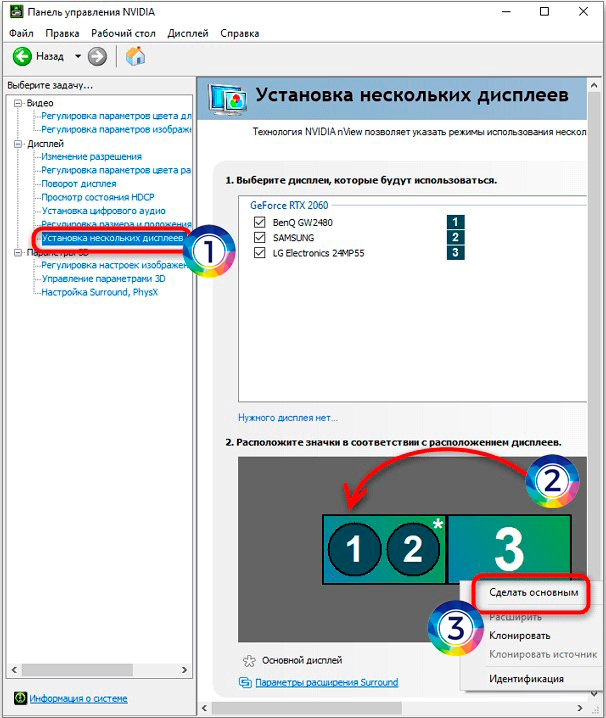
Способ 2: Панель управления NVIDIA
Еще один вариант – это использовать «Панель управления NVIDIA». Чтобы открыть панель, кликните по пустому месту вашего рабочего стола.
Далее в разделе «Дисплей» переходим в пункт «Установка нескольких дисплеев». Здесь вы увидите все установленные экраны. На втором шаге просто, аналогично, как и в первой главе – перетащите экран в то положение, которое вам нужно. Чтобы сделать какой-то из экранов основным – кликните по нему правой кнопкой мыши.
У данного варианта есть один недостаток, если вы пытаетесь подключить к ноутбуку второй монитор, то в списке будет отображаться только второй экран. Почему так? – скорее всего это баг. Его не пытаются починить уже долгое время. Поэтому для ноутбука – используем первый способ.