
Все способы:
- Вариант 1: Переименование через свойства директории
- Вариант 2: Удаление конфигурационного файла каталога
- Вопросы и ответы: 0
Вариант 1: Переименование через свойства директории
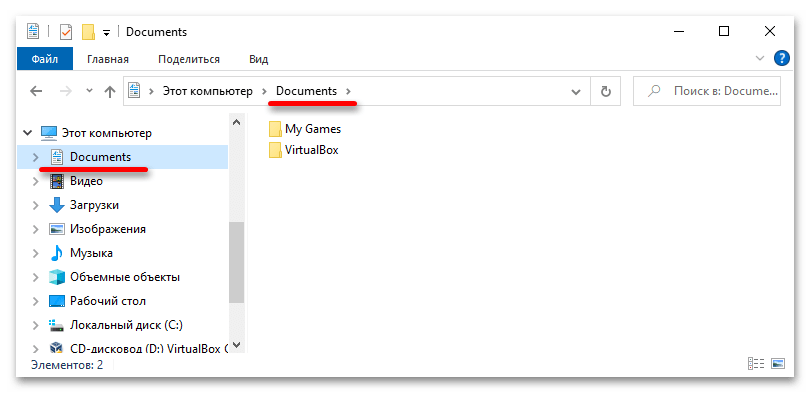
По умолчанию пользовательская папка «Документы» в операционной системе имеет название «Documents», просто оно отображается на русском языке. Но все программы, взаимодействующие с этой директорией, «видят» ее на английском. Если вы когда-то вручную ее переименовывали, тогда для выполнения поставленной задачи потребуется это сделать снова.
- Откройте окно файлового менеджера любым доступным способом. Проще всего это сделать через соответствующий ярлык на панели задач, но также для этого можете воспользоваться горячими клавишами Win + E.

Читайте также: Как открыть «Проводник» в Windows 10
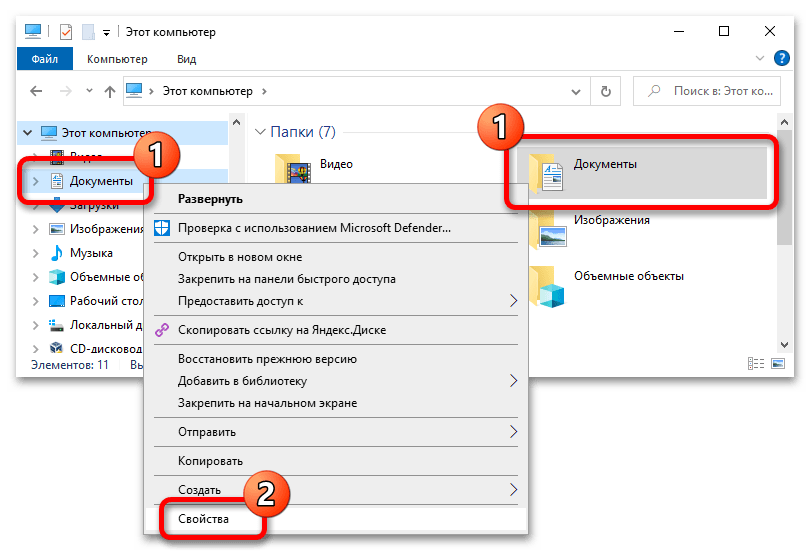
- В появившемся окне «Проводника» откройте свойства папки «Документы». По умолчанию она закреплена в навигационной панели в левой части интерфейса и отображается в разделе «Папки» меню «Этот компьютер». Кликните по ней правой кнопкой мыши и выберите пункт «Свойства».
- В открывшемся окне проследуйте во вкладку «Расположение» и в выделенном на изображении ниже поле введите путь к директории, указав ее название как «Documents» (без кавычек). Если вы хотите использовать изначальное расположение, можете просто кликнуть по кнопке «По умолчанию». В завершение нажмите «Применить», чтобы сохранить внесенные изменения.
- После выполненных действий пользовательская папка будет переименована, хотя и оставит свое прежнее название в навигационной панели файлового менеджера.

Вариант 2: Удаление конфигурационного файла каталога
Если вам нужно настроить отображение папки «Документы» на английском языке, необходимо удалить скрытый конфигурационный файл, который и переводит ее на русский язык. Для этого предварительно потребуется выполнить некоторые настройки.
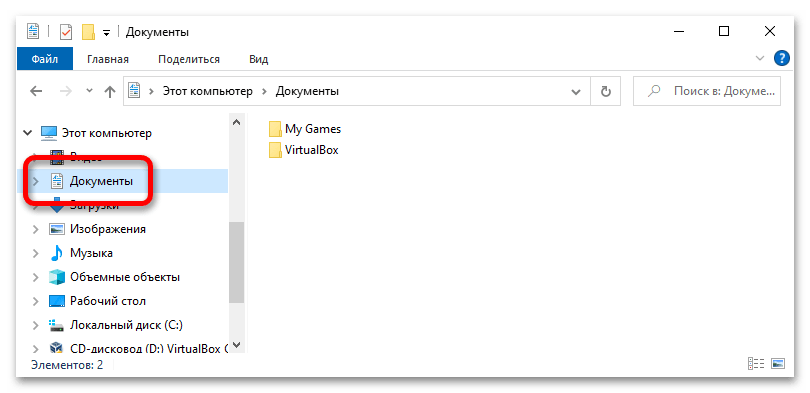
- Откройте файловый менеджер и перейдите в корневую директорию «Документы». Для этого можете воспользоваться навигационной панелью в левой части интерфейса.
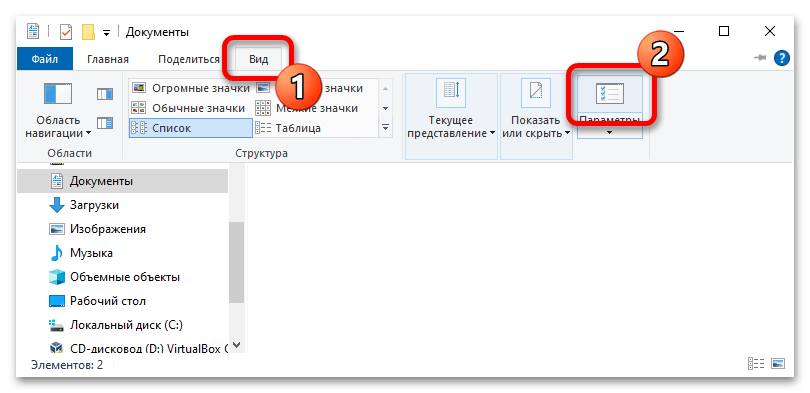
- Выведите на экран окно параметров «Проводника». Для этого в верхней части перейдите во вкладку «Вид» и кликните по кнопке «Параметры», расположенной в правой части появившейся панели инструментов.

Читайте также: Как открыть параметры папок в Windows 10
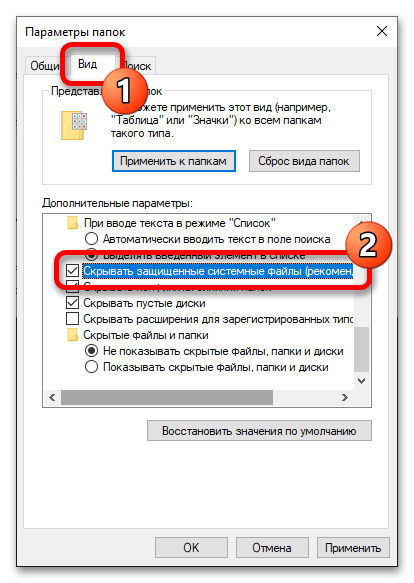
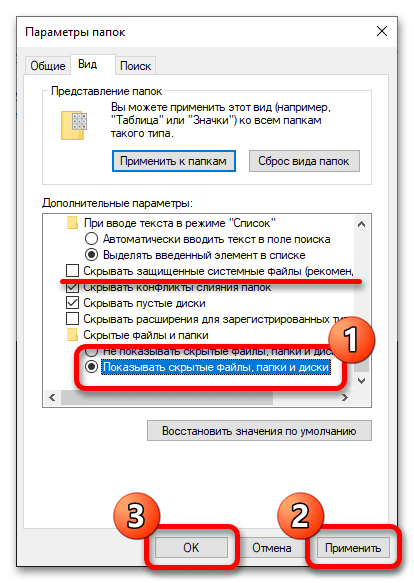
- В новом окне проследуйте во вкладку «Вид» и в списке «Дополнительные параметры» снимите отметку с пункта «Скрывать защищенные системные файлы (рекомендуется)».
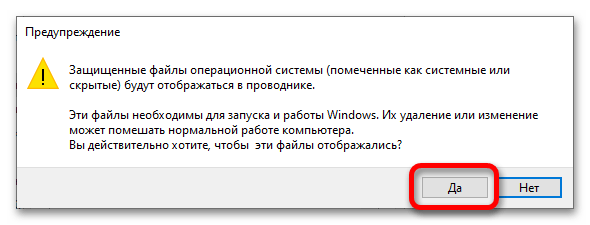
- При появлении окна с предупреждением щелкните по кнопке «Да», чтобы подтвердить выполнение действия.
- Убедитесь, что галочка была убрана, после чего переведите переключатель «Скрывать файлы и папки» в положение «Показывать скрытые файлы, папки и диски». Щелкните поочередно по кнопкам «Применить» и «ОК», чтобы сохранить внесенные изменения.
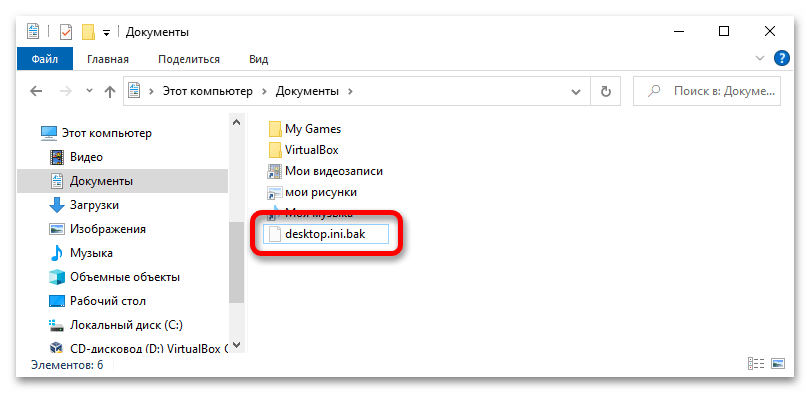
- Вернувшись в окно файлового менеджера, вы заметите, что в корневой директории отобразились до этого скрытые файлы и ярлыки. Удалите конфигурационный файл «desktop.ini», чтобы папка «Документы» отображалась в системе как «Documents».
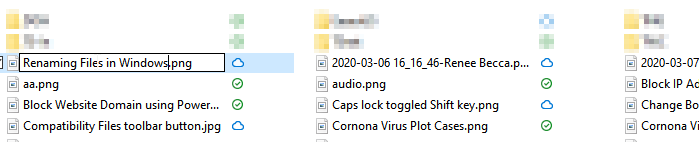
Примечание! Предпочтительнее будет не удалять конфигурационный файл, а переименовать его, добавив расширение «.bak», как это показано на изображении ниже. Таким образом вы при необходимости сможете быстро восстановить изначальное название директории.
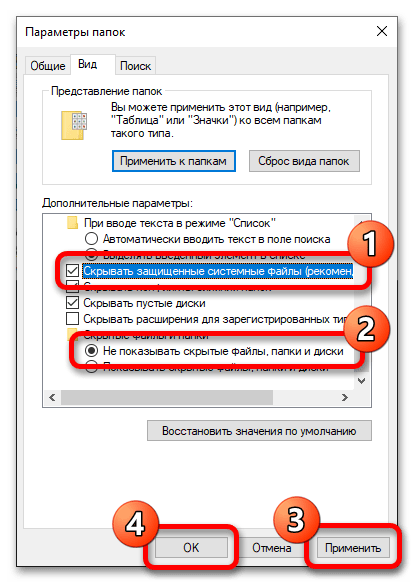
- После выполнения всех описанных выше действий рекомендуется снова скрыть системные файлы, чтобы они не мешали при работе за компьютером. Для этого откройте окно «Параметры папок» и на вкладке «Вид» в списке «Дополнительные параметры» установите отметку напротив пункта «Скрывать защищенные системные файлы (рекомендуется)» и переведите переключатель «Скрытые файлы и папки» в положение «Не показывать скрытые файлы, папки и диски». Не забудьте в конце нажать по кнопкам «Применить» и «ОК», чтобы сохранить изменения.
- После проделанных действий вы можете заметить, что папка «Документы» по-прежнему имеет русскоязычное название. Так будет продолжаться до тех пор, пока вы не перезайдете в свой аккаунт. Быстрее всего это будет сделать путем перезагрузки компьютера. Как только вы войдете на рабочий стол и откроете файловый менеджер, то увидите, что пользовательская директория теперь отображается в системе как «Documents». Поставленную задачу можно считать решенной


Обратите внимание! Если в дальнейшем вы захотите вернуть папке изначальное название, необходимо настроить отображение скрытых системных файлов и в корневой директории удалить в имени конфигурационного файла расширение «.bak». После перезагрузки компьютера каталог «Документы» снова будет иметь русскоязычное название.

Наша группа в TelegramПолезные советы и помощь
«Documents» — лишь английское название папки «Документы».
В том, что название сменилось на английское, ничего страшного нет, если вы конечно не перфекционист.
Раз проблема появилась после одного из обновлений, то это могло случиться, потому-что возникла какая-то ошибка с этой папкой, а так как английский язык родной для Windows, в случае любой ошибки, например, с созданием переадресации папки для новой системы, будет использоваться он. Когда-то даже были кривые обновления, которые вообще по ошибке зачищали эту папку.
У меня ещё такая проблема появлялась, когда перемещал расположение папки в другое место. Возможно винда в ходе обновления зачем-то затрагивала эти папки, и из-за ошибки одна из них стала иметь английское название.
Ну а теперь к решению. ПКМ по папке «Documents» -> Свойства -> Сверху выбираем «Расположение» -> Кнопка «Найти папку…». Вам высветится сама папка «Documents». Просто переименовываете её как хотите, в нашем случае, как я понял, это будет «Документы». Перезапускаете проводник через диспетчер задач.
Готово!
UPD: В свойствах также нажмите на кнопку «Переместить…» и выберите переименованную папку. Тем самым проводник изменит переадресацию на эту папку в реестре.
It’s risky. But it can be done. Here are your options
Updated on March 17, 2025
D3Damon / iStock / Getty Images
What to Know
- An admin can change the name of a user folder, but it might break how some software works.
- The safer alternative is to make a new account with the Users folder name you want.
- Create the account via Settings > Accounts > Family & other users > Add someone else to this PC.
This guide explains two methods for renaming your Windows 10 user folder.
Make a New Account to Change the User Folder Name
Editing the name of your account in Windows 10 is simple, but it just updates the name seen on the Start and Welcome screens. Changing the name of the user folder is a whole different process.
Although this is possible (keep reading to find out how), doing so can easily break how some of your software works or even make the profile unusable. The safer and more reliable method is to make a new user account.
To create a new account in Windows 10, go to Settings > Accounts > Family & other users > Add someone else to this PC. As you follow the steps in that guide, be sure to name the user account whatever it is you want the Users folder name to be.
The Difference Between Local and Microsoft Accounts in Windows
Change the User Folder Name in Windows 10 Registry
The more advanced method for changing your user folder name is to do so in the registry. This method retains the original account (you don’t need to make a new profile), but any mistakes made along the way can corrupt the profile and the apps installed within it.
Make a System Restore point before you start in case something goes wrong. This method only works in Windows 10 Pro, not Windows 10 Home.
-
Open Command Prompt as an administrator from a different user account (i.e., not the one for which you want to change the folder name).
-
Enter this command:
wmic useraccount list full -
In the resulting list, find the account’s existing name and take note of its SID.
-
To rename your existing account, enter this command:
cd C:\UsersThen, enter this command, but be sure to set your new account name to what you want the user folder to be:
rename OldAccountName NewAccountNameIn our example, you can see that we’re changing the folder from Jeff to Jeffery.
If you see an ‘Access is denied’ message, it most likely means the other user is still logged in. A quick way to sign them out is through Task Manager’s Users tab.
-
Open Registry Editor to this path:
Computer\HKEY_LOCAL_MACHINE\SOFTWARE\Microsoft\Windows NT\CurrentVersion\ProfileListYou can browse the folders/keys on the left to get to this path, or copy/paste the whole thing into the navigation bar at the top of Registry Editor.
-
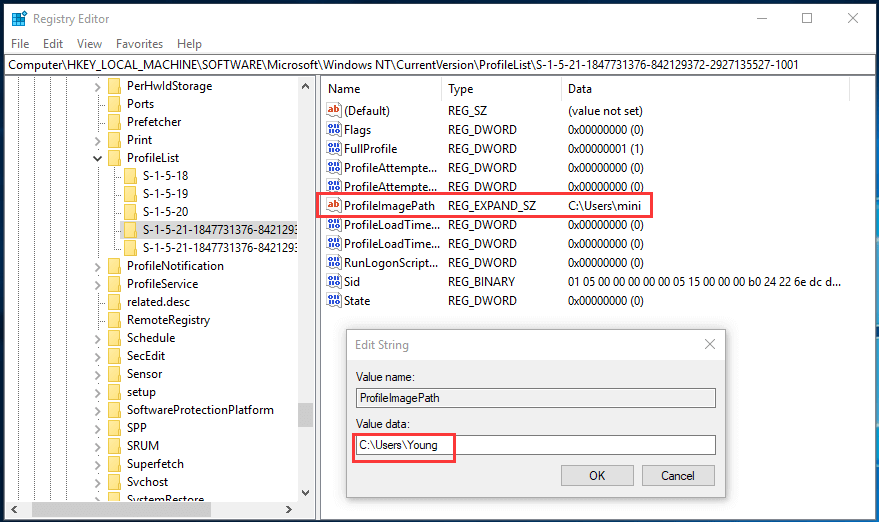
Open the registry key that matches the SID you recorded earlier, and then double-click ProfileImagePath on the right.
-
Change the value data to the new folder name—make sure it’s the same as your newly renamed account—and select OK.
-
Restart your computer.
If you followed the steps correctly, your Windows 10 user folder name should have your new account name. If you run into issues accessing the account or the user profile is corrupted, use your System Restore point.
FAQ
-
The easiest way to take a screenshot in Windows 10 is by using the Windows + PrtSc (Print Screen) key combination on your keyboard. Screenshots are stored in Pictures > Screenshots by default.
-
One way to perform a Windows factory reset is through Settings > Update & Security. In the Recovery section, select Get started and follow the on-screen instructions.
-
To turn on Bluetooth, go to Settings > Devices > Bluetooth & other devices and toggle on Bluetooth.
Thanks for letting us know!
Get the Latest Tech News Delivered Every Day
Subscribe
A file name is described as the title of the file and the file extension. When you rename a file, only the first part of the file name is changed. The file extension remains the same and usually, is not to be changed. In case, you need to change the file extension as well, select the entire file and change the name and the extension as desired. In this post, we will learn how to rename a file or a folder in Windows 11 and Windows 10 and the various ways to do so.
There are multiple ways to rename a file or folder in Windows 11/10. They are as mentioned below:
- Using Context Menu – Right-clicking on the item
- Using Properties
- Using Keyboard Shortcut – Alt+Enter
- Using Keyboard Shortcut – F2
- Using Home Menu in File Explorer
- By Two Single Clicks
- Using Command Prompt
- Using PowerShell.
1] Using Context Menu – Right-clicking on the item

Select the file or folder you want to rename and right-click on that item. The Context Menu will open.
Click on the ‘Rename’ option and enter the new name of the file or folder, and then hit Enter or click anywhere else on the screen.
In Windows 11, you will have to click on the Rename icon or select Show more options and then click on Rename.
2] Using Properties
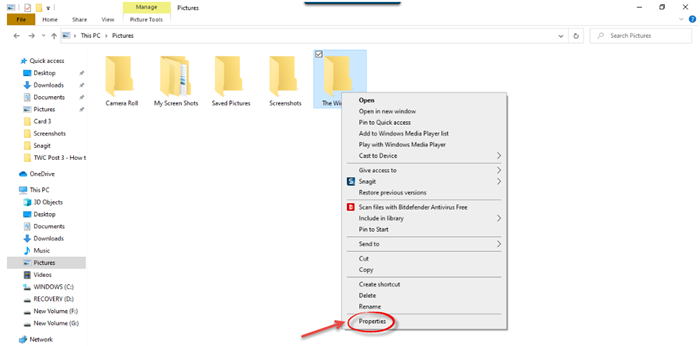
Right-click on the file or folder and select ‘Properties’.
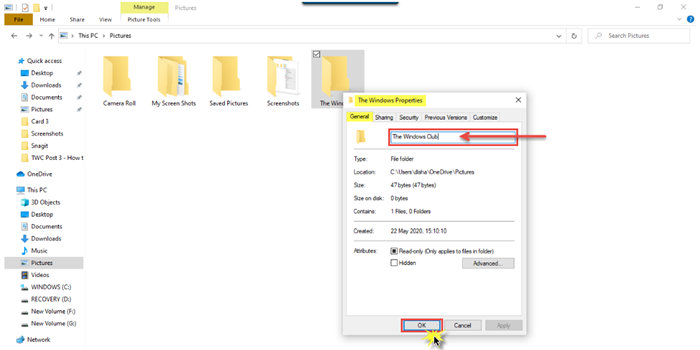
The Properties window will open. In the General tab, enter the new file name and then click OK.
Read: How to rename multiple Files or Folders at once in Windows
3] Using Keyboard Shortcut – Alt+Enter
Select the file you want to rename and simply press Alt+Enter.
The File Properties pop-up will open. Type in the new name of the file and click OK.
4] Using Keyboard Shortcut – F2
Select the file or folder and simply press F2 to rename the item.
TIP: How to batch rename files and file extensions.
5] Using Home Menu in File Explorer
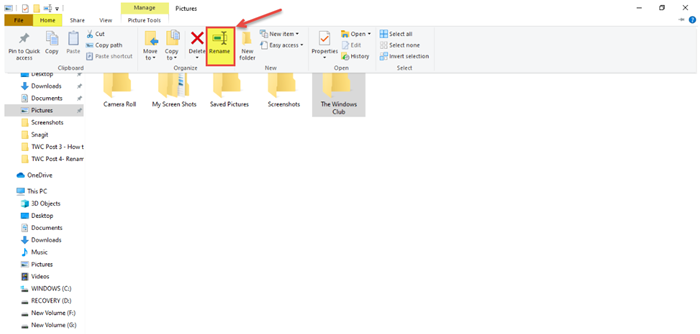
To rename using File Explorer, select the item and click on ‘Home’.
Further, click on the ‘Rename’ option and follow the same steps.
Read: Trick to Rename folders, files in serial order instantly.
6] By Two Single Clicks
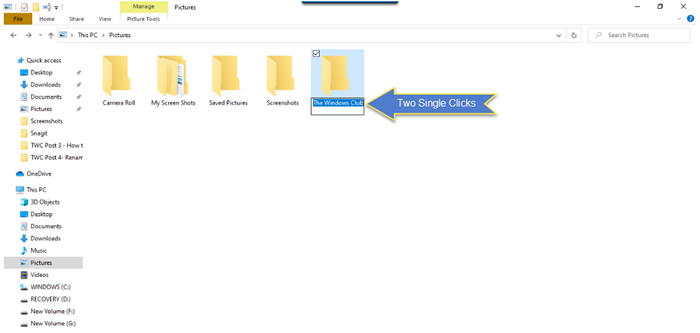
Click on the file or folder two single times. The file or folder name will get highlighted.
Enter the new name for the file and press the Enter key to save it.
Read: Best free Bulk File Renamer software to Mass Rename files.
7] Using Command Prompt
Command Prompt allows you to rename the files or folders using the ren command. Open the File Explorer and go to the destination file or folder. Next, click on the address bar and type “cmd”, and then press Enter. Use the following syntax:
ren file_path new_name
For example, this will rename the document named fileA located on D drive to fileB.
ren d:\fileA.doc fileB.doc
8] Using PowerShell
Open the file or folder location and open a PowerShell window there
Use the rename-item command:
rename-item –path d:fileA –newname d:fileB
The command below renames the folder fileA to fileB on Drive.
TIP: In Windows, now, it’s even easier to rename multiple files or folders. If you want to rename multiple files, after renaming the first file, just tap the TAB button, and you’ll be moved on to the next in-line file or folder. You can thus immediately rename the following file.
Moreover, Windows also has one more nice feature. Even if you have the ‘show file extension’ feature enabled, it does not highlight the file type extension while renaming. So you are safer, as while renaming, you will not change or delete the extension by mistake.
These are the various ways in which we can rename a file or a folder in Windows 11/10.
Now read: 7 ways to move Files and Folders in Windows.
If you want to change user folder name in Windows 10 but find that there is no Rename option when you right-click the user folder in C drive, this post provides 2 ways to let you rename user folder in Windows 10. FYI, MiniTool software provides some useful software to help you better manage your Windows computer incl. data recovery software, disk partition manager, etc.
To change user folder name in Windows 10, the common practice we may think of is to go to C drive and open the Users folder in Windows 10, then right-click the target user folder and click Rename to give it a new name.
However, you may find that there is no Rename option after you right-click the user folder. Then how to change user folder name in Windows 10? This tutorial provides 2 ways to help you with Windows 10 change user folder name task.
How to Change User Folder Name in Windows 10 – 2 Ways
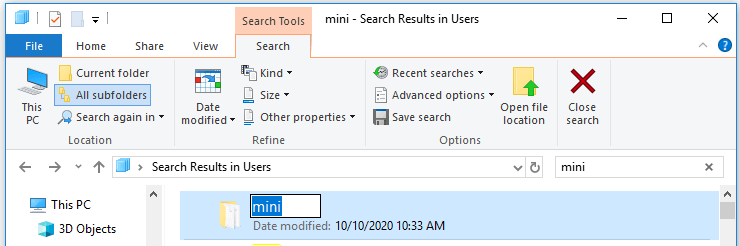
Way 1. Use the Top-right Search Bar in File Explorer
It’s tricky that you will find the Rename option to rename the user folder in Windows 10 if you follow the operation below.
- You can go to C drive (the OS drive) -> Users folder.
- Then click the search box at the upper-right in File Explorer, and search the user folder name you want to change.
- In the search result list, find the user folder and right-click it and you will see the Rename option. Click Rename to change the name for the user folder in Windows 10.
If you are wondering how to change c/users/username in Windows 10, you may try this way.
But some people find that this only changes the user folder name, but not the user account name. If you search a file in the user folder, you will find that the user folder name in the directory is still the old one. To really change user account name in Windows 10 and rename the user folder, you can try Way 2.
Attention: Changing user folder name or editing the Registry is risky and may cause data loss. Do at your own risk. You can make a backup of your Windows OS and important data with free backup tool like MiniTool ShadowMaker. You can also create a system restore point to easily restore Windows 10 OS if something bad happens.
Way 2. Change User Folder Name in Windows 10 with Registry Editor
This way is a little bit complicated, but you can try if you really want to rename a Windows 10 user folder.
Step 1. Create a new local user account.
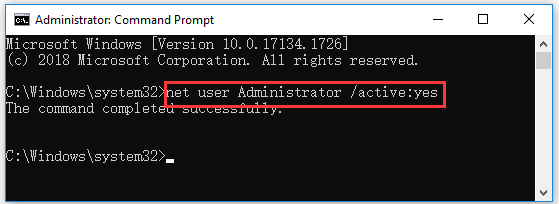
You can press Windows + R, type cmd, and press Ctrl + Shift + Enter to open elevated Command Prompt in Windows 10.
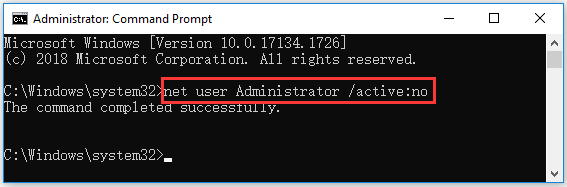
Type net user Administrator /active:yes command, and press Enter to execute the command to create a new Administrator account.
Step 2. Log in the Administrator account.
Next you can click Start -> User -> Sign out to sign out the current user account. Then select the Administrator account that you created to log in.
Step 3. Rename the user folder in OS drive.
Then you can open C drive on your computer and open Users folder. Right-click the target user folder and rename it.
Step 4. Change c/users/username in Registry Editor.
Now you can press Windows + R, type regedit, and press Enter to open Registry Editor in Windows 10.
In Registry Editor window, you can expand the folder in the left panel as the following path: HKEY_LOCAL_MACHINE\SOFTWARE\Microsoft\Windows NT\CurrentVersion\ProfileList\<User SID>\.
If you find several User SIDs and don’t know which one to change, you can click each User SID and check its values in the right window to find the right one with the target user folder name you want to change.
Click the User SID and double-click ProfileImagePath key in the right window. Then you can input the new user folder name at the end of the directory under Value data. Click OK to save the changes. Restart your computer to make the changes take effect.
Attention: Before you edit the registry, it’s highly advised you back up Windows 10 Registry first in case something goes wrong. Check: How to backup and restore Registry.
Step 5. Change user profile folder name in User Accounts window.
Next you press Windows + R, type netplwiz in Run dialog, and press Enter to open User Accounts window.
Select the target user account, and click Properties to open its properties window. Change your user name. You can copy the new user name in File Explorer and paste it into the box to avoid wrong input. Click Apply and click OK to save the setting.

Step 6. Sign in with the new user account.
Then you can click Start -> User -> Sign out to sign out Administrator account. Then select the user account with the new name to sign in.
Step 7. Delete the Administrator account.
At last, you can press Windows + R, type cmd, and press Ctrl + Shift + Enter to run Command Prompt as administrator again. Type the command net user Administrator /active:no in Command Prompt, and press Enter to delete the Administrator account you created in Step 1.
Bottom Line
Please be noted that we do not advise you to change user folder name in Windows 10 or edit the registry. If you really want, Way 1 lets you change the c/users/username folder name in Windows 10 but not change the user account name. If you want to change both, you may try Way 2, but be careful, do not mess up, or you may be unable to log into your account and cause computer malfunction.