
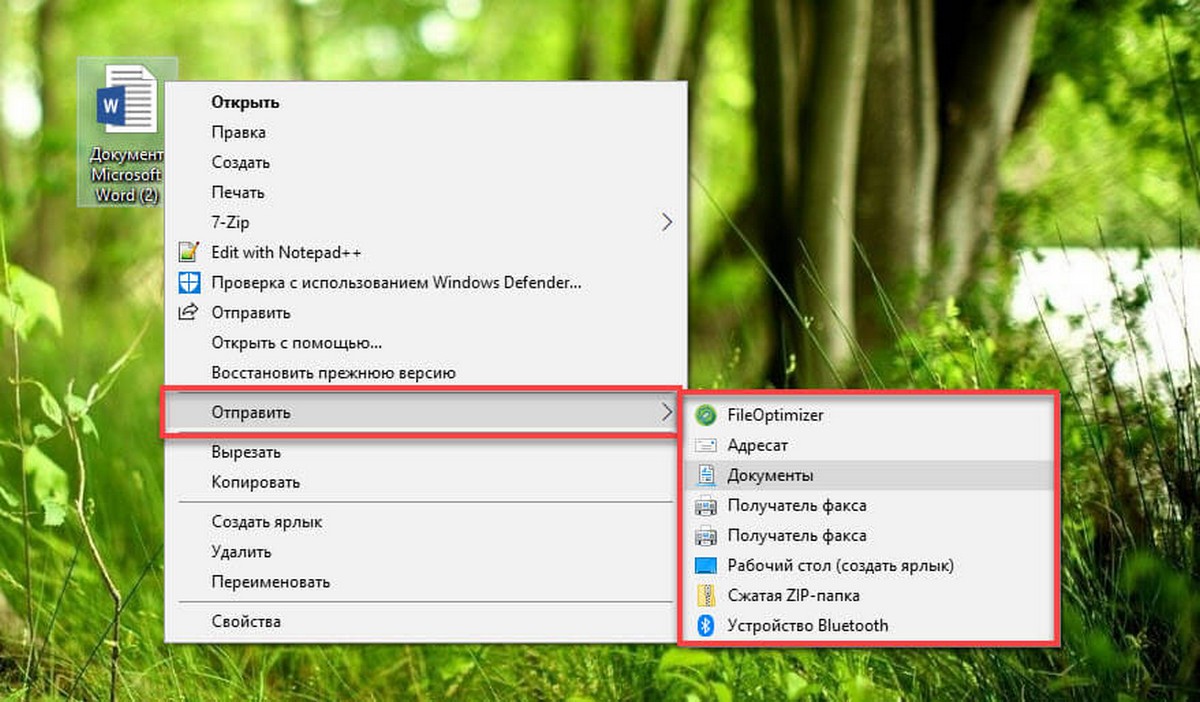
При нажатии правой кнопкой мыши по файлу или папке в открывшемся контекстном меню присутствует пункт «Отправить», позволяющий быстро создать ярлык на рабочем столе, скопировать файл на флешку, добавить данные в ZIP-архив. При желании, вы можете добавить свои пункты в меню «Отправить» или удалить уже имеющиеся, а также, если требуется — изменить иконки этих пунктов, о чем и пойдет речь в инструкции.
Описываемое возможно реализовать как вручную средствами Windows 10, 8 или Windows 7, так и с помощью сторонних бесплатных программ, оба варианта будут рассмотрены. Обратите внимание, что в Windows 10 в контекстном меню присутствует два пункта «Отправить», первый из них, служит для «отправки» с помощью приложений из магазина Windows 10 и при желании его можно удалить (см. Как удалить «Отправить» из контекстного меню Windows 10). Также может быть интересно: Как убрать пункты из контекстного меню Windows 10.
Как удалить или добавить пункт в контекстное меню «Отправить» в проводнике
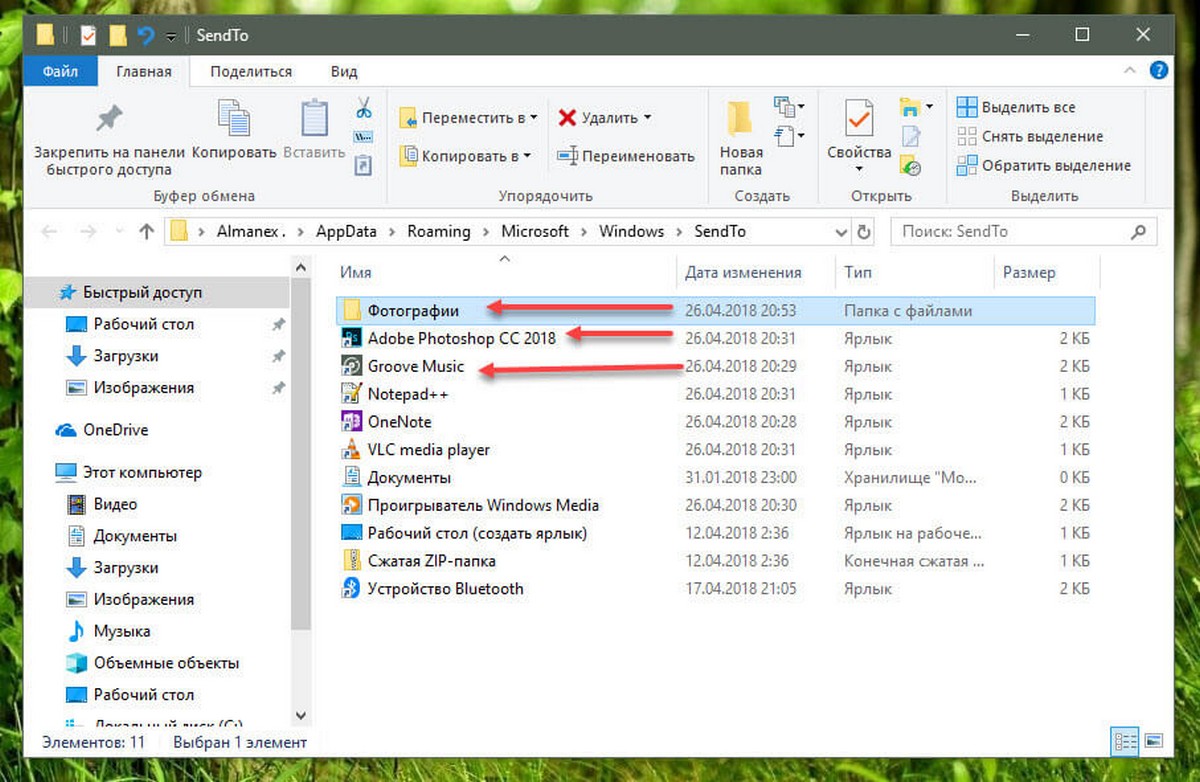
Основные пункты контекстного меню «Отправить» в Windows 10, 8 и 7 хранятся в специальной папке C:\Users\имя_пользователя\AppData\Roaming\Microsoft\Windows\SendTo
При желании, вы можете удалить отдельные пункты из этой папки или добавить собственные ярлыки, которые появятся в меню «Отправить». К примеру, если вы хотите добавить пункт для отправки файла в блокнот, шаги будут следующими:
- В проводнике введите в адресную строку shell:sendto и нажмите Enter (это автоматически переведет вас в указанную выше папку).

- В пустом месте папки нажмите правой кнопкой мыши — создать — ярлык — notepad.exe и укажите имя «Блокнот». При необходимости вы можете создать ярлык на папку для быстрой отправки файлов в эту папку с помощью меню.
- Сохраните ярлык, соответствующий пункт в меню «Отправить» появится сразу, без перезагрузки компьютера.

При желании, вы можете изменить ярлыки имеющихся (но в данном случае — не всех, только для тех, которые являются ярлыками с соответствующей стрелочкой у значка) пунктов меню в свойствах ярлыков.
Для изменения иконок других пунктов меню вы можете использовать редактор реестра:
- Перейдите в раздел реестра
HKEY_CURRENT_USER\Software\Classes\CLSID
- Создайте подраздел, соответствующий нужном пункту контекстного меню (список будет далее), а в нем — подраздел DefaultIcon.
- Для значения «По умолчанию» укажите путь к иконке.

- Перезагрузите компьютер или выйдите из Windows и снова зайдите.
Список имен подразделов для пунктов контекстного меню «Отправить»:
- {9E56BE60-C50F-11CF-9A2C-00A0C90A90CE} — Адресат
- {888DCA60-FC0A-11CF-8F0F-00C04FD7D062} — Сжатая ZIP-папка
- {ECF03A32-103D-11d2-854D-006008059367} — Документы
- {9E56BE61-C50F-11CF-9A2C-00A0C90A90CE} — Рабочий стол (создать ярлык)
Редактирование меню «Отправить» с помощью сторонних программ
Существует достаточно большое количество бесплатных программ, позволяющих добавлять или удалять пункты из контекстного меню «Отправить». Среди тех, что можно рекомендовать — SendTo Menu Editor и Send To Toys, причем русский язык интерфейса поддерживается только в первой из них.
SendTo Menu Editor не требует установки на компьютер и очень проста в использовании (не забудьте переключить язык на русский в Options — Languages): в ней вы можете удалить или отключить имеющиеся пункты, добавить новые, а через контекстное меню — изменить иконки или переименовать ярлыки.
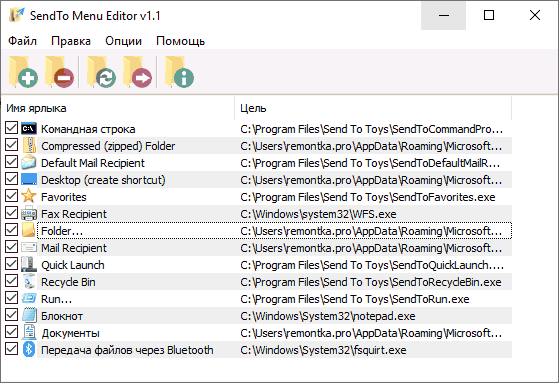
Скачать SenTo Menu Editor можно с официального сайта https://www.sordum.org/10830/sendto-menu-editor-v1-1/ (кнопка загрузки находится внизу страницы).
Дополнительная информация
Если вы хотите полностью удалить пункт «Отправить» в контекстном меню, используйте редактор реестра: перейдите к разделу
HKEY_CLASSES_ROOT\AllFilesystemObjects\shellex\ContextMenuHandlers\Send To
Очистите данные из значения «По умолчанию» и перезагрузите компьютер. И, наоборот, если пункт «Отправить» не отображается, убедитесь, что указанный раздел существует и значение по умолчанию установлено в {7BA4C740-9E81-11CF-99D3-00AA004AE837}
Пункт меню «Отправить», которое появляется при клике правой кнопкой мыши по файлу или папке, часто используется пользователями ПК для создания ярлыков файлов и программ на рабочем столе, а также для отправки файлов на внешний диск.
По умолчанию в меню «Отправить» есть только несколько стоящих вариантов. Если вы хотите сделать эту опцию более полезной, вы можете добавить новые пункты в меню «Отправить». Например, вы можете добавить папку с фотографиями или папку, которую вы часто используете для сохранения и быстро перемещать файлы в эту папку.
До.
После.
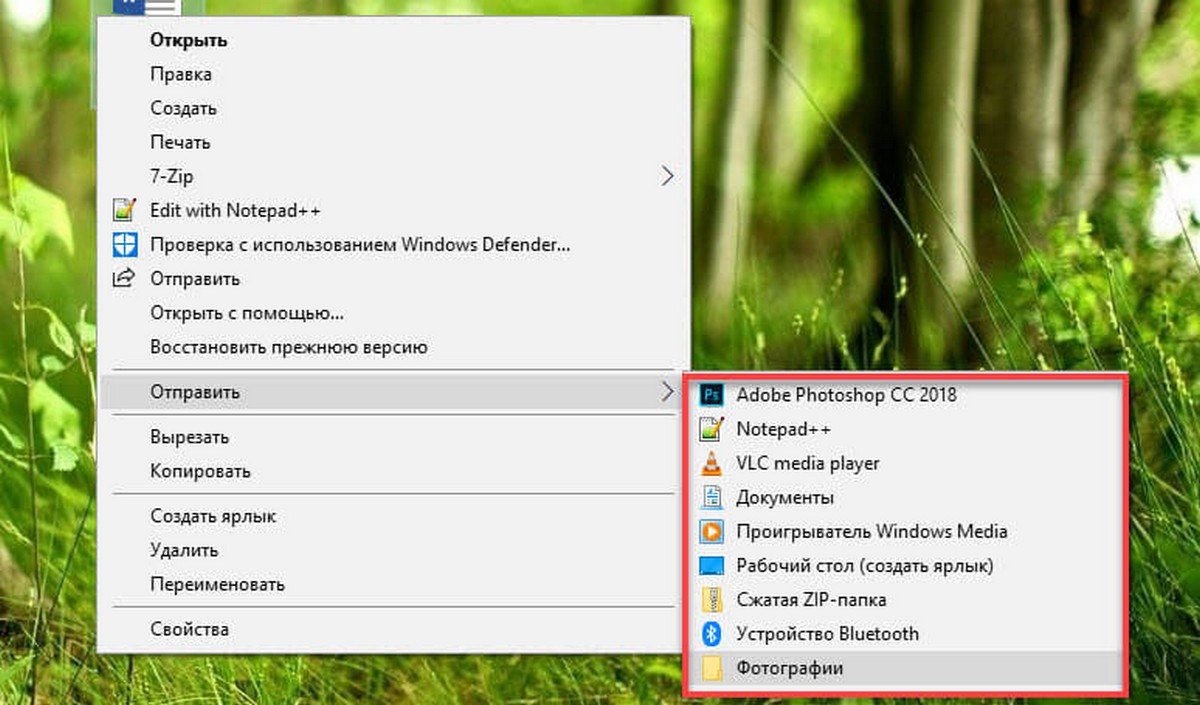
Вы также можете добавить свои любимые программы в меню «Отправить», чтобы быстро открывать файлы в определенном приложении. Например, если вы добавили ярлык программы Paint в список «Отправить», вы можете быстро открыть файл изображения, кликнув правой кнопкой мыши по файлу, нажав в контекстном меню «Отправить», а затем выбрав «Paint». Конечно, вы всегда можете использовать опцию Открыть с помощью, чтобы открыть файл в программе, отличной от программы по умолчанию.
Если вы хотите настроить меню «Отправить», добавив новые пункты или удалив существующие, вот как это сделать.
Настроить меню «Отправить» в Windows 10.
Шаг 1. Откройте в проводнике пользовательскую папку или папку с программой, которую вы хотите добавить в меню «Отправить».
Шаг 2. Кликните правой кнопкой мыши папку или файл программы, нажмите «Отправить» и выберите «Рабочий стол» (создать ярлык). Это создаст ярлык папки или программы на рабочем столе.
Примечание: Если вы хотите добавить современные приложения в меню «Отправить», вы также должны создать для него ярлык приложения на рабочем столе.
Шаг 3. Откройте поле диалоговое окно «Выполнить» с помощью сочетания клавиш Win + R, введите или скопируйте и вставьте команду: Shell:sendto а затем нажмите клавишу Enter, чтобы открыть папку: C:\Users\Имя_пользователя\AppData\Roaming\Microsoft\Windows\SendTo
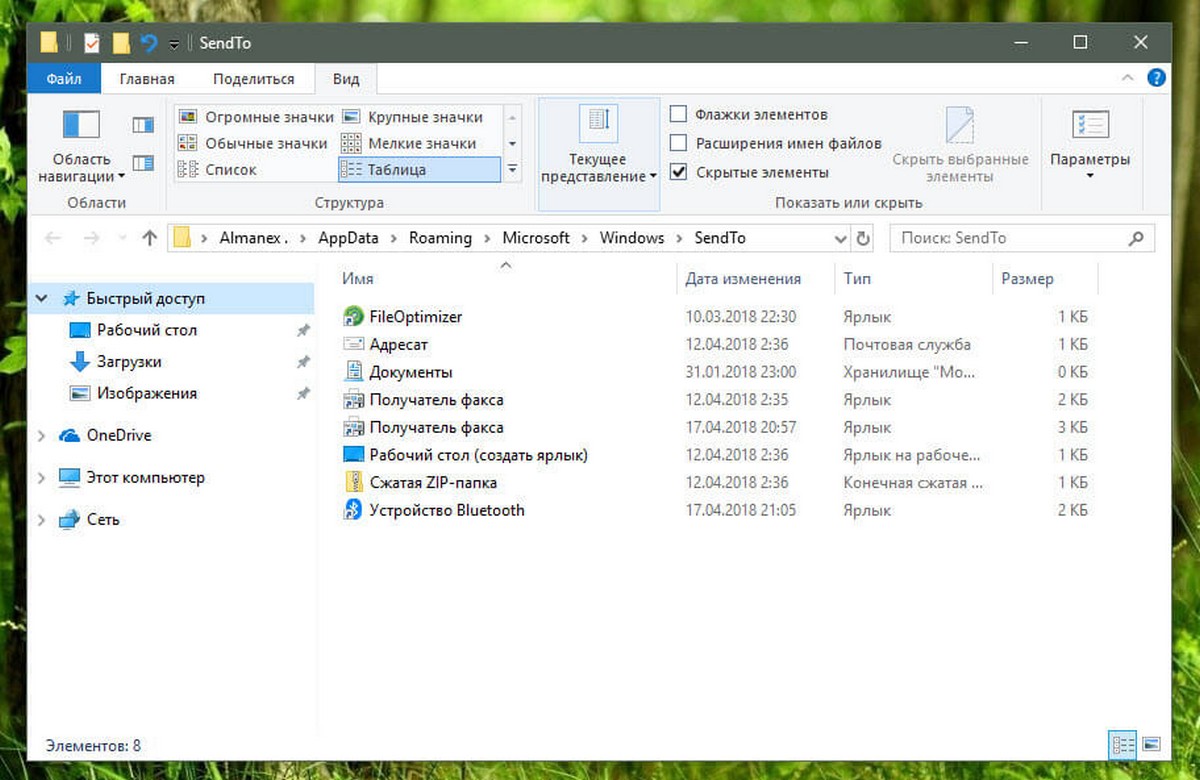
Шаг 4. Скопируйте и вставьте в папку SendTo – ярлык папки или программы, которые вы создали на рабочем столе, чтобы добавить ее в меню «Отправить». После чего вы можете удалить ярлыки на рабочем столе.
Когда вы кликните правой кнопкой мыши на файле или папке и выберите «Отправить», вы должны увидеть новую добавленную опцию.
Все!
Your right-click menu contains many shortcuts you never use. What’s worse, the Send to menu, one of its sub-menus, is missing useful shortcuts.
Let us show you how to customize your Send to menu to remove links you don’t need and add shortcuts you’ll want to use.
Send to Folder Basics
If you haven’t seen the Send to folder in a while, or haven’t ever used it, it’s easy to access. Open up a File Explorer window and right-click on any file. Near the bottom of the context menu that pops up, you’ll see a Send to entry with an arrow next to it. Highlight this, and the Send to menu will slide out, revealing all its options.
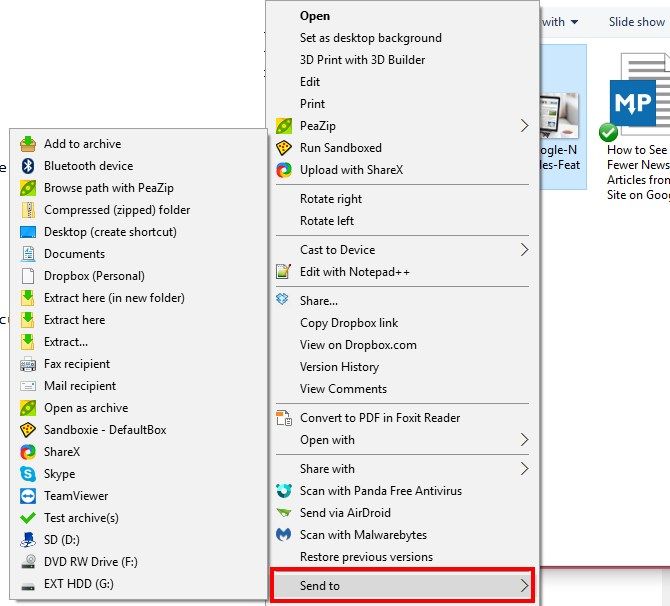
Depending on how much software you have installed, this menu could contain a handful of items or a few dozen. In addition to the below, you might also have Bluetooth device or various external devices listed. The default Windows entries are:
- Compressed (Zipped) Folder — Uses the basic compression utility built into Windows to add the selected items to a ZIP file.
- Desktop (Create Shortcut) — Creates a shortcut to the selected item on the desktop. Useful for when you’re working with some files deep in your system and don’t want to forget their location.
- Fax Recipient — You might not even have known Windows could send faxes, much less ever sent one. Because you can easily send faxes online, this is basically useless for most people.
- Mail Recipient — Opens your default email program with the selected file attached to a new message.
The inbuilt zipping folder option is okay, but you should probably have a better file compression software installed that can handle that functionality. If you often use Outlook, the mail recipient shortcut is handy. The desktop shortcut is probably the most useful on the default menu for most people, while the fax shortcut is pointless.
Clearly, the Send to menu could use some help. Thankfully, it’s not hard to edit these entries.
Accessing the Send to Editor
You don’t need any special software to make changes to this menu. You can find the shortcuts that power the Send to menu at the following location:
C:\Users\USER\AppData\Roaming\Microsoft\Windows\SendTo
However, there’s a much faster way to jump to this menu. Into either a File Explorer window’s address bar or the versatile Run menu, just type this command:
shell:sendto
This opens the same destination as the above. Once you’re here, you’ll see a shortcut file for each entry on the Send to menu. Delete a shortcut here, and it disappears from the Send to menu as well.
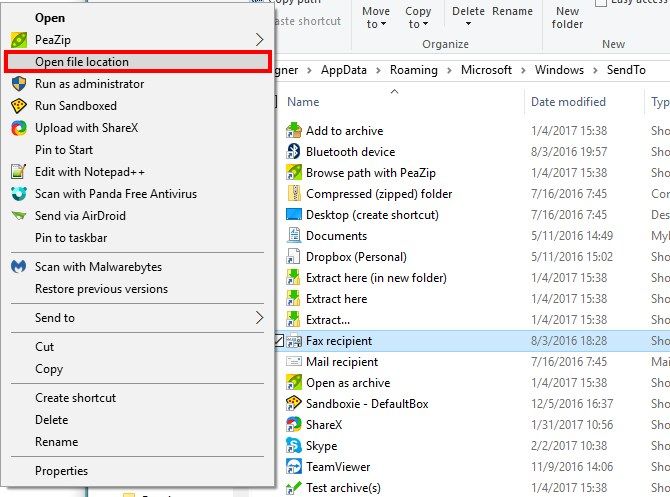
If you’re not sure where a shortcut comes from, right-click on it and click Open File Location. For example, we can see that the Fax Recipient shortcut comes from the WFS.exe (Windows Fax and Scan) program in the System32 folder. If you’re worried about deleting one of these and needing them later, just cut and paste them to a different folder for safekeeping instead.
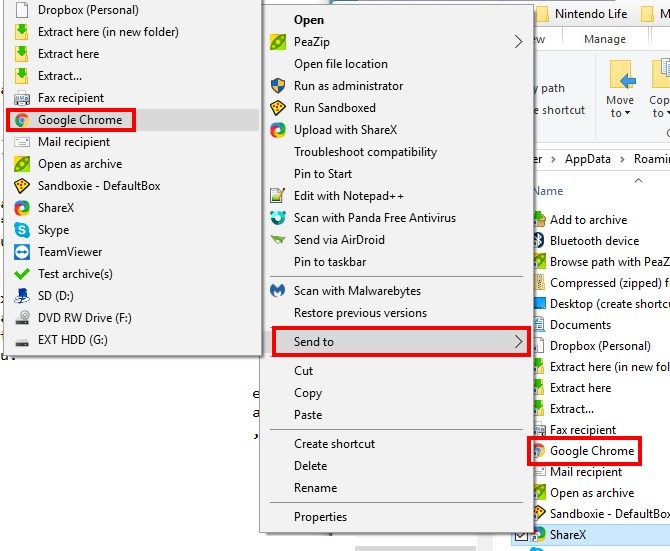
You’re not limited to just deletions at this menu, either. You can add your own shortcuts to programs or folders just like the existing ones. To add a folder, right-click on it and choose Create shortcut. Windows might alert you that it has to create the shortcut on the desktop, which is no problem. Cut and paste that new shortcut into the Send to folder, rename it if you like, and it will appear on your Send to menu.
To add a program as a shortcut, search for it using the Start Menu. Right-click and choose Open file location to access its executable, then right-click again on the resulting file and Create shortcut. Move that shortcut into the Send to folder, and it’ll be a new option for you.
Add More Options
The above method is perfectly fine for basic Send to editing, but you can go deeper with a program dedicated to helping with this task, Send To Toys. When you install it, you can choose which additional Send to commands you want to add. These include Send to clipboard, Send to Command Prompt, and Send to Run. If you’re not sure, leave them all checked and you can remove them later.
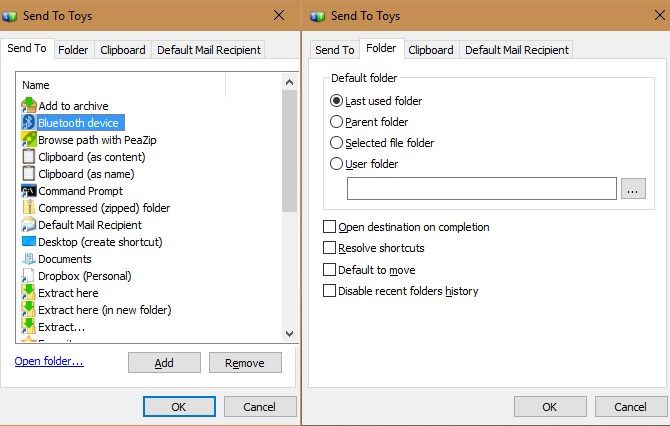
Once installed, open Send To Toys and you can easily remove any entries from the list just like the manual method. Click Add to browse out to any folder or program and easily add it to the list. You can also rename any shortcut by right-clicking on it and choosing Rename.
Some of the options feature extra configuration on the app’s other tabs. Click Folder to change the behavior for the Folder shortcut. You can select to send to the parent folder, the last used folder, or another folder of your choice. The Clipboard tab lets you change what happens when you send something to it via one of its shortcuts. Finally, you can specify a Default Mail Recipient if you often use that shortcut to send an email.
Getting «Send To» Just Right
The Send to menu is underappreciated, but with just a few minutes you can clean up the junk and make it into an even better tool. It’s always just a click away, and doesn’t require any extra software bogging down your computer. Sending files from the File Explorer instead of always opening them from other programs cuts down on wasted time. Be sure to give this menu a shot if you’ve neglected it thus far!
Want to make another Windows tool better for you? Check out how to tweak the Taskbar to your needs.
Which Send to shortcuts are indispensable for you? Let us know if you’ve used another tool to customize it, and share your favorite shortcuts down in the comments!
The “Send to” option in Windows context menu is astonishingly helpful, but it’s also one of the most underrated features. I’ll blame its lame default entries for receiving the cold shoulder.
But, what if you can customize the context menu‘s “Send to” option, it would be able to help you easily send any file to your desired location with just a click, or even open files in a respective program without forcing you to jump between different locations.
So, in this post, I’ll tell you everything you need to manage the “Send to” option. Read on after the jump.
Read Also: Create Custom Right-Click Context Menus with justContext.js
Understanding the “Send to” option
At its very core, “Send to” option is very similar to drag and drop feature. If you drag and drop a file in a folder, it will be moved to it. Similarly, if you drag and drop a file on a specific program then that program will try to open that file (if possible).
When you right-click a file and select a program/location from the “Send to” option, it copies the file to that location or opens it in the selected program. So basically, Send to (as its name also suggests) sends the select file to the selected location or program.
Manage the “Send to” option manually
Getting to the sweeter part, adding and removing items in the “Send to” option is all you need to know to be productive while moving or opening files. Interestingly, “Send to” option is backed up by a simple folder, not surprisingly called SendTo.
Everything that is added in this folder is shown in the “Send to” option, and similarly, everything removed from it is removed from the “Send to” option as well (and you thought I’ll drag you in the registry, right?).
Access the SendTo folder
The SendTo folder is located in the below-mentioned directory:
C:\Users\username\AppData\Roaming\Microsoft\Windows\SendTo
Here username is your actual username in your PC. You can go to this directory manually to access the folder. Alternatively, you can also use a Run command to open this folder. Press Windows + R keys to open the Run dialog and enter this command shell:sendto. When you will press Enter, the SendTo Folder will open up.

Here you can add the shortcut to any program or folder and it will immediately appear in the “Send to” context menu option. Although make sure you copy a shortcut to the original program/folder to keep confusions to a minimum.
Just right-click on the required program/folder and select create shortcut from the context menu. This will create a shortcut that you can move to the SendTo folder.
Use third-party tool to manage “Send to” option
Adding and removing items from the “Send to” option isn’t that hard, but if you want to make it even easier; then a third-party tool may help. For this purpose, Send To Toys is an interesting tool that offers multiple ways to add/remove items from the “Send to” option and also adds some handy entries of its own.
Using Send To Toys
After installation, Send To Toys will automatically add more handy entries in the “Send to” option. The entries include a Quick Launch shortcut, Recycle Bin shortcut, copy to clipboard shortcut, a folder shortcut to send files directly to a default folder, and a few more.

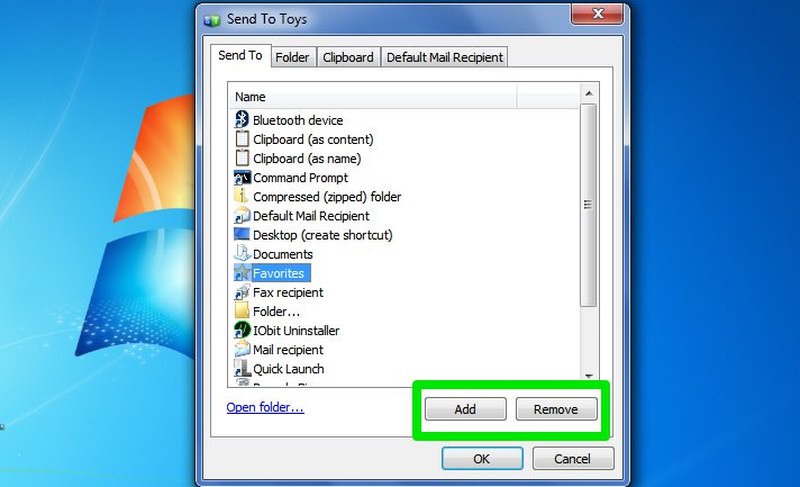
The program’s configuration window lists all the items in your “Send to” option and gives simple Add and Remove button to easily add more items or delete the unrequired ones. You can also configure the Folder option to let you send files to the last accessed folder, user folder, or a predefined folder.
The best feature of this tool is its context menu entries that let you add or remove any item from the “Send to” option by right-clicking on it and selecting the desired option.
For example, if you want to work on a folder and add items to it frequently, then there is no need to go to the SendTo folder. Simply right-click on it and select Add to Send To menu and it will be added. Afterward, when you are done working on it, just right-click on it again and select Remove from Send To menu to easily remove it.

“Send to” option tips and tricks
Now that you know how to manage the “Send to” option, here are a few tips and tricks to help you get started:
Access an extended “Send to” list
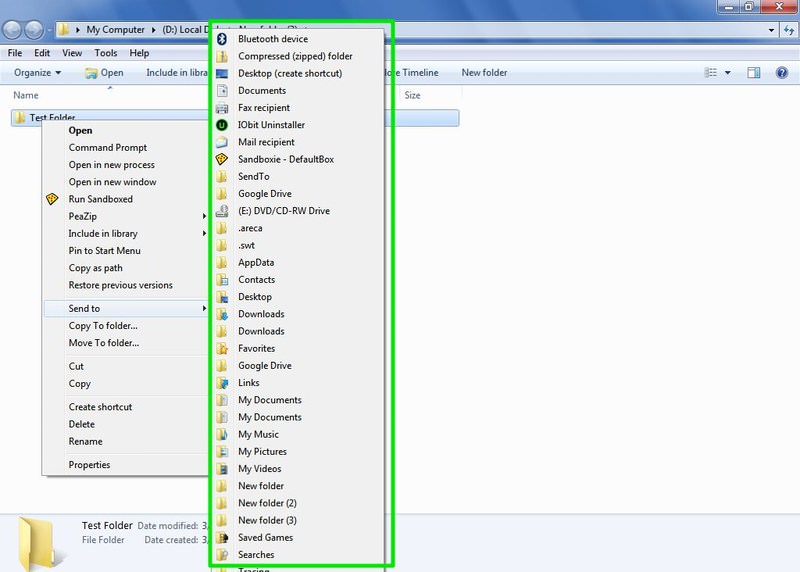
Windows also has an extended “Send to” list that also shows all the folders inside your current User folder. Just press and hold the Shift key and then right-click on the item.
Now move to the Send to option and you will see an extended list of folders. If you work often with folders inside your user account, such as video, documents, and music, etc. then this trick will surely help.
Add cloud storage folder in “Send to” for quick syncing
I commonly use the “Send to” option to easily send any file to my Google Drive folder and sync it with my Google Drive account. If you have a Dropbox folder or a Google Drive folder, then you can add its shortcut in the SendTo folder for quick syncing.
Add an uninstaller shortcut
If you use a third-party uninstaller such as IObit Uninstaller, then you can simply add its shortcut in the “Send to” option to quickly delete any program from anywhere.
Read Also: 8 Tools to Customize Your Windows 10
Ending words
“Send to” option can be really handy when you need to work with multiple folders at the same time, or need to quickly open items with a dedicated program. If you frequently use the “Send to” option, then I will recommend you to download Send To Toys tool to make it easier to add/remove items and get more control.
The “Send to” menu in Windows 10 and Windows 11 allows you to send files or folders to specific locations, applications, or devices. You can customize this menu by adding shortcuts to frequently used apps, drives, or folders. In Windows 11, hold down shift on your keyboard, then right click on a file or folder in File Explorer and you’ll find ‘send to’ in the popup menu.
Hold down the windows key on your keyboard, then press the R key.

Type the following into the run dialog box.
shell:sendto
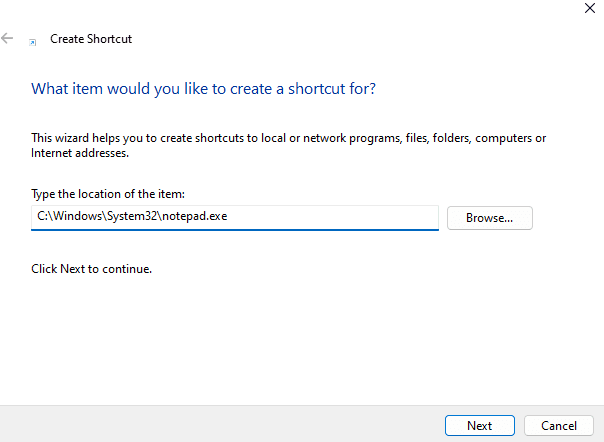
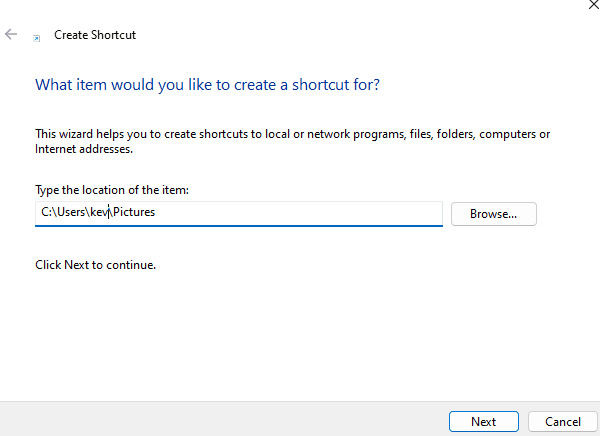
A File Explorer window will open, displaying the contents of the “Send to” menu folder. Now all you need to do is create your shortcuts in this directory. You can create shortcuts to drives, folders or apps here. To do this, right click in the folder, go to ‘new’ then select ‘shortcut’ from the menu.

Adding an Application
To add an application, locate the executable file (.exe).
Below is a list of commonly used applications and their typical paths:
| Application | Path |
|---|---|
| Notepad | C:\Windows\System32\notepad.exe |
| Paint | C:\Windows\System32\mspaint.exe |
| WordPad | C:\Windows\System32\write.exe |
| VLC Media Player | C:\Program Files\VideoLAN\VLC\vlc.exe |
| 7-Zip File Manager | C:\Program Files\7-Zip\7zFM.exe |
| Google Chrome | C:\Program Files\Google\Chrome\Application\chrome.exe |
| Mozilla Firefox |
C:\Program Files\Mozilla Firefox\firefox.exe |
Adding a Folder
Enter the folder path manually or click Browse to locate it.
Adding a Drive
Enter the drive’s path (e.g., D:\ for a D: drive or a USB stick).

Further Reading
For more information on the topics discussed, have a look at the following book
-
Original price was: £26.99.Current price is: £23.99.
Rated 4.83 out of 5
Buy now