
Если у вас имеется более одного подключаемого к Windows Bluetooth устройства с одним именем — например, одинаковые колонки или наушники, используемые для разных задач, может иметь смысл изменить их имена, чтобы было ясно, к какому именно из устройств выполняется подключение.
В этой инструкции о том, как изменить имя Bluetooth устройства в Windows 11 и Windows 10 и с какими нюансами можно при этом столкнуться.
Изменение имени Bluetooth устройства в Windows 11 и Windows 10
Опции переименования Bluetooth устройств, особенно в последней Windows, не очевидны и даже после нахождения нужной настройки многие пользователи сталкиваются с тем, что имя сбрасывается на имя по умолчанию. Однако это решаемо.
Чтобы переименовать Bluetooth устройство в Windows 11/10 выполните следующие шаги:
- В Windows 10 нажмите клавиши Win+R, введите control printers в окно «Выполнить» и нажмите Enter, после чего перейдите к 4-му шагу.
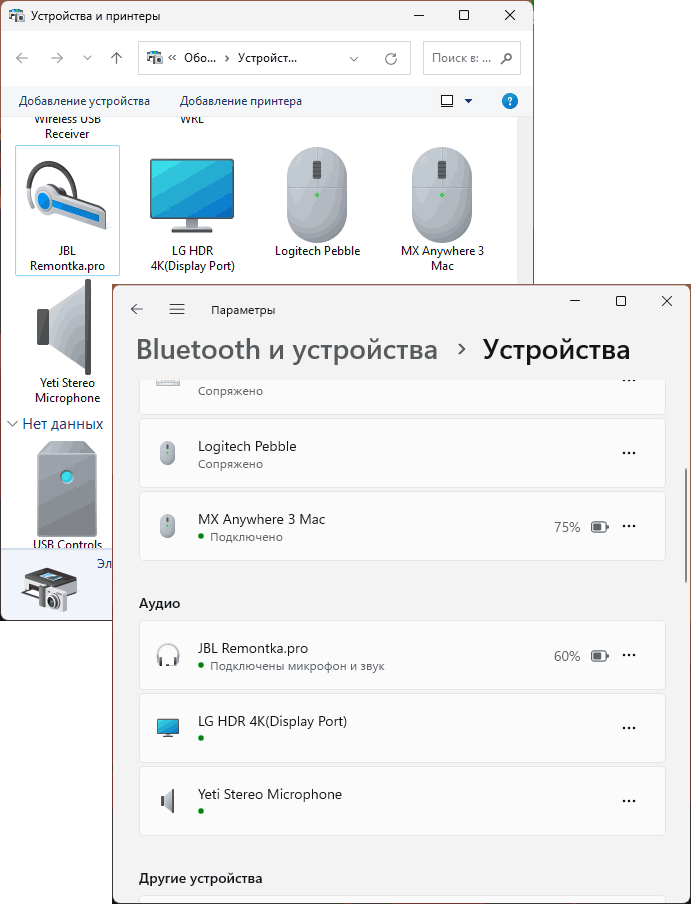
- В Windows 11 откройте «Параметры» — «Bluetooth и устройства», затем нажмите «Посмотреть другие устройства».

- Внизу следующего экрана параметров нажмите «Дополнительные параметры устройств и принтеров».
- В открывшемся окне найдите устройство, которое нужно переименовать, нажмите по нему правой кнопкой мыши и выберите пункт «Свойства».

- Перейдите на вкладку «Bluetooth», укажите новое имя устройства и нажмите «Ок».

- Готово, устройство переименовано.


А теперь о важных нюансах и проблемах с переименованием Bluetooth-устройств этим способом:
- Успешно проделав описанные выше действия, вы можете столкнуться с тем, что после перезагрузки Windows старое имя устройства вернулось. Решение: отключить (не разорвать сопряжение, а просто отключить) Bluetooth устройство и снова подключить ещё до перезагрузки. Второй способ — проделывать все описанные действия при отключенном устройстве и подключить его снова лишь после переименования.
- Вкладка «Bluetooth» отсутствует в свойствах устройства, а при попытке поменять имя на вкладке «Подключенное устройство» вы получаете сообщением об ошибке «Ошибка переименования устройства». Вкладка действительно может отсутствовать для некоторых Bluetooth устройств и, к сожалению, решения здесь я предложить не могу. Вы можете встретить информацию об изменении параметра FriendlyName для устройства в реестре в разделах
HKEY_LOCAL_MACHINE\SYSTEM\ControlSet001\Enum\BTHENUM
HKEY_LOCAL_MACHINE\SYSTEM\ControlSet001\Enum\BTHLE\
однако в моем тесте эти подходы не срабатывают — соответствующее имя устройство сбрасывается автоматически.
Дополнительная информация
При необходимости переименовать подключаемый по Bluetooth смартфон или ноутбук, следует изменить имя в настройках Bluetooth самого подключаемого устройства, либо в настройках имени телефона (пример для iPhone).
Если переименование требуется лишь для выбора устройства вывода звука, вы можете не переименовывать само Bluetooth устройство, а выполнить следующие действия (пример для Windows 11, но в Windows 10 почти те же):
- Зайти в Параметры — Система — Звук.
- Открыть свойства нужного устройства воспроизведения.
- Нажать «Переименовать» для ввода нового имени устройства.

Если у вас остались вопросы или есть собственные подходы к переименованию Bluetooth-устройств, буду рад вашему комментарию ниже.
Quick Links
-
Change Your Gamertag for Free
-
Change Your Gamertag for $10
-
Use a Different Microsoft Account in the Xbox App
Xbox is no longer just a gaming console. It’s an app and set of services integrated into Windows 10. But Xbox still uses whatever old gamertag, or nickname, is associated with your Microsoft account. You may have set this name on an Xbox 360 a decade ago, or may have been provided by Microsoft’s Games for Windows LIVE service.
If you want to change your gamertag, but don’t have an Xbox—or just want an easier way to do it—you can change it through the Windows 10 Xbox app.
There’s one catch: Microsoft is stingy with name changes. In theory, you have one free gamertag change—although that didn’t work for me. After that, you’ll need to spend $10 or add a different Microsoft account to the Xbox app.
Change Your Gamertag for Free
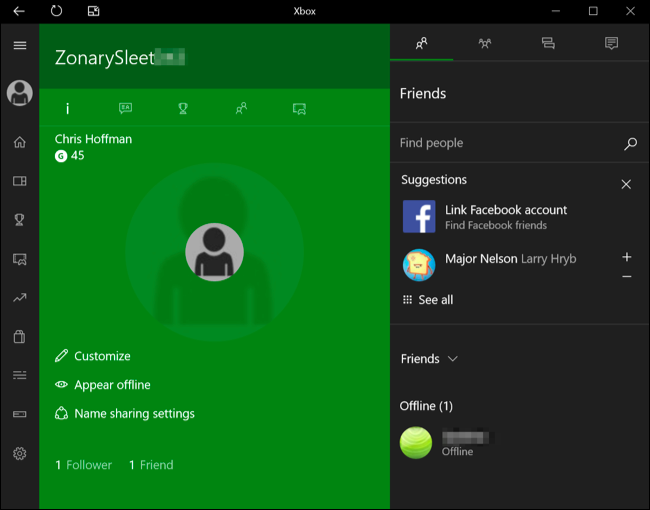
To change your gamertag from Windows 10, open the Xbox app from your Start menu. Click or tap your profile picture at the top-left corner of the app. You’ll see your Xbox profile information. Click «Customize» under your picture the bottom of the profile pane.
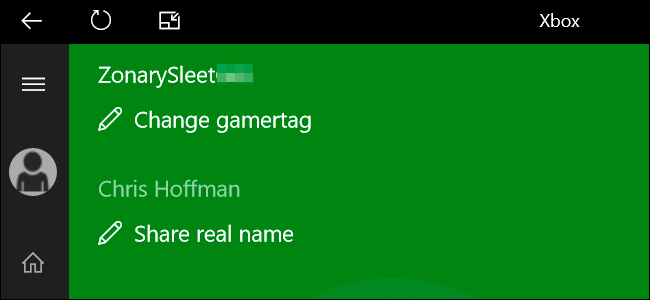
Click «Change gamertag» under your gamertag name.
Everyone gets one free gamertag change, at least in theory. The Xbox app informs me that I’ve «already used my free gamertag change,» which isn’t actually true in my case. I blame Microsoft’s failed Games for Windows LIVE service for messing this up somehow when it provided me with my this default gamertag many years ago.
If you’re lucky—and perhaps if you recently created your Xbox profile—you may still have a free gamertag change available and the app will let you enter a new gamertag. Bear in mind that this is your only free gamertag change for this account, so make it count!

Change Your Gamertag for $10
If you don’t have a free gamertag change, you’ll be told to «Go to Xbox.com» from here. You’ll be taken to the Change gamertag page on Microsoft’s website, which you can also open directly in your web browser to change your gamertag from any device. Sign in with the same Microsoft account you use in Windows 10’s Xbox app.
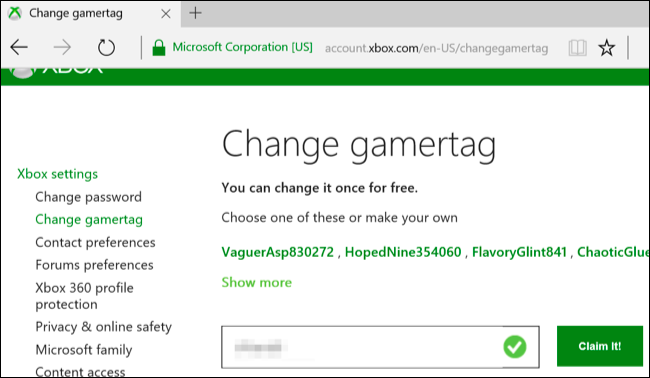
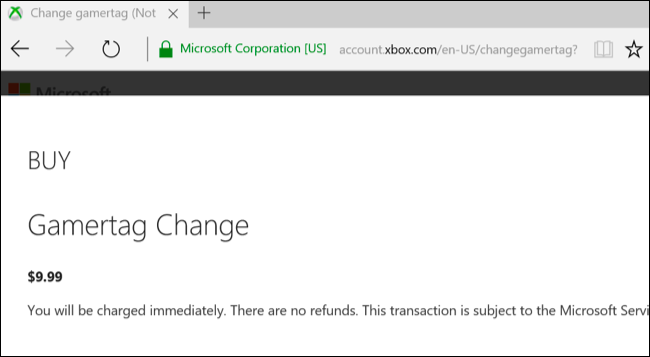
The website allows you to pick a new gamertag. After you do, click «Claim it!» You’ll be redirected to a page that allows you to buy the «Gamertag Change» service. This costs $9.99 in the USA, and will cost different—but likely comparable—amounts of money in other currencies, depending on the country you live in.
Yes, there’s no way around this. You could try hassling Microsoft’s support people into giving you a free name change via the «Contact Support» app included with Windows 10, but they’ll probably just tell you to spend the $10. «There are no refunds,» as the website notes.
Use a Different Microsoft Account in the Xbox App
If you don’t want to pay to change your Xbox gamertag, you have one more option. You can sign into the Xbox application with a different Microsoft account. To do so, click the gear icon at the bottom-left corner of the Xbox app and select «Sign Out» under your user account.

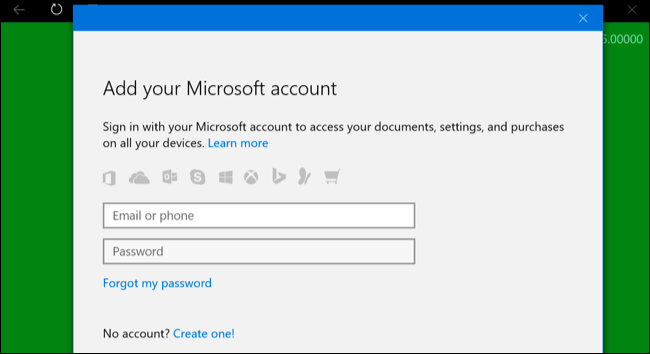
When you try to sign in again, the Xbox app will attempt to sign you in with a the same Microsoft account you’re using with Windows 10. However, you can click the «Sign In With a Different Microsoft Account» link under Use Another Account.
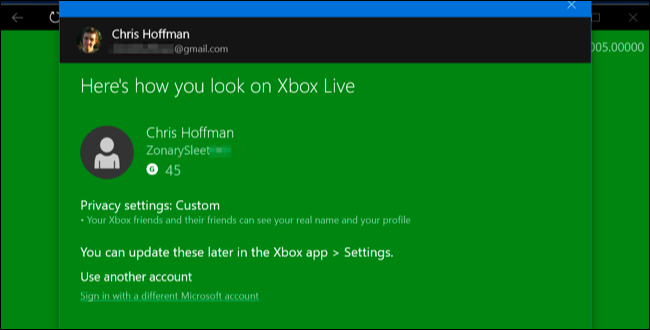
The new account can be anything you like. You could even create a new Microsoft account specifically for this purpose. After you sign in with a Microsoft account that’s never had an Xbox Live profile before, you’ll be able to choose a gamertag for it. That gamertag will appear in the Xbox app and in Xbox services in Windows 10’s Store apps. Your original Microsoft account will still be used for your Windows account, the Windows Store, and other services in Windows 10.
When you sign in with a new Microsoft account, you’ll won’t have any of the achievements, friends, and other data associated with the old Xbox profile. It’s a fresh account. If you want to create a new gamertag without losing your achievements or friends, you’ll need to pay $10 for the gamertag change service.
Microsoft has reasons for their stinginess, of course. Gamertags are supposed to uniquely identify you on Xbox Live, and Microsoft doesn’t want people constantly changing them, especially if someone’s harassing you online. But, don’t fret—even Xbox Live Gold users who pay $60 a year never get any free name changes and have to shell out an extra $10 to Microsoft if they ever want this service.
With Microsoft increasingly competing with Steam for PC gaming, it’s worth noting that Steam allows as many free name changes as you want.
Introduction
What is a USB gamepad?
A USB gamepad is a type of gaming controller that connects to a PC via a USB port. Gamepads typically feature a set of buttons and joystick controls that allow the user to interact with games. Some gamepads also feature additional buttons or switches that can be used to access menu functions or perform other actions, such as vibration feedback or rumble motors.
Most gamepads can be customized to work with specific games or applications. For example, many gamepads allow the user to reassign buttons to different functions. Some gamepads also include built-in profiles that can be used to optimize the controller for specific games.
Why would you want to customize your USB gamepad settings?
There are a few reasons you might want to customize your USB gamepad settings. Maybe you’re not comfortable with the default layout, or you want to map certain buttons to different functions. Whatever the reason, it’s easy to do in Windows 10.
Step-by-step guide to customizing your USB gamepad settings on Windows 10
To use a usb gamepad windows 10 PC, you will need to first install any necessary drivers. Once the drivers are installed, you can connect the gamepad to your PC via the USB port. After the gamepad is connected, you can access its settings by going to the Devices and Printers section of the Control Panel. From here, you can change the button assignments and other settings.
Button Mapping
Assuming you’ve already installed the latest driver for your gamepad, you can start by opening the Windows 10 Game Controllers menu. This can be done by pressing the Start button and then typing in «game controllers» into the search bar. In the menu that appears, find your gamepad in the list of devices and double-click on it.
In the window that pops up, go to the «Settings» tab and then click on «Edit.» From here, you can change the mapping of your buttons and sticks to anything you want. Once you’re done, click on «OK» to save your changes.
Now, whenever you use your gamepad in a game, it will use the new button mapping that you’ve set. This can be a great way to customize your gaming experience and make sure that you’re always in control.
Sensitivity
If you’re using a USB gamepad, you can adjust the analog stick sensitivity to better suit your needs. To do this, open the Game Controller panel in Windows 10. In the «Properties» section, you’ll see an «Analog Stick Sensitivity» slider. Adjust this to your liking and click «OK» to save your changes. You can also adjust the sensitivity of the trigger buttons in this same panel.
Vibration Settings
On Windows 10, you can change the vibration settings for your USB gamepad in the Settings app. To do this, go to Start > Settings > Devices > Bluetooth & other devices. From here, select your gamepad in the «Other devices» section and click on the «Settings» button. In the «Vibration» section, you can adjust the vibration intensity and duration. You can also create custom vibration patterns.
Conclusion
In this article, we’ve shown you how to customize your USB gamepad settings in Windows 10. By following the steps in this guide, you can change the button mapping, analog stick sensitivity, and vibration settings to better suit your needs. Customizing your gamepad can help you get the most out of your gaming experience. So if you’re not happy with the default settings, don’t be afraid to change them. Until next time, game on!

So, you want to play a game on your PC using your PS4 controller, but it isn’t working. Luckily, with a program called DS4Windows, you can easily start PC gaming with your PlayStation controller.
In this article, we’ll explain how to use DS4Windows to connect your PS4 controllers to your Windows PC.
What Is DS4Windows?

The DS4Windows app is a program that lets you use console controllers on your Windows PC. It’s mostly used by gamers who like to play with a controller rather than a mouse and keyboard since many games don’t provide native compatibility for non-Microsoft controllers.
DS4Windows lets you use the following controllers:
- DualSense 3 (DS3) controllers
- DualSense and DualShock 4 controllers
- DS5 controllers
- Nintendo Switch Pro controllers
- Joycon controllers
How Does DS4Windows Work?
DS4Windows enables you to use Sony PlayStation 4 and Nintendo controllers on your Windows 10 or Windows 11 PC by emulating an Xbox 360 controller. You can then customize the controller settings and remap all of your key bindings on the buttons, touchpad, joysticks, keyboard, and mouse.
It also lets you emulate a DS4 controller, but most games only support the Xbox gamepad — that’s why the default emulation mode is an Xbox controller.
Note: Unfortunately, DS4Windows is no longer available for Windows 7 and below.
How to Install and Use DS4Windows
Since the DS4Windows program is lightweight, no installation is necessary. However, you’ll still need to download the app from the official website to get started.
To download DS4Windows:
- Download the latest DS4Windows x64 installation file from the official website.

- Extract the ZIP file into a folder on your desktop (or wherever is convenient). To do so, you’ll require a file archiver tool like 7zip. Simply right-click the archived package and select Extract, then choose the folder you want to extract the files to.

- Open the DS4Windows.exe file then choose a place to save your user data when prompted. The developers recommend choosing the AppData folder or %AppData%.
- Next, DS4Windows will ask you to install a few drivers. The first one, VIGEmBUS, is necessary for the program to work. The next two, HidHide and FakerInput are optional, but they help add features and avoid common errors with the app.

- With the DS4Windows program installed, it’s finally time to connect your wireless controller to your PC. To do so, plug your computer into your PC via a Micro USB cable or Bluetooth adapter dongle. It should appear in the Controllers tab in the default profile section. If everything is connected properly, it should work straight away.

- Use the New Profile option to set up your controller emulation.
If you’re connecting your Sony DualShock gaming controller by Bluetooth, you’ll need to press the Share button and PS button until the light bar begins to flash. This enters it into pairing mode and you’ll be able to connect to it for the first time. If you can’t get your Bluetooth device to work, you can always connect your PS4 controller to the PC via the USB port.
Note: If your PS4 or PS5 controller won’t connect or light up, it might be out of batteries. Here’s how to check your PS5 DualSense controller battery level.
How to Customize Your Gaming Controller
To create your custom controller setup using DS4Windows, you need to create a new profile. Once you have, you can easily access all controller settings, from key mappings to joystick dead zones. Here’s how to get started:
- In DS4Windows, select the Profiles tab.
- Select New.

- A pop-up will appear asking you if you want to use a preset. We recommend saying Yes and choosing the DualShock or Xbox 360 controller preset. This just means you can customize the relevant fields, rather than filling each one out in turn from scratch.

- Change each setting so that it fits your preferences. Below, we’ll provide a list of all of the major settings you can change.
Some of the things to keep your eye out for include:
- Controls. This menu lets you map your controller to specific mouse and keyboard inputs, so you can control your PC via the controller.

- Special actions. Special actions are like macros. You can map specific keyboard key combinations to single buttons so that in-game, you can perform actions much easier.
- Controller readings. A real-time display of your controller movements that’s useful for troubleshooting and setup.

- Axis config. Change the dead zones and sensitivities for your LS and RS joysticks and L2 and R2 triggers.

- Lightbar. Change the color and flashing pattern of the controller’s lightbar while it’s connected or charging.

- Touchpad. These settings let you alter what your touchpad can do. By default, it’s set to mimic the mouse (like a laptop’s touchpad).

- Gyro. Lets you calibrate your gyro settings so that you can use the controller’s in-built gyroscope to play games by moving your controller through the air.

How to Use a PS4 or PS5 Controller in Steam
Luckily, many Steam games now include PlayStation configuration support so that you can use the PS4 controller natively. To do so, open Steam and select Settings. Press the Controller tab, select General Controller Settings, and make sure PlayStation Configuration Support is ticked.
Time to Start Playing
DS4Windows is a great solution if you want to play PC games with a PlayStation controller, but the game doesn’t support it natively. Hopefully, this guide has helped you set up DS4Windows so you can enjoy your games how you want to play them.
Related Posts
- How to Fix a “This file does not have an app associated with it” Error on Windows
- How to Add OneDrive to Windows File Explorer
- How to Fix an Update Error 0x800705b4 on Windows
- How to Resolve “A JavaScript error occured in the main process” Error on Windows
- How to Fix the Network Discovery Is Turned Off Error on Windows