
Last Updated :
28 May, 2024
Windows OS is more dependent upon the execution of the background activities. You can term such activities as the Critical Process of Windows. You will be surprised to know that you can get Errors on Critical Windows Processes as well.
In such cases, you get the Windows Blue Screen Error along with the Stop Code Critical Process Died Error on Windows. This article will discuss the methods needed to resolve the CRITICAL_PROCESS_DIED Error Stop Code on Windows.
Methods to Fix «Critical Process Died» in Windows 10
- Method 1: Fix «Critical Process Died» by Restarting Device
- Method 2: Fix «Critical Process Died» by Fixing Corrupt System Files
- Method 3: Fix «Critical Process Died» in Windows by Scanning System
- Method 4: Fix «Critical Process Died» in Windows by Scanning Virus & Malware
- Method 5: Fix «Critical Process Died» in Windows by Updating Driver
- Method 6: Fix «Critical Process Died» in Windows by Removing Latest Installed App
- Method 7: Fix «Critical Process Died» in Windows Using System Restore
What is the Error Code 0x000000EF?
The Error Code 0x000000EF denotes the issue that the Windows OS is now encountering the Critical Process Died Error. You will get the Windows Error Message as well as the Windows Error Code on the screen. Also, you will face the windows Blue Screen Death if the Windows Critical Process Died.
The simple reason for this problem is the Background Windows Application stopped working on which the Windows Execution was dependent. Either, the application becomes corrupted or it is modified somehow.
How to Fix «Critical Process Died» Error in Windows 10?
To Resolve CRITICAL_PROCESS_DIED error in Windows, the following steps are worthful to be executed one by one. We will start Simple Windows Restarting.
Method 1: Fix «Critical Process Died» by Restarting Device
The first & very simple method is to perform a Windows Restart Operation. You have to check whether the problem originally exists or if it is a simple problem that can be resolved with a quick Windows Restarting.
After the restart, if the problem still exists, then it is time to move ahead with the more complex & complicated steps that will surely fix critical process died error.
Method 2: Fix «Critical Process Died» by Fixing Corrupt System Files
To Fix Critical Process Died by fixing Corrupted System files, You’ve to follow the given steps —
Step 1: Search for the Command Prompt on the Search Bar. And go with it.

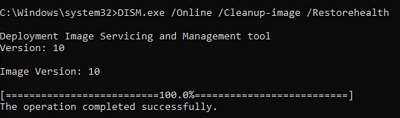
Step 2: Execute the following command there. It will find all the Corrupted Files on Windows & if anything is present, it will be resolved.
Command: DISM /Online /Cleanup-Image /RestoreHealth
Method 3: Fix «Critical Process Died» in Windows by Scanning System
To Fix Critical Process Died using the Scanning System, You’ve to follow the given steps —
Step 1: Again, search for the Command Prompt on the Windows Search Bar & go with the CMD Option.
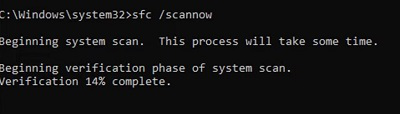
Step 2: Now, scan all the device drivers & disks whether any problem is there or not using the following command.
Command: sfc /scannow
Method 4: Fix «Critical Process Died» in Windows by Scanning Virus & Malware
To Fix Critical Process Died by scanning viruses and malware, You’ve to follow the given steps —
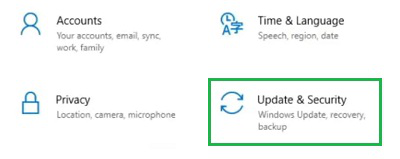
Step 1: Open Windows Settings & click on the Update & Security option.
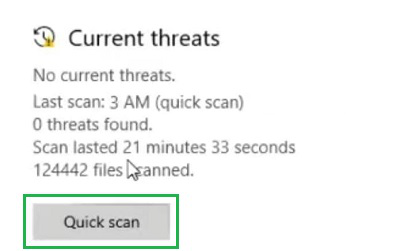
Step 2: Then, under the Protection Area, click on Virus & Threat Protection.
Step 3: Click on the Quick Scan to get the details of the Virus Infection.
Method 5: Fix «Critical Process Died» in Windows by Updating Driver
To Fix Critical Process Died by updating the driver, You’ve to follow the given steps —
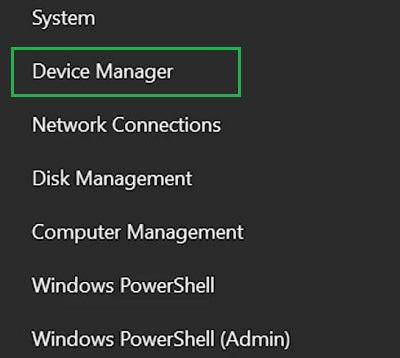
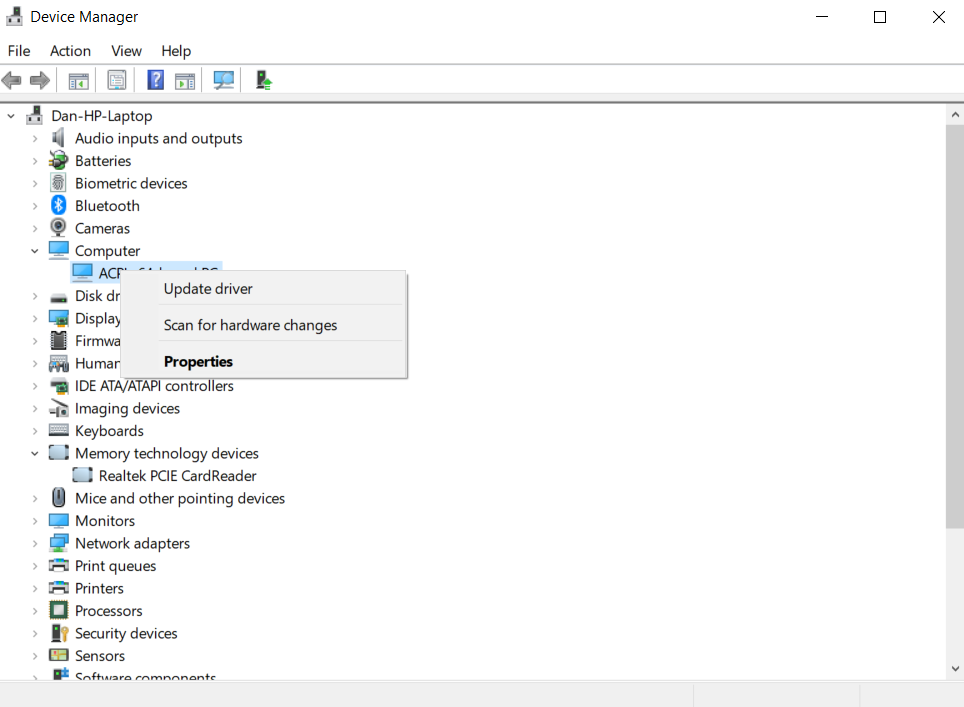
Step 1: Open the Device Manager, by right-clicking on the Start Menu.
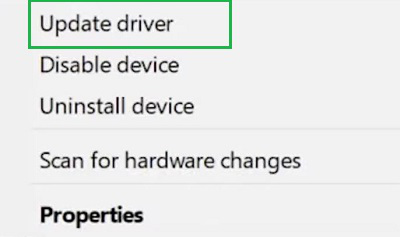
Step 2: After that, select the Display Driver & click on the Update Driver option.
Step 3: Now, go for the Search Automatically for Driver Option.

Method 6: Fix «Critical Process Died» in Windows by Removing Latest Installed App
To Fix Critical Process Died by removing Programs, You’ve to follow the given steps —
Step 1: Search for the Remove Application on the Search Bar. And go with the option Add or Remove Application.
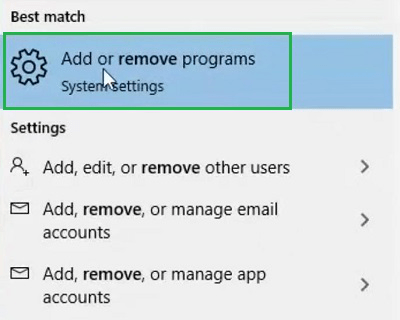
Step 2: After that, select the latest installed application & click on the Uninstall Option. Now, in the Popup Window, click again on Uninstall.

Method 7: Fix «Critical Process Died» in Windows Using System Restore
To Fix Critical Process Died using System Restore, You’ve to follow the given steps —
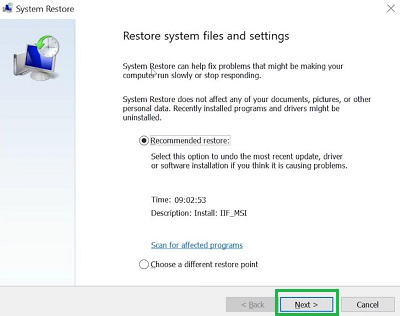
Step 1: Search For System Restore & from the opened window click on Open System Restore.
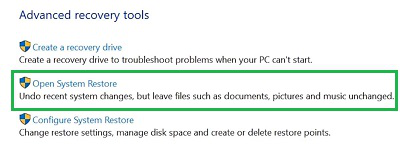
Step 2: Click on Next without making any changes on the Default Screen.
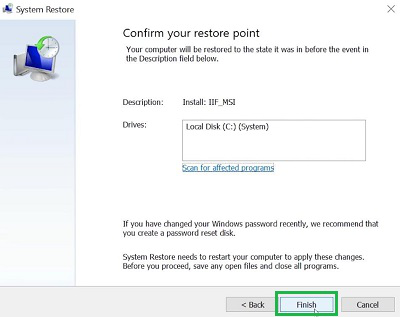
Step 3: After selecting the Restore Point, click on Finish to complete the process.
So, we can conclude that with the above-mentioned methods, you can resolve how to Fix the CRITICAL_PROCESS_DIED Stop Code on Windows. We will recommend executing each & every method discussed here. As then only, you can have a chance to permanently stop the issue. Otherwise, the issue might be stopped temporarily.
CRITICAL_PROCESS_DIED — эта ошибка возникает, когда операционная система Windows не запускает или завершает процесс. Это может быть вызвано различными причинами. Ниже подробнее разберем, какие причины и решения могут быть.

Источник: addictivetips.com / Ошибка critical process died
Причины
- Проблемы с оборудованием — неисправный жесткий диск, видеокарта или оперативная память могут стать причинами сбоев в операционке;
- Вирусное заражение — вредоносные программы могут повредить системные файлы и вызвать сбой в работе процессов;
- Некорректная установка обновлений — обновления могут содержать ошибки, которые могут быть причиной сбоев в работе системы;
- Конфликт программного обеспечения — некоторые программы могут конфликтовать друг с другом.
Источник: ytimg.com / Windows 10 и 11
Решения
Восстановление во время загрузки
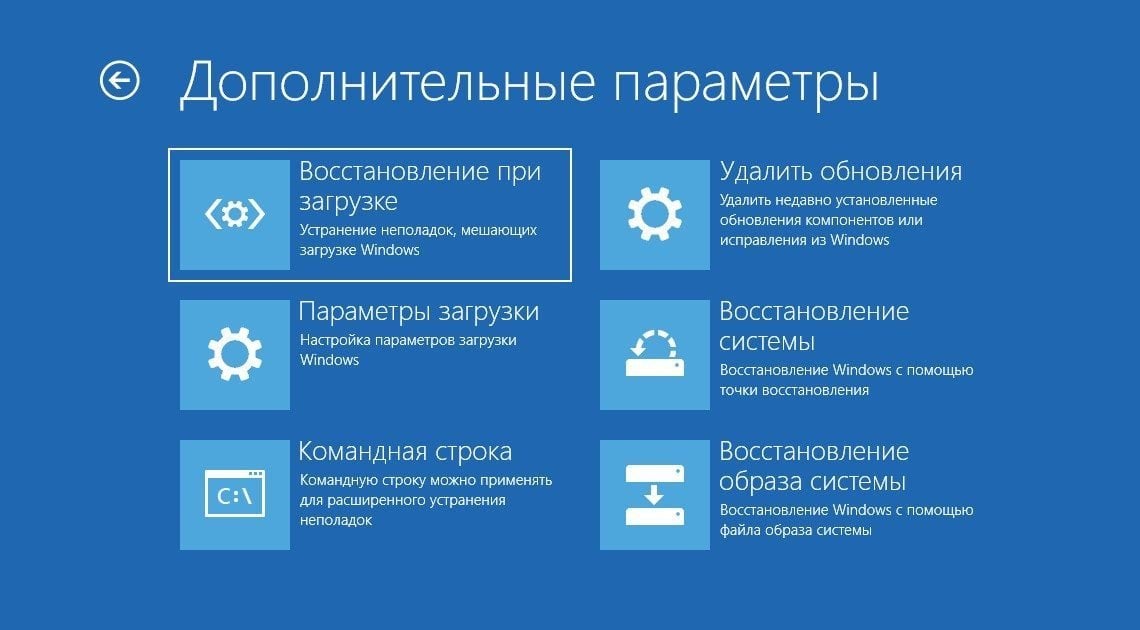
Если ошибка CRITICAL_PROCESS_DIED возникает циклически и не позволяет загрузить рабочий стол, то будет запущено автоматическое восстановление. Для этого идем в дополнительные параметры. Если дополнительных параметров нет, попробуйте перезагрузить компьютер пару раз, пока не появится меню с выбором дополнительных параметров.

Источник: microsoft.com / Автоматическое восстановление
В этом меню можно выбрать один из следующих вариантов:
- Восстановление при загрузке — вариант позволит автоматически выполнить ремонт системы;
- Командная строка — может потребоваться для выполнения дополнительных действий по устранению ошибки;
- Восстановление системы — позволит откатить Windows к более ранней точке восстановления, когда ошибки еще не было;
- Восстановить образ с сохранением файлов — если у вас есть установочная флешка с Windows 10 или 11, вы можете совершить восстановление системы, сохранив все файлы;
- Удалить последнее обновление — например, ПК не загружается, можно попытаться удалить последнее установленное обновление. Оно могло вызвать ошибку.
Источник: lifehacker.ru / Восстановление системы при загрузке
Проверка битых секторов и файлов на диске
Поврежденные системные файлы и битые секторы на диске могут быть причиной ошибки critical process died на Windows 10 и 11. Чтобы автоматически проверить целостность системы и наличие ошибок на диске, сделайте следующее:
- Запускаем командную строку от имени администратора;
- Вводим команду chkdsk c: /f /r, чтобы проверить диск на ошибки и исправить их (если возможно);
- Далее команда sfc /scannow, чтобы восстановить поврежденные файлы системы;
- Если предыдущие команды не помогли, введите команду DISM /Online /Cleanup-Image /RestoreHealth, для проведения более подробной проверки системы и запуска восстановления файлов.
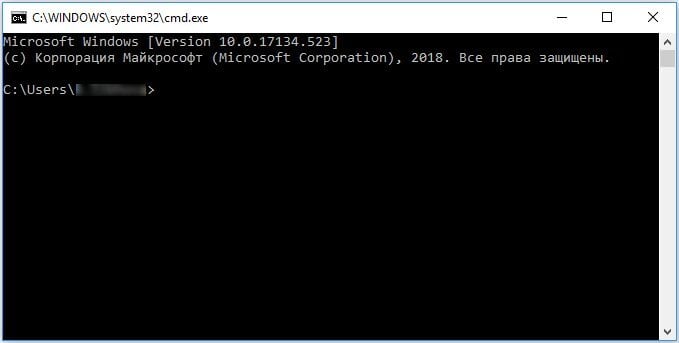
Источник: timeweb.com / Командная строка
Сканирование антивирусом
Ошибка CRITICAL_PROCESS_DIED может быть вызвана вредоносными программами. Они способны изменять файлы системы и процессы, и это приводит к сбоям в работе системы.
Для проверки компьютера на наличие вирусов, можно воспользоваться бесплатным антивирусом. Например, защитник Windows в режиме автономного сканирования или DrWeb, Zemana и другие сканеры.
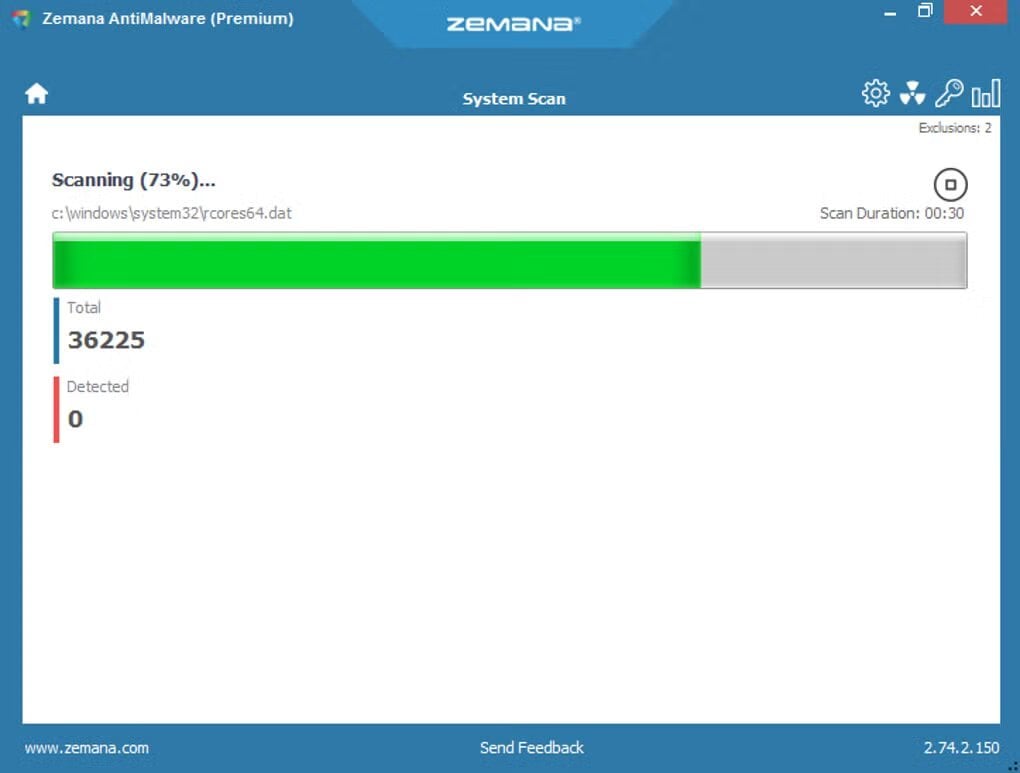
Источник: sftcdn.net / Антивирус Zemana
Обновление драйверов
Старые драйвера можно считать распространенной проблемой ошибки. Во время загрузки часто выскакивает critical process died Windows 10 и 11.
Чтобы проверить состояние драйверов нужно:
- Нажмите ПКМ на «Пуск»;
- Находим «Диспетчер устройств»;
- Просмотрите список устройств и обратите внимание на наличие желтого восклицательного знака рядом с каким-либо из них: если такой есть, то проблема с драйвером присутствует;
- Выберите правой кнопкой мыши устройство с восклицательным знаком;
- Воспользуйтесь пунктом «Обновить драйвер» в контекстном меню.
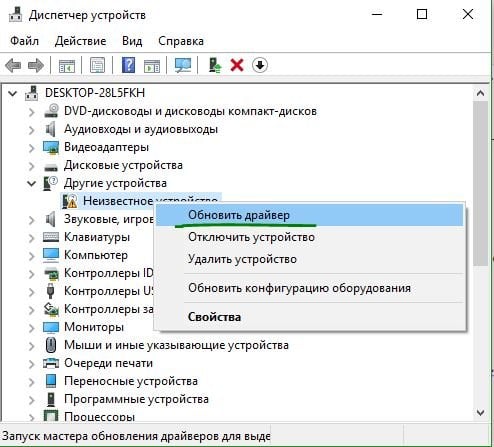
Источник: mywebpc.ru / Обновление драйверов
Для правильного обновления лучше всего посетить сайт бренда устройства. Там вы сможете найти самые свежие драйвера для решения своей проблемы.
Удаление обновлений
Бывает что CRITICAL_PROCESS_DIED высвечивается после того, как вы обновили систему. Тогда можно удалить последнее обновление. Это может помочь решить проблему.
Чтобы удалить обновления:
- Откройте «Параметры», далее — «Обновление и безопасность»;
- В разделе «Центр обновления Windows» выберите «Просмотр журнала обновлений»;
- Найдите последнее обновление и удалите его.
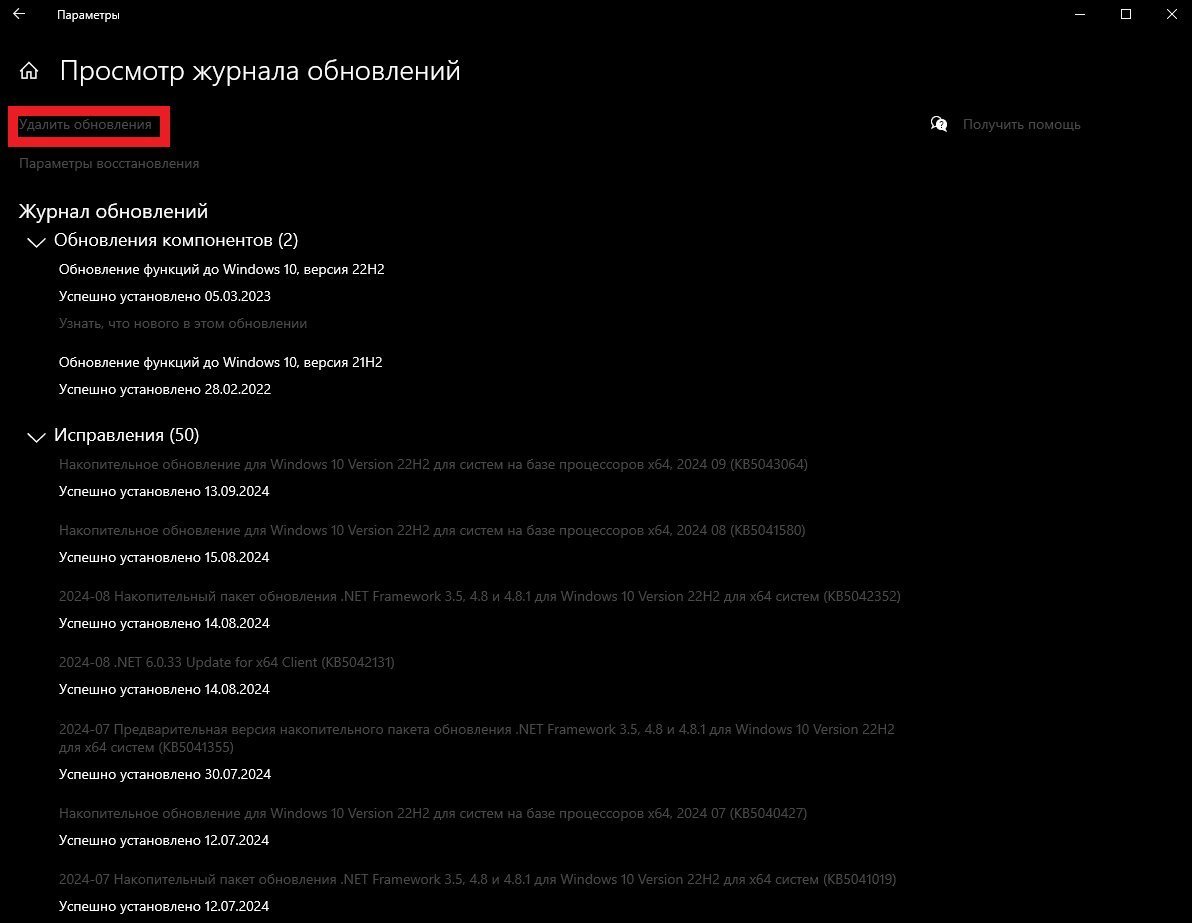
Скриншот: CQ.ru / Журнал обновлений
Чистая загрузка
Чистая загрузка — режим запуска Windows, которое задействует минимум программ, процессов и драйверов. Это может помочь определить, какое приложение или драйвер вызывает ошибку CRITICAL_PROCESS_DIED.
Чтобы запустить чистую загрузку:
- Нажмите клавиши Win + R;
- В появившемся окне пропишите команду msconfig;
- Перейдите на вкладку «Службы»;
- Установите флажок «Не отображать службы Майкрософт»;
- Нажмите «Отключить все»;
- Перейдите на вкладку «Автозагрузка»;
- Далее «Открыть диспетчер задач»;
- Во вкладке «Автозагрузка» отключите все элементы;
- Перезагрузите компьютер.

Источник: comp-security.net / Автозагрузка системы
Восстановление системы
При созданной точке восстановления можно откатить компьютер до появления ошибки CRITICAL_PROCESS_DIED.
Для этого:
- Откройте «Параметры»;
- Перейдите в раздел «Обновление и безопасность»;
- Выберите «Восстановление»;
- Следуйте инструкциям на экране.

Скриншот: CQ.ru / Восстановление системы
Отключение спящего режима
Если ошибка critical process died windows появляется после пробуждения компьютера или ноутбука, можно попробовать отключить спящий режим.
Спящий режим — создает автоматически точку сохранения текущей работы, отключает монитор и все компоненты как HDD, процессор, видеокарта. При нажатии любой кнопки на клавиатуре Windows 10 запускает все компоненты устройства, загружает сохраненную работу и включает монитор.

Источник: bisv.ru / Спящий режим
Windows 10
Для отключения:
- Нажмите сочетание клавиш Win + I;
- Выберите «Система»;
- Перейдите в раздел «Питание и спящий режим»;
- Справа вы увидите две графы: «Экран» и «Спящий режим». Вы можете отключить эти функции или увеличить промежуток времени до перехода в спящий режим и выхода из него.
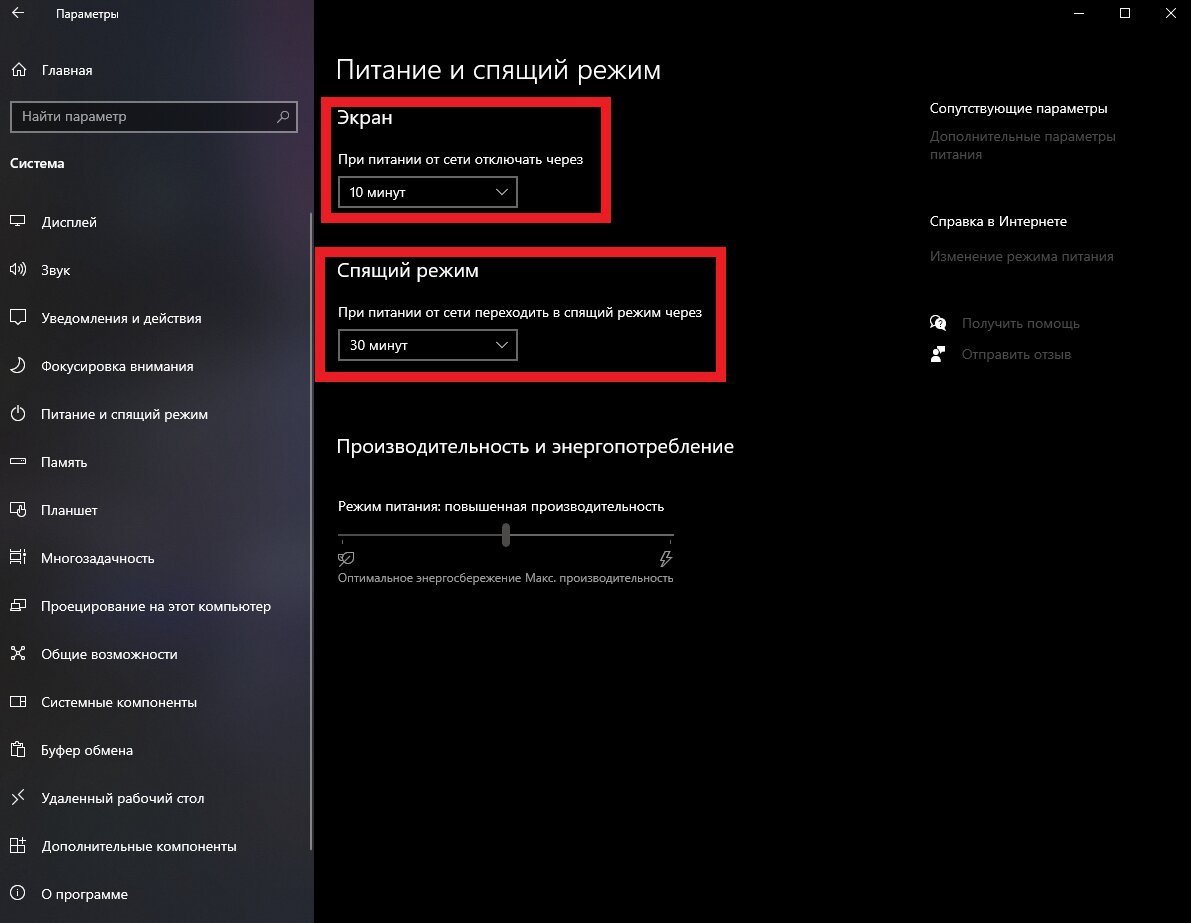
Скриншот: CQ.ru / Раздел спящего режима на Windows 10
Windows 11
На Windows 11 действия похожи:
- Откройте «Параметры»;
- В разделе «Система» выберите «Питание»;
- Справа найдите графу «Экран и спящий режим»;
- Во всех пунктах выберите «Никогда».
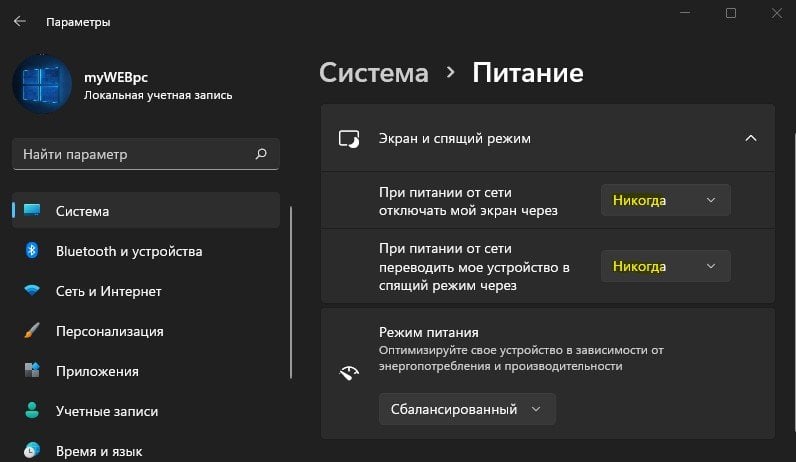
Источник: mywebpc.ru / Раздел спящего режима на Windows 11
Обновление BIOS
Чтобы обновить BIOS, нужно зайти на сайт производителя вашего компьютера и найти там последнюю версию BIOS для вашей модели. Затем следовать инструкциям на сайте или в этом руководстве.

Источник: asus-service-pro.ru / Обновление БИОСа
Обновление BIOS — это сложный процесс, который может привести к сбоям в работе компьютера, поэтому перед обновлением рекомендуется создать резервную копию важных данных и иметь под рукой инструкции по восстановлению системы.
Обновление Windows
Чтобы обновить Windows 10 или 11, перейдите на сайт Microsoft и скачайте соответствующий инструмент:
- Для Windows 10 — MediaCreationTool.

Источник: besplatnyeprogrammy.ru / Приложение Media Creation Tool
- Для Windows 11 — помощник по установке Windows 11.
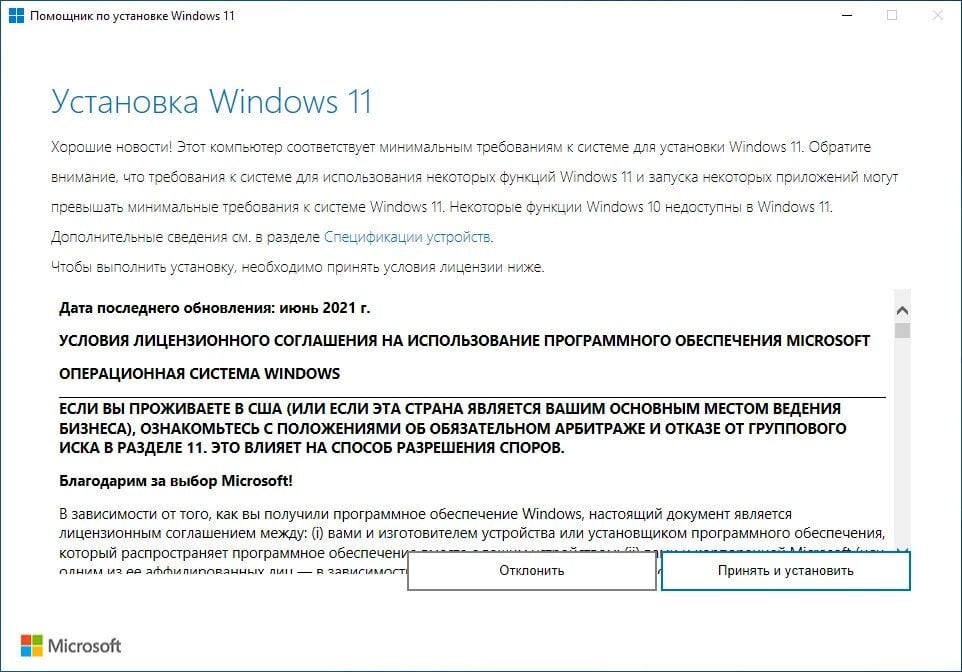
Источник: comss.net / Помощник по установке
Эти инструменты помогут обновить системные файлы и саму операционную систему. При этом ваши данные и личные настройки сохранятся.
Заглавное фото: CQ.ru с помощью DALL-E
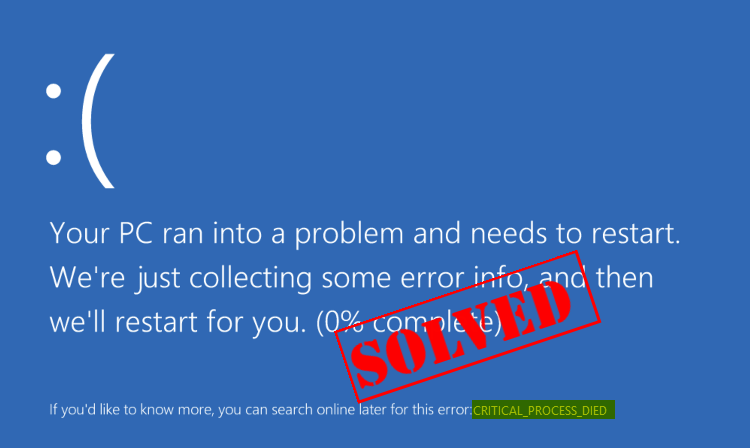
If your Windows 10 computer suddenly goes into a blue screen, and it says you’re having a CRITICAL PROCESS DIED error, you’re not alone. But no need for you to worry about it, we’ve got your covered.
What is Critical Process Died?
Critical Process Died blue screen of death, with the error code 0x000000EF, means that a critical system process is your computer died. The process can be so critical that it could damage your hard disk, your memory or, even very rare, your processor. But no worries, we got you covered. Read on and locate the solutions to this problem.
If this is the very first time you have this problem, your computer will restart and it’ll be back to normal. But if you’ve seen this error message many times, you need to do something about your PC, since it indicates that a critical system process is at fault.
7 fixes for Critical Process Died
Here are 7 fixes for you to try to fix the Critical Process Died error. You may not have to try them all; just work your way down until you find the one works for you.
- What is Critical Process Died?
- 7 fixes for Critical Process Died
- 1. Run a virus scan
- 2. Update device drivers
- 3. Undo recent changes
- 4. Run SFC & DISM
- 4.1: Run SFC (System File Checker)
- 5: Update your BIOS or firmware
- 6: Check the crash logs
- Last Resort: Refresh or Reset your Windows
You’ll need to be logged into Windows on the problem computer to try any of these solutions. If you can’t log into Windows, power on and off your PC 3 times to perform a hard reboot and restart it in Safe Mode, then try these solutions.
1. Run a virus scan
The CRITICAL PROCESS DIED error could be caused by some spyware or malware. Even if they aren’t the dangerous kind, they could still cause the problem.
So before we go any deeper into solving this problem in other ways, you should scan your computer with a trusted antivirus program(s). If you find any malware-infected programs or files, uninstall and remove them completely.
2. Update device drivers
In most cases, buggy drivers could cause Critical Process Died blue screen of death error. You can try updating all the device drivers to the latest versions to fix it.
There are two ways you can get the right drivers for your video card and monitor: manually or automatically.
Manual driver update – You can update your device drivers manually by going to the manufacturer’s website for both all your devices, and searching for the most recent correct driver for each. Be sure to choose only drivers that are compatible with your variant of Windows 10.
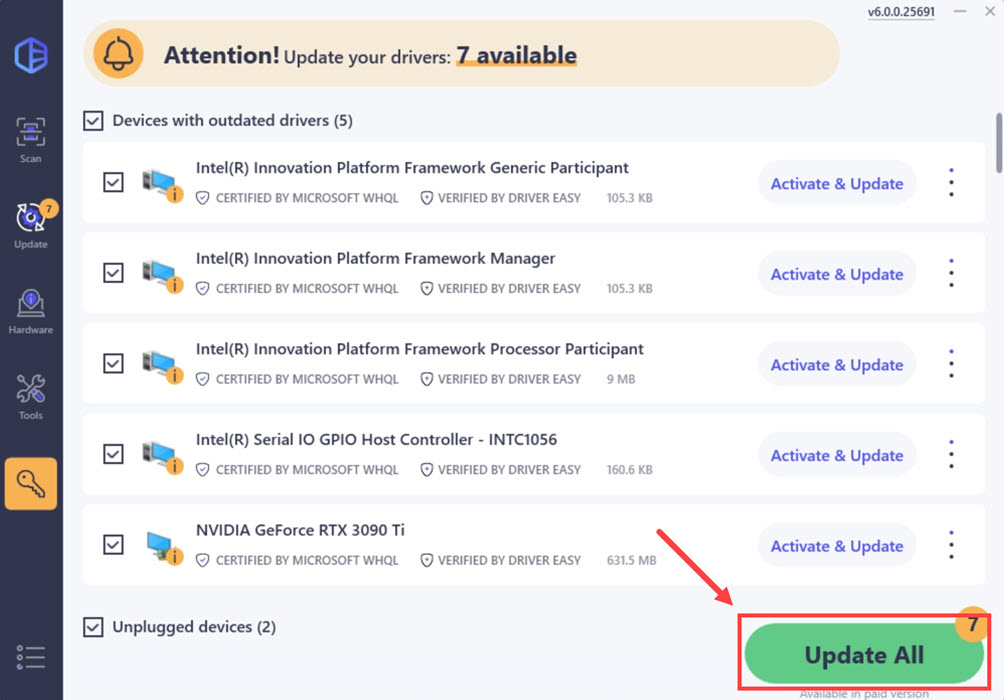
Automatic driver update – If you don’t have the time, patience or computer skills to update your device drivers manually, you can, instead, do it automatically with Driver Easy. Driver Easy will automatically recognize your system and find the correct drivers for your exact hardware devices, and your variant of Windows 10, and it will download and install them correctly.
You can update your drivers automatically with either the 7 days free trial or the Pro version of Driver Easy. It takes just 2 clicks, and you get full support and a 30-day money-back guarantee with the Pro version:
- Download and install Driver Easy.
- Run Driver Easy and click the Scan Now button. Driver Easy will then scan your computer and detect any problem drivers.

- Click the Activate & Update button next to the flagged device to automatically download and install the correct version of this driver.
Or click Update All to automatically download and install the correct version of all the drivers that are missing or out of date on your system (You’ll need the Pro version for this – when you select Update All, you’ll get a prompt to upgrade. If you’re not prepared to purchase the Pro version yet, Driver Easy provides a 7-day trial at no cost, granting access to all Pro features like fast downloads and easy installation. No charges will occur until after your 7-day trial period ends.)

- After updating, restart your computer to take effect.

If you need assistance, please contact Driver Easy’s support team at support@drivereasy.com.
3. Undo recent changes
Another big cause of Critical Process Died is faulty or buggy hardware or software programs installed. If you’ve recently installed some programs or hardware components, try upgrade them to the latest versions available or remove them completely from your PC.
4. Run SFC & DISM
If your hard drive or RAM is corrupted, a blue screen of death error such as Critical Process Died would pop up and force reboot your computer. This is your computer’s way of protecting itself from further damage. You can run two built-in checks to make sure that your disk and RAM are at a good state:
4.1: Run SFC (System File Checker)
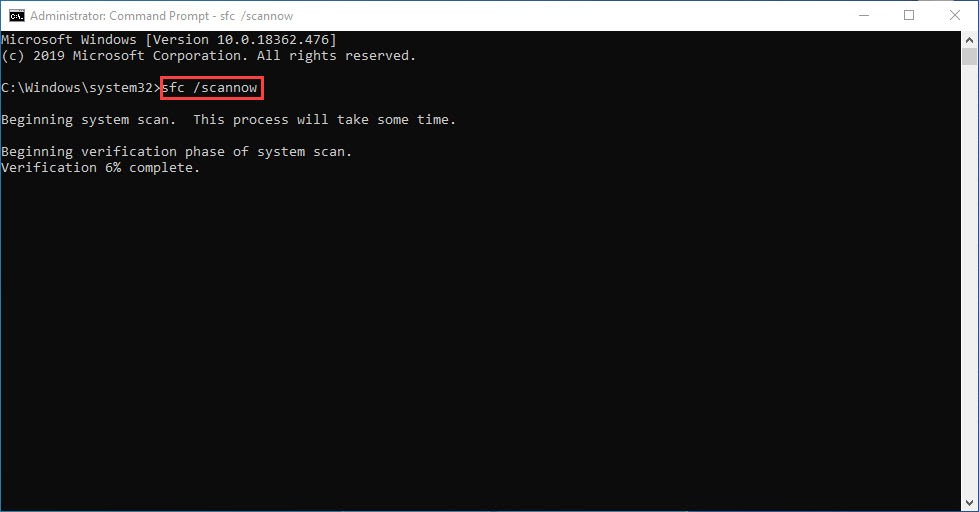
1) On your keyboard, press the Windows logo key and R at the same time. Type cmd and press Ctrl+Shift+Enter at the same time to run Command Prompt as administrator.
Click Yes when prompted for permission to make changes to your device.
2) In the Command Prompt window, copy and paste the following command and hit Enter.
sfc /scannow
3) System File Checker will then scan all system files and repair any corrupted or missing ones it detected. This may take 3-5 minutes.
4) After the scan, see if the Critical Process Died blue screen problem still persists. If so, move on to the next test.
4.2: Run dism.exe
1) On your keyboard, press the Windows logo key and R at the same time. Type cmd and press Ctrl+Shift+Enter to run Command Prompt as administrator.
Click Yes when prompted for permission to make changes to your device.
2) In the Command Prompt window, copy and paste the following commands and hit Enter after each line:
dism.exe /online /cleanup-image /scanhealth
dism.exe /online /cleanup-image /restorehealth
2) When the process finishes:
- If the DISM tool gives you errors, you can always try this command line. This will take up to 2 hours.
dism /online /cleanup-image /startcomponentcleanup
- If you get Error: 0x800F081F, reboot your computer, then open Command Prompt as administrator again (step 1) and run this command line instead:
Dism.exe /Online /Cleanup-Image /AnalyzeComponentStore
When these tests are done, see if the Critical Process Died problem remains. If the problem still persists, please move on to the next fix.
5: Update your BIOS or firmware
If the above still doesn’t help to fix the Critical Process Died blue screen of death error on your computer, you may need to consider a BIOS and firmware update, as it could be a problem between your computer hardware and your Windows system. But you should always check your motherboard’s BIOS update release note to see if BSOD errors are mentioned.
If you’re up for a BIOS update, here’s a post on how you can do it manually: When & How to Safely Update BIOS [Quick Guide]
DO NOT attempt a BIOS update if you’re not 100% confident in knowing what you’re doing, as a faulty BIOS update could harm or even brick your computer.
6: Check the crash logs
If the Critical Process Died blue screen of death error still won’t go away, you can try to analyze the crash logs created by your computer when the blue screen happens: there are time stamps on the logs.
If you’re interested in knowing more about analyzing your crash logs files, please refer to method 4 in this post we have: View Crash Logs with Minidump Files
You should then find some error codes and/or error messages in your minidump files that might help to locate the culprit to the Critical Process Died blue screen of death error on your computer. The codes or messages you see might be unique in your case, so we don’t have more general fixes here to suggest. But if you do find such codes or error messages, you can always search them on our knowledge base here: https://www.drivereasy.com/knowledge/ for further troubleshooting tips.
Last Resort: Refresh or Reset your Windows
If you’ve tried all the above methods but still can’t solve your Critical Process Died problem, it’s time to refresh or reset your Windows 10.
If you need more help, go to the posts below for more detailed instructions: How to refresh or Reset Windows 10 Easily?
The dreaded «blue screen of death,» infamously known as BSOD, can wreck your day. There are more than 500 BSOD error codes, but the Critical Process Died Stop Code gets the most attention.
In fairness, BSODs are much less common in Windows 10 than in previous versions of the OS, but they are still annoying when they happen. Losing the stuff you were working on is the least of your worries.
So, how do you fix this unforeseen, «critical process died» error in Windows 10? Keep reading, and we’ll explain everything.
What Is the «Critical Process Died» Stop Code?
A critical process unexpectedly stopping is responsible for the majority of BSODs. You’ll know if you’re a victim because you’ll see error code 0x000000EF on the blue crash screen.
At its most basic level, the cause is simple—a background process that Windows relies on has become corrupted. It could have either stopped entirely, or its data has been incorrectly modified.
Digging deeper, it becomes much harder to pinpoint the precise issue. Everything from iffy drivers to memory errors could be the culprit. Worse still, there are near-endless scenarios in which the BSOD could arise. Perhaps it only happens when you’re gaming, when you log into your machine, when you open a certain app, or when you wake your machine from sleep.
How to Fix the «Critical Process Died» Stop Code
The diversity of possible causes means there are several BSOD troubleshooting steps you need to work through. Let’s take a closer look at how you can fix the Critical Process Died stop code in Windows 10.
1. Restart Your PC
It’s a cliche at this point, but a simple restart can fix surprisingly many problems with your PC. In fact, this holds true for almost all tech devices, including your smartphones.
A reboot clears your memory or resources, resets your system settings, and clears your caches and other temporary files. Since the “critical process died” error comes up because of something going wrong with the process, a reboot can be handy.
So restart your PC and see if it fixes the error.
2. Run the Hardware and Device Troubleshooting Tool
Before we move on to the more complicated solutions, let’s begin with the easiest one.
Windows now includes a broad range of specialized troubleshooting tools. One of them is specifically designed for hardware and device issues.
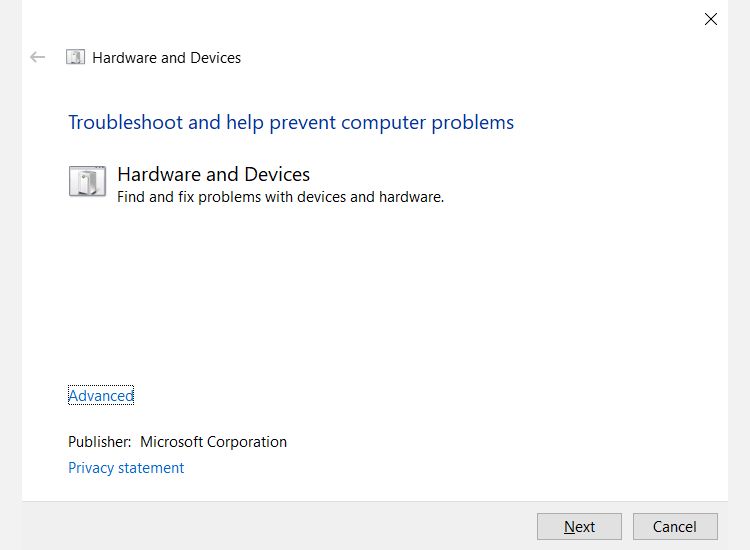
Unfortunately, it is no longer visible in the Settings menu. Instead, you will need to fire it up from the command line. Thankfully, it is easy to do; open Command Prompt, type msdt.exe -id DeviceDiagnostic, and press Enter.
On the window that pops up, hit Next, and your system will spend a few minutes scan for problems. It will report back with its findings.
3. Run the Deployment Imaging and Servicing Management Tool
If you’re still encountering errors, it’s time to move on to the Deployment Imaging and Servicing Management (DISM) tool. It will repair a corrupt system image.
The tool has three switches:
- /ScanHealth,
- /CheckHealth
- /RestoreHealth
We are only interested in the last one. To use DISM, open Command Prompt as an administrator using the steps described previously. When the app is open, type DISM /Online /Cleanup-Image /RestoreHealth and hit Enter.
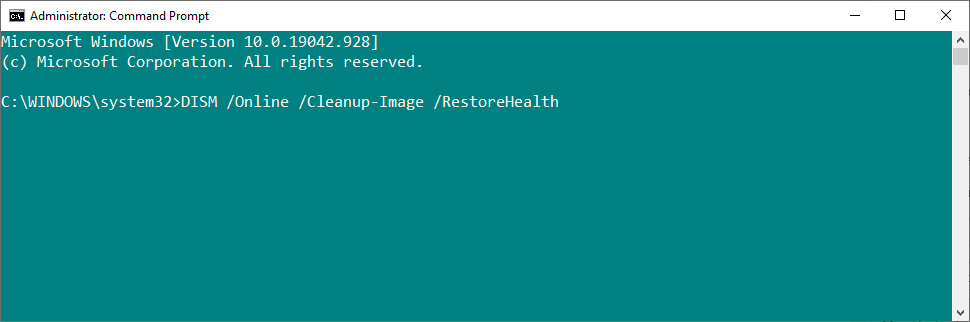
The process typically takes between 10 minutes and half an hour. Do not be alarmed if the progress bar pauses at 20 percent for several minutes; it is expected behavior.
After the scan has finished, restart your machine. The «critical process died» error should’ve gotten resolved.
4. Run the System File Checker
The next step is to run the System File Checker tool. It’s a well-known utility that can cure a wide variety of Windows-based aliments by repaired corrupted or incorrectly modified system files.
In truth, it’s not always useful; people run it out of habit more than out of necessity. However, in the case of the 0x000000EF error code, it’s a critical troubleshooting step.
To run the checker, you will need to fire up Command Prompt as an admin. The easiest way is to run a search for cmd, right-click on the result, and select Run as administrator.
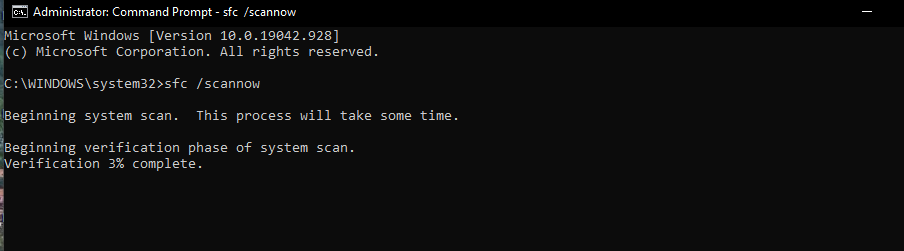
Once Command Prompt is open, type sfc /scannow and hit Enter. The process might take a while to complete.
When it’s finished, you’ll see an on-screen list of any problems and the steps that the scan took to remedy them.
Make sure you restart your computer before continuing to work.
This also helps fix the Bad System Config Info error.
5. Run an Antivirus Scan
The stop code could be caused by malware on your system. Malware can alter system files and processes and make them unusable.
You can use either Windows Defender or one of the best third-party antivirus suites for Windows of your choice. Just make sure you run a deep, full-system scan.
6. Update Your Drivers
Bad drivers are one of the most common causes of the stop code. Therefore, it’s sensible to check that none of them require updates.
To check the status of your drivers, right-click on the Start tile, select Device Manager, and scan through the list to see whether any devices have a yellow exclamation point alongside them.
If you find an exclamation point, right-click on the device in question and choose Update Driver Software from the context menu.
7. Uninstall Recent Windows Updates
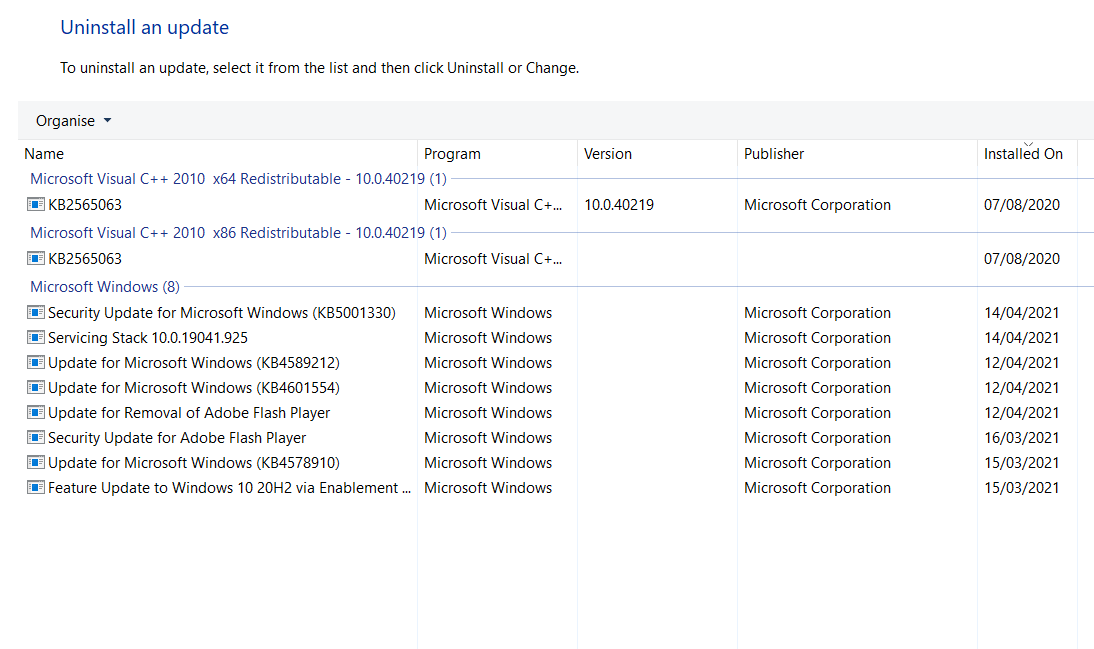
If your problem has only just started, a recent Windows update could be to blame. Thankfully, it’s easy to uninstall recent updates, so you can see if your issue goes away.
To uninstall an update, open the Settings app and go to Update & Security > Windows Update > Update History > Uninstall Updates. Highlight the update you want to remove from your system, then hit the Uninstall button at the top of the window.
8. Perform a Clean Boot
A clean boot is a start-up mode that uses the bare minimum number of drivers, processes, and programs. Once your computer is running, you can start to load the missing processes in a bid to isolate the problem.
To clean boot your computer, follow the step-by-step instructions below:
- Type System Configuration in the Start menu search bar and select the Best Match
- Click on the Services tab
- Unmark the checkbox next to Hide all Microsoft Services
- Click on the Disable All button
- Select the Startup tab
- Click on Open Task Manager
- In the new window, click on the Startup tab again
- Disable all the items in the list
- Restart your computer
9. Restore Your System
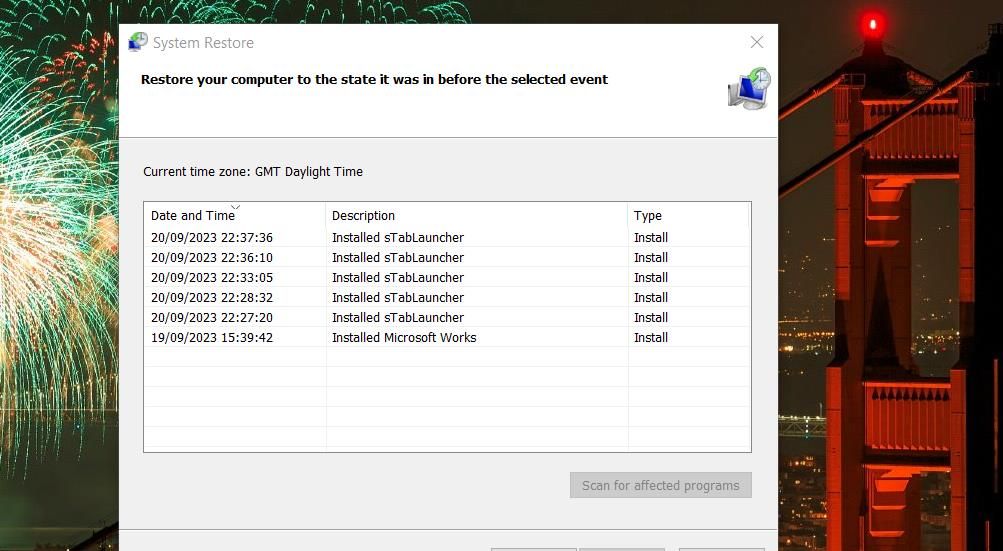
You can try to roll back your computer to a previous state using the System Restore tool. This option is only a possibility if you have enabled the creation of restore points before your stop code problems started.
To use the System Restore tool, type «restore» into the Start menu search bar and select Create a restore point. In the resulting menu, click System Restore to open the utility. Follow the on-screen instructions to choose a restore point and move your system back to that prior state.
10. Update the BIOS
As a final throw of the dice, you can try to update your computer’s BIOS.
Unfortunately, there is no standardized method to do so; it depends on your computer manufacturer. Refer to the company’s support literature for guidance.
Fixing the Critical Process Died Error on Windows
If none of the above tips fix your problem, is it time to throw your computer against the nearest wall and head to the shops?
Actually, there’s one throw of the dice remaining. The last recourse is to reset Windows or reinstall a fresh copy of Windows. Now, if that fails, it definitely means you have a hardware issue on your hands; in that case, heading to the local tech shop would be a good idea.