
При установке обновлений Windows 11 или 10 некоторые пользователи могут столкнуться с ошибкой установки 0x800f081f, при этом повторные попытке скачивания и установки обновления обычно не срабатывают.
В этой инструкции подробно о способах, которые могут помочь исправить ошибку и установить обновление, с которым возникла проблема. Обратите внимание: если ошибка появляется при установке .NET Framework, решения приведены в отдельной инструкции.
Очистка кэша обновлений и сброс компонентов Центра обновлений Windows

Как и при большинстве других ошибок Центра обновлений, первое, что следует попробовать выполнить в случае ошибки 0x800f081f — очистку кэша обновлений, для этого достаточно выполнить следующие действия:
- Запустите командную строку от имени администратора (как это сделать).
- По порядку введите следующие команды (если некоторые сообщат об ошибке, пропускаем и переходим к следующей):
net stop bits
net stop wuauserv
net stop appidsvc
net stop cryptsvc
ren C:\Windows\SoftwareDistribution SoftwareDistribution.old
ren C:\Windows\System32\catroot2 Catroot2.old
net start bits
net start wuauserv
net start appidsvc
net start cryptsvc
- Перезагрузите компьютер.
Выполнив перезагрузку, попробуйте снова скачать и установить обновление — возможно, в этот раз всё пройдёт исправно.
Если описанные шаги не привели к решению проблемы, попробуйте выполнить полный сброс компонентов Центра обновления Windows:
В ситуации, когда вышеописанные шаги не помогли, можно сделать предположение, что проблема не ограничивается Центром обновлений и его компонентами, возможно, её источник — сама Windows 11 или Windows 10, а точнее какие-то неполадки в её работе, об устранении которых — в следующем разделе.
Дополнительные варианты решения
Ошибка 0x800f081f может быть вызвана повреждением системных файлов Windows, чтобы восстановить их, запустите командную строку от имени администратора и по порядку выполните команды:
dism /online /cleanup-image /restorehealth
sfc /scannow
После чего перезагрузите компьютер и повторите установку обновления.
Если не помогло и это, можно попробовать такие варианты:
- Выполнить поиск обновления в официальном каталоге обновлений по его KB-номеру, скачать обновление и выполнить установку вручную.
- По некоторым сообщениям пользователей может сработать отключение компонентов .NET Framework в Win+R — appwiz.cpl — дополнительные компоненты, перезагрузка и повторное их включение.

- Если на компьютере присутствуют сторонние антивирусы, а также программы очистки места на диске или оперативной памяти в автоматическом режиме, попробуйте временно отключить их.
- Попробуйте откатить систему с использованием точек восстановления: нажмите клавиши Win+R на клавиатуре, введите rstrui и нажмите Enter, выберите недавнюю точку восстановления, когда всё работало исправно и попробуйте выполнить откат, а после него вновь установить доступные обновления.

- На всякий случай, выполните проверку компьютера на наличие вирусов и других вредоносных программ, но используя не тот антивирус, который у вас установлен, а другие варианты — KVRT, Kaspersky Recue Disk.


И, наконец, в крайнем случае можно попробовать выполнить «Обновление на месте» для исправления ошибок Windows и, с большой вероятностью, всех ошибок при установке обновлений.
After every rollout of cumulative updates and feature release, users have been accustomed to encountering certain issues. Error 0x800f081f is such an error code that appears failing the installation of the update. Further, this frustrating error prevents the downloading of the patch or build, as a result, Windows 10 or 11 couldn’t receive the update.
Error Code 0x800f081f Windows 11 and 10 might occur due to broken components, corrupt system resources, and incorrect configuration of gpedit. Furthermore, enabled Developer mode, regedit, and issues with .Net Framework may also cause this problem. Wrong download path of Windows update and low disk space are the reason behind this nagging issue.
Error 0x800f081f Windows 11 and 10 Update
Here is How to fix Error 0x800f081f Windows 11/10 Update –
1] Re-establish Windows Update Components manually
For Windows updates to work reliably and help the process running seamlessly till the end the components must be intact. Services like wuauserv, BITS control this functionality, and any misconfiguration in these results in Microsoft update error 0x800f081f. Hence, in order to fix that you must reset the Windows update components rigging out any sort of bugs. Follow the instructions for the same –
- Click – Search icon from the taskbar.
- Type – cmd.
- Choose – Run as administrator.
- When a UAC arrives, click – Yes.
- On the Command Prompt, insert bellow lines one at a time and hit Enter after each –
net stop bits
net stop wuauserv
Del “%ALLUSERSPROFILE%\Application Data\Microsoft\Network\Downloader\qmgr*.dat”
cd /d %windir%\system32
regsvr32.exe atl.dll
regsvr32.exe urlmon.dll
regsvr32.exe mshtml.dll
regsvr32.exe shdocvw.dll
regsvr32.exe browseui.dll
regsvr32.exe jscript.dll
regsvr32.exe vbscript.dll
regsvr32.exe scrrun.dll
regsvr32.exe msxml.dll
regsvr32.exe msxml3.dll
regsvr32.exe msxml6.dll
regsvr32.exe actxprxy.dll
regsvr32.exe softpub.dll
regsvr32.exe wintrust.dll
regsvr32.exe dssenh.dll
regsvr32.exe rsaenh.dll
regsvr32.exe gpkcsp.dll
regsvr32.exe sccbase.dll
regsvr32.exe slbcsp.dll
regsvr32.exe cryptdlg.dll
regsvr32.exe oleaut32.dll
regsvr32.exe ole32.dll
regsvr32.exe shell32.dll
regsvr32.exe initpki.dll
regsvr32.exe wuapi.dll
regsvr32.exe wuaueng.dll
regsvr32.exe wuaueng1.dll
regsvr32.exe wucltui.dll
regsvr32.exe wups.dll
regsvr32.exe wups2.dll
regsvr32.exe wuweb.dll
regsvr32.exe qmgr.dll
regsvr32.exe qmgrprxy.dll
regsvr32.exe wucltux.dll
regsvr32.exe muweb.dll
regsvr32.exe wuwebv.dll
netsh winsock reset
net start bits
net start wuauserv
- Exit the Command Prompt and restart the PC.
2] Repair Windows system files
You often install 3rd party software for your personal use without ensuring its trustworthiness and this may end up with the corruption of system files. Low-level coding in an app can damage the system configuration, .DLL, .exe files and these corrupted system resources can create hindrance in the installation of Windows update.
In this way, error 0x800f081f occurs but fortunately, Windows offers built-in utilities capable of dealing with this issue. SFC /Scannow, DISM.Exe, CHKDSK are the tools that efficiently take curative action to fix these kinds of messes. This procedure is fairly easy and you can perform it by following these few simple steps –
- Press – Windows + S.
- Type – cmd.
- Hit – Ctrl+Shift+Enter.
- When a User Account Control appears, click – Yes.
- In the Command Prompt, insert –
chkdsk C: /f /r /x. - Press the – Enter.
- When the scanning process finishes, close the console and then reboot the device.
- After powering up, again open Command Prompt as administrator.
- This time, insert
SFC /Scacnowand hit – Enter. - Once the diagnosis procedure reaches 100%, execute the below command –
DISM.exe /Online /cleanup-image /Restorehealth /Source:C:RepairSourceWindows /LimitAccess- In the end, restart Windows 10.
3] Check whether Developer mode is turned off
Windows 10 Anniversary update brought out Developer mode feature especially for users interested in building applications and using visual studio. This setting supports Windows Subsystem for Linux, Bash shell, Device Portal, Device Discovery, and many more. But enabled disabled mode commonly produces problems during Windows update downloading and installing and this a part of history. So you must disable the mode as 0x800f081f error solution.
For Windows 10 –
- Press – Windows + I.
- Click – Update & Security.
- From the left pane, choose – For Developers.
- Move to the right.
- Make sure the toggle button of Install apps from any source, including loose files is turned off.
- When the system asks for your consent, click – Yes.
- Now, Press – Windows + X.
- Choose – Apps and Features.
- From the right pane, click – Optional features.
- Select – Windows Developer Mode.
- Hit – Uninstall.
- After completion, reboot your PC.
For Windows 11 –
- Click – Search.
- Type – Developer mode.
- Press – Enter.
- When the Settings page opens, click on the toggle switch of Developer mode to turn it off.
4] Run Windows Update Troubleshooter
Microsoft’s in-built windows troubleshooter is proven extremely useful in resolving various system errors. Therefore, if you ever face any kind of unusual thing on your Windows 10 or 11 system first put the utilities into use. The tool will scan for the reason behind the error and automatically prompt you to apply some fixes if there needs to be.
Windows update troubleshooter is one among these that diagnose and rectify the update related topsy turvy. So run the utility using the following guidelines –
- Press the – Windows key.
- Type in – troubleshoot.
- Hit – Enter.
- Move to the right.
- Click the – Additional troubleshooter. (For Windows 11, click on “Other troubleshooter”)
- From the next page, select – Windows update.
- Hit – Run the troubleshooter. (In case of Windows 11, click on “Run”)
- If the utility presents an automatic solution, click – Apply this fix.
- Or else, do whatever the utility suggests.
- Close the troubleshooter and then restart your device.
Once the troubleshooter finishes reboot your system and check if the error 0x800f081f still persists.
5] Configure Gpedit to fix 0x800f081f
Windows controls different settings and options from the Group Policy editor and grant permission to the administrator to make changes via this administrative tool. Every policy related to Windows update resides in the Gpedit allowing you to configure as per your preferences. It’s very much possible that the group policy might be imposing a restriction over Windows ability to download and install any sort of updates. In order to change the parameters using the following steps:
- Press – Windows + Q.
- Type in – gpedit.msc.
- Hit – Enter.
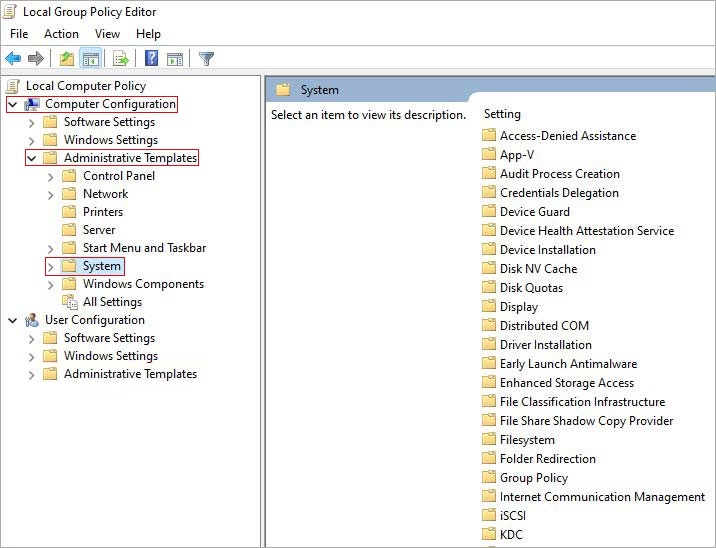
- From the left sidebar, select – Computer Configuration => Administrative templates => System.
- Move to the right.
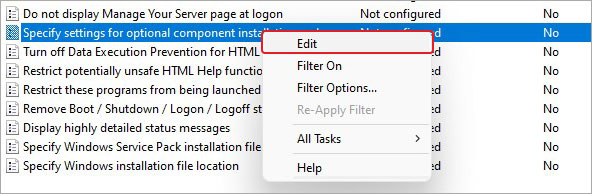
- Find – Specify settings for optional component installation and component repair.
- Double-click the same.
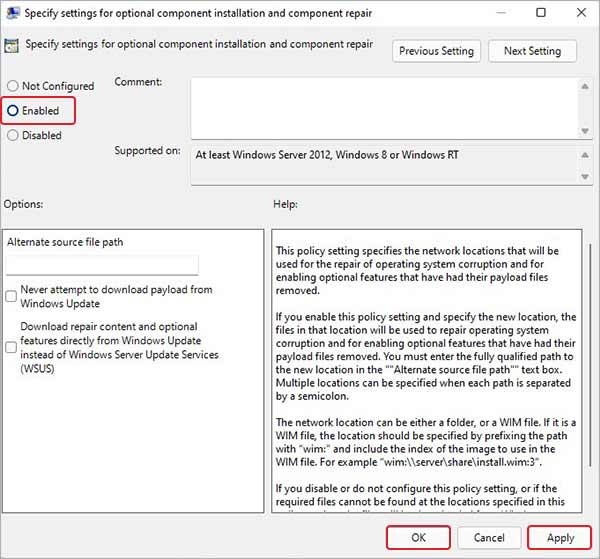
- Click the radio button set before Enabled.
- Hit – OK.
6] Download and install updates manually
Every patch, build, OEM driver update, and other which you receive through automatic Windows update are available on the Microsoft update catalog site. So when the update failed with 0x800f081f error occurs there is always an alternative to manually install the same. The website stores the MSU format of all the files and allows them to download easily. So follow the below method and install it manually –
- Visit the official webpage of Microsoft Update Catalog.
- Click its – search bar.
- Type the KB number you want to get.
- Hit the – Enter.
- Find the compatible package based on your system requirement.
- Click – Download.
- Double-click the setup file.
- Follow on-screen instructions to finish the installation process.
7] Use offline .NET Framework installer
Many times, cumulative update for .Net framework also encounter 0x800f081f error code and this solution addresses this issue. Luckily, you can get offline installer for exactly same version on the download center of Microsoft you can use this instead as an alternative. Follow the method –
- Visit – official Microsoft webpage.
- Select your preferred language.
- Click the – Download.
- Double-click the downloaded file.
- Follow on-screen instructions to finish the installation procedure.
- Restart Windows 11/10 PC and check if 0x800f081f fails to update error still persists.
8] Make sure .Net framework 3.5 is enabled
Disabled or uninstalled .Net framework couldn’t receive an automatic Windows update. So first ensure that it is enabled and if not then turn it on by underneath steps –
- Press – Windows key.
- Type – Windows feature.
- Hit – Enter.
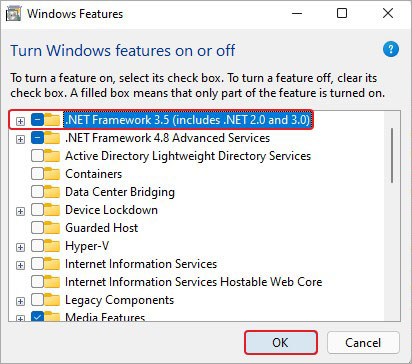
- Fill the checkbox set before – .NET framework 3.5 (includes .NET 2.0 and 3.0).
- Click – OK.
9] Clear the download path of Windows update
In this case, Registry string for Windows update has some unwanted DWORD that might obstruct the successful update installation. So delete them by following steps –
- Press – Win+S.
- Type – regedit.
- Hit the – Enter.
- When a User Account Control becomes visible, click – Yes.
- Go to –
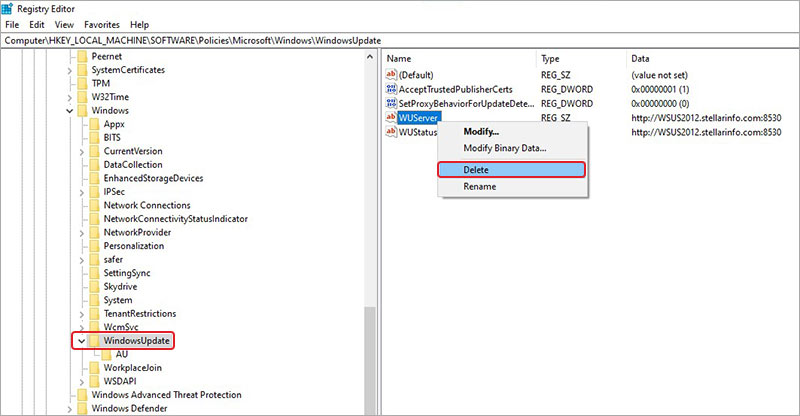
Computer \ HKEY_LOCAL_MACHINE \ SOFTWARE \ Policies \ Microsoft \ Windows \ WindowsUpdate
- Shift to the right-hand side and look for WUServer.
- Right-click the same and choose – Delete.
- Similarly, delete WIStatusServer.
- Restart your computer.
10] Reset Windows 11/10 to fix 0x800f081f problem
If you were unable to execute any of those above-mentioned solutions or if those were unable to solve the error 0x800f081f then you must go ahead with Reset this PC. It could be possible that malicious malware has taken hold of your system and it’s more susceptible to the current version of your OS. Hence performing the reset should rid your PC of any sort of virus moreover corruption that may have been causing the issue.
Here is a step by step procedure to accomplish that –
- Press Windows key and type – reset this pc.
- Hit – Enter.
- From the right pane, click – Get Started. (For Windows 11, click Reset PC)
- Select – Keep my files.
- Click – Next.
- Hit – Reset.
- Let the procedure finish without interruption.
11] Fix Windows 11 or 10 Update Error 0x800f081f with in-place upgrade
- Visit – Micrososft website.
- Click – Download tool now.
- Double-click the setup file you just got.
- When a User Account Control appears, hit – Yes.
- When the setup wizard becomes ready, click – Accept.
- Click the radio button present before – Create installation media (USB flash drive, DVD, or ISO file) for another PC.
- Hit – Next.
- Make sure Language, Edition, and Architecture are set correctly. Thereafter, click – Next.
- Click the radio button of ISO file and hit – Next.
- Select a location where you want to save the file.
- Click – Save.
- After completion, hit – Finish.
- Double-click the downloaded file and install it.
Methods list
1] Re-establish Windows Update Components manually
2] Repair Windows system files
3] Check whether Developer mode is turned on
4] Run Windows Update Troubleshooter
5] Configure Gpedit Group policy editor
6] Download and install updates manually
7] Use offline .NET Framework installer
8] Make sure .Net framework 3.5 is running
9] Clear the download path of Windows update
10] Reset Windows 10
11] In-place upgrade
That’s all!!
How to Fix Update Error 0x800f081f in Windows 10
If you’re getting error 0x800f081f when trying to update your operating system, you won’t get important system updates. This article will show you several methods to fix this error.
What Causes Error 0x800f081f
You may experience error 0x800f081f due to incompatibility issues caused by Microsoft .NET Framework 3.5. It has been determined that such incompatibilities occur when users enable NET Framework.
In Windows 10, NET Framework works as an on-demand feature, meaning that when the user turns it on, the Windows Update service tries to acquire the binaries of .NET and other files. If your computer has been incorrectly configured, you will get the 0x800f081f error because Windows Update cannot find the necessary files for NET.
If Microsoft NET Framework is the cause of error 0x800f081f, then you may be able to resolve the issue by using an offline NET Framework installer or enabling the currently installed NET Framework version manually. NET Framework can be enabled using a PowerShell Command, the Deployment Image Servicing, and Management tool, or the installation wizard.
Video Guide on How to Fix Windows Update Error 0x800f081f
Table of Contents:
- Introduction
- Solution 1. Run the Windows Update Troubleshooter
- Solution 2. Enable Microsoft .NET Framework using Command Prompt
- Solution 3. Run the System File Checker (SFC) Scan
- Solution 4. Run the Deployment Image & Servicing Management (DISM) Scan
- Solution 5. Configure the Group Policy Setting
- Solution 6. Upgrade Windows 10 Using the Media Creation Tool
- Video Guide on How to Fix Windows Update Error 0x800f081f
Download Computer Malware Repair Tool
It is recommended to run a free scan with Combo Cleaner — a tool to detect viruses and malware on your device. You will need to purchase the full version to remove infections. Free trial available. Combo Cleaner is owned and operated by Rcs Lt, the parent company of PCRisk.com read more.
Solution 1. Run the Windows Update Troubleshooter
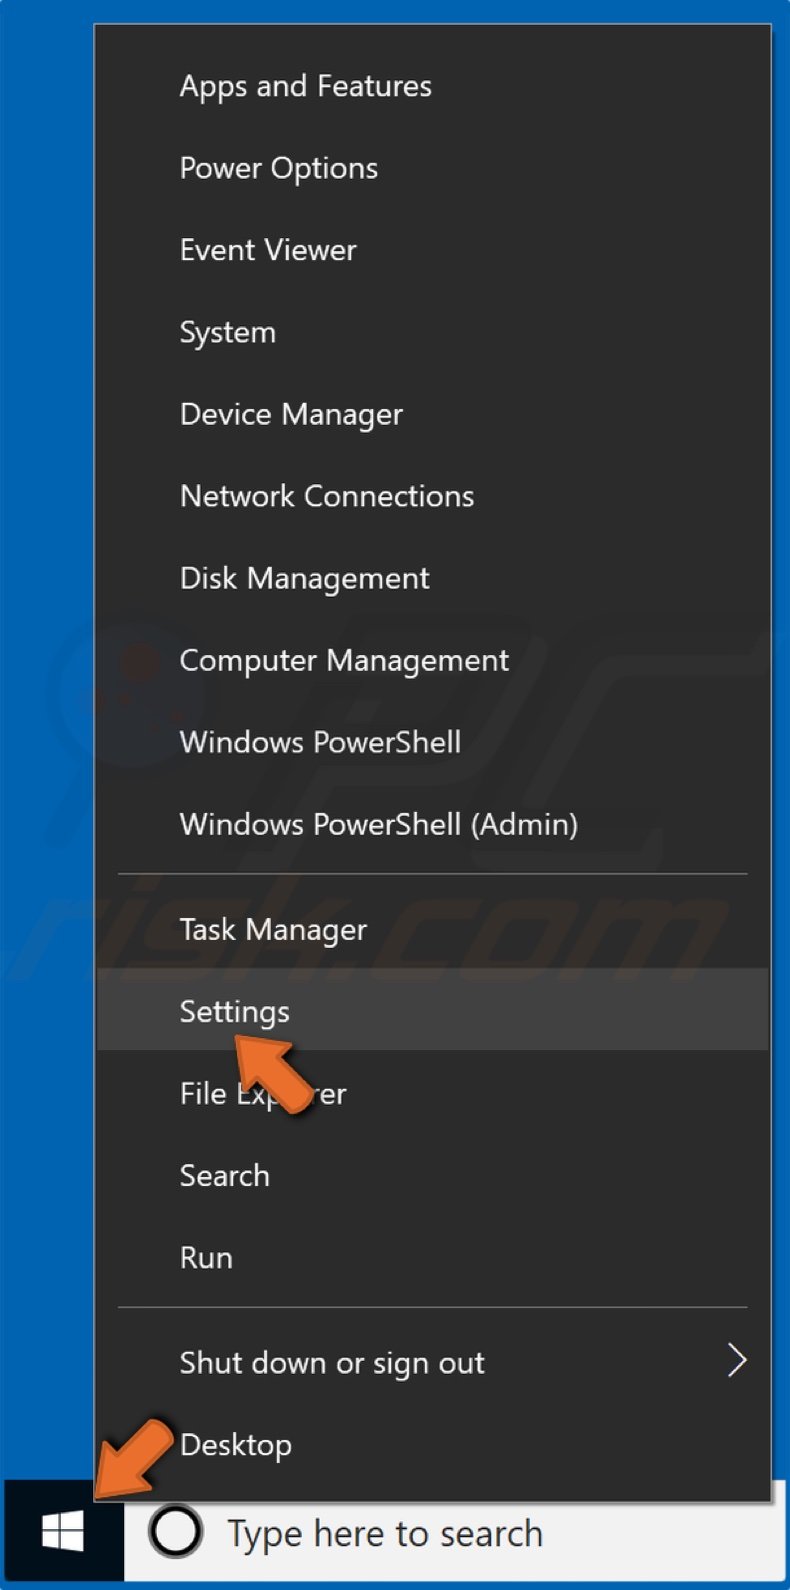
1. Right-click the Start Menu and click Settings.
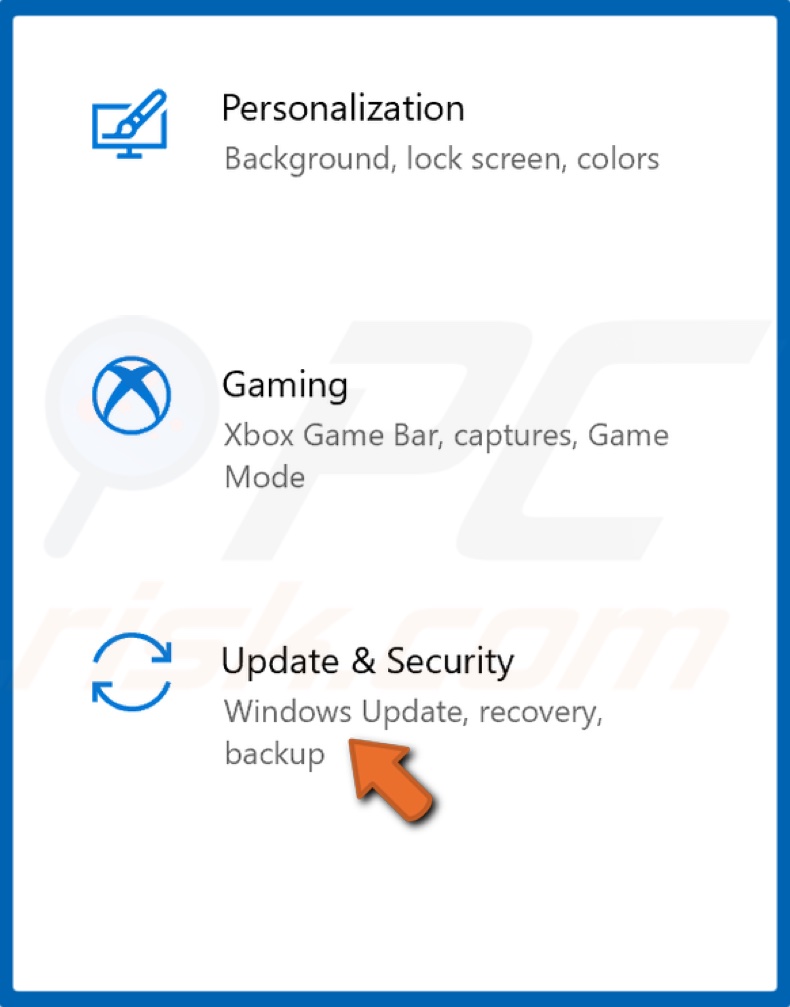
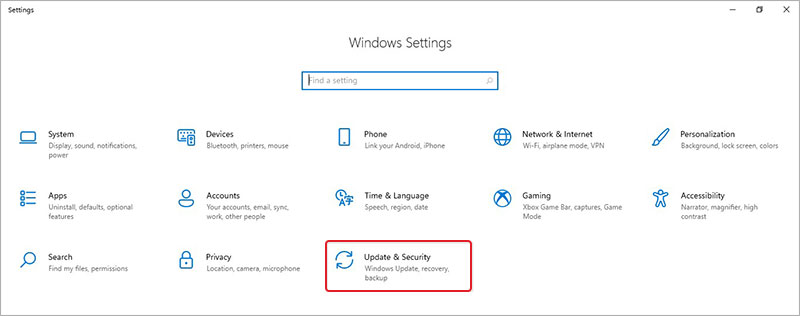
2. Select Update & Security.
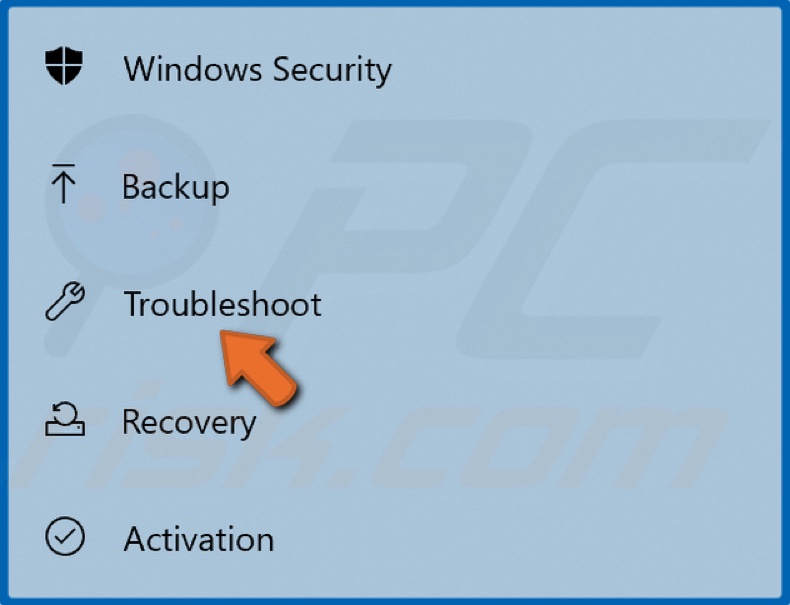
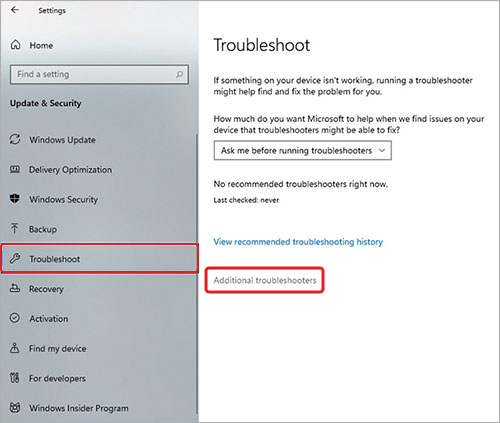
3. Click Troubleshoot.
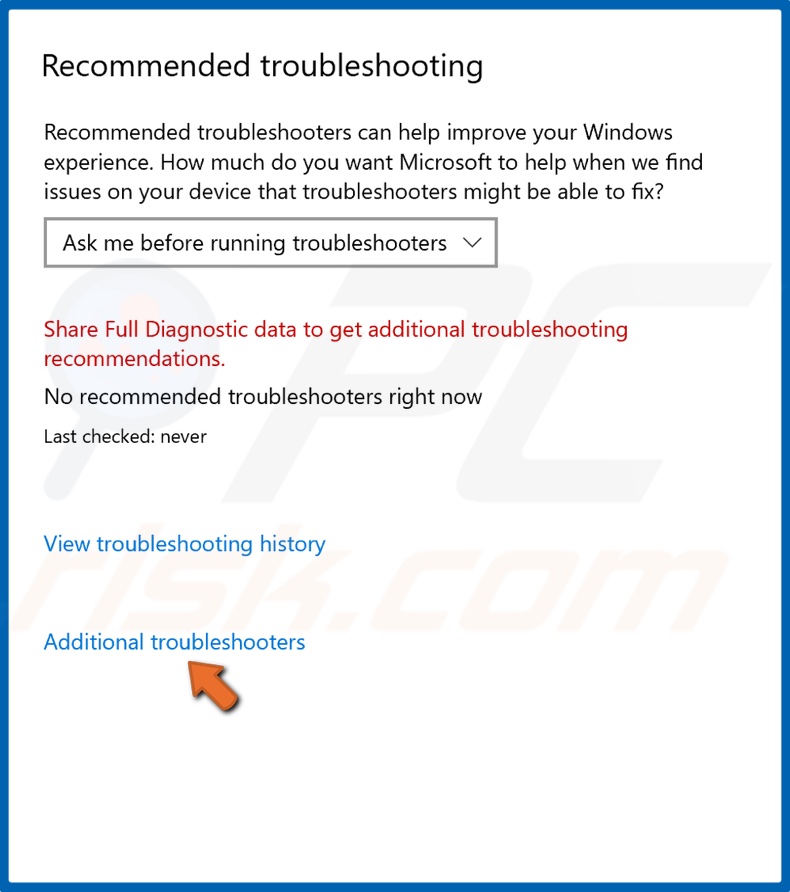
4. Click Additional troubleshooters.
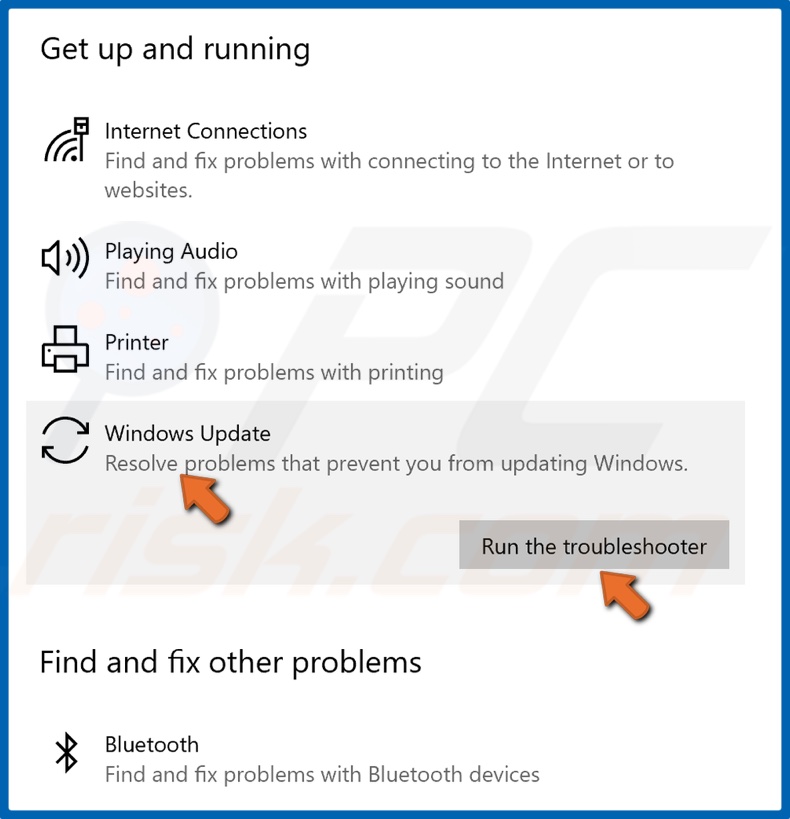
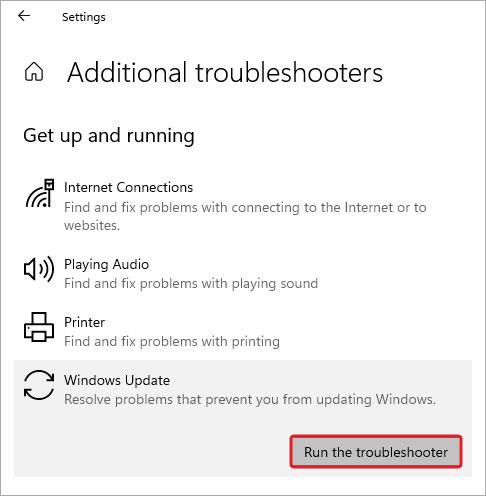
5. Select Windows Update and click Run the troubleshooter.
6. If the troubleshooter detects an issue, it will select and apply a fix automatically.
[Back to Table of Contents]
Solution 2. Enable Microsoft .NET Framework using Command Prompt
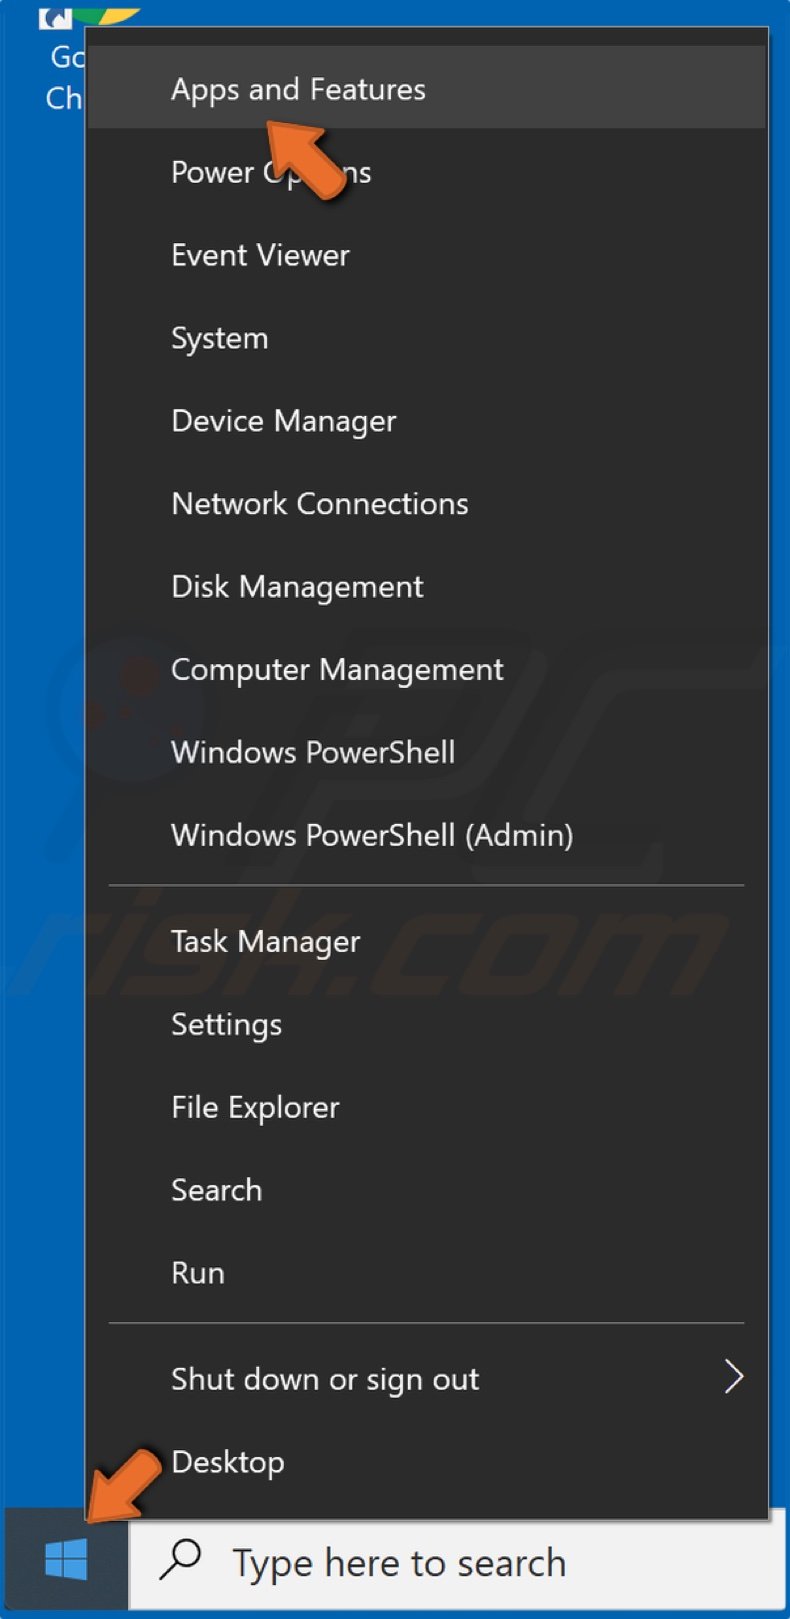
1. Right-click the Start Menu and select Apps and Features.
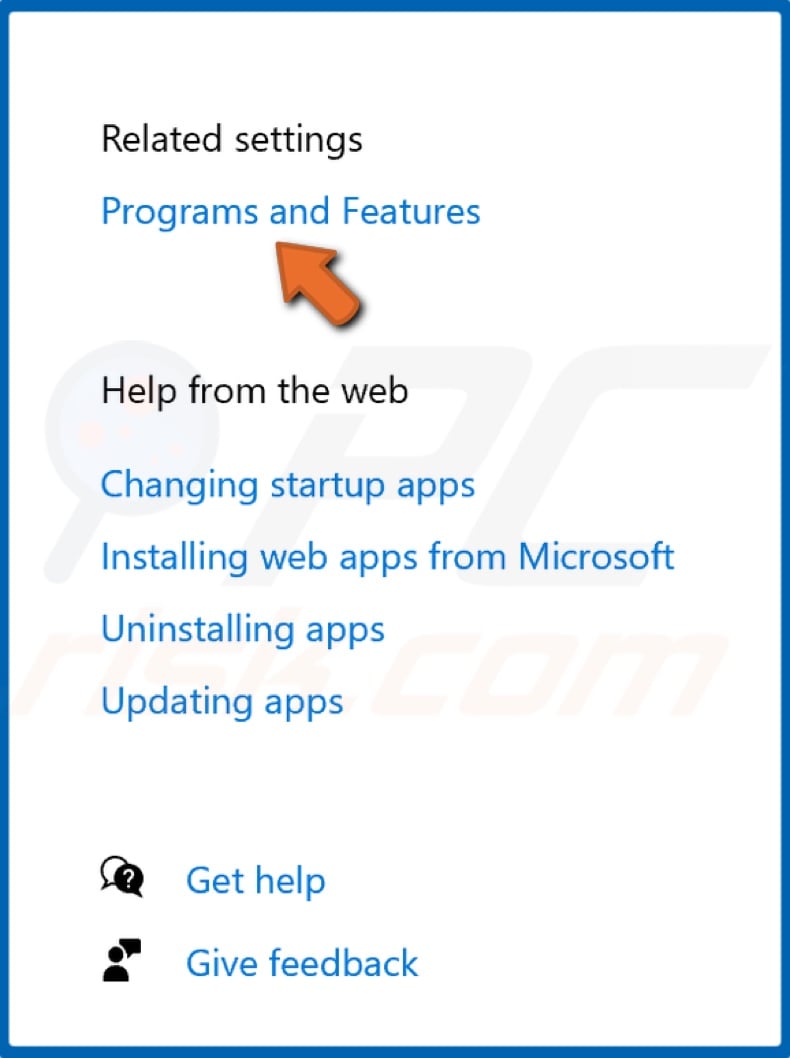
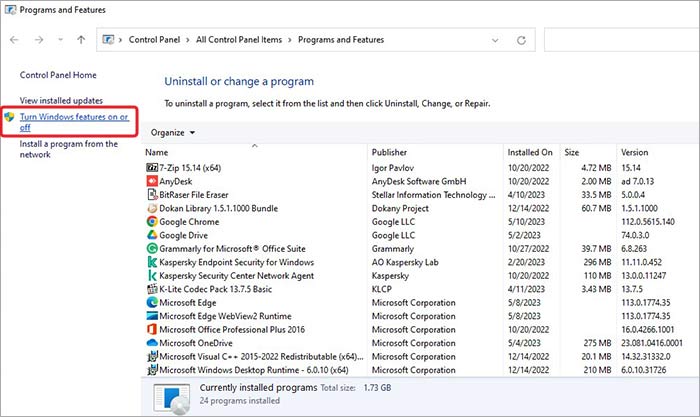
2. At the top-right of the window, select Programs and Features.
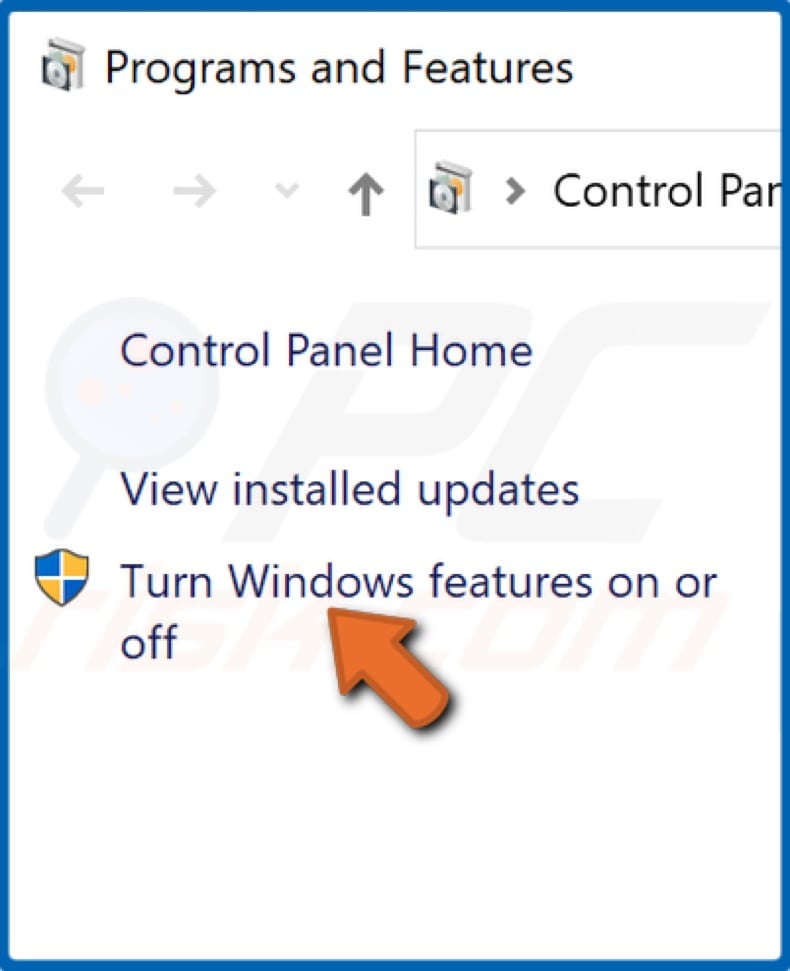
3. In the resulting Programs and Features window, click Turn Windows features on or off.
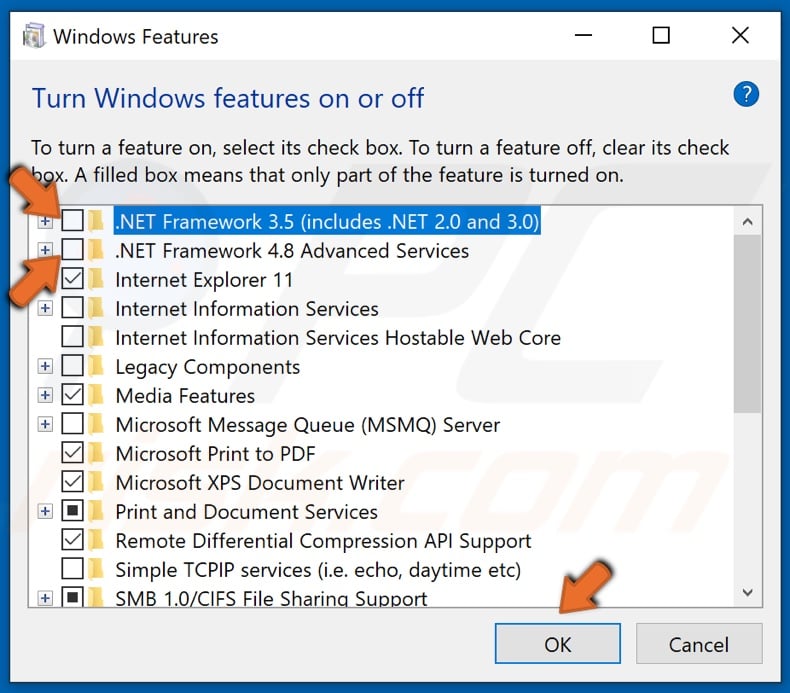
4. Find .NET Framework 3.5 and .NET Framework 4.8.
5. Uncheck the boxes next to .NET Framework 3.5 and .NET Framework 4.8 and click OK to disable them.
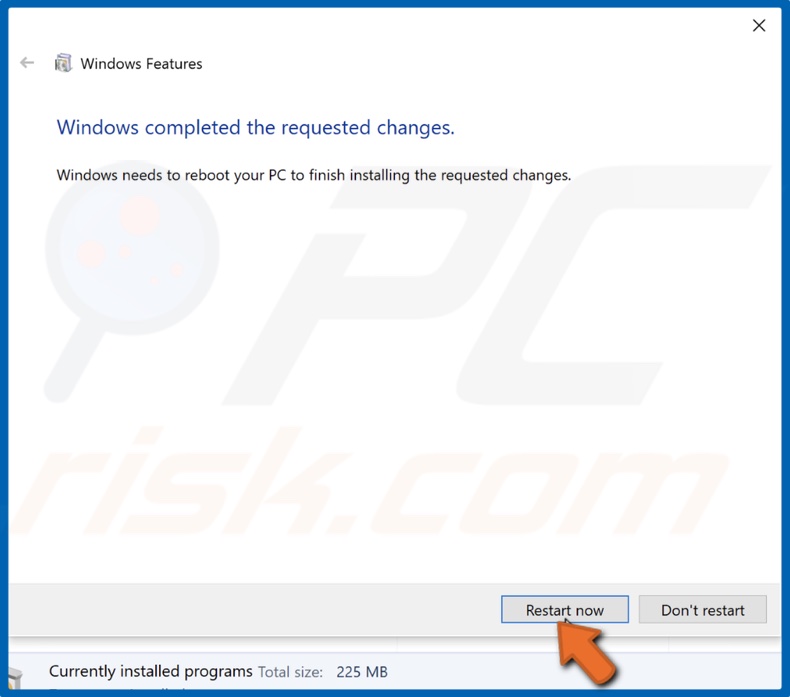
6. Click Restart Now.
7. Return to the Turn Windows features on or off window.
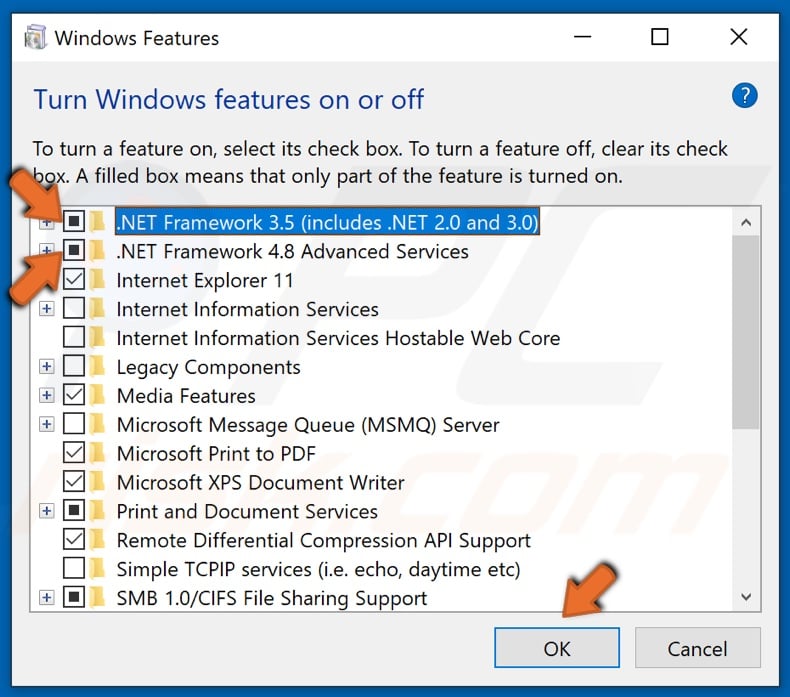
8. Check the boxes next to .NET Framework 3.5 and .NET Framework 4.8 and click OK.
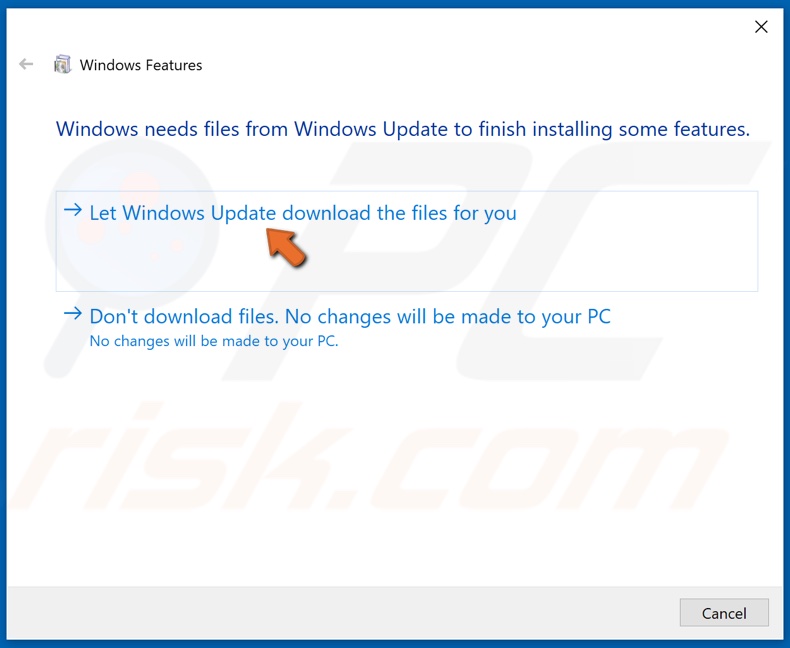
9. Then, click the Let Windows Update download the files for you option.
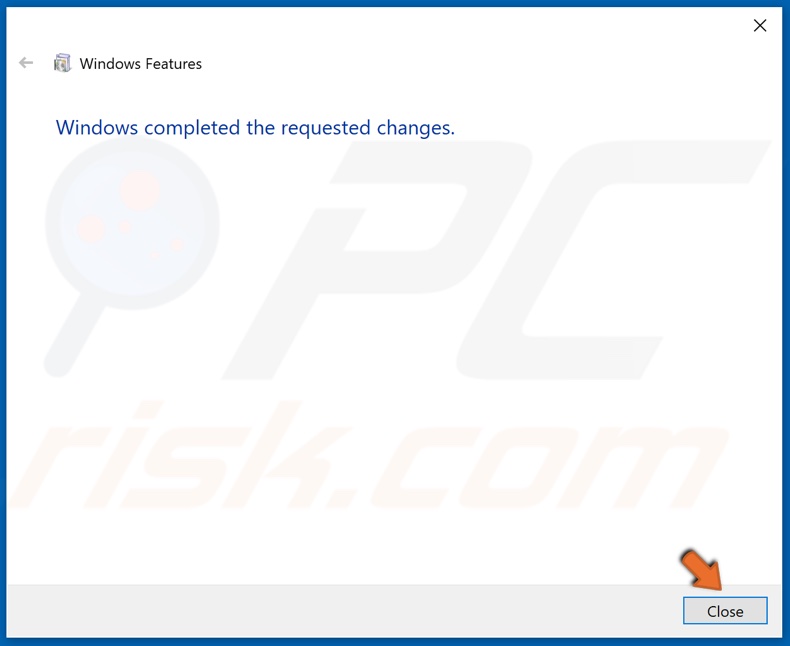
10. Click Close once the requested changes have been completed.

11. Then, Hold down Windows+R keys to open the Run dialog box.
12. Type in CMD in the dialog box, and hold down Ctrl+Shift+Enter to open elevated Command Prompt.
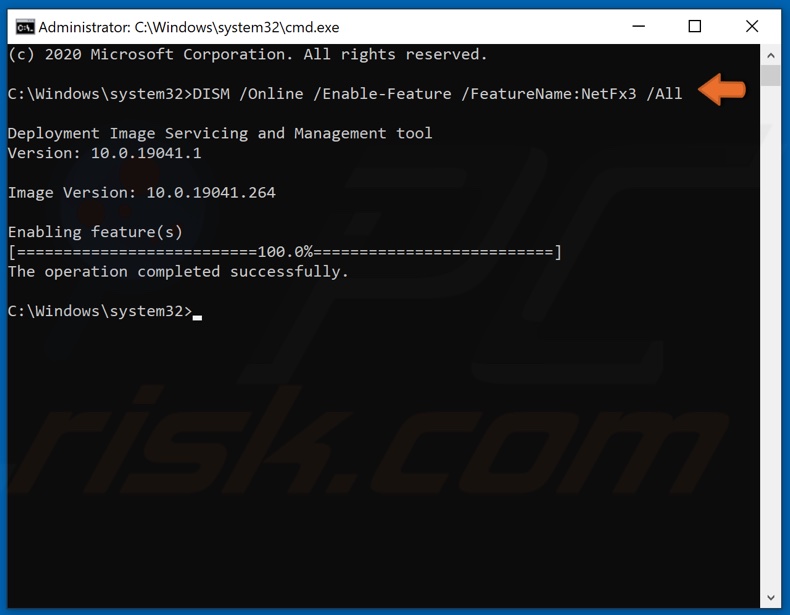
13. In the Command Prompt window, type in DISM /Online /Enable-Feature /FeatureName:NetFx3 /All and hit the Enter key.
14. Close the Command Prompt and try updating Windows.
[Back to Table of Contents]
Solution 3. Run the System File Checker (SFC) Scan
1. Hold down Windows+R keys to open the Run dialog box.
2. Type in CMD in the Run text box and hold down Ctrl+Shift+Enter keys to open the elevated Command Prompt.
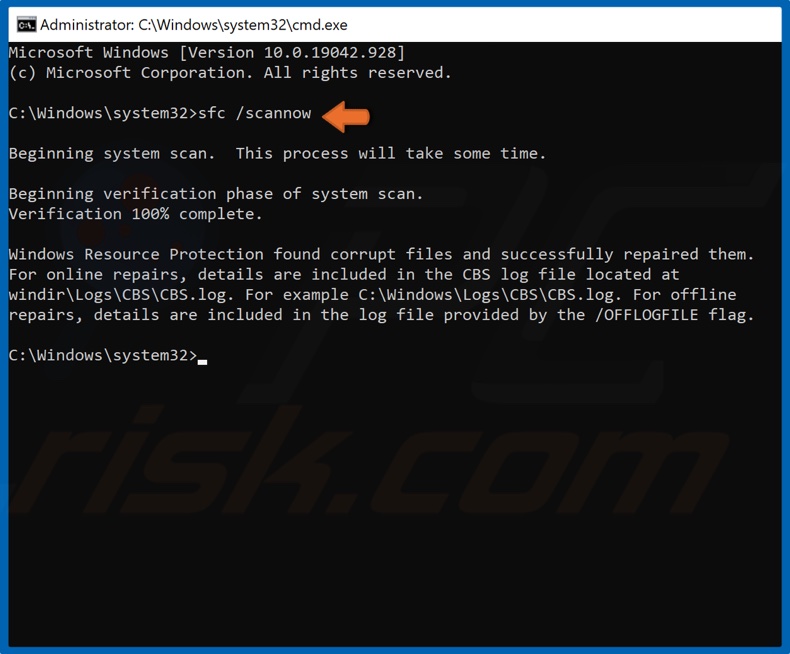
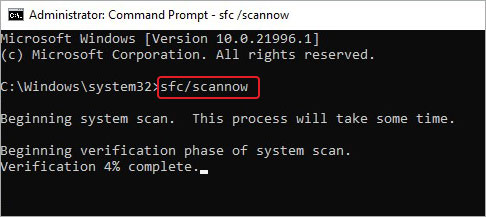
3. In the Command Prompt window, type in SFC /Scannow and hit the Enter key to start the scan.
4. Once the scan has been completed, restart your PC.
[Back to Table of Contents]
Solution 4. Run the Deployment Image & Servicing Management (DISM) Scan
1. Hold down Windows+R keys to open the Run dialog box.
2. Type in CMD in the Run text box and hold down Ctrl+Shift+Enter keys to open the elevated Command Prompt.
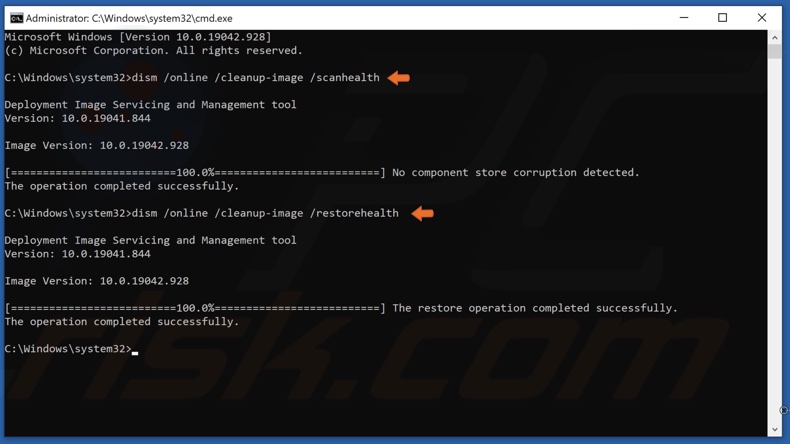
3. In the Command Prompt window, type in DISM /Online /Cleanup-Image /ScanHealth and hit the Enter key. This parameter will scan the component store for corruption.
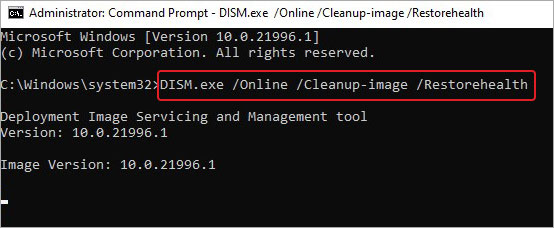
4. Type in DISM /Online /Cleanup-Image /RestoreHealth and hit the Enter key.
5. Once the process has been completed, try updating Windows 10.
[Back to Table of Contents]
Solution 5. Configure the Group Policy Setting
This solution is not possible on Windows 10 Home Edition since the Home Edition does not have the Group Policy Editor.
1. Hold down Windows+R keys to open the Run dialog box.
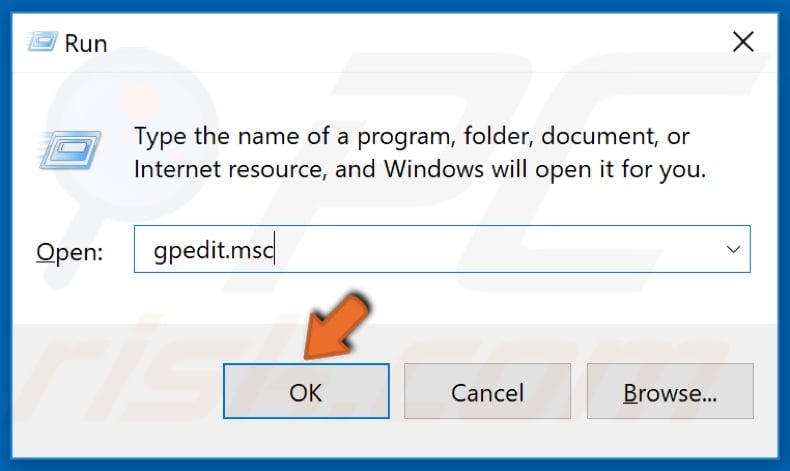
2. In the Run dialog box, type in gpedit.msc and click OK.
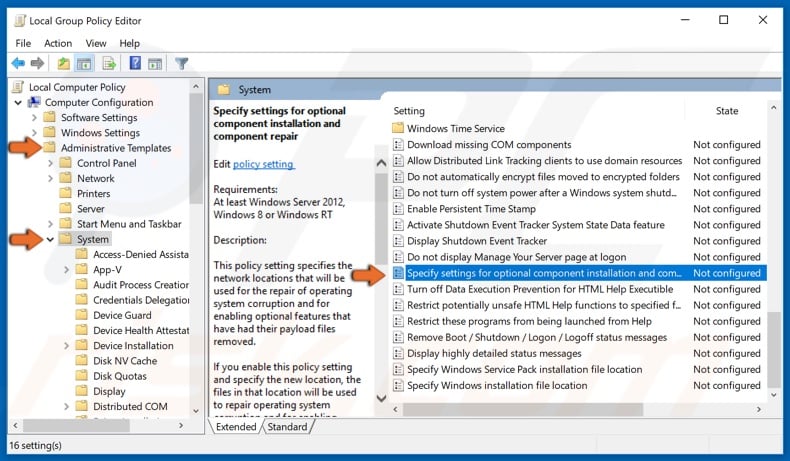
3. In the left pane, expand Administrative Templates.
4. Then, select System.
5. In the right pane, open the Specify Settings for Optional Content Installation.
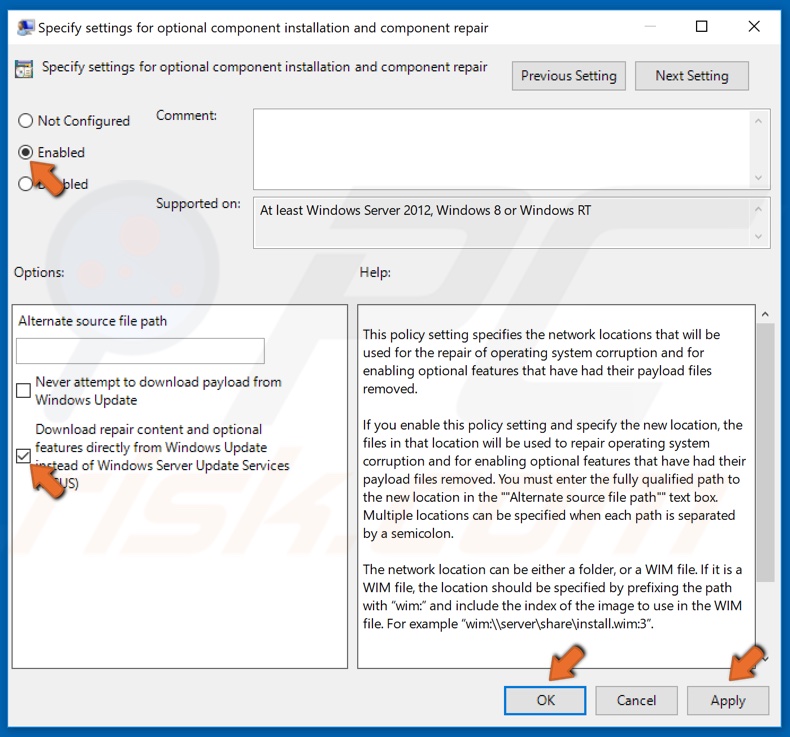
6. At the top-right of the window, select the Enabled option.
7. Then, mark the Download Repair Content and options features directly from Windows Update instead of Windows Server Update Services (WSUS) checkbox.
8. Click Apply and click OK to save the changes.
[Back to Table of Contents]
Solution 6. Upgrade Windows 10 Using the Media Creation Tool
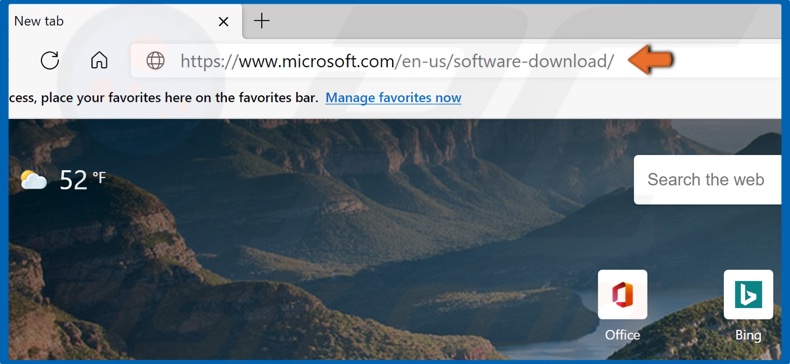
1. Open your web browser, and go to Microsoft’s Download Windows 10 web page.
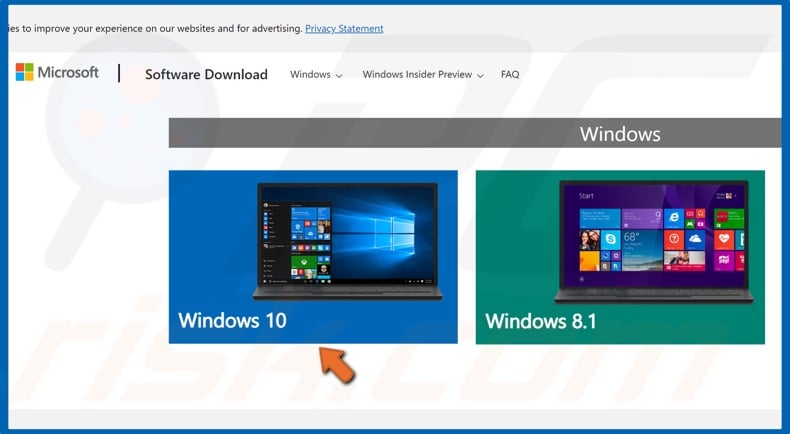
2. Once on the website, select Windows 10.

3. Click Download tool now to get the Media Creation Tool.
4. Run the Media Creation Tool once it’s been downloaded.
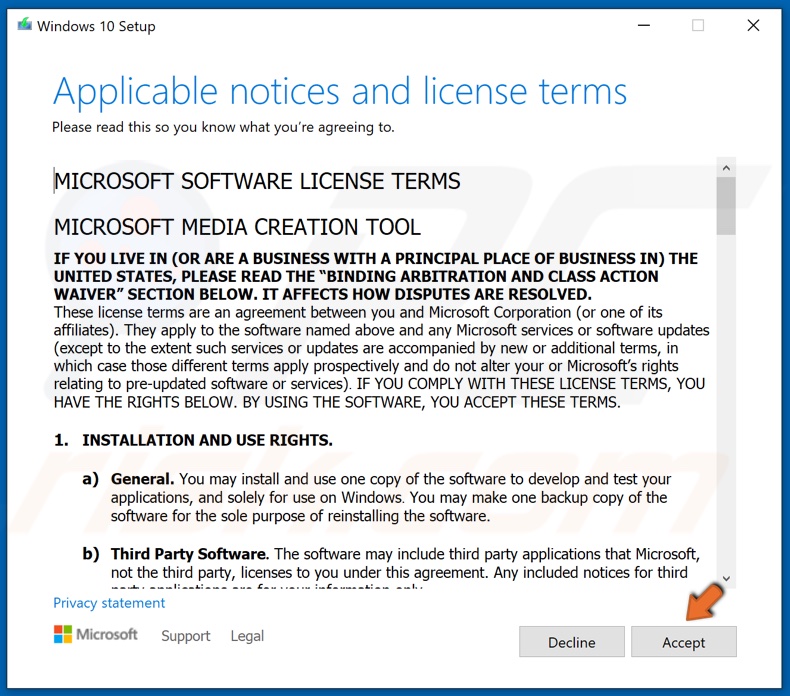
5. Then, Accept the license agreement.
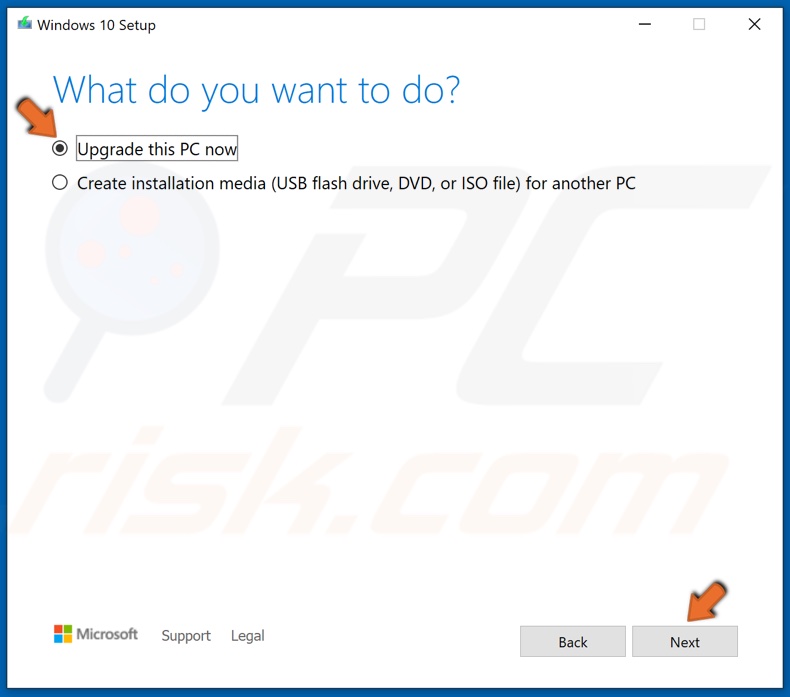
6. Make sure that the Upgrade this PC now is ticked, and click Next.
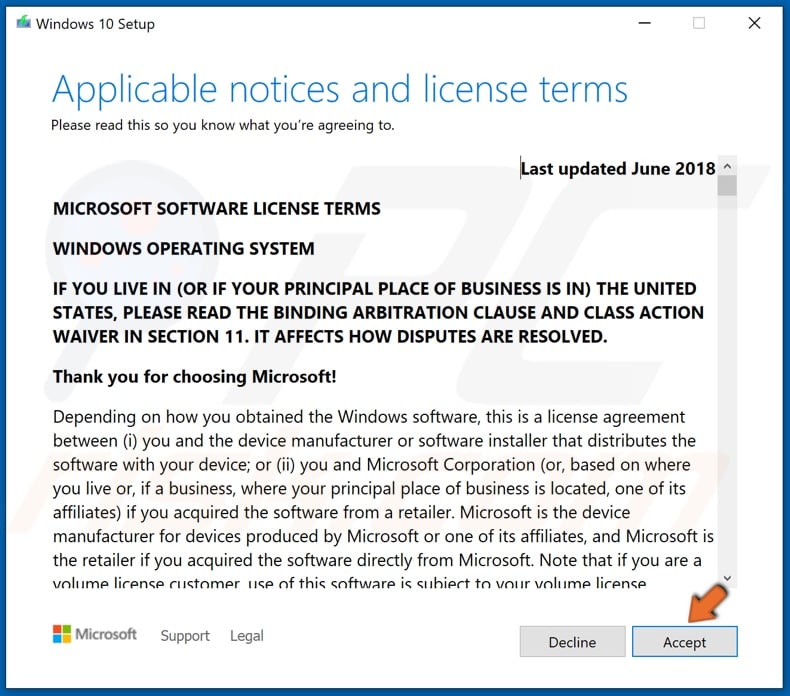
7. Then, Accept the Windows 10 license agreement.
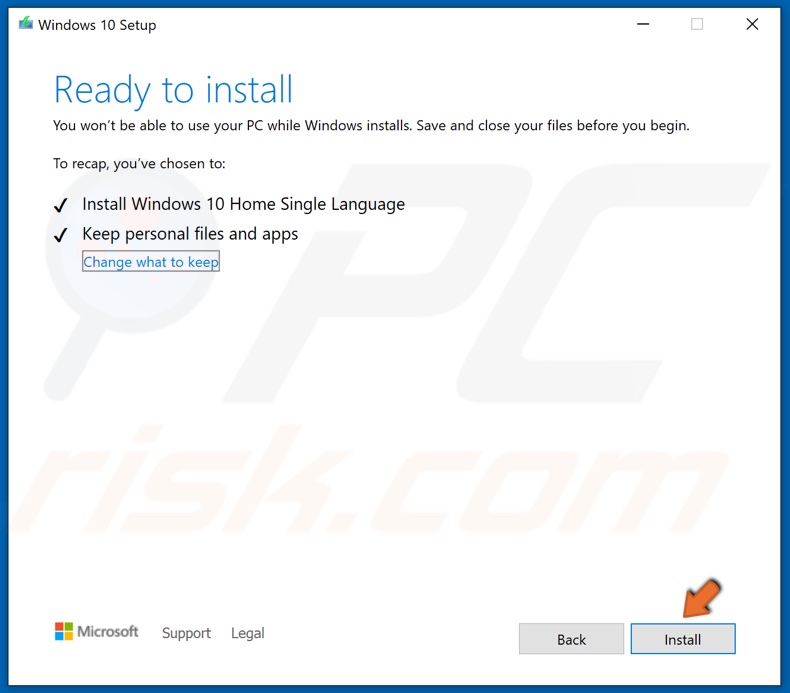
8. You can opt to keep your personal files and apps, but if you want a clean installation of Windows 10, click the Change what to keep button to customize the installation settings.
9. Then, click Install, and the setup will begin installing Windows 10.
Take note that the installation will take some time, and your computer will restart several times throughout the installation.
[Back to Top]
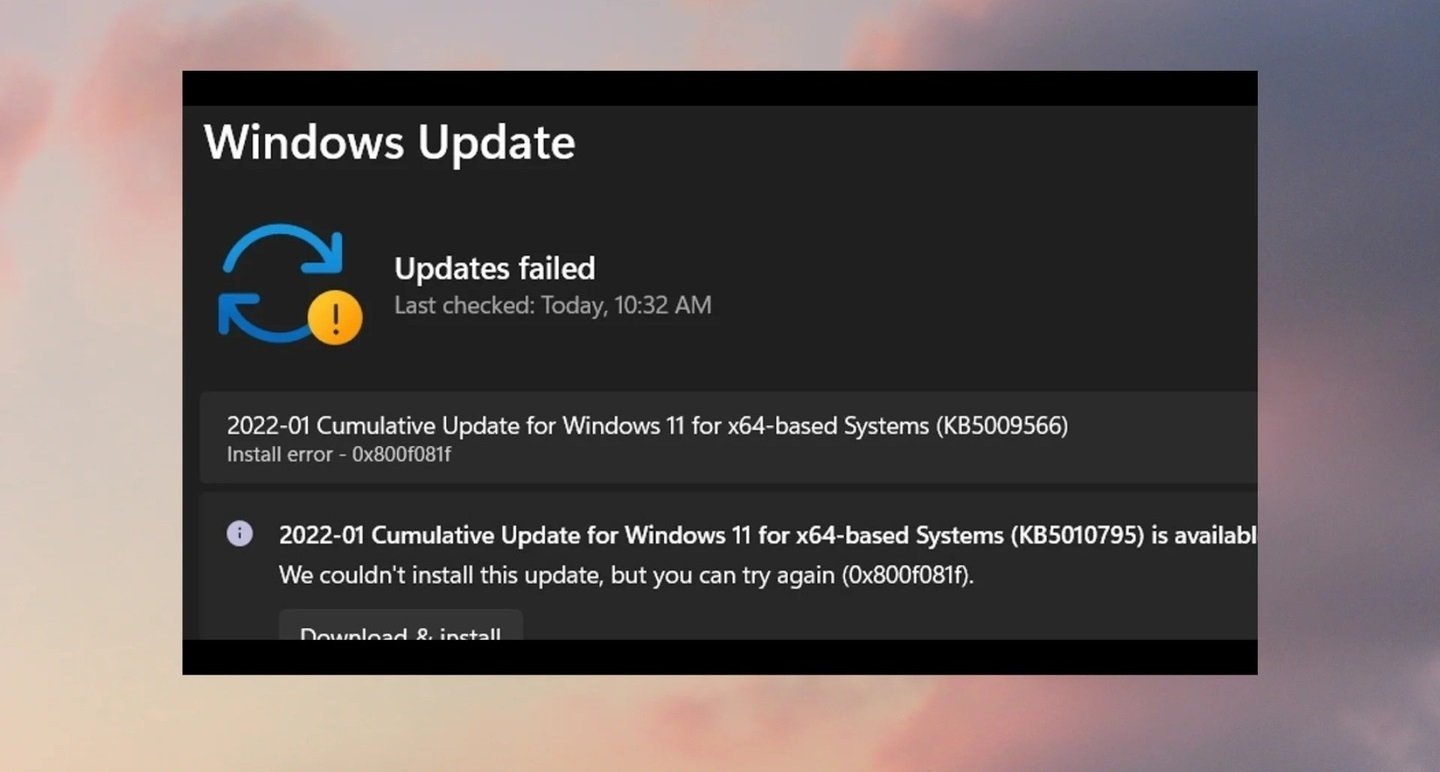
Windows 11 has come a long way since its debut back in 2021. Numerous updates and fixes later, however, the OS is still riddled with bugs that are coming to light every day. One such bug is the install error – 0x800F081F, which pops up while installing an OS update. The reasons behind this are many like corrupted system files, issues with the .NET framework, and more. Let’s read further and see what this issue is.
What is the 0x800F081F Install Error?
The 0x800F081F install error code is a common system error that first came into light when Windows 11 users were unable to install the Windows 11 (KB5016632) 2022-08 cumulative update.
Users encountering this error speculated that this error code originated due to unresolved bugs in the update. This error is generated due to issues with the .NET Framework or corrupt registry keys or system files. It has also affected many users running Windows 10 and Windows Server 2016. Here are some reasons that could cause your Windows 11/10 PC to show the 0x800F081F error code –
- Using the insider build
- Compatibility issues .NET Framework
- Damaged or missing registry keys
- Corrupt system files
- Buggy update
- Improperly installed OS update
- Corrupted user profile
Methods to Fix the Install Error 0x800F081F on Windows 11
Let’s look at some ways to get rid of the install error – 0x800F081F on your Windows 11 PC.
Method 1: Run Windows Update Troubleshooter
Sometimes, the updates that you are trying to install could be buggy or there could be an issue with the update wizard. In such a case, you can encounter the 0x800F081F error code on your computer screen. You can easily fix it by running the Update troubleshooter. Here are the steps to do so –
- Press WINDOWS + I to open Settings.

- Click on Update & Security and then click on Troubleshoot in the left pane.
- Click on Additional troubleshooters.
- Look for Windows Update in the list and click on it.
- Click on Run the troubleshooter and wait for it to finish the process.
- Follow the instructions as prompted by the wizard.
Method 2: Edit Group Policy
This is another solution to fix the 0x800F081F error on your Windows 11 PC. Here, you can adjust the group policy settings that allow you to set up a Windows update configuration for the installation of optional components. Here’s what to do in this method –
- Press WINDOWS + R to launch RUN, type gpedit.msc and hit Enter.
- Expand the following in the left pane – Computer Configuration > Administrative Templates > System.
- Locate the Specific settings for optional component installation and component repair entry on the right-hand side pane.
- Right-click on it and click on Edit.
- Choose the Enabled option and then click on Apply and OK.
- Restart your computer.
Method 3: Use the DISM Command to Service Windows 11 OS Image
You can use the DISM or Deployment Image Servicing and Management to service and repair Windows images. You can run this to fix any issue with your Windows image that might be causing the 0x800F081F error to pop up on your Windows computer. To do this –
- Launch CMD with administrative rights.
- Type DISM.exe /Online /Cleanup-image /Restorehealth in the terminal and press Enter.
- Wait for it to finish.
- Once it is finished and the “The operation completed successfully.” message appears, close everything and reboot your PC.
Method 4: Perform SFC Scan
SFC or System File Checker is a tool that is used for scanning the system files for any data corruption. This tool replaces corrupted system files using a cached copy available locally on the computer itself. This is pretty easy to use –
- Launch the elevated Command Prompt and type in sfc /scannow.
- Press Enter.
Wait for the scan to complete. Once it is done, restart your computer and see if this has fixed the issue.
Method 5: Remove WUServer and WIStatusServer from the Registry
Certain registry keys can sometimes interfere with the installation of updates and cause errors like the 0x800F081F to pop up. You can easily fix it by deleting the following registries from the system. However, you should first take a backup of these. Once you have taken a backup of these registries, follow the steps below carefully –
- Press WINDOWS + R and type regedit. Press Enter.
- In the address bar, paste the following address and press Enter – HKEY_LOCAL_MACHINE\SOFTWARE\Policies\Microsoft\Windows\WindowsUpdate
- Locate WUServer & WIStatusServer. Right-click on them and delete them.
- Restart your computer.
Method 6: Reinstall Microsoft .NET Framework 3.5
The install error 0x800F081F is due to an issue with the Microsoft .NET Framework 3.5. In this case, you can reinstall Microsoft .NET Framework 3.5 to fix the issue at hand. To do so –
- Press WINDOWS + I to open Windows Settings.
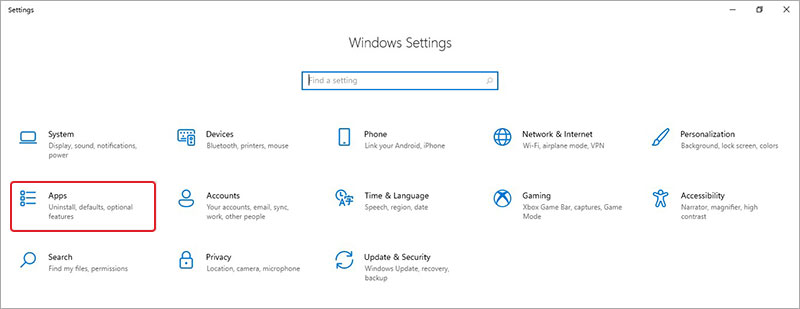
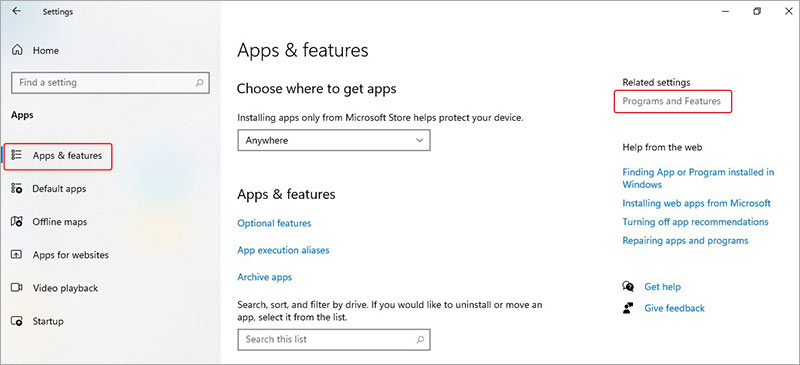
- Click on Apps and then Apps & features in the left pane.
- Locate Related settings and click on Programs and Features under it.
- In the next window, click on Turn Windows features on or off.
- Select the .NET Framework 3.5 (includes .NET 2.0 and 3.0) and click OK.
- Wait for the installation to finish.
Method 7: Manually Install Windows 11 Update
If you are unable to install Windows 11 update that is available in the updates, you can manually download it from the Microsoft Catalogue website and install it. Here are the steps to do this –
- Open the Microsoft Catalogue website.
- In the search bar, type in the KB number and press Search.

- Locate the correct update from the available list of update packages. Click on it.
- Click on Download.
- A download link will appear. Right-click on it and click on Save link as…
- Choose the location where you want to save it and click on Save.
- Once downloaded, go to the save location, and double-click on it to run.
- Follow the instructions as prompted by the installer.
Method 8: Reset Windows 11 without Losing Data
Resetting Windows 11 is the last resort you should employ if none of the above-mentioned methods work. However, you should take a complete backup of your data before proceeding with it. Carefully follow the steps below to reset your PC without losing data –
- Press WIN + I to open the Settings app.
- Click on Update & Security.
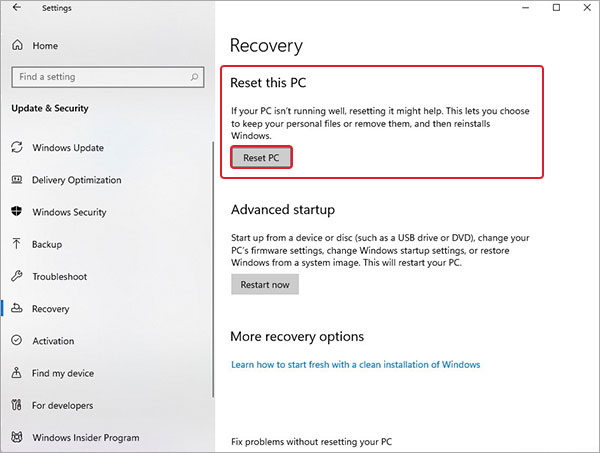
- Click Recovery in the left pane and then click on Reset PC under Reset this PC.
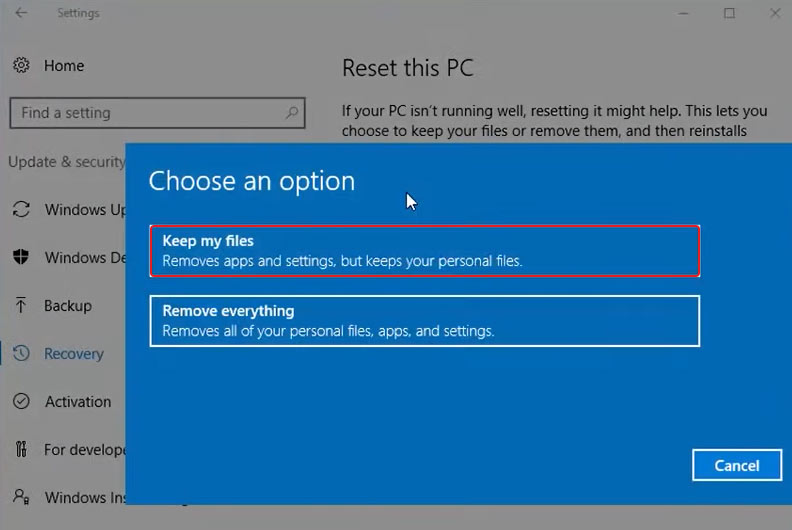
- A prompt will ask you to either Keep my files or Remove everything. Click on Keep my files and proceed further.
- In the next section, you will have to choose between Cloud download or Local reinstall. Carefully, select whatever you feel comfortable with.
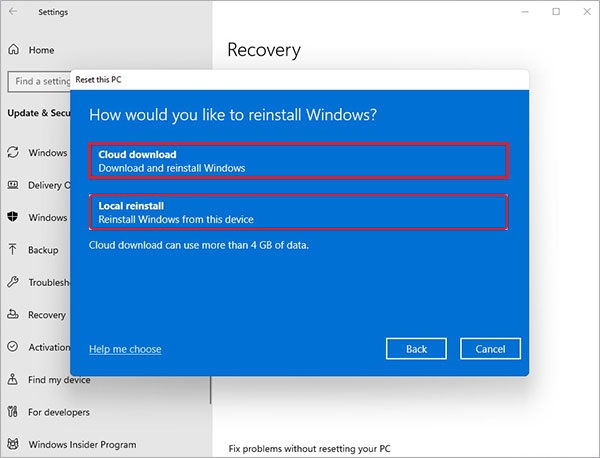
Note – Selecting cloud download will download a fresh image of Windows OS and remove any custom OS image that came preinstalled with the PC.
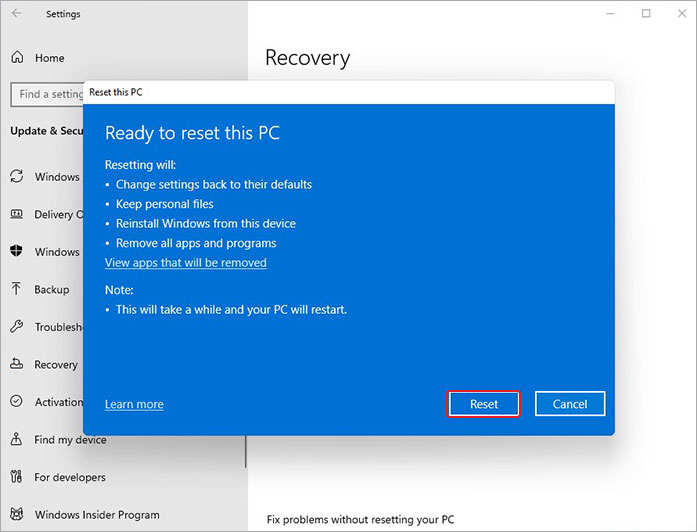
- Proceed with the wizard by carefully reading the reinstallation instructions listed on the Ready to reset this PC screen. Click Reset whenever you are ready.
What if This Error Leads to Data Loss?
Improperly working or installed Windows OS updates can cause errors like the 0x800F081F to pop up, which can lead to subsequent issues and even unexpected system crashes. Unexpected system crashes can cause inconvenience and even lead to unprecedented data losses.
If this error has caused your system to crash and become unbootable or lead to data loss, you should not worry as there is a way to retrieve your data.
Get a professional data recovery software like Stellar Data Recovery Professional to recover your lost data. This powerful software can help you recover your lost data from various devices like SD cards, HDDs, SSDs, and more. It supports recovery of various file types and can recover data lost in various cases like formatting, deletion, system crash, malware attack, and more.
Final Words
The Install error 0x800F081F is a system error code that affected many Windows 11 users trying to install a specific cumulative update. In this post, we learnt the reasons behind this error and discussed some methods to get rid of it. In the end, we also came across a software that can help you get your lost data back safely. We hope the methods mentioned in this post helped you resolve the error and install the updates smoothly.
FAQs
How do I fix Windows 11 update error?
You can fix the Windows 11 update error by :
- Making sure that there is ample storage space on your computer
- Running Windows update a few times
- Making sure that all device drivers are updated
- Repairing hard disk drive errors
Why does the Windows 11 cumulative update keep failing?
A. The error message “Windows 11 cumulative update failed to download and install” could be a result of insufficient space on the hard drive, corrupted system files, unstable internet, etc.
What is the 0x800F081F .NET error?
The 0x800F081F .NET error is a Microsoft .NET Framework-related error, which can occur due to corrupted or incomplete installation files, or insufficient permissions with the user or the source location specified by the path doesn’t contain any installation files.
Was this article helpful?
YES0
NO
Нередко при обновлении .NET Framework 3.5, Cumulative Updates и других системных пакетов возникает ошибка 0x800f081f. Это приводит к нестабильной работе Windows — вплоть до зависаний. В этом материале мы рассмотрим основные причины появления ошибки и способы ее устранения.
Пользователь может столкнуться с ошибкой 0x800f081f по самым разным причинам. Чаще всего проблема кроется в следующем:
- Отсутствие необходимых файлов или компонентов для установки обновления;
- Повреждение системных файлов или реестра;
- Проблемы с хранилищем компонентов Windows;
- Конфликт свежего обновления с ранее установленными патчами на системном уровне;
- Блокировка нужных файлов антивирусом.
Способы устранения ошибки 0x800f081f
Способы решения данной проблемы во многом зависят от причины его возникновения. Но в любом случае начать следует с самых базовых действий, а именно с проверки устройства на наличие вирусов и шпионских программ, установки свежих драйверов и очистки реестра. Также убедитесь, что на вашем жестком диске достаточно свободного места для установки обновлений.
Источники: Windows Report / Уведомление об ошибке 0x800f081f
Если после этого неприятное уведомление продолжает выскакивать, следует прибегнуть к более сложным вариантам.
Средство проверки системных файлов
Утилита System File Checker считается одним из самых действенных инструментов, вшитых в саму систему и позволяющих решить множество проблем. Она способна проверить целостность важных файлов, отвечающих за установку обновлений, и восстановить их в случае необходимости.
Для запуска проверки через программу нужно:
- Кликнуть правую кнопку мыши на «Пуск» и открыть «Терминал Windows (Администратор)»;
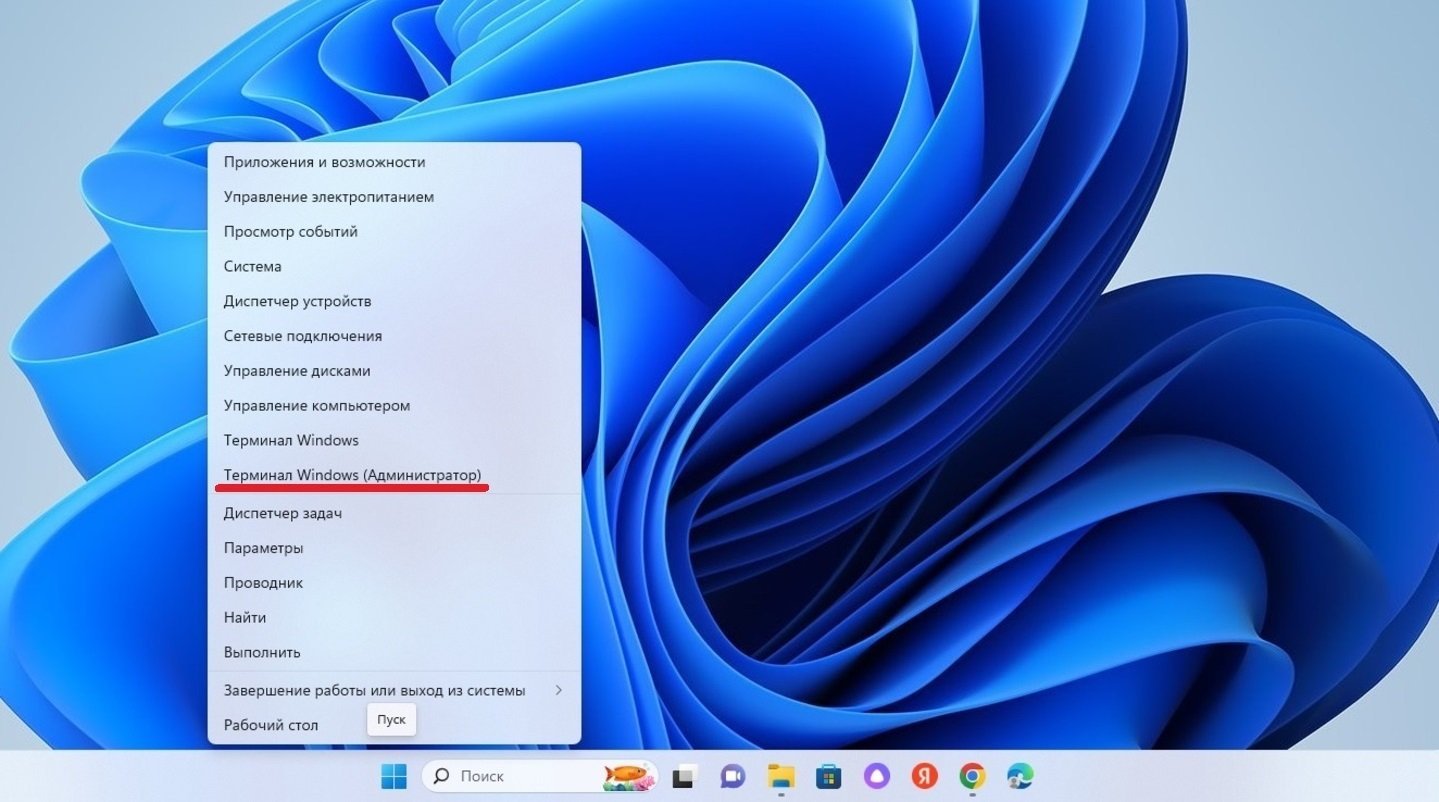
Источники: CQ / Запуск «Терминала Windows»
- В поле набрать команду sfc /scannow и нажать Enter.
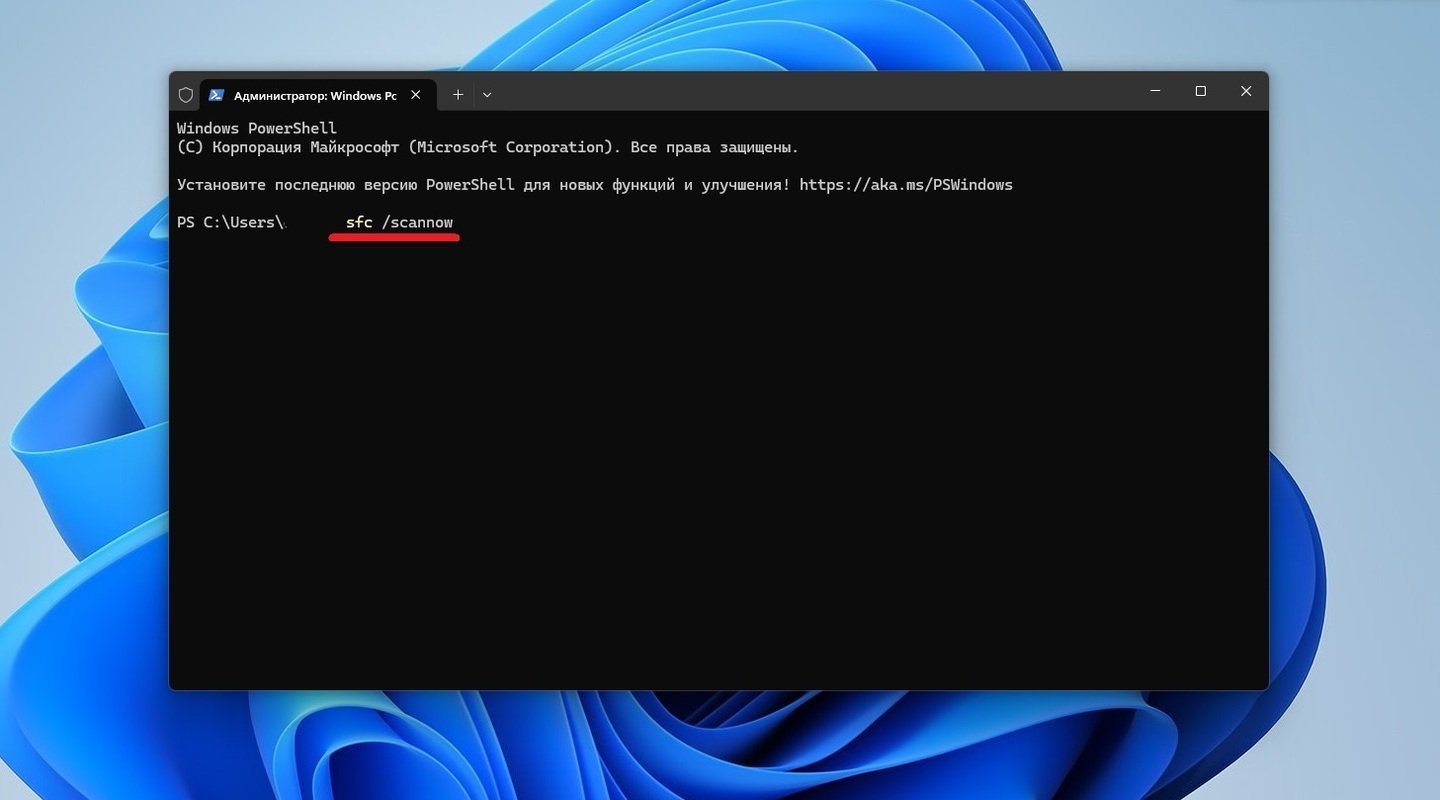
Источники: CQ / Сканирование через команду sfc /scannow
После этого остается только дождаться окончания сканирования. В случае обнаружения поврежденных файлов, система постарается восстановить их. В самом конце надо перезагрузить компьютер и проверить, решена ли ошибка. Кстати, ознакомиться с отчетом работы программы можно как в окне терминала, так и в специальном файле.
Средство восстановления хранилища компонентов
DISM — еще один встроенный инструмент сканирования и восстановления системных компонентов. Чтобы устранить ошибку установки 0x800f081f с ее помощью:
- Кликните правую кнопку мыши на «Пуск» и откройте «Терминал Windows (Администратор)»;
Источники: CQ / Запуск «Терминала Windows»
- Введите команду DISM /Online /Cleanup-Image /RestoreHealth и нажмите Enter.
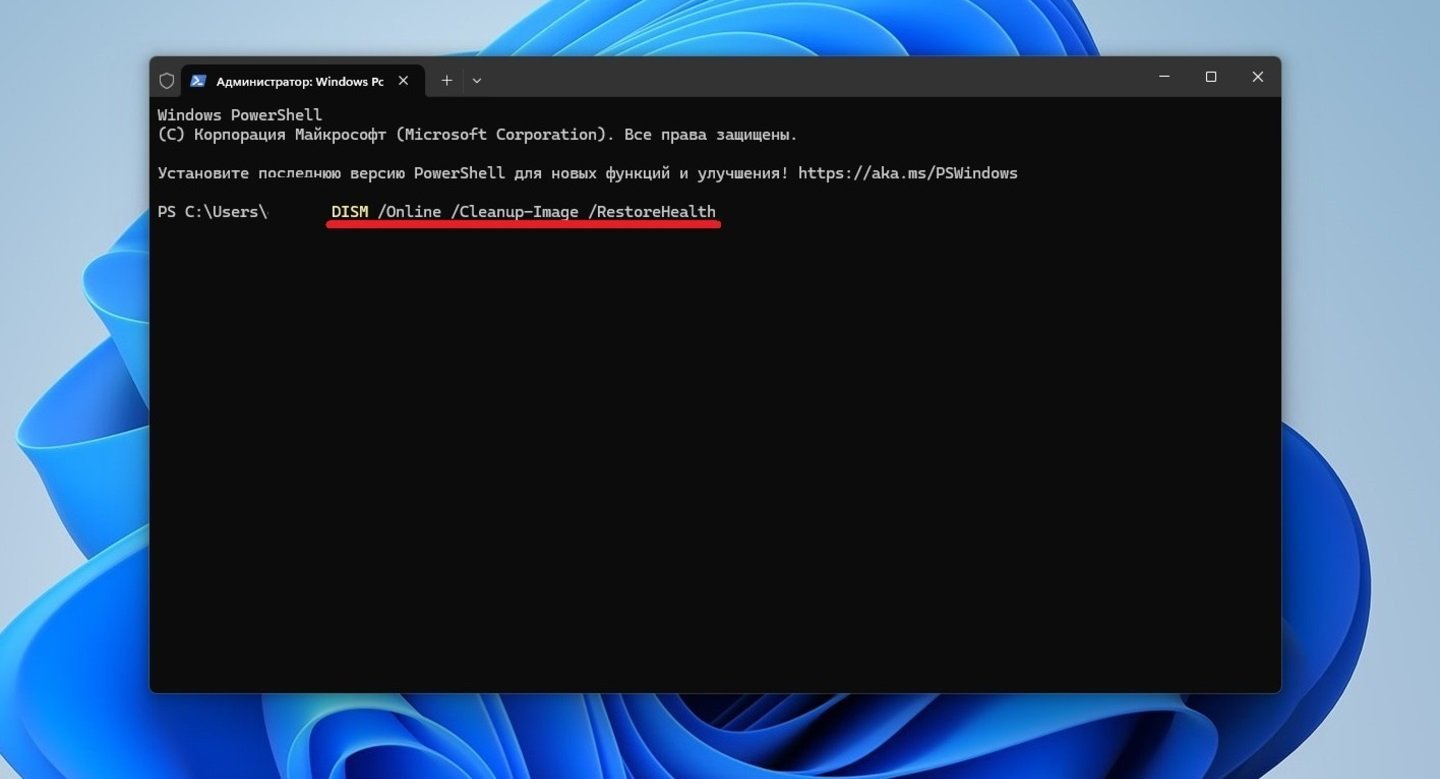
Источники: CQ / Сканирование через утилиту DISM
Данная опция позволяет восстановить повреждения, обнаруженные в хранилище компонентов образа Windows, путем скачивания, установки или замены недостающих и неисправных файлов. Сама процедура может занять более получаса реального времени, после которой необходимо заново перезапустить компьютер.
Отключение антивируса
Если внутренний защитник Windows обычно работает стабильно, то сторонние антивирусы могут «переусердствовать» и стать причиной той самой ошибки. Ведь они очень «любят» блокировать установку необходимых обновлений.
Но если с установкой возникают проблемы, то временно отключите встроенный антивирус. Для этого:
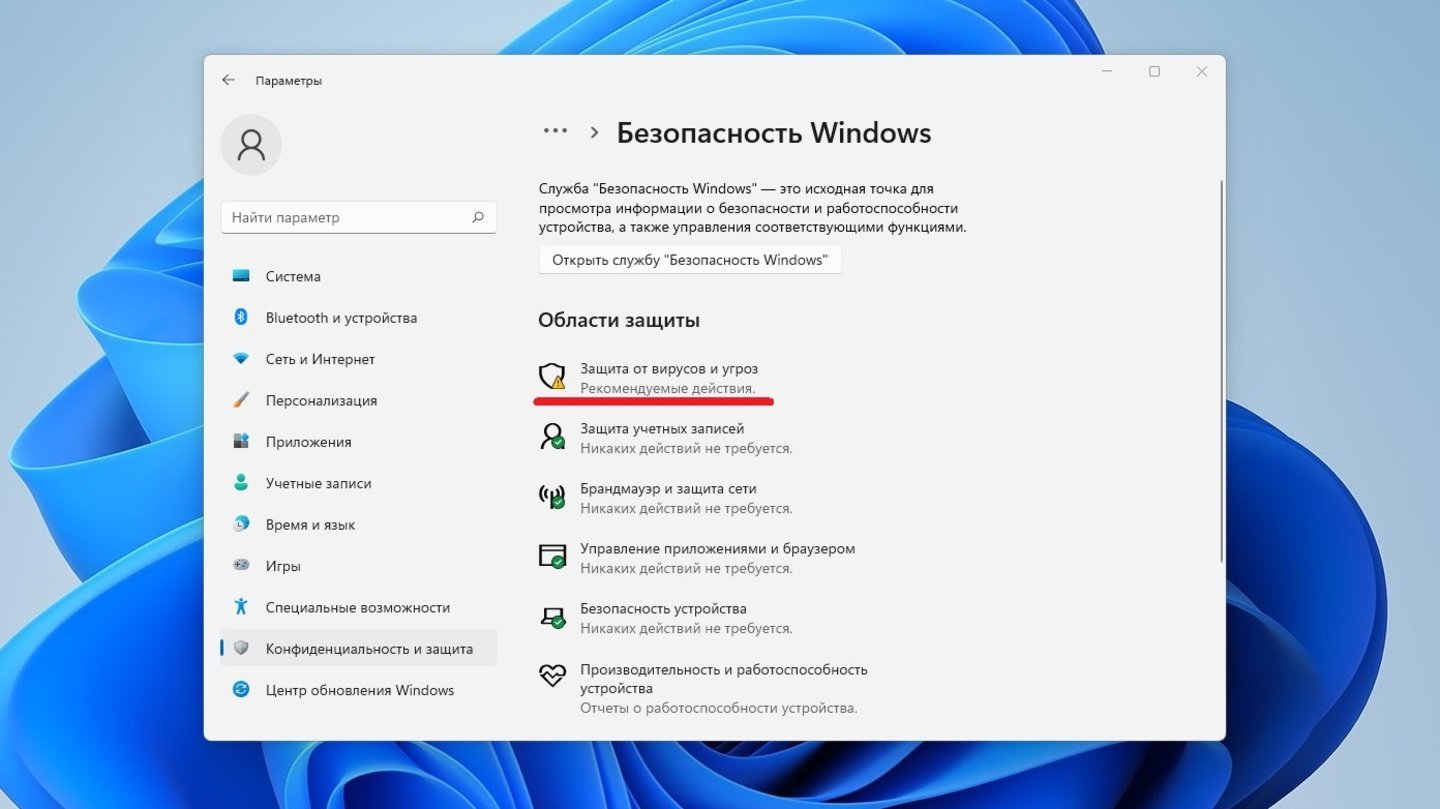
- Через «Пуск» откройте панель «Параметры»;
- В левом столбце кликните сначала на пункт «Конфиденциальность и защита», а затем «Безопасность Windows»;
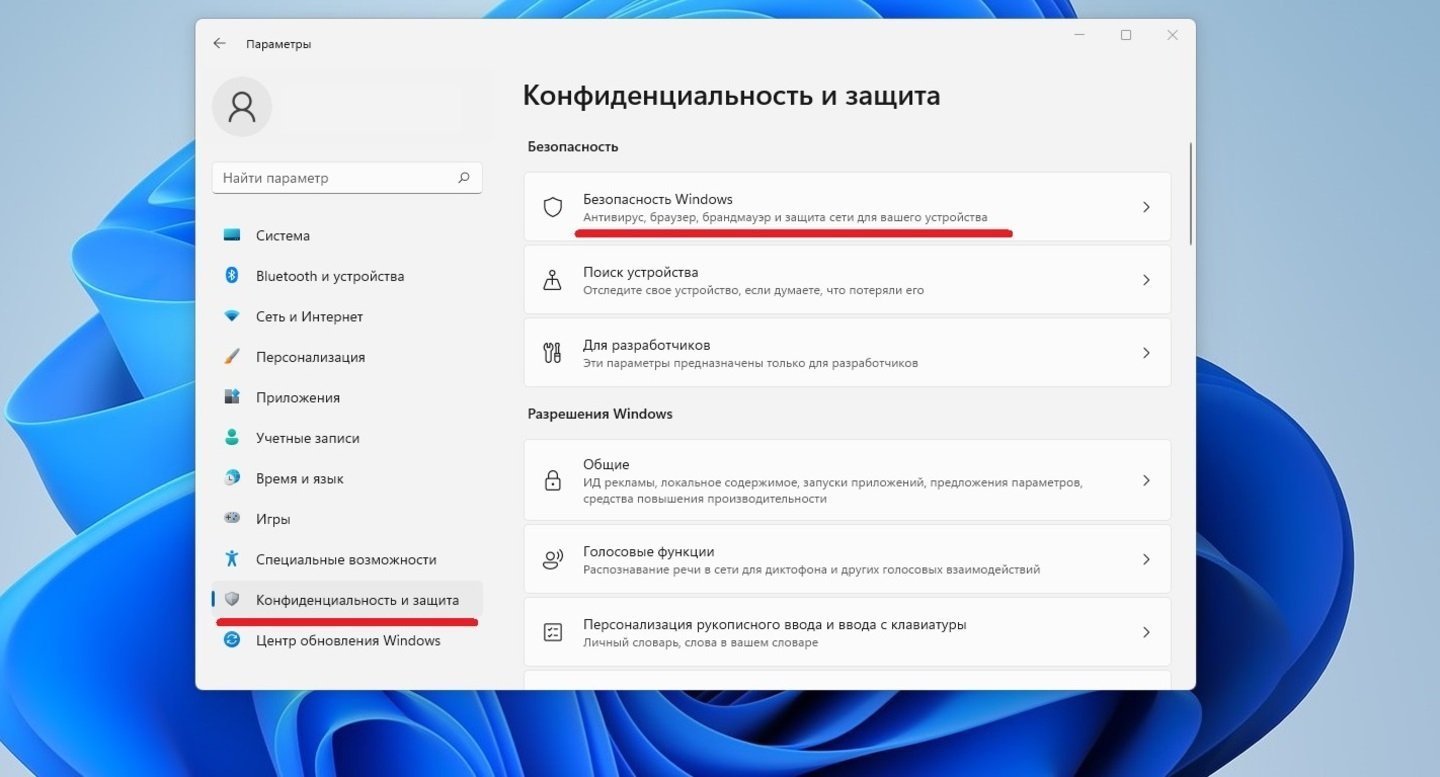
Источники: CQ / Раздел «Безопасность Windows»
- Из появившихся вариантов выберите «Защита от вирусов и угроз»;
Источники: CQ / Переход во вкладку «Защита от вирусов и угроз»
- В появившемся окне нажмите на кнопку «Управление настройками»;

Источники: CQ / Настройки внутреннего антивируса
- Отключите защиту, просто переключив все тумблеры.
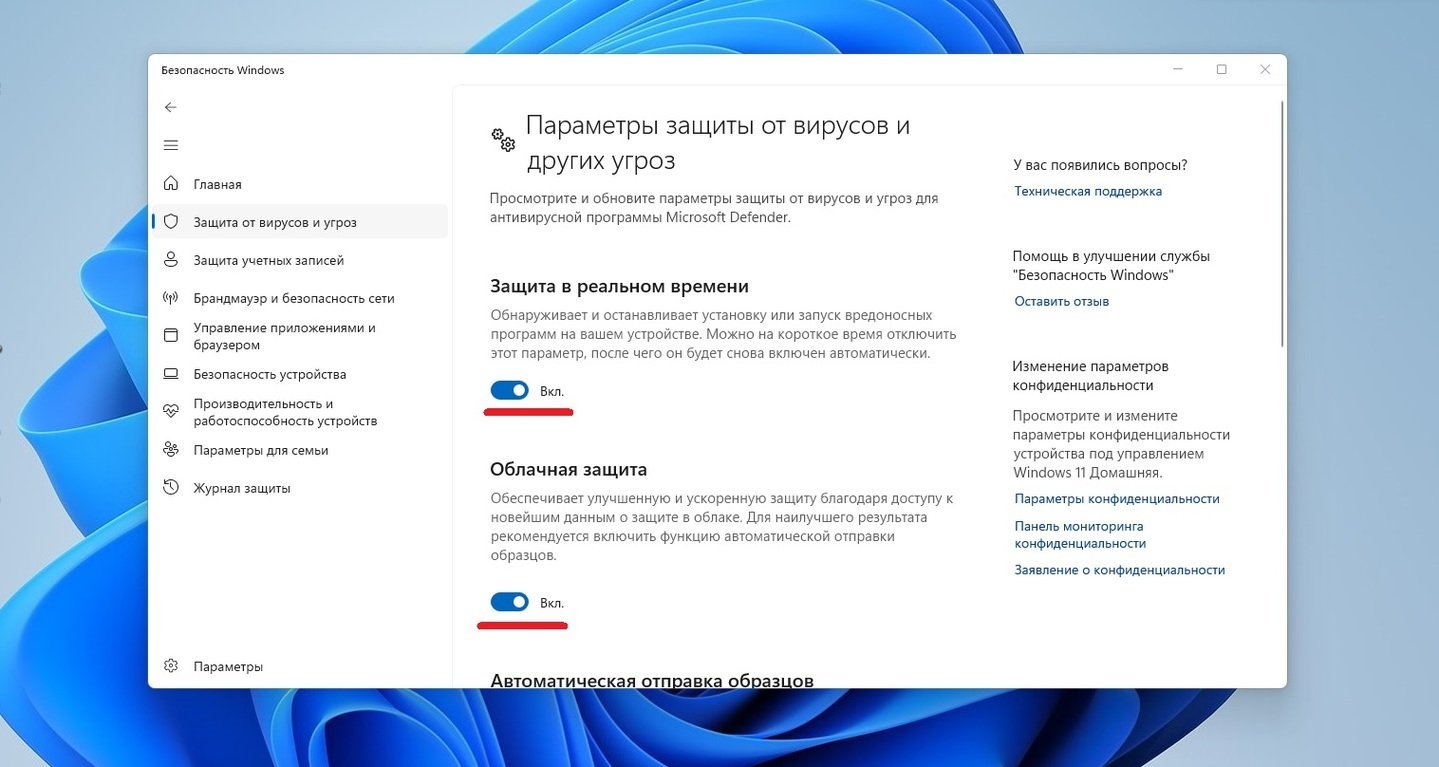
Источники: CQ / Отключение антивируса Windows
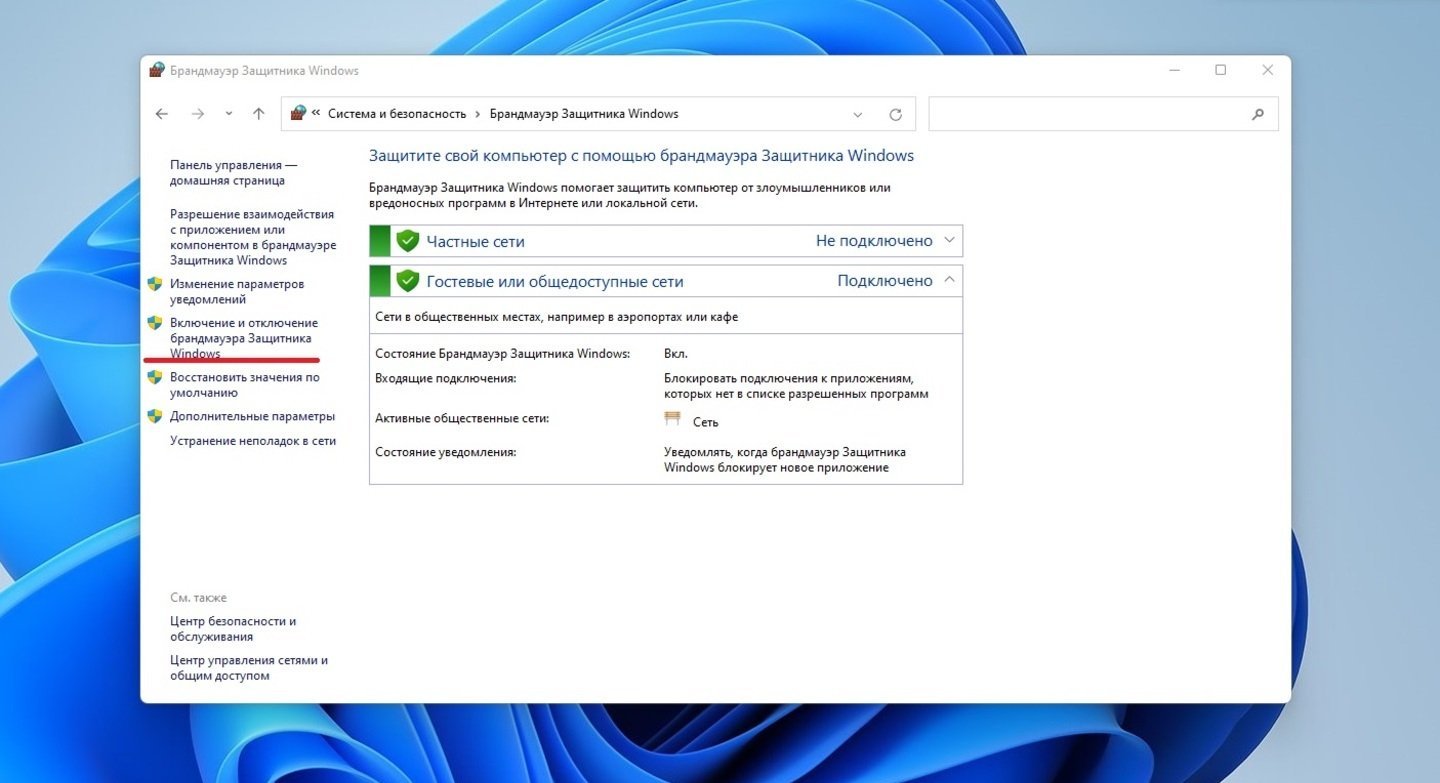
Также, на всякий случай, отключите еще и брандмауэр. Алгоритм действий выглядит следующим образом:
- В «Панели управления» откройте вкладку «Система и безопасность»;
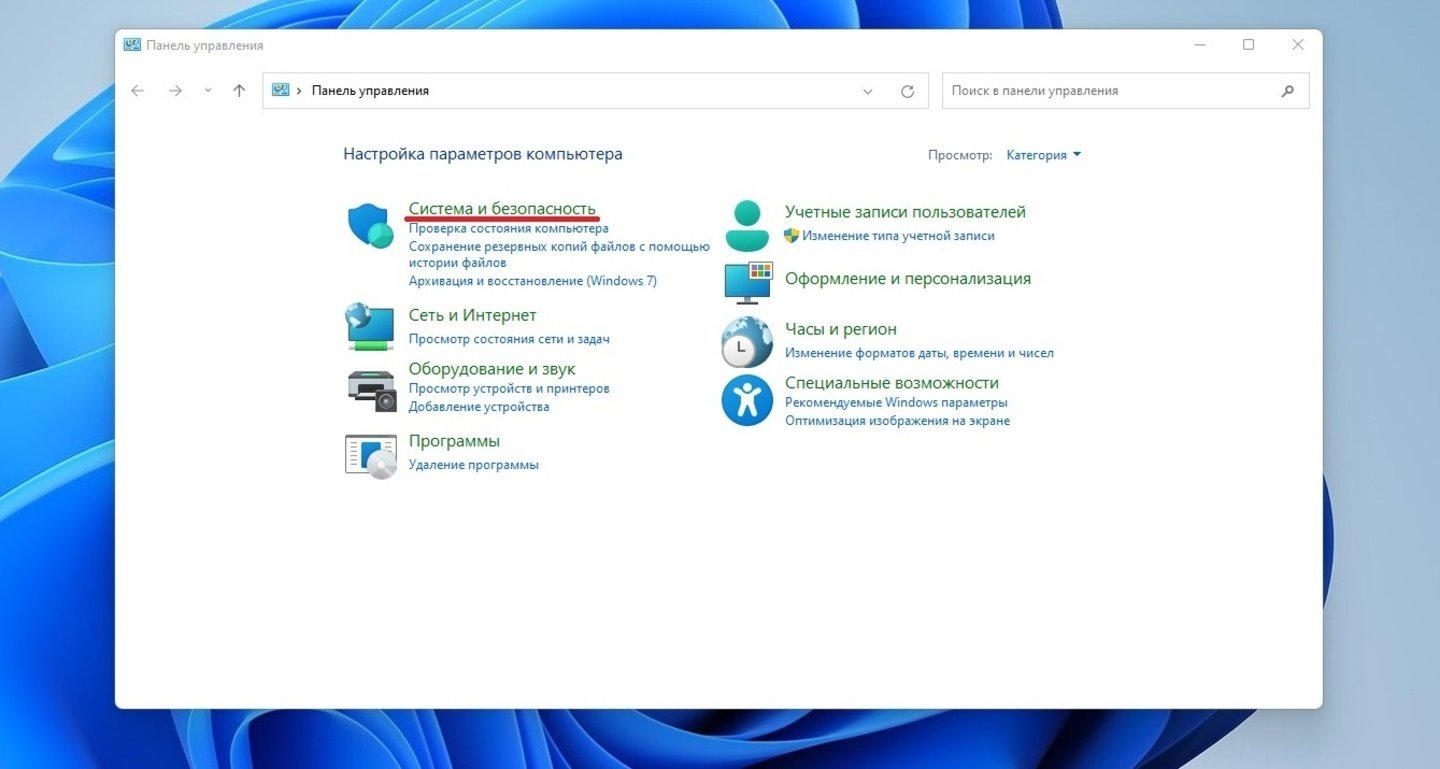
Источники: CQ / Переход во вкладку «Система и безопасность»
- Нажмите на пункт «Брандмауэр Защитника Windows»;
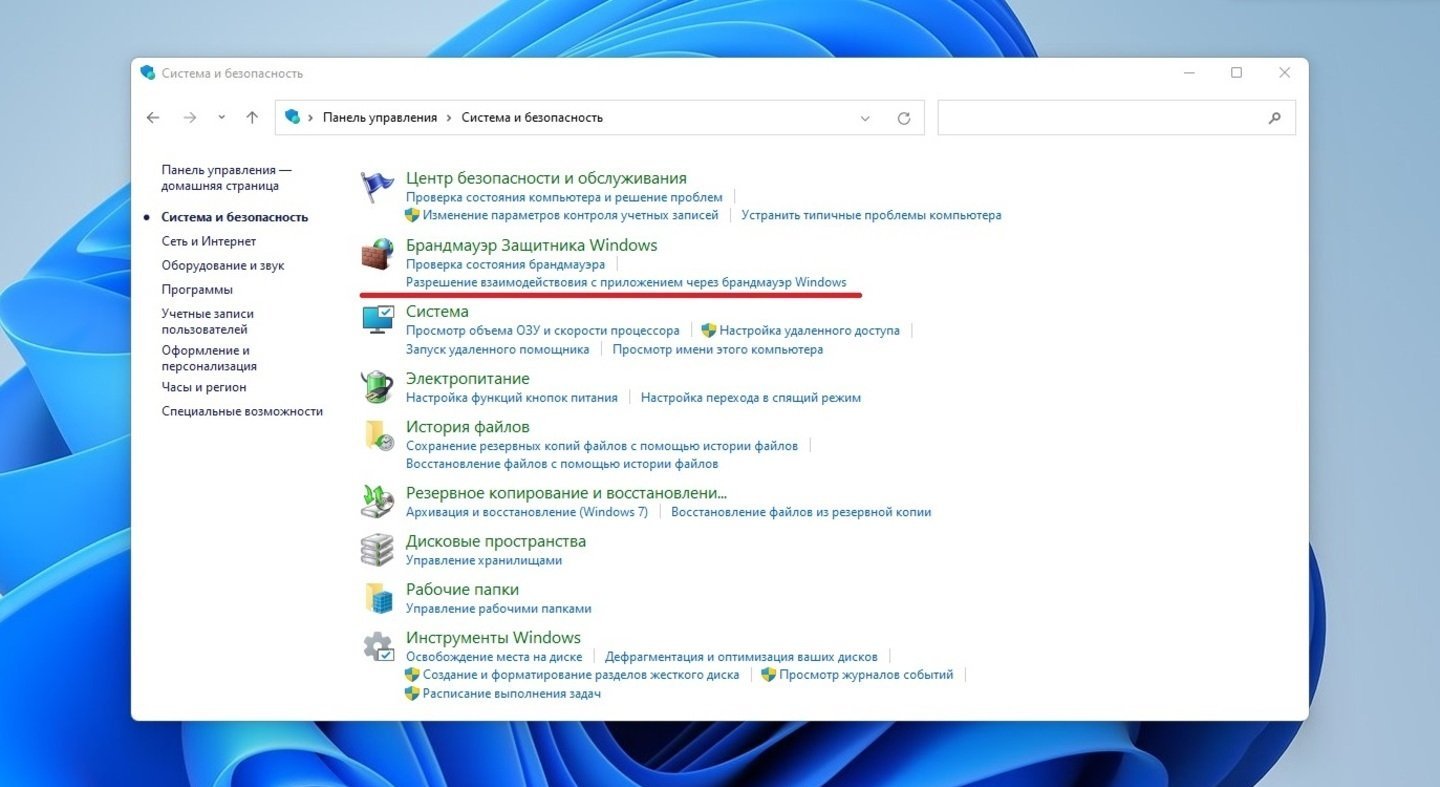
Источники: CQ / Раздел «Брандмауэр Защитника Windows»
- С левой стороны кликните на строчку «Включение и отключение брандмауэра Защитника Windows»;
Источники: CQ / Параметры отключения «Брандмауэра Защитника Windows»
- Поставьте галочки напротив пунктов «Отключить брандмауэр Защитника Windows».
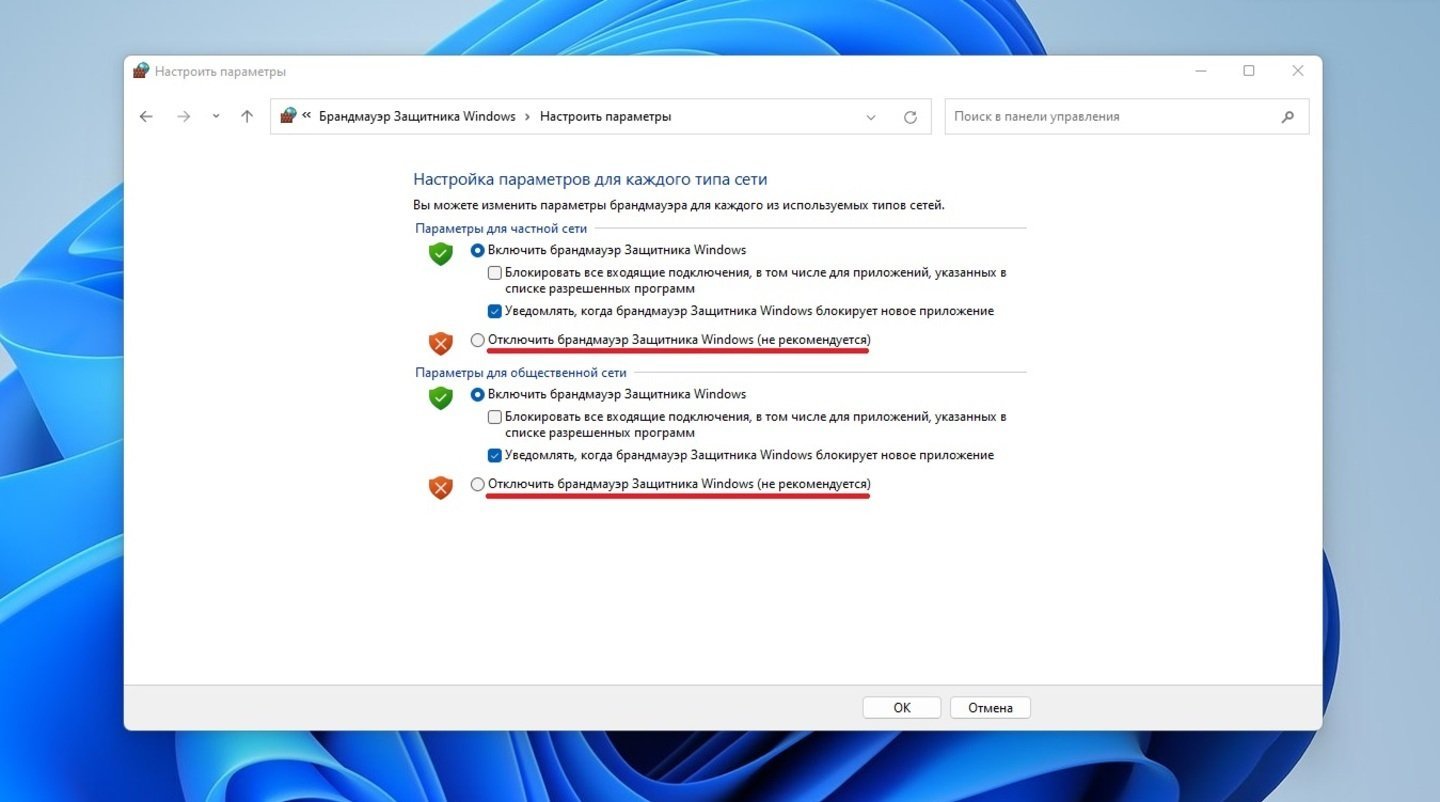
Источники: CQ / Отключения «Брандмауэра Защитника Windows»
Главное, не забыть включить Windows Defender и брандмауэр обратно после завершения установки обновлений. Что касается сторонних антивирусных программ, то они отключаются в «Параметрах» или «Настройках» приложения.
Сброс Windows Update
Если предыдущие варианты не помогли, то придется заняться центром обновления Windows. Именно этот раздел ответственен за установку системных апдейтов.
- Уже знакомым способом запустите «Терминал Windows (Администратор)»;
- В свободном поле наберите команду net stop wuauserv;
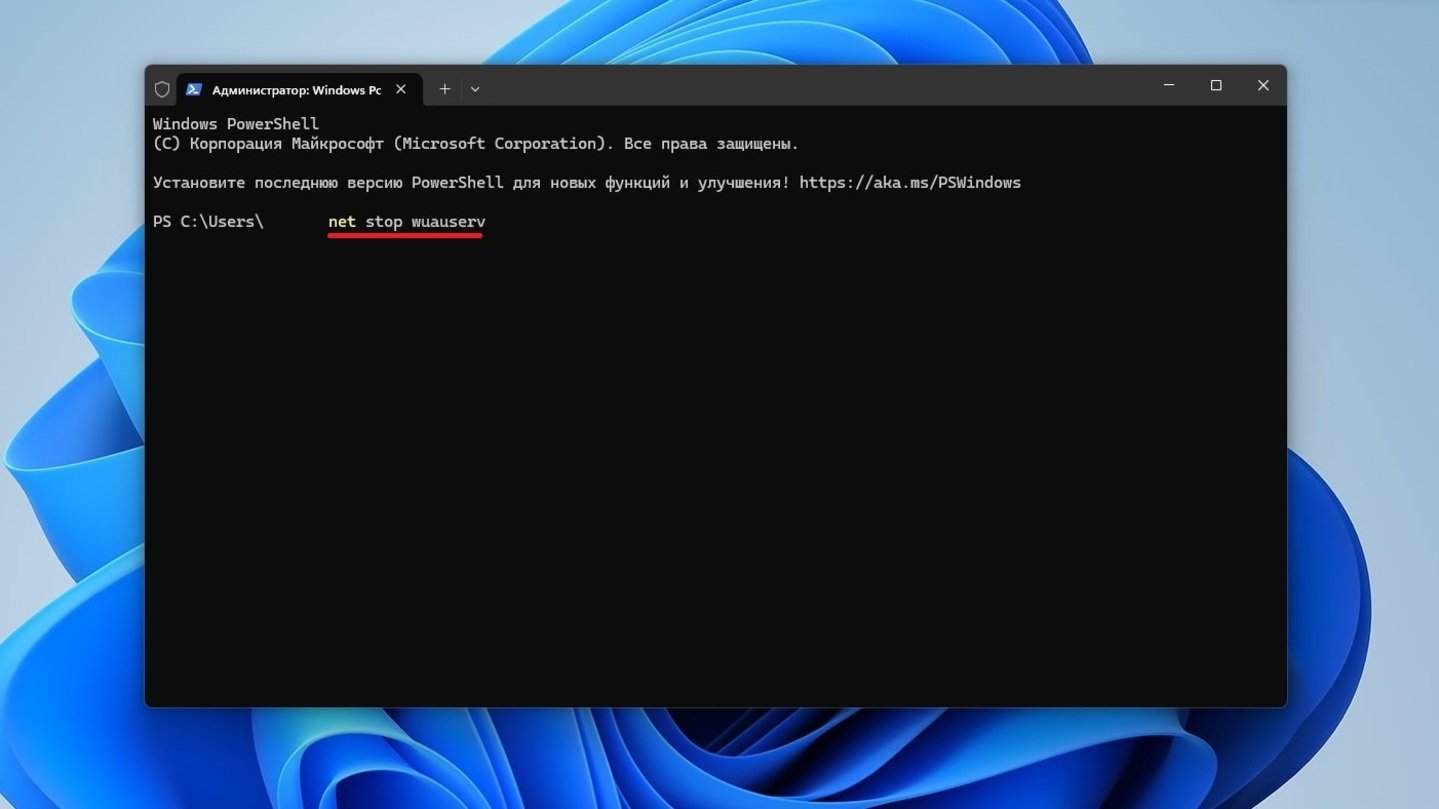
Источники: CQ / Сброс Windows Update
- Перейдите в папку C:\Windows\SoftwareDistribution, где расположены все прошлые апдейты, и удалите ее.
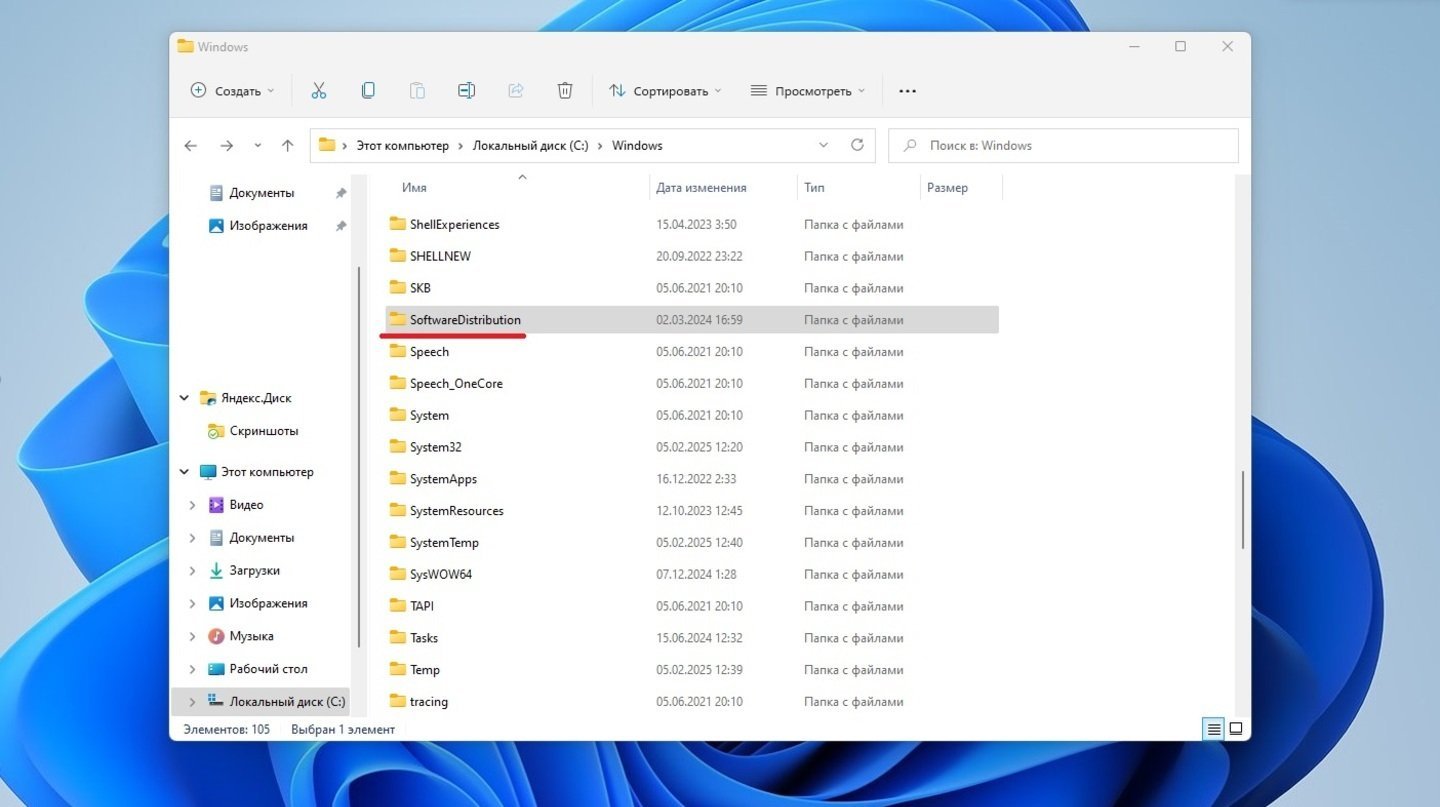
Источники: CQ / Очистка папки SoftwareDistribution
Этот вариант эффективен только в том случае, если причина крылась в повреждении компонентов службы. В других случаях лучше лишний раз туда не соваться, поскольку велик риск навредить операционке.
Включение .NET Framework 3.5
Данный метод работает только в том случае, если ошибка 0x800f081f случилась из-за .NET Framework 3.5. Системный компонент потребуется включить вручную. Делается это так:
- В «Панели управления» кликните на «Программы»;
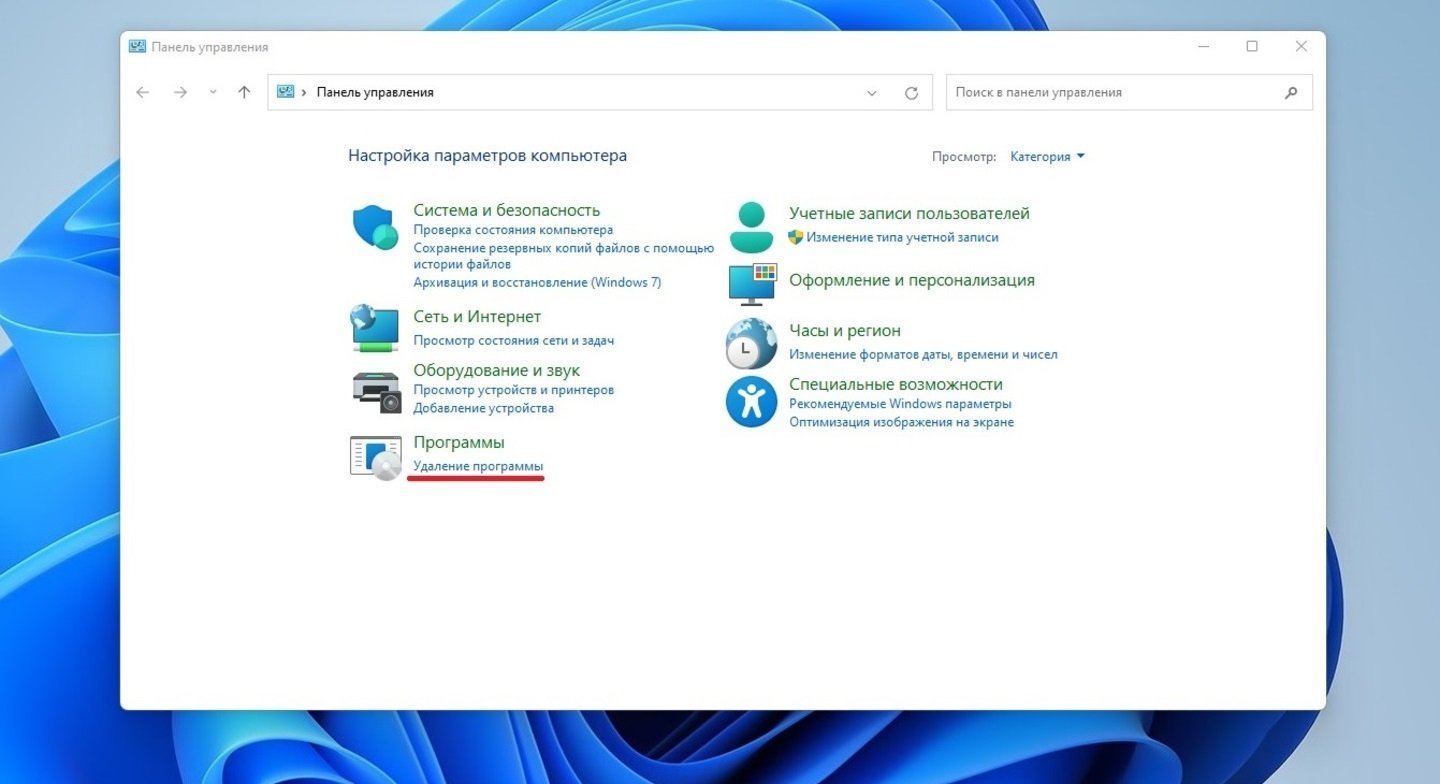
Источники: CQ / Вкладка «Программы» в «Панели управления»
- В новом окне нажмите на «Программы и компоненты»;

Источники: CQ / Вкладка «Программы и компоненты»
- С левой стороны откройте пункт «Включение и отключение компонентов Windows»;
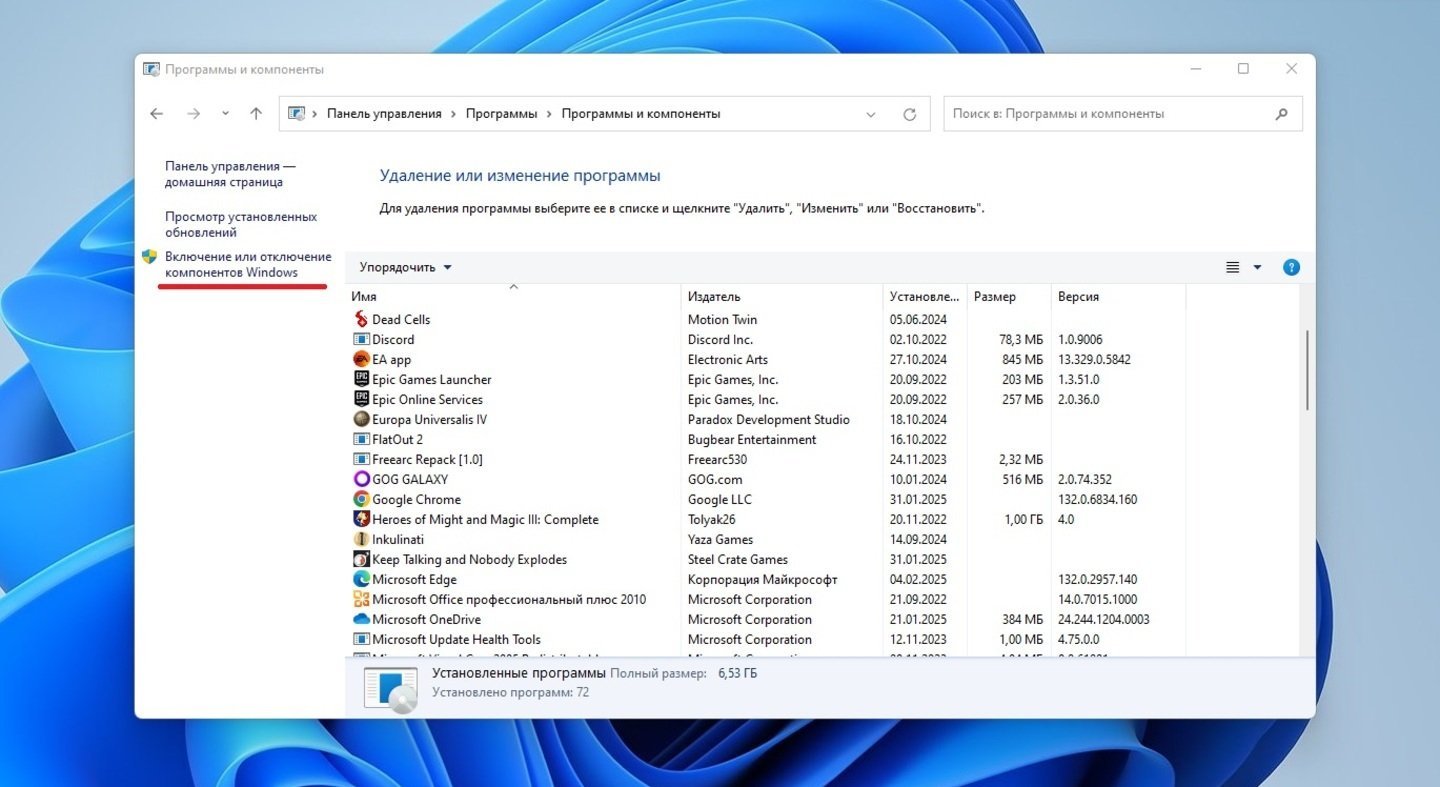
Источники: CQ / Пункт «Включение и отключение компонентов Windows»
- Поставьте галочку напротив «.NET Framework 3.5 (включает .NET 2.0 и 3.0)» и нажмите кнопку «OK».
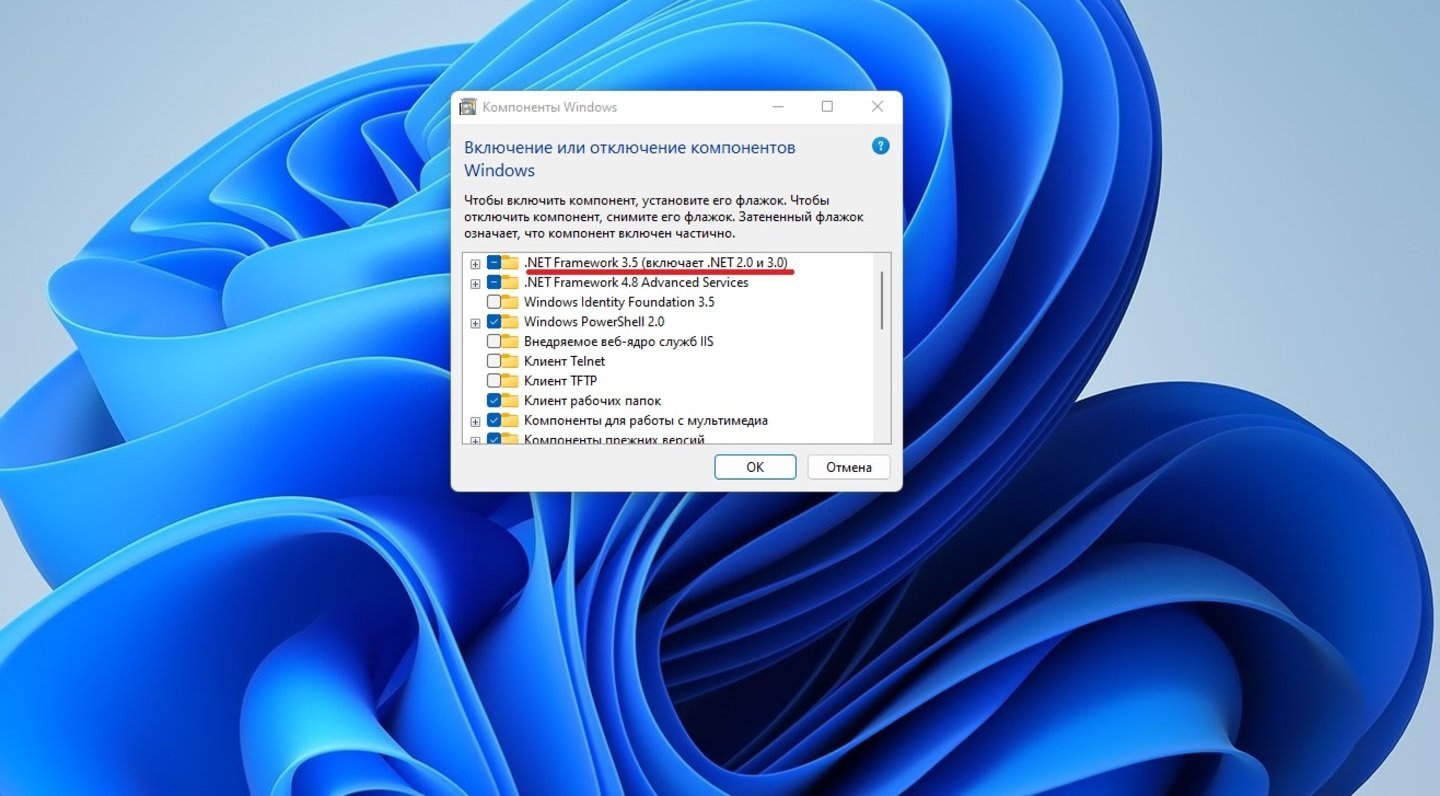
Источники: CQ / Включение .NET Framework 3.5
Когда операционная система попросит, то перезагрузите компьютер. Не забудьте перед началом обеспечить надежное соединение с интернетом.
Заглавное фото: Videvo
Читайте также:
- Ошибка BAD SYSTEM CONFIG INFO в Windows — причины и решения
- Как исправить ошибку 0xc0000225 при загрузке Windows
- Как исправить ошибку 0x80070570 в Windows
- Как исправить ошибку 0x80004005 в Windows
- Как исправить ошибку 0xc0000142 при запуске приложения