
Windows OS gets constantly updated with new features while some of the existing ones that are seldom being used by the users are either entirely removed or hidden deep inside the OS. One such feature is the Stereo Mix. It is a virtual audio device that can be used to record the sound currently being played out of the computer speakers. The feature, although handy, cannot be found on all Windows 10 systems nowadays. Some lucky users can continue using this built-in recording tool, while others will need to download a specialized third-party application for this purpose.
We have explained two different ways to enable Stereo Mix on Windows 10 in this article along with some troubleshooting tips if any issues arise. Also, a couple of alternative ways to record the computer’s audio output if the Stereo mix feature is not available.

Table of Contents
Many users reported that the Stereo mix feature suddenly disappeared from their computer after updating to a particular Windows version. A few were also under the misconception that Microsoft took the feature away from them, although Stereo mix was never entirely removed from Windows 10 but only disabled by default. It could also have been one of the many third-party applications you have installed that automatically disabled the Stereo Mix device. Nevertheless, follow the below steps to enable Stereo Mix.
1. Locate the Speaker icon on your Taskbar (if you do not see the speaker icon, first click on the upward-facing ‘Show hidden icons’ arrow), right-click on it, and select Recording Devices. If the Recording Devices option is missing, click on Sounds instead.

2. Move to the Recording tab of the ensuing Sound window. Here, right-click on Stereo Mix and select Enable.

3. If the Stereo Mix recording device isn’t listed (being displayed), right-click on the blank space and tick Show Disabled Devices & Show Disconnected Devices options.

4. Click on Apply to save the new modifications and then close the window by clicking on OK.
You can also enable Stereo Mix from the Windows Settings application:
1. Use the hotkey combination of Windows key + I to launch Settings and click on System.

2. Switch to the Sound settings page from the left-hand panel and click on Manage Sound Devices on the right.

3. Under the Input devices label, you will see Stereo Mix as Disabled. Click on the Enable button.

That’s it, you can now use the feature to record your computer’s audio output.
Also Read: No Sound in Windows 10 PC [SOLVED]
How to Use Stereo Mix & Troubleshooting Tips
Using the Stereo mix feature is as easy as enabling it. Launch your preferred recording application, select Stereo Mix as the input device instead of your Microphone, and hit the record button. If you are unable to select Stereo Mix as the recording device in the application, first unplug your Microphone and then make Stereo Mix the default device for your computer by following the below steps-
1. Open the Sound window once again and move to the Recording tab (See step 1 of the previous method.)
2. First, deselect the Microphone as the default device, and then right-click on Stereo Mix and select Set as Default Device from the ensuing context menu.

This will successfully enable the Stereo Mix on Windows 10. In case you are unable to view Stereo Mix as a device in your recording application or the feature doesn’t seem to work as advertised, try the below troubleshooting methods.
Method 1: Ensure Microphone is available for Access
One of the reasons why you may fail to enable Stereo Mix is if applications do not have access to the Microphone. Users often disable third-party applications from accessing the Microphone for privacy concerns and the solution is to simply allow all (or selected) applications to use the Microphone from the Windows Settings.
1. Use the hotkey combination of Windows key + I to launch Windows Settings then click on Privacy settings.
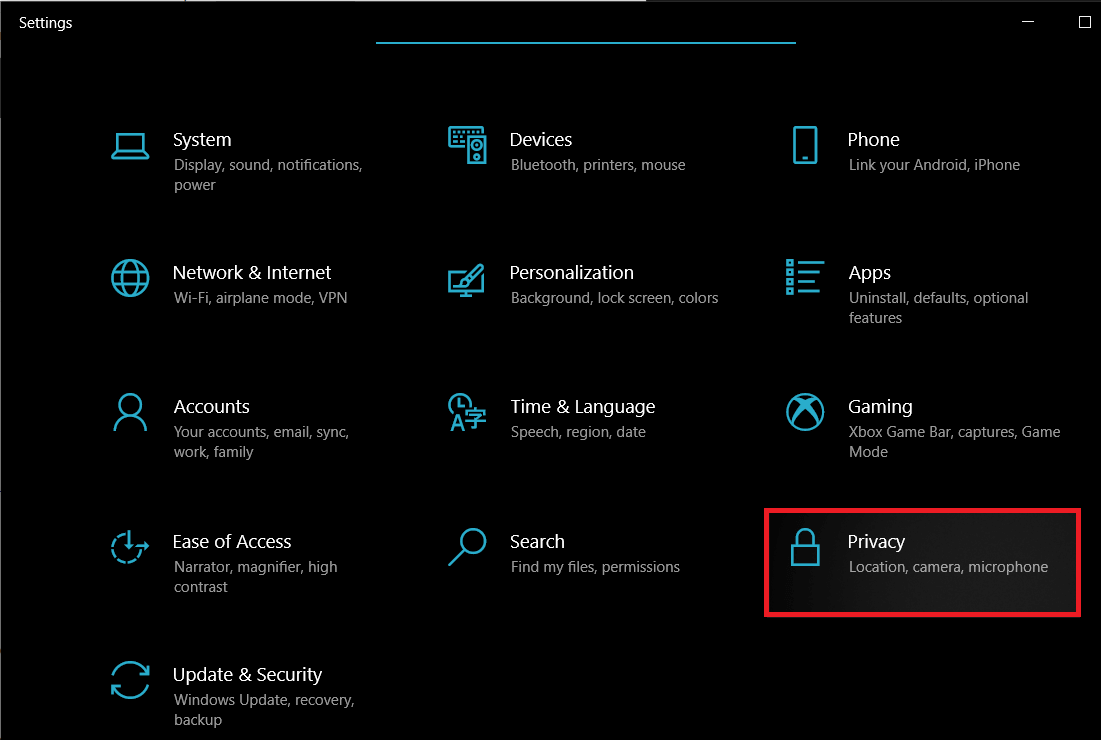
2. Scroll down the left navigation menu and click on Microphone under App permissions.

3. On the right panel, check if the device is allowed to access the Microphone. If not, click on the Change button and toggle the following switch to on.
Also Read: What to Do When Your Laptop Suddenly Has No Sound?
Method 2: Update or Downgrade Audio drivers
Since Stereo Mix is a driver-specific feature, your computer needs to have the appropriate audio drivers installed. It could be as easy as updating to the latest driver version or reverting back to a previous version that supported the Stereo mix. Follow the below guide to update audio drivers. If updating doesn’t resolve the issue, perform a Google search for your sound card and check which driver version of it supports Stereo mix.
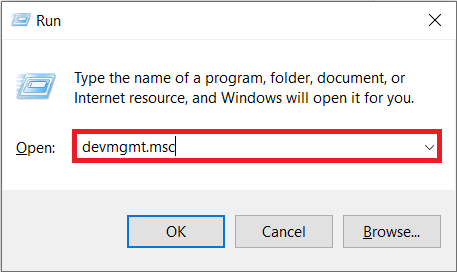
1. Press Windows Key+ R to launch the Run command box, type devmgmt.msc, and click on OK to open the Device Manager application.
2. Expand Sound, video and game controllers by clicking on the tiny arrow to its left.
3. Now, right-click on your sound card and select Update driver from the ensuing menu.

4. On the next screen, select Search Automatically for drivers.

Alternatives to Stereo Mix
There are a number of third-party applications available on the world wide web that can be used to record the computer’s audio output. Audacity is one of the most popular recorders for Windows with over 100M downloads. Modern systems that lack Stereo mix contain WASAPI (Windows Audio Session API) instead which captures audio digitally and thus, eliminates the need of converting the data to analog for playback (In layman’s terms, the recorded audio file will be of better quality). Simply download Audacity, choose WASAPI as the audio host, and set your headphones or speakers as the loopback device. Click on the Record button to start.

Few other good alternatives to Stereo mix are VoiceMeeter and Adobe Audition. Another very easy way to record the computer’s audio output is to use an aux cable (a cable with 3.5 mm jack on both ends.) Plug one end into the Microphone port (output) and the other into the mic port (input). Now you can use any basic recording application to record the audio.
Recommended:
- How to Repair or Fix Corrupted Hard Drive Using CMD?
- Fix Computer Sound Too Low on Windows 10
- How To View Clipboard History On Windows 10
- Fix Site Can’t Be Reached, Server IP Could Not Be Found
We hope this guide was helpful and you were able to enable the Stereo Mix device on Windows 10 and record your computer’s audio output using the feature. For any more help regarding this topic, get in touch with us in the comments below.
Все способы:
- Способ 1: Настройки окна «Звук»
- Способ 2: Устранение неполадок
- Способ 3: Обновление драйверов
- Способ 4: Проверка целостности системных файлов
- Вопросы и ответы: 0
Способ 1: Настройки окна «Звук»
Отсутствие или недоступность микшера звука может быть обусловлено его отключением, поэтому для начала нужно проверить статус устройства в настройках звука.
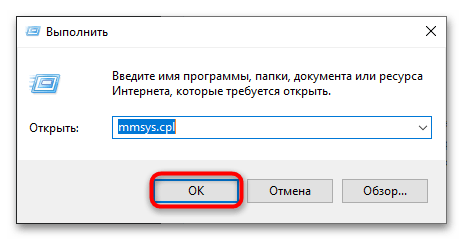
- Откройте оснастку «Звук» командой
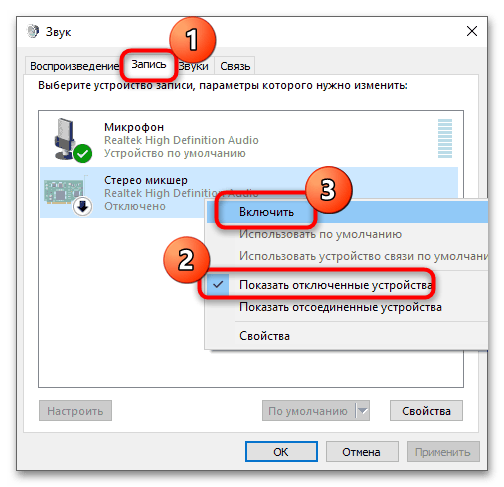
mmsys.cpl, введя ее в диалоговом окошке «Выполнить», вызванном нажатием клавиш Win + R. - Переключитесь на вкладку «Запись», кликните правой кнопкой мыши по пустому пространству окна «Звук» и активируйте опцию «Показать отключенные устройства».
- Если микшер появится в списке устройств, во-первых, включите его, во-вторых, назначьте его устройством по умолчанию в том же контекстном меню.
Способ 2: Устранение неполадок
Если исчезновение микшера громкости было вызвано сбоем, попробовать устранить проблему можно штатными средствами самой операционной системы.
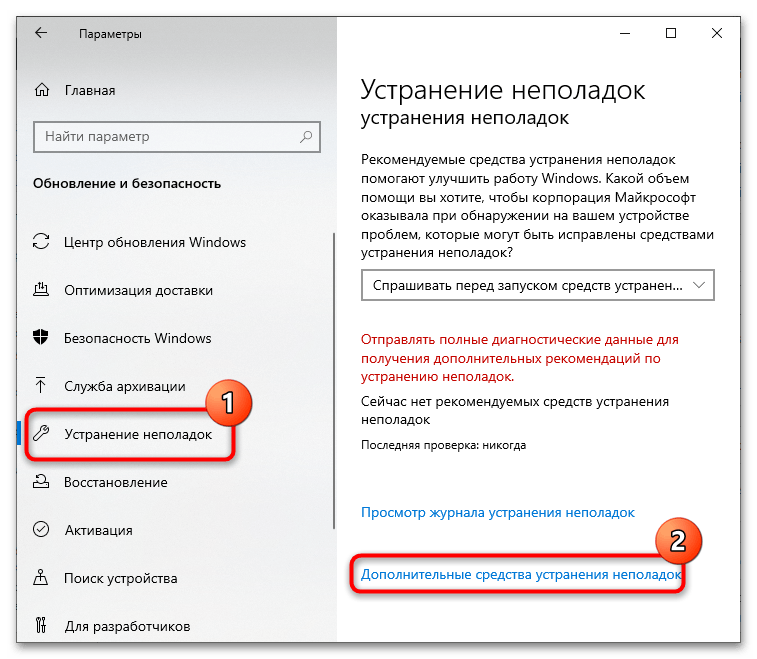
- Запустите приложение «Параметры», перейдите в раздел «Обновление и безопасность» → «Устранение неполадок» и нажмите ссылку «Дополнительные средства устранения неполадок».
- В следующем окне выберите пункт «Воспроизведение звука» и запустите утилиту диагностики.
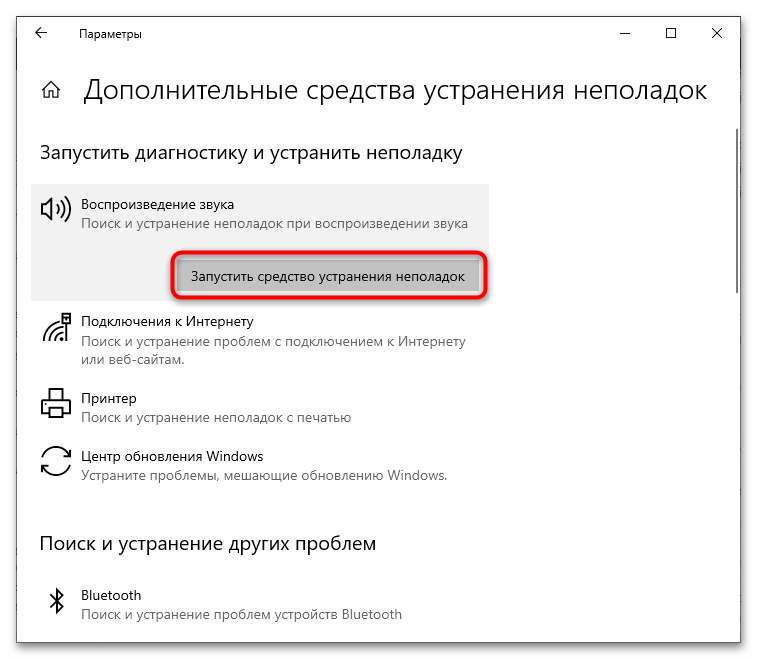
В случае обнаружения препятствующих нормальной работе микшера проблем, будет предпринята попытка их устранения.
Способ 3: Обновление драйверов
Отсутствие микшера громкости не обязательно связано с настройками или неполадками, микшер будет недоступен в случае отсутствия соответствующего драйвера аудиокарты. Проверить, имеется ли в системе подходящий драйвер, можно следующим образом. Вызовите нажатием Win + R диалоговое окошко «Выполнить», введите в него команду sndvol и нажмите клавишу ввода.
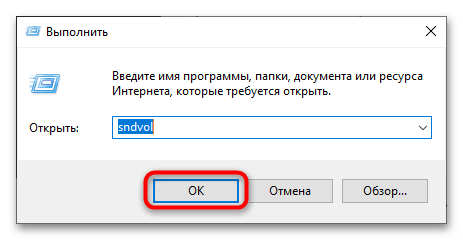
Если в открывшемся окошке будет указано «Аудиоустройства не установлены», значит, подходящий драйвер отсутствует в системе.

В этом случае необходимо скачать драйвер с сайта производителя материнской платы или аудиокарты и установить его. Самый простой способ найти такой драйвер – воспользоваться специальными программами для скачивания и установки актуальных драйверов.
Подробнее:
Определение необходимых для звуковой карты драйверов
Программы для обновления драйверов
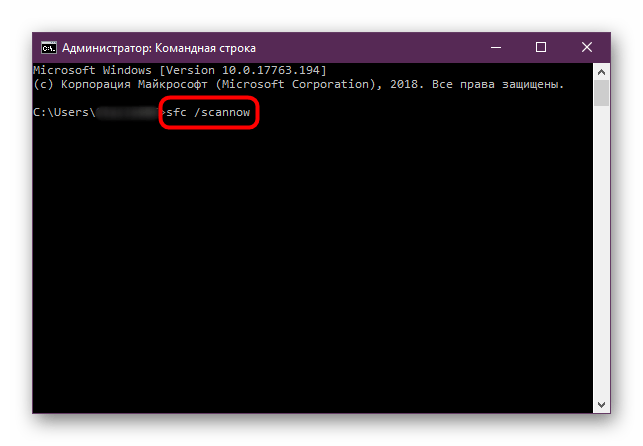
Способ 4: Проверка целостности системных файлов
Чтобы удостовериться, что в самой операционной системе нет неполадок, вызывающих исчезновение тех или иных функций, следует проверить наиболее важные файлы на целостность. Запускается эта процедура при помощи консоли и определенных команд, а выполняются проверка и восстановление автоматически. Узнать более развернуто, как просканировать Windows и при необходимости восстановить поврежденные файлы, можете из статьи по ссылке ниже.
Подробнее: Использование и восстановление проверки целостности системных файлов в Windows 10
Наша группа в TelegramПолезные советы и помощь
,
If you want to use Stereo Mix in Windows 10/11 and Stereo Mix is not working or not showing as a recording device, then continue reading below. Stereo Mix is a feature on Windows 11/10 that allows you to record your computer’s output streams such as a broadcast radio, speaker output, live streaming audio, or system sounds.Stereo Mix is disabled by default in both Windows 10 and Windows 11 and in this tutorial I will show you how to enable it and how to troubleshoot problems with Stereo Mix.
Quick steps to Show/Enable Stereo Mix in Windows 10/11:
- Navigate to Control Panel > Sound
- At Recording tab, right-click at recording devices list and select Show Disabled Devices.
- Right-click on Stereo Mix and select Enable.
How to Install and Enable Stereo Mix in Windows 10/11.
- Unhide and Activate Stereo Mix.
- Install Stereo Mix driver.
- Troubleshoot Stereo Mix problems.
- Audacity.
Method 1. Enable Stereo Mix in Recording devices in Windows 10/11 Sound options.
As I said at the beginning of this article, Stereo Mix is disabled (hidden) by default and does not appear on Windows 10/11 recording devices. To activate Stereo on your device, follow the instructions below:
1. Press Windows + R keys simultaneously on your keyboard to open a Run dialog box.
2. Inside the text field of the dialog box, type mmsys.cpl and click OK to open the Sound utility.

3a. In the Sound dialog, head over to the Recording tab and then right-click anywhere below.
3b. Select Show Disabled Devices from the context menu to unhide the Stereo Mix device.
3c. Then, right-click on Stereo Mix and select Enable. When done, click Apply and then OK to save the changes. *
* Note: If you cannot see the Stereo Mix after the hidden devices are displayed, skip to method-2 below.

4. When done, open your recording program set Stereo Mix as the default recording source device and start recording.
Method 2. Install Stereo Mix using Realtek Audio drivers.
1. Head over to the Realtek website.
2. In the Realtek’s website, scroll down and locate a driver according to your Windows version and system type (32-bit or 64-bit). Then hit the download icon to download the Realtek Sound Driver/Codecs.*
* Note: For Windows 11 download the Windows 10 drivers.

3. Accept he the terms and click Download this file.

4. Type the letters shown in the Captcha window and hit Go to start the download.
5. One the file is downloaded, double-click on it and follow the onscreen instructions to install the Realtek drivers.

6. After drivers installation, restart your PC.
7. Navigate again in Sound options in Control panel and normally you should see the Stereo Mix at recording devices. If not, right-click anywhere and select (click) Show Disabled Devices from the context menu and then Enable Stereo Mix. *
* Note: If you cannot see the Stereo Mix after the hidden devices are displayed, skip to method-3 below to troubleshoot the problem.

8. When done, open your recording program set Stereo Mix as the default input device and start recording.
Method 3. Troubleshoot Stereo Mix device.
If after following the above methods your still cannot record from Stereo Mix (Stereo Not working), follow the next steps below:
Step 1. Enable Microphone Access.
If you are a Windows 10 user, follow the steps below. Click here for Windows 11 instructions.
1. Press Windows + I keys simultaneously to open Windows Settings.
2. Inside the Settings window, click on Privacy.

3a. Now, select Microphone from the left panel and click the Change button under Allow access to the microphone on this device.

3b. Turn the toggle to On.

4. Now scroll down in the same window and turn the toggle to On for Allow desktop apps to access your microphone.

5. Now open your recording program set Stereo Mix as the default recording source and start recording. If the problem persists continue to step-2.
Enable Microphone Access in Windows 11.
1. Type Microphone Privacy settings in the search box of your taskbar and click Open.

2. Turn the toggle for Microphone access to On.

Step 2. Update Audio Drivers
The final step to troubleshoot Stereo Mix issues is to Update the Audio driver. To do that:
1. Press Windows + R keys to load the Run dialog box.
2. Type devmgmt.msc and press Enter to open the device manager.
3a. in the Device Manager window, expand the Sound, video and game controllers option.
3b. Right-click on your audio device and select Update driver from the context menu.

3c. In the next dialog box, click Automatically search for drivers and let Windows find and install the latest drivers for your audio device. If Windows can’t find an updated driver, check your computer manufacturer’s support site to see if there is a new driver available.

Method 4. Record Audio with Audacity.
If you have tried the above methods and nothing works, keep in mind that not all sound cards support Stereo Mix. In such a case, you can use Audacity, which is a free third-party software designed for recording audio.
1. Download and install Audacity:
2. Open Audacity and go to Edit > Preferences.
3. In the Preferences window, select the Audio Settings tab and adjust the following:
- At Interface Host, choose Windows WASAPI
- At Playback Device, choose Speakers
- At Recording Device, choose Speakers (loopback)
4. Click OK to apply the changes.

6. Now start playing any audio file on your computer and then click the Record button in Audacity program to start recording the audio playing on your computer.
That’s it! Which method worked for you?
Let me know if this guide has helped you by leaving your comment about your experience. Please like and share this guide to help others.
If this article was useful for you, please consider supporting us by making a donation. Even $1 can a make a huge difference for us in our effort to continue to help others while keeping this site free:
- Author
- Recent Posts
Konstantinos is the founder and administrator of Wintips.org. Since 1995 he works and provides IT support as a computer and network expert to individuals and large companies. He is specialized in solving problems related to Windows or other Microsoft products (Windows Server, Office, Microsoft 365, etc.).
549060
Этот вопрос с одновременным выводом звука на колонки, или динамики ноутбука и на динамики телевизора подключенного по HDMI уже не раз обсуждали в комментариях к статье почему нет звука через HDMI на телевизоре, при подключении ноутбука (ПК) на Windows 7 и Windows 10. И там же в комментариях, Влад подсказал решение, как в Windows настроить одновременный вывод звука на динамики или колонки и на телевизор. Я проверил, но у меня почему-то не получилось. Сегодня решил еще раз все проверить, и как оказалось, все отлично работает. Достаточно настроить стерео микшер в Windows и звук выводится на два источника. В Windows 10 стерео микшер у меня заработал без проблем. В настройках устройств воспроизведения в Windows 7 я его почему-то не нашел. Возможно, нужно обновить драйвера. Сделаю инструкцию на примере Windows 10, а как разберусь с семеркой, то дополню статью. Там настройки практически одинаковые, так что если у Windows 7 и есть этот стерео микшер – настроите все без проблем.
Этим способом можно сделать так, чтобы звук воспроизводился одновременно из динамиков ноутбука, или подключенных к ноутбуку или компьютеру колонок и из динамиков телевизора, который подключен через HDMI-кабель. Так же можно настроить одновременный вывод звука на динамики и Bluetooth-наушники, или Bluetooth-колонку. Проверил – все отлично работает. Я так понял, что можно выводить максимум на два разных устройства.
Единственный минус, который я заметил у себя, так это то, что звук который выводится через стерео микшер немного отстает. Я выводил на монитор (подключен по HDMI) со встроенными динамиками. Есть небольшая рассинхронизация звука между разными источниками вывода. Возможно, это такая проблема только на моем оборудовании, так как железо у меня не самое новое и мощное. А вообще, эта фишка интересно работает. Так же пробовал выводить звук одновременно на динамики ноутбука и на Bluetooth-наушники. Можно, например, подключить Bluetooth-колонку, вывести на нее звук и поставить ее где-то за спиной. Получится объемный звук.
Перед настройкой нужно подключить к компьютеру этот второй источник вывода звука и убедится, что он работает (звук выводится, если установить это устройство по умолчанию). Будь то телевизор, или Bluetooth наушники/колонка. Думаю, эти инструкции вам пригодятся:
- Как подключить телевизор к компьютеру через HDMI
- Как подключить ноутбук к телевизору через HDMI
- Как подключить Bluetooth колонку к ноутбуку или компьютеру
- Как подключить Bluetooth наушники к компьютеру или ноутбуку на Windows 10
Подключили, проверили все ли работает, и только после этого можно переходить к настройке.
Стерео микшер в Windows 10: вывод звука на два устройства одновременно
Открываем параметры звука (нажав на соответствующую иконку в трее правой кнопкой мыши) и переходим в панель управления звуком.

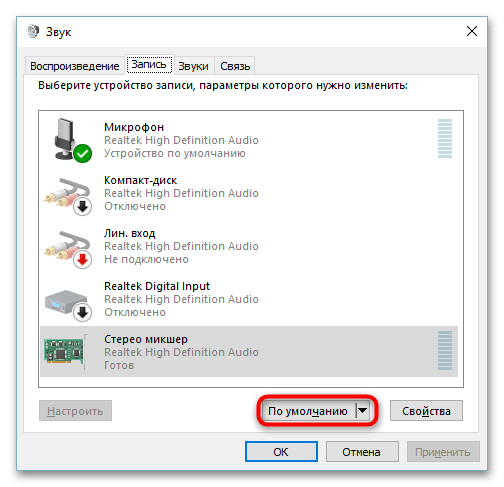
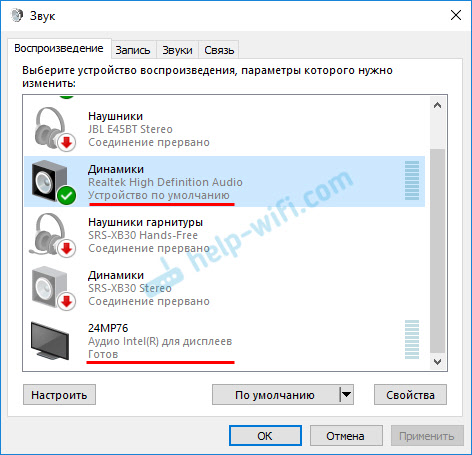
В окне «Звук» проверяем, чтобы устройство «Динамики» было в статусе «Устройство по умолчанию». Если это не так, то нажмите на них правой кнопкой мыши и выберите «Использовать по умолчанию». Так же обратите внимание, что у меня там отображается подключенный по HDMI телевизор (в моем случае это монитор со встроенными динамиками, это не важно) и он в статусе «Готов».
Переходим на вкладку «Запись». Там должен быть «Стерео микшер». Если он тусклый и возле него написано «Отключено», то нажмите на него правой кнопкой мыши и выберите «Включить». Так же, если он не используется по умолчанию (возле него нет соответствующей надписи), то нажмите правой кнопкой мыши и выберите «Использовать по умолчанию». После чего нажмите еще раз и откройте «Свойства».

В новом окне, открыв вкладку «Прослушать», убедитесь, что возле пункта «Прослушивать с данного устройства» стоит галочка. Из меню выберите устройство, на которое нужно вывести звук с компьютера. Значит динамики у нас используются по умолчанию, и нужно выбрать второе устройство. В моем случае это телевизор (имя устройства у вас будет другое). Так же это могут быть Bluetooth-наушники, колонка, возможно еще какое-то устройство.

После нажатия на кнопку «Применить», звук начал воспроизводится одновременно из колонок (динамиков ноутбука) и телевизора. Проверьте уровень громкости на телевизоре, или наушниках (колонке).
Чтобы отключить звук из второго источника, достаточно выключить стерео микшер, или отключит устройство. Настройки сохраняются. Когда мы регулируем звук в настройках Windows, то он одновременно регулируется на обеих устройствах (в моем случае на колонках и динамиках телевизора).
Дополнительные настройки стерео микшера
Там в настройках стерео микшера есть еще несколько вкладок с дополнительными настройками. Давайте посмотрим, что там можно настроить и нужно ли это делать. Скажу сразу, что ничего интересного и полезного я там не нашел.
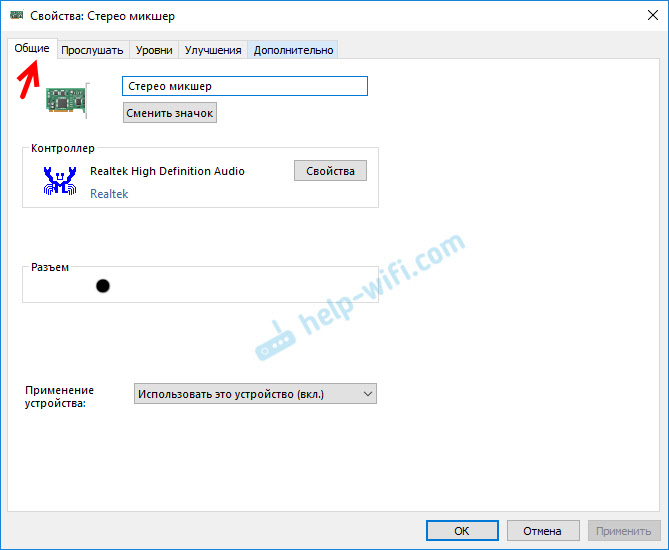
На вкладке «Общие» находится информация о самом устройстве. Можно открыть свойства контроллера (обычно это Realtek High Definition Audio), сменить имя или иконку, или выключить/включить стерео микшер.
Открыв вкладку «Уровни», можно изменить громкость на устройстве, на которое выводится звук через стерео микшер. Так же можно отключить звук и изменить баланс.

На вкладке «Улучшения» по идеи должны быть какие-то настройки для улучшения звука. Но у себя я их не обнаружил. Только одна галочка «Отключение всех звуковых эффектов», которая ни на что не влияет (в моем случае).

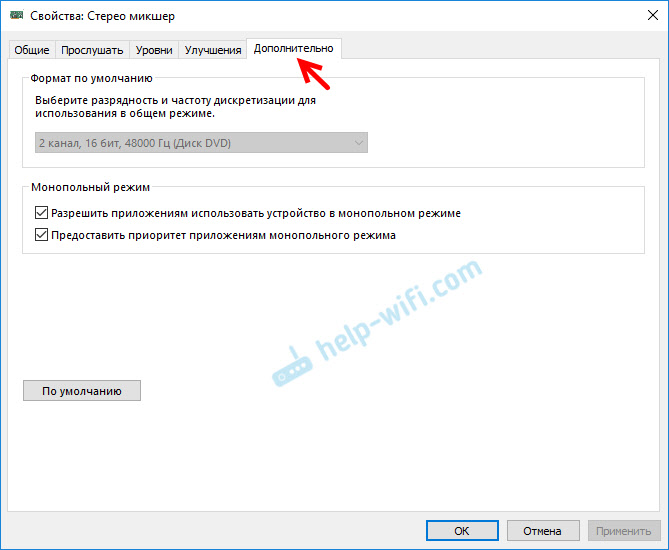
Ну и вкладка «Дополнительно», на которой можно настроить разрядность и частоту дискретизации (эти настройки у меня не активны) и настроить монопольный режим. Эти настройки лучше не трогать. Хотя в моем случае, они ни на что не влияли. По крайней мере я ничего не заметил.
Вот собственно и все настройки.
Надеюсь, вы смогли настроить этот стерео микшер в Windows 10 и вывести звук на два устройства одновременно. Напишите в комментариях, для каких задач вы используете эту схему, на какие устройства выводите звук, и как все это у вас работает. Нет рассинхронизации звука? Ну и задавайте вопросы, не стесняйтесь 🙂