
View this page
Toggle table of contents sidebar
Usually, pip is automatically installed if you are:
-
working in a
virtual environment -
using Python downloaded from python.org
-
using Python that has not been modified by a redistributor to remove
ensurepip
Supported Methods
If your Python environment does not have pip installed, there are 2 mechanisms
to install pip supported directly by pip’s maintainers:
-
ensurepip -
get-pip.py
ensurepip
Python comes with an ensurepip module[1], which can install pip in
a Python environment.
Linux
$ python -m ensurepip --upgrade
MacOS
$ python -m ensurepip --upgrade
Windows
C:> py -m ensurepip --upgrade
More details about how ensurepip works and how it can be used, is
available in the standard library documentation.
get-pip.py
This is a Python script that uses some bootstrapping logic to install
pip.
-
Download the script, from https://bootstrap.pypa.io/get-pip.py.
-
Open a terminal/command prompt,
cdto the folder containing the
get-pip.pyfile and run:
More details about this script can be found in pypa/get-pip’s README.
Standalone zip application
Note
The zip application is currently experimental. We test that pip runs correctly
in this form, but it is possible that there could be issues in some situations.
We will accept bug reports in such cases, but for now the zip application should
not be used in production environments.
In addition to installing pip in your environment, pip is available as a
standalone zip application.
This can be downloaded from https://bootstrap.pypa.io/pip/pip.pyz. There are
also zip applications for specific pip versions, named pip-X.Y.Z.pyz.
The zip application can be run using any supported version of Python:
If run directly:
Linux
$ chmod +x ./pip.pyz
$ ./pip.pyz
then the currently active Python interpreter will be used.
MacOS
$ chmod +x ./pip.pyz
$ ./pip.pyz
then the currently active Python interpreter will be used.
Windows
then the currently active Python interpreter will be used.
You may need to configure your system to recognise the .pyz extension
before this will work.
Alternative Methods
Depending on how you installed Python, there might be other mechanisms
available to you for installing pip such as
using Linux package managers.
These mechanisms are provided by redistributors of pip, who may have modified
pip to change its behaviour. This has been a frequent source of user confusion,
since it causes a mismatch between documented behaviour in this documentation
and how pip works after those modifications.
If you face issues when using Python and pip installed using these mechanisms,
it is recommended to request for support from the relevant provider (eg: Linux
distro community, cloud provider support channels, etc).
Upgrading pip
Upgrade your pip by running:
Linux
$ python -m pip install --upgrade pip
MacOS
$ python -m pip install --upgrade pip
Windows
C:> py -m pip install --upgrade pip
Compatibility
The current version of pip works on:
-
Windows, Linux and macOS.
-
CPython 3.9, 3.10, 3.11, 3.12, 3.13, and latest PyPy3.
pip is tested to work on the latest patch version of the Python interpreter,
for each of the minor versions listed above. Previous patch versions are
supported on a best effort approach.
Other operating systems and Python versions are not supported by pip’s
maintainers.
Users who are on unsupported platforms should be aware that if they hit issues, they may have to resolve them for themselves. If they received pip from a source which provides support for their platform, they should request pip support from that source.
This section covers the basics of how to install Python packages.
It’s important to note that the term “package” in this context is being used to
describe a bundle of software to be installed (i.e. as a synonym for a
distribution). It does not refer to the kind
of package that you import in your Python source code
(i.e. a container of modules). It is common in the Python community to refer to
a distribution using the term “package”. Using
the term “distribution” is often not preferred, because it can easily be
confused with a Linux distribution, or another larger software distribution
like Python itself.
Requirements for Installing Packages
This section describes the steps to follow before installing other Python
packages.
Ensure you can run Python from the command line
Before you go any further, make sure you have Python and that the expected
version is available from your command line. You can check this by running:
You should get some output like Python 3.6.3. If you do not have Python,
please install the latest 3.x version from python.org or refer to the
Installing Python section of the Hitchhiker’s Guide to Python.
Note
If you’re a newcomer and you get an error like this:
>>> python3 --version
Traceback (most recent call last):
  File "<stdin>", line 1, in <module>
NameError: name 'python3' is not defined
It’s because this command and other suggested commands in this tutorial
are intended to be run in a shell (also called a terminal or
console). See the Python for Beginners getting started tutorial for
an introduction to using your operating system’s shell and interacting with
Python.
Note
If you’re using an enhanced shell like IPython or the Jupyter
notebook, you can run system commands like those in this tutorial by
prefacing them with a ! character:
In [1]: import sys
        !{sys.executable} --version
Python 3.6.3
It’s recommended to write {sys.executable} rather than plain python in
order to ensure that commands are run in the Python installation matching
the currently running notebook (which may not be the same Python
installation that the python command refers to).
Note
Due to the way most Linux distributions are handling the Python 3
migration, Linux users using the system Python without creating a virtual
environment first should replace the python command in this tutorial
with python3 and the python -m pip command with python3 -m pip --user. Do not
run any of the commands in this tutorial with sudo: if you get a
permissions error, come back to the section on creating virtual environments,
set one up, and then continue with the tutorial as written.
Ensure you can run pip from the command line
Additionally, you’ll need to make sure you have pip available. You can
check this by running:
If you installed Python from source, with an installer from python.org, or
via Homebrew you should already have pip. If you’re on Linux and installed
using your OS package manager, you may have to install pip separately, see
Installing pip/setuptools/wheel with Linux Package Managers.
If pip isn’t already installed, then first try to bootstrap it from the
standard library:
Unix/macOS
python3 -m ensurepip --default-pip
Windows
py -m ensurepip --default-pip
If that still doesn’t allow you to run python -m pip:
-
Securely Download get-pip.py [1]
-
Run
python get-pip.py. [2] This will install or upgrade pip.
Additionally, it will install Setuptools and wheel if they’re
not installed already.Warning
Be cautious if you’re using a Python install that’s managed by your
operating system or another package manager. get-pip.py does not
coordinate with those tools, and may leave your system in an
inconsistent state. You can usepython get-pip.py --prefix=/usr/local/
to install in/usr/localwhich is designed for locally-installed
software.
Ensure pip, setuptools, and wheel are up to date
While pip alone is sufficient to install from pre-built binary archives,
up to date copies of the setuptools and wheel projects are useful
to ensure you can also install from source archives:
Unix/macOS
python3 -m pip install --upgrade pip setuptools wheel
Windows
py -m pip install --upgrade pip setuptools wheel
Optionally, create a virtual environment
See section below for details,
but here’s the basic venv [3] command to use on a typical Linux system:
Unix/macOS
python3 -m venv tutorial_env
source tutorial_env/bin/activate
Windows
py -m venv tutorial_env
tutorial_env\Scripts\activate
This will create a new virtual environment in the tutorial_env subdirectory,
and configure the current shell to use it as the default python environment.
Creating Virtual Environments
Python “Virtual Environments” allow Python packages to be installed in an isolated location for a particular application,
rather than being installed globally. If you are looking to safely install
global command line tools,
see Installing stand alone command line tools.
Imagine you have an application that needs version 1 of LibFoo, but another
application requires version 2. How can you use both these applications? If you
install everything into /usr/lib/python3.6/site-packages (or whatever your
platform’s standard location is), it’s easy to end up in a situation where you
unintentionally upgrade an application that shouldn’t be upgraded.
Or more generally, what if you want to install an application and leave it be?
If an application works, any change in its libraries or the versions of those
libraries can break the application.
Also, what if you can’t install packages into the
global site-packages directory? For instance, on a shared host.
In all these cases, virtual environments can help you. They have their own
installation directories and they don’t share libraries with other virtual
environments.
Currently, there are two common tools for creating Python virtual environments:
-
venv is available by default in Python 3.3 and later, and installs
pip into created virtual environments in Python 3.4 and later
(Python versions prior to 3.12 also installed Setuptools). -
virtualenv needs to be installed separately, but supports Python 2.7+
and Python 3.3+, and pip, Setuptools and wheel are
installed into created virtual environments by default. Note thatsetuptoolsis no longer
included by default starting with Python 3.12 (andvirtualenvfollows this behavior).
The basic usage is like so:
Using venv:
Unix/macOS
python3 -m venv <DIR>
source <DIR>/bin/activate
Windows
py -m venv <DIR>
<DIR>\Scripts\activate
Using virtualenv:
Unix/macOS
python3 -m virtualenv <DIR>
source <DIR>/bin/activate
Windows
virtualenv <DIR>
<DIR>\Scripts\activate
For more information, see the venv docs or
the virtualenv docs.
The use of source under Unix shells ensures
that the virtual environment’s variables are set within the current
shell, and not in a subprocess (which then disappears, having no
useful effect).
In both of the above cases, Windows users should not use the
source command, but should rather run the activate
script directly from the command shell like so:
Managing multiple virtual environments directly can become tedious, so the
dependency management tutorial introduces a
higher level tool, Pipenv, that automatically manages a separate
virtual environment for each project and application that you work on.
Use pip for Installing
pip is the recommended installer. Below, we’ll cover the most common
usage scenarios. For more detail, see the pip docs,
which includes a complete Reference Guide.
Installing from PyPI
The most common usage of pip is to install from the Python Package
Index using a requirement specifier. Generally speaking, a requirement specifier is
composed of a project name followed by an optional version specifier. A full description of the supported specifiers can be
found in the Version specifier specification.
Below are some examples.
To install the latest version of “SomeProject”:
Unix/macOS
python3 -m pip install "SomeProject"
Windows
py -m pip install "SomeProject"
To install a specific version:
Unix/macOS
python3 -m pip install "SomeProject==1.4"
Windows
py -m pip install "SomeProject==1.4"
To install greater than or equal to one version and less than another:
Unix/macOS
python3 -m pip install "SomeProject>=1,<2"
Windows
py -m pip install "SomeProject>=1,<2"
To install a version that’s compatible
with a certain version: [4]
Unix/macOS
python3 -m pip install "SomeProject~=1.4.2"
Windows
py -m pip install "SomeProject~=1.4.2"
In this case, this means to install any version “==1.4.*” version that’s also
“>=1.4.2”.
Source Distributions vs Wheels
pip can install from either Source Distributions (sdist) or Wheels, but if both are present
on PyPI, pip will prefer a compatible wheel. You can override
pip`s default behavior by e.g. using its –no-binary option.
Wheels are a pre-built distribution format that provides faster installation compared to Source
Distributions (sdist), especially when a
project contains compiled extensions.
If pip does not find a wheel to install, it will locally build a wheel
and cache it for future installs, instead of rebuilding the source distribution
in the future.
Upgrading packages
Upgrade an already installed SomeProject to the latest from PyPI.
Unix/macOS
python3 -m pip install --upgrade SomeProject
Windows
py -m pip install --upgrade SomeProject
Installing to the User Site
To install packages that are isolated to the
current user, use the --user flag:
Unix/macOS
python3 -m pip install --user SomeProject
Windows
py -m pip install --user SomeProject
For more information see the User Installs section
from the pip docs.
Note that the --user flag has no effect when inside a virtual environment
— all installation commands will affect the virtual environment.
If SomeProject defines any command-line scripts or console entry points,
--user will cause them to be installed inside the user base’s binary
directory, which may or may not already be present in your shell’s
PATH. (Starting in version 10, pip displays a warning when
installing any scripts to a directory outside PATH.) If the scripts
are not available in your shell after installation, you’ll need to add the
directory to your PATH:
-
On Linux and macOS you can find the user base binary directory by running
python -m site --user-baseand addingbinto the end. For example,
this will typically print~/.local(with~expanded to the absolute
path to your home directory) so you’ll need to add~/.local/binto your
PATH. You can set yourPATHpermanently by modifying ~/.profile. -
On Windows you can find the user base binary directory by running
py -mand replacing
site --user-sitesite-packageswithScripts. For
example, this could return
C:\Users\Username\AppData\Roaming\Python36\site-packagesso you would
need to set yourPATHto include
C:\Users\Username\AppData\Roaming\Python36\Scripts. You can set your user
PATHpermanently in the Control Panel. You may need to log out for the
PATHchanges to take effect.
Requirements files
Install a list of requirements specified in a Requirements File.
Unix/macOS
python3 -m pip install -r requirements.txt
Windows
py -m pip install -r requirements.txt
Installing from VCS
Install a project from VCS in “editable” mode. For a full breakdown of the
syntax, see pip’s section on VCS Support.
Unix/macOS
python3 -m pip install -e SomeProject @ git+https://git.repo/some_pkg.git          # from git
python3 -m pip install -e SomeProject @ hg+https://hg.repo/some_pkg                # from mercurial
python3 -m pip install -e SomeProject @ svn+svn://svn.repo/some_pkg/trunk/         # from svn
python3 -m pip install -e SomeProject @ git+https://git.repo/some_pkg.git@feature  # from a branch
Windows
py -m pip install -e SomeProject @ git+https://git.repo/some_pkg.git          # from git
py -m pip install -e SomeProject @ hg+https://hg.repo/some_pkg                # from mercurial
py -m pip install -e SomeProject @ svn+svn://svn.repo/some_pkg/trunk/         # from svn
py -m pip install -e SomeProject @ git+https://git.repo/some_pkg.git@feature  # from a branch
Installing from other Indexes
Install from an alternate index
Unix/macOS
python3 -m pip install --index-url http://my.package.repo/simple/ SomeProject
Windows
py -m pip install --index-url http://my.package.repo/simple/ SomeProject
Search an additional index during install, in addition to PyPI
Unix/macOS
python3 -m pip install --extra-index-url http://my.package.repo/simple SomeProject
Windows
py -m pip install --extra-index-url http://my.package.repo/simple SomeProject
Installing from a local src tree
Installing from local src in
Development Mode,
i.e. in such a way that the project appears to be installed, but yet is
still editable from the src tree.
Unix/macOS
python3 -m pip install -e <path>
Windows
py -m pip install -e <path>
You can also install normally from src
Unix/macOS
python3 -m pip install <path>
Windows
Installing from local archives
Install a particular source archive file.
Unix/macOS
python3 -m pip install ./downloads/SomeProject-1.0.4.tar.gz
Windows
py -m pip install ./downloads/SomeProject-1.0.4.tar.gz
Install from a local directory containing archives (and don’t check PyPI)
Unix/macOS
python3 -m pip install --no-index --find-links=file:///local/dir/ SomeProject
python3 -m pip install --no-index --find-links=/local/dir/ SomeProject
python3 -m pip install --no-index --find-links=relative/dir/ SomeProject
Windows
py -m pip install --no-index --find-links=file:///local/dir/ SomeProject
py -m pip install --no-index --find-links=/local/dir/ SomeProject
py -m pip install --no-index --find-links=relative/dir/ SomeProject
Installing from other sources
To install from other data sources (for example Amazon S3 storage)
you can create a helper application that presents the data
in a format compliant with the simple repository API:,
and use the --extra-index-url flag to direct pip to use that index.
./s3helper --port=7777
python -m pip install --extra-index-url http://localhost:7777 SomeProject
Installing Prereleases
Find pre-release and development versions, in addition to stable versions. By
default, pip only finds stable versions.
Unix/macOS
python3 -m pip install --pre SomeProject
Windows
py -m pip install --pre SomeProject
Как любой серьёзный язык программирования, Python поддерживает сторонние библиотеки и фреймворки. Их устанавливают, чтобы не изобретать колесо в каждом новом проекте. Необходимы пакеты можно найти в центральном репозитории Python — PyPI (Python Package Index — каталог пакетов Python).
Однако скачивание, установка и работа с этими пакетами вручную утомительны и занимают много времени. Именно поэтому многие разработчики полагаются на специальный инструмент PIP для Python, который всё делает гораздо быстрее и проще.
Сама аббревиатура — рекурсивный акроним, который на русском звучит как “PIP установщик пакетов” или “Предпочитаемый установщик программ”. Это утилита командной строки, которая позволяет устанавливать, переустанавливать и деинсталлировать PyPI пакеты простой командой pip.
Если вы когда-нибудь работали с командной строкой Windows и с терминалом на Linux или Mac и чувствуете себя уверенно, можете пропустить инструкции по установке.
Устанавливается ли PIP вместе с Python?
Если вы пользуетесь Python 2.7.9 (и выше) или Python 3.4 (и выше), PIP устанавливается вместе с Python по умолчанию. Если же у вас более старая версия Python, то сначала ознакомьтесь с инструкцией по установке.
Правильно ли Python установлен?
Вы должны быть уверены, что Python должным образом установлен на вашей системе. На Windows откройте командную строку с помощью комбинации Win+X. На Mac запустите терминал с помощью Command+пробел, а на Linux – комбинацией Ctrl+Alt+T или как-то иначе именно для вашего дистрибутива.
Затем введите команду:
python --version
На Linux пользователям Python 3.x следует ввести:
python3 --version
Если вы получили номер версии (например, Python 2.7.5), значит Python готов к использованию.
Если вы получили сообщение Python is not defined (Python не установлен), значит, для начала вам следует установить Python. Это уже не по теме статьи. Подробные инструкции по установке Python читайте в теме: Скачать и установить Python.
Как установить PIP на Windows.
Следующие инструкции подойдут для Windows 7, Windows 8.1 и Windows 10.
- Скачайте установочный скрипт get-pip.py. Если у вас Python 3.2, версия get-pip.py должны быть такой же. В любом случае щелкайте правой кнопкой мыши на ссылке и нажмите “Сохранить как…” и сохраните скрипт в любую безопасную папку, например в “Загрузки”.
- Откройте командную строку и перейдите к каталогу с файлом get-pip.py.
- Запустите следующую команду:
python get-pip.py
Как установить PIP на Mac
Современные версии Mac идут с установленными Python и PIP. Так или иначе версия Python устаревает, а это не лучший вариант для серьёзного разработчика. Так что рекомендуется установить актуальные версии Python и PIP.
Если вы хотите использовать родную систему Python, но у вас нет доступного PIP, его можно установить следующей командой через терминал:
sudo easy_install pip
Если вы предпочитаете более свежие версии Python, используйте Homebrew. Следующие инструкции предполагают, что Homebrew уже установлен и готов к работе.
Установка Python с помощью Homebrew производится посредством одной команды:
brew install python
Будет установлена последняя версия Python, в которую может входить PIP. Если после успешной установки пакет недоступен, необходимо выполнить перелинковку Python следующей командой:
brew unlink python && brew link python
Как установить PIP на Linux
Если у вас дистрибутив Linux с уже установленным на нем Python, то скорее всего возможно установить PIP, используя системный пакетный менеджер. Это более удачный способ, потому что системные версии Python не слишком хорошо работают со скриптом get-pip.py, используемым в Windows и Mac.
Advanced Package Tool (Python 2.x)
sudo apt-get install python-pip
Advanced Package Tool (Python 3.x)
sudo apt-get install python3-pip
pacman Package Manager (Python 2.x)
sudo pacman -S python2-pip
pacman Package Manager (Python 3.x)
sudo pacman -S python-pip
Yum Package Manager (Python 2.x)
sudo yum upgrade python-setuptools
sudo yum install python-pip python-wheel
Yum Package Manager (Python 3.x)
sudo yum install python3 python3-wheel
Dandified Yum (Python 2.x)
sudo dnf upgrade python-setuptools
sudo dnf install python-pip python-wheel
Dandified Yum (Python 3.x)
sudo dnf install python3 python3-wheel
Zypper Package Manager (Python 2.x)
sudo zypper install python-pip python-setuptools python-wheel
Zypper Package Manager (Python 3.x)
sudo zypper install python3-pip python3-setuptools python3-wheel
Как установить PIP на Raspberry Pi
Как пользователь Raspberry, возможно, вы запускали Rapsbian до того, как появилась официальная и поддерживаемая версия системы. Можно установить другую систему, например, Ubuntu, но в этом случае вам придётся воспользоваться инструкциями по Linux.
Начиная с Rapsbian Jessie, PIP установлен по умолчанию. Это одна из серьёзных причин, чтобы обновиться до Rapsbian Jessie вместо использования Rapsbian Wheezy или Rapsbian Jessie Lite. Так или иначе, на старую версию, все равно можно установить PIP.
Для Python 2.x:
sudo apt-get install python-pip
Для Python 3.x:
sudo apt-get install python3-pip
На Rapsbian для Python 2.x следует пользоваться командой pip, а для Python 3.x — командой pip3 при использовании команд для PIP.
Как обновить PIP для Python
Пока PIP не слишком часто обновляется самостоятельно, очень важно постоянно иметь свежую версию. Это может иметь значение при исправлении багов, совместимости и дыр в защите.
К счастью, обновление PIP проходит просто и быстро.
Для Windows:
python -m pip install -U pip
Для Mac, Linux, или Raspberry Pi:
pip install -U pip
На текущих версиях Linux и Rapsbian Pi следует использовать команду pip3.
Как устанавливать библиотеки Python с помощью PIP
Если PIP работоспособен, можно начинать устанавливать пакеты из PyPI:
pip install package-name
Установка определённой версии вместо новейшей версии пакета:
pip install package-name==1.0.0
Поиск конкретного пакета:
pip search "query"
Просмотр деталей об установленном пакете:
pip show package-name
Список всех установленных пакетов:
pip list
Список всех устаревших пакетов:
pip list --outdated
Обновление устаревших пакетов:
pip install package-name --upgrade
Следует отметить, что старая версия пакета автоматически удаляется при обновлении до новой версии.
Полностью переустановить пакет:
pip install package-name --upgrade --force-reinstall
Полностью удалить пакет:
pip uninstall package-name
PIP stands for “Preferred Installer Program” or “Pip Installs Packages” and is a standard package manager for Python that enables users to install and manage additional libraries and dependencies not included in the standard Python library. To use PIP, you must install Python on your Windows machine.
This article provides a step-by-step guide on how to install and configure PIP on Windows, along with tips for managing Python packages effectively.
Prerequisities:
- Windows (11, 10, 8 , 7)
- Python (version 3.13.1)
- Admin Rights
Verify Python Installation
Before installing PIP, you need to ensure that Python is already installed on your system. You can check this by running the following command in the command prompt
python --version
If it is installed, You will see something like this:
Python 3.13.1
If it is not installed, you can install it with the help of this article: How to install Python on Windows.
To get more knowledge about Python packages or modules, get hands-on in our Python course. This course will offer you basic to advanced insights into Python programming.
Installing Python PIP on Windows
Installing pip in Windows is very easy. You just need to follow the given steps to install pip and some additional steps to finally use it. By these steps, we can see how to pip install on Windows. To ensure proper installation and use of pip we need to tick this checklist to install pip Python:
- Download PIP
- Install PIP
- Verify Installation
- Add pip to environment variables
1. Download PIP
To install PIP, you’ll need the get-pip.py script. Let’s understand this in the below-mentioned detailed steps:
Method 1. Install Python pip using Python cURL
Curl is a UNIX command that is used to send the PUT, GET, and POST requests to a URL. This tool is utilized for downloading files, testing REST APIs, etc.
Note: It will download the get-pip.py file.
Follow these instructions to pip windows install:
Step 1: Open Command Prompt
Press Win + R and type CMD and hit the enter button to open the cmd terminal using the Windows keyboard shortcut or alternatively, click on Start Menu and type “Command Prompt” and hit the enter button.
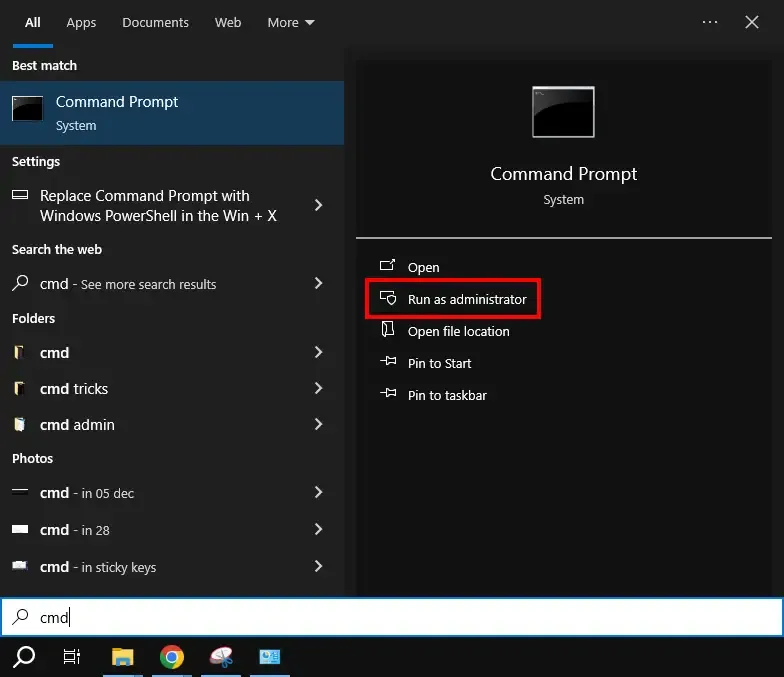
Start Menu – Command Prompt – Run as admin
2. Installing PIP
Here, we have now used cURL to transfer the data requests, let’s check out the executed command in here:
Step 2: Transfer Data Request from a Server
In python, a curl is a tool for transferring data requests to and from a server. Use the following command to request:
https://bootstrap.pypa.io/get-pip.py
python get-pip.py
Method 2. Manually Download and Install Python PIP on Windows
Python pip must be manually installed on Windows. We can pip install in Python by manually installing it. You might need to use the correct version of the file from pypa.io if you’re using an earlier version of Python or pip. Get the file and save it to a folder on your PC.
1.1 Download PIP
This is another method for downloading PIP manually. Let’s check down the steps below:
Step 1: Download the get-pip-py Script
Download the get-pip.py (https://bootstrap.pypa.io/get-pip.py) file and store it in the same directory as Python is installed.
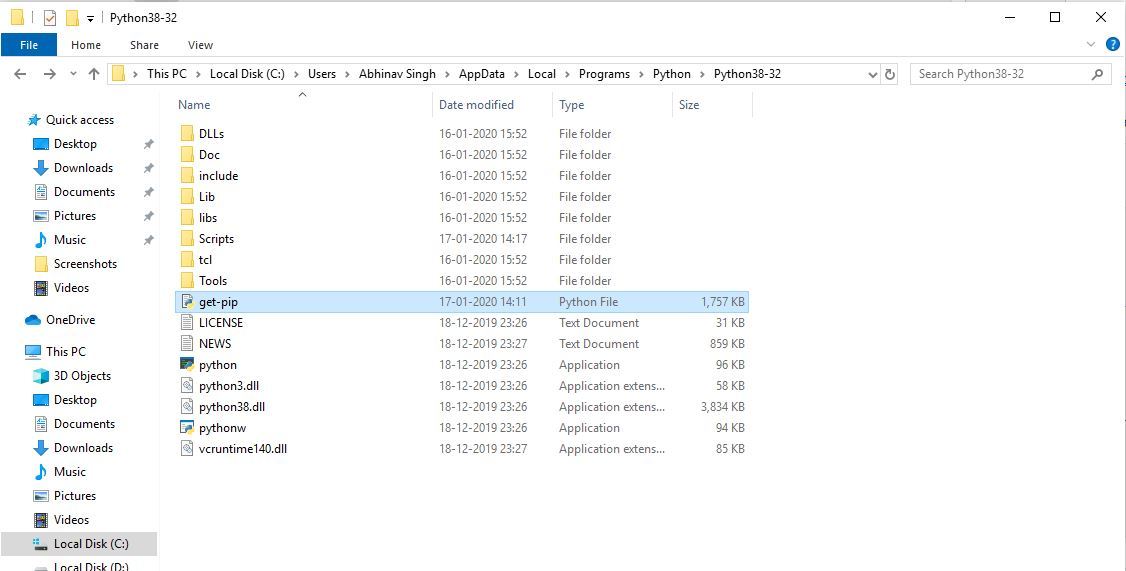
Step 2: Change the Directory
Change the current path of the directory in the command line to the path of the directory where the above file exists.

2.2 Installing PIP
Now, in the next two steps, we will understand how you can install PIP in Python environment. Let’s check them out:
Step 3: Execute the command to Install Python
get-pip.py is a bootstrapping script that enables users to install pip in Python environments. Here, we are installing pip python3. Run the command given below:
python get-pip.py
Step 4: Wait Untill You Get the Confirmation
Now wait through the installation process. Voila! pip is now installed on your system.

3. Verify the PIP Installation
One can easily verify if the pip has been installed correctly by performing a version check on the same. Just go to the command line and execute the following command:
pip -Vorpip --version

4. Adding PIP to Windows Environment Variables
If you are facing any path error then you can follow the following steps to add the pip to your PATH. You can follow the following steps to adding pip to path Windows 10 and set the Path:
Step 1: Locate te PIP installation directory
- You are likely to get this in: C\Python33\Scripts\
Step 2: Add to the PATH
- Go to System and Security > System in the Control Panel
- On the left side, click the Advanced system settings link.
- Then, select Environment Variables.
- Double-click the PATH variable under System Variables.
- Click New, and add the directory where pip is installed, e.g. C:\Python33\Scripts\ and select OK.
Step 3: Verify
- Open the command prompt and type the following command to verify the PIP installation:
pip --version
How to Upgrade Pip On Windows
pip can be upgraded using the following command:
python -m pip install -U pip
How to Downgrad PIP on Windows
It may happen sometimes that your current pip version is not supporting your current version of python or machine.
To fix that, you can downgrade your pip version with the help of Python pip install command and the following command.
Note: You can mention the version you want to install
python -m pip install pip==17.0
If you followed these steps, you will not face any issues while installing pip on windows. We have also discussed methods to upgrade or downgrade pip version in case you face any issues.
Managing Python Packages with PIP
Once PIP is installed, you can use it to manage Python packages. Here are some common commands:
- Install a Package: To install a package, use:
pip install package_name - Uninstall a Package: To remove a package, use:
pip uninstall package_name - List Installed Packages: To see all installed packages, use:
pip list - Show Package Information: To get detailed information about a package, use:
pip show package_name - Search for Packages: To search for packages in the Python Package Index (PyPI), use:
pip search package_name
Troubleshooting Tips
1. Python Not Recognized
Always ensure that Python is added to the PATH during the installation. In case, if it’s not, you can modify the PATH manually.
2. Permission Errors
Try running the Command Prompt as an administrator access.
3. SSL Errors
Ensure that te date and time is correct of your system (as SSL certificates usually relies on actual system clocks.)
Also Read
- How to install PIP in Linux?
- How to install pip in macOS?
- Download and install pip Latest Version
Conclusion
By following this guide, you can successfully download, install, upgrade, downgrade, and manage PIP on Windows seamlessly. With PIP installed in your system, you can easily manage to Python packages and enhance your Python development environment. Whether you’re a beginner or an experienced developer, understanding how to work with PIP is essential for efficient Python programming.
Последнее обновление: 08.03.2025
По умолчанию вместе с установкой интерпретатора Python также устанавливается множество дополнительных пакетов/библиотек, которые с помощью импорта соответствующих модулей мы можем использовать в своей программе. Часть из них уже была рассмотрена
в предыдущих статьях. Однако кроме встроенных пакетов есть огромнейшее количество пакетов, которые развиваются сообществом (различными компаниями или даже отдельными разработчиками) и которые мы также можем использовать при разработке приложения.
Для управления пакетами — их установки или удаления необходим такой инструмент как менеджер пакетов. Для работы с пакетами Python существует множество менеджеров пакетов, например,
pip, conda, pixi, uv и так далее.
Этой статье мы рассмотрим использование менеджера pip, поскольку он является стандартным и наиболее распространенным способом для управления пакетами, и, кроме того, обычно он устанавливается вместе с
интерпретатором Python и поэтому обычно уже присутствует в системе. pip загружает пакеты из репозитория PyPI (Python Package Index), который является самым большим репозиторием пакетов Python. Так, на момент написания текущей статьи PyPI насчитывал более 600000 проектов.
Репозиторий также доступен по адресу https://pypi.org/. В частности, через веб-интерфейс можно найти нужный пакет, всю связанную с ним информацию, его историю версий и т.д.
Для начала необходимо убедиться, что у вас установлен pip. Если у вас установлен Python, то, скорее всего, pip тоже уже есть. Чтобы проверить наличие pip, откройте терминал (или командную строку) и выполните команду:
pip --version
Если pip установлен, вы увидите версию менеджера пакетов:
eugene@Eugene:~$ pip --version
pip 24.0 from /usr/lib/python3/dist-packages/pip (python 3.12)
eugene@Eugene:~$
Если pip по какой-то причине вдруг не был установлен, то мы увидим ошибку типа
"pip" не является внутренней или внешней командой, исполняемой программой или пакетным файлом
В этом случае нам надо установить pip. Для этого можно выполнить в командной строке/консоли следующую команду:
python -m ensurepip --upgrade
Если pip ранее уже был установлен, то можно его обновить с помощью команды
python -m pip install --upgrade pip
Установка виртуальной среды
В операционной системе на базе Linux (Ubuntu, Debian и др.), где используется встроенное управление пакетами, например, через apt или другой пакетный менеджер, перед установкой пакетов Python через pip
также необходимо создать виртуальную среду. На Windows использовать виртуальную среду необязательно, но тоже является рекомендуемым подходом при работы с пакетами Python.
Виртуальная среда позволяет изолировать пакеты от системных установок Python.
Так, без использования виртуальной среды все устанавливаемые через pip пакеты на Windows устанавливаются глобально. Однако что если после создания первого приложения выйдет новая версия используемого пакета?
Если мы захотим использовать для второго проекта новую версию пакета, то из-за глобальной установки пакетов придется обновлять первый проект, который использует старую версию.
Это потребует некоторой дополнительной работы по обновлению, так как не всегда соблюдается обратная совместимость между пакетами.
Если мы решим использовать для второго проекта старую версию, то мы лишимся потенциальных преимуществ новой версии.
И использование виртуальной среды как раз позволяет разграничить пакеты для каждого проекта.
Для работы с виртуальной средой в python применяется встроенный модуль venv. Обычно этот модуль доступен по умолчанию, но на некоторых операционных системах на базе Linux он может остутствовать.
В этом случае нам надо установить в ОС пакет python3-venv. Например, установка на Ubuntu/Debian:
sudo apt install python3-venv
Итак, создадим вируальную среду. Вначале определим каталог для проектов и перейдем в него в консоли/командной строке. Затем для создания виртуальной среды выполним следующую команду:
python3 -m venv myenv
Модулю venv передается название среды, которая в данном случае будет называться «myvenv». Для наименования виртуальных сред нет каких-то определенных условностей.
После этого в текущей папке будет создан подкаталог «myvenv».
eugene@Eugene:/python/metanit$  python3 -m venv myenv
eugene@Eugene:/python/metanit$  ls -l myenv
total 2
drwxrwxrwx 1 root root 528 Mar  8 14:56 bin
drwxrwxrwx 1 root root   0 Mar  8 14:56 include
drwxrwxrwx 1 root root 152 Mar  8 14:56 lib
lrwxrwxrwx 1 root root   3 Mar  8 14:56 lib64 -> lib
-rwxrwxrwx 1 root root 192 Mar  8 14:56 pyvenv.cfg
eugene@Eugene:/eugene/python/metanit$
Активация виртуальной среды
Для использования виртуальную среду надо активировать. И каждый раз, когда мы будем работать с проектом, надо активировать связанную с ним виртуальную среду.
Например, активируем выше созданную среду, которая располагается в текущем каталоге в папке «myvenv». Процесс активации немного отличается в зависимости от операционной системы и от того, какие инструменты применяются. Так, в Windows можно использовать командную строку и PowerShell,
но между ними есть отличия:
-
Активация в Windows в коммандной строке
Если наша ОС — Windows, то в папке myvenv/Scripts/ мы можем найти файл activate.bat, который активирует
виртуальную среду. Так, в Windows активация виртуальной среды в коммандной строке будет выглядеть таким образом:myvenv\Scripts\activate.bat
-
Активация в Windows в PowerShell
Также при работе на Windows в папке myvenv/Scripts/ мы можем найти файлactivate.ps1, который также активирует виртуальную среду,
но применяется только в PowerShell. Но при работе с PowerShell следует учитывать, что по умолчанию в этой оболочке запрещено применять скрипты. Поэтому
перед активацией среды необходимо установить разрешения для текущего пользователя. Поэтому для активации виртуальной среды в PowerShell необходимо выполнить две следующих команды:Set-ExecutionPolicy -ExecutionPolicy RemoteSigned -Scope CurrentUser myvenv\Scripts\Activate.ps1
-
Активация в Linux и MacOS
Для Linux и MacOS активация будет производиться с помощью следующей команды:
source myvenv/bin/activate
После активации слева текущего пути мы увидим название виртуальной среду в круглых скобках:
(myenv) eugene@Eugene:/eugene/python/metanit$
Пример на основе командной строки Windows:
C:\eugene\python\metanit>python -m venv .venv

C:\eugene\python\metanit>myvenv\Scripts\activate.bat

(.venv) C:\eugene\python\metanit>
Пример на основе консоли Ubuntu:
eugene@Eugene:/python/metanit$ python3 -m venv myenv
eugene@Eugene:/python/metanit$ source myenv/bin/activate
(myenv) eugene@Eugene:/python/metanit$
Деактивация виртуальной среды
После окончания работы с виртуальной средой мы можем ее деактивировать с помощью команды:
deactivate
Управление пакетами с помощью pip
Установка пакетов
Для установки пакетов с помощью pip применяется команда
pip install название_пакета
Рассмотрим на примере установки популярного пакета для отрисовки графиков matplotlib. Для его установки после активации виртуальной среды (как было показано выше)
выполним команду
pip install matplotlib
И в конце проверим установку, выполнив команду, которая выводит версию matplotlib:
python -c "import matplotlib; print(matplotlib.__version__)"
Полный пример
(myenv) eugene@Eugene:/python/metanit$ pip install matplotlib
Collecting matplotlib
  Downloading matplotlib-3.10.1-cp312-cp312-manylinux_2_17_x86_64.manylinux2014_x86_64.whl.metadata (11 kB)
Collecting contourpy>=1.0.1 (from matplotlib)
  Downloading contourpy-1.3.1-cp312-cp312-manylinux_2_17_x86_64.manylinux2014_x86_64.whl.metadata (5.4 kB)
Collecting cycler>=0.10 (from matplotlib)
  Downloading cycler-0.12.1-py3-none-any.whl.metadata (3.8 kB)
.....................................................................
Downloading six-1.17.0-py2.py3-none-any.whl (11 kB)
Installing collected packages: six, pyparsing, pillow, packaging, kiwisolver, fonttools, cycler, contourpy, python-dateutil, matplotlib
Successfully installed contourpy-1.3.1 cycler-0.12.1 fonttools-4.56.0 kiwisolver-1.4.8 matplotlib-3.10.1 packaging-24.2 pillow-11.1.0 pyparsing-3.2.1 python-dateutil-2.9.0.post0 six-1.17.0
(myenv) eugene@Eugene:/python/metanit$ python -c "import matplotlib; print(matplotlib.__version__)"
3.10.1
(myenv) eugene@Eugene:/python/metanit$
Получение информации о пакетах
С помощью команды pip list можно получить список всех установленных пакетов и их версий:
(myenv) eugene@Eugene:/python/metanit$ pip list
Package         Version
--------------- -----------
contourpy       1.3.1
cycler          0.12.1
fonttools       4.56.0
kiwisolver      1.4.8
matplotlib      3.10.1
packaging       24.2
pillow          11.1.0
pip             24.0
pyparsing       3.2.1
python-dateutil 2.9.0.post0
six             1.17.0
(myenv) eugene@Eugene:/python/metanit$
Как видно из консольного вывода, несмотря на то, что был установлен только один пакет, вместе с ним также был установлен набор других пакетов, от которых зависит основной пакет.
Если надо получить информацию по какому-то конкретному пакету, то можно использовать команду
pip show имя_пакета
Например, получим информацию по matplotlib:
(myenv) eugene@Eugene:/python/metanit$ pip show matplotlib
Name: matplotlib
Version: 3.10.1
Summary: Python plotting package
Home-page:
Author: John D. Hunter, Michael Droettboom
................................
Requires: contourpy, cycler, fonttools, kiwisolver, numpy, packaging, pillow, pyparsing, python-dateutil
Required-by:
(myenv) eugene@Eugene:/python/metanit$
Удаление пакета
Для удаления пакета применяется команда
pip uninstall имя_пакета
Использование установленных пакетов
Теперь для демонстрации применим установленный пакет в простейшей программе. Например, выведем показатели популярности языка Python согласно рейтингу TIOBE за 2022 год помесячно. Для этого в текущем каталоге определим файл app.py со следующим кодом:
import matplotlib.pyplot as plt     # импортируем функциональность модуля pyplot из пакета matplotlib

months = ["Jan", "Feb", "Mar", "Apr", "May", "Jun", "Jul", "Aug", "Sep", "Oct", "Nov", "Dec"]
rates = [13.58,  15.33, 14.26, 13.92, 12.74, 12.2, 13.44, 15.63, 15.74, 17.08, 17.18, 16.66]

# метка по оси X
plt.xlabel("month")
# метка по оси Y
plt.ylabel("rate")

plt.plot(months, rates)
plt.show()
Так как этот код приведен больше для демонстрации, то рассмотрим вкратце, что он делает. Здесь список months хранит сокращенные названия месяцев, а rates — показатели популярности.
С помощью функции xlabel() устанавливаем метку для оси Х, а с помощью функции ylabel() — для оси Y. В функцию plot() передаются
два списка — для отображения по оси X (здесь список months) и по оси Y (здесь список rates). Функция plot() принимает набор значений, которые надо
вывести на графике. С помощью функции show() отображаем график в окне просмотра по умолчанию.
После активации виртуальной среды (если она ранее была деактивирована или не была активирован) запустип скрипт на выполнение:
(myenv) eugene@Eugene:/python/metanit$ python3 app.py
В итоге нам отобразится следующее окно:

Таким образом, пакетный менеджер pip позволяет устанавливать пакеты Python. А создание виртуальных окружений предоставляет лучший способ работать с Python-проектами, особенно когда нужно установить дополнительные пакеты, такие как matplotlib, без изменения глобальных системных установок. Это изолирует зависимости и предотвращает конфликты с другими проектами и системными библиотеками.