
Если вы удалили или заменили один, или несколько системных шрифтов в Windows, вы можете воспользоваться восстановления стандартных шрифтов и их настроек. Если в системных (и не только) диалоговых окнах вместо нормальных символов отображаются что-то непонятное или вообще нечитаемые символы (в нашем примере, это иероглифы и квадратики), скорее всего в Windows отсутствуют какие-то файлы системных шрифтов. Такая проблема может возникнуть после деинсталляции стороннего приложения, которое при удалении вместе с собой удалило несколько файлов системных шрифтов (вплоть до полной очистки каталога со шрифтами C:\Windows\Fonts). Также проблема с шрифтами может встречаться, когда некая программа при установке заменила один из стандартных шрифтов своим собственным файлов.
В этой статье мы разберем методику, позволяющую восстановить стандартные системные шрифты Windows 10 или Windows 11 к состоянию чистой системы.

Содержание:
- Встроенное средство восстановления шрифтов Windows
- Как извлечь файлы стандартных системных шрифтов из установочного образа Windows 10 или 11?
- Сброс кэша шрифтов Windows
- Готовые архивы со стандартными шрифтами для Windows 10, 11 и 8.1
Встроенное средство восстановления шрифтов Windows
В первую очередь стоит попробовать восстановить стандартные шрифты Windows 10/8.1 с помощью встроенного функционала. Для этого:
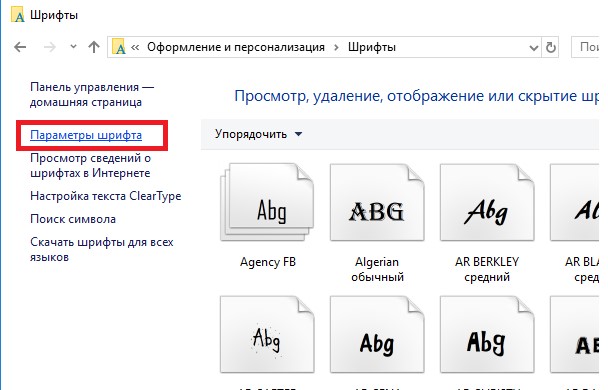
- Откройте Панель управления и перейдите в раздел Оформление и персонализация –> Шрифты (Control Panel -> Appearance and Personalization -> Fonts). Эту панель можно открыть, выполнив команду:
control fonts
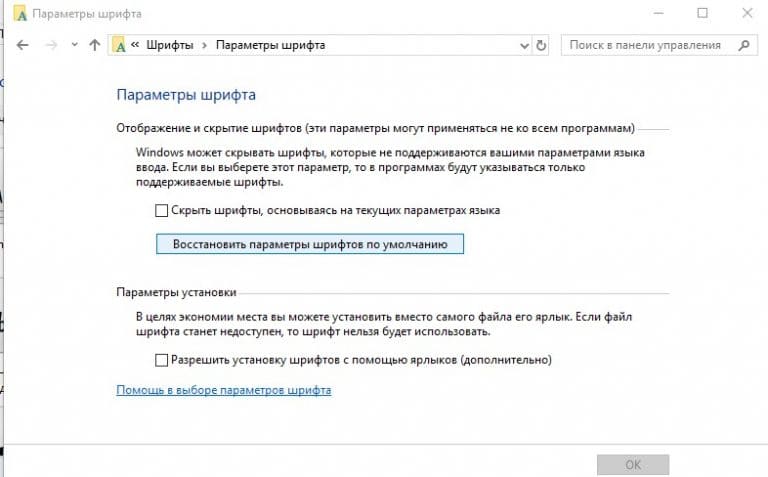
; - В левой панели выберите пункт Параметры шрифта (Font settings);

- В открывшемся окне нажмите кнопку Восстановить параметры шрифтов по умолчанию (Restore default font settings);


Данная опция позволяет удалить все сторонние шрифты, оставив только стандартные шрифты, поставляемые в дистрибутиве Windows. Однако, если файл нужного шрифта (*.fon или *.ttf) был удален или заменен, функция сброса не поможет.
В современных версиях Windows для отображения системного интерфейса по умолчанию используется шрифт Segoe UI. Убедитесь, что он есть в списке шрифтов в панели управления.
Чтобы вернуть нужный шрифт можно скопировать нужный файл из дистрибутива Windows (или с другого компьютера), скачав и установив файл шрифта вручную или через GPO (обратите внимание, что в Windows 10 есть функция блокировки установки сторонних шрифтов, которая может мешать установке новых шрифтов).
Совет. Установка большого количества шрифтов в Windows может привести к проблемам с производительностью системы и некоторых приложений (как правило, связанных с графикой и версткой).
Как извлечь файлы стандартных системных шрифтов из установочного образа Windows 10 или 11?
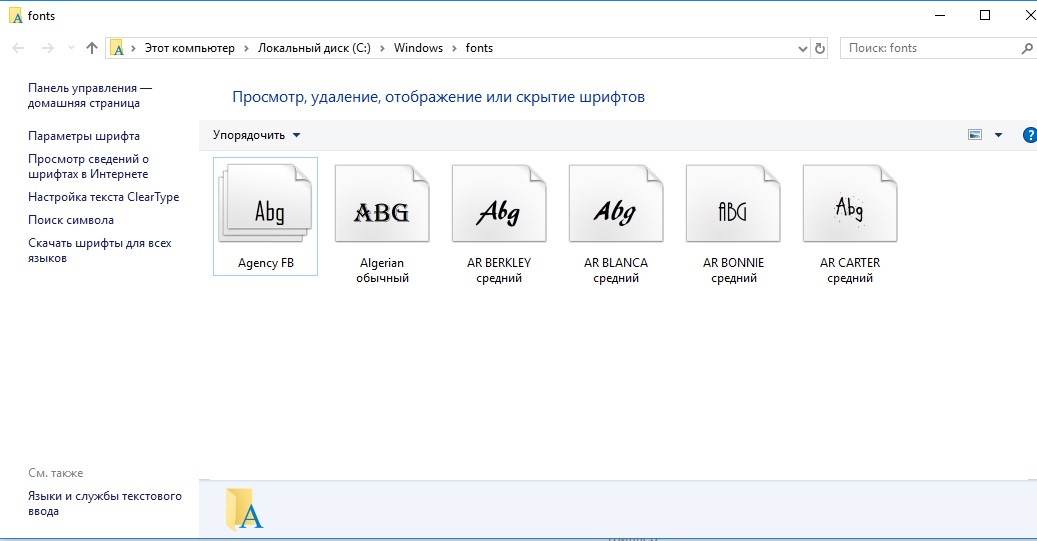
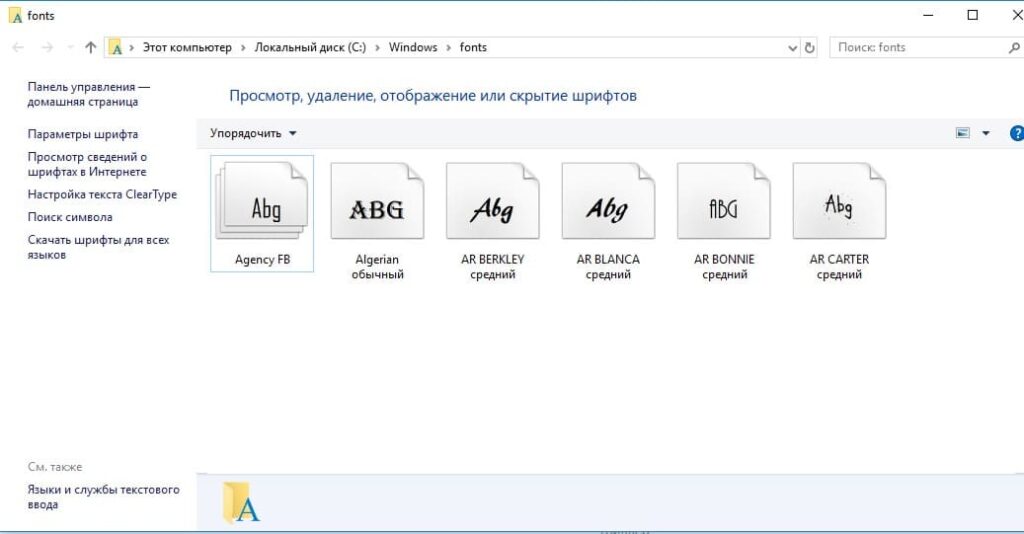
В Windows файлы шрифтов хранятся в каталоге C:\Windows\fonts. Попробуйте открыть ее в Проводнике File Explorer. Если в этом каталоге вы увидите только несколько файлов шрифтов с расширениями *.fon и *.ttf, значит, стандартные файлы шрифтов были удалены и их сброс встроенными средствами (как описано выше) не поможет.
Недостающие файлы шрифтов можно скопировать с любого компьютера с той же версией ОС, либо извлечь их из установочного диска или ISO/WIM образа Windows 10 (11). Рассмотрим второй случай.
Для этого нам понадобится установочный диск с Windows 10. Проще всего создать установочный ISO образ Windows с помощью утилиты Media CreationTool. Смонтируйте ISO образ в виртуальный привод (допустим, ему назначена буква диска H:).
Откройте командную строку PowerShell с административными правами и скопируйте файл H:\sources\install.wim или H:\sources\install.esd (подробнее про esd формат образа здесь) в каталог C:\Distr\.
Copy-Item D:\sources\install.wim C:\Distr\
Совет. Если в вашем дистрибутиве Windows есть только файл install.esd (подробнее про esd формат образа здесь), вы можете переконвертировать ESD файл в формат WIM с помощью команды:
dism /export-image /SourceImageFile:c:\distr\install.esd /SourceIndex:4 /DestinationImageFile: c:\distr\install.wim /Compress:max /CheckIntegrity
Смонтируйте файл установочного образа Windows 10 install.wim в каталог C:\Distr\wim:
dism /mount-wim /wimfile:C:\Distr\install.wim /index:1 /mountdir:C:\Distr\wim

Совет. Если команда DISM возвращает ошибку Error: 0xc1510111: You do not have permissions to mount and modify this image (
Ошибка: 0xc1510111: Отсутствуют разрешения на подключение и изменение образа
), проверьте, что в свойствах файла install.wim не установлен атрибут Read-Only.
Скопируйте оригинальные файлы шрифтов из каталога C:\Distr\wim\Windows\Fonts в системную папку C:\Windows\Fonts с заменой файлов в целевом каталоге. Воспользуйтесь такой командой PowerShell:
Copy-Item -path C:\Distr\wim\Windows\Fonts -Destination C:\Windows -recurse –container -force
Файлы шрифтов будут заменены оригинальными. Часть системных шрифтов, которые используются в текущий момент, заменить не удастся, об этом будет свидетельствовать ряд ошибок в окне консоли.
Теперь можно отключить WIM образ:
dism /unmount-wim /mountdir:C:\Distr\wim /discard
Перезагрузите компьютер и проверьте, исчезла ли проблема со шрифтами.
Сброс кэша шрифтов Windows
В Windows по-умолчанию включено кэширование шрифтов в каталоге
%WinDir%\ServiceProfiles\LocalService\AppData\Local\FontCache
(по аналогии с кэшем иконок). Это позволяет ускорить загрузку шрифтов в диалоговых окнах и приложения. Если кэш шрифтов поврежден, это также может вызвать проблемы с отображением шрифтов в Windows. Рекомендуем вручную сбросить текущий кэш шрифтов Windows.
Для этого нужно:
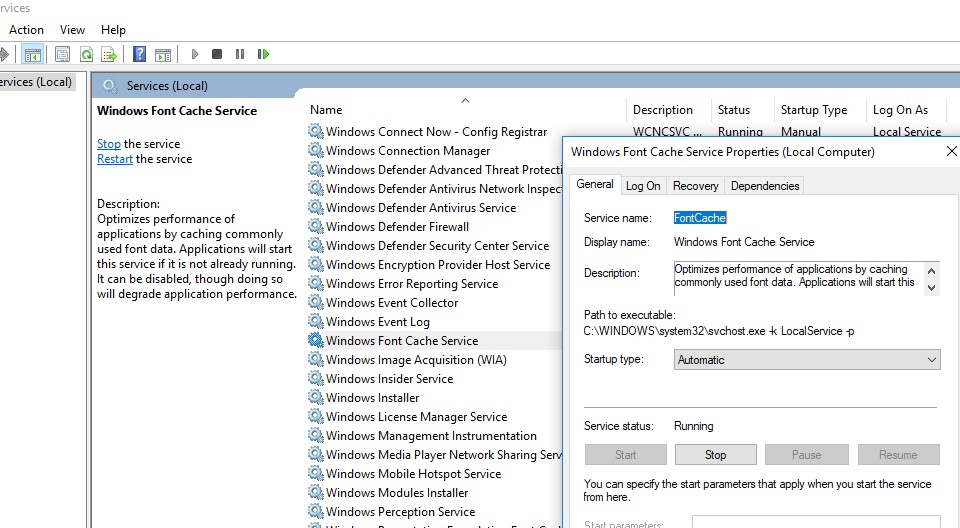
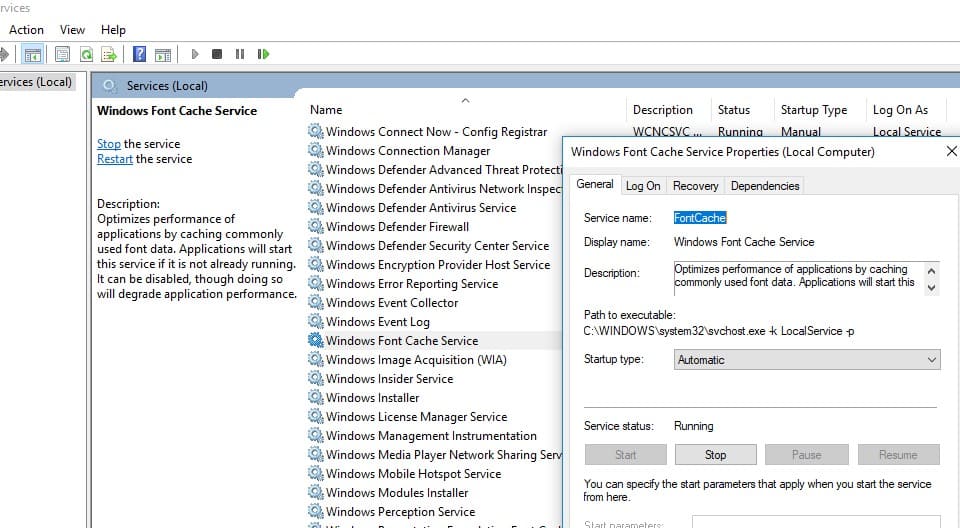
- Запустите консоль управления службами (
services.msc
); - Остановите службу Служба кэша шрифтов Windows (Windows Font Cache Service) в консоли или с помощью команды PowerShell:
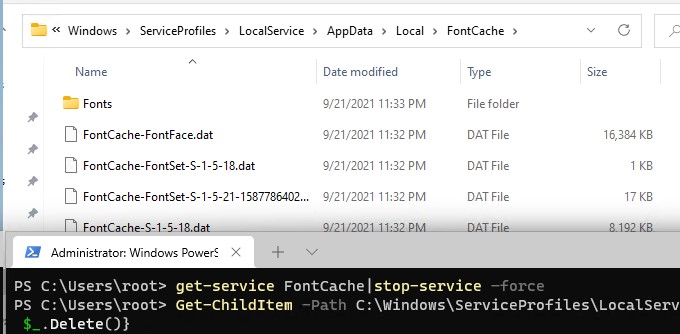
get-service FontCache|stop-service –force
- Очистите каталог %WinDir%\ServiceProfiles\LocalService\AppData\Local\FontCache:
Get-ChildItem -Path C:\Windows\ServiceProfiles\LocalService\AppData\Local\FontCache -File | foreach { $_.Delete()}; - Удалите файл C:\Windows\System32\FNTCACHE.DAT: C:\Windows\System32\FNTCACHE.DAT:
Remove-Item c:\Windows\System32\FNTCACHE.DAT

- Запустите службу FontCache и перезагрузите компьютер.
Готовые архивы со стандартными шрифтами для Windows 10, 11 и 8.1
Для тех, у кого под рукой нет дистрибутива Windows 10 (Windows 11 b Windows 8.1), можно скопировать каталог с оригинальными шрифтами с другого компьютера с той же версий ОС, либо воспользоваться готовыми архивами со шрифтами. Вы можете скачать архивы по ссылкам ниже:
- Оригинальные шрифты для Windows 8.1 — OrigFontsWin8-1.zip (263 Мб);
- Оригинальные шрифты для Windows 10 21H1 (подойдет и для других билдов Windows 10) —OrigFonts-win10-21h1.zip (189 Мб)
- Оригинальные шрифты для Windows 11 — OrigFonts-win11.zip (190 Мб)
Скачайте и распакуйте архив для вашей версии Windows. Скопируйте содержимое архива в каталог C:\Windows\Fonts с заменой файлов.
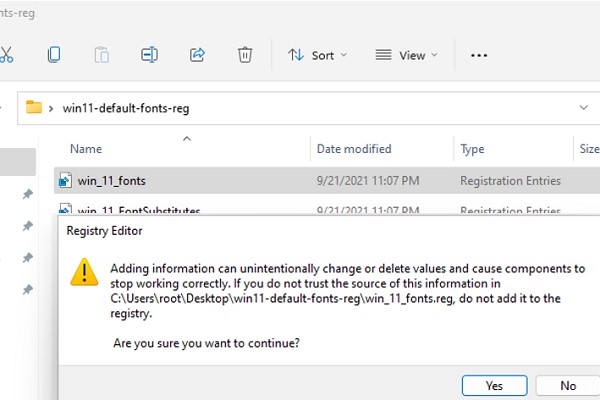
Затем скачайте и примените reg файлы со стандартными настройками шрифтов в реестре для вашей версии Windows:
- Windows 10 — win10-default-fonts-reg.zip
- Windows 11 — win11-default-fonts-reg.zip
Каждый архив содержит три файла:
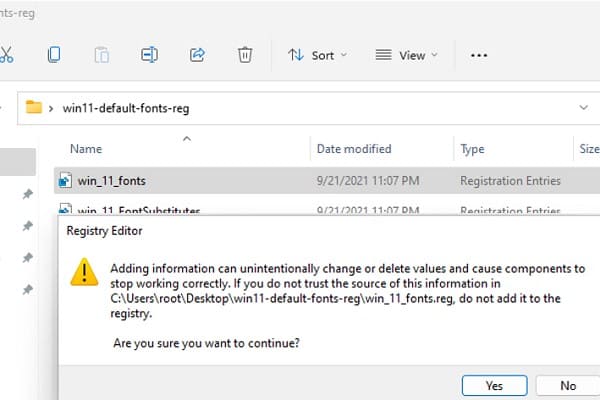
- win_10_fonts.reg содержит список стандартных шрифтов, зарегистрированных в реестре (HKLM\SOFTWARE\Microsoft\Windows NT\CurrentVersion\Fonts);
- win_10_FontSubstitutes.reg файл с настройками ассоциаций шрифтов (HKLM \SOFTWARE\Microsoft\Windows NT\CurrentVersion\FontSubstitutes);
- win_restore_default_user_font_settings.reg – восстанавливает стандартные настройки шрифтов в пользовательской ветке реестра (HKCU\Software\Microsoft\Windows NT\CurrentVersion\Font Management).
Распакуйте архив и примените (дважды щелкните) по каждому reg файлу.
Перезагрузите компьютер, проблема со шрифтами должна пропасть!
Совет. Если проблема со шрифтами вызвана установкой нового шрифта, содержимое C:\Windows\Fonts перед заменой можно предварительно сбросить (используемые шрифты удалить не получится). Эта операция выполняется кнопкой в панели управления, о которой мы говорили выше.
Если ничего не помогает и шрифты отображаются некорректно, попробуйте проверить целостность вашего образа Windows с помощью команд:
sfc /scannow
DISM /Online /Cleanup-Image /RestoreHealth
It’s hard to overstate just how important fonts are. To spice up your Word documents, Photoshop files, and InDesign creations, you need to know how to install fonts in Windows 11, and in this guide, we’re going to walk you through it. These steps should also work in Windows 10.
There are two main ways to install fonts on Windows, but most people should use our first method. In addition to installing fonts, we also have some steps on uninstalling fonts you don’t want, as well as our favorite places online to download new fonts.
We’re covering Windows 11 and 10 here, which will apply fonts across all of your applications. If you’re looking for a different method, make sure to read our guides on how to install fonts to Photoshop and how to install fonts on a Mac.
How to install fonts in Windows 11 and Windows 10
The best way to install fonts on Windows 11 and Windows 10 is also the easiest. All you need to do is download a font, select the font file, and drag it over to the Windows font screen. Within a few seconds, you’ll have a new font without worrying about restarting your computer or downloading any programs.
We took screenshots on Windows 11, but the process is the same for Windows 10, as well. If you’re having trouble finding the right spot, use the Windows Key + S keyboard shortcut to search for Font Settings.
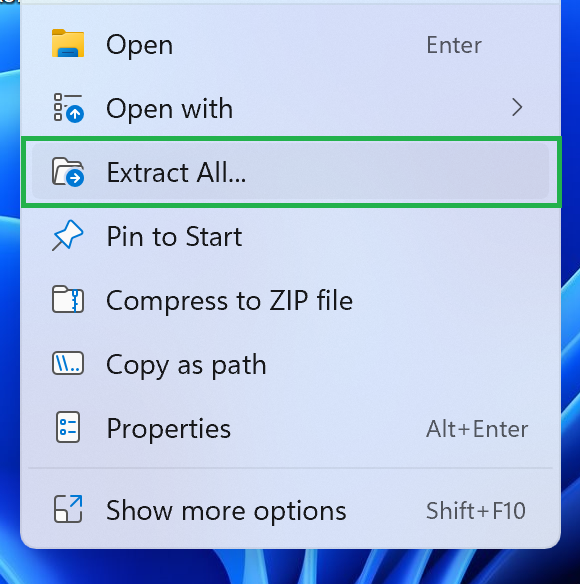
Step 1: Download the font you want to install. Fonts usually come in zipped (compressed) folders. Extract the folder to your desktop or a location you can easily access on your PC. You can do this by selecting Extract All from the top of the File Explorer window.

Image used with permission by copyright holder
Step 2: Open the Windows Settings menu and select Personalization from the left menu. In the list of options, select Fonts.

Image used with permission by copyright holder
Step 3: Find your extracted font folder. Select the TrueType font (ttf) files in the folder and drag them to the dotted rectangle in the Windows Settings screen.
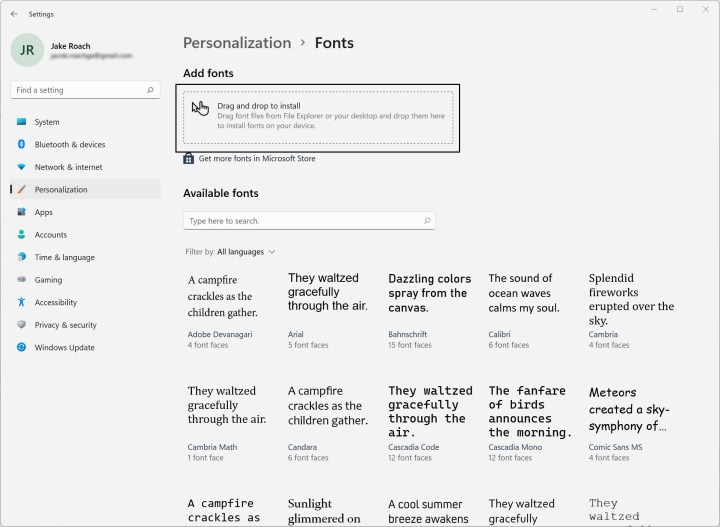
Image used with permission by copyright holder
How to install fonts through the Microsoft Store
You can install fonts through the Microsoft Store as well. The process is easier, but the Microsoft Store doesn’t have that many options. Most of the fonts are free, but certain packs will cost you. We found a few packs around $5 at the time of writing, as well as some fonts for around $2.
This isn’t the best option for installing fonts, not only due to the limited selection, but also because some of the fonts cost money. We recommend using the drag-and-drop method above instead. Still, we’ll show you how to install fonts through the Microsoft Store.
Step 1: Open the Windows Settings menu and select Personalization from the left menu. Then, select Fonts from the list.
Image used with permission by copyright holder
Step 2: Click Get More Fonts in Microsoft Store to open the font store. Select the font you want to install, and click Get.

Image used with permission by copyright holder
How to delete fonts in Windows
If you want to clean up your font menu, you can delete any font in Windows 11 — including the ones provided by Microsoft. Once again, we used Windows 11 for our screenshots, but this process is the same on Windows 10.
Step 1: Open the Windows Settings menu, select Personalization from the left menu, then select Fonts.
Image used with permission by copyright holder
Step 2: Left-click on the font you want to uninstall. Under Metadata, select Uninstall.

Image used with permission by copyright holder
Where to find Windows fonts
The Microsoft Store has fonts, but you’ll need to look online if you want to find more options. There are dozens of free font websites online, though some are better than others. Here are some of the few Windows font archives we frequent.
If you want free fonts, the best place to start is Google Fonts. Google has thousands of free fonts available, and you don’t need to worry about downloading something you didn’t sign up for. Google also makes the licenses clear, which isn’t always the case elsewhere.
For paid fonts, check out Creative Market. There are several community-generated packs that you can usually pick up for a few dollars. Behance is a solid alternative, too, though it’s tailored for Adobe applications.
Before installing your new font, make sure to check out its license. Although many fonts are free to download, not all of them are free to use. Fonts may be free for personal use but not commercial use, for example, so it’s best to double-check.
Changing fonts is just one of many ways you can customize Windows 11. You can also change the mouse pointer.
Если системные шрифты Windows 11 были удалены или заменены, это может привести к некорректному отображению текста в приложениях и интерфейсе системы. В этой статье мы разберём, как восстановить стандартные шрифты Windows 11 (а также Windows 10) с использованием встроенных средств, установочных образов и готовых архивов.
Приобрести оригинальные ключи активации Windows 11 можно у нас в каталоге от 1690 ₽
Причины проблем с шрифтами
Проблемы с шрифтами могут возникнуть из-за:
— Удаления файлов шрифтов сторонними приложениями.
— Замены стандартных шрифтов другими версиями.
— Повреждения кэша шрифтов.
1) Восстановление шрифтов через встроенное средство Windows
Windows имеет встроенную функцию для восстановления стандартных шрифтов:
Шаги:
1. Откройте Панель управления → Оформление и персонализация → Шрифты. Можно использовать команду control fonts в окне «Выполнить» (Win+R).
2. Выберите Параметры шрифта в левой части окна.
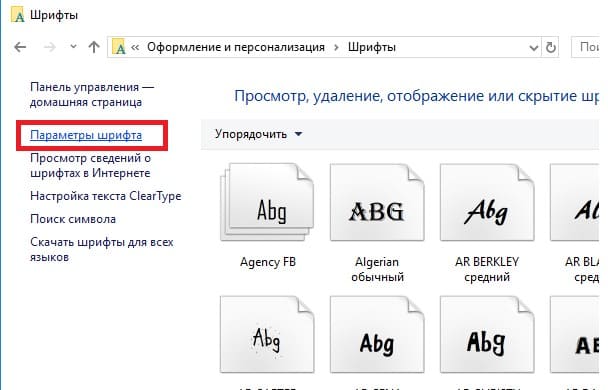
3. Нажмите «Восстановить параметры шрифтов по умолчанию».
Примечание: Этот способ удаляет сторонние шрифты, но не восстанавливает удалённые файлы шрифтов.
В современных версиях Windows для отображения системного интерфейса по умолчанию используется шрифт Segoe UI. Убедитесь, что он есть в списке шрифтов в панели управления.
В Windows файлы шрифтов хранятся в каталоге C:\Windows\fonts. Попробуйте открыть ее в Проводнике File Explorer. Если в этом каталоге вы увидите только несколько файлов шрифтов с расширениями *.fon и *.ttf, значит, стандартные файлы шрифтов были удалены и их сброс встроенными средствами (как описано выше) не поможет.
Недостающие файлы шрифтов можно скопировать с любого компьютера с той же версией ОС, либо извлечь их из установочного диска или ISO/WIM образа Windows 10 (11). Рассмотрим второй случай далее.
2) Извлечение шрифтов из установочного образа Windows
Если стандартные шрифты удалены, их можно извлечь из установочного образа Windows.
Шаги:
1. Скачайте ISO-образ Windows c нашего каталога.
2. Смонтируйте ISO-образ (например, диск H:).
3. Скопируйте файл install.wim или install.esd из папки H:\sources в каталог C:\Distr:
Copy-Item H:\sources\install.wim C:\Distr\
4. Если у вас файл install.esd, конвертируйте его в WIM:
dism /export-image /SourceImageFile:c:\Distr\install.esd /SourceIndex:4 /DestinationImageFile:c:\Distr\install.wim /Compress:max /CheckIntegrity
5. Смонтируйте WIM-файл:
dism /mount-wim /wimfile:C:\Distr\install.wim /index:1 /mountdir:C:\Distr\wim

Если команда DISM возвращает ошибку Error: 0xc1510111: You do not have permissions to mount and modify this image ( Ошибка: 0xc1510111: Отсутствуют разрешения на подключение и изменение образа ), проверьте, что в свойствах файла install.wim не установлен атрибут «Только для чтения».
6. Скопируйте шрифты из C:\Distr\wim\Windows\Fonts в C:\Windows\Fonts:
Copy-Item -path C:\Distr\wim\Windows\Fonts -Destination C:\Windows\Fonts -recurse -force
7. Отключите WIM-образ:
dism /unmount-wim /mountdir:C:\Distr\wim /discard
Перезагрузите компьютер.
3) Сброс кэша шрифтов Windows
Повреждённый кэш шрифтов может вызвать проблемы с их отображением.
Шаги:
1. Откройте консоль управления службами (Win+R → services.msc).
2. Остановите службу Служба кэша шрифтов Windows:
get-service FontCache | stop-service –force
3. Очистите каталог кэша:
Get-ChildItem -Path C:\Windows\ServiceProfiles\LocalService\AppData\Local\FontCache -File | foreach { $_.Delete() }
4. Удалите файл кэша:
Remove-Item C:\Windows\System32\FNTCACHE.DAT

5. Перезапустите службу FontCache и перезагрузите компьютер.
4) Использование готовых архивов со шрифтами
Вы можете скачать архивы со стандартными шрифтами для Windows:
— Windows 8.1: OrigFontsWin8-1.zip
— Windows 10: OrigFonts-win10-21h1.zip
— Windows 11: OrigFonts-win11.zip
Шаги:
1. Скачайте и распакуйте архив.
2. Скопируйте содержимое архива в C:\Windows\Fonts с заменой файлов.
3. Примените REG-файлы для восстановления настроек шрифтов в реестре:
— win11-default-fonts-reg.zip для Windows 11.
— win10-default-fonts-reg.zip для Windows 10.
Каждый архив содержит три файла:
win_10_fonts.reg — содержит список стандартных шрифтов, зарегистрированных в реестре (HKLM\SOFTWARE\Microsoft\Windows NT\CurrentVersion\Fonts)
win_10_FontSubstitutes.reg — файл с настройками ассоциаций шрифтов (HKLM \SOFTWARE\Microsoft\Windows NT\CurrentVersion\FontSubstitutes);
win_restore_default_user_font_settings.reg – восстанавливает стандартные настройки шрифтов в пользовательской ветке реестра (HKCU\Software\Microsoft\Windows NT\CurrentVersion\Font Management).
Распакуйте архив и примените (дважды щелкните) по каждому reg файлу.
5) Проверка целостности системы
Если ни один из методов не помог, проверьте целостность системы:
1. В командной строке от имени администратора выполните:
sfc /scannow
2. Если проблема не решена, используйте DISM:
DISM /Online /Cleanup-Image /RestoreHealth
Восстановление стандартных шрифтов в Windows 11 возможно несколькими способами: встроенными средствами, через установочный образ или готовые архивы. Выберите метод, который лучше всего подходит для вашей ситуации.
Windows 11 ships with plenty of fonts, but it offers several ways for people who aren’t content with the likes of Arial, Georgia, and Times New Roman to install their own. This can be particularly useful for developers who spend a lot of time staring at text, graphic designers who think a piece needs more pizazz than Verdana can offer, and writers who have successfully convinced themselves that constantly experimenting with new fonts is productive. (Ahem.)
Fonts can be installed on Windows 11 or 10 via the Microsoft Store, Settings and File Explorer. Each method has its own benefits and drawbacks. The Microsoft Store can install a given font with just a few clicks, for example, but it doesn’t offer the same breadth of choices as the open web. Settings and File explorer require a bit more effort on the installation front but can be used to install any font available for download in the TrueType, OpenType or PostScript file formats. Note that, though these screenshots were taken from Windows 11, the same steps also work in Windows 10.
How to install fonts via the Microsoft Store in Windows 11 or 10
The Microsoft Store is the most approachable way for most Windows users to install new fonts because it’s a straightforward process that’s unlikely to be used to install anything malicious on your system, which isn’t guaranteed when you’re installing a font from an obscure website, for example. Here’s how to install new fonts on Windows 11 via the Microsoft Store.
1. Launch the Microsoft Store. Microsoft pins it to Windows 11’s Taskbar and Start menu by default, but if you’ve removed it from both of those places, the quickest way to access the marketplace is by searching for “Microsoft Store” via the Start menu.
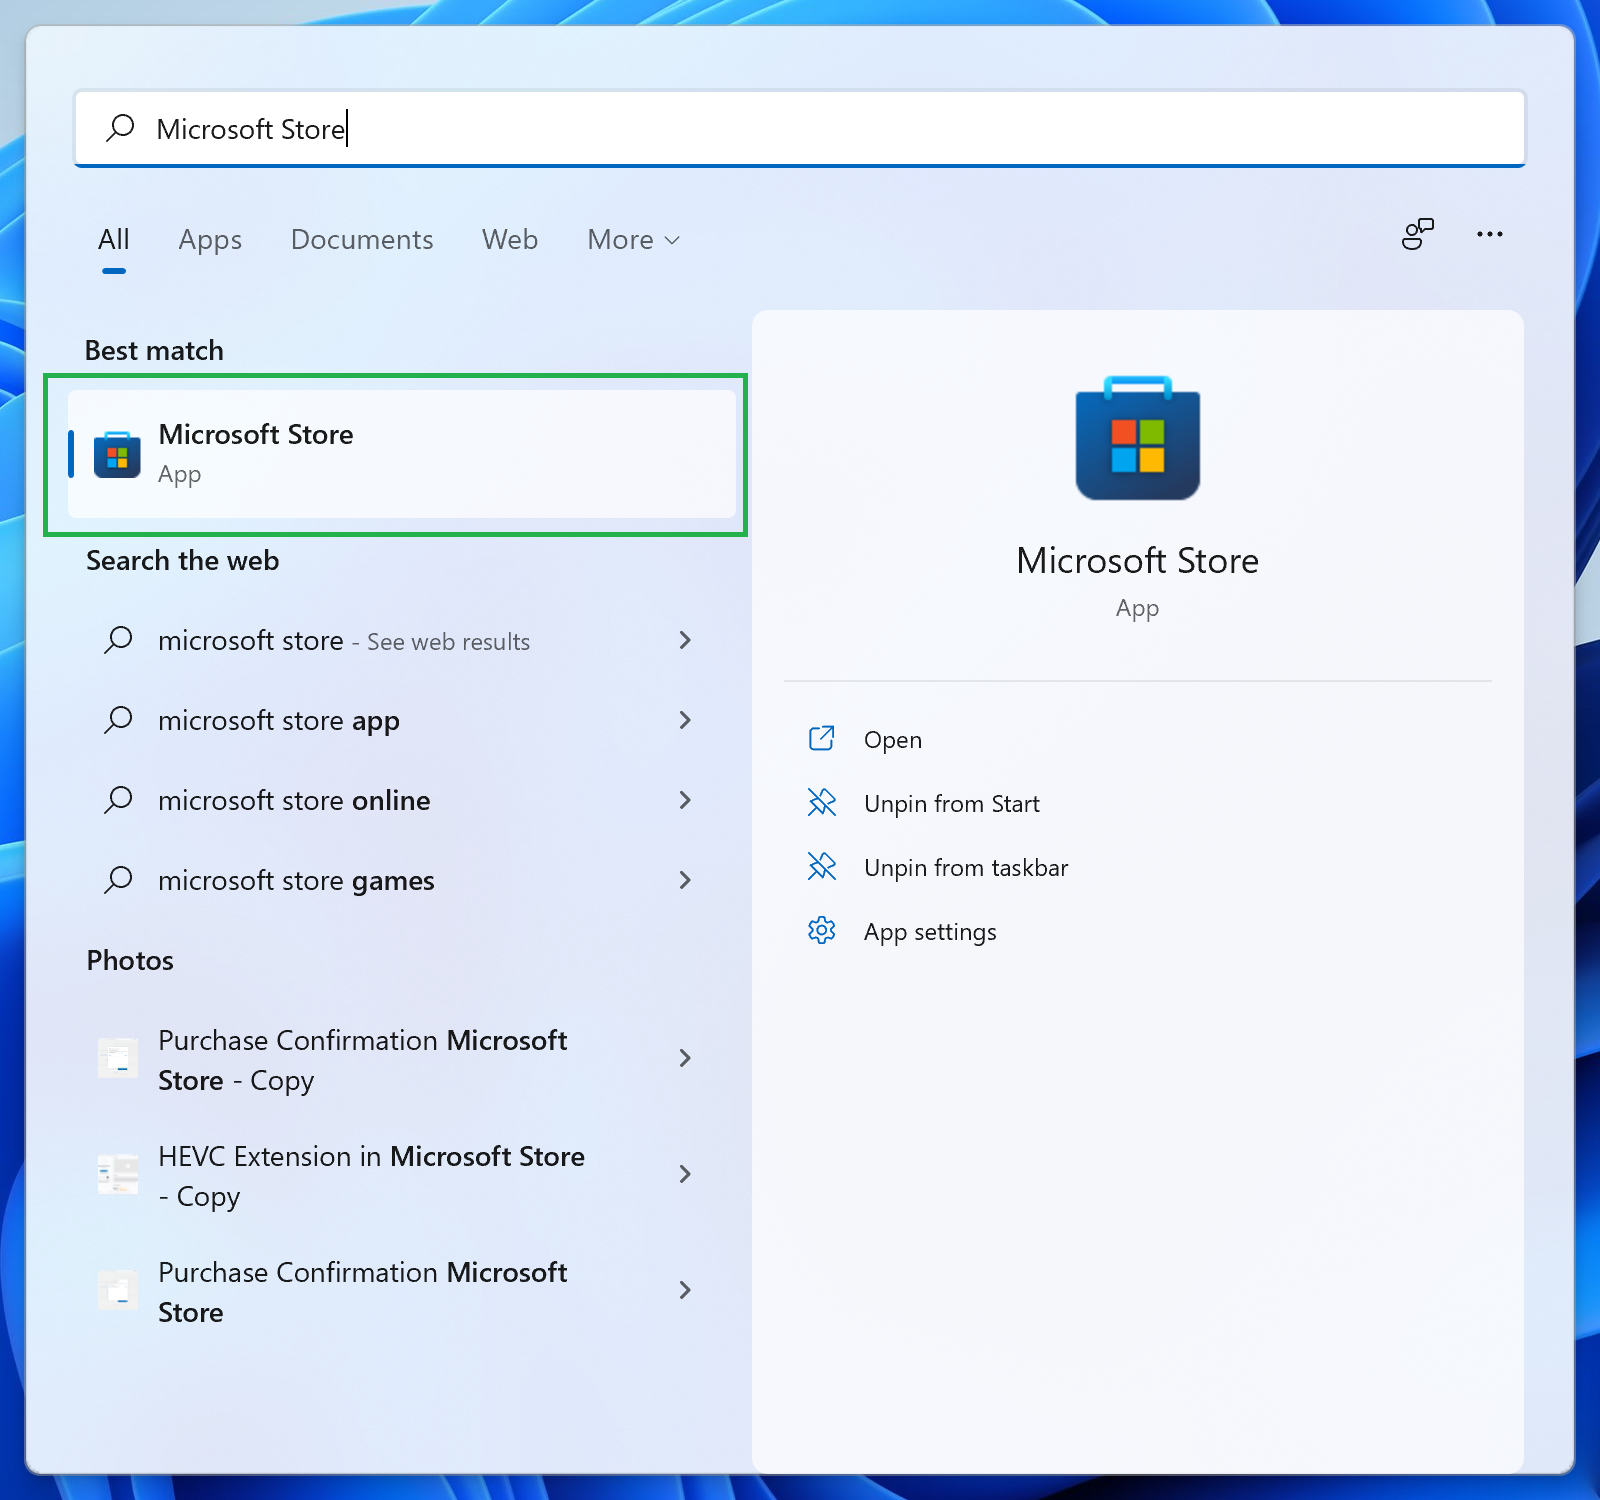
2. Search for ‘Fonts’ in the top search bar. A results menu will appear, and “Fonts” should be the top result. It’s easy to spot if it isn’t, though, because it has a nondescript icon and is captioned with “Explore new fonts.” Click it.
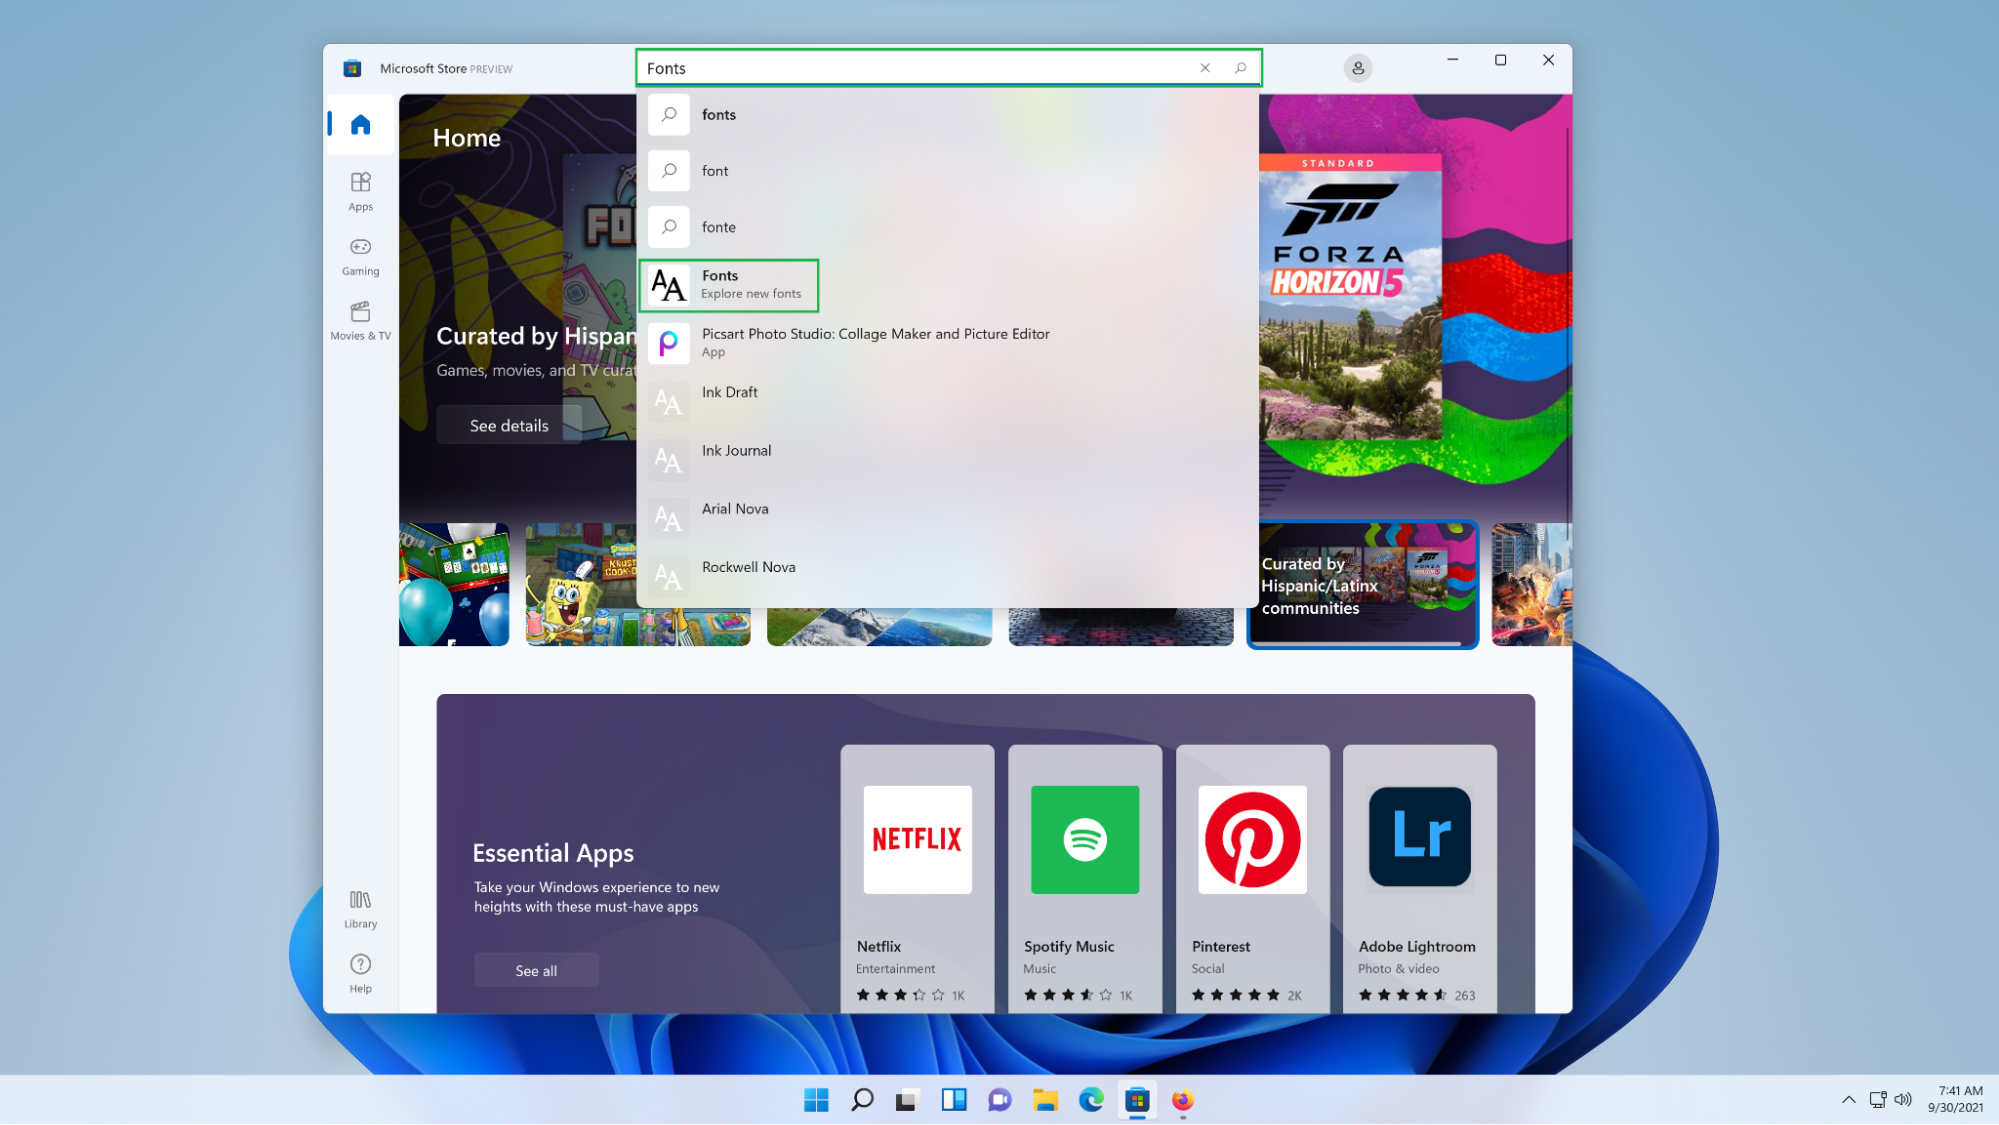
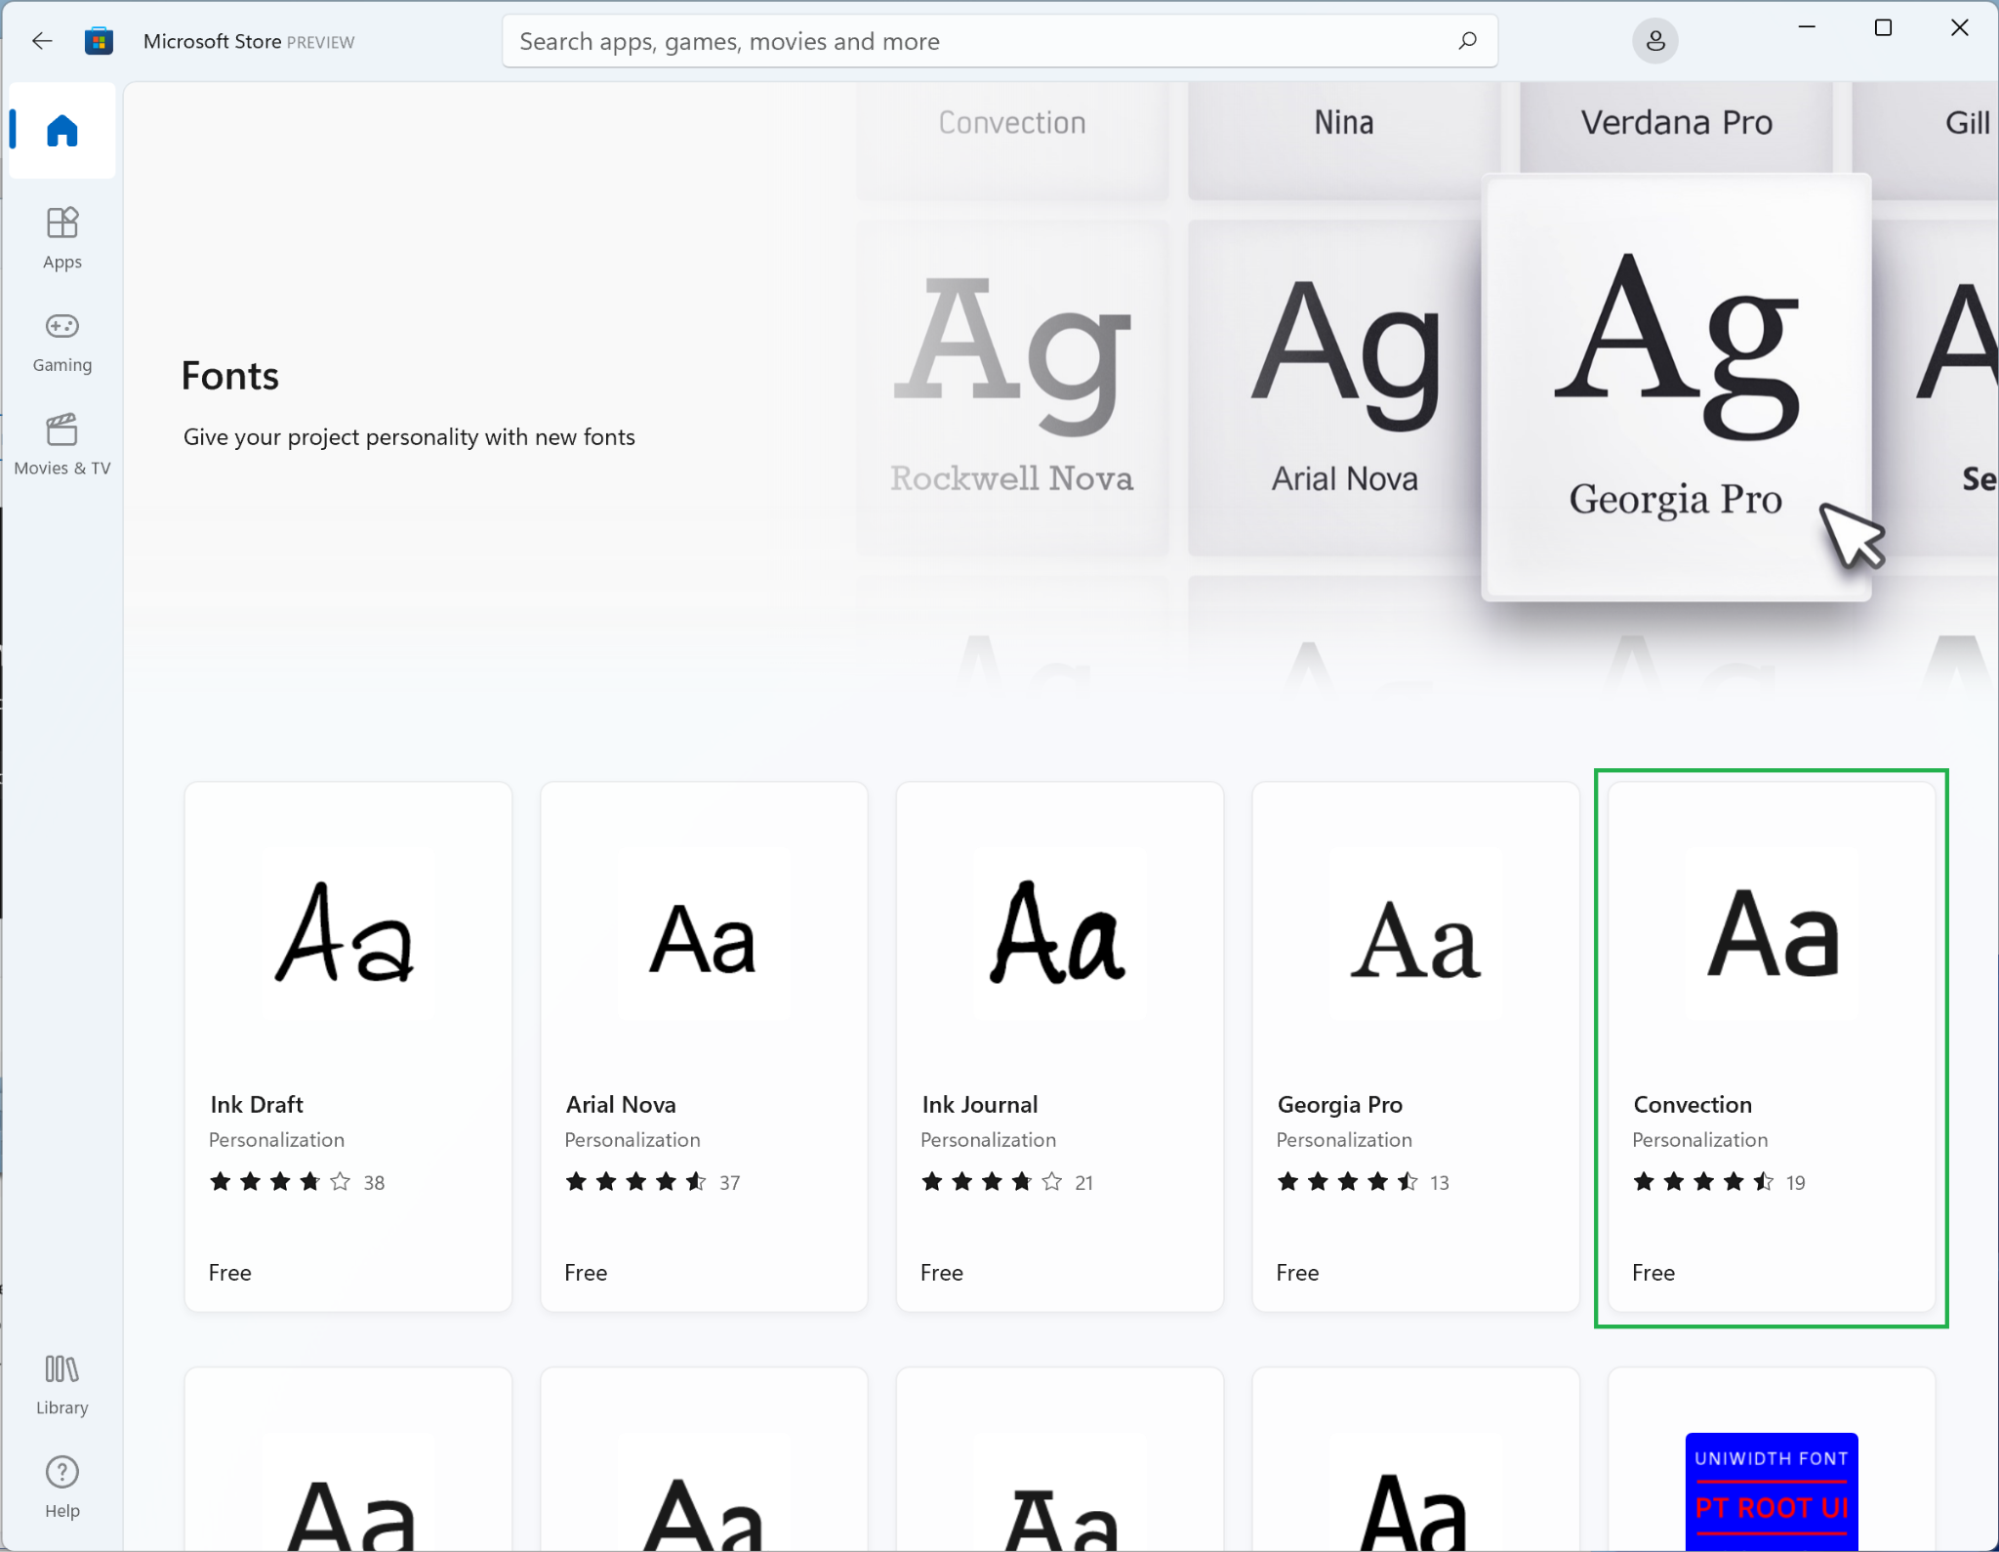
3. Click the ‘Explore new fonts’ button. Microsoft devotes a significant amount of this page to a curated selection of fonts, many of which it designed, so we’ll start there.

4. Choose a font that interests you. In our case we’re going to select “Convection” because it looks like a fun sans serif we might want in our collection, but the steps will be the same for any of the fonts you choose, so pick whichever option catches your eye.
Get Tom’s Hardware’s best news and in-depth reviews, straight to your inbox.
5. Click the ‘Free’ button. You don’t even have to sign in to the Microsoft Store to install free fonts; you simply have to click the “Free” button. Paid fonts do require you to sign in to a Microsoft account, however, and you’ll have to choose your payment method before you can confirm your purchase and install the font you want to use.
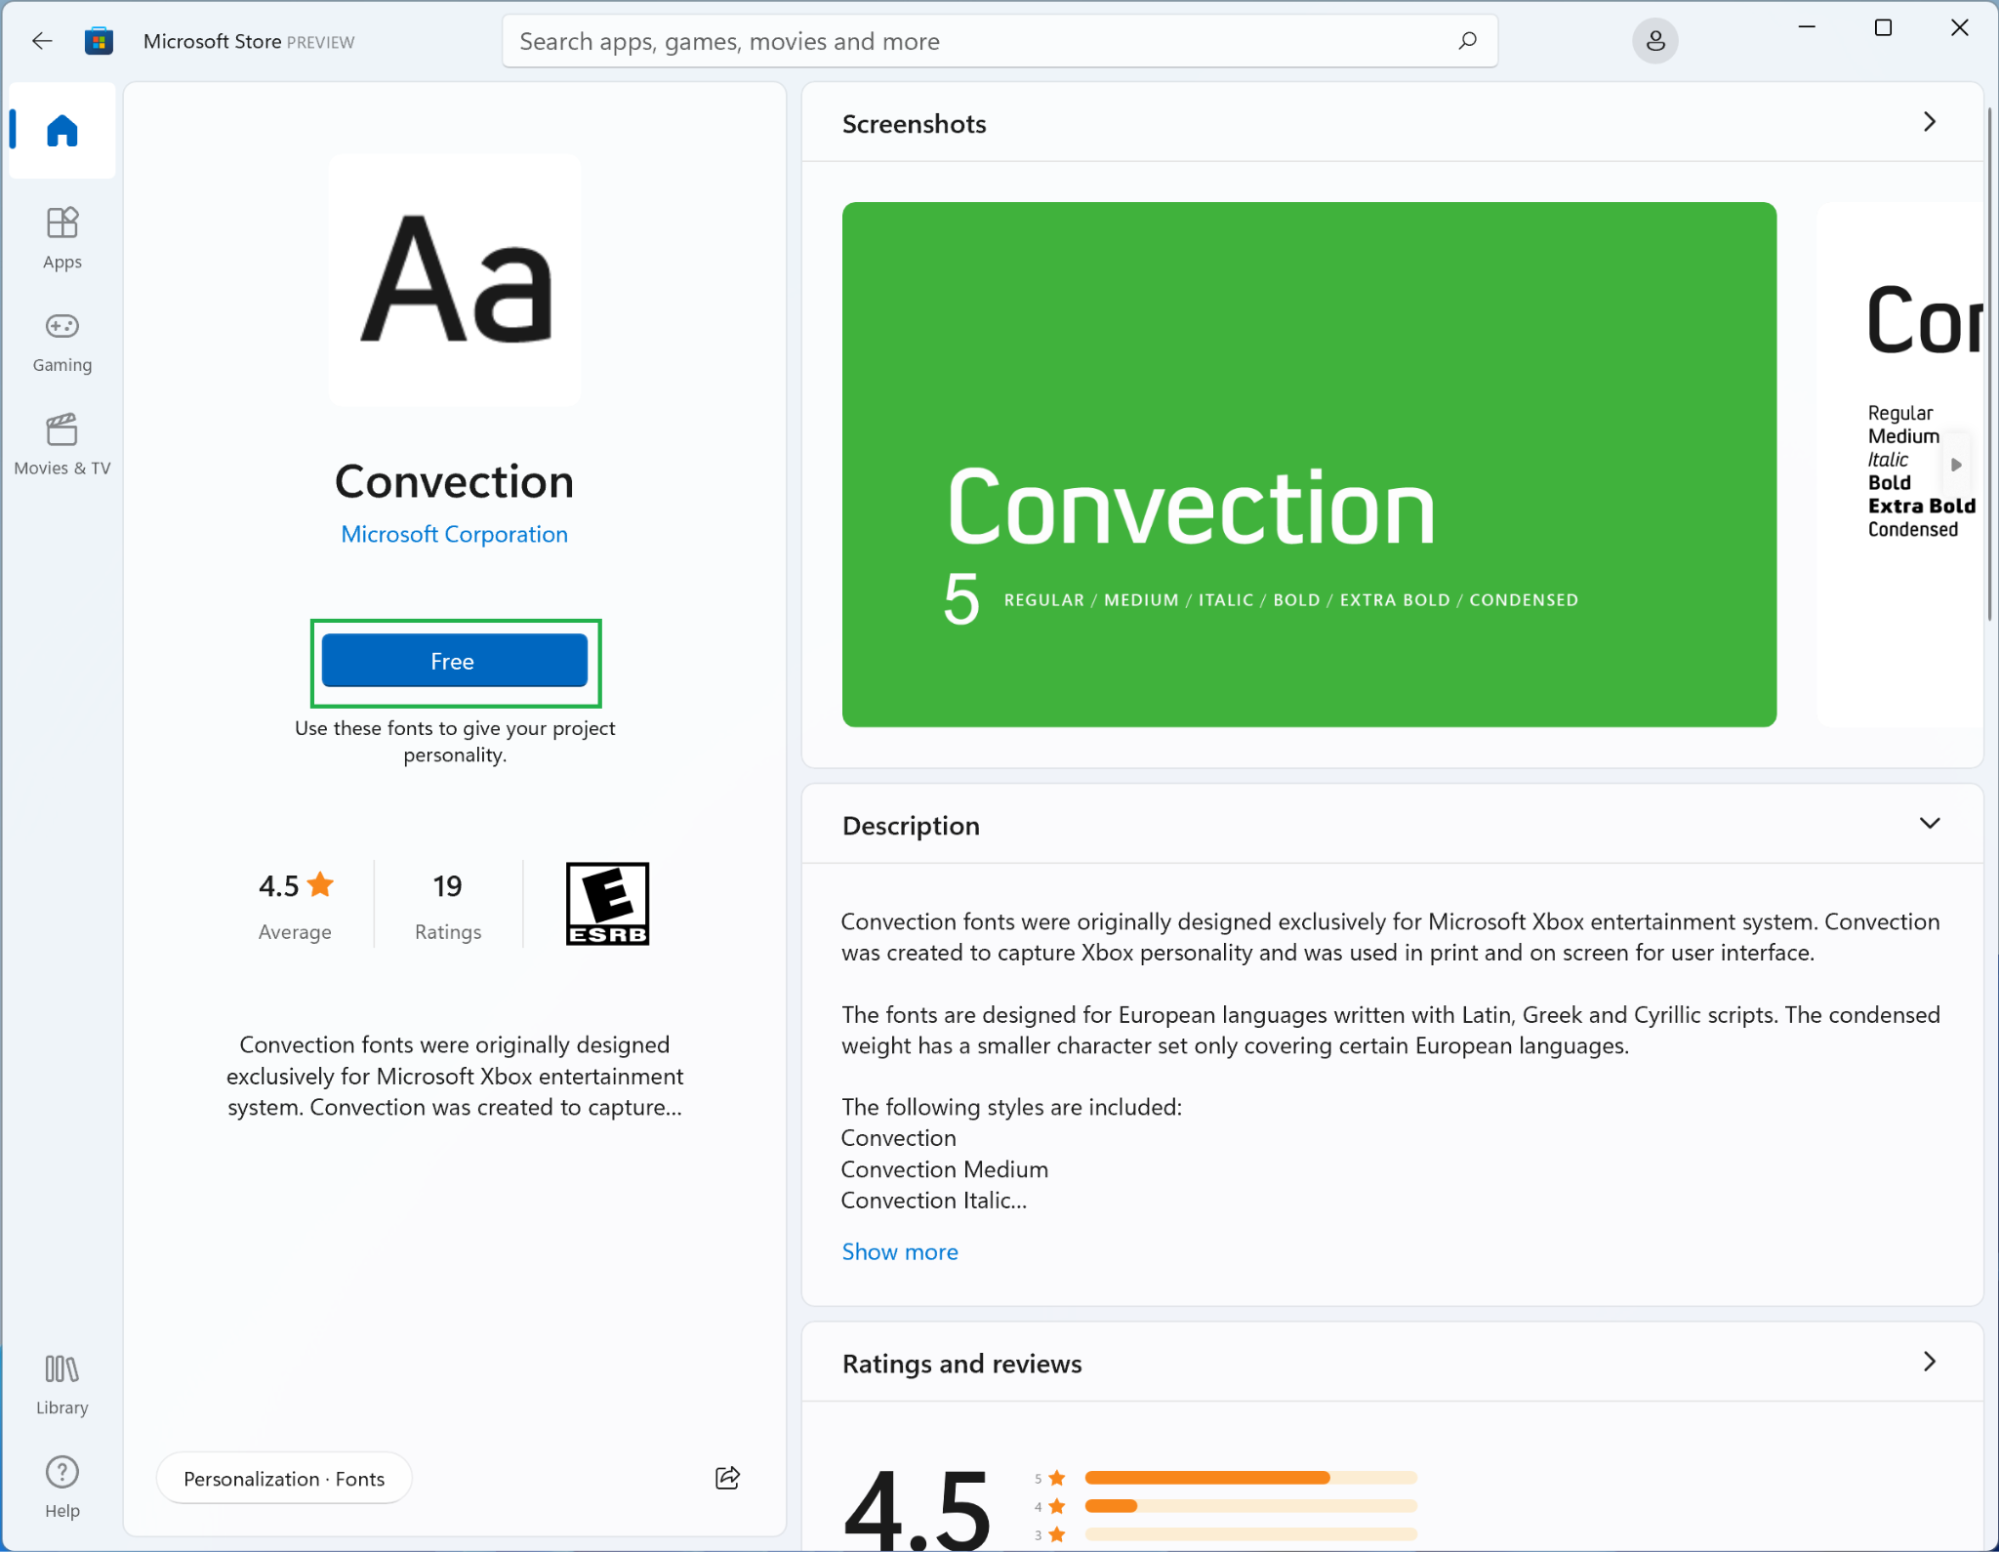
Once the “Free” button changes to “Open” you should be able to use the font you chose. Note that clicking the “Open” button won’t actually preview the font. It simply leads to the Personalization section of the Settings app, which is exactly where we were going to go next.
How to install fonts via Settings in Windows 11 or 10
Installing fonts via Settings requires you to download a TrueType, OpenType or PostScript file. Many sites offer a variety of free, often user-created fonts, and professionally designed fonts can be found on a variety of marketplaces. Google Fonts is one of the best. Just be wary about where you choose to download something from so you can minimize your potential exposure to malicious files. With all that said, here’s how to install fonts via the Settings app that’s built in to Windows 11 and Windows 10.
1. Locate your downloaded font. Most browsers automatically save downloaded files to the Downloads folder, but if you set a custom destination, navigate to it using your file manager of choice. You can then leave that program window open or move the file to your Desktop, which is what we’ve done in the picture below with Google’s Roboto font. Note that if your download is compressed (in a ZIP file perhaps) you’ll have to extract it.
Installing fonts via Settings requires you to download a TrueType, OpenType or PostScript file. Many sites offer a variety of free, often user-created fonts, and professionally designed fonts can be found on a variety of marketplaces. Google Fonts is one of the best. Just be wary about where you choose to download something from so you can minimize your potential exposure to malicious files. With all that said, here’s how to install fonts via the Settings app that’s built in to Windows 11 and Windows 10.
2. Locate your downloaded font. Most browsers automatically save downloaded files to the Downloads folder, but if you set a custom destination, navigate to it using your file manager of choice. You can then leave that program window open or move the file to your Desktop, which is what we’ve done in the picture below with Google’s Roboto font. Note that if your download is compressed (in a ZIP file perhaps) you’ll have to extract it.

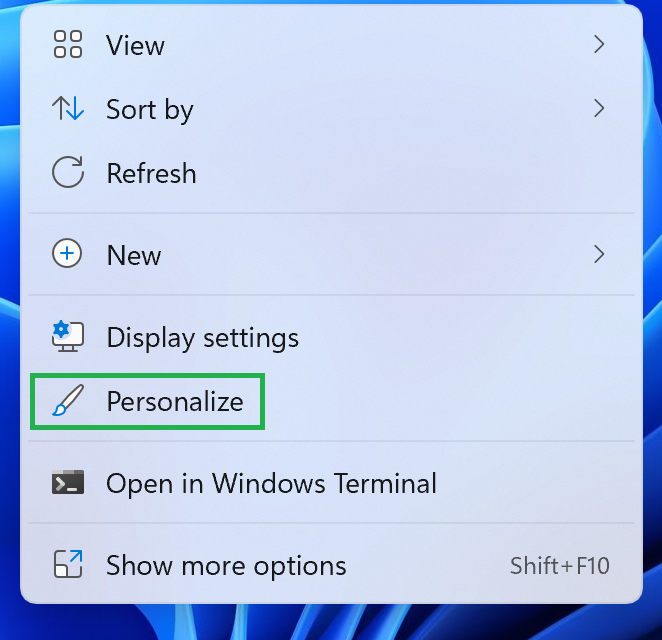
3. Navigate to the ‘Personalization’ page in Settings. The quickest way to do this is to right-click on the Desktop and choose “Personalize” from the menu that appears. You can also navigate to it in the Settings app by clicking “Personalization” in the sidebar.
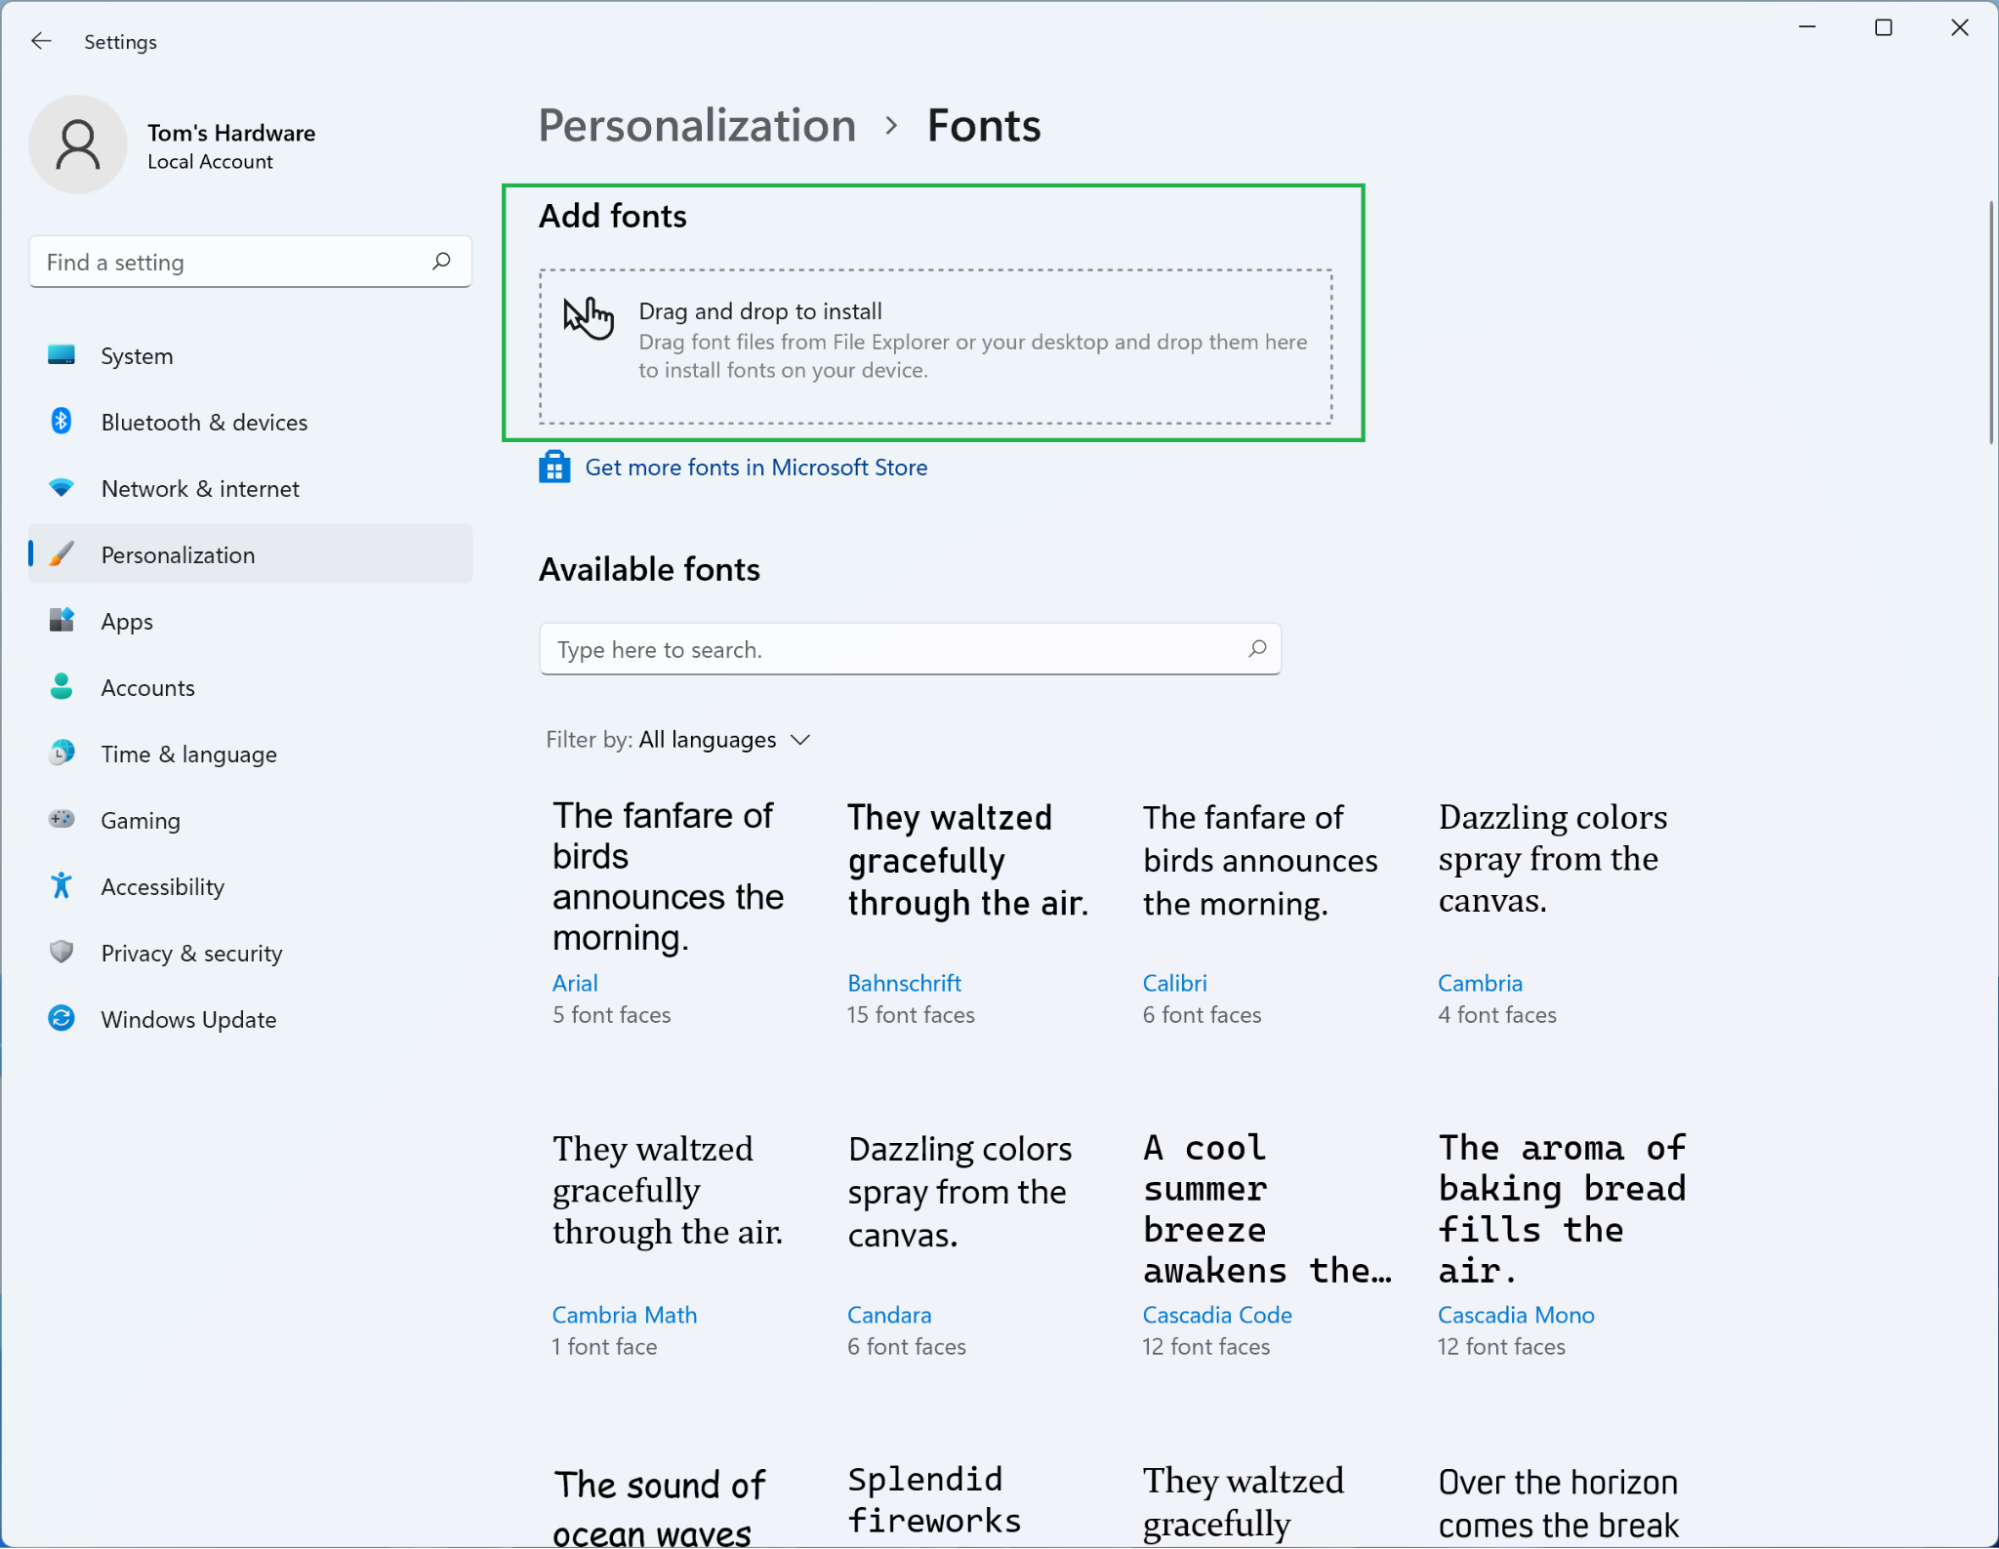
4. Select the ‘Fonts’ option. You might have to scroll, but there will be an option called “Fonts” captioned “Install, manage.” Clicking it will bring up a page showing your installed fonts and, more important for our purposes, a way to add new ones.

5. Drag your downloaded font to the appropriate box in Settings. You can’t drag-and-drop the folder itself for some reason, but you can select multiple files within the folder and drop them in the indicated area to install your new font.
6. Confirm the font was installed. Settings will automatically show the new font as the first item in the list of installed fonts below the drag-and-drop interface to confirm it was successfully installed. (The fonts will be alphabetically sorted again if you return to the page.) The app will also group multiple font faces, such as Roboto Bold or Roboto Italic, under a single font to prevent duplicates from cluttering up the list.
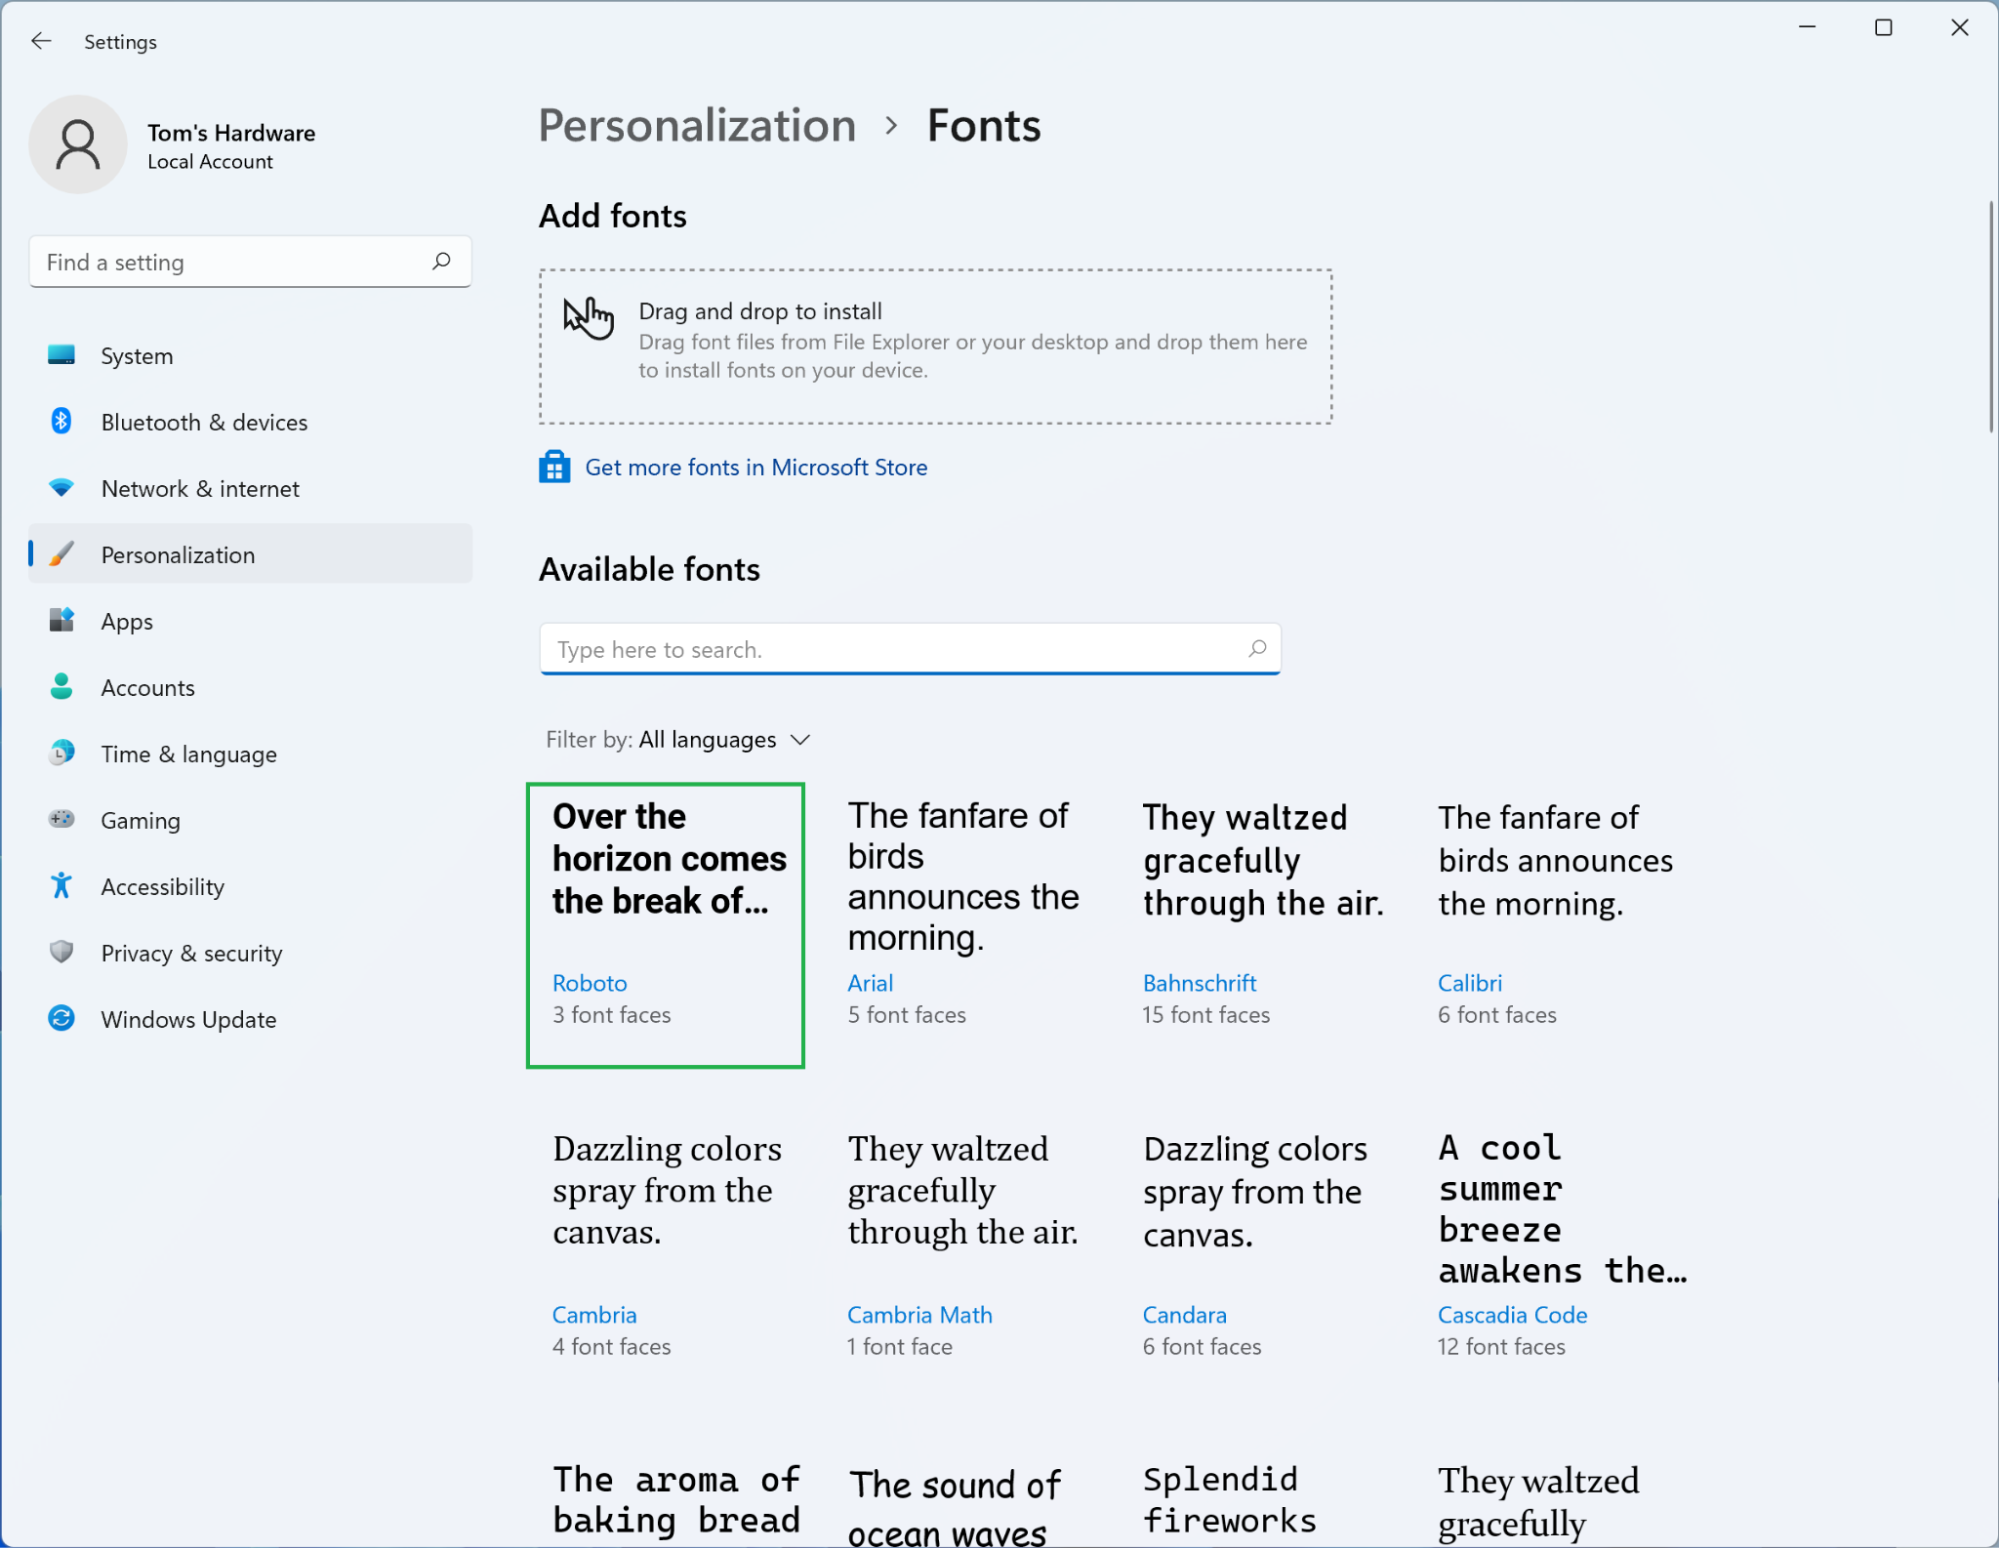
That’s it! The font you downloaded has now been successfully installed and should be selectable in most programs. You can safely remove the downloaded file from your system; Windows stores installed fonts in a separate folder to make sure they remain available.
How to install fonts via File Explorer in Windows 11
Installing fonts via File Explorer is very similar to installing them via Settings—it simply requires more right-clicking instead of dragging and dropping files across multiple windows. Let’s begin.
1. Locate the downloaded font. As before, you’ll most likely want to check your Downloads folder, but if you saved the font somewhere else you can either navigate to the appropriate folder in File Explorer or use Windows 11 or 10’s search tool to find it.

2. (Optional) Decompress the archive. If you downloaded the font as a ZIP file you can right-click it, choose “Extract All…” from the menu, and then click “Extract” in the window that appears. Other archive formats such as .rar files will require additional software.
3. Select the files you need. Many fonts ship with numerous font faces (bold, italic, etc.) and weights (light, heavy, and so on) you can use. If you want to install all of them for posterity’s sake, you can select all of them. If you only want to install a few of them, just pick the ones you need, and ignore the rest.
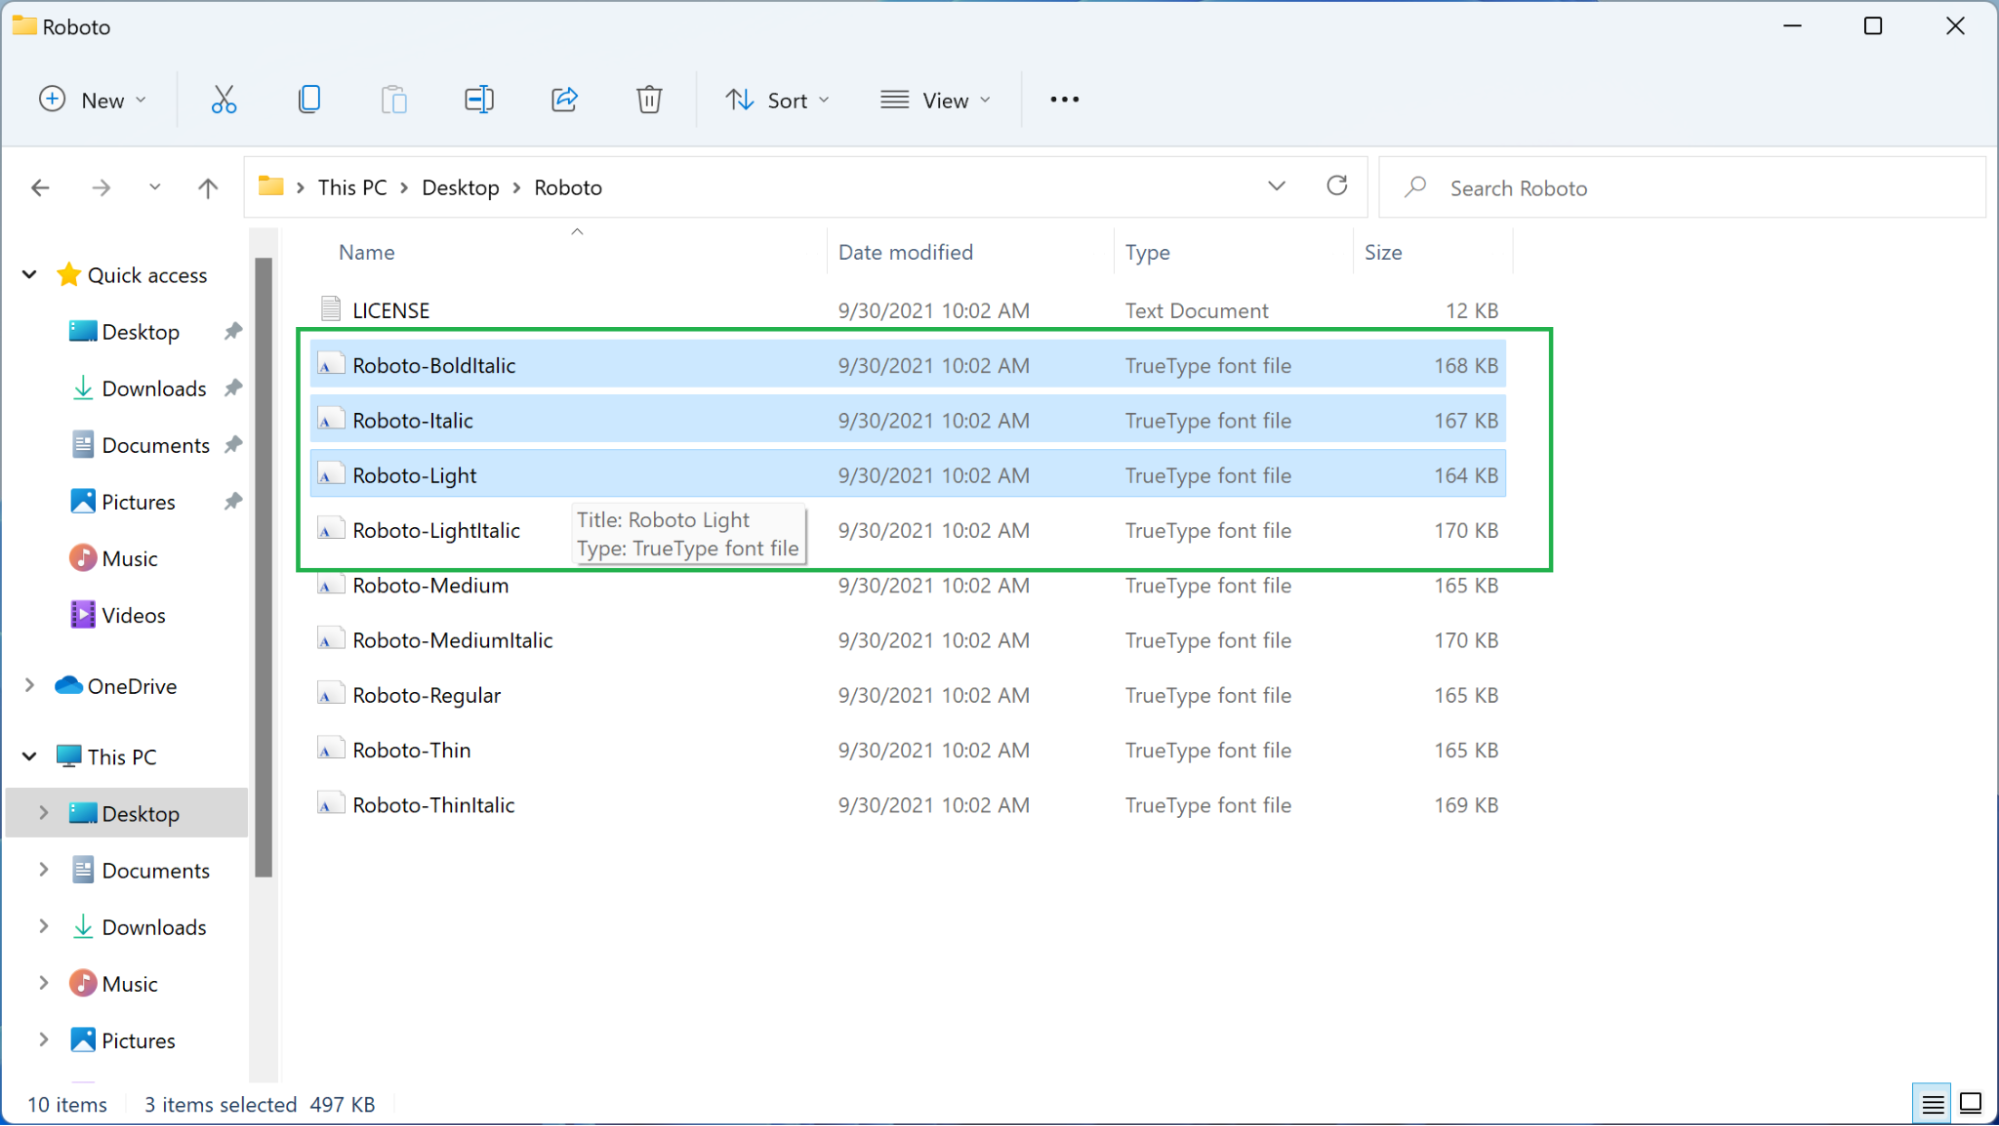
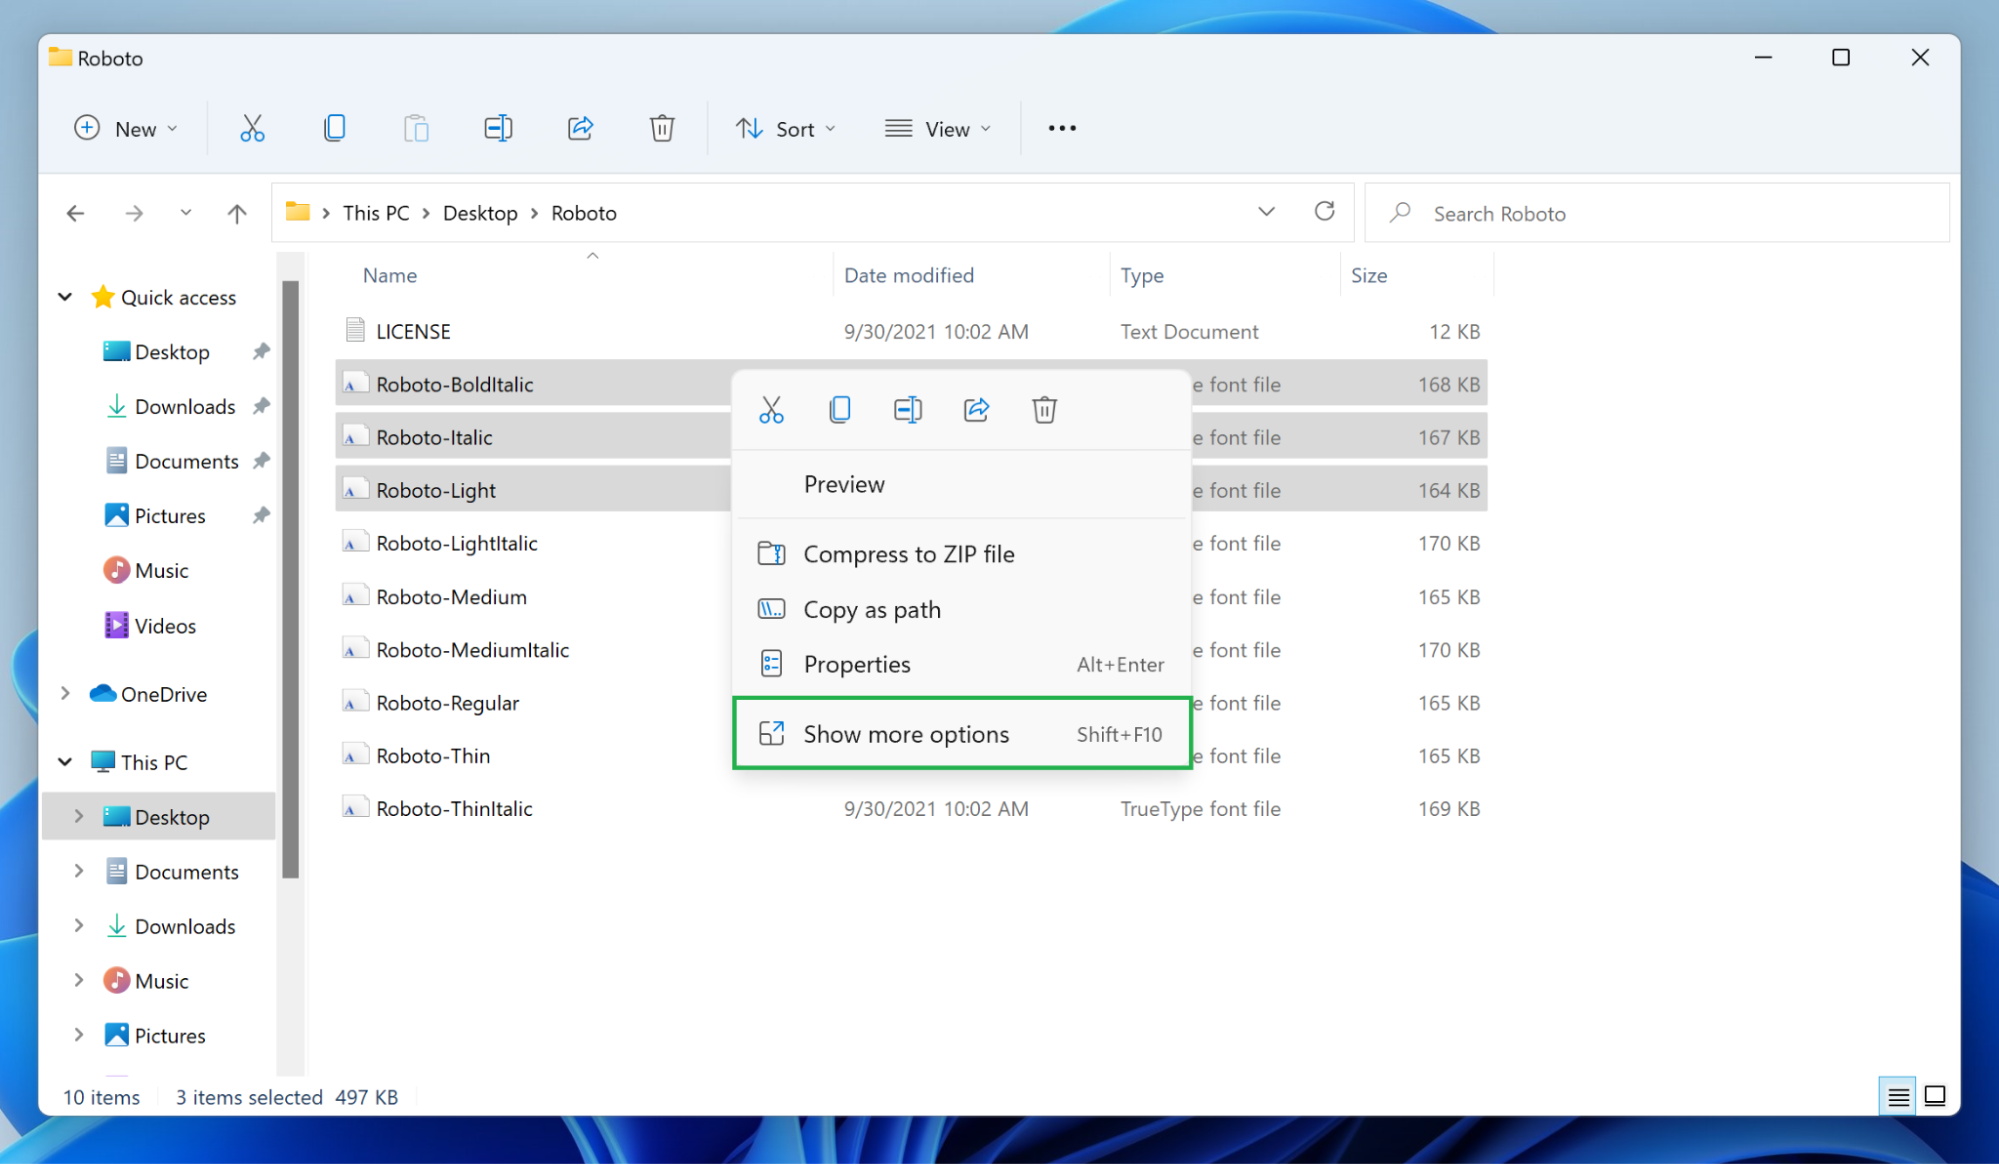
4. Right-click and, if the option to install doesn’t appear, select ‘Show more options’ in the menu. Windows 11 has moved the ability to install fonts by right-clicking the appropriate file and then choosing the appropriate option, so you’ll have to click “Show more options” or press Shift+F10 to access it. Windows 10 users can skip this step.
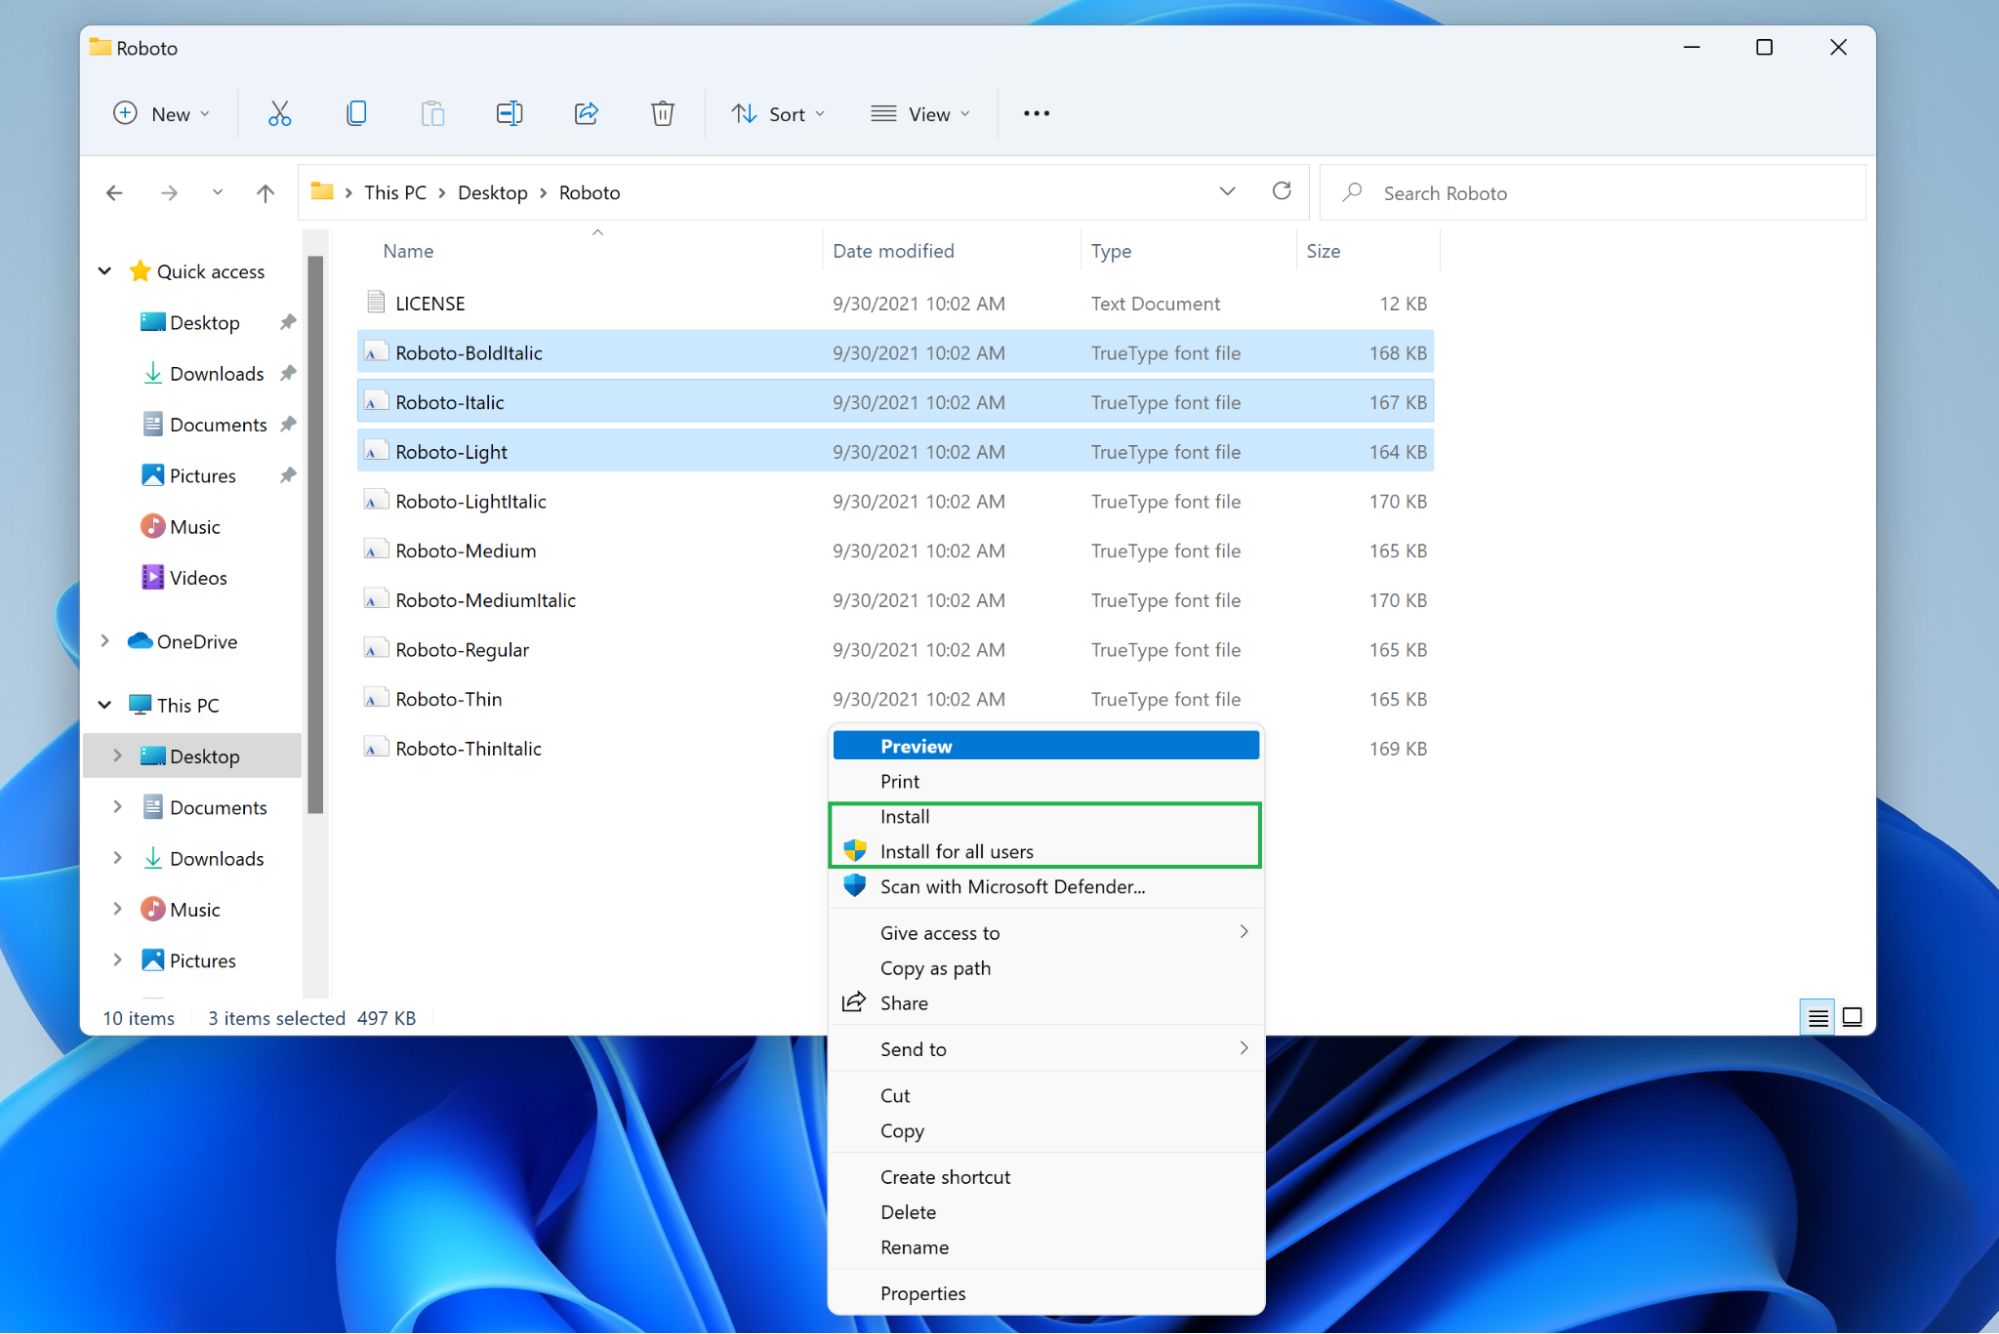
5. Choose ‘Install’ or ‘Install for all users’ from the menu. Normal users can install fonts for their own use, but installing it for every account on the system requires administrator privileges. Either way, once you’ve clicked whichever option you chose, a progress window should appear that automatically closes when the font is successfully installed.
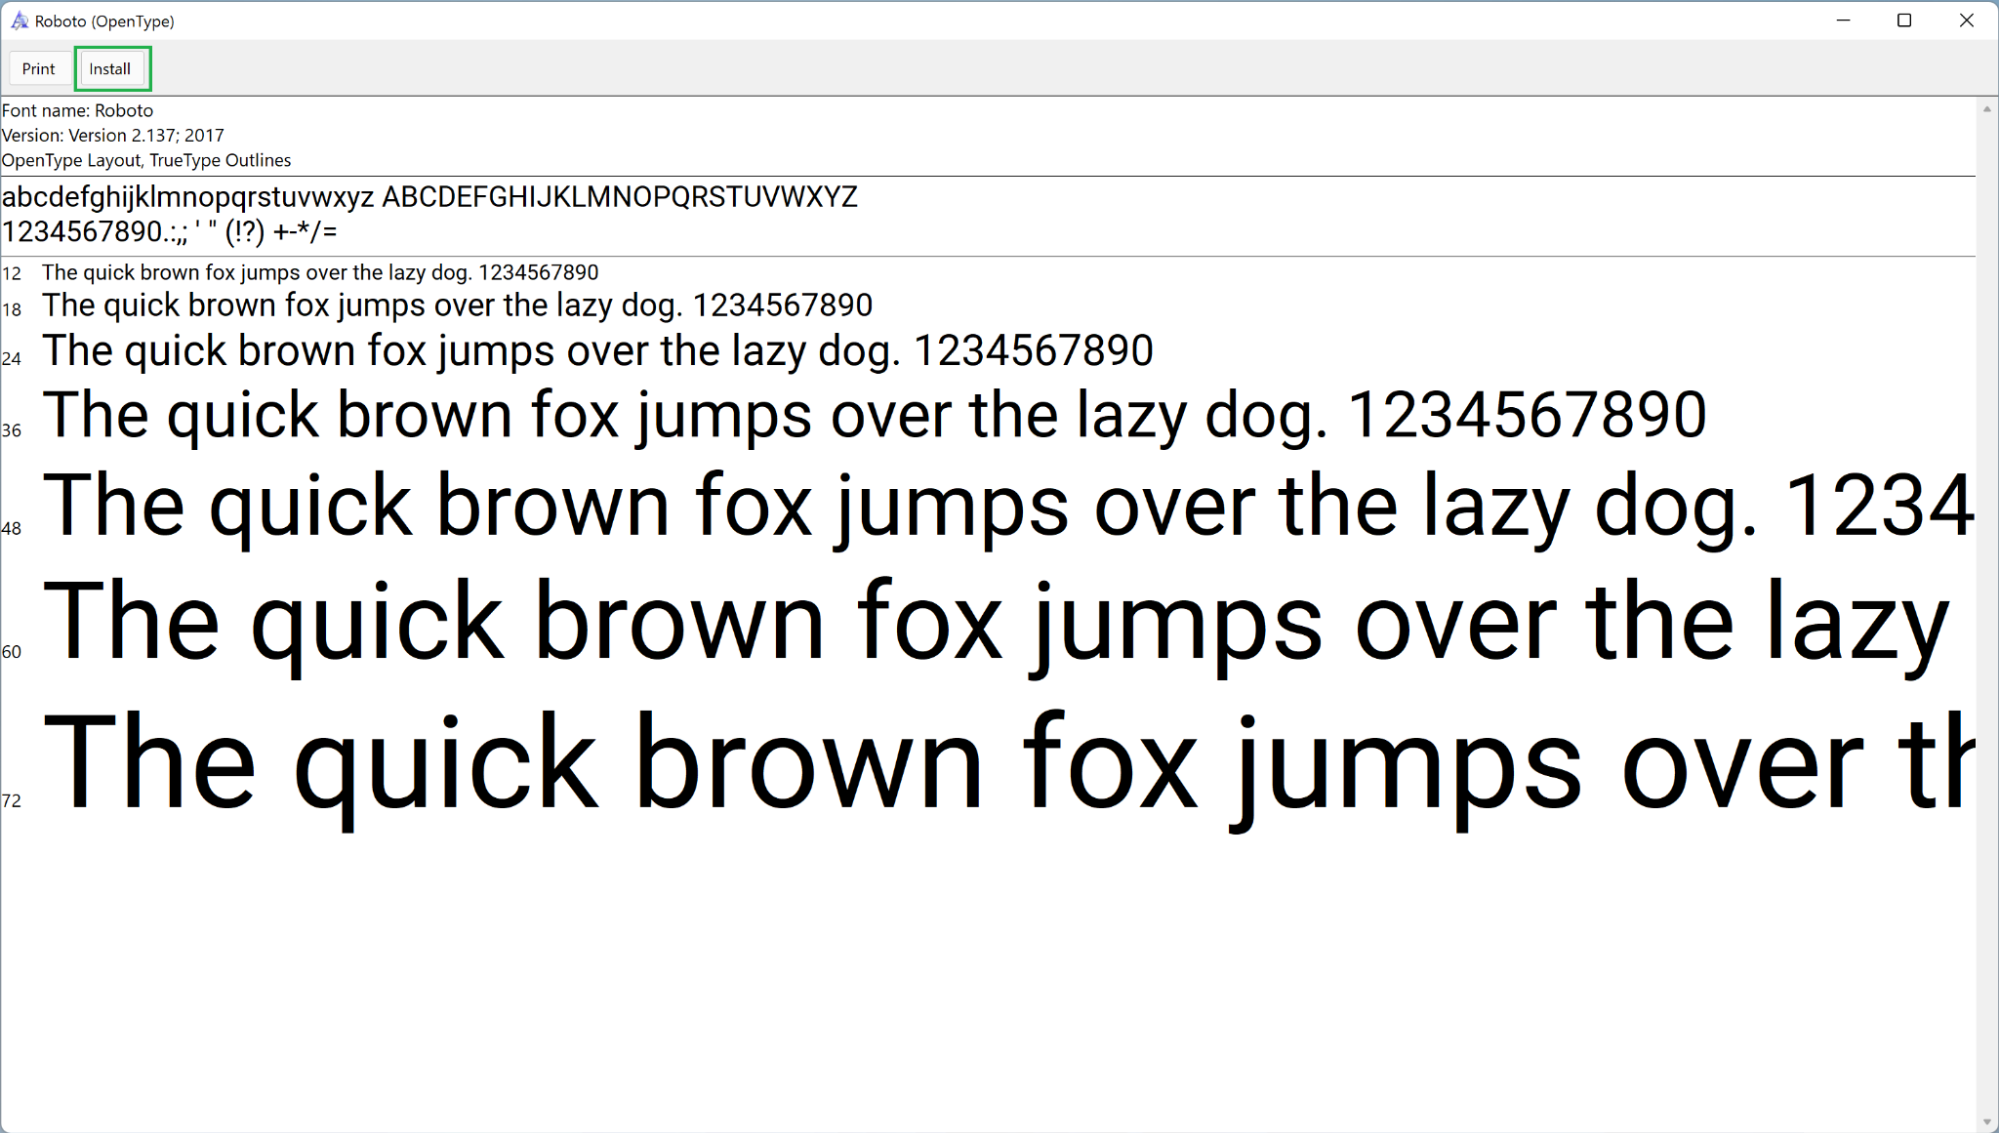
Alternative: Preview and then install. You can also skip all this right-clicking by opening the font face (or faces) you wish to install directly. This will show you a standard preview of the font face you’re about to add, and if you still want it, you can click the “Install” button.
Any of these methods will expand Windows 11 or Windows 10’s collection of fonts so you can use something that’s a little easier on the eyes, perhaps, or maybe even more eye-catching than the default options. Just remember that Comic Sans is never the appropriate font for the job.
More Windows 11 Tutorials:
- How to Get a Windows 11 ISO File and Do a Clean Install
- How to Enable God Mode in Windows 11 or 10
- How to Uninstall Windows 11 and Return to 10
- How to Clean Install Windows 11, No Product Key Required
- How to Install Windows 11 in a Virtual Machine
Nathaniel Mott is a freelance news and features writer for Tom’s Hardware US, covering breaking news, security, and the silliest aspects of the tech industry.
While Windows 11 has gotten a major overhaul, that has not impacted the default fonts currently available. This can mean a sigh of relief to those who dislike too many changes. However, it can also mean a carryover of monotony for some who like to add a little twist to things. If you belong to the latter, here are 2 ways you can install fonts in Windows 11.
Do the fonts automatically get installed once they’re downloaded? Or are there other steps involved to install these fonts? In this article, we will address these questions and go one step further by giving step-by-step ways to install and download fonts in Windows 11 using third-party sites as well. Let’s get right into it.
Method 1: Add Fonts to Windows 11 Using Microsoft Store
While Windows 11 comes with its set of fonts, you can get more fonts straight from the Microsoft Store. This helps in making sure you’re downloading fonts from a secure source. To do this, simply open the Microsoft Store and install the required fonts.
Follow the below steps to do it.
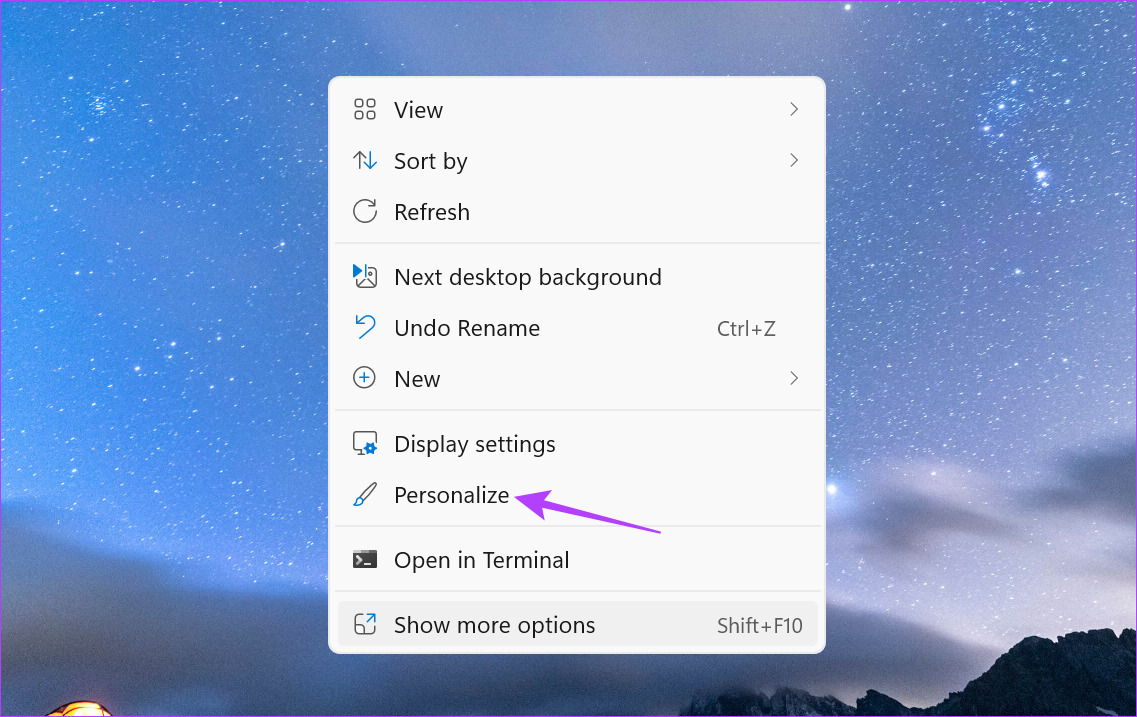
Step 1: Right-click on your desktop.
Step 2: Then, click on Personalize.
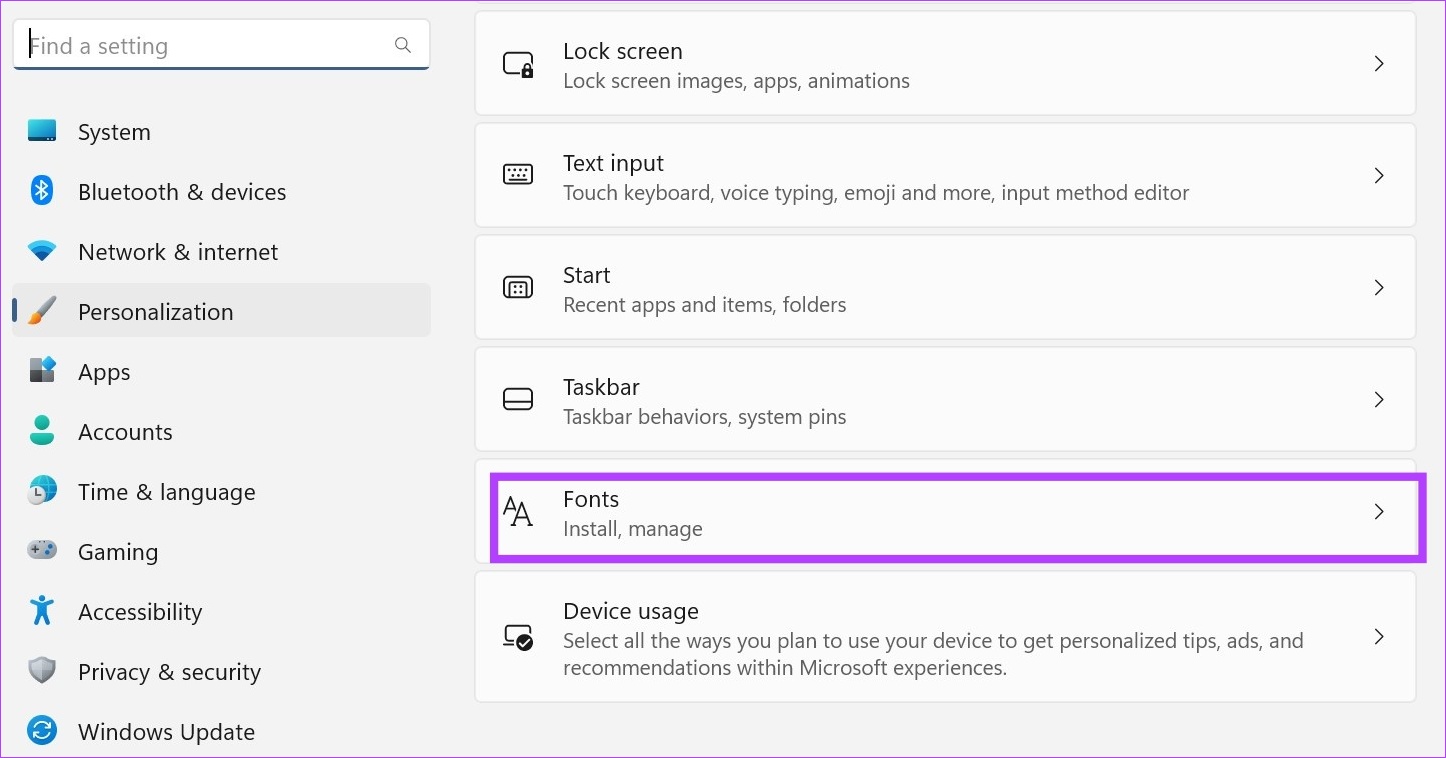
Step 3: Once the Personalization page opens, scroll down and click on Fonts.
Step 4: Here, click on ‘Get more fonts in Microsoft Store’. This will launch the Microsoft Store in a separate window.
Note: You can also open the Microsoft Store using the Windows search bar. Simply type Microsoft Store in the search bar and click on the relevant search result.
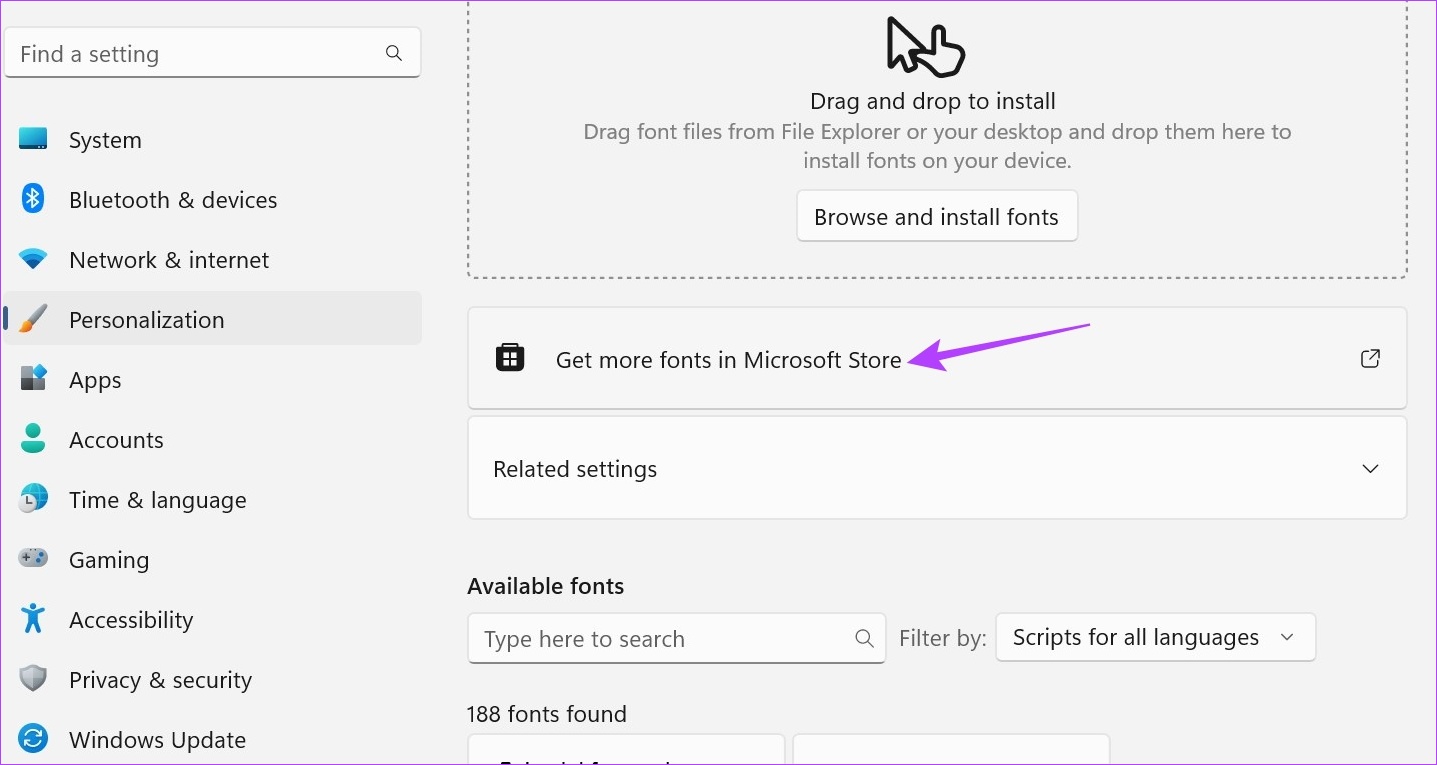
Step 5: While some fonts are available, all search results might not be visible on this page. So, go to the Microsoft Store search bar and type Fonts. Then, press enter. This will open the fonts page.
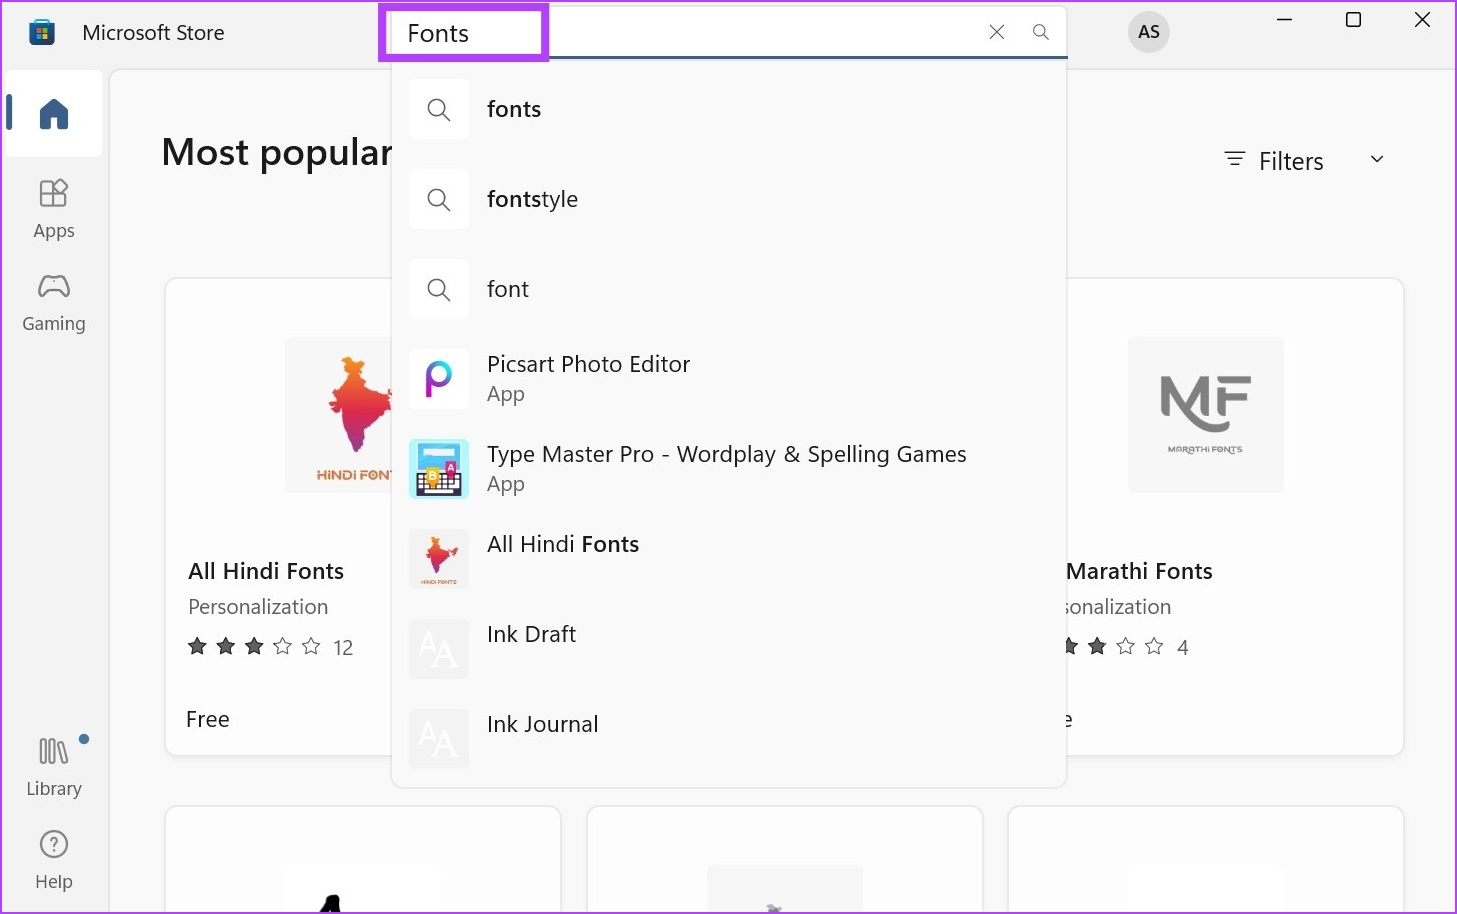
Step 6: From this page, click on the font that you want to add to Windows.

Step 7: Then, click on Get.
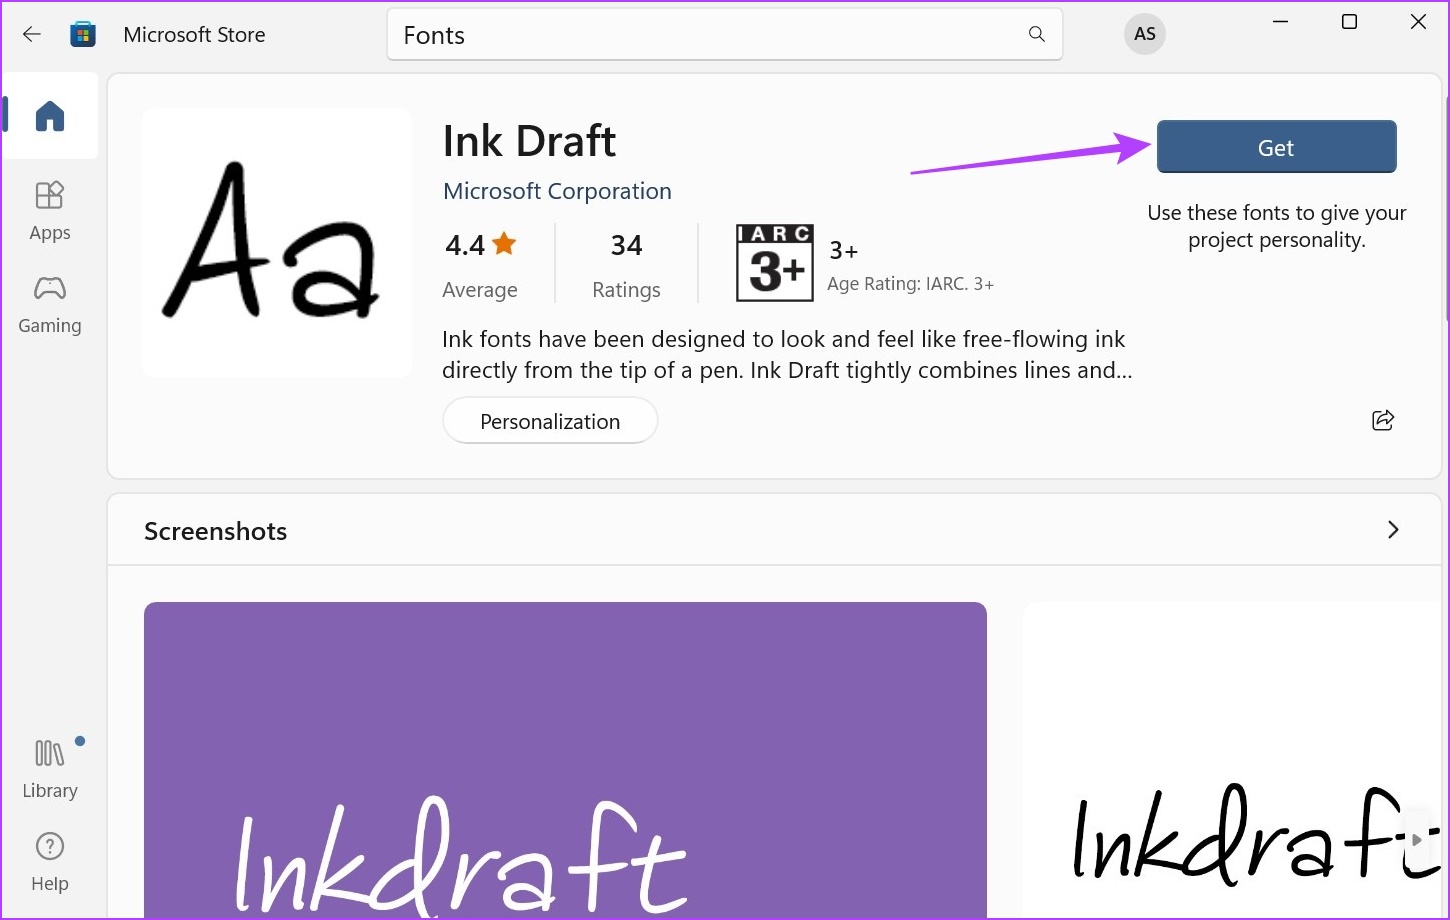
Step 8: Once downloaded, click on Open.

This will open the Fonts window once again. You can also check out our other article to know how to use these downloaded fonts as your system default.
Method 2: Install Windows 11 Fonts Using Third-Party Sites
While the Microsoft Store has a decent collection of fonts available, there are bound to be some fonts missing. To make up for that, you can use third-party sites to download and install fonts in Windows 11. Here’s how to do it.
Note: You can use different third-party sites like Google Fonts, DaFont, Ttf Fonts, and SkyFonts to install fonts in Windows 11. For demonstration purposes, we will be using Google Fonts.
Step 1: Open Google Fonts on any browser.
Open Google Fonts
Step 2: Here, either use the search bar to look for a specific font or click on it if it’s available on the main page.
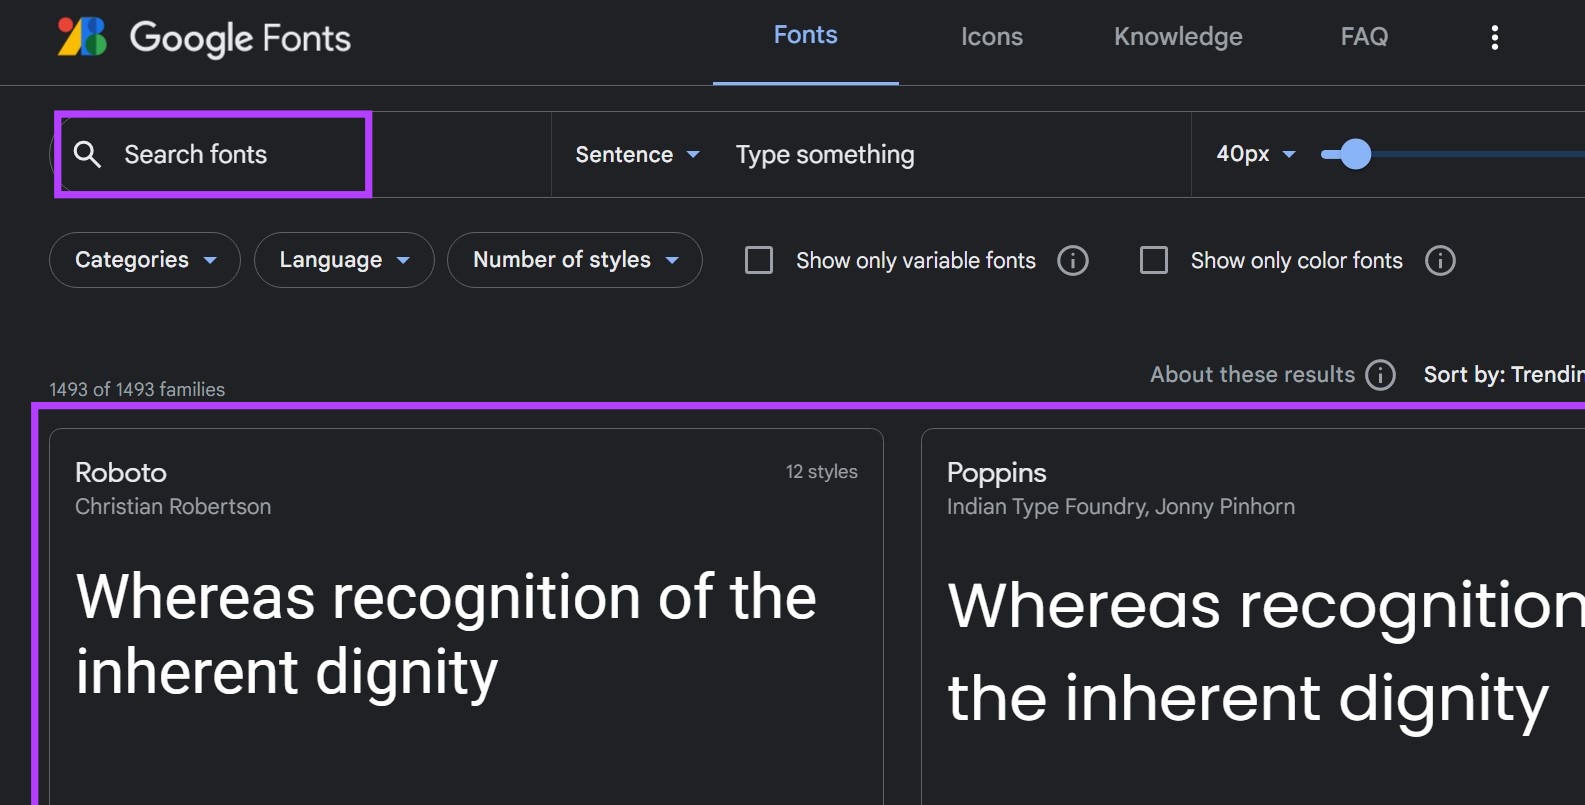
Step 3: Once the relevant font opens, click on Download family.

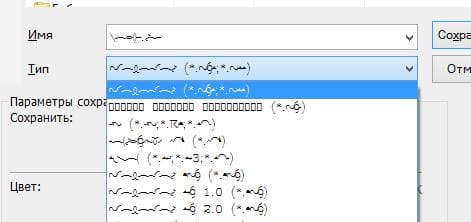
Step 4: Go to the file download location and, if it’s a .zip file, extract its contents first. To do this, right-click on the .zip file.
Step 5: Then, click on Extract All.

Step 6: Select the destination and click on Extract. A separate window might open with the file contents.
Note: If a separate window does not open, go back to the download location page and manually click on the extracted file to open it.

Step 7: Now, minimize this window and go to your desktop. Right-click and select Personalize.
Step 8: In the Personalization page, scroll down and click on Fonts.
Step 9: Here, you can drag and drop fonts from the other window.

This will install the font in Windows 11 and make it available in the fonts setting.
How to Delete Installed Fonts in Windows 11
If your Fonts page is too overcrowded or you simply wish to do away with some fonts, you can also delete the installed fonts. Here’s how.
Step 1: Right-click on your desktop and click on Personalize.
Step 2: Then, scroll down and click on Fonts.
Step 3: Here, click on the search bar and type the name of the font you wish to delete. You can even scroll through this page to look for the relevant font.

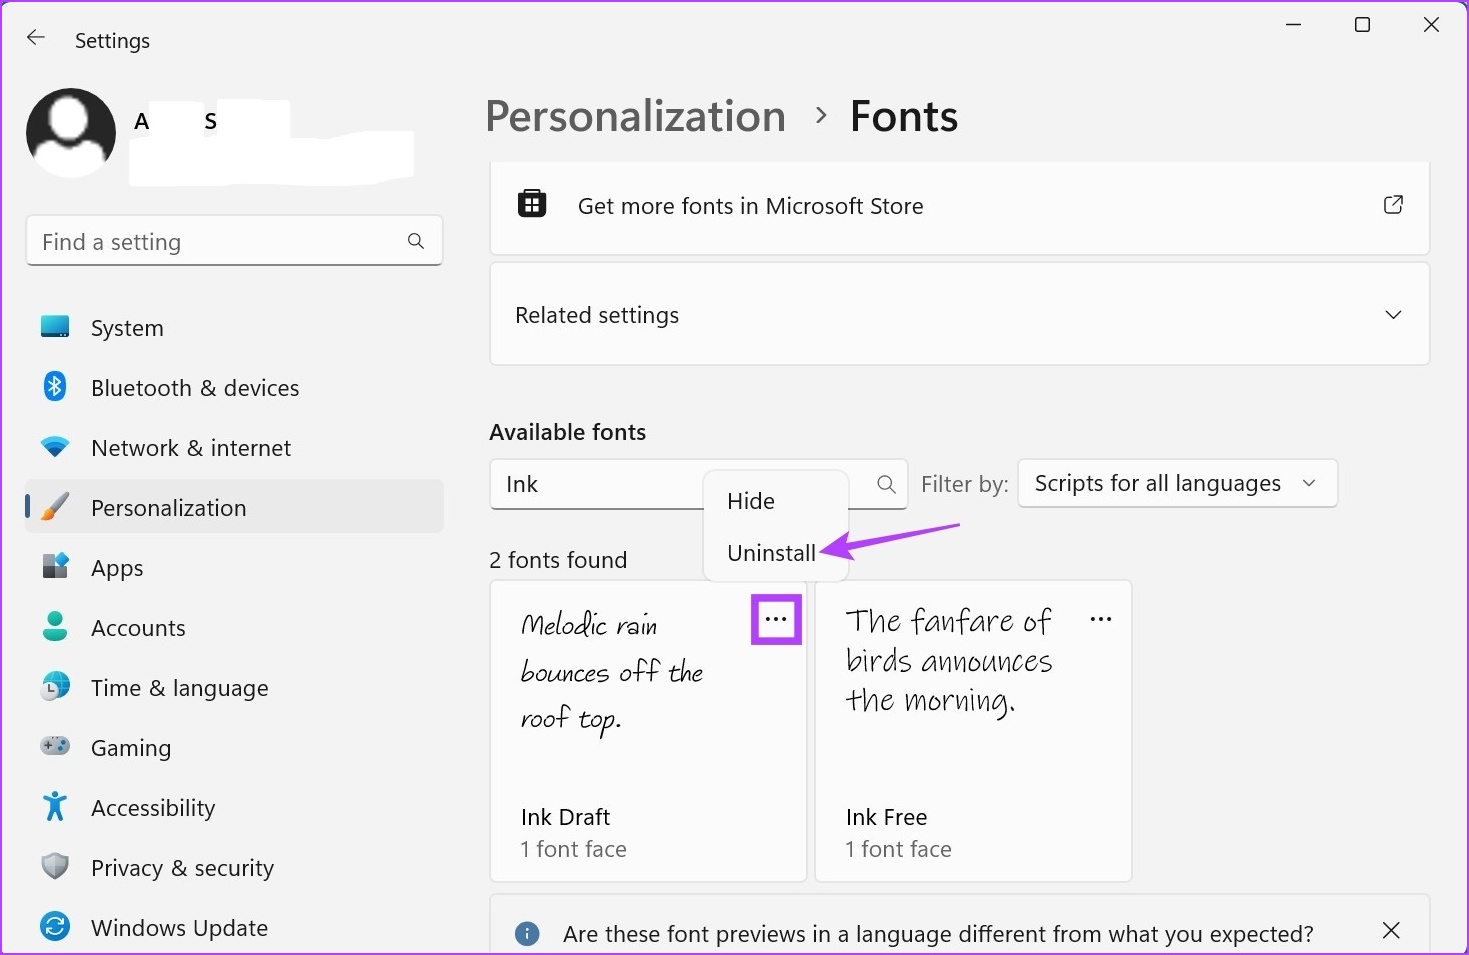
Step 4: Once the font appears, click on the three-dot icon.
Step 5: Then, select Uninstall.
Step 6: Again, click on Uninstall.

This will delete the downloaded font from Windows 11.
FAQs for Installing Fonts in Windows 11
1. Can I install multiple fonts at once in Windows 11?
Yes, you can install multiple fonts at once in Windows 11. Simply bulk download the fonts from your preferred site and then use the Control + A keyboard shortcut to select all the fonts at once. Then, open the Fonts window using the above steps and drag and drop all the fonts into the ‘Browser and install fonts’ window. This will display all the fonts in the menu options. Then, select the fonts and change them as you deem fit.
2. Where are downloaded fonts stored in Windows 11?
While downloaded fonts are usually stored in the Windows 11 Downloads folder, they can be someplace else if the default download location has been previously changed. In this case, you can open the download list in your browser and manually go to the windows 11 font folder.
These are all the ways you can install fonts in Windows 11. Use this to further personalize your Windows experience. If you want to further customize Windows, you can also check out how to change screen resolution in Windows 11.
Was this helpful?
Thanks for your feedback!
The article above may contain affiliate links which help support Guiding Tech. The content remains unbiased and authentic and will never affect our editorial integrity.