
Although Windows 11 introduces a new widget feature, the widgets offered cannot be attached to the desktop. You can open the Windows 11 built-in widget board by pressing the Win + W keys, or learn more from this article: How to add or remove Windows 11 widgets. However, as mentioned, these widgets cannot be placed on the desktop. If you need widgets that can stick to the desktop in Windows 11, you need to use a different widget app.
This guide will show you how to add widgets to desktop in Windows 11 using a custom widget app called BeWidgets which can be installed via Microsoft Store.
How to put widgets on desktop in Windows 11
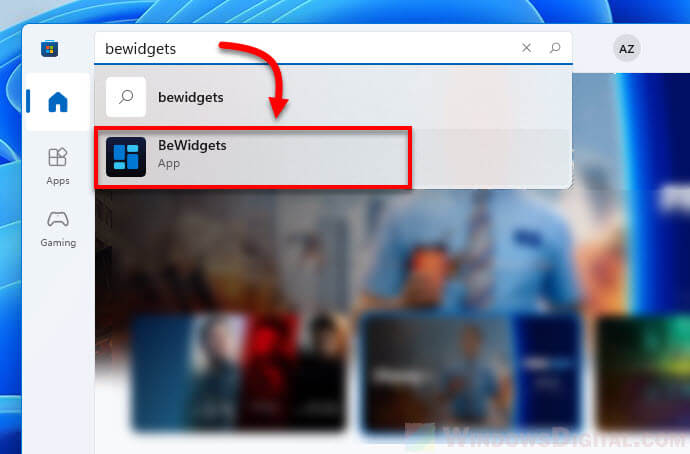
1. Open Microsoft Store from the taskbar and search for BeWidgets.
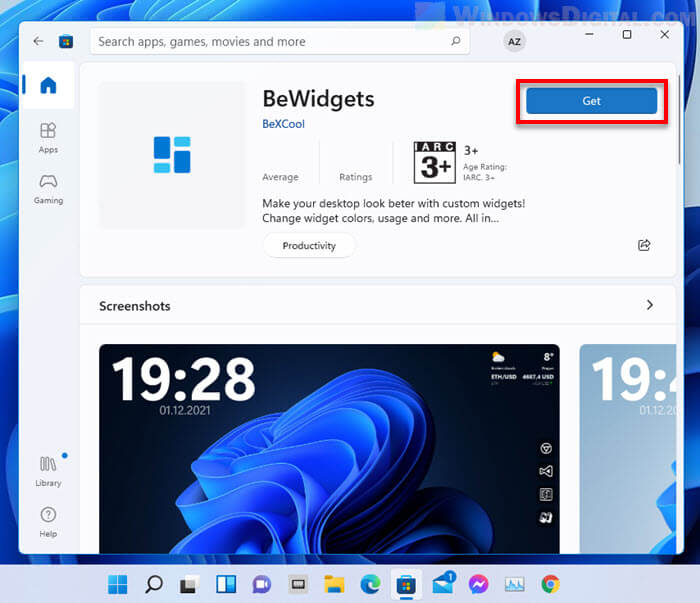
2. Select BeWidgets to open its store page. Then, click the Get button to install the app.
3. Once installed, you can launch the app directly from Microsoft Store by simply clicking the Open button. To open the app again next time, you can search for the app via Start and alternatively pin it to Start or taskbar for quick access.
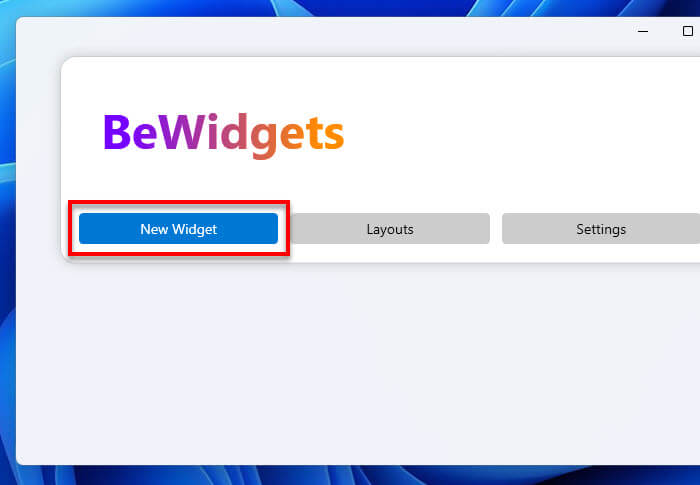
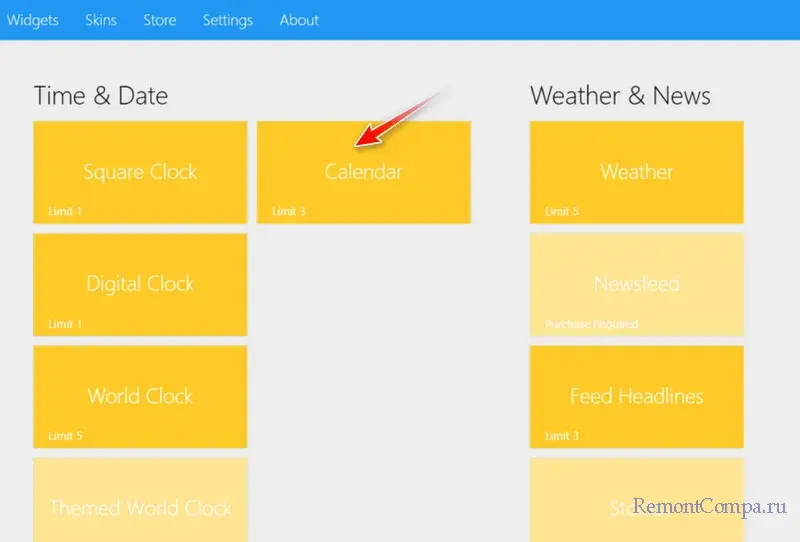
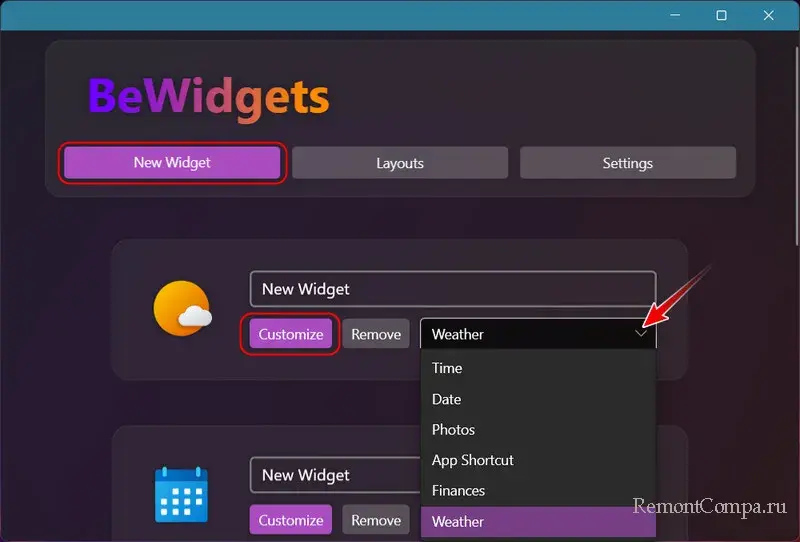
4. In the BeWidgets app’s window, click New Widget to create a new widget.
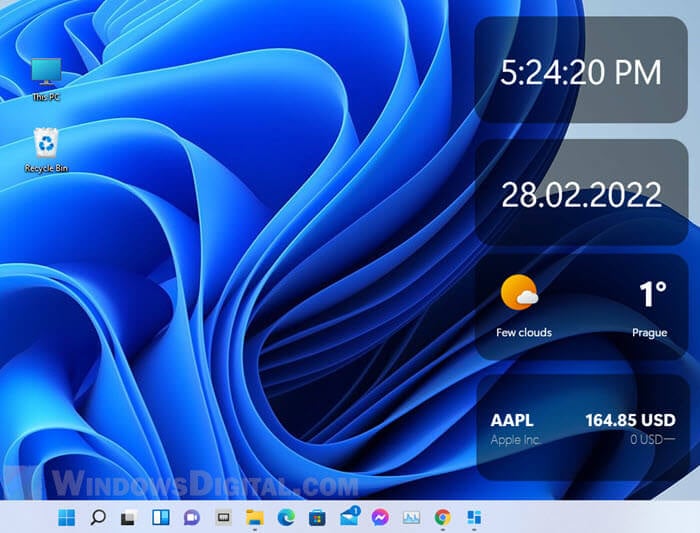
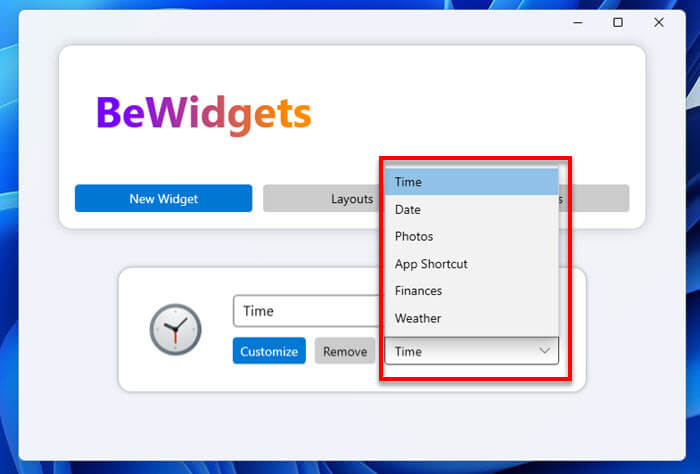
5. The default widget will always be the Time widget. To change this widget to another different widget, click the drop-down menu of the widget and select a different widget. The available widgets for now are: Time, Date, Photos, App Shortcut, Finances and Weather. The developer of this app may add more widgets in the future.
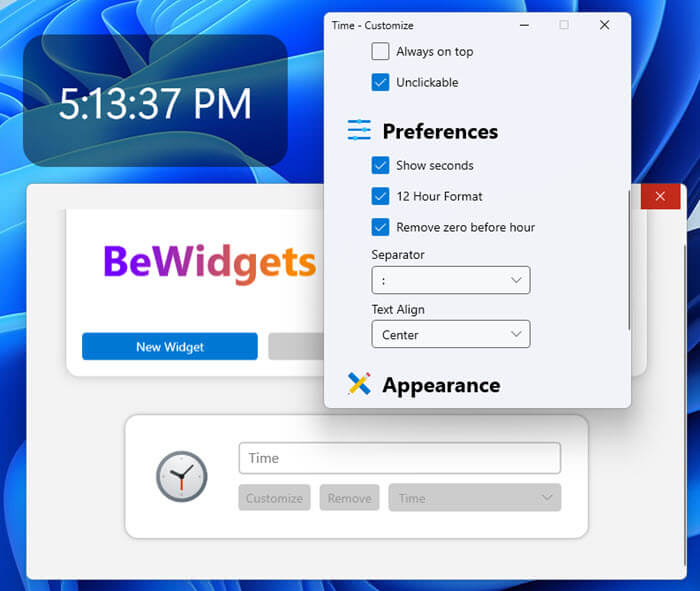
6. To customize a widget, for example, the Time widget, click Customize. In the Customize window, you can configure various options and preferences such as whether or not to show seconds in the widgets, changing to 12 hour format, making the widget unclickable, etc.
7. You can freely move the added widget on the desktop by clicking and dragging it to anywhere you want to place it on the desktop. However, if the unclickable option is enabled via Customize, the widget will no longer be clickable or moved. The unclickable option is recommended after you’ve placed your widget to prevent accidental clicking or moving of the widget.
Add a date widget to desktop in Windows 11
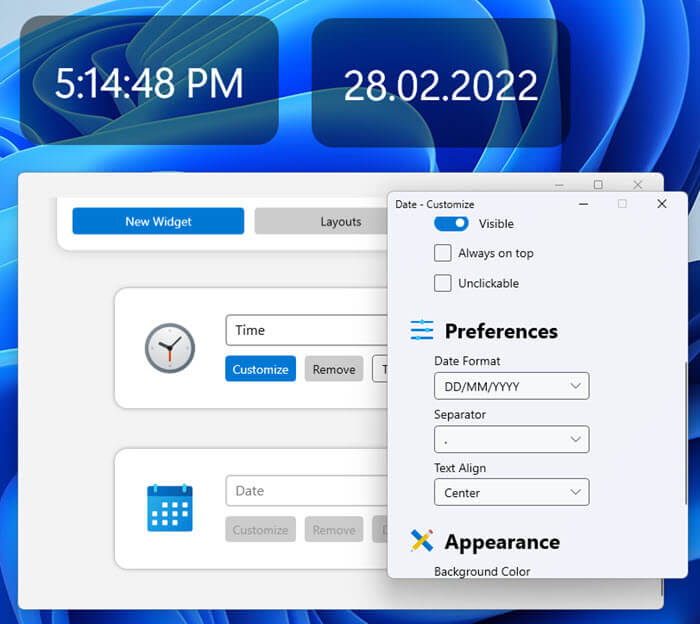
To add a widget that shows the date, click New Widget and change the default widget to Date via the drop-down menu. To customize how the date is displayed, click Customize in the Date widget. From there you can configure preferences such as Date Format (e.g. DD/MM/YYYY), separator used, text alignment, and appearance settings such as background color, etc.
Add a weather widget to desktop
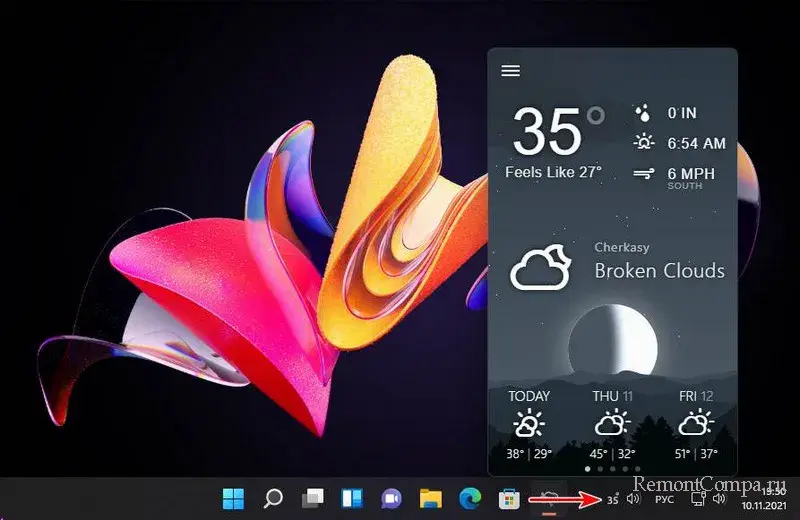
To add a weather widget, click New Widget, then select Weather from the drop-down menu. To change the location the weather widget shows and to configure other settings for the weather widget, click Customize.
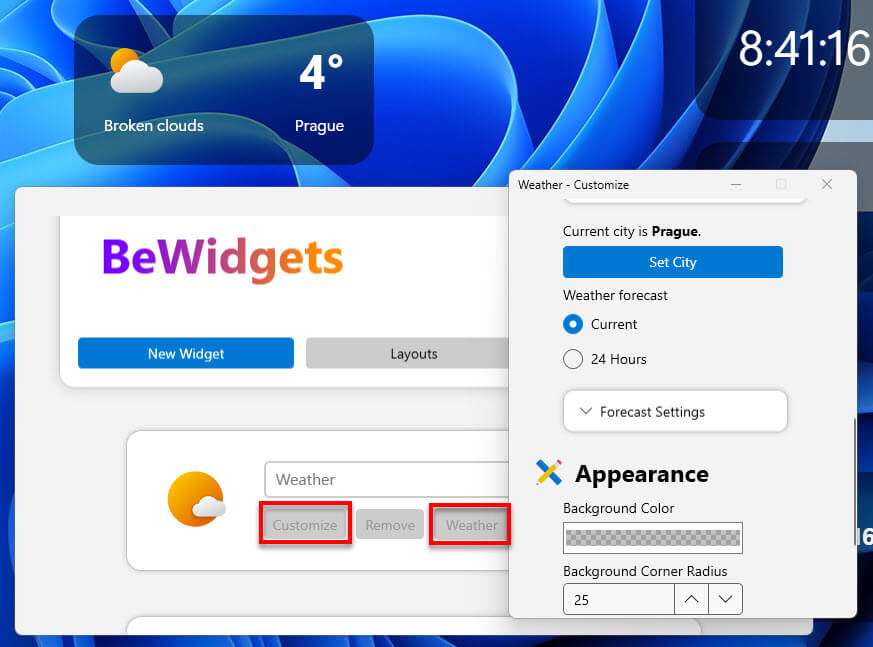
From there you can change the weather location by clicking the Set City button under “Current city is” setting. You can also configure other settings such as “Weather forecast” to choose if the widget should show only current weather or weather in 24 hours, as well as appearance settings such as background color of the weather widget.
Add a rotating photo display widget in Windows 11
BeWidgets Photo widget is a widget that can display photos from a photo folder. When there are multiple photos in the selected folder and its subfolders, the widget will use the photos and display them as a slideshow.
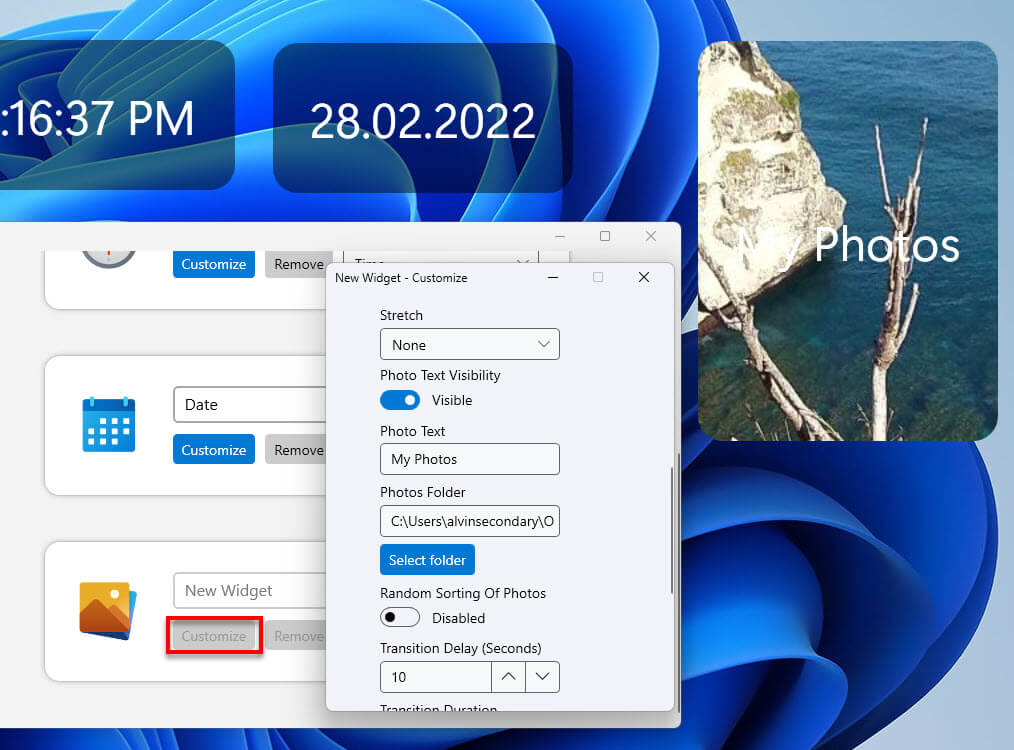
You can configure from which folder should the widget use photos from, the photos’ transition delay in seconds, the text on the photo widget, and other settings, via Customize.
Create layout to backup and restore widgets
BeWidgets also allows you to save your widget layout with all their settings and positions. You can create a layout of your current widgets by first clicking the Layouts button in the app, then select Create Layout From Current Widgets.
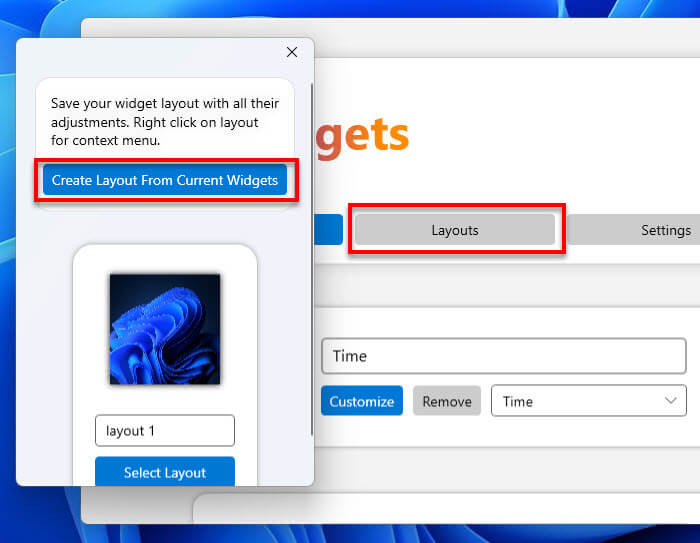
To restore a widget layout, click the Select Layout button on a saved layout.
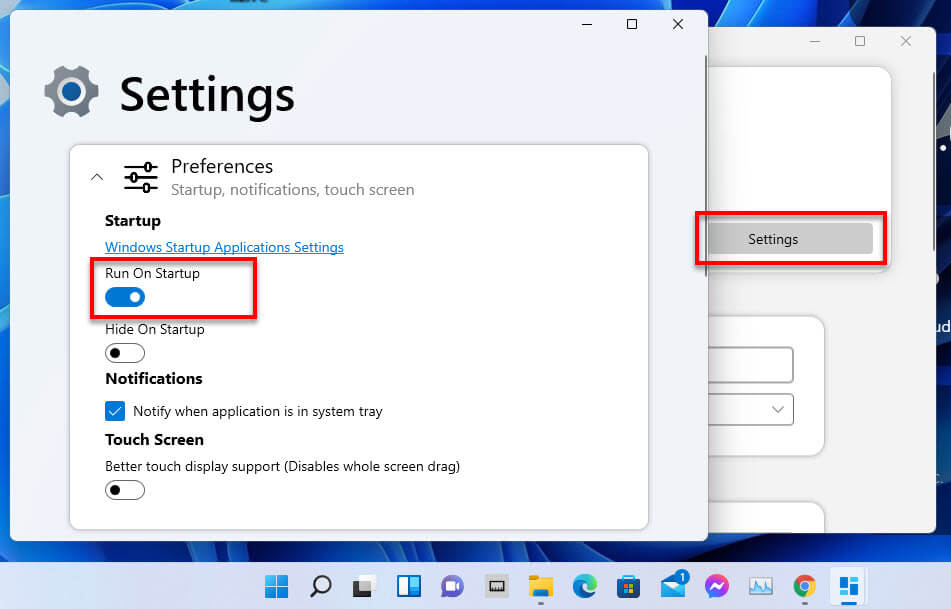
Enable automatic launching of BeWidgets on startup
The widgets will only show up on the desktop if BeWidgets is running. Thus, it is recommended to allow BeWidgets to run on startup automatically so that you don’t have to open it every time you start up computer.
To enable BeWidgets to run on startup, click Settings in the app, and make sure the “Run On Startup” option is enabled. The “Hide On Startup” option tells BeWidgets to hide the app’s window (while showing only widgets) when it runs on startup.
By hitting Win + W in Windows 11, you can bring up the widgets board. You can also do the same by hovering over the Widgets button on the left side of the Taskbar. On the board, you can add or remove widgets and even customize and rearrange them however you like, but you can’t add them to your desktop.
Luckily, Windows has a third-party app called Widget Launcher that allows you to pin widgets to the desktop. Here’s how to use it.
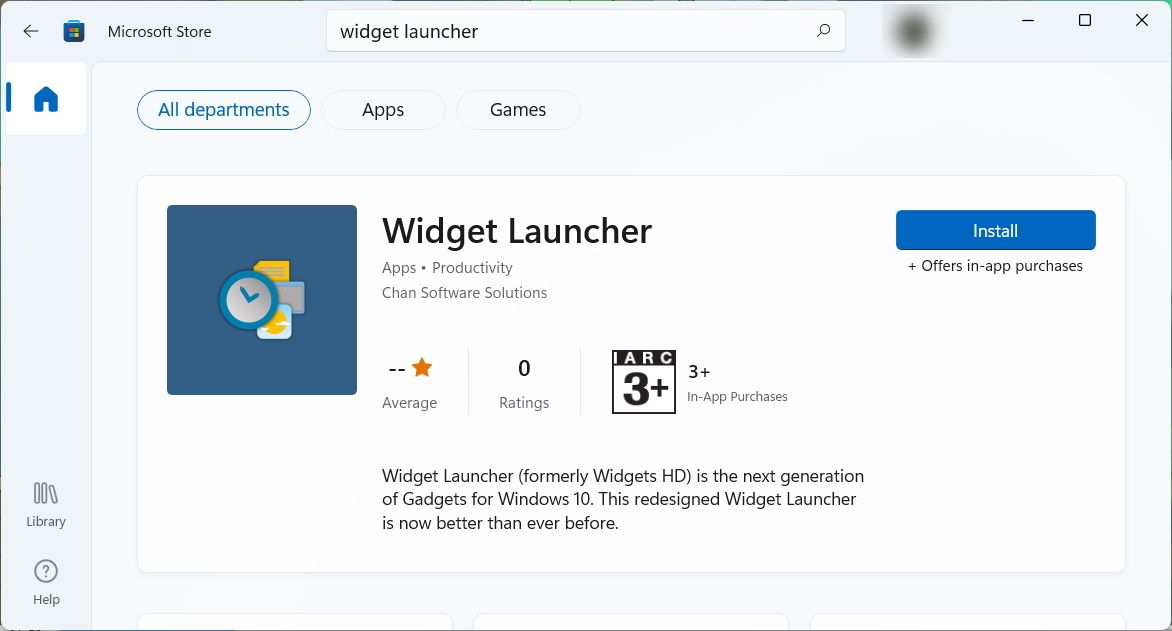
Widget Launcher is available on the Microsoft Store. If you haven’t explored it before, the Microsoft Store has plenty of award-winning and innovative apps. For the time being, we’ll use it to download Widget Launcher.
If Microsoft Store is up and running on your PC, you should be able to download the app via the Widget Launcher page on the Microsoft Store. Just click Get in Store app and Windows will handle the rest.
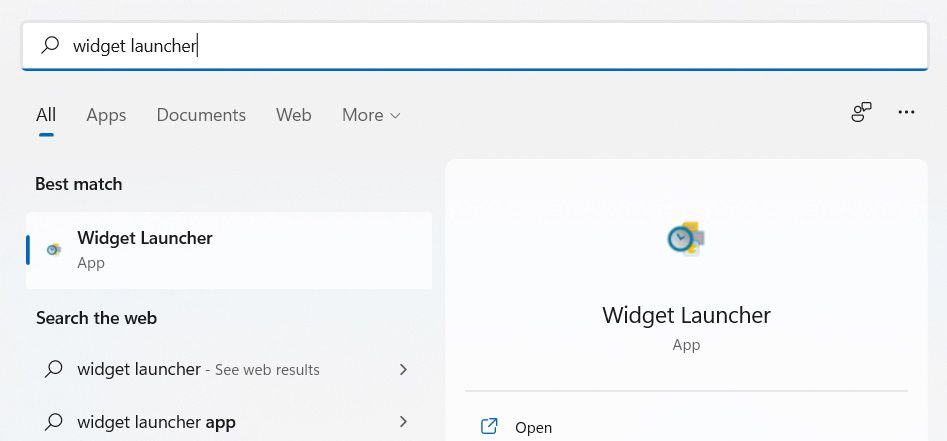
Otherwise, press Win + S to open Windows Search and type store in the search box. Under Best match in the search results, click on Microsoft Store to launch the app. Search for widget launcher and install the app that appears.
After the Microsoft Store downloads Widget Launcher onto your Windows 11 PC, click Open to launch the app. You can also open it by pressing Win + S, typing widget launcher in the search box, and clicking on the app in the search results under Best match.
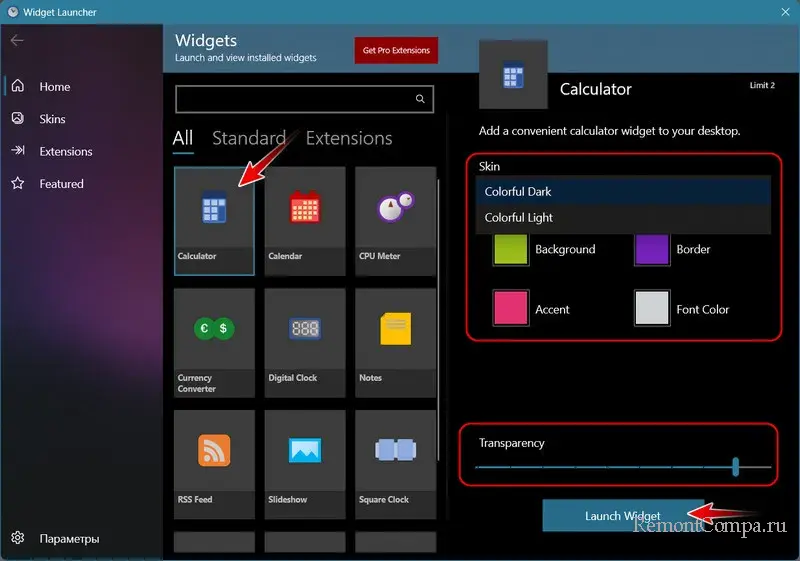
With Widget Launcher open, you’ll see a list of all the available widgets, such as Weather, Clock, Calendar, Notes, and CPU Meter, in the middle panel. Click on the widget you want to add to the desktop.
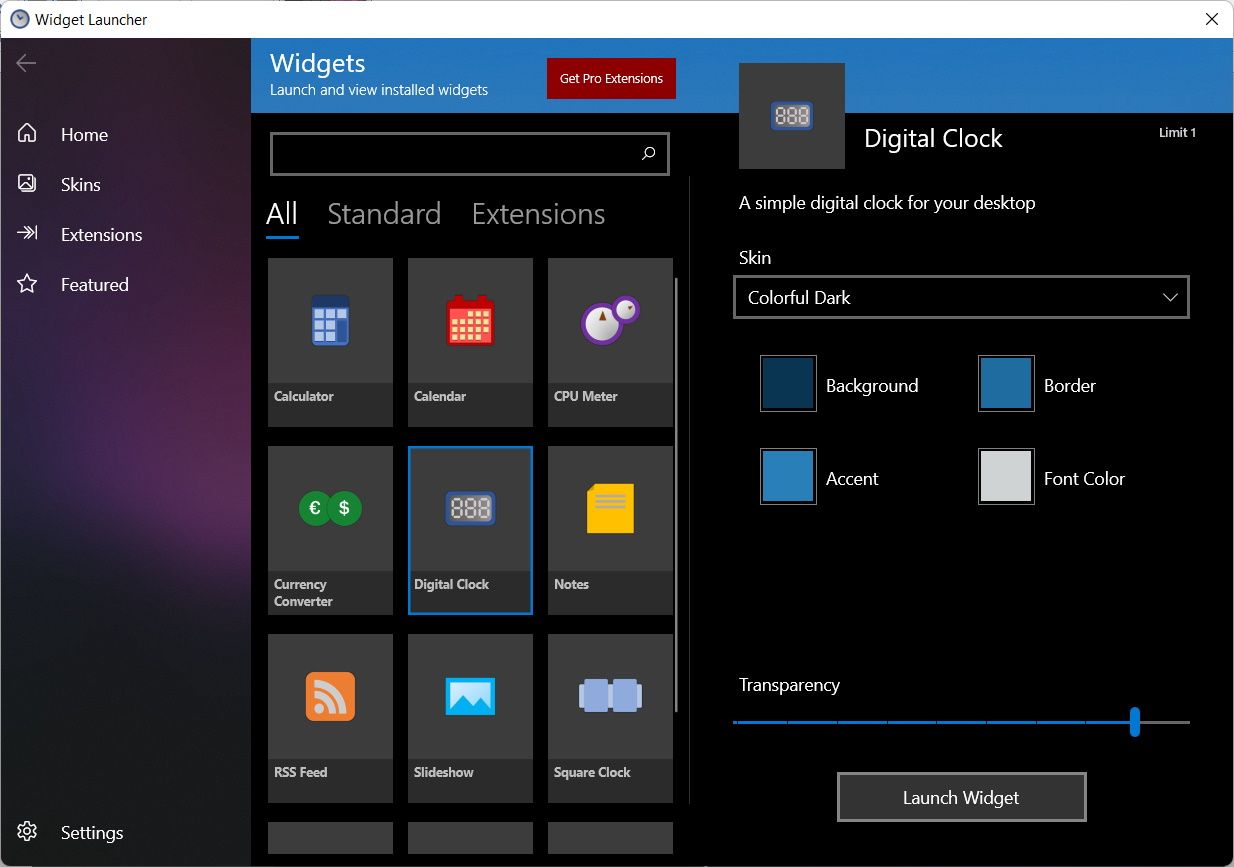
In the right panel, click on Launch Widget, and the widget will now appear on your desktop. If you decide these widgets are enough for your needs, you can disable Windows 11’s widgets.
Some widgets, such as Weather, RSS Feed, and Slideshow, will be blank when you first launch them. That’s because you need to tell them where to get the data they need to display.
Let’s take the RSS Feed widget, for example. To make it show the feeds you want, start by hovering over the widget and clicking on the gear icon in the small panel that appears on the right to open Settings.
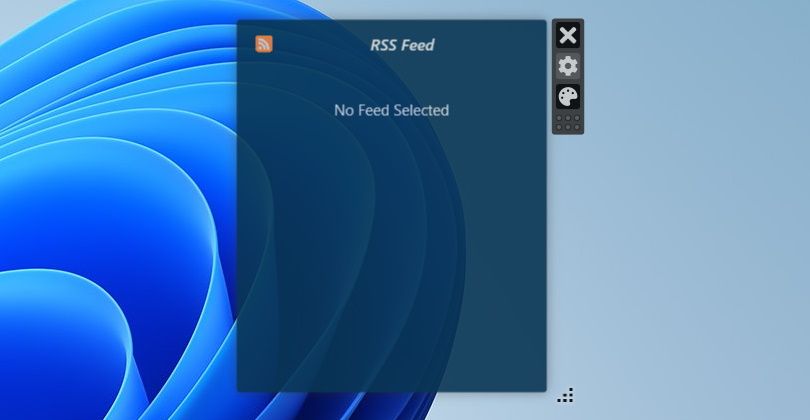
Then, enter the URL to the website the RSS Feed widget will use to populate itself with feeds, and then click OK. Now the widget won’t be blank anymore.

If this was the Weather widget, you’d need to add a location. And if it was the Slideshow widget, it would require a folder to find the images to display.
If you want to see the widgets every time no matter what window you’re on, click Settings in the bottom left corner of the Widget Launcher app. Then, turn on the toggle for Widgets Always on Top.
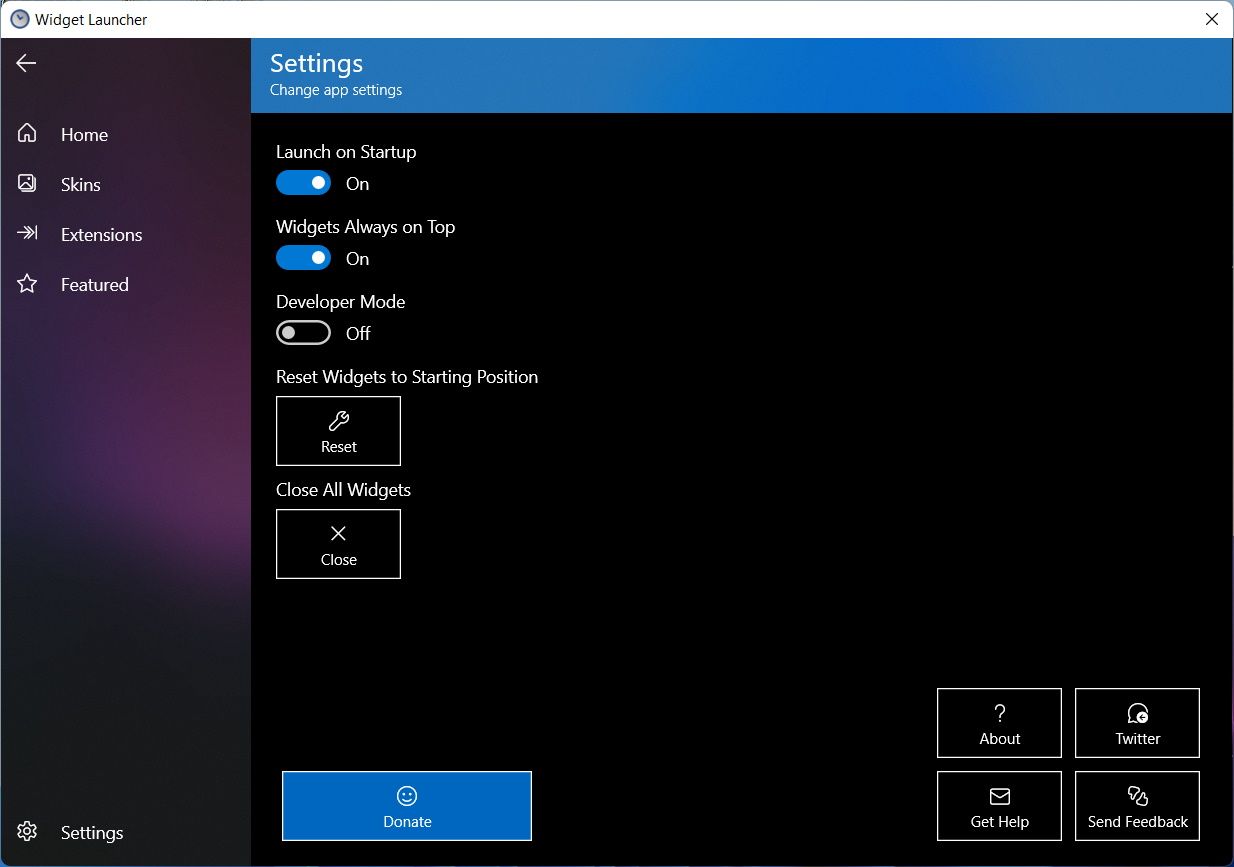
By default, Widget Launcher is set to launch the widgets during startup as well. You can prevent this by setting the toggle for Launch on Startup to Off.
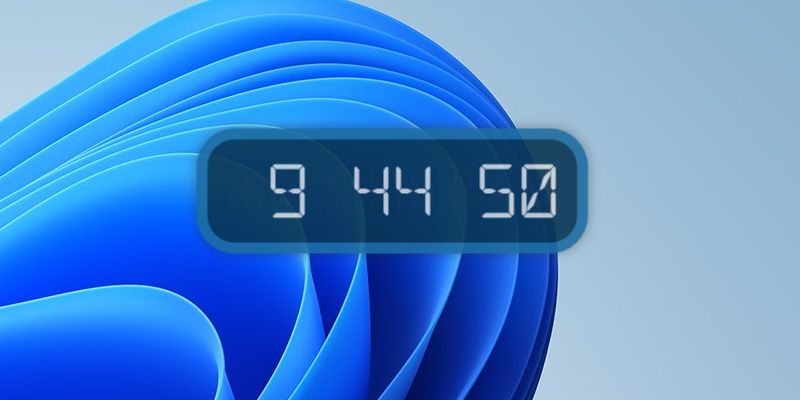
If you want to add widgets to your Windows 11 desktop, Widget Launcher allows you to do that easily. That way, you can always see your favorite information right from your desktop. And if you want to see the widgets all the time, you can just set them to always be on top.
В этой статье, друзья, рассмотрим гаджеты в Windows 11. Гаджеты — мини-приложения, размещаемые на рабочем столе или на отдельной боковой его панели, как системный функционал появились в Windows 7. С их помощью можно было отслеживать различную информацию — погоду, новости, курсы валют, потребление ресурсов компьютера и т.п. — прямо на рабочем столе. Несмотря на популярность гаджетов, ни в одной из следующих версий Windows они не появились, так Microsoft решила из соображений безопасности. Но появилась масса сторонних решений по внедрению гаджетов, и их можно реализовать в любой актуальной версии Windows – 8.1, 10, 11. Что за сторонние решения?
Gadgets Revived — бесплатная программа, реализующая в любой Windows начиная с 8 классические гаджеты, точь-в-точь такие, какими они были в Windows 7.
После установки программы запускаем её из классической панели управления.
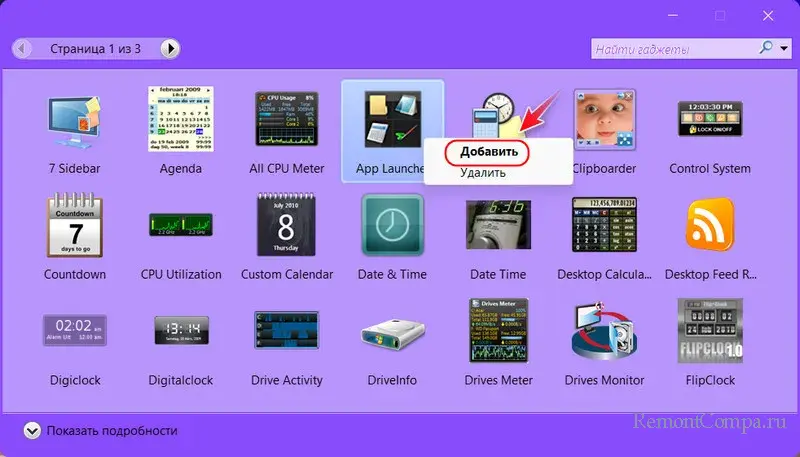
И добавляем гаджеты опцией в их контекстном меню или перетаскиванием на рабочий стол. Изначально нам предлагается небольшой ассортимент гаджетов. Но этот ассортимент можно пополнить на сайте программы по отсылке внизу окна.
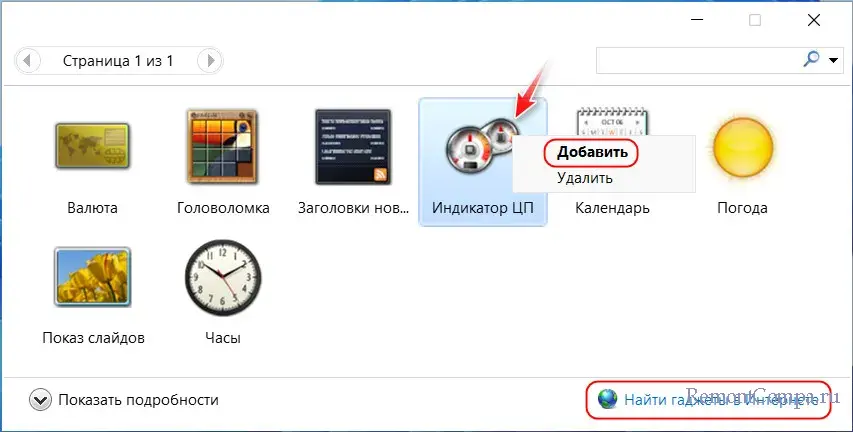
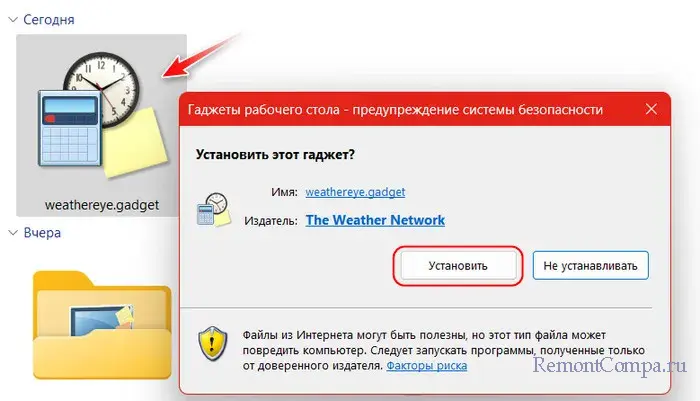
Скачиваем на сайте заинтересовавшие гаджеты и устанавливаем их как обычные программы.
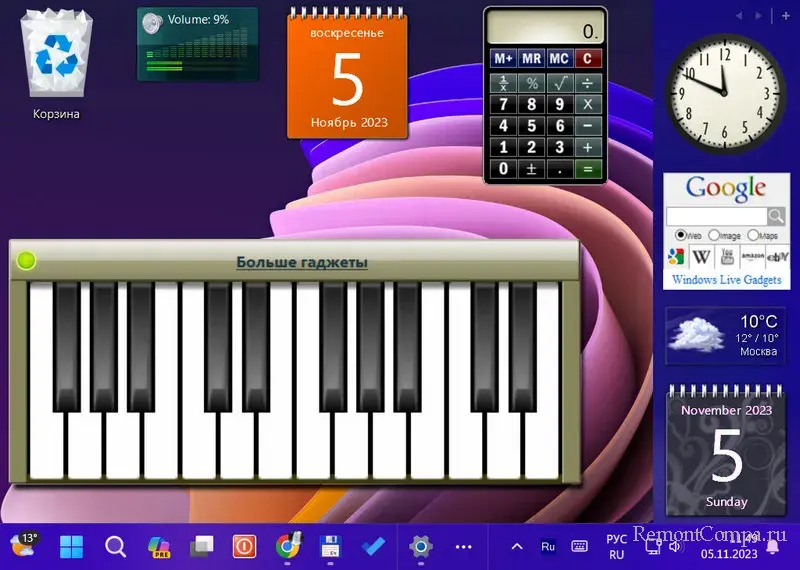
Аналогичный предыдущему бесплатный проект — 8GadgetPack. Реализует в любой Windows начиная с 8 такие же гаджеты, какими те были в Windows 7. Предусматривает боковую панель.
Добавлять гаджеты можно на этой панели – в её контекстном меню или кнопкой-плюсиком.
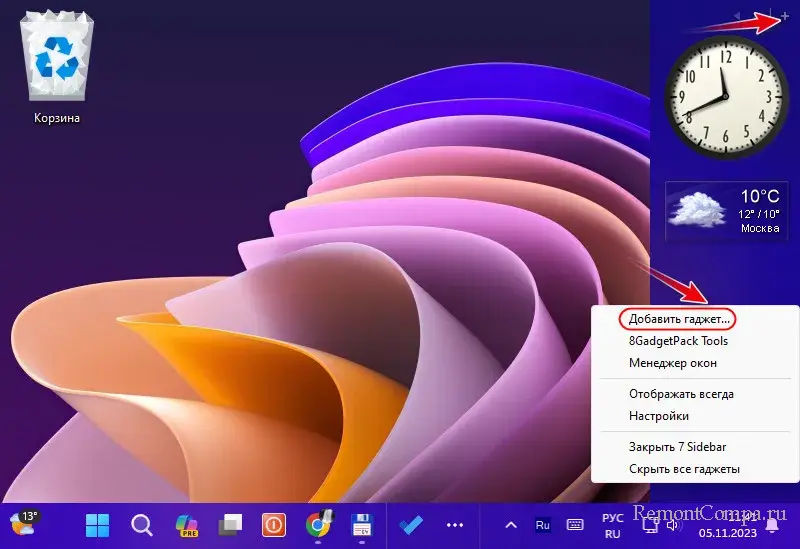
Запускается программное окно с выбором гаджетов, где каждый из них мы можем добавить на рабочий стол опцией в контекстном меню или перетаскиванием.
8GadgetPack изначально предусматривает полный ассортимент гаджетов. Детально о 8GadgetPack.
Что Gadgets Revived, что 8GadgetPack, помимо своего ассортимента, могут быть совместимы с гаджетами, предлагаемыми на различных сайтах по кастомизации Windows. Однако ни одна из программ не гарантирует корректность работы всех гаджетов, даже своих.
В Windows 10 и 11 гаджеты можно реализовать в современном формате, с помощью приложений из Microsoft Store. Одно из таких – условно-бесплатное Desktop Gadgets. Предлагает гаджеты как то: время, дата, погода, активность системных ресурсов, фотогалерея, заметки, калькулятор, конвертер величин.
В окне приложения выбираем гаджет и двойным кликом добавляем его на рабочий стол.
Всё это доступно бесплатно, за плату можно получить дополнительные гаджеты и сменить их скины.
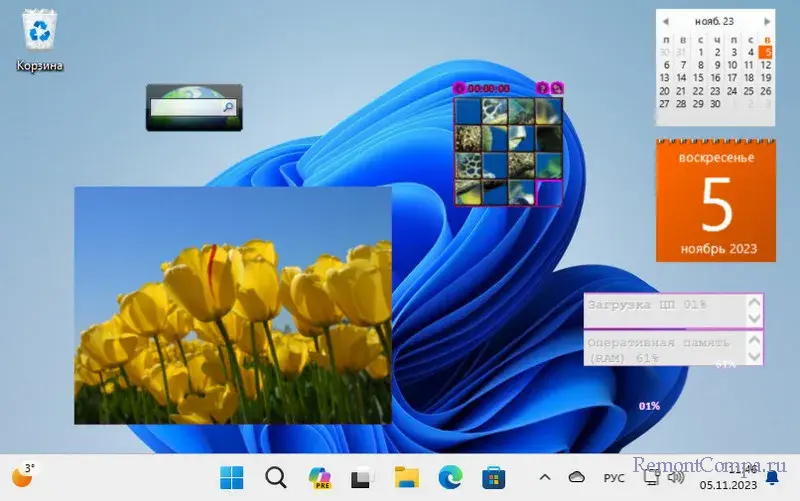
Бесплатное приложение Widget Launcher – это стильные современные гаджеты, именуемые виджетами. Есть виджеты: часы, погода, калькулятор, календарь, активность системных ресурсов, конвертеры, RSS, заметки, слайд-шоу фото и пр.
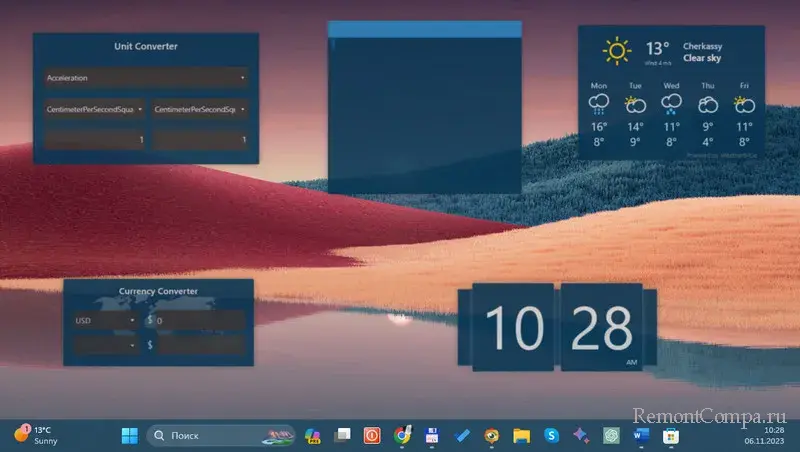
Для добавления виджета на рабочий стол кликаем его в окне приложения. Можем выбрать для него тёмную или светлую тему, настроить цвета и прозрачность. В итоге жмём «Launch Widget».
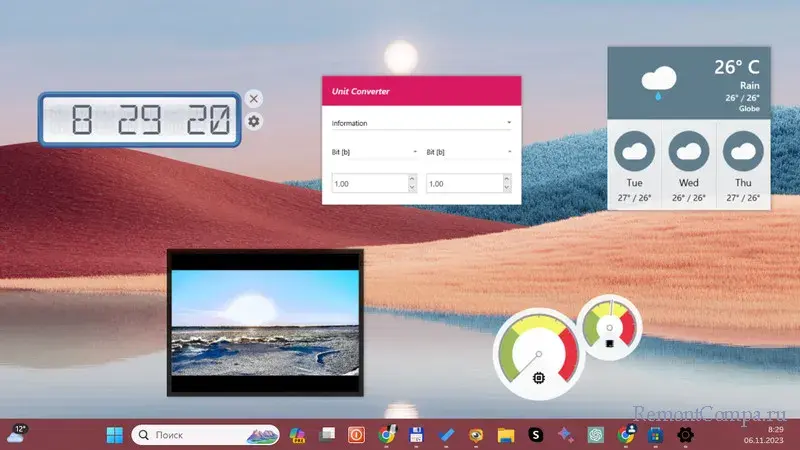
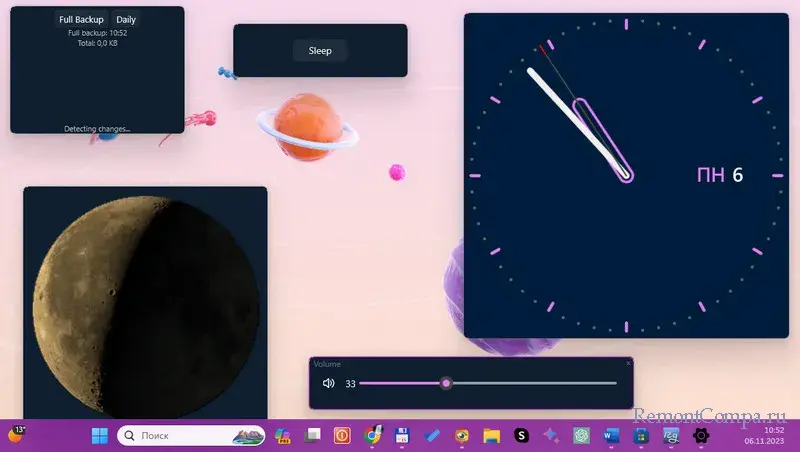
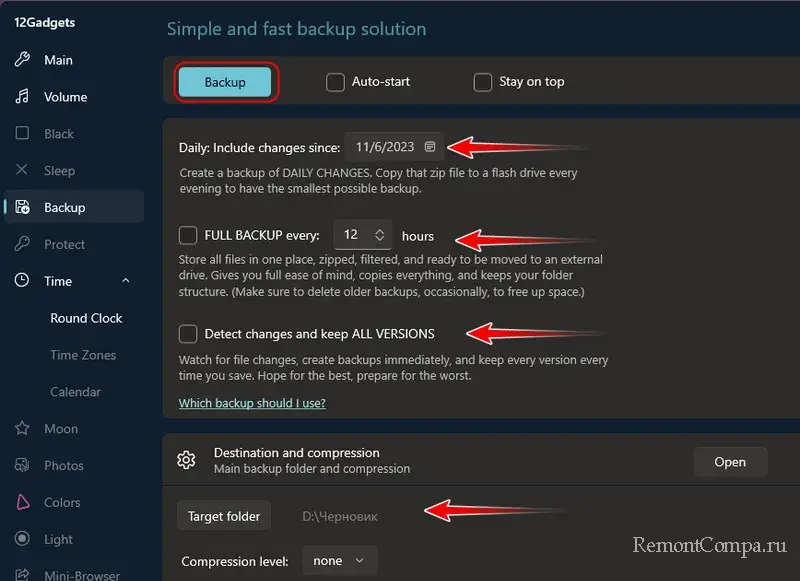
Бесплатное приложение 12Gadgets предлагает подборку 12-ти современных гаджетов. В их числе типичные как то: ползунок громкости, кнопка сна, часы календарь, слайд-шоу фото. И есть уникальные гаджеты — экранная заставка, бэкап и шифрование файлов, информация о луне, цветовая палитра с кодами оттенков, цветовая температура.
Для добавления гаджета открываем его вкладку в приложении. Если есть настройки, вносим их. Можем назначить автозапуск и поверх других окон. И запускаем гаджет кнопкой вверху с его названием.
Бесплатное приложение BeWidgets – это небольшая подборка современных гаджетов, именуемых виджетами, как то: часы, дата, погода, фото, финансы, ярлыки программ. Позволяет виджеты настраивать и создавать с ними разные слои с разными подборками.
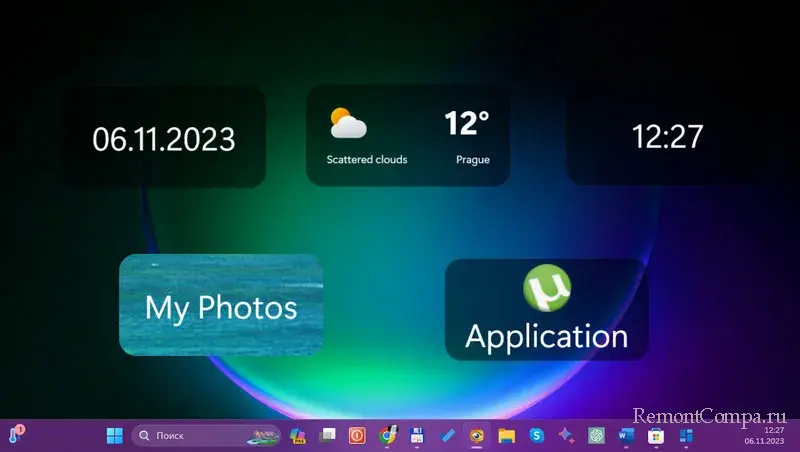
Для добавления виджета в окне приложения жмём «New Widget». Выбираем виджет, и он появится на рабочем столе. Нажав для виджета «Customize», можем настроить его.
Детально о BeWidgets.
Weather Bar – это бесплатный виджет погоды, интегрирующийся в системный трей. Детально о Weather Bar.
Максимум возможностей в плане гаджетов в любой Windows начиная с 7 получим с бесплатной программой Rainmeter. Потребляет минимум системных ресурсов, с открытым исходным кодом, имеет своё сообщество, создающее скины.
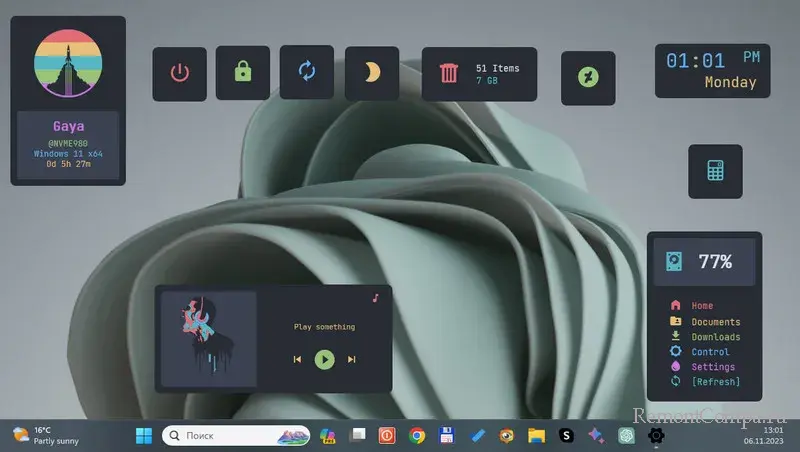
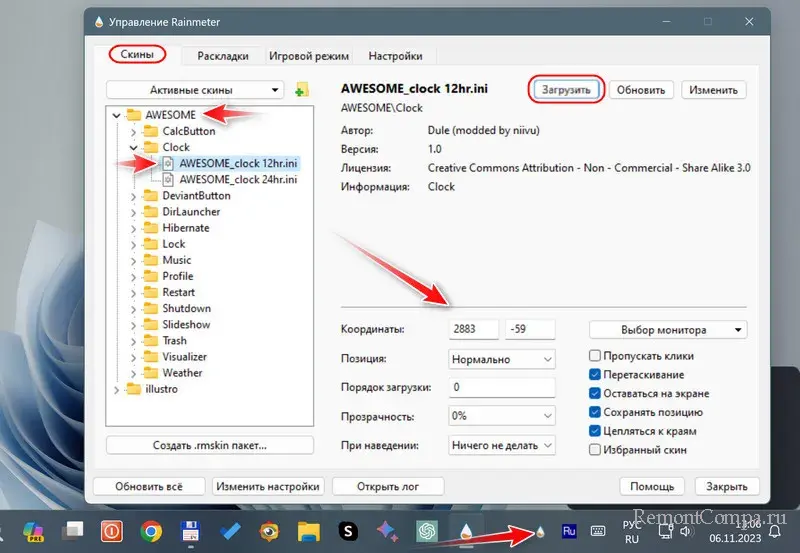
Сама программа – это платформа для гаджетов, сами же они реализуются скинами. Это оболочки, предусматривающие подборки с теми или иными гаджетами, с тем или иным интерфейсом и дизайном. Вместе с программой устанавливается дефолтный скин. Но мы можем найти в Интернете множество скинов на любой вкус. Просто вводим в поисковик «скины Rainmeter». Детали установки уточняем на сайтах, где предлагаются скины. Обычно они внедряются путём установки файла типа «.rmskin», для этого программа Rainmeter должна быть установлена в систему, а не работать как портативная. Также скины могут поставляться в папках, которые необходимо поместить в папку «Skins» внутри папки программы Rainmeter.
После установки файлов «.rmskin» новые скины обычно сами открываются со всей подборкой гаджетов. Если скин мы добавили в папке, жмём иконку Rainmeter в трее Windows. Запустится окошко управления программой. Во вкладке «Скины» открываем папку нового скина. Кликаем каждый гаджет и жмём кнопку «Загрузить». Здесь же ниже можно настроить любой гаджет в составе любого скина.
Widgets are a component that seem to come and go on both desktop and mobile operating systems. iOS has widgets, Android has widgets, macOS has widgets, and now, Windows 11 has widgets.
When an OS adds widgets, it has to make them easy to access but still keep them out of the way of everything else. A widget is useful because it can be used/accessed quickly but users are rarely willing to sacrifice easy access areas on the screen for widgets.
Access widgets on Windows 11
Widgets on Windows 11 have their own panel. The panel can be accessed by clicking the widget button on the taskbar.
Clicking the button will open the panel and you can scroll through your widgets. When you click outside this panel, it will close automatically.
Add widgets on Windows 11
Windows 11 comes with widgets out of the box. Once it’s released to the stable channel, there will be third-party widgets available (via apps in the Microsoft Store).
- Click the widgets button on the taskbar.
- Scroll down to the end of the widgets and click Add widgets.
- Click the plus button next to a widget to add it.
- Click the close button at the top right to return to the widgets panel.
Remove widgets on Windows 11
A widget can be removed from the widget panel any time. You can remove stock widgets in much the same way as you can third-party widgets.
- Click the Widgets button on the taskbar to open the Widgets panel.
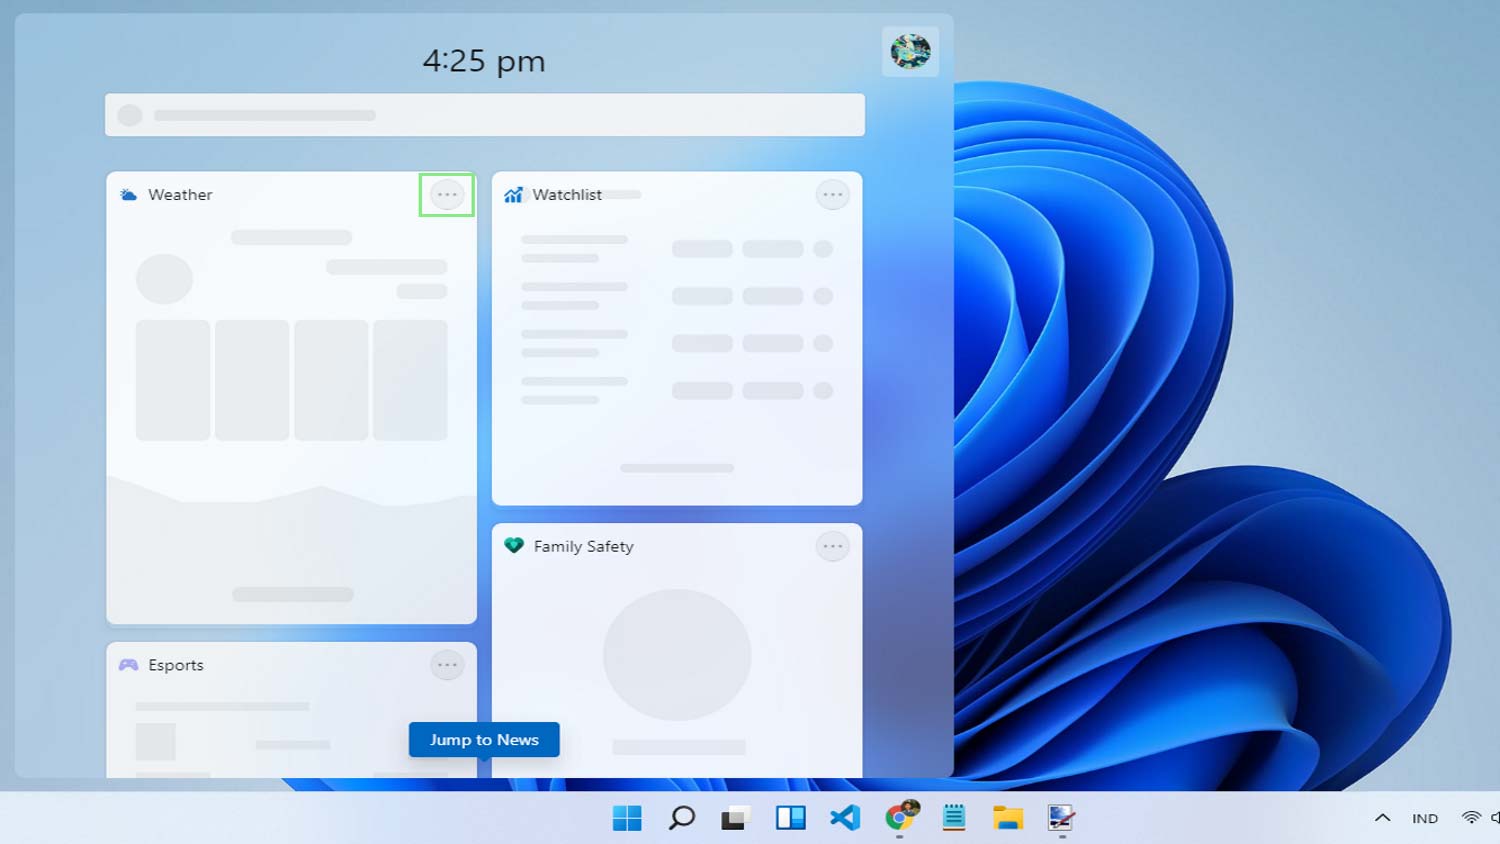
- Click the more options button at the top right of the widget you want to remove.
- Click Remove widget in the menu.
- The widget will be removed.
Note: Widgets are tied to apps installed on Windows 11. Removing a widget will not uninstall it. If you want to uninstall a widget, find out which app added it, and uninstall the app. If you do not want to uninstall the app, you’re going to have to keep the widget as well.
Drag & drop widgets
When a widget is added to the widgets panel, it is added to the bottom. Unfortunately, it seems the order cannot be changed unless you’re willing to remove and add them all again.
Change widget size
Much like the Start Menu tiles on Windows 10, the size of widgets on Windows 11 can be changed.
- Click the widgets icon on the taskbar to open the widgets panel.
- Click the more options button at the top right of the widget you want to resize.
- Select a size from the menu.
Note: Widgets can be small, medium, or large however not all widgets support all three sizes.
Conclusion
Windows 11 isn’t the first Windows version to have widgets. In fact, Windows users have been adding little tools to their desktop for ages with Rainmeter. Windows 7 had something similar called gadgets. For Microsoft, this is a revisit of an old, discarded feature.

Fatima Wahab
Fatima has been writing for AddictiveTips for six years. She began as a junior writer and has been working as the Editor in Chief since 2014.
Fatima gets an adrenaline rush from figuring out how technology works, and how to manipulate it. A well-designed app, something that solves a common everyday problem and looks
(Image credit: Microsoft)
Widgets were previously available in Windows Vista and Windows 7 under the name Gadgets. Microsoft then made it unavailable on Windows 8 and all Windows OS that came after. But now, they’re coming back for another tour of duty in Windows 11.
So, what makes Windows 11’s Widgets different from its previous iterations? First, it addressed security concerns that got the previous Gadgets booted in the first place. This new version of Widgets also has all your widgets in their own menu on your Taskbar. On Vista and Windows 7, Widgets were displayed on the right side of your desktop.
- Best laptops in 2021
- Best business laptops you can buy today
- Best cheap laptop deals on the market
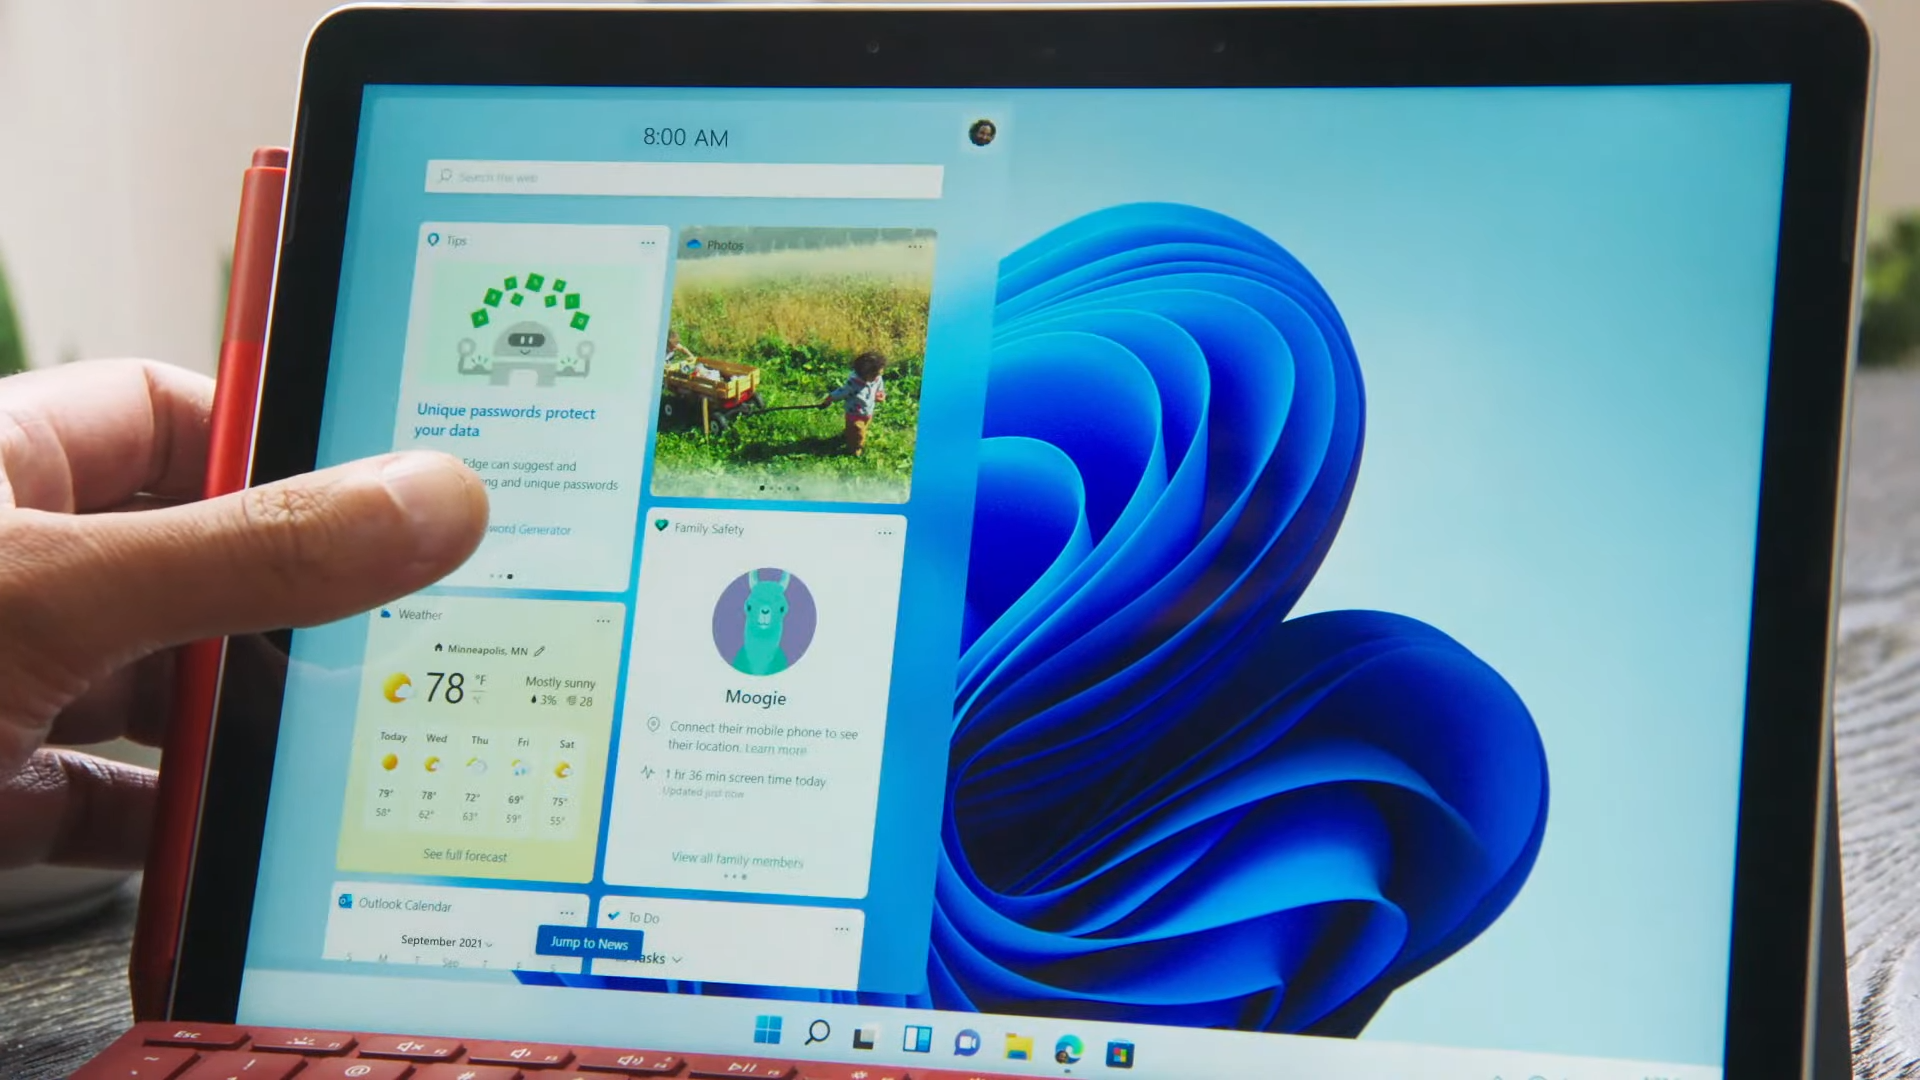
Using widgets allows you to once again view everything from productivity apps, to weather, traffic, and news at a glance and from your preferred location. All of this can be accomplished in just a few clicks.
As of writing, the current version of Windows 11’s Widgets offers little for you to do besides adding and deleting widgets. Nevertheless, the currently available widgets are helpful. Read the guide below to learn how to use them.
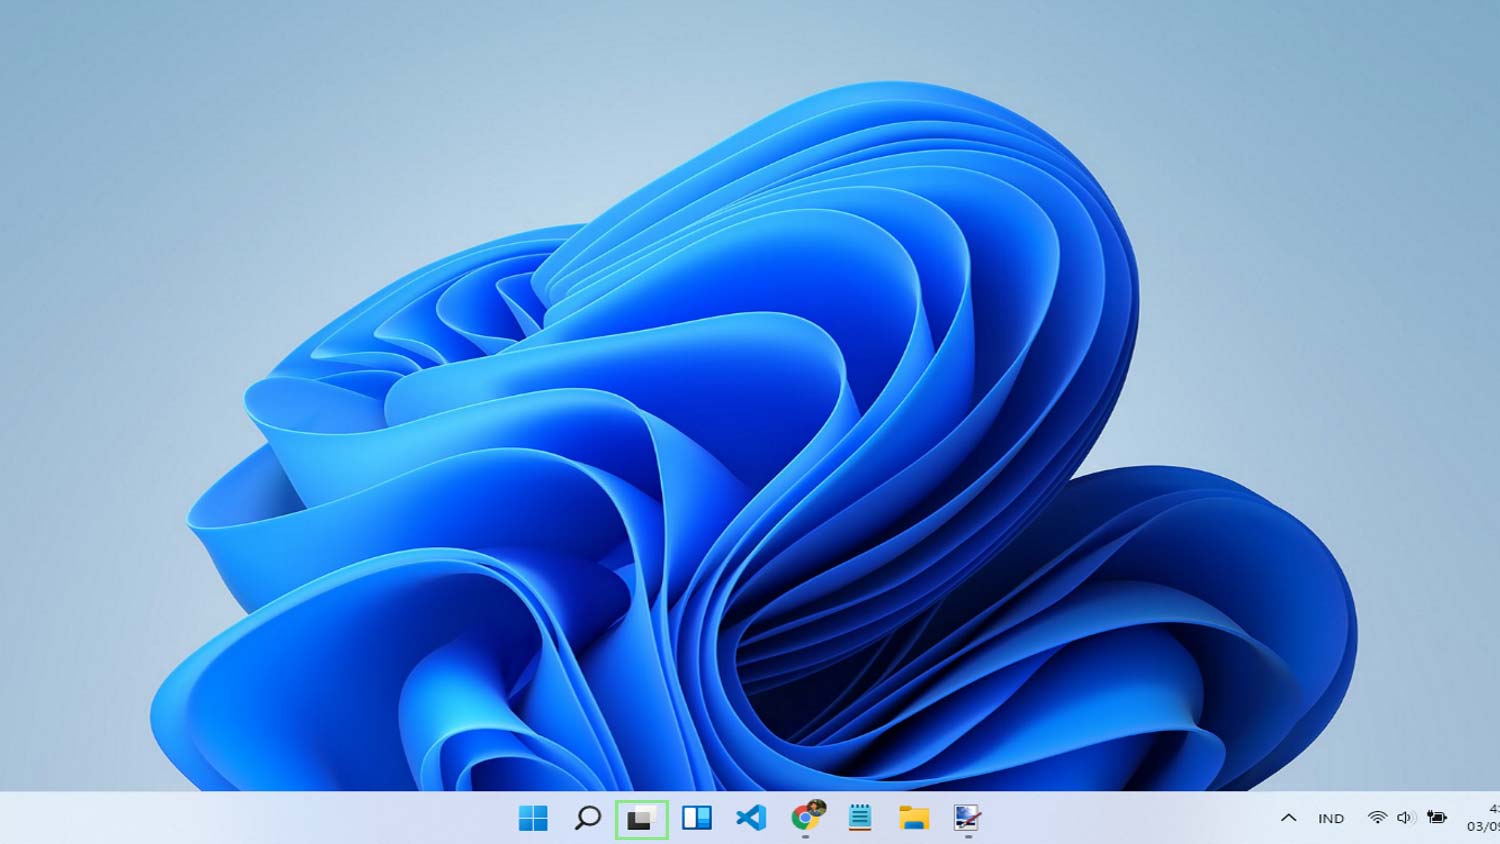
1. To open your Widgets menu, click on the Widgets button on your Taskbar.
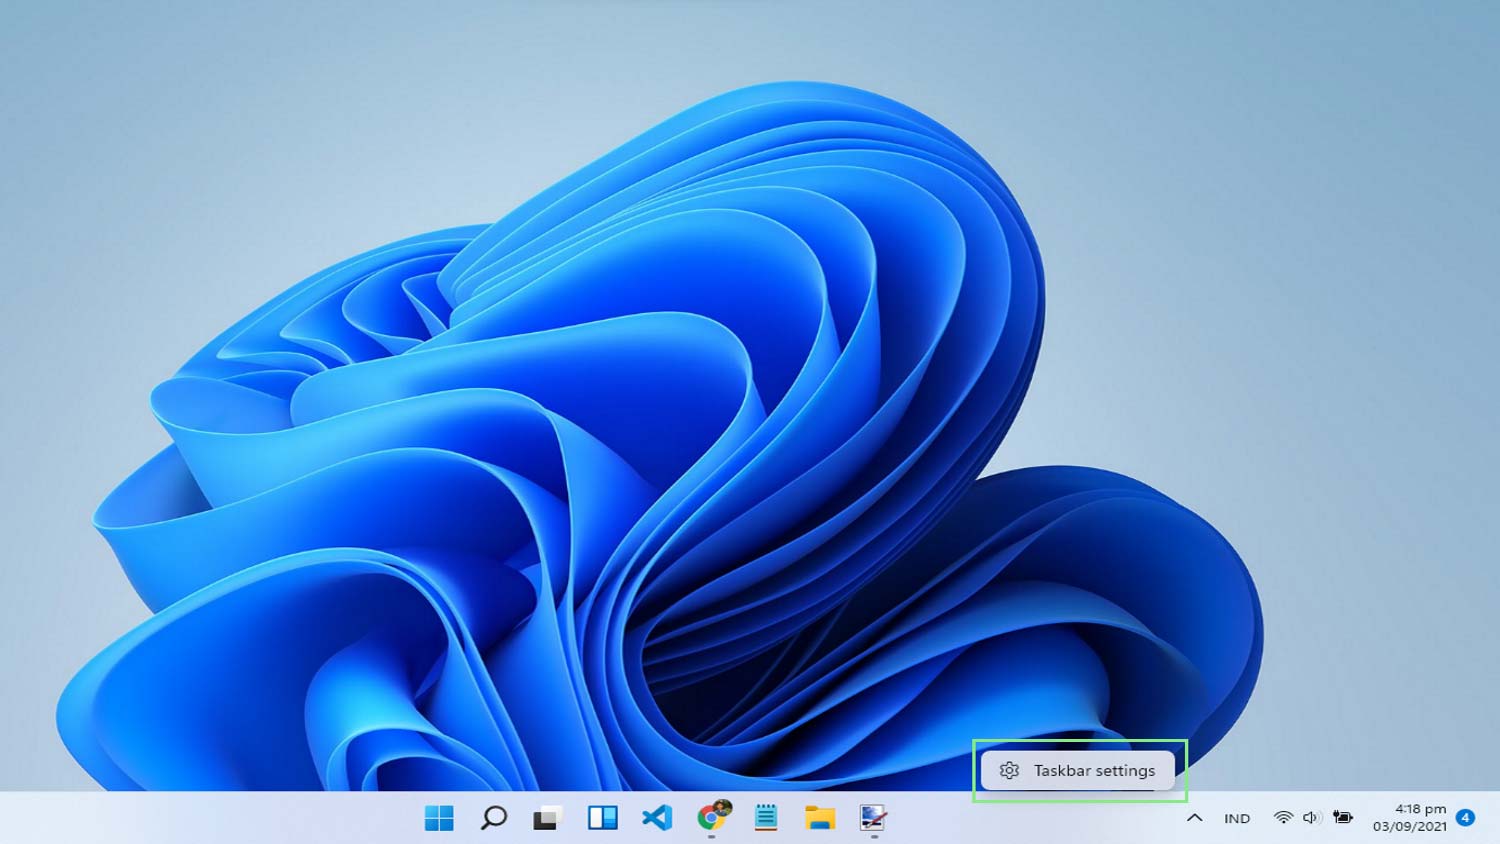
2. If the Widgets button is hidden on your Taskbar, right-click your Taskbar and select Taskbar settings.
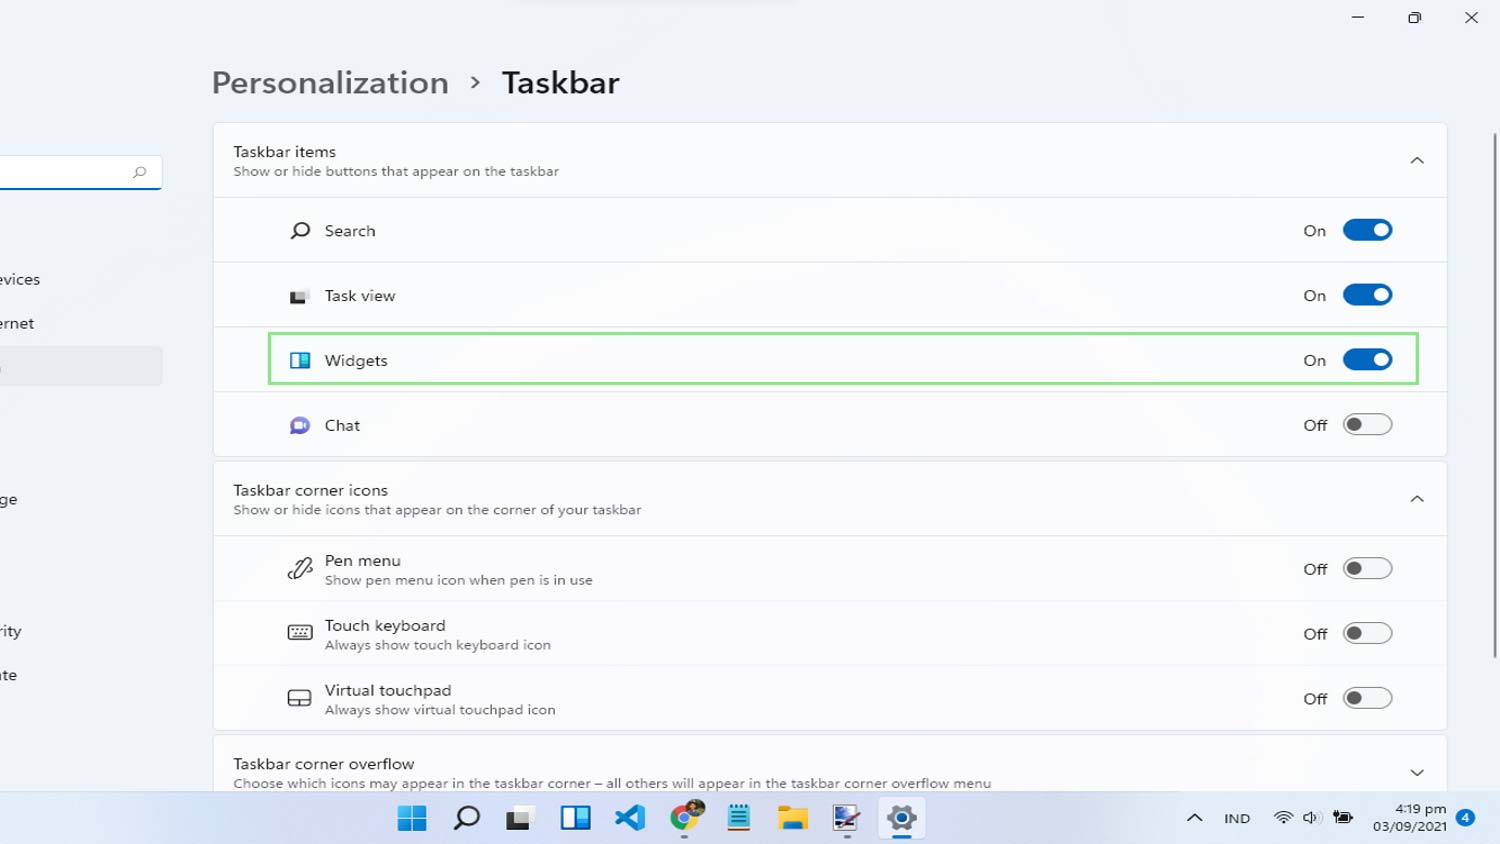
3. Under the Taskbar items section, turn on Widgets. After which, you can retry step one again.
Sign up to receive The Snapshot, a free special dispatch from Laptop Mag, in your inbox.
1. Click the Widgets button on your Taskbar to open the Widgets menu.
2. Click the Add widgets button to view all available widgets. Currently, the available widgets include Weather, Family Safety, Watchlist (Stocks), Outlook Calendar, To Do, Photos, Tips, Sports, Traffic, Entertainment, and Esports.
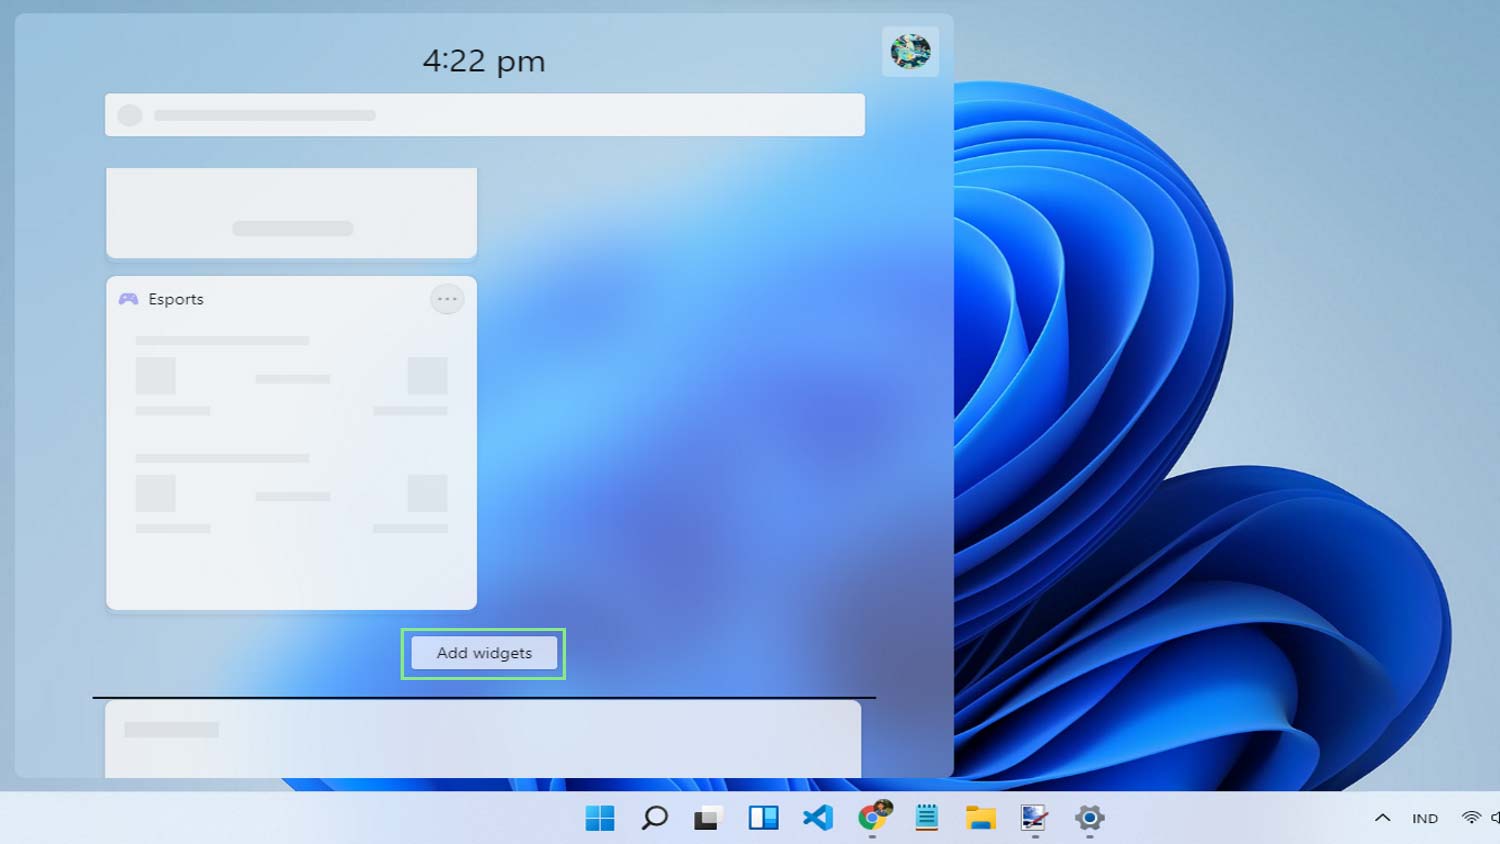
3. Add your chosen widget by clicking on the plus button beside the widget’s name. You can now view your new widget whenever you open your Widgets menu.

1. Click the Widgets button on your Taskbar to open the Widgets menu.
2. Click the More options button at the upper-right corner of the widget you wish to remove. This menu lets you change the size of your widget, customize its content, and remove it.
3. Select Remove widget. And there you have it; your widget is now gone from your Widgets menu.
Bryan covers everything you need to know about Windows, social media, and the internet at large for Laptop Mag. Thanks to his extensive knowledge of operating systems and some of the most popular software out there, Bryan has written hundreds of helpful guides, including tips related to Windows 11 drivers, upgrading to a newer version of the OS, editing in Microsoft Photos, or rearranging pages in Google Docs.