
Welcome to WPS Official Academy to check the contents of how to insert fonts in WPS Office word.
What is WPS Office?
WPS Office is the best alternative to Microsoft 365. WPS Office Suite supports both PC and Mobile, installs the latest versions (11.2.0.10443) online and is compatible with Microsoft Office, Google Docs and Adobe PDF.
Before adding fonts, please check your version first.
Head to the WPS Office interface > click Settings above > About WPS Office, and then you can check whether the current version is the latest one.
To download the latest version, please go to WPS Office’s official website where you can download it for both PC and mobile for free.
Preparations for adding fonts
What are fonts?
Fonts are different styles and sizes of letters that make your text look calmer and easier to read. There are many different font styles in use. Each font gives a different vibe; a fancy font might make something feel formal, while a modern one would make it seem more relaxed. The font size can make the text more accessible or difficult to read. So, fonts are a big deal when making your writing feel just right.
What are some examples of commonly used fonts and styles?
-
Serif fonts — these are fonts that have these little lines or «feet» at the end of the letters. They’re fancy and often used in printed books and newspapers. Examples of serif fonts include Times New Roman, Georgia and Courier.
-
Sans-serif fonts don’t have those little lines at the end. They’re more modern and are commonly used on websites and online magazines. Some examples of sans-serif fonts are Arial, Verdana and Helvetica.
-
script fonts that are supposed to look like handwriting. They’re pretty and usually used for more formal stuff like invitations. Examples of script fonts are Brush Script, Calligraphy and Freestyle Script.
-
Display fonts are meant to be used in a specific size to make a statement or stand out. They’re great for headings or other text to grab people’s attention. Some examples of display fonts include Comic Sans, Impact, and Papyrus.
-
Comic fonts: These are playful cartoon-style fonts. Mainly containing fun and user-friendly elements like balloons, round strokes, and other cartoon symbols. Comic fonts are popular with designers creating websites with a storytelling theme. Some examples of great comic fonts include Banbang, Super Kids, and Street Pops.
Option 1: Adding Cloud Fonts
A suitable font can make your document more personalized and attractive, and you can easily add more fonts to your word in a few clicks. Let’s start to master how to add fonts in WPS Writer.
1. Click Home >Fonts>View more Cloud fontsto select fonts to download.
Option 2: install the local font manually.
1. Right-click to copy the font and open My Computer — Local Disk C: C:\Windows\Fonts.
2. Copy the font into the file and restart the WPSOffice after fonts installation.
-
Use Word, Excel, and PPT for FREE, No Ads.
-
Edit PDF files with the powerful PDF toolkit.
-
Microsoft-like interface. Easy to learn. 100% Compatibility.
-
Boost your productivity with WPS’s abundant free Word, Excel, PPT, and CV templates.
Algirdas Jasaitis
How to download and install fonts?
In our discussion on how to add fonts to Word, let us see how to download fonts first.
How to download fonts?
Looking for a cool font to spice up your project?
Check out some reputable font sites like
dafont.com,
1001freefonts.com,
fontspace.com,
fontsquirrel.com.
These sites offer a variety of fonts for free (most of the time), and you can effortlessly search by category and type.
Before downloading a font, check out all of its characters. Some fonts only have upper- or lower-case letters or may be missing certain punctuation marks you need.
Another essential thing to check before using a font is its licence.
Some fonts are royalty-free. However, other fonts might be accessible for personal use, so you can’t use them in your business’s logo or any designs you plan to sell. You might have to pay to use a font for commercial purposes.
Click the download button on the font’s page to download a font. The font will usually save to your computer in ZIP format, which includes the font itself and sometimes a Readme or Info file. You can choose the font format you want to download on some sites.
If you’re using Windows, you can install True Type (.TTF or . TTC) fonts containing both on-screen and printing fonts in a single file. You can also use OpenType (.OTF) fonts, similar to True Type but with more advanced features like alternate characters and small caps.
Finally, you can install PostScript (.PFB and . PFM) fonts, which are older and less common but can still be used if you have both.PFB and . PFM files.
How to install fonts?
A step-by-step guide to installing fonts on Windows
Step 1: Download the font you wish to install. Most fonts come in compressed, zipped folders. Extract the folder to your PC, by selecting «Extract All» from the top of the File Explorer window.
Step 2: go to the Windows Settings menu and click on «Personalization» from the left-hand menu. From there, select «Fonts» from the list of options.
Step 3: Locate the folder where you extracted the font files. Within that folder, select the TrueType font files (ttf) and drag them over to the dotted rectangle on the Fonts screen in Windows Settings.
A Step-by-Step Guide to Installing Fonts on Mac
-
To install a font, double-click the font file in the Finder.
-
In the preview pane, click «Install.»
-
Once installed, the font will appear in the Font Book app and can be used in any of your apps.
-
If you want the font to be available to all user accounts on your Mac, you can change the default install location in the Font Book settings.
To download or activate fonts:
-
Open the Font Book app from your Applications folder.
-
Any fonts that are deactivated or haven’t been downloaded will appear dimmed in Font Book.
-
Select a dimmed font to download a font and click «Edit» then «Download.»
-
To activate a deactivated font, select it and click «Edit» then «Activate» (or «Enable»).
-
If you want to deactivate a font you don’t need, you can do so in Font Book.
That’s it! Now you can easily install and manage your fonts on your Mac.
A Step-by-Step Guide to Installing Fonts on iPad
-
Open the App Store app on your iPad.
-
Search for the font you want.
-
Download and install the app onto your iPad.
-
Open the app to install the fonts onto your iPad.
To manage fonts:
-
Go to your iPad’s Settings app.
-
Tap «General.»
-
Scroll down and tap «Fonts.»
-
You will see a list of fonts installed on your iPad. You can enable or disable any of them by toggling the switch next to each font.
A Step-by-Step Guide to Installing Fonts on Android
This will guide you to install fonts using iFont App.
-
Install the iFont app from the Google Play Store.
-
Go to Settings on your device.
-
Scroll down and tap on «Security».
-
Use the search bar to find «Unknown Sources».
-
Tap on «Install unknown apps» and look for «iFont».
-
Press the toggle button next to iFont to «Allow from this source».
-
Open the iFont app.
-
Tap the font you want to install.
-
Tap «Download» on the front page.
-
Tap «Set» and follow the on-screen instructions to install the font.
-
After the installation, open Settings on your Android device.
-
Head to «Display» and go to «Font» > «Font Style».
-
Select the font from the list of available fonts.
Use Word, Excel, and PPT for FREE
Frequently Asked Questions
How to uninstall the installed fonts?
-
Open File Explorer on your computer.
-
In the address bar, type or paste in the path: C:\Windows\Fonts, and hit Enter. This will take you to the Windows Fonts folder.
-
Find the font you want to remove from the folder.
-
Select the font file you want to delete.
-
Right-click the font file and select «Delete.»
-
Confirm the deletion. The font will be permanently removed from your computer.
How to verify that the font has been installed correctly?
-
Press the Windows key+Q on your keyboard.
-
Type «fonts» in the search box that appears.
-
Hit Enter on your keyboard.
-
The Font Control Panel will open.
-
A list of fonts installed on your computer will be shown.
Where can I download Fonts for Microsoft Word?
-
Visit a trusted font website like dafont.com, fontspace.com, fontsquirrel.com, or 1001freefonts.com.
-
Search and click on the font you want and download it. Remember to only download fonts from trusted sources and avoid EXE files that may contain viruses.
WPS Office: The Free Office Software with Rich Fonts
So, there you have it! A new font is a great way to make your document stand out from the rest.
Now you know how to add fonts to words: it’s a breeze to find a new font for a specific project or wants to expand your options; it’s easy to do with these simple steps.
WPS Office is free software that supports 13 languages and provides many rich fonts for everyone. With WPS Office, you can easily add new fonts to your documents and make them stand out.
WPS Office has a wide range of fonts. Whether creating a presentation, writing a report, or designing a flyer, WPS Office has the tools to make your work look professional and polished.
WPS Office is completely free to use. Unlike other software programs that charge high subscription fees, WPS Office offers all its features at no cost. It is an excellent option for students and small business owners who want to create high-quality documents without breaking the bank.
In addition to its vast library of fonts, WPS Office also provides other useful features such as templates, document encryption, and compatibility with Microsoft Office files. WPS Office helps you create your documents quickly and confidently, knowing that your work will look great.
If you’re looking for free and user-friendly office software that provides a wide variety of fonts, look no further than WPS Office. With its rich library of fonts and other valuable features, WPS Office is the perfect solution to add creativity and professionalism to documents. Download WPS Office today and take your work to the next level!
In the digital realm, where visual communication reigns supreme, the choice of fonts can significantly impact the overall aesthetic and readability of your documents. Fonts are the building blocks of typography, shaping the way your words appear on screen and in print. A well-chosen font can elevate your message, enhance brand identity, and create a lasting impression. However, when using software like WPS Office, the ability to personalize your typography with custom fonts is essential. This comprehensive guide will walk you through the process of installing fonts in WPS Office, empowering you to unleash your creativity and tailor your documents to perfection.
Understanding Fonts and Their Importance
Fonts are essentially sets of characters, including letters, numbers, punctuation marks, and symbols, designed in a specific style and typeface. They come in a wide variety of weights, widths, and styles, each conveying a unique mood or message. Serif fonts, characterized by small decorative strokes at the ends of letterforms, often evoke a sense of tradition and formality. Sans-serif fonts, lacking these strokes, tend to appear more modern and minimalist. Script fonts mimic handwriting, adding a touch of elegance and personality. Display fonts, with their bold and eye-catching designs, are ideal for headlines and titles.
Choosing the right font can significantly impact the readability and overall effectiveness of your documents. A font that is too ornate or difficult to decipher can hinder comprehension. Conversely, a font that is too plain or generic may lack visual appeal. Consider your target audience, the tone of your message, and the purpose of your document when selecting fonts.
Installing Fonts in WPS Office: A Step-by-Step Guide
WPS Office, a popular and versatile office suite, allows you to install custom fonts to enhance your document design. Here’s a detailed guide on how to install fonts in WPS Office:
1. Downloading Fonts
The first step is to acquire the desired fonts. Numerous online resources offer free and paid font downloads. Popular websites include Google Fonts, Dafont, and Font Squirrel. Once you’ve found a font you like, download the file, which typically comes in a .ttf (TrueType Font) or .otf (OpenType Font) format.
2. Locating the Fonts Folder
The next step is to locate the fonts folder on your computer. The exact path may vary depending on your operating system:
- Windows: C:\Windows\Fonts
- macOS: Library/Fonts
3. Copying and Pasting Fonts
Open the fonts folder and copy the downloaded font file(s) to this location. You can use the drag-and-drop method or right-click and select “Copy” and then “Paste”. (See Also: How to Add More Fonts to Goodnotes? Enhance Your Notes)
4. Verifying Font Installation
To ensure the fonts have been installed correctly, open a WPS Office application, such as Writer or Presentation. Go to the “Format” menu and select “Font”. You should now see the newly installed fonts listed in the font list.
Using Fonts in WPS Office Documents
Once you’ve installed fonts in WPS Office, you can easily apply them to your documents. Here’s how:
1. Selecting a Font
In the “Format” menu, navigate to the “Font” section. Click on the dropdown menu next to “Font” to view the available font options. Select the desired font from the list.
2. Adjusting Font Size and Style
You can further customize the font by adjusting its size, weight, style, and other attributes. Use the font size slider or enter a specific size value. Choose from bold, italic, underline, and other style options.
3. Applying Font Formatting
To apply font formatting to selected text, highlight the text you want to modify. Then, choose the desired font, size, and style from the “Format” menu or the font toolbar. You can also apply font formatting to entire paragraphs or documents.
Advanced Font Management in WPS Office
WPS Office offers advanced font management features to help you organize and control your fonts effectively:
1. Font Preview
When selecting a font from the list, you can preview how it will appear in your document. This allows you to compare different fonts and make informed choices. (See Also: How to Make Font Smaller in Pdf? Easy Tricks)
2. Font Sorting
You can sort fonts alphabetically, by weight, or by style. This makes it easier to find the specific font you need.
3. Font Search
Use the search bar to quickly locate a font by its name. This is particularly helpful when working with a large library of fonts.
Troubleshooting Font Installation Issues
If you encounter issues installing fonts in WPS Office, here are some troubleshooting steps:
- Restart WPS Office: Sometimes, a simple restart can resolve font installation problems.
- Check File Permissions: Ensure that you have the necessary permissions to write to the fonts folder.
- Reinstall Fonts: Try deleting the font files and reinstalling them.
- Update WPS Office: Make sure you are using the latest version of WPS Office, as updates often include bug fixes and improvements.
- Contact Support: If you continue to experience issues, contact WPS Office support for assistance.
Frequently Asked Questions
How do I know if a font is installed correctly in WPS Office?
You can check if a font is installed correctly by going to the “Format” menu, selecting “Font”, and looking for the font in the list. If it appears, it’s installed.
Can I use fonts from other programs in WPS Office?
Yes, as long as the font files are in a compatible format (.ttf or .otf) and installed in the correct fonts folder, you can use them in WPS Office.
Where can I find free fonts to download?
There are many websites that offer free fonts, such as Google Fonts, Dafont, and Font Squirrel. (See Also: Handwritten Font How to Write Chapter in Calligraphy? Mastering The Art)
What are the different font formats?
Common font formats include .ttf (TrueType Font) and .otf (OpenType Font).
What happens if I delete a font file from the fonts folder?
If you delete a font file from the fonts folder, it will no longer be available for use in WPS Office or other programs.
Mastering the art of font installation in WPS Office empowers you to elevate your documents, create visually appealing designs, and communicate your message with clarity and style. By following the step-by-step guide and exploring the advanced font management features, you can unlock the full potential of typography and transform your documents from ordinary to extraordinary.
WPS Office Fonts
These are the symbol fonts required by wps-office. They are used to display math formulas. We have collected the fonts here to make things easier.
Arch Linux Installation
You can use the ttf-wps-fonts package from the AUR.
Using the Install Script
You can use the install script on most distributions.
For this tutorial we will use the /tmp directory to temporary save the files.
Change to the /tmp directory.
Clone the Git repository.
git clone https://github.com/dv-anomaly/ttf-wps-fonts.git
Enter the directory.
Run the install script.
Clean up the tmp directory.
rm -rf /tmp/ttf-wps-fonts
Manual Installation
For this tutorial we will use the /tmp directory to temporary save the files.
Change to the /tmp directory.
Clone the Git repository.
git clone https://github.com/iamdh4/ttf-wps-fonts.git
Create a sub directory in your system’s fonts directory. This is usually /usr/share/fonts, otherwise consult your distribution’s documentation.
sudo mkdir /usr/share/fonts/wps-fonts
Move fonts to the new directory.
sudo mv ttf-wps-fonts/* /usr/share/fonts/wps-fonts
Fix the file permissions.
sudo chmod 644 /usr/share/fonts/wps-fonts/*
Rebuild the font cache.
Clean up the tmp directory.
rm -rf /tmp/ttf-wps-fonts
WPS Office Ubuntu: Русификация и установка необходимых шрифтов
Начальные действия
Скопируем (или скачаем) репозиторий с русификатором и шрифтами:
git clone https://github.com/alexsoin/wps-office-fix
Перейдем в скопированный репозиторий
Русификация WPS Office после установки в Ubuntu 20.04
Убеждаемся что, находимся внутри папки скопированного репозитория из пункта «Начальные действия».
Копируем папку ru_RU в директорию со списками языковых пакетов WPS Office:
cp -r ru_RU/ /opt/kingsoft/wps-office/office6/mui/ru_RU/
Переименовываем языковые пакеты английской версии:
sudo mv /opt/kingsoft/wps-office/office6/dicts/spellcheck/en_US/ /opt/kingsoft/wps-office/office6/dicts/spellcheck/en_US-old/
sudo mv /opt/kingsoft/wps-office/office6/mui/en_US/ /opt/kingsoft/wps-office/office6/mui/en_US-old/
Перезапускаем офис и он должен подхватить автоматически русский язык, если этого не произошло, то в левом верхнем углу справа от кнопке Menu нажимаем на стрелку вниз, выбираем tools, затем set Language и выбираем русский язык (после этого также WPS Office надо перезапустить).
Установка недостающих шрифтов в WPS Office в Ubuntu 20.04
Если при запуске WPS Office появляется ошибка, что нехватает шрифтов, то этот пункт как раз вам поможет.
Убеждаемся что, находимся внутри папки скопированного репозитория из пункта «Начальные действия».
Запускаем команду
sudo bash fonts/install.sh
После окончания установки ошибки больше не будет =)
P.S.
Уже какой раз когда устанавливаю заново ubuntu, сталкиваюсь с тем, что много времени трачу на поиск устранения этих ошибок, поэтому решил собрать всё в одном месте, но и не забываю о том, где эти решения я нашел))) Про русификатор я узнал из этой статьи, а проблему со шрифтами мне помог решить вот этот репозиторий.
Если вам данная статья, как и мне, помогла, то прошу поставить звезду в этом репозитории или описать, что не получилось в issues.
Fonts for WPS Office
Это сочетание шрифтов пакет для WPS Office App.Change стиль шрифта ваших файлов WPS.
Последняя версия
29 нояб. 2016 г.
Разработчик
Google Play ID
Количество установок
App APKs
Font for WPS APK
Fonts for WPS Office APP
This is a mix fonts pack for WPS Office App.Change font style of your wps files.
How to use: See app tips.
Популярные запросы
LD Player — #1 Android Emulator
Лучший Эмулятор Андроида для ПК
Приложения · Hot
TikTok TikTok Pte. Ltd. · Социальные
Psiphon Pro Psiphon Inc. · Связь
Thunder VPN Signal Lab · Инструменты
Google Play Маркет Google LLC · Инструменты
自由浏览 Greatfire.org · Связь
Популярные
Mary Kay InTouch® Mary Kay CJSC · Бизнес
Docx Reader Docx Viewer Word Xonscious · Бизнес
Appbonus AppBonus · Бизнес
LinkedIn LinkedIn · Бизнес
Google Meet Google LLC · Бизнес
ZZ — КУСПЕХУ Philip Morris International Management SA · Бизнес
Remote Desktop 8 Microsoft Corporation · Бизнес
Мой ММК ПАО ММК · Бизнес
Лидер Продаж Лидер Продаж · Бизнес
Садовод — Агрегатор Teimur Gavrilov · Бизнес
APKCombo Installer
Порядок установки XAPK, APKS, OBB?
Fonts for WPS Office
Это сочетание шрифтов пакет для WPS Office App.Change стиль шрифта ваших файлов WPS.
This is a mix fonts pack for WPS Office App.Change font style of your wps files.
How to use: See app tips.
Что нового в последней версии 1.0.0
Last updated on 29/11/2016
Minor bug fixes and improvements. Install or update to the newest version to check it out!
Загрузка перевода.
Дополнительная информация о Приложения
Nur Aina Humaira
Требуемая версия Android
Fonts for WPS Office Скриншоты
Старые Версии Fonts for WPS Office
Fonts for WPS Office 1.0.0
Альтернатива Fonts for WPS Office
Microsoft Word: Edit Documents
WPS Office-PDF,Word,Sheet,PPT
Microsoft Excel: Spreadsheets
WPS Office Lite
Microsoft Lens — PDF Scanner
Портал компании Intune
Polaris Office — Edit,View,PDF
Foxit PDF Editor
Больше от Ever Filter Studio
Anime Filter -Cartoon Photo
100 Filter Photo Editor
Girl Font for OPPO Phone
Full answers for Word Cookies
Call from Killer Clown Prank
Color Effect Filter Pic Lab
笑抽筋笑话大全-搞笑段子
Загрузка комментария
Рекомендуем
Volvo Cars
Car Parking Multiplayer
TOPUP Live
Toilet War — Бета
Spotify: музыка и подкасты
Real Oper City
Soul Knight Prequel
- English
- Indonesia
- Português
- Español
- Pусский
- العربية
- 中文(简体)
- 中文(繁體)
- Italiano
- 日本語
- Deutsch
- Tiếng Việt
- Français
- Türkiye
- 한국어
- Malaysia
- ภาษาไทย
Отмена Окей
- isiZulu
- 中文
- Việt Nam
- Ўзбек
- اردو
- українська мова
- Türkçe
- Wikang Tagalog
- ไทย
- తెలుగు
- தமிழ்
- Kiswahili
- svenska
- српски језик
- Shqip
- slovenski jezik
- slovenčina
- සිංහල
- Русский
- limba română
- Português
- język polski
- ਪੰਜਾਬੀ
- nederlands
- नेपाली
- Norsk bokmål
- ဗမာစာ
- هاس ملايو
- मराठी
- Монгол хэл
- മലയാളം
- македонски јазик
- latviešu valoda
- lietuvių kalba
- ພາສາ
- Кыргызча
- 한국어
- ಕನ್ನಡ
- ខេមរភាសា
- қазақ тілі
- ქართული
- 日本語
- Italiano
- Íslenska
- Հայերեն
- magyar
- hrvatski jezik
- हिन्दी
- ગુજરાતી
- galego
- Français
- suomi
- فارسی
- euskara
- eesti
- Español
- English
- ελληνικά
- Deutsch
- dansk
- čeština
- català
- bosanski jezik
- বাংলা
- български език
- беларуская мова
- azərbaycan dili
- اللغة العربية
- አማርኛ
- Afrikaans
Discover what you want easier, faster and safer.
- Установить APK
- Проверка подписи APK
- Сервис загрузки APK

Пакет офисных программ WPS Office (ранее назывался Kingsoft Office) в первую очередь может быть интересен пользователям Linux, но существуют версии и для других ОС: Windows, macOS и даже Android. Некоторые функции доступны по платной подписке, но основные инструменты не требуют покупки. Универсальный пакет предусматривает текстовый редактор, инструменты для работы с таблицами и презентациями.
Давайте разберемся, как пользоваться WPS Office, и рассмотрим его основные возможности.
Установка WPS Office
Установка WPS Office на Windows не займет много времени: достаточно скачать установочный файл в формате EXE с официального сайта разработчиков, затем запустить его и следовать инструкции пошагового мастера.
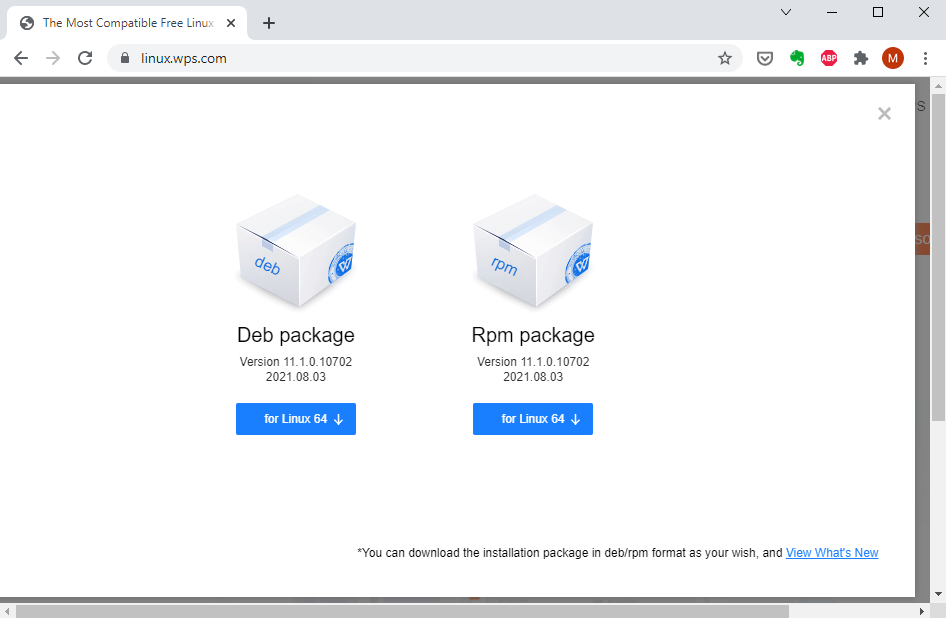
Для пользователей Linux инсталляция офисного набора программ также не вызовет трудностей при базовом знании терминала. В качестве дополнения рекомендуется отдельно загрузить шрифты и словари, которые есть на сайте разработчиков.
Для ОС Android пакет можно скачать через магазин приложений Play Market, достаточно ввести его название в поисковой строке. Пользователи macOS могут найти приложение в App Store.
Комьюнити теперь в Телеграм
Подпишитесь и будьте в курсе последних IT-новостей
Главное окно
Главное окно WPS Office открывает доступ ко всему инструментарию программы. В верхней панели реализована удобная система вкладок, благодаря которой можно быстро переключаться между документами. Слева находятся разделы, позволяющие создать или открыть файл, а также использовать возможности WPS Team для совместной работы с командой и дополнительные приложения.
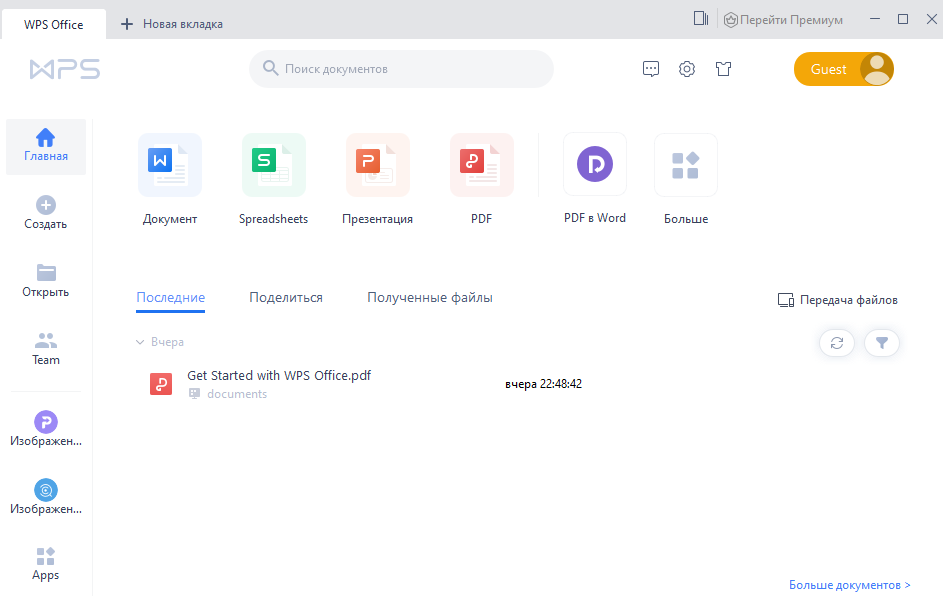
В главном окне располагаются основные инструменты для работы с документами различных типов:
- WPS Writer – приложения для создания и редактирования файлов в формате DOC;
- Spreadsheets – инструмент для работы с таблицами, заметками, графиками;
- Presentation – программа, позволяющая создавать презентации с использованием эффектов;
- PDF – различные средства для работы с файлами в формате PDF.
Офисный пакет поддерживает работу с тремя десятками форматов, включая DOCS, XLSX, TXT, PPT. Кроме того, предусмотрена опция преобразования файла в PDF. Все перечисленные программы работают в едином поле и отрываются отдельными вкладками в меню.
Работа с текстом
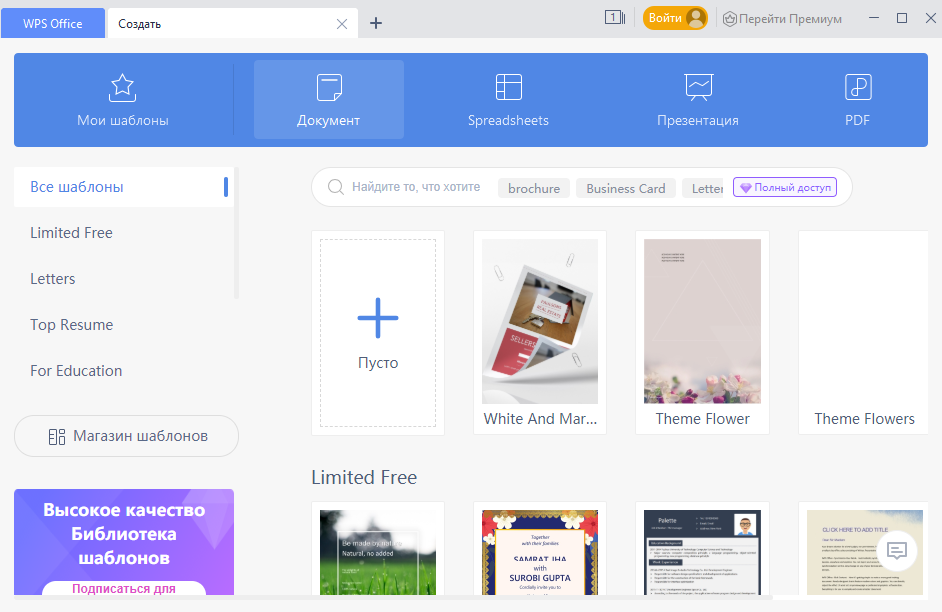
Пакет WPS Office позволяет работать с текстовыми документами, предоставляя полный функционал, аналогичный известному редактору от Microsoft. При нажатии на иконку WPS Writer в главном окне откроется дополнительная вкладка с готовыми шаблонами текстовых документов. Чтобы создать новый документ, щелкните по пустому файлу, отмеченному знаком «+».
Чтобы отформатировать текст, нужно выделить фрагмент и воспользоваться инструментами на вкладке «Главная». Также здесь доступны настройки стиля и размера шрифта, установка заголовков, добавление нумерованных и маркированных списков. Для настройки отступов и выравнивания нажмите на кнопку «Параметры», затем выберите пункт «Абзац».
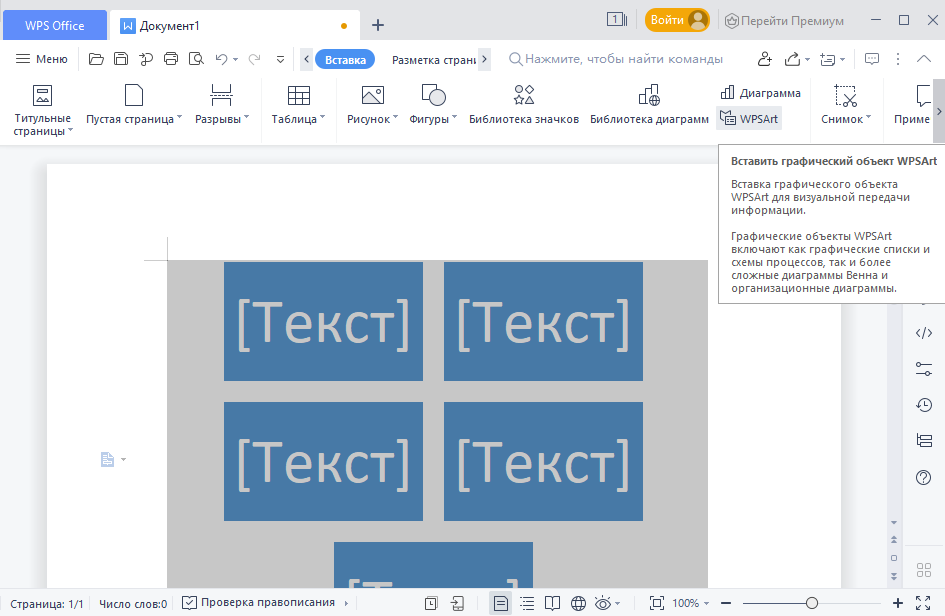
На вкладке «Вставка» доступны функции для добавления различных элементов в документ: таблиц, рисунков, диаграмм, графических объектов WPSArt. Также через нее можно работать с колонтитулами и нумерацией страниц. Чтобы создать оглавление документа, потребуется перейти на вкладку «Ссылки». Здесь же предусмотрены опции для создания сносок и подписей.
Проверка текста на орфографию
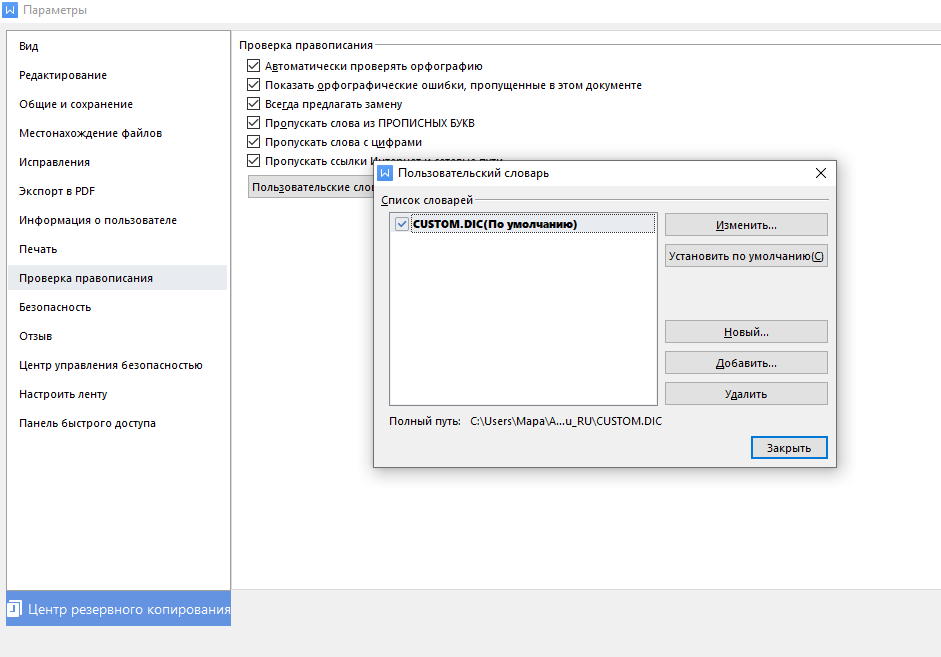
Проверка правописания работает в версиях для всех ОС. Версия для Linux также предусматривает проверку орфографии, но по умолчанию только на английском языке, поэтому дополнительно необходимо добавить русский словарь. Скачать его можно на официальном сайте разработчиков, затем поместить файлы dicts в папку на локальном диске. В большинстве случаев это /home/имя_пользователя/.wps/office/dicts.
После это следуйте простой инструкции:
- Перезапустите приложение и через вкладку «Меню» перейдите в параметры.

- В открывшемся окне в панели слева выберите пункт «Проверка правописания».
- В окне справа щелкните по кнопке «Пользовательские словари».
- Выберите русский язык и подтвердите изменения в окне параметров.

В WPS Office для Windows проверка орфографии по умолчанию идет на русском языке, поэтому дополнительно скачивать словари не придется. Чтобы изменить язык правописания на любой другой, потребуется изменить пользовательский словарь.
Создание таблиц в Spreadsheets
Приложение Spreadsheets позволяет работать с таблицами и диаграммами, причем функционал не сильно отличается от известного MS Excel. При выборе инструмента в главном окне также открывается список готовых шаблонов. Интерфейс разбит на ячейки и панели. Сверху располагается панель вкладок с основными инструментами редактора.
Spreadsheets работает с формулами, суммами, выравниваниями и другими простыми операциями. Через вкладку «Главная» возможно настроить форматирование, границы и стиль ячеек, а также установить параметры шрифта.
Для удобства использования формул на панели расположена соответствующая вкладка, через которую можно быстро отыскать математические, финансовые, логические и другие функции.
Редактор презентаций
Один из лучших бесплатных офисных пакетов предусматривает встроенные средства для создания и редактирования презентаций в формате PPT или PPTX. Доступны шаблоны документов, которые отсортированы по тематике. Для поиска готовых проектов реализована поисковая строка.
WPS Office в разделе «Презентации» предлагает удобный интерфейс со вкладками, рабочей областью и статус-баром. Разберем основные функции редактора:
- Чтобы добавить новый слайд, необходимо щелкнуть правой кнопкой мыши по свободной области в панели слева, затем в меню выбрать соответствующий пункт. Также функция доступна на вкладке «Главная».
- Для добавления различных объектов нужно перейти на вкладку «Вставка», где есть функции вставки таблиц, рисунков, фигур, диаграмм и другим элементов. Доступна и возможность перетаскивания мультимедийных объектов в окно.
- Настроить анимационные эффекты, переходы между слайдами и общий стиль презентации можно через вкладки «Дизайн», «Переходы» и «Анимация».
- Чтобы просмотреть созданную презентацию, нужно щелкнуть по значку воспроизведения ниже. На вкладке «Показ слайдов» доступна более подробная настройка параметров показа.
Внизу интерфейса предусмотрен ползунок для масштабирования окна, режим чтения, сортировщик слайдов, функция добавления примечаний и отображения заметок. При необходимости пользователь может создать автоматическую резервную копию, чтобы не потерять данные.
Отличия бесплатной и премиум-версии WPS
Главный минус бесплатной версии – реклама. Остальные инструменты работают не хуже, чем в именитом Microsoft Office.
- отсутствие рекламы,
- до 9 синхронизированных устройств,
- бесплатное облако на 20 Гб,
- расширенная библиотека шрифтов и шаблонов,
- одновременная поддержка нескольких языков,
- совместная работа над документами.
Премиум-версия работает по подписке, ее стоимость составляет $29.99 в год.
Выводы
У WPS Office нет существенных недостатков. Хочется отметить удобный интерфейс и многофункциональность – не надо качать несколько программ и работать в них отдельно, как это реализовано в Microsoft Office. Для пользователей операционной системы Linux существуют и другие бесплатные альтернативы, а в случае с Windows достойным аналогом будет только офисный пакет от Microsoft, который хорошо справляется со своими задачи, но, увы, не распространяется бесплатно.
Как добавить шрифт Times New Roman в WPS Office Android [Обновленное руководство 2023 г.]
Шрифты помогают стилизовать и стандартизировать официальные документы. Times New Roman — широко используемый шрифт в образовательных и деловых документах. Этот шрифт также доступен в WPS Office Android.
стиль шрифта Times New Roman
Как использовать шрифт Times New Roman в WPS Office на Android? Эта статья поможет вам узнать, как добавить шрифт Times New Roman в WPS Office Android. Мы также рекомендуем добавлять разные шрифты в WPS Office на Android.
Часть 1. Зачем использовать шрифт Times New Roman?
Times New Roman — популярный стиль шрифта, используемый в официальных документах. Два британских дизайнера, Стэнли Морисон и Виктор Лардент, разработали этот шрифт в 1932 году. Это встроенный стиль шрифта во многих приложениях и операционных системах. Microsoft Word использует шрифт Times New Roman в качестве шрифта по умолчанию. Вот краткая история, информация и использование этого шрифта.
История Times New Roman
XIX век был эпохой газет и издательского дела. Шрифты, используемые в издательском секторе, не подходили для небольших текстов и их было трудно читать. Итак, ощущалась потребность в новом шрифте, который был бы легко читаем в газете.
Людям нужны были острые засечки, чтобы можно было легко читать газеты и другие печатные документы. Times New Roman был разработан с использованием надежных засечек и легко читается в опубликованных статьях. Это стиль шрифта, не требующий лицензии. Вы можете использовать и включать этот стиль шрифта в коммерческих целях в свои приложения и операционные системы, не приобретая лицензии и не платя комиссию.
Использование Times New Roman
Times New Roman широко используется во многих областях, от полиграфии до дизайна. Каждый из вас сталкивался с этим стилем шрифта. Вы можете использовать этот стиль шрифта в документах Word, логотипах, брендинге, журналах, газетах и для написания контента веб-сайтов.
Благодаря легкости чтения на отпечатках небольшого размера, это лучший стиль шрифта для газет, журналов и веб-сайтов. Семейство шрифтов Times New Roman включает следующие 12 различных гарнитур.
- Times New Roman, курсив
- Таймс Нью Роман Жирный
- Таймс Нью Роман Обычный
- Times New Roman, сжатый жирный шрифт
- Times New Roman Жирный курсив
- Таймс Нью Роман Экстра Жирный
- Times New Roman полужирный
- Times New Roman Полужирный курсив
- Times New Roman в сокращенном виде
- Times New Roman Сокращенный курсив
- Таймс Нью Роман Средний
- Times New Roman, средний курсив
Прочтите эту статью, чтобы узнать, как добавить шрифт Times New Roman в WPS Office Android.
Часть 2. Как добавить шрифт Times New Roman в WPS Office Android?
WPS Office для Android — отличное современное приложение с уникальным пользовательским интерфейсом. Он поможет вам редактировать документы Word, Excel и PowerPoint на вашем телефоне Android. WPS Office также устанавливает на ваше устройство различные шрифты во время установки. Если шрифт Times New Roman не установлен в вашей системе, вы не сможете использовать этот шрифт для стилизации своих документов.
Как скачать шрифт для WPS Office Android?
Вы можете легко добавить этот шрифт, выполнив следующие действия.
Крок 1: Посетите этот сайт, чтобы загрузить файл шрифта.
Крок 2: Найдите Times New Roman в списке шрифтов и нажмите кнопку «Загрузить».
нажмите кнопку «Загрузить».
Крок 3. Перейдите в папку «Загрузки» в проводнике Android.
перейти в папку загрузки.
Крок 4: Скопируйте загруженный файл с расширением TTF.
нажмите «Копировать в».
Крок 5: Вернитесь, просмотрите папку «Шрифты» на своем устройстве и вставьте этот файл.
вставить файл шрифта
Крок 6: Откройте любое новое приложение WPS Office, например WPS Writer, и введите что-нибудь в этот документ.
Крок 7: Выделите набранный текст и щелкните значок стиля шрифта на рисунке ниже.
выберите «Текст», а затем щелкните стиль шрифта
Крок 8: выберите значок «Шрифт» и Times New Roman из списка шрифтов.
Часть 3. Как добавить больше шрифтов в WPS Office на вашем устройстве Android?
Вы также можете добавить в WPS Office разные шрифты, например Arial, Verdana и другие шрифты. Вы можете добавить разные шрифты, используя следующие методы.
Способ 1. Добавьте шрифты с веб-сайтов
Вы можете загружать шрифты по вашему выбору с разных веб-сайтов, а затем скопировать их в папку «Шрифты» на своем телефоне Android. Используйте следующие шаги для загрузки шрифтов с веб-сайтов.
Крок 1: Посетите этот сайт, чтобы загрузить различные файлы шрифтов. website
Крок 2: Найдите нужные шрифты и нажмите кнопку «Загрузить». Вы можете загружать разные шрифты один за другим.
нажмите кнопку «Загрузить»
Крок 3: Перейдите в папку «Загрузки» в проводнике на телефоне Android.
перейти в папку загрузки
Крок 4: Выберите и скопируйте загруженные файлы шрифтов.
нажмите «Копировать в»
Крок 5: Вернитесь в папку «Шрифты» и вставьте все скопированные файлы. Вы можете использовать все эти стили шрифтов в WPS Office.
Paste the Fond file
Способ 2. Добавить шрифты из Windo
Microsoft Windows имеет обширную коллекцию известных и широко используемых стилей шрифтов. Используя эти шаги, вы можете легко импортировать эти стили шрифтов на свой телефон Android.
Крок 1: Подключите телефон Android к компьютеру с помощью USB-кабеля. Выберите опцию FileTransfer.

нажмите «Параметры передачи файлов»
Крок 2: Перейдите на диск C на ПК с Windows.

открыть диск C
Крок 3: Заходим в папку Windows.

открыть папку Windows
Крок 4: Найдите папку «Шрифты» и выберите все файлы шрифтов, нажав сочетание клавиш Ctrl + A. Щелкните правой кнопкой мыши и выберите копию. Вы также можете использовать Ctrl + C, чтобы скопировать все выбранные файлы.

выбрать все, а затем скопировать
Крок 5: Вы не можете напрямую скопировать эти файлы на свой телефон Android. Итак, вставьте эти файлы на диск D или в любое другое место на вашем компьютере.

скопировать на другой диск
Крок 6: скопируйте все файлы из этого места и просматривайте свой телефон Android через проводник Windows.

откройте свой телефон Android
Крок 7: Откройте папку «Шрифты» и вставьте все скопированные файлы. Все эти шрифты будут импортированы в WPS Office на телефонах Android.

вставить файлы
Второй метод прост в использовании; вы можете легко скопировать все стили шрифтов с компьютера Windows на телефон Android.
Настройка шрифтов в WPS Office Android может улучшить внешний вид документа, но помните об ограничениях совместимости шрифтов и хранилища. Персонализируйте свои документы, сохраняя при этом эффективность устройства.
Часть 4. Зачем использовать WPS Office?
WPS Office— это мощный и многофункциональный офисный пакет, включающий все решения для повышения производительности офиса. Вы можете использовать WPS Office на устройствах Windows, Linux, Android, iOS и Mac. WPS Office совместим со всеми форматами файлов Microsoft Office. Вот невероятные возможности WPS Office.

логотип WPS Office
Возможности WPS-офиса
Бесплатное использование
Лучшая особенность WPS Office — его бесплатная доступность для всех. Вы можете бесплатно загрузить и использовать WPS Office на Android, iOS, Windows, Mac и Linux.
Совместимость
WPS Office совместим со всеми форматами файлов Microsoft Office. Вы можете легко открыть все файлы Word, Excel и PowerPoint с помощью WPS Office.
WPS 365
Вы также можете бесплатно использовать WPS Office онлайн. WPS 365 — это веб-версия WPS Office. Вы можете создавать свои документы с помощью Документов, Слайдов, Таблиц, AirPage и Форм.

WPS 365
Крокс для редактирования Word/Excel/Powerpoint в WPS:
Вы можете легко редактировать все документы Word, Excel и PowerPoint с помощью WPS Office. Чтобы отредактировать документ, выполните следующие действия.
Крок 1: Откройте документ Word, Excel или PowerPoint с помощью WPS Office. Вы можете щелкнуть файл правой кнопкой мыши, выбрать параметр «Открыть с помощью» и выбрать WPS Office из доступных вариантов. Вы можете начать редактирование документа после его открытия.

нажмите «Открыть с помощью» и выберите WPS Office
Крок 2: откройте файл Word, Excel или PowerPoint в WPS Office. Откройте WPS Office и найдите нужный файл с помощью панели навигации.

открыть WPS Office и просмотреть документ
Часто задаваемый вопрос
1. Какие шрифты доступны в Android?
Roboto — шрифт по умолчанию на всех устройствах Android. Другие шрифты включают моноширинный (Droid Sans Mono), с засечками (Droid Serif) и обычный (Droid Sans).
2. Какое приложение может изменить стиль шрифта на Android?
В магазине Play Store доступны различные приложения для изменения стиля шрифта на Android. Вот некоторые из этих приложений, получивших рейтинг 4 звезды в магазине Google Play.
- Стильные шрифты
- ШрифтФикс
- Фонтази
- Шрифты
- Большой шрифт
- Стильный текст — стиль шрифта
Как добавить шрифт Times New Roman в WPS Office Android — Резюме
Roboto — шрифт по умолчанию, установленный на всех устройствах Android. На устройствах Android установлено ограниченное количество стилей шрифтов. Times New Roman — известный и широко распространенный стиль шрифта. Вы можете легко установить Times New Roman в WPS Office, используя простые методы, описанные в этой статье. Вы также можете установить все стили шрифтов Microsoft Windows на свой телефон Android.
WPS Office — лучшее решение для создания и оформления потрясающих и профессиональных документов. Вы можете бесплатно скачать download WPS Office с официального сайта.
- 1. Как добавить процент к числу в Excel (простые способы)
- 2. Руководство по формуле среднего значения: как рассчитать среднее значение в Excel
- 3. Как использовать Excel IF-THEN (Подробное руководство)
- 4. Пример и руководство: Как использовать абсолютную ссылку в Excel
- 5. [Обновленное руководство] Microsoft 365 Business Basic/Standard/Premium
- 6. Как Добавить Раскрывающийся Список в Excel (Пошаговое Руководство)