
What to know
- Check if PIP is already installed using the command
pip help. - Since PIP comes bundled with Python, you can install or upgrade Python to get it.
- To install PIP separately, download get-pip.py, paste the file in Python’s directory. Then open CMD, change directory to Python, and use the command
python get-pip.pyto install it. - Verify PIP installation with command
pip -V; upgrade PIP with commandpython -m pip install --upgrade pip; downgrade PIP with commandpython -m pip install pip==(version number). - Fix the “PIP is not recognized as command…” error by adding PIP to the PATH environment variable.
Python is easily one of the most widely used open-source programming languages out there that lets you integrate systems efficiently and get work done quickly. And PIP is the best tool for the purposes of installing and managing Python packages. Python users would concur.
Although PIP comes pre-packaged with the newest versions of Python, if you’re using an older version, you will have to install PIP on Windows yourself. Here is everything you need to know about installing PIP on Windows 11.
What is PIP?
PIP (or Preferred installer program) is a tool that enables third-party package installations and is the standard package manager for Python. Through PIP, you can install and manage packages that contain some features that are not available in the standard Python library. As such, a wide variety of applications use PIP to install binary packages, which is one of the reasons for its widespread fame.
Related: Windows 11 Shortcuts: Our Complete List
How to check if PIP is already installed
As mentioned, PIP is so important for Python that it has been included with the Python installer since Python version 3.4 (for Python 3) and Python version 2.7.9 (for Python 2). That means it’s possible that you most probably have PIP already installed. Here’s how to check:
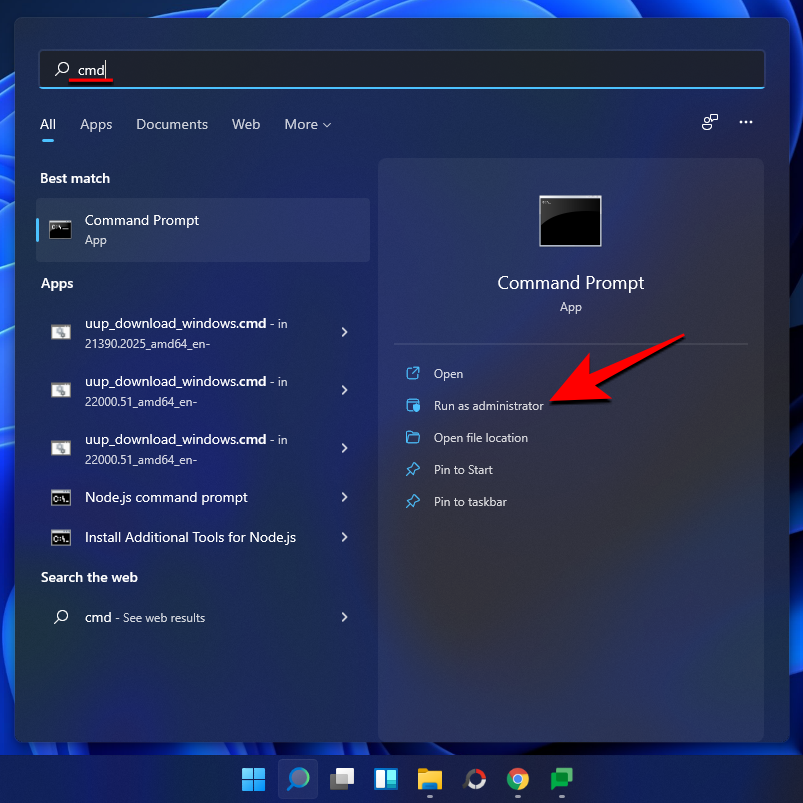
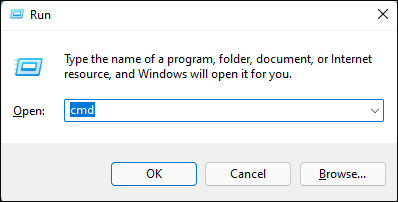
- Open an elevated instance of the Command Prompt. To do so, press Start, type cmd, then click on Run as administrator.

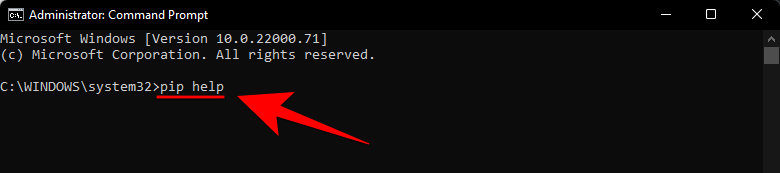
- Then type the following command:
pip help
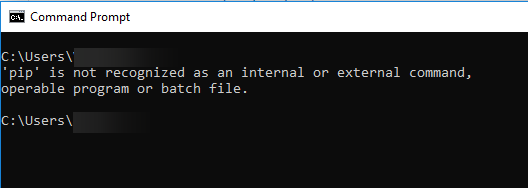
- If the command prompt tells you that “‘pip’ is not recognized as an internal or external command, operable program or batch file”, it is either not installed or its system variable path hasn’t been set. If you’re sure that PIP has been installed, then go to the last section to know the fix.

If for some reason you don’t have pip installed or are using an older version, use the steps below to install pip on Windows 11.
Related: How to Create a Restore Point in Windows 11
Here are a couple of ways to install PIP on Windows 11.
Method 1: Install PIP while installing/upgrading Python 3
- Download Python.
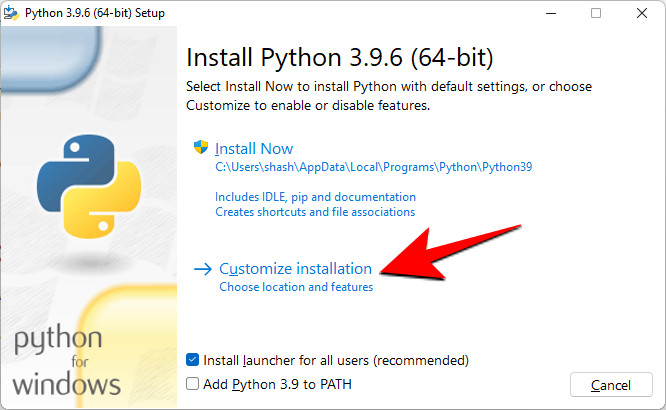
- Once downloaded, run the setup file. Then click on Customize installation.

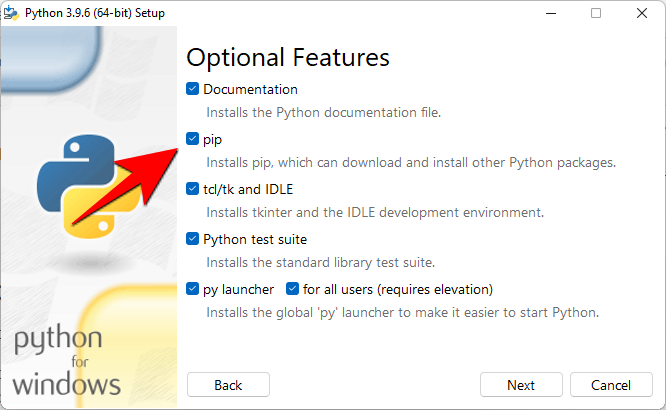
- Here, make sure there’s a tick next to ‘pip’ to ensure that it gets installed.
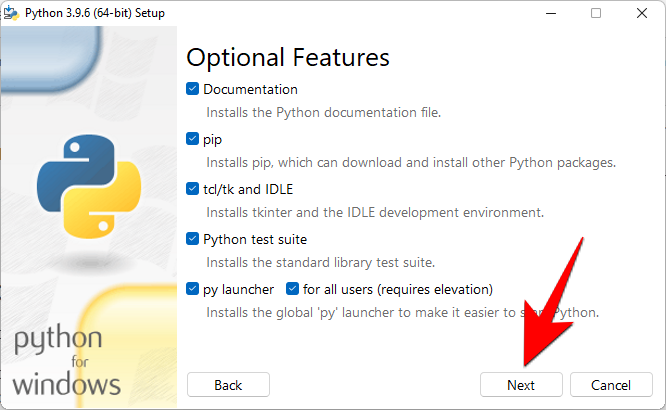
- Although you wouldn’t need to do this for newer versions of Python, it is one way to be sure that it does get installed. Click on ‘Next’ and go ahead with the installation.
Method 2: Using get-pip.py file and command line
Here’s how to fix an existing PIP installation or install a new one if you already have Python but only want to install PIP.
Step 1: Download the get-pip.py file
- Firstly, download the get-pip.py file.
- You may notice upon clicking the link that you are taken to a new page with a bunch of binary data. In that case, press
Ctrl+Sto save the file. However, to easily download it, you will have to right-click on the link given above and select Save links as… option and then save the file on your hard disk.
- Copy the file to the same directory where Python is installed. For us, it is Pythin39 but it may change for you depending on what version of Python 2 or 3 you have installed. So, the python folder for us is here:
C:\Users\(username)\AppData\Local\Programs\Python\Python39.
Step 2: Install PIP via Command Prompt
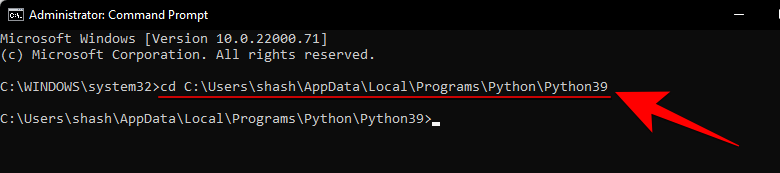
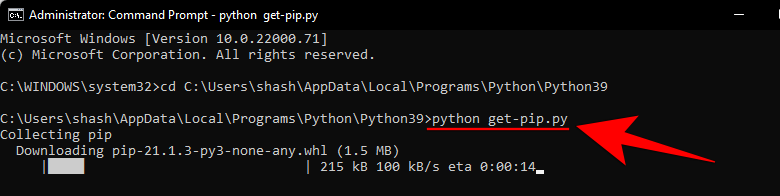
- Now, to install PIP, open the Command Prompt as shown before. Change the current path directory to the directory where the file is saved by typing the following command and press Enter:
cd C:\Users\shash\AppData\Local\Programs\Python\Python39
- Now, type the following command and press Enter:
python get-pip.py
- Wait for the installation process to complete. Once it’s done, you will see the ‘Successfully installed pip…’ message.


And that’s it! PIP is now installed on your system.
How to check PIP version and verify PIP installation
Just to be sure, you can verify whether pip has been properly installed or not by checking its version. To do so, enter the following command in the Command Prompt and hit Enter:
pip -V

The Command Prompt will show you the PIP version in the next line.

How to upgrade PIP
PIP, just like every software, gets updated from time to time and it’s important to stay updated to get the most out of the latest features and bug fixes. In fact, you can even update PIP with a simple command line. Here’s how to do so:
Open the Command Prompt as shown before. Then type the following command line and press Enter:
python -m pip install --upgrade pip

This will uninstall the previous version and get you updated to the latest PIP version.
How to downgrade PIP
On the other hand, if you are experiencing compatibility issues with the latest version of PIP, you may want to downgrade it to a previous version. Here’s how you can downgrade PIP:
Open the Command Prompt and enter the following command, followed by the specific PIP version number, and press Enter:
python -m pip install pip==(version number)

This will uninstall the previous version and install the PIP version that you’ve specified.
Fix: ‘PIP’ is not recognized as an internal or external command
There may be times when, while running the PIP command, the Command Prompt gives the “not recognized as an internal or external command” error message. There can be two causes for this – either PIP is not installed on your computer, or it’s not added to the PATH environment variable.
Since we’ve already shown how to install PIP on Windows 11, the problem most definitely lies with the Path environment variable not being updated. To fix this error message, follow the instructions given below:
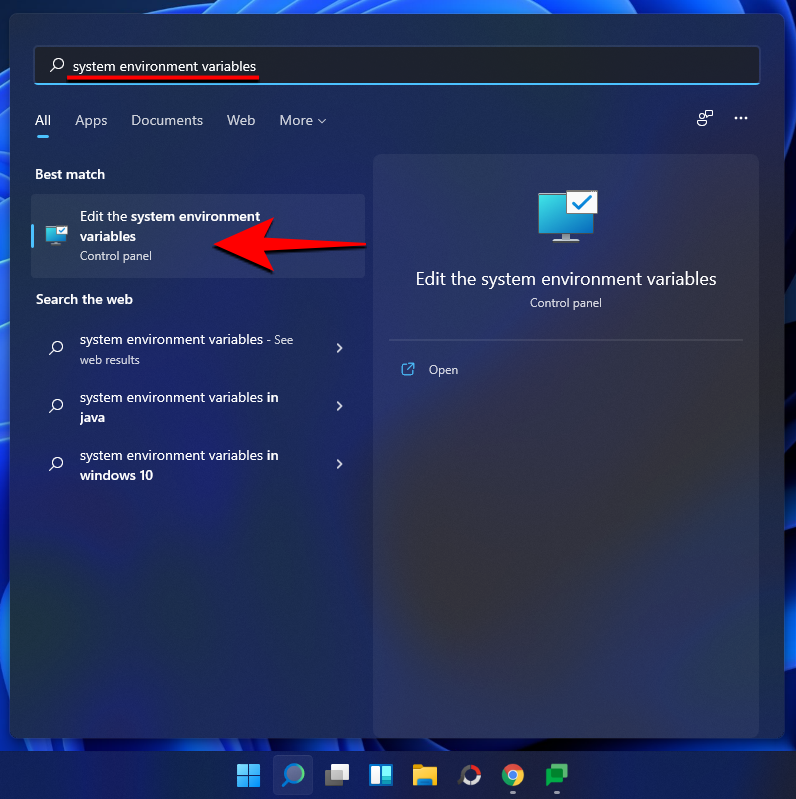
- Press Start and search for System Environment Variables, and click on the first option.

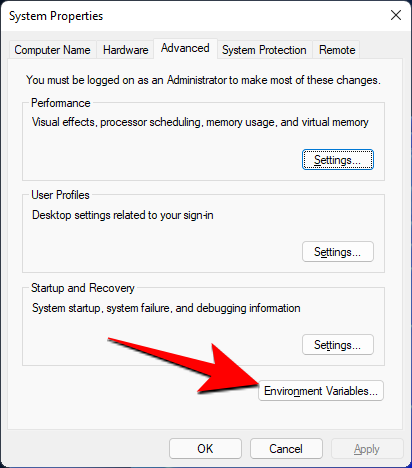
- Now click on Environment Variables.

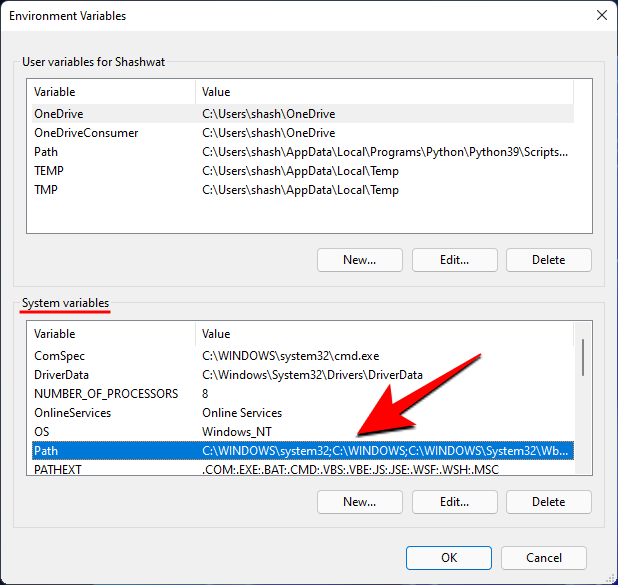
- Under ‘System Variables’, double-click on Path.

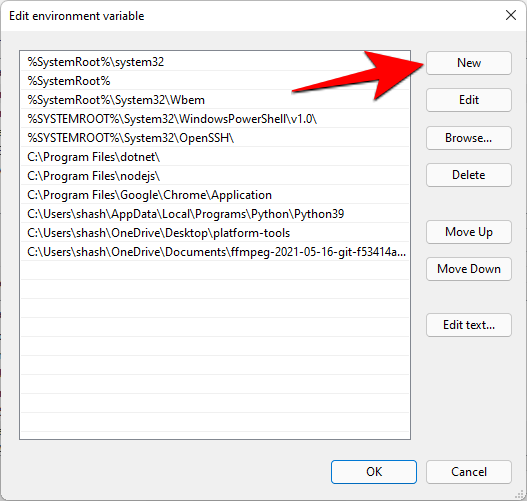
- Here, click on New.

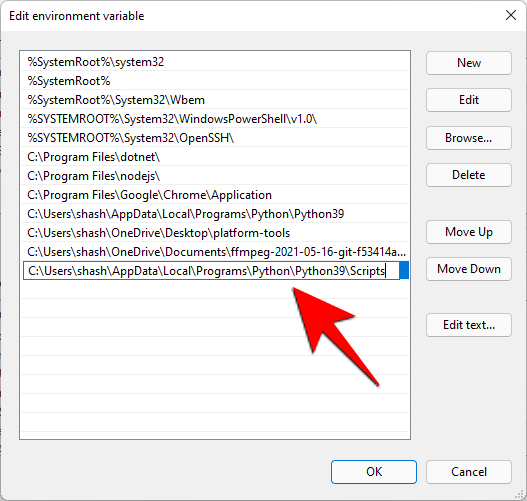
- Then add the location where ‘PIP’ is installed. By default this is
C:\Users\(username)\AppData\Local\Programs\Python\Python39\Scripts
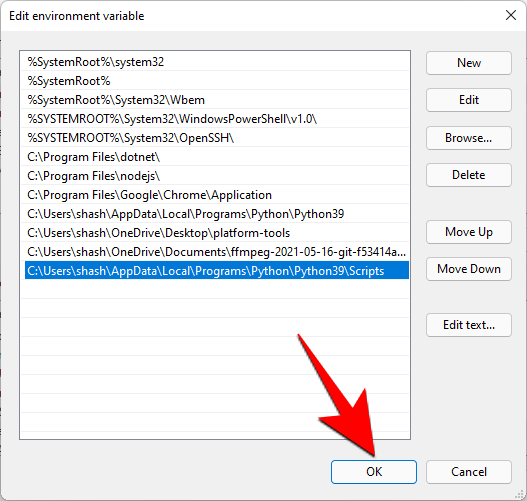
- Click OK on all open windows.
- Now open a new instance of Command Prompt and try the ‘pip’ command again. Because the command prompt now knows where to look for the ‘pip’ command, it won’t throw up the error message again.
So this is how you can install PIP on Windows 11, upgrade, or downgrade it.
RELATED
- How to Change a Wallpaper on Windows 11
- How to Ungroup Icons on Windows 11 Taskbar With a Registry Hack
- What Windows 11 Services to Disable Safely and How?
- How to Show Hidden Files on Windows 11
- How to Change Brightness on Windows 11
- How to Find Product Key on Windows 11
Read Next
Subscribe to Newsletter
Join me on this exciting journey as we explore the boundless world of web design together.
Recently, we wrote a detailed tutorial on how to build your own AI chatbot with ChatGPT API. And for that project, we used Python and Pip to run several essential libraries. So if you are also getting started with Python for a project, make sure to install Pip on your Windows PC. You will be able to download many of the dependencies and libraries in a few seconds. On that note, let’s go ahead and learn how to install Pip on Windows 11 and 10.
What is Pip?

Pip is the package manager for Python. In simple terms, it basically allows you to install and manage millions of Python packages and libraries from the command line. It connects to the Python Package Index (PyPI) repository where you can find thousands of projects, apps, software development kits, clients, and more. If you are developing a project, and if you need some dependencies which are not part of the standard Python distribution, Pip can add them for you effortlessly. Simply put, Pip is an integral part of Python and to get started, you must install both of them.
Check If Pip Is Already Installed on Windows
If you have installed Python, you may already have Pip installed on your system. So before you move to the installation steps, let’s check if Pip is already installed on Windows or not.
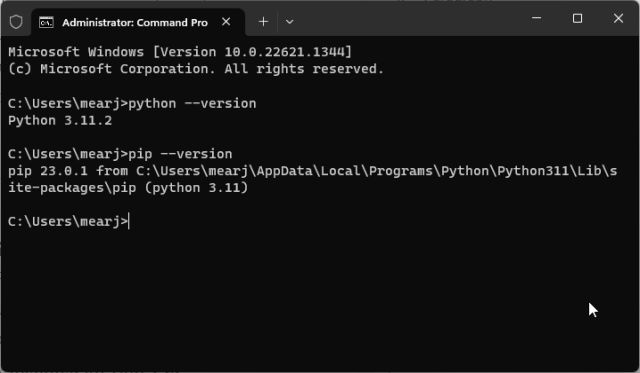
1. Open Command Prompt or Windows Terminal. After that, run the below command. If you get the Pip version as the output, it means Pip is already installed on your PC. You can scroll down and learn how to upgrade Pip to the latest version on Windows.
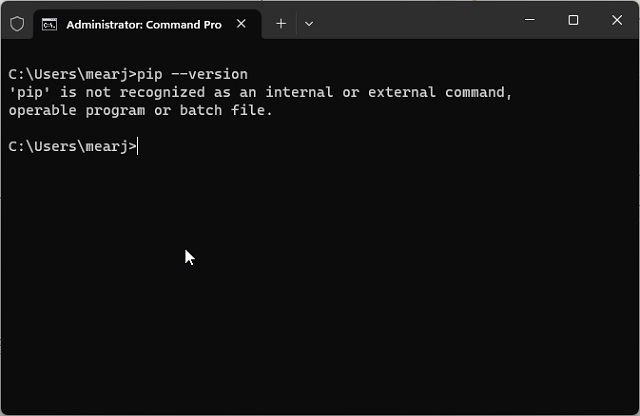
pip --version

2. In case, you get errors like “Command not found” or “‘Pip’ is not recognized as an internal or external command, operable program or batch file.”, it means that Pip is not properly installed on your PC. Follow the below steps to install Pip and configure its path as well.
Install Pip with Python
To install Pip on Windows, you need to install Python only. When you install Python using the desktop setup file, Pip is also sideloaded on Windows. Here is how you can set up Pip on Windows.
1. First and foremost, move to this link and download the latest version of Python for Windows.

2. After that, double-click on the setup file. Once the installer appears, make sure to enable the checkbox next to “Add Python.exe to PATH“.
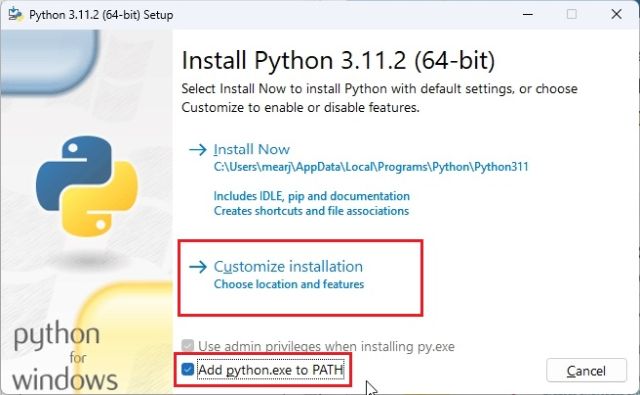
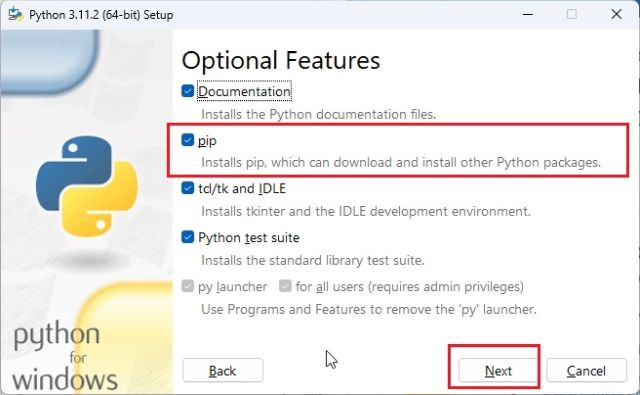
2. After that, click on “Customize installation” and make sure “pip” is enabled along with other options. Click on “Next” and then “Install”.
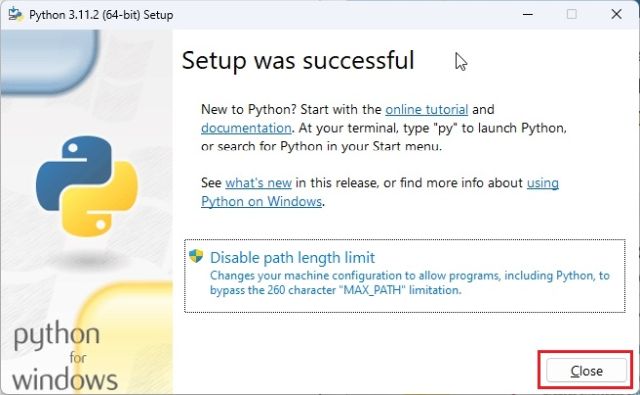
3. Now, Python along with Pip, both will get installed on your Windows PC.
Install Pip via Command Line
You can also manually install Pip on Windows from the command line either using CMD or Windows Terminal. Follow the steps below.
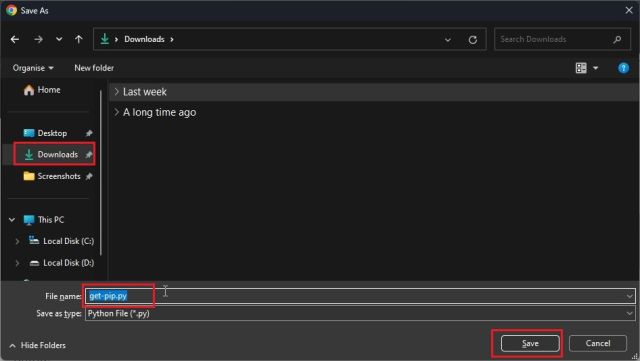
1. Right-click on this link and then choose “Save link as…”.
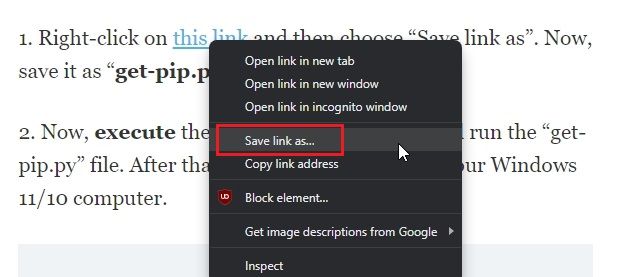
2. Now, save it as “get-pip.py” file in the “Downloads” folder.
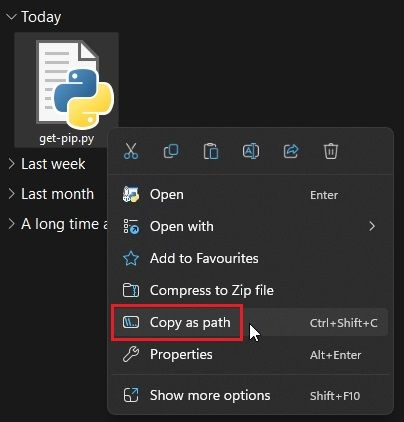
3. Next, right-click on the “get-pip.py” file and choose “Copy as path”.
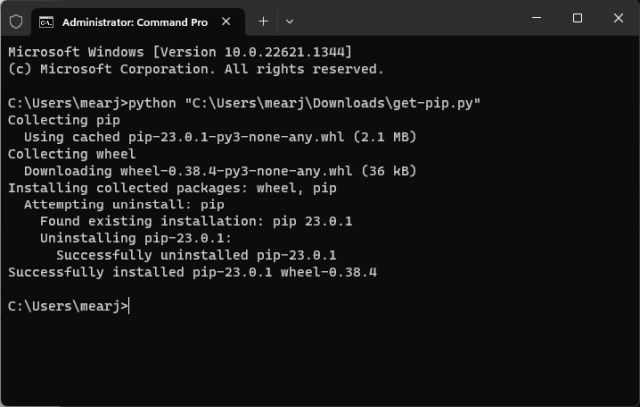
4. Finally, open the Terminal and execute it in the below fashion. Enter python, add a space, and then paste the path. After that, hit Enter and Pip will be installed on your Windows 11/10 computer.
python "C:\Users\mearj\Downloads\get-pip.py"
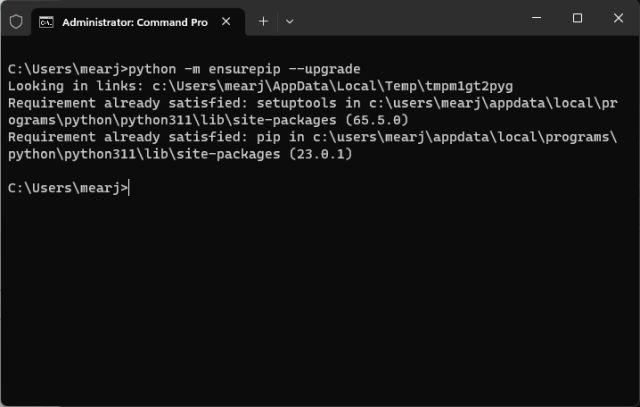
5. Apart from that, you can also run this command to download and install Pip on a Windows PC using the “ensurepip” module.
python -m ensurepip --upgrade
Verify Pip Installation
1. To check if everything went right, open Windows Terminal or Command Prompt and run the below commands. If the installation was successful, the first command will display the Python version, and the second command will show the Pip version currently installed on your PC.
python --version
pip --version
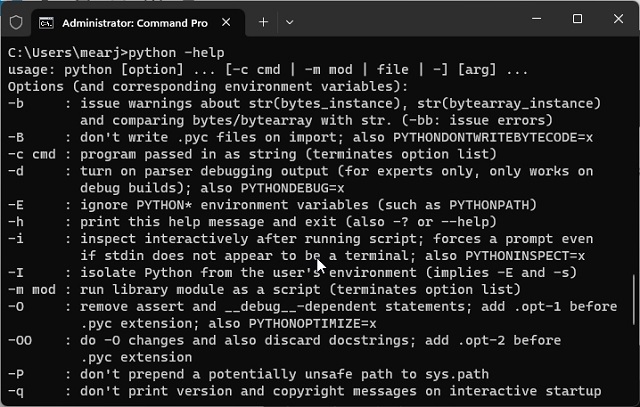
2. You can also type the below command to find all the commands pip takes as an argument. If it returns a long list of command options, you are good to go.
python --help
pip --help

Upgrade or Downgrade Pip on Windows
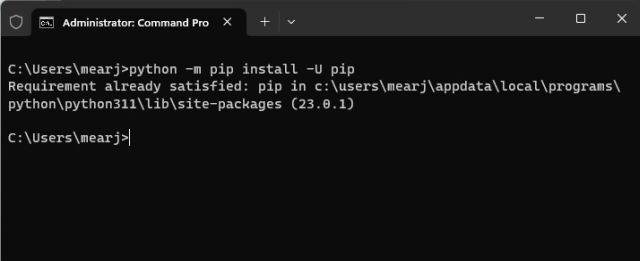
1. After installation, run the below command in the Terminal to upgrade Pip to the latest version on Windows. Here’s what the syntax looks like:
python -m pip install -U pip
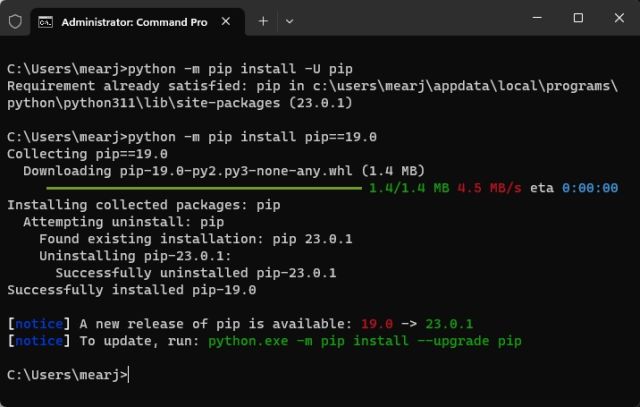
2. In case you want to downgrade Pip to a specific version, run the below command:
python -m pip install pip==19.0
How to Add Python and Pip to PATH on Windows 11 and 10
After installing and running the Python or Pip command on Windows if you get errors such as “Pip is not recognized as an internal or external command,” or “Python is not recognized as an internal or external command,” or simply “Python not found”, do not worry. It means that Python or Pip may have been installed on your Windows PC, but their paths have not been configured correctly. We need to add their directories as a global Windows environment variable. Here is how to do it.
1. First of all, press “Windows + R” to open the Run prompt and paste the below path, and hit Enter.
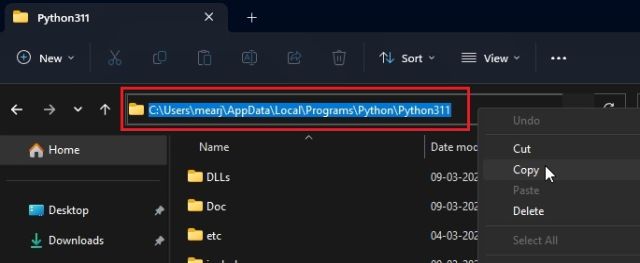
%localappdata%\Programs\Python
2. After that, open another “Python3XX” folder. Now, copy the whole path from the address bar. This is Python’s path you need to add as an environment variable.
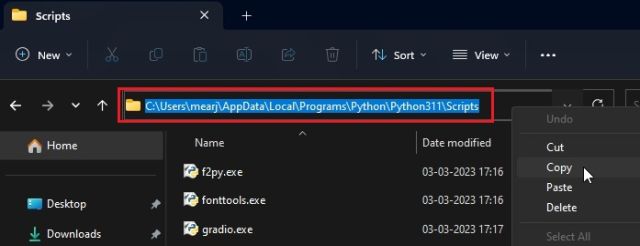
3. Next, move to the “Scripts” folder and click on the “Address bar”. Now, copy the whole path again. This is Pip’s path you need to add as an environment variable.
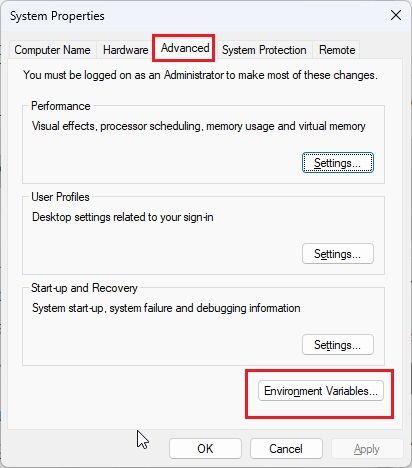
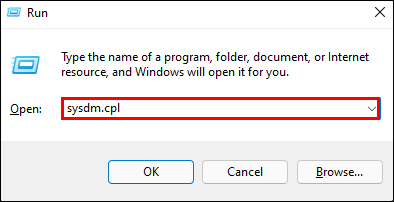
4. After you get paths for both Python and Pip, open the Run prompt again by pressing “Windows + R”. Here, type sysdm.cpl and hit Enter. This will directly open the Advanced System Settings.
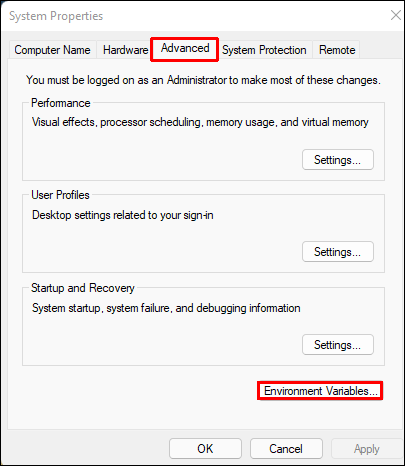
5. Move to the “Advanced” tab, and click on “Environment Variables” at the bottom.
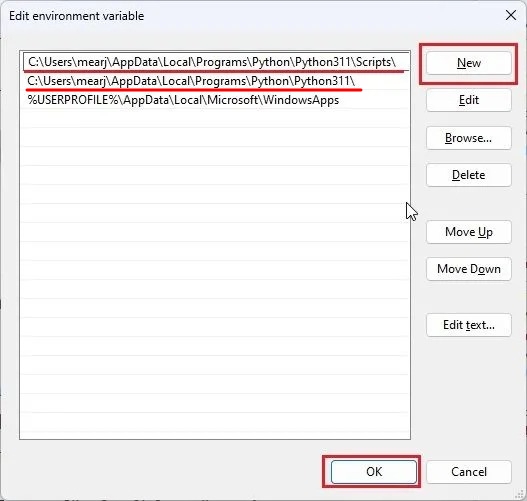
6. Next, under the “User variables for …” section, select “Path” and click on the “Edit…” button.
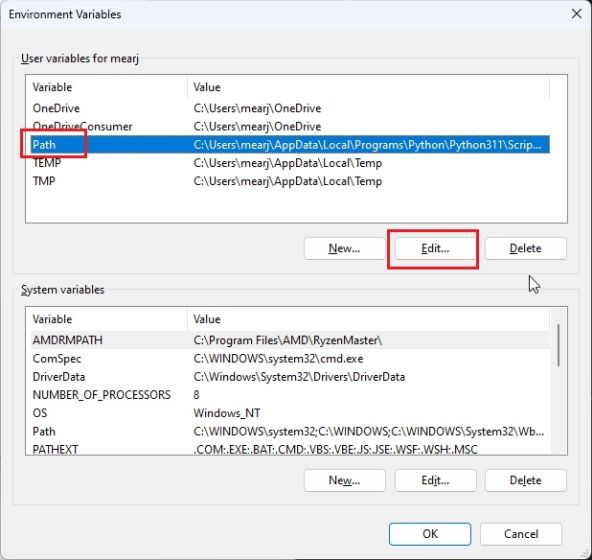
7. Here, click on “New” and add both the paths you copied above on the left side. Now, click on “OK”. Keep in mind, the paths will be different for each PC. This will add python and pip as global environment variables on your PC.
7. Finally, open Command Prompt or Windows Terminal and run a Python/ Pip command. For example – You can use the pip command to install the OpenAPI on your Windows PC, and it won’t display an error.
python --version
pip install openai


So this is how you can download and install Pip on Windows 11 or 10. I would suggest downloading the official installer from Python’s website and installing it to steer clear of any errors. It works for me 100% of the time. Anyway, that is all from us. If you want to learn how to install Python in Ubuntu Linux, head to our guide for more details. And to find the best Python learning courses, we have a curated list ready for you. Finally, if you have any questions, let us know in the comment section below.
Author:
Joel Gray
Published: 18 October 2023
Read Time: ~2 minutes
Are you sick of adding “python -m” to the beginning of your pip install commands?
Or maybe you’ve reinstalled python and realise that now you have to write “python -m pip install package” instead of just “pip install package”?
This short and simple blog will show you how to add pip to your system’s environment path, which means it will know how to find pip without prefixing it with “python -m”.
For macOS and Linux:
1. Locate pip Installation:
• Run the following command in your terminal to find where pip is installed:
python -m site --user-base
• Note the path returned, e.g., /home/username/.local.
2. Modify the PATH Environment Variable for this session:
• Append /bin to the path obtained, e.g., /home/username/.local/bin.
• For a temporary modification, run:
export PATH="$PATH:/home/username/.local/bin"
3. Modify the PATH Environment Variable permanently:
• For a permanent modification, add the above line to your ~/.bashrc (for Linux) or ~/.bash_profile (for macOS) file:
echo 'export PATH="$PATH:/home/username/.local/bin"' >> ~/.bashrc
source ~/.bashrc
4. Verify the Modification:
• Open a new terminal window and run:
pip --version
For Windows:
1. Locate pip Installation:
• Run the following command in your Command Prompt to find where pip is installed:
py -m site --user-site
• Note the path returned, e.g., C:\Users\Username\AppData\Roaming\Python\Python39\site-packages.
2. Modify the PATH Environment Variable:
• Navigate to the Scripts directory which is a sibling to the site-packages directory, e.g., C:\Users\Username\AppData\Roaming\Python\Python39\Scripts.
• Copy this path.
3. Add the Path to the Environment Variables:
• Right-click on ‘This PC’ or ‘My Computer’ on your desktop or in File Explorer, and select ‘Properties’.
• Click on ‘Advanced system settings’.
• Click on ‘Environment Variables’.
• Under ‘System variables’, scroll down and select the ‘Path’ variable, then click on ‘Edit’.
• Click on ‘New’, and paste the path copied earlier.
• Click ‘OK’ to close each window.
4. Verify the Modification:
• Open a new Command Prompt window and run:
pip --version
Pip, also known as “PIP Installs Packages,” is a package organization system to install and operate Python software packages. Yes, it’s “Installs” and “Packages” with an “s.” It’s typically used for Python Package Index packages.
When installing Python packages, many users report receiving the message “‘pip’ is not recognized as an internal or external command” and aren’t sure how to troubleshoot. If you’re seeing this error, read on for tips on how to fix it.
The Causes for ‘Pip ‘is Not Recognized as an Internal or External Command Operable Program or Batch File
Let’s look at the two most common reasons for this error:
Reason #1: The Pip Install is Not in the System Variable
For Python commands to run from a Windows Command Prompt, the path of your pip install will need to be added to your “PATH” system variable. It should be added automatically if you obtained Python via the installation file.
Reason #2: The Installation Was Not Added to Your PATH or System Variables
If you’ve manually added the path, the problem could be a typo. One missing semicolon or an extra space somewhere will produce an error.
How to Fix ‘Pip ‘is Not Recognized as an Internal or External Command in Windows 10 or Visual Studio Code
If you see this error message when working in Windows or with Visual Code, it usually means a problem exists with the Python installation or the PATH has not been set correctly. Try the following tips to fix the issue:
Fix 1: Ensure Pip Was Added to Your PATH Variable
If you’re confident that pip got added to the PATH variable, move on to “Fix 3.” If not, continue here.
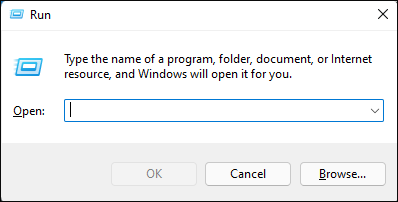
- Press “Windows key + R.” to open the “Run” dialog box.

- Type”
cmd"and press “Enter.”
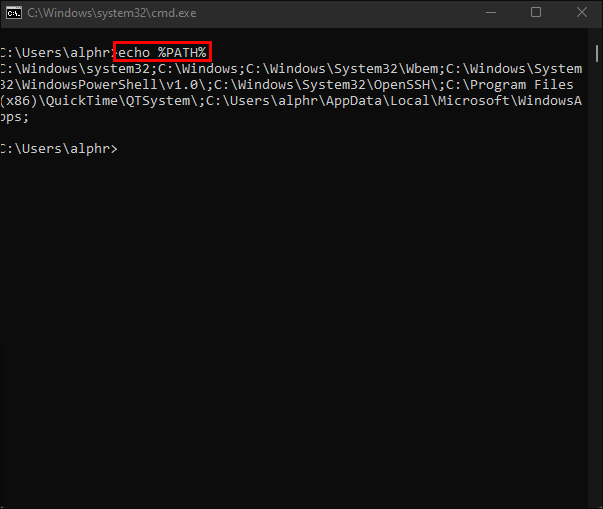
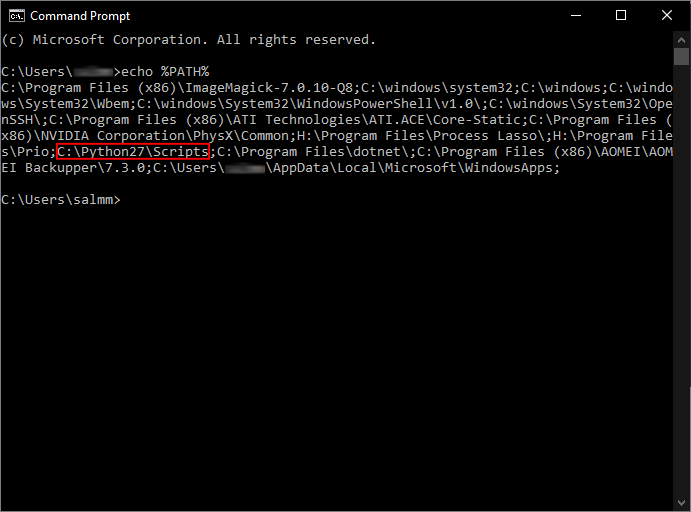
- For a list of all the locations added to your PATH variable, type “
echo %PATH%“ without quotes into the command prompt, then press “Enter.”
- The path was successfully added to the PATH variable if you find something like “C:\Python39\Scripts” (with the number depending on your Python version).


If pip hasn’t been added, try the next fix.
Fix 2: Add Pip to the PATH Environment Variable
There are two ways to add pip to the PATH environment variable—System Properties and the Command Prompt.
How to Add Pip to PATH Environment Variable using System Properties
- Open the “Run” dialog box by pressing the “Windows key + R.”
- Type in“
sysdm.cpl“ and press “Enter” to access “System Properties.”
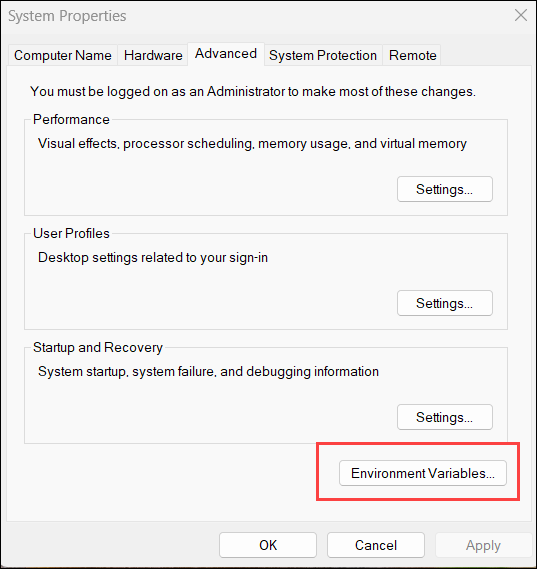
- Select the “Advanced” tab, then click “Environment Variables.”

- Go to the “System variables” section and select “Path,” then click the “Edit” button at the bottom.

- Click “New,” then add your “pip installation path” followed by “Enter,” and then select “OK” to save it and close the window. The default location is: “C:\Python##\Scripts” with actual numbers, but your location and file version may differ.
- Once the path has been added, restart Windows (IMPORTANT), open a new command window, then try to install a pip package to see whether the problem was solved.


How to Add Pip to PATH Environment Variable using the Command Prompt
- Press “Windows key + R.” to launch the “Run” dialog box.
- For a new command prompt window, type “
cmd"and then hit “Enter.”
- Type the following command (with your actual path following the semicolon) and press “Enter” to run it:
setx PATH "%PATH%;C:\Python39\Scripts"


Fix 3: Open the Python Package Without Adding the Pip Variable
Follow these steps to open Python install packages in CMD without adding the pip variable:
- Press the “Windows key + R” to open the “Run” prompt.
- Type”
cmd"and press “Enter” to open the Command Prompt.
- Enter the following command for Python 3 (with the package name that uses pip), then press “Enter” to run it:
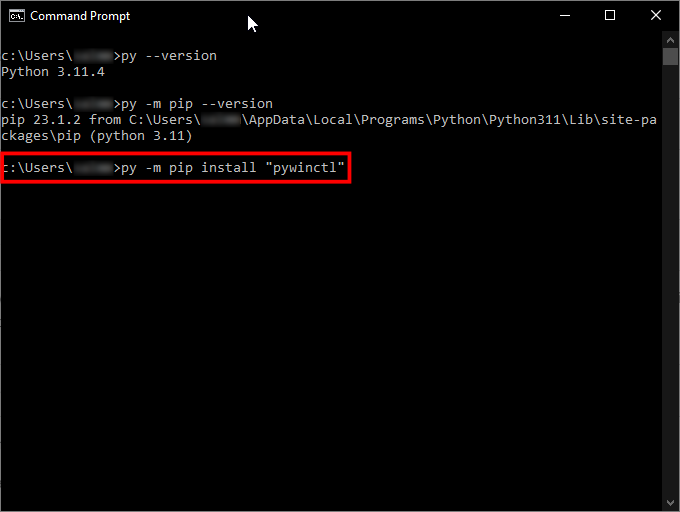
py -m pip3 install "package name"

Fix 4: Ensure Pip is Included in the Installation
Some Python installers exclude pip from the default installation. You can fix this by changing the Python installer to include pip, and here’s how:
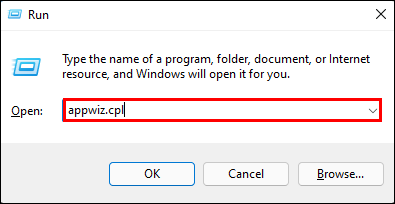
- Press the “Windows key + R” to open the “Run” prompt.
- Type “
appwiz.cpl“ and press “Enter.”
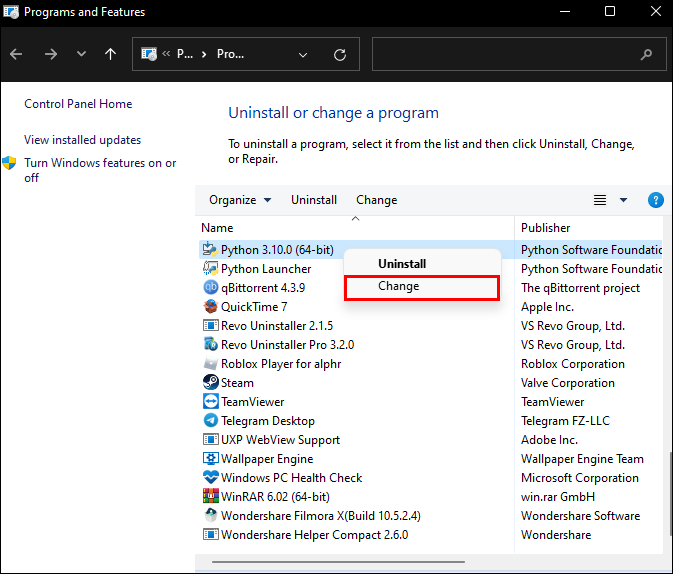
- In the “Program and Features” window, right-click “Python” and choose “Change.”

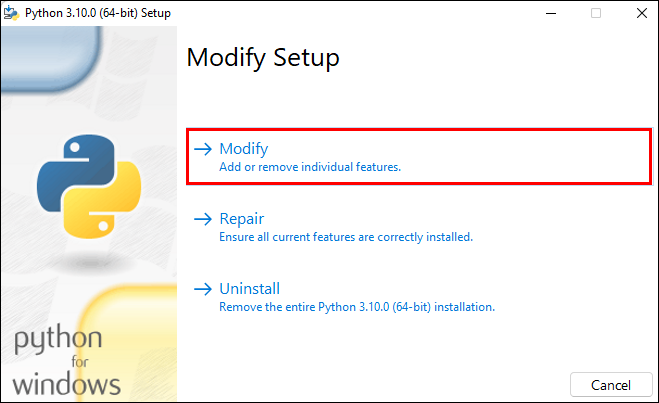
- Select “Modify.”

- In “Optional Features,” check the “pip” box and press “Next.”
- In the “Advanced Options” window, ensure “Add Python to environment variables” is checked.

- To apply the changes, click “Install.”
- When the installation is complete, open “Command Prompt” and verify whether you can install a Python package that uses pip without receiving the error.


If you still see the error, head to the last section of this article for steps to uninstall and reinstall Python.
This error usually means a problem with the Python installation exists, or the system variable PATH is not set up correctly. Try reinstalling Python and all its components to fix the problem. The easiest way is via the Python executable installer. Here’s how to do this:
- Press “Windows key + R” to open the “Run” dialog box.
- Type “
appwiz.cpl“ to get to the “Programs and Features” window.
- Scroll down the installed programs list to find the Python installation, NOT the launcher.

- Right-click it and select “Uninstall,” then follow the instructions.
- Once Python is removed, restart your computer (IMPORTANT) and download the latest Python installer for your OS.

- Execute “python-3.##.#-amd64.exe” (or whatever installer you downloaded) by double-clicking the file or using the Command Prompt.

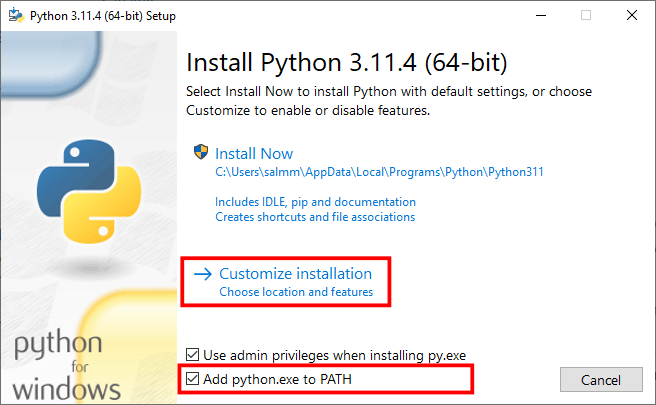
- Ensure “Add Python 3.## to PATH” is checked at the bottom, then choose “Customize Installation.”

- In the “Optional Features” section, ensure the “pip” option is checked, then click “Next.”
- The default location can be left as is, but ensure “Add Python to environment variables” is checked, then click “Install.” You can also check off “Install Python 3.xx for all users” if desired.
- Once the installation is complete, install a Python 3 package that uses pip to see if the installation process works by typing the following:
py -m pip install "Project Name Here"


Pip is Now Recognized
The “‘pip’ is not recognized as an internal or external command” error message is a common scenario. The cause usually boils down to the path of the pip install being unavailable or being added incorrectly to the system variable PATH. You can manually add it via Command Prompt or System Properties, change the Python install to include pip, or uninstall and reinstall Python and ensure the “pip” option and adding it to environmental variables are checked.
pip is a package management tool for Python that allows you to install and manage software packages from the Python Package Index (PyPI). The name pip originated as an acronym for Pip Installs Packages.
Most modern Python versions include pip by default. However, if it is missing, you can install it manually.
This guide will explain how to check if pip is installed, install it using two different methods, and upgrade or configure it on Windows.
Prerequisites
- A Windows system.
- Access to Command Prompt or PowerShell.
- Python installed and added to PATH.
Note: Python is usually preinstalled on Windows. If not, the easiest method to get it is with Windows Package Manager. To install Python with winget, run: winget install Python.Python.
Check if pip Is Installed on Windows
Python’s latest versions include pip, but some installations may not. Before installing pip on Windows, check if the system already has it.
Launch the command prompt and type the following command:
pip --version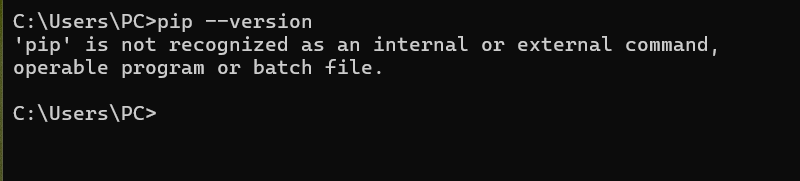
If pip is installed, the output displays the installed version. In case the system responds with an error message like the one above, follow one of the methods in this tutorial to install it.
Method 1: Install pip on Windows Using ensurepip
The ensurepip module is built into Python and can install pip if it’s missing. It’s useful in environments where pip was not included by default, such as embedded Python installations.
To install pip, run the following command:
python -m ensurepip --upgrade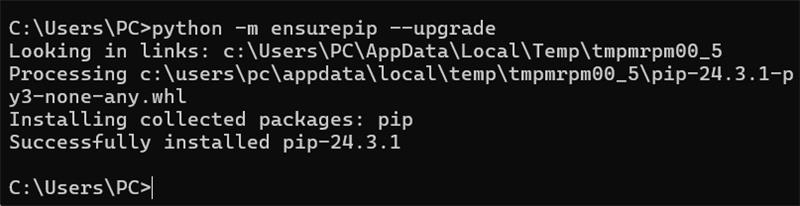
After the installation completes, verify the pip installation with:
pip --version
Method 2: Install pip on Windows Using get-pip.py
To install pip using this method, download the get-pip.py script using curl, then run it. Follow the steps below to install pip using this method.
Step 1: Download pip get-pip.py
Download the get-pip.py script with the following command:
curl https://bootstrap.pypa.io/get-pip.py -o get-pip.py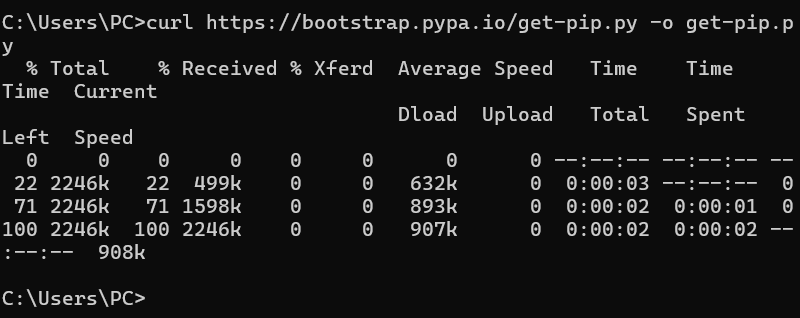
Note: To check if the link in the command is up to date, visit the official site for get-pip.py. If you can access the file directly and it doesn’t print any errors, the link is still valid.
Step 2: Install pip on Windows
If you used the get-pip.py script to download pip, run the following Python command to install it:
python get-pip.py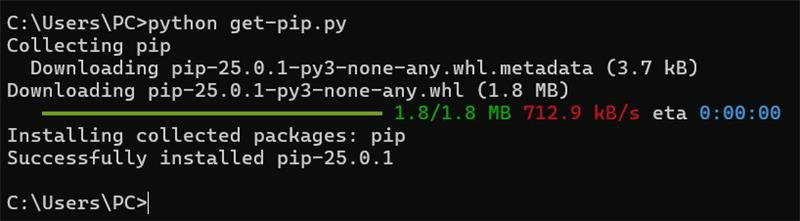
Note: In some cases, get-pip.py outputs the installation location. If this happens, note the PATH to use when adding pip to your system’s PATH variable.
Step 3: Verify Installation
To test whether the installation was successful, type the following command:
pip --version
Step 4: Add pip to PATH
To run pip from any location and as a standalone command, add it to Windows environment variables.
Before modifying environment variables, check whether pip is already in your system’s PATH. Run this command:
where pip
If the command returns a valid PATH, skip this step. If the command cannot find the PATH, it returns the error:

Follow these steps to add pip manually:
1. Locate the pip installation directory, which is, by default, in the Scripts subdirectory of your Python installation. A typical path is:
C:\Users\[YourUsername]\AppData\Local\Programs\Python\PythonXX\ScriptsReplace [YourUsername] with your actual Windows username and PythonXX with the Python version.
In this tutorial, the path is:
C:\Users\PC\AppData\Local\Programs\Python\Python313\ScriptsNote it because you will need it in the coming steps.
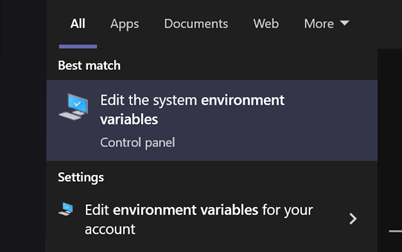
2. Open the Start menu, search for Environment Variables, and press Enter.
3. Click the Environment Variables button.
4. Double-click the Path variable to edit it.
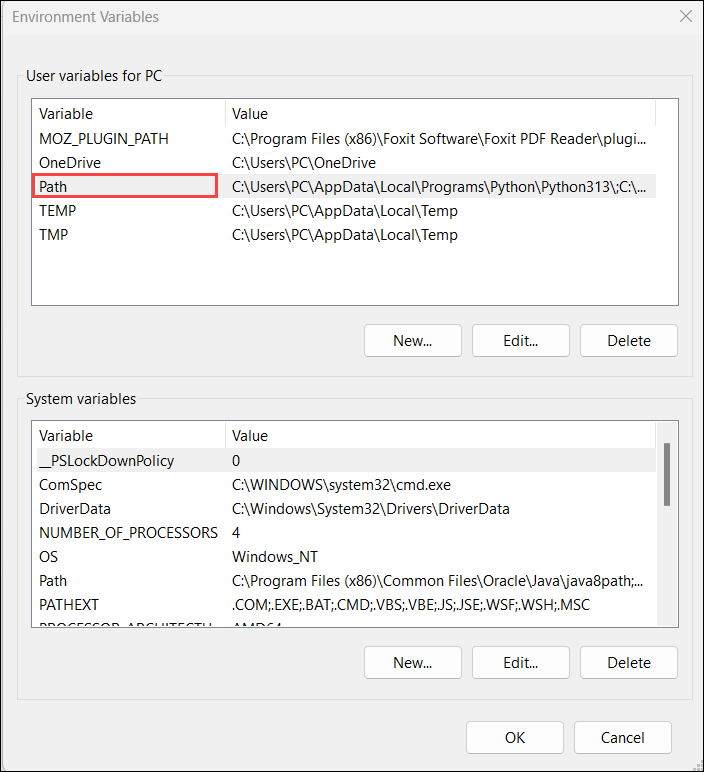
Note: Modify User variables for a single user or System variables to apply changes for all users.
5. Select New and add the directory where pip is installed, which you located and noted earlier,
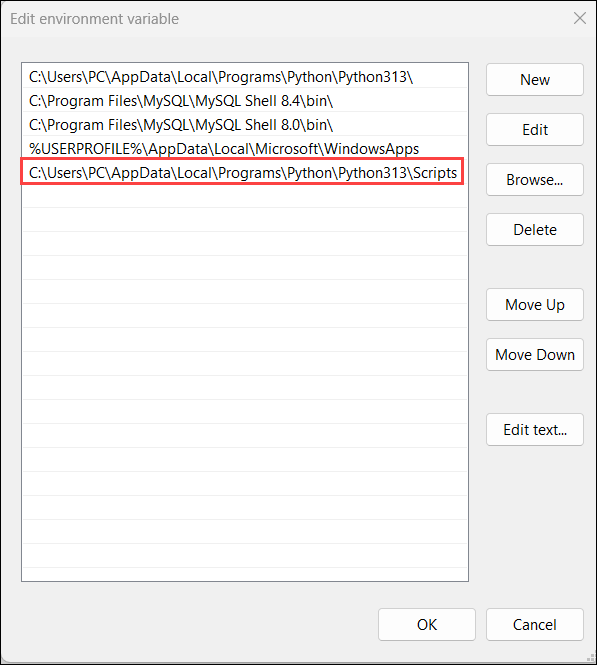
6. Click OK to save the changes.
7. Open a new command prompt session and run the following command to test the changes:
pip help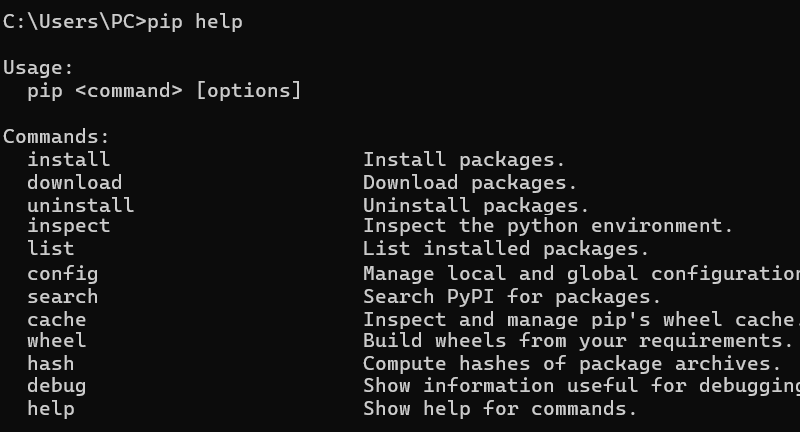
If the command does not work, try using pip3 instead of pip. Alternatively, add the directory where Python is installed to PATH and repeat the process.
Step 5: Configuration
The configuration file for pip exists in several locations on the system, including global, user-specific, and site-specific paths.
The configuration provides insight into how pip is set up and helps find installation problems or unexpected behavior.
To see the current configuration settings, run:
pip config -v list
The command shows the possible global, user, and site locations for the pip.ini configuration file. If you need to adjust pip’s behavior, edit the appropriate pip.ini file based on these locations.
Upgrade or Downgrade pip on Windows
New versions of pip are released occasionally. These updates improve functionality or are necessary for security purposes.
To upgrade pip on Windows, run:
pip install --upgrade pipDowngrading is necessary if a new version of pip starts performing badly. To downgrade pip to a prior version, specify the version you want.
Use the following syntax:
python -m pip install pip==[version_number]Conclusion
This guide explained two ways to install pip on Windows and elaborated on how to add pip to PATH when necessary. Additionally, it showed how to upgrade or downgrade pip.
Next, check out our guide and learn how to install NumPy, a powerful Python library for numerical computing, using pip.
Was this article helpful?
YesNo