
Adding a Python interpreter in PyCharm might seem complex to some, but it is an essential step for any Python developer aiming for efficiency. PyCharm, developed by JetBrains, is a powerful Integrated Development Environment (IDE) tailored for Python programming.
In this guide, you will learn how to add a Python interpreter in PyCharm to set up your development environment flawlessly.
You’ll discover how to configure settings in PyCharm, manage Python paths, and integrate virtual environments like Virtualenv or PyEnv. Whether you are working with Python scripts or larger frameworks like Django and Flask, understanding this process is crucial.
We’ll also troubleshoot common issues you might encounter, ensuring you can focus on writing and debugging your code efficiently.
By the end of this article, you’ll be ready to set up your Python interpreter, navigate through PyCharm’s preferences, and optimize your coding workflow, whether you’re using the community or professional edition of PyCharm. Unleash the full potential of your development environment today.
How To Add Python Interpreter In PyCharm: Quick Workflow
To add a Python interpreter in PyCharm, follow these steps:
Configuring the Python Interpreter
- Open Settings:
- Press
Ctrl + Alt + S(orCmd + ,on macOS) to open the settings menu.
- Press
- Navigate to Project Interpreter:
- In the settings window, go to Project: [Your Project Name] and select Python Interpreter from the side menu.
- Add Interpreter:
- Click on the gear icon next to the list of available interpreters and select Add…. This will open a dialog where you can choose different types of interpreters.
- Select Interpreter Type:
- You can choose from several options:
- System Interpreter: Select this if you want to use an interpreter that is already installed on your system. You may need to browse for the Python executable (e.g.,
python.exeon Windows) if it’s not automatically detected. - Virtual Environment: If you want to create a new virtual environment, select this option and configure it accordingly. PyCharm supports virtual environments created with
virtualenv,pipenv, orconda. - Remote Interpreters: If you are using PyCharm Professional, you can also configure interpreters for remote environments via SSH, Vagrant, Docker, etc.
- System Interpreter: Select this if you want to use an interpreter that is already installed on your system. You may need to browse for the Python executable (e.g.,
- You can choose from several options:
- Configure Path:
- If you are adding a system interpreter, you will need to specify the path to the Python executable. Make sure that Python is installed on your system before doing this.
- Apply Changes:
- After selecting or configuring your interpreter, click OK or Apply to save your changes.
- Verify Configuration:
- Once added, ensure that the interpreter is displayed in the list and is selected for your project.
Additional Notes
- If you encounter any issues with no interpreter being configured, ensure that Python is installed correctly on your system and that PyCharm can locate its executable.
- You can also set a default interpreter for all future projects by selecting it in the settings menu under Python Interpreter settings.
Setting Up Python Interpreters
Initial Configuration of a Python Interpreter

Configuring a Python interpreter in PyCharm after creating a new project is straightforward. Here’s how you do it:
First, create your project. Once done, follow these steps:
1. Steps to configure an interpreter after creating a new project
Head over to File > Settings. If you’re using macOS, it’s PyCharm > Preferences.
In the left-hand pane that appears, navigate to Project: [Your Project Name] > Python Interpreter. Click the gear icon next to the current interpreter, then select Add.
Choose Virtualenv Environment, Conda, or any other environment type you prefer. If you’re using Virtualenv, PyCharm often suggests creating it based on the project’s location.
2. Accessing the settings for project-specific configuration
Aside from accessing Settings/Preferences, you can also go the Quick Menu way. Just hit Ctrl+Alt+S (or Cmd+, on macOS), then jump directly to Project: [Name] > Python Interpreter.
Swiftly, click the gear icon to tweak further settings. Project-specific configurations are handy when juggling multiple projects.
Selecting an Interpreter
1. Using the Python Interpreter selector
PyCharm makes it easy to switch between interpreters. The Interpreter selector, usually found at the bottom right corner, comes into play here. Click on it. You’ll see a drop-down menu listing all available interpreters.
Pick your desired interpreter from the list. This is particularly useful if you’re toggling between different environments frequently, like switching from a system interpreter to a Virtualenv.
2. Switching interpreters via IDE settings
Navigate back to File > Settings (or PyCharm > Preferences on macOS). Click on Project: [Your Project] > Python Interpreter.
Hit the gear icon next to the already set interpreter, then click Show All. You’ll see a detailed list of all interpreters. Select your preferred interpreter and click OK. The IDE updates accordingly.
Adding New Python Interpreters
Local Interpreters
For adding local interpreters, here’s how you can proceed.
Steps for adding Virtualenv, Pipenv, and Conda environments
To add a Virtualenv interpreter, go to File > Settings (or PyCharm > Preferences on macOS). Navigate to Project: [Your Project Name] > Python Interpreter. Click on the gear icon, select Add, and choose Virtualenv Environment. PyCharm will prompt you to create a new environment, specifying the location and base interpreter.
For Pipenv, follow the same route but choose Pipenv Environment. PyCharm will automatically detect the Pipfile in your project directory, and you can set up the interpreter accordingly.
For Conda, select Conda Environment. Ensure that Conda is installed on your system. PyCharm will help you set up the interpreter based on the Conda executable.
Choosing system interpreters for development
Sometimes, you need to use the system interpreter for development instead of isolated environments. Go back to File > Settings. In Project: [Your Project Name] > Python Interpreter, click the gear icon and select Add. This time, choose System Interpreter. PyCharm will display a list of all Python interpreters installed on your system. Pick the appropriate one and confirm.
Remote Interpreters
Optimizing projects with remote interpreters requires different steps.
Using SSH to configure a remote Python interpreter
In the settings menu, navigate to Project: [Your Project Name] > Python Interpreter. Clicking the gear icon, select Add, then choose SSH Interpreter. Specify the SSH credentials, and PyCharm will connect to the remote server, allowing you to use its Python interpreter.
Setting up interpreters via Docker, Docker Compose, WSL, and Vagrant
For Docker, once again, head to Project: [Your Project Name] > Python Interpreter. Gear icon, Add, and this time select Docker Interpreter. PyCharm will guide you through selecting the Docker container with the correct environment.
Using Docker Compose follows similar steps but involves specifying the YAML file for the Docker Compose setup.
For WSL, choose WSL Interpreter after hitting the gear icon. PyCharm will fetch the list of interpreters available in your WSL environment.
In the case of Vagrant, select Vagrant. Ensure your Vagrant box is running and configured; PyCharm will connect to it and use the specified Python interpreter.
Installing Python for Interpreter Setup
Ensuring Python is set up correctly is crucial.
Importance of ensuring Python is installed
Before configuring any interpreter, ensuring that the Python installation on your system is intact is critical. Without it, settings may fail or behave unpredictably.
Command-line techniques to locate the Python executable path
Open a terminal or command prompt. Use the command python --version or python3 --version to check Python’s presence. To find the executable path, type which python or which python3 on macOS/Linux, or where python on Windows. This path is necessary for pointing PyCharm to the correct Python executable when setting up new interpreters.
Managing Existing Interpreters
Modifying Interpreter Settings
Changing interpreter paths or names
Access File > Settings (or PyCharm > Preferences on macOS). Navigate to Project: [Your Project Name] > Python Interpreter. Click the gear icon next to your current interpreter and select Show All….
From the list, choose your interpreter and click the pen icon to edit its name or path. Adjust the settings to reflect new paths if the Python executable has moved or been renamed.
Associating interpreters with specific projects
To tie specific interpreters to your projects, go to the same Project: [Name] > Python Interpreter. Use the gear icon to add or select an interpreter explicitly for a given project.
This ensures consistency and avoids conflicts, especially when sharing projects across different development environments. Always check the interpreter settings after importing or cloning project repositories to confirm they align with the project requirements.
Removing Unnecessary Interpreters
Steps to remove an interpreter from the project
Open File > Settings (or PyCharm > Preferences on macOS). In Project: [Your Project Name] > Python Interpreter, click the gear icon and choose Show All….
Select the interpreter you wish to remove and click the minus icon. Confirm the removal, ensuring you’re not actively using it in any project settings.
Avoiding clutter with multiple unused interpreters
Regularly inspect your list of configured interpreters. Delete those no longer in use by repeating the steps above. This keeps your environment clean and minimizes confusion. Too many unused interpreters can lead to unnecessary complexity and potential errors.
Keeping your interpreter list minimal makes switching and configuring environments easier and more efficient. By managing your settings properly, you’ll streamline your Python projects effectively and avoid complications.
Configuring Default and Multiple Interpreters
Setting a Default Interpreter
Specifying default settings for new projects
Open up File > Settings (or PyCharm > Preferences on macOS). Look for Project Defaults on the left pane. Click on Project Interpreter.
Click the gear icon next to the interpreter field. Select Add and choose your preferred interpreter type: Virtualenv, Conda, System Interpreter, etc.
This interpreter will now be pre-configured for any new project you create. This is essential for maintaining consistency across projects without having to manually set up the interpreter each time.
Automatically applying default interpreters for certain configurations
For more automated setups, tweak version control settings and ensure your interpreter aligns with project-specific requirements.
Use pyenv or similar tools for managing different Python versions seamlessly. This ensures your default interpreter automatically adapts based on the project’s base interpreter configuration.
Working with Multiple Projects and Interpreters
Opening multiple projects with different interpreters simultaneously
Launching multiple projects with varying interpreters can be tricky. From File > Open, select another project directory. When prompted, choose Open in New Window.
Each window will have its own set of interpreters. Use the bottom-right corner interpreter selector to switch interpreters for each project window.
This is handy when juggling between projects requiring unique setups, like one using Virtualenv and another using Conda.
Managing memory allocation and independence across projects
Multiple projects running in different windows can be resource-intensive. Ensure you have sufficient memory allocation. Close unnecessary tabs and disable plugins not in use.
Use dockerized environments to isolate project dependencies effectively. Each container can run its own interpreter setup, ensuring full independence across projects.
Advanced Features and Customization
Managing Packages in Interpreters
Installing, upgrading, and removing packages using pip and conda
Managing packages is crucial. Open File > Settings (or PyCharm > Preferences on macOS). Navigate to Project: [Your Project Name] > Python Interpreter.
Here, you can see a list of installed packages. For pip users, to install a package, click the + icon, search for it, and hit Install Package. To upgrade, select the package and click the Upgrade icon. Removing follows similar clicks—just hit the – icon.
Using conda? The process is almost identical. Set your interpreter to a Conda environment, and PyCharm will manage package installations via Conda.
Using the Python Packages tool window for enhanced package management
For more graphical management, the Python Packages tool window is your friend. It simplifies package tasks with a clear GUI. Open this via View > Tool Windows > Python Packages.
From here, search, install, update, and remove packages with ease. Whether you’re managing TensorFlow for AI or Pandas for data science, it’s streamlined and efficient.
Customization Options for Specialized Development
Adapting interpreters for AI/ML, data science, and other frameworks
Specialized fields require tailored configurations. For AI/ML development, configure your interpreter with necessary libraries pre-installed. Use the conda environment for packages like TensorFlow, PyTorch, and scikit-learn.
Data science projects? Ensure interpreters include NumPy, Pandas, and Matplotlib. Configure virtual environments specific to the needs of your framework to avoid conflicts and ensure smooth development.
Leveraging PyCharm Professional’s advanced remote configurations
PyCharm Professional adds depth with remote configurations. Whether connecting to a Docker container, SSH server, or using WSL, the pro version extends possibilities.
Launch File > Settings or Preferences, then go to Project: [Your Project Name] > Python Interpreter. Use the gear icon to add remote interpreters, enhancing flexibility and environment management.
Such configurations allow running heavy computations on remote servers, ensuring your local machine stays responsive. Perfect for data science, AI projects, and simultaneous development.
What is the process for adding a Python interpreter in PyCharm?
To add a Python interpreter in PyCharm, go to Settings/Preferences > Project > Python Interpreter.
Click the gear icon, select Add, and choose your interpreter type—Virtualenv, Conda, System Interpreter, or custom. Follow the prompts to complete the setup. This will configure the IDE for your Python projects.
Can I use a virtual environment in PyCharm?
Yes, you can use a virtual environment like Virtualenv or Conda in PyCharm. Navigate to Settings/Preferences > Project > Python Interpreter, click the gear icon, and select Add.
Choose Virtualenv Environment or Conda Environment. This method isolates dependencies per project, ensuring a clean development setup.
How do I change the Python interpreter for an existing project in PyCharm?
To change the interpreter for an existing project, go to Settings/Preferences > Project > Python Interpreter.
Click the gear icon, choose Show All, select your preferred interpreter, and apply the changes. This updates the Python path for your project, ensuring it uses the specified environment.
What should I do if PyCharm can’t find my Python interpreter?
If PyCharm can’t find your Python interpreter, check that Python is correctly installed and the paths are set up.
Verify the interpreter path in Settings/Preferences > Project > Python Interpreter. If issues persist, try reinstalling PyCharm or the interpreter itself to resolve any configuration problems.
How do I add a system interpreter in PyCharm?
To add a system interpreter, go to Settings/Preferences > Project > Python Interpreter. Click the gear icon and choose Add.
Select System Interpreter and specify the path where Python is installed on your system. Confirm and apply the settings to integrate the system interpreter into your PyCharm environment.
Is it possible to add multiple Python interpreters in PyCharm?
Absolutely. You can add multiple Python interpreters by navigating to Settings/Preferences > Project > Python Interpreter.
Click the gear icon, select Show All, and add as many interpreters as needed. This flexibility allows you to switch between different environments for various projects seamlessly.
How do I set up a Conda environment in PyCharm?
To set up a Conda environment, go to Settings/Preferences > Project > Python Interpreter. Click the gear icon and select Add.
Choose Conda Environment, specify the path to your Conda installation, and create a new environment. This will enable you to manage packages and dependencies efficiently within PyCharm.
Can I use PyEnv with PyCharm?
Yes, PyCharm supports PyEnv. Go to Settings/Preferences > Project > Python Interpreter, click the gear icon, and select Add.
Choose Python from PyEnv and follow the prompts to integrate a PyEnv-managed interpreter into your PyCharm environment. This allows version management and seamless interpreter switch.
How do I manage Python packages within PyCharm?
To manage Python packages in PyCharm, go to Settings/Preferences > Project > Python Interpreter. Select the interpreter, click the plus icon, and search for packages via the integrated package manager.
Install, update, or remove packages as needed. This streamlines dependency management directly within the IDE.
For interpreter-related issues, ensure the Python path is correct. Check Settings/Preferences > Project > Python Interpreter and verify the configured interpreter.
Reinstall the interpreter and PyCharm if issues persist. Review environment variables, interpreter paths, and virtual environment configurations to troubleshoot effectively.
Conclusion
Understanding how to add a Python interpreter in PyCharm is crucial for any Python developer. In this guide, we’ve covered the step-by-step process of configuring your Python interpreter, from accessing the Settings/Preferences to selecting the appropriate interpreter type—whether it’s a system interpreter, virtual environment, or Conda environment.
- Configurations: We explored configuring settings and checking paths to ensure your PyCharm environment recognizes the interpreter.
- Virtual Environments: You learned how to integrate Virtualenv and Conda to manage dependencies.
- Troubleshooting: We addressed common issues and offered solutions for when PyCharm can’t locate the interpreter.
By following these steps, you’ll have a streamlined and efficient setup for your Python projects within PyCharm. Whether you’re managing Python packages, switching between multiple interpreters, or dealing with environment configurations, this guide equips you with the necessary tools and insights. Optimize your development workflow today by mastering these PyCharm configurations.
If you liked this article about how to add Python interpreter in PyCharm, you should check out this article about how to use PyCharm.
There are also similar articles discussing how to update PyCharm, how to install numpy in PyCharm, how to run code in PyCharm, and how to install packages in PyCharm.
And let’s not forget about articles on how to install PyCharm on windows, how to install PyCharm on linux, how to install pandas in PyCharm, and how to setup PyCharm.
- Author
- Recent Posts
Bogdan is a seasoned web designer and tech strategist, with a keen eye on emerging industry trends.
With over a decade in the tech field, Bogdan blends technical expertise with insights on business innovation in technology.
A regular contributor to TMS Outsource’s blog, where you’ll find sharp analyses on software development, tech business strategies, and global tech dynamics.
Пройдите тест, узнайте какой профессии подходите
Работать самостоятельно и не зависеть от других
Работать в команде и рассчитывать на помощь коллег
Организовывать и контролировать процесс работы
Введение
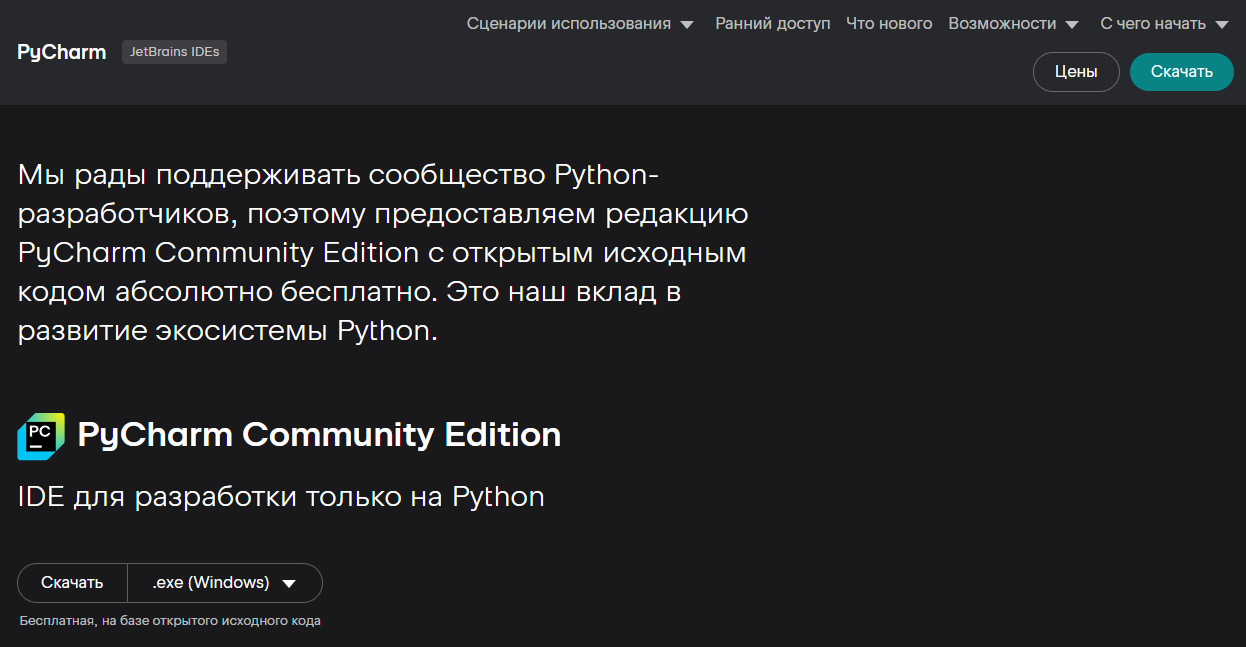
PyCharm — одна из самых популярных интегрированных сред разработки (IDE) для Python. Она предлагает множество функций, которые облегчают написание, тестирование и отладку кода. В этой статье рассмотрим, как установить и настроить PyCharm для разработки на Python. Мы пройдем через все этапы, начиная от скачивания и установки, до настройки интерпретатора и создания первого проекта.

Скачивание и установка PyCharm
Шаг 1: Скачивание PyCharm
Для начала нужно скачать PyCharm с официального сайта JetBrains. Перейдите по ссылке jetbrains.com/pycharm/download и выберите версию, подходящую для вашей операционной системы (Windows, macOS или Linux). PyCharm доступен в двух версиях: Community (бесплатная) и Professional (платная). Для большинства задач начального уровня достаточно версии Community.
Шаг 2: Установка PyCharm
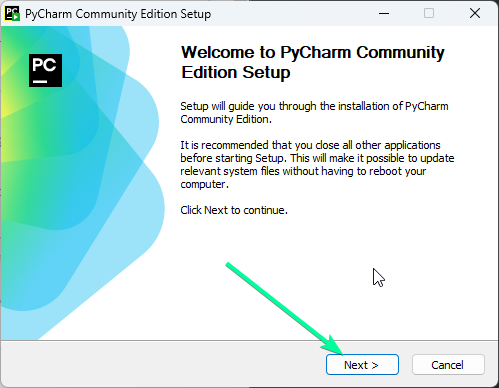
После скачивания установочного файла, выполните следующие шаги:
-
Windows:
– Дважды щелкните на скачанный файл.exe.
– Следуйте инструкциям мастера установки.
– Выберите опции, такие как создание ярлыков и ассоциация файлов.pyс PyCharm.
– Нажмите «Install» и дождитесь завершения установки. Установка может занять несколько минут в зависимости от производительности вашего компьютера. -
macOS:
– Откройте скачанный.dmgфайл.
– Перетащите иконку PyCharm в папку «Applications». Это стандартный способ установки приложений на macOS, который обеспечивает их правильную интеграцию в систему. -
Linux:
– Распакуйте скачанный.tar.gzархив.
– Откройте терминал и перейдите в распакованную папку.
– Выполните команду./bin/pycharm.sh. Это запустит PyCharm, и вы сможете создать ярлык для удобного запуска в будущем.
Первоначальная настройка PyCharm
Шаг 1: Запуск PyCharm
После установки запустите PyCharm. При первом запуске вам предложат импортировать настройки из предыдущих версий или начать с нуля. Выберите «Do not import settings» и нажмите «OK». Это позволит вам начать с чистого листа и настроить PyCharm под свои нужды.
Шаг 2: Настройка интерфейса
PyCharm предложит настроить интерфейс под ваши предпочтения:
- Тема: выберите светлую или темную тему. Темная тема может быть более комфортной для глаз при длительной работе.
- Плагины: установите дополнительные плагины, если они вам нужны. Например, плагины для работы с базами данных, веб-разработки или интеграции с системами контроля версий.
Шаг 3: Создание нового проекта
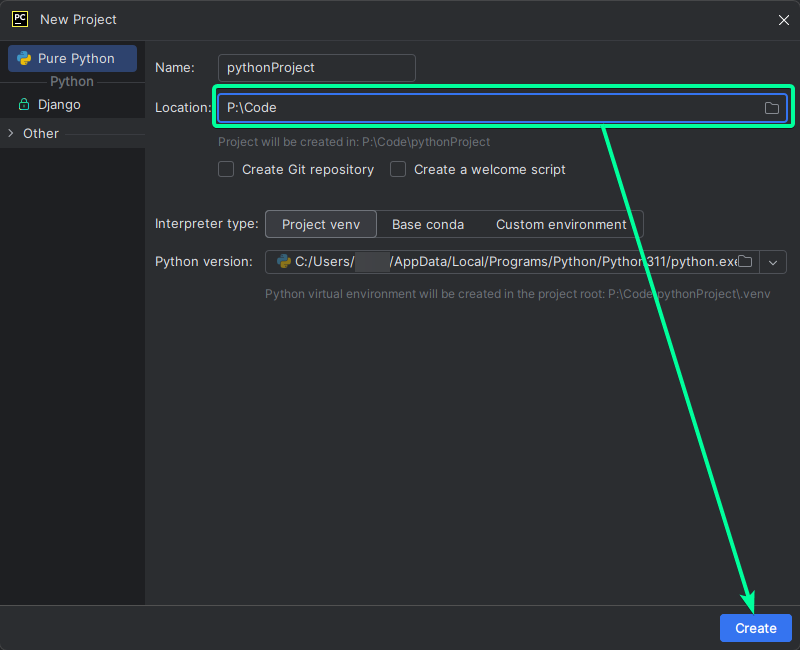
Для создания нового проекта:
- Нажмите «Create New Project».
- Выберите расположение проекта. Это может быть любая папка на вашем компьютере.
- Убедитесь, что выбран правильный интерпретатор Python. PyCharm автоматически найдет установленные версии Python, но вы можете указать путь вручную.
- Нажмите «Create». PyCharm создаст структуру проекта и откроет его в основном окне.
Настройка интерпретатора Python
Шаг 1: Проверка интерпретатора
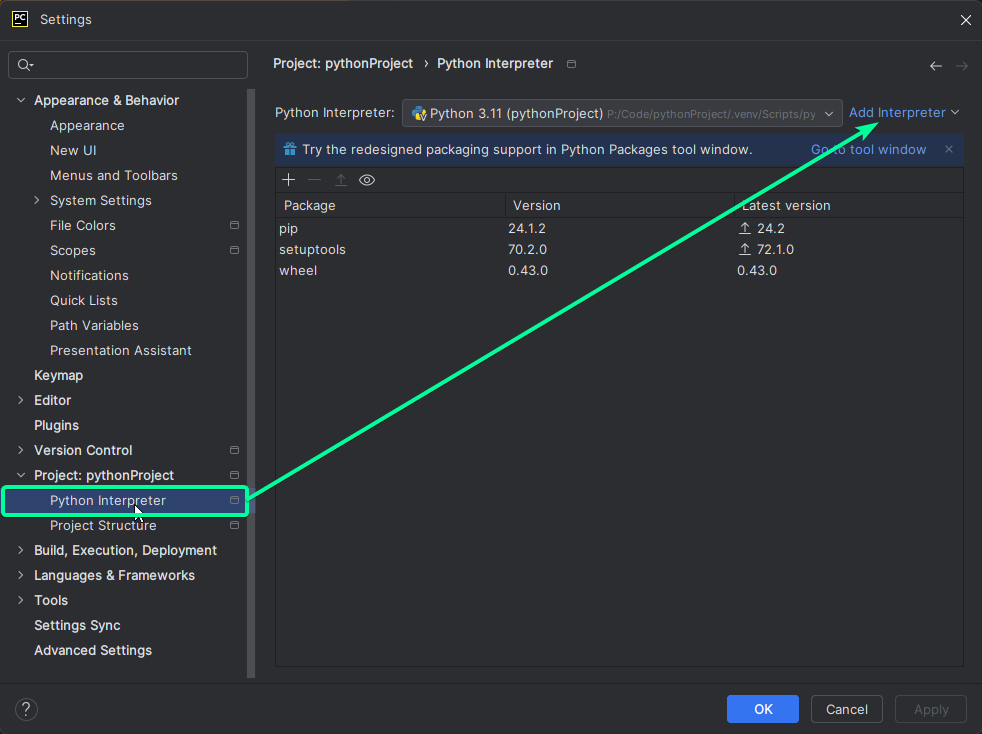
После создания проекта убедитесь, что PyCharm правильно настроил интерпретатор Python. Для этого:
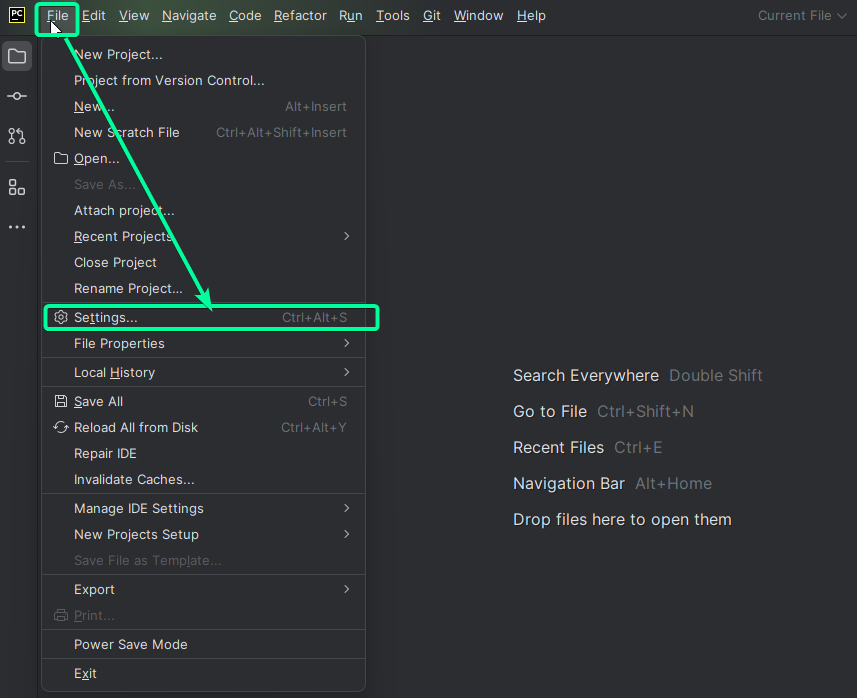
- Перейдите в «File» -> «Settings» (или «PyCharm» -> «Preferences» на macOS).
- В разделе «Project: [имя проекта]» выберите «Python Interpreter».
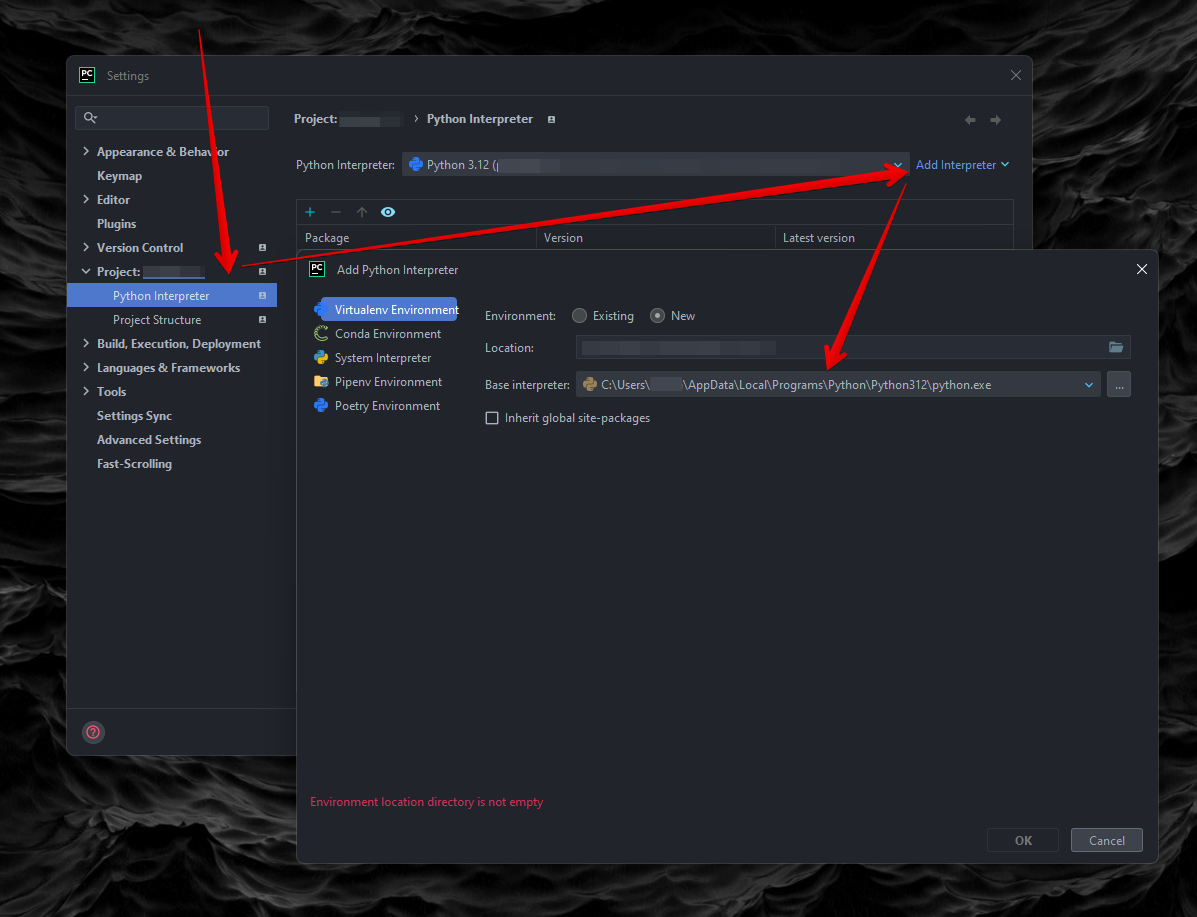
- Убедитесь, что выбран правильный интерпретатор. Если нет, нажмите на шестеренку и выберите «Add». Правильный интерпретатор важен для корректной работы вашего проекта.
Шаг 2: Добавление интерпретатора
Если интерпретатор не был найден автоматически:
- Нажмите «Add Interpreter».
- Выберите «System Interpreter» или «Virtualenv».
- Укажите путь к интерпретатору Python (например,
/usr/bin/python3для Linux илиC:\Python39\python.exeдля Windows). Это позволит PyCharm использовать нужную версию Python для выполнения вашего кода.
Создание и настройка первого проекта
Шаг 1: Создание проекта
Для создания нового проекта:
- Нажмите «File» -> «New Project».
- Укажите имя и расположение проекта. Это может быть любая папка на вашем компьютере.
- Выберите интерпретатор Python. Убедитесь, что выбран правильный интерпретатор, чтобы избежать проблем с зависимостями.
- Нажмите «Create». PyCharm создаст структуру проекта и откроет его в основном окне.
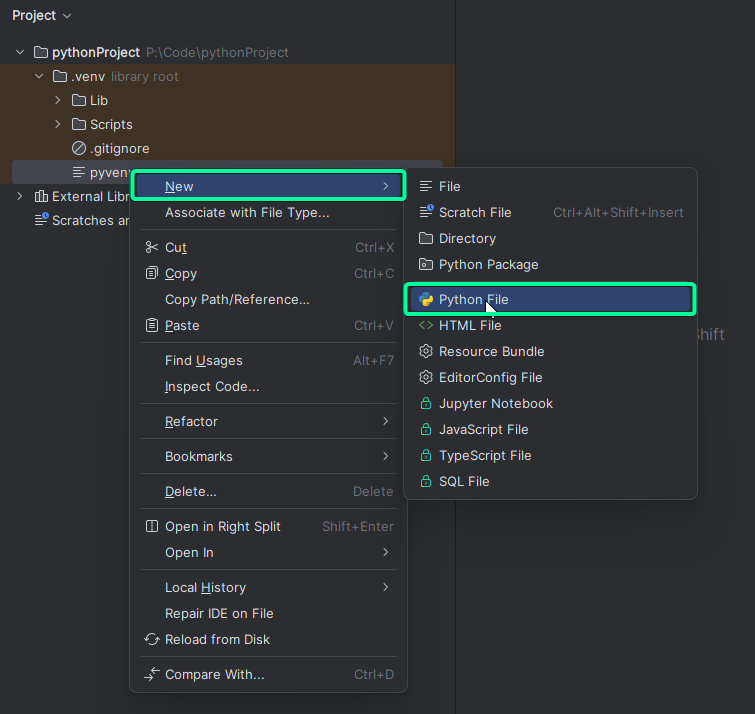
Шаг 2: Создание первого файла
Для создания нового файла:
- Щелкните правой кнопкой мыши на папке проекта в панели слева.
- Выберите «New» -> «Python File».
- Укажите имя файла и нажмите «Enter». Например, можно назвать файл
main.py.
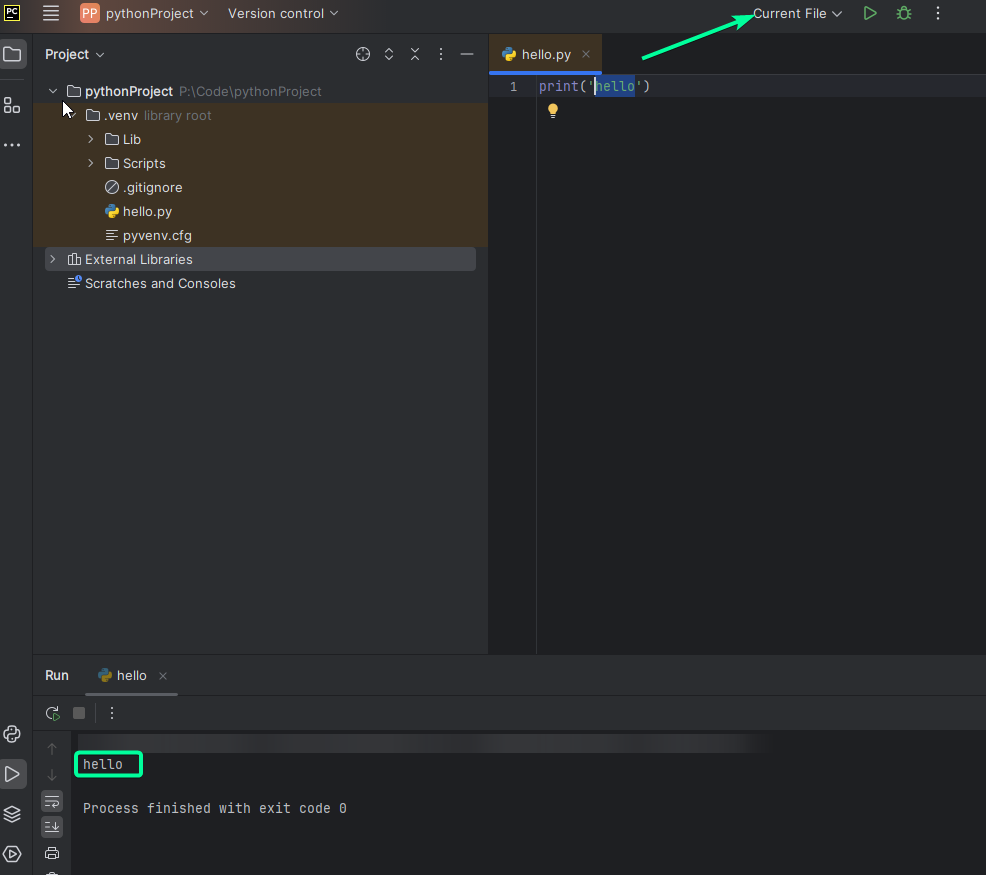
Шаг 3: Написание и запуск кода
Напишите простой код, например:
Для запуска кода нажмите правой кнопкой мыши на файле и выберите «Run ‘имя файла'». Вы увидите результат выполнения кода в нижней панели.
Шаг 4: Настройка виртуального окружения
Для управления зависимостями проекта рекомендуется использовать виртуальное окружение:
- Перейдите в «File» -> «Settings» -> «Project: [имя проекта]» -> «Python Interpreter».
- Нажмите на шестеренку и выберите «Add».
- Выберите «Virtualenv Environment» и укажите расположение окружения. Виртуальное окружение позволяет изолировать зависимости проекта, что делает его более управляемым.
- Нажмите «OK». PyCharm создаст виртуальное окружение и настроит его для использования в проекте.
Теперь вы готовы к разработке на Python в PyCharm! 🎉 PyCharm предоставляет множество инструментов для повышения вашей продуктивности, включая автодополнение кода, рефакторинг, интеграцию с системами контроля версий и многое другое.
Читайте также
Что такое PyCharm и почему его выбирают разработчики Python
PyCharm – это интегрированная среда разработки (IDE) для языка программирования Python, созданная компанией JetBrains. Она поддерживает широкий спектр функций, таких как автодополнение кода, отладка, тестирование и работа с системами контроля версий. PyCharm выбирают за его удобство, функциональность и поддержку различных фреймворков и технологий, что делает его идеальным инструментом для начинающих и профессиональных разработчиков.
Для установки PyCharm вам понадобится современный компьютер с операционной системой Windows, macOS или Linux. Рекомендуется иметь не менее 8 ГБ оперативной памяти и использовать SSD для лучшей производительности. PyCharm поддерживает Python версии 2.7 и 3.5 и выше. Перед установкой убедитесь, что у вас достаточно места на диске – около 2.5 ГБ.
Пошаговая инструкция по установке PyCharm на Windows, macOS и Linux
Перейдите на официальный сайт JetBrains и скачайте установочный файл для вашей операционной системы.
Запустите установочный файл и следуйте инструкциям мастера установки.
Установка на Windows
На Windows выберите все необходимые опции и нажмите Next, затем Install.
Обязательно поставьте галочки на:
- Create Assosiations
- Add «bin» folder to the PATH
Нажмите на Next и завершите установку.
Установка на MacOS
На macOS переместите .dmg-файл PyCharm в папку Applications. Нажмите на появившийся ярлык PyCharm и начните установку.
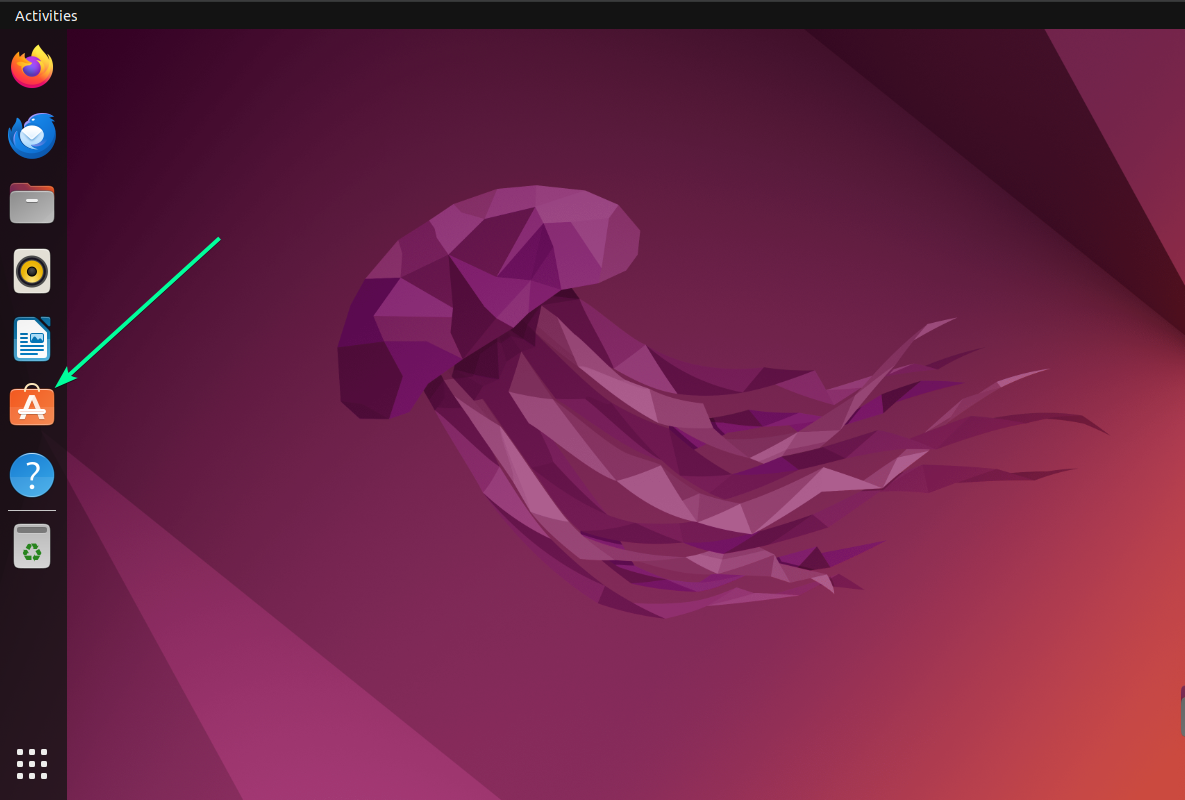
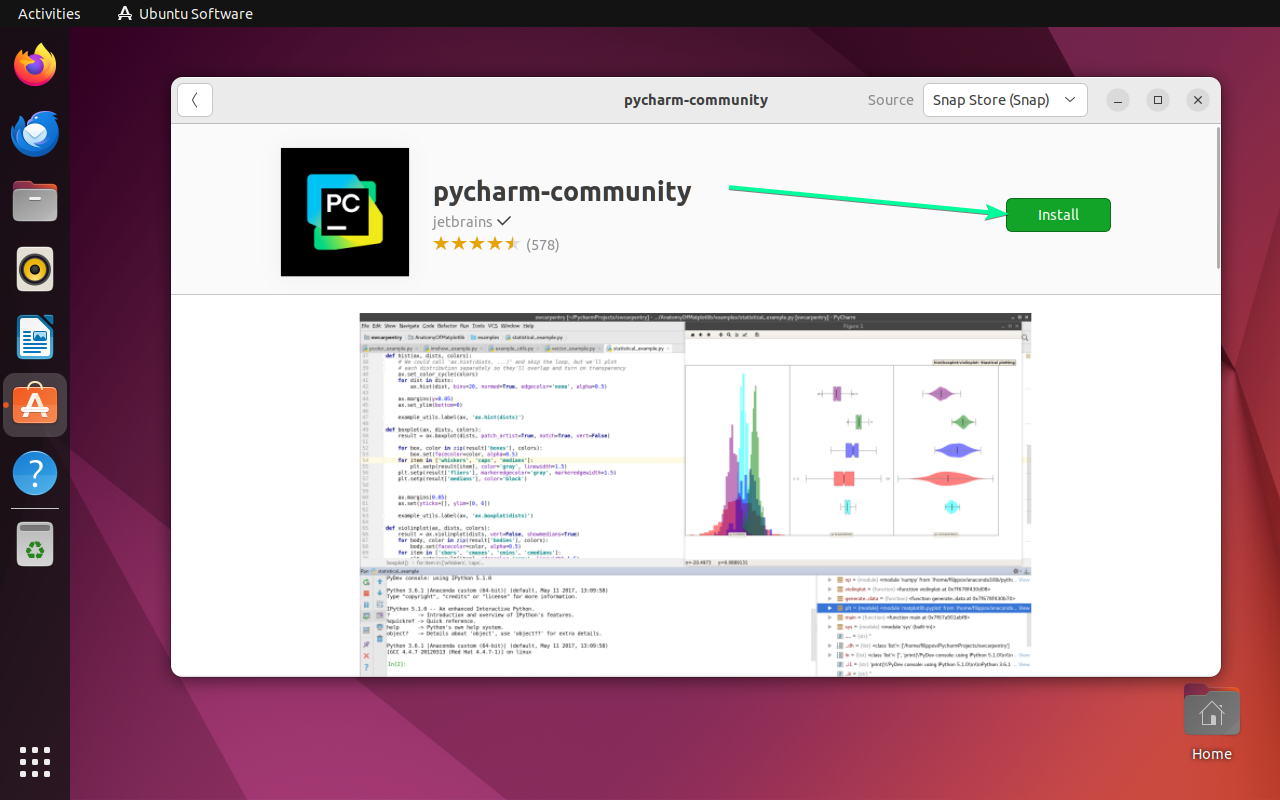
Установка на Ubuntu
На Ubuntu откройте Ubuntu Software.
В поисковом поле введите pycahrm и выберите pycharm-community.
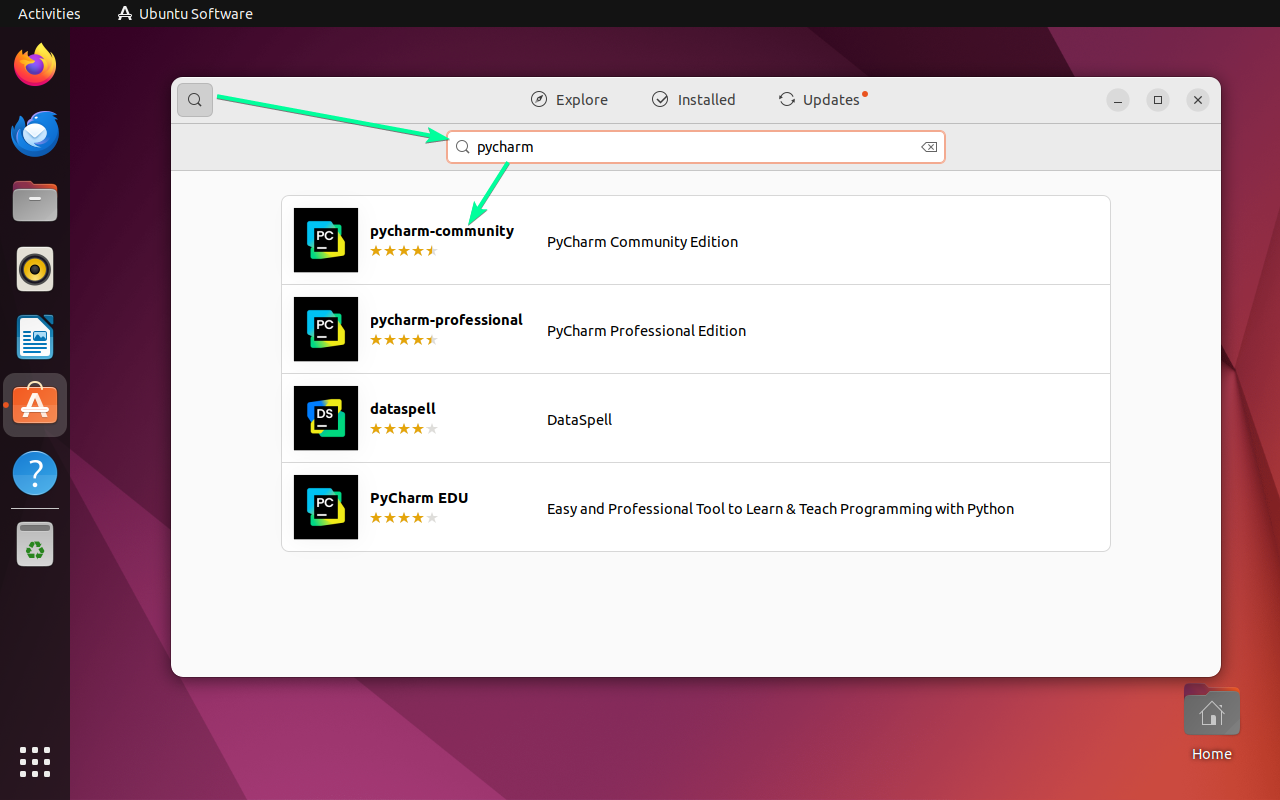
Для установки PyCharm нажмите на кнопку Install.
Настройка PyCharm: интерфейс, тема и шрифты
После установки PyCharm запустите программу и перейдите в раздел Customize на стартовом экране. Здесь можно выбрать тему оформления (светлая или темная), настроить размер шрифта и другие параметры интерфейса. Для изменения шрифтов и цветовой схемы перейдите в File → Settings
Затем → Editor → Font для настройки шрифта
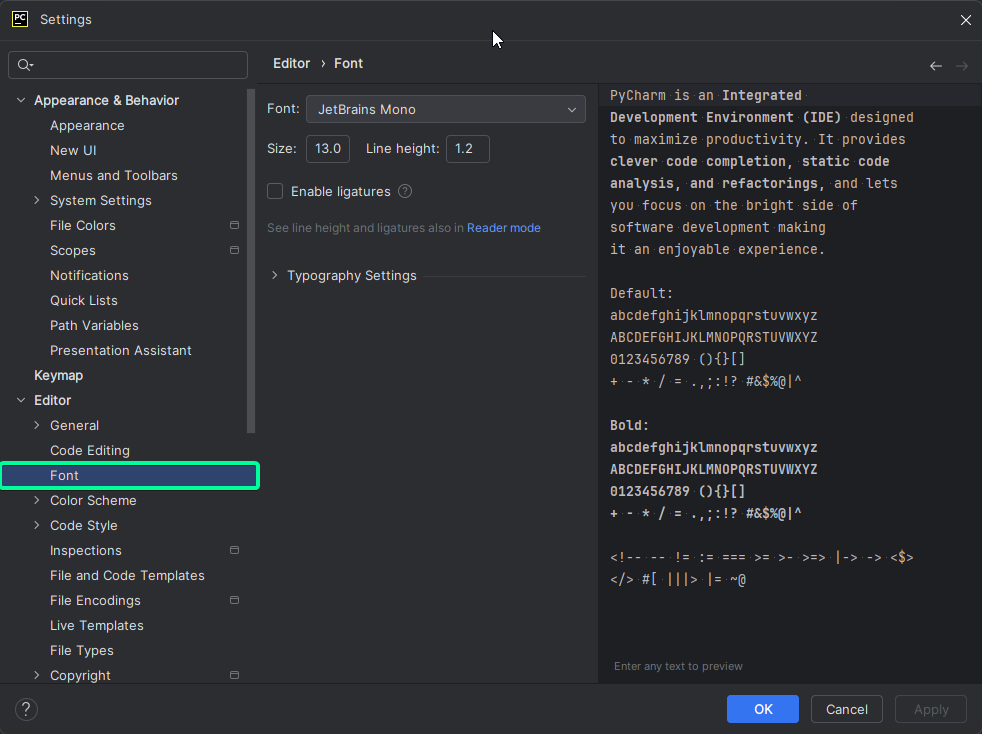
и File → Settings → Editor → Color Scheme для настройки цветовой схемы.

Создание первого проекта в PyCharm: от идеи до запуска
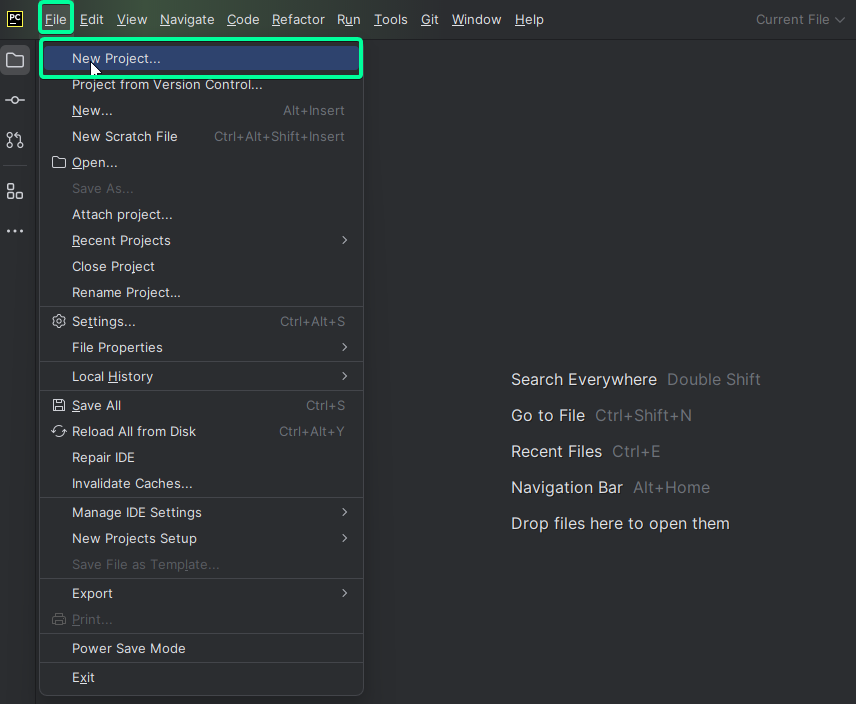
Для создания нового проекта откройте PyCharm и нажмите New Project. Выберите директорию для проекта и настройте виртуальную среду. В поле Location укажите путь к папке проекта. Нажмите Create, чтобы создать проект.
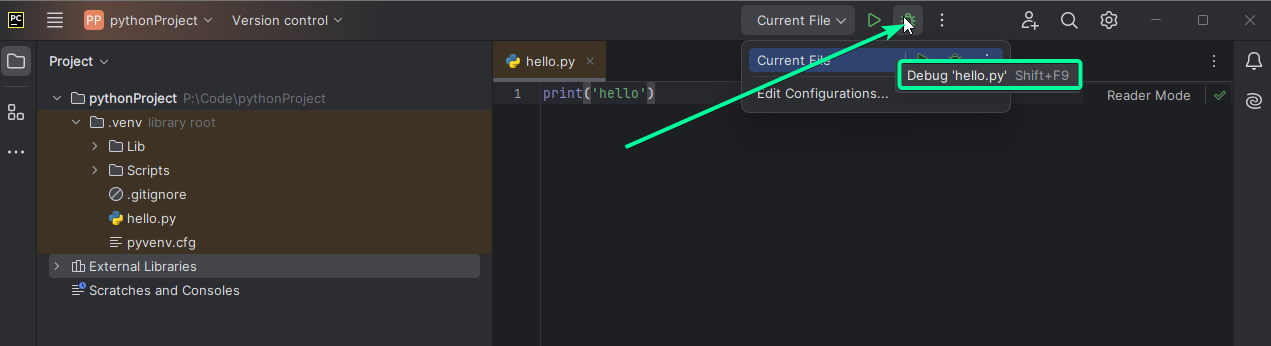
Внутри проекта создайте новый Python файл hello.py, щелкнув правой кнопкой мыши по корневой папке и выбрав New → Python File.
Напишите print('hello') и запустите код, нажав Run (Shift + F10).
Подключение и настройка интерпретатора Python в PyCharm
При первом запуске PyCharm предложит выбрать интерпретатор Python. Если этого не произошло, перейдите в File → Settings → Project → Project Interpreter. Нажмите на Add Interpreter. Укажите путь к установленному интерпретатору Python и нажмите OK.
Основные функции PyCharm для эффективной разработки на Python
PyCharm предлагает множество функций для разработки: автодополнение кода, подсветка синтаксиса, встроенный терминал, отладчик, инструменты для работы с Git. Среда также поддерживает работу с виртуальными окружениями и имеет встроенные инструменты для тестирования и рефакторинга кода.
🐍🎓 Библиотека Python для собеса
🐍🧩 Библиотека задач по Python
Отладка кода в PyCharm: инструменты и техники
Для отладки кода в PyCharm установите точки останова (breakpoints) напротив строк кода. Запустите отладку, нажав на значок жука или комбинацию клавиш Shift + F9. В режиме отладки можно пошагово выполнять код, следить за значениями переменных и анализировать выполнение программы.
Работа с системами контроля версий (Git) в PyCharm

PyCharm поддерживает интеграцию с Git и другими системами контроля версий. Для настройки Git перейдите в File → Settings → Version Control → Git. Здесь можно указать путь к исполняемому файлу Git и настроить параметры работы. Основные действия с Git (коммиты, пуши, пуллы) можно выполнять прямо из интерфейса PyCharm.
Установка и использование плагинов для расширения возможностей PyCharm
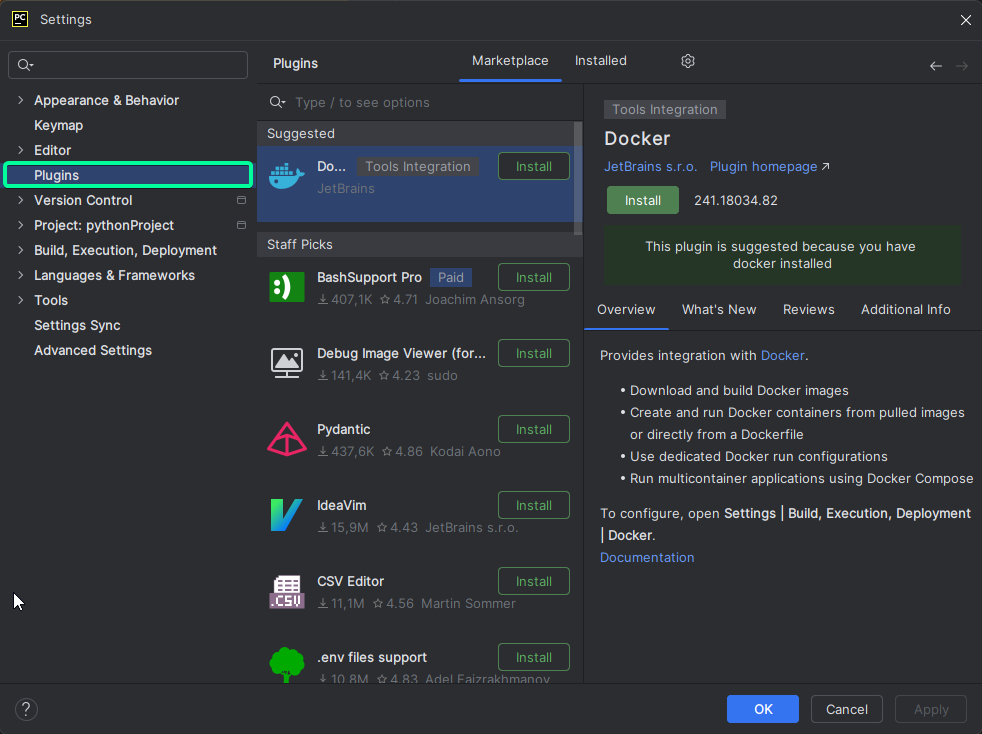
Для установки плагинов откройте File → Settings → Plugins. В строке поиска введите название плагина и нажмите Install. Популярные плагины включают Tabnine для автодополнения, Rainbow Brackets для подсветки скобок и GitToolBox для расширенной работы с Git.
PyCharm для веб-разработки: поддержка фреймворков и инструментов
PyCharm поддерживает популярные веб-фреймворки, такие как Django, Flask и FastAPI. Для настройки проекта с Django выберите соответствующий шаблон при создании нового проекта. PyCharm автоматически настроит окружение и установит необходимые зависимости (только в платной версии).
Сравнение бесплатной (Community) и платной (Professional) версий PyCharm
PyCharm Community Edition бесплатна и подходит для большинства задач, связанных с разработкой на Python. Professional Edition предлагает дополнительные функции, такие как поддержка веб-технологий (HTML, CSS, JavaScript), работа с базами данных и инструменты для совместной разработки.
Горячие клавиши PyCharm: ускорение работы и повышение продуктивности
Изучение горячих клавиш PyCharm поможет ускорить работу. Некоторые полезные комбинации:
- Shift + F10 для запуска кода
- Shift + F9 для отладки
- Ctrl + D для дублирования строки
- Ctrl + / для комментирования
Полный список горячих клавиш можно найти в документации PyCharm.
Интеграция PyCharm с другими инструментами разработки
PyCharm легко интегрируется с другими инструментами разработки, такими как Docker, Vagrant и различные CI/CD системы. Для настройки интеграции перейдите в File → Settings → Plugins и установите необходимые плагины. PyCharm также поддерживает работу с удаленными серверами и базами данных.
Как добавить интерпретатор в PyCharm?
-
Вопрос задан
-
7925 просмотров
Комментировать
Подписаться
1
Простой
Комментировать
Решения вопроса 1
@Mike_Ro
Python, JS, WordPress, SEO, Bots, Adversting
1. Перейти в проект $ cd path/to/project (для win $ cd /d path/to/project).
2. Поставить изолированную среду, выполнив $ python -m venv venv.
3. Указать в настройках PyCharm, где обитает файл с Python Interpreter: File | Settings | Project: your_project | Python Interpreter | Add Interpreter | Add Local Interpreter.
Скрин из под винды:
Пригласить эксперта
Ваш ответ на вопрос
Войдите, чтобы написать ответ
Похожие вопросы
-
Показать ещё
Загружается…
Минуточку внимания
This article will tell you how to install a python interpreter in the PyCharm project. Before start, you should make sure you had installed python on your system.
1. How To Install Python Interpreter In PyCharm.
1.1 On macOS.
- Open PyCharm IDE, I use PyCharm community edition with Anaconda plugin.
- Then click the PyCharm —> Preferences… menu item ( macOS) or Window —> Preferences menu item ( Windows OS ).
- In the popup Preferences window, click Project: Project-Name —> Project Interpreter menu item at the left panel. Then you can see there is no Project Interpreter that has been selected on the right panel.
- Click the Project Interpreter drop-down list on the right panel, then click Show All… item, it will pop up the Project Interpreters dialog window.
- There is a default PyCharm python interpreter in the dialog. You can select it as the project python interpreter.
- If you want to install another Python interpreter, you can click the plus button ( + ) at the bottom left corner of the Project Interpreters popup dialog window.
- Then it will popup Add Python Interpreter window. There list 4 types of python interpreters on the window left side, they are Virtualenv Environment, Conda Environment, System Interpreter, Pipenv Environment. You can select the python interpreter type from the left pane as you need.
- After you select one python interpreter in PyCharm, it will list all the modules package and version information that has been installed in that interpreter in the Preferences window, you can code and run your python program with that python interpreter.
1.2 On Windows.
- It is similar to macOS, the difference is that you should click the PyCharm File —> Settings… menu item to open the Settings dialog.
- The Settings dialog is the same as the Preferences dialog on macOS.
- Now you can follow steps 3 – 8 of section 1.1 On macOS to install the Python interpreter.