
Содержание статьи:
- Инструменты для добавления часиков на раб. стол
- Вариант 1
- Вариант 2
- Вариант 3
- Вопросы и ответы: 4
Народный гнев в комментариях
Зачем вообще добавлять еще одни часы на рабочий стол?! Ведь в правом нижнем углу и так есть время! Пустая заметка, захламляете систему пользователей…
Всех приветствую!
Специально привел в самом начале заметки (☝️) часть одного комментария (из моей старой статьи по похожей теме / правда, там речь о др. ОС шла). И я с этим утверждением, разумеется, не согласен:
- во-первых, ряд пользователей скрывает панель задач для увел. пространства на раб. столе (особенно при работе за ноутбуком с небольшим экраном). И отдельные часы очень выручают в этом плане!
- во-вторых, не у всех хорошее зрение и мелкие цифры в углу не всегда легко воспринимаются. То ли дело крупный циферблат по центру экрана!
- в-третьих, есть пользователи с тонкой душевной организацией (😉) и желанием изменить как-нибудь классический серо-голубой дизайн во что-то более красивое, приятное, удивляющее. К тому же психологи отмечают, что добавление даже незначительных «улучшений» на раб. месте — положительно может сказываться на настроении!
*
✏️ В общем, кому ненужно — просто проигнорируют материал, а кому нужно — ниже приведу неск. способов, как можно добавить часики к себе на раб. стол (ссылки + примеры настроек в комплекте). Заранее отмечу, что материал актуален для современных ОС Windows 11 (10).
*
Инструменты для добавления часиков на раб. стол
Вариант 1
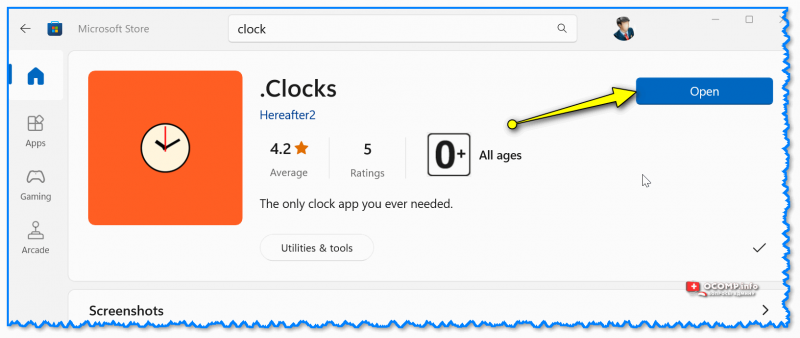
В магазине приложений Microsoft Store (встроен в Windows 11) есть несколько весьма неплохих приложений-часов. Мне импонируют очень простенькие «.Clocks», ссылка на них ниже (рекомендую к тестированию).
✏️ Clocks
Ссылка на Store: https://www.microsoft.com/store/productId/9NQ1TSHFWJG4
Как открыть Microsoft Store: https://ocomp.info/kak-ustanovit-magazin-prilozheniy-v-windows-10-microsoft-store.html
Для установки этих часов нужно нажать по синей кнопке «Get» (установка), а затем «Open» (открыть/запустить).

Установка Clock
👉 После запуска приложения — перед вами появится окно с предложением выбрать вариант циферблата. Есть прямоугольный, круглый, цифровой и т.п. (возле понравившегося есть кнопка «Play ▶« — для начала работы необходимо ее нажать).
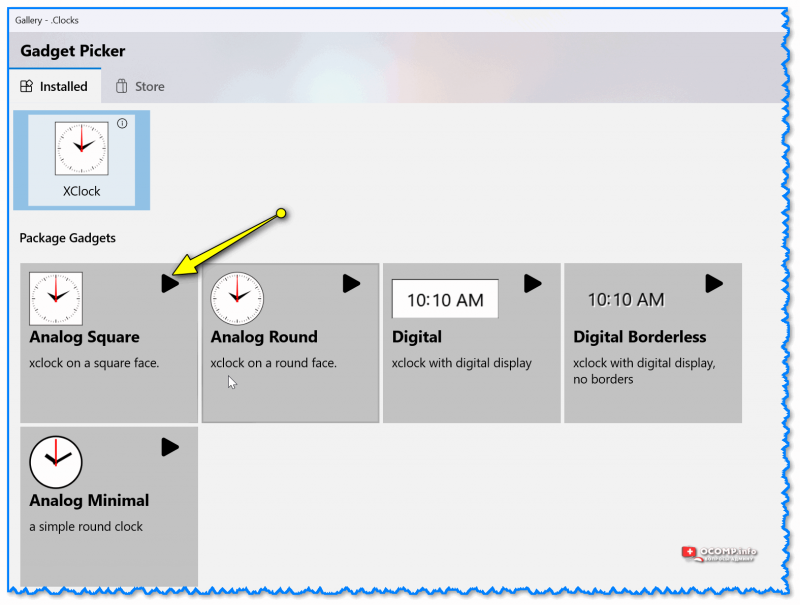
Запуск часиков
Сразу после этого у вас на рабочем столе появится заветный циферблат со временем. В принципе, на этом задача решена?! 😉
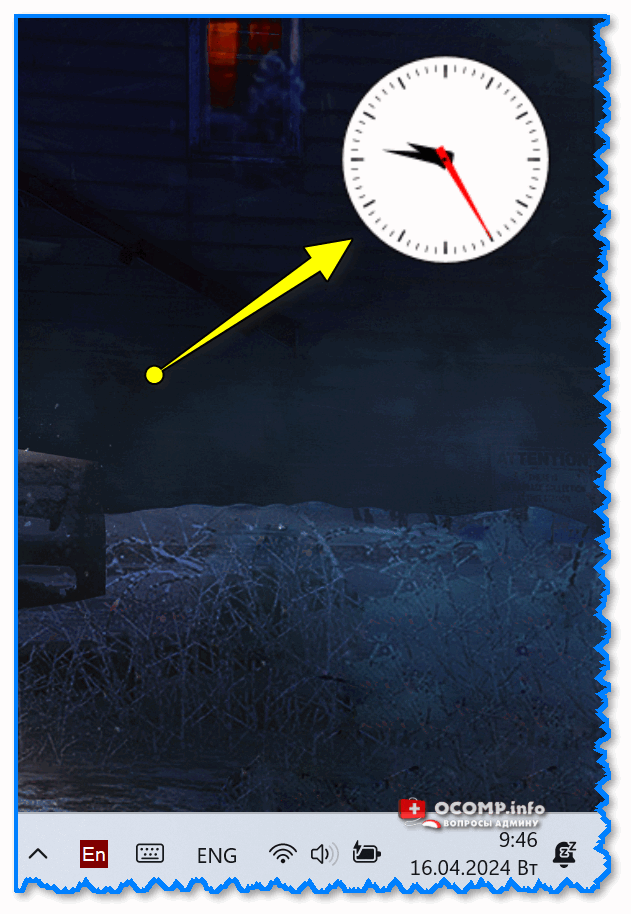
На рабочем столе появился будильник!
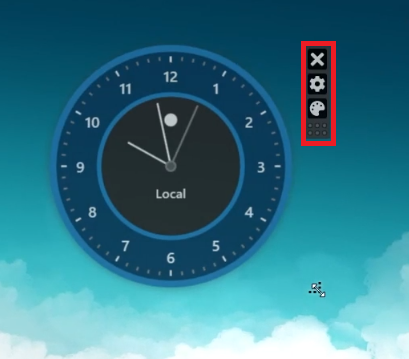
Кстати, если навестись мышкой на часы (и подождать 2-3 сек.) — то появиться спец. меню, с помощью которого можно переместить циферблат на др. место, изменить ряд настроек, да и просто закрыть их…

Если навестись мышкой на часы — появится меню опций
В общем, всё в лучшем стиле минимализма: задача решена, и в то же время нет ничего лишнего… 👌
*
Вариант 2
Store — это, конечно, хорошо, но есть магазин не во всех версиях Windows (да и в самом магазине не так, чтобы уж очень большой выбор бесплатного ПО по этой теме).
И для этих случаев весьма неплохим выбором будут сторонние наборы гаджетов. Одним из лучших (на мой субъективный взгляд) явл. набор 8gadgetpack.net (ссылка на офиц. сайт: ✏️https://8gadgetpack.net/).
Для его установки: необходимо открыть офиц. сайт, загрузить пакет (кнопка Download), и запустить его (установка проходит в обычном режиме, т.е. неск. раз, нажать «Далее»…). Пакет актуален для ОС Windows 7, 8, 10, 11). 👇👇
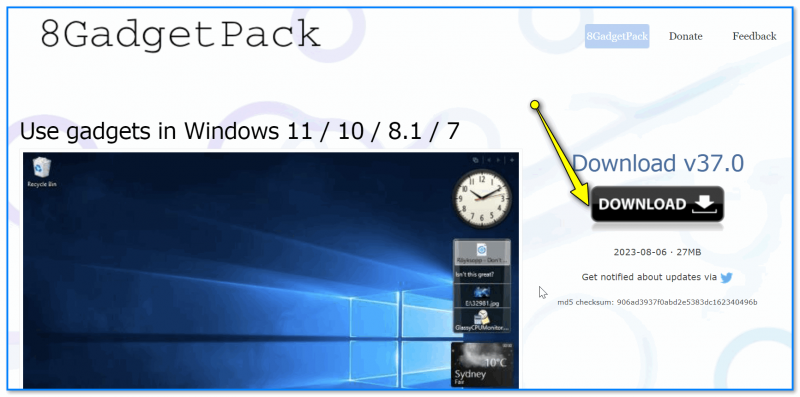
Загрузка и установка 8gadgetpack.net (скрин с офиц. сайта)
После у вас в меню ПУСК появится кнопка для настройки гаджетов (после установки рекомендуется сразу же открыть их).
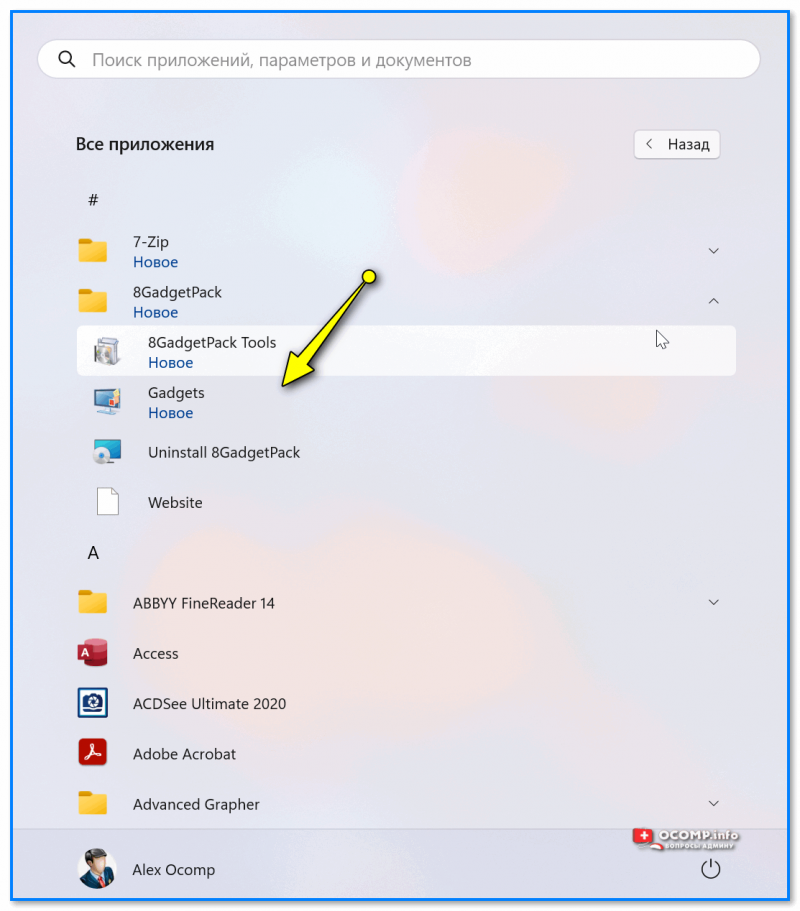
Запускаем новый пакет гаджетов
Пред вами появится целая страница с гаджетами: тут и часы, и погода, и нагрузки на диск, ЦП и т.п. Сделайте двойной клик ЛКМ для тех гаджетов, которые вам нужны!
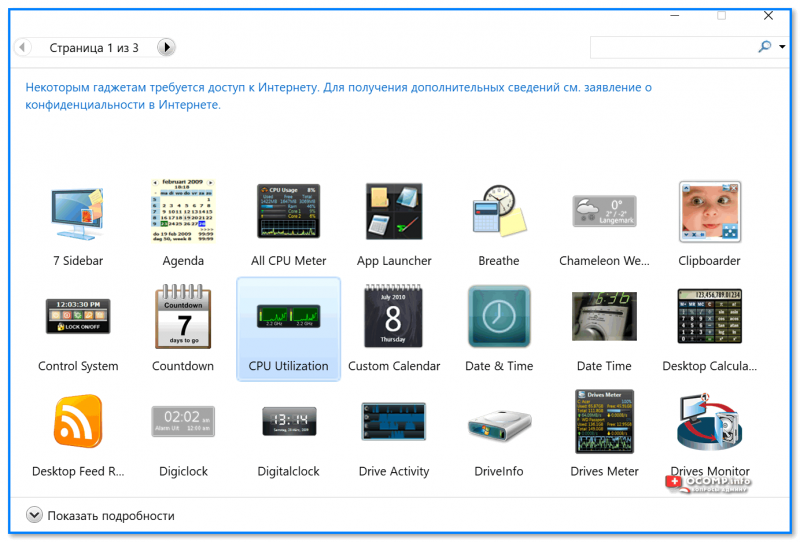
Выбираем нужные гаджеты — их тут 3 страницы
Все добавленные гаджеты появятся на рабочем столе. Например, я добавил календарик и часы (получилось удобно и наглядно! 😉).
Пример — календарь, часы, погода
Кстати, если сделать клик ПКМ (прав. кнопка мыши) по тому или иному элементу гаджетов — то можно открыть меню настроек и изменить их отображение (например, сделать их отобр. поверх остальных окон). Также при помощи ЛКМ можно переместить их в нужное место. В общем, удобно! 👌
Серую полоску можно откл., если войти в настройки через ПКМ
*
Вариант 3
Если с гаджетами возиться нет желания — можно попробовать одну небольшую утилиту TheAeroClock (от немецких разработчиков, в установке не нуждается!).
TheAeroClock
Офиц. сайт: https://www.softwareok.com/?seite=Freeware/TheAeroClock
После ее загрузки и извлечения из архива — нужно только запустить EXE-файл часиков и они тут же появятся на рабочем столе!
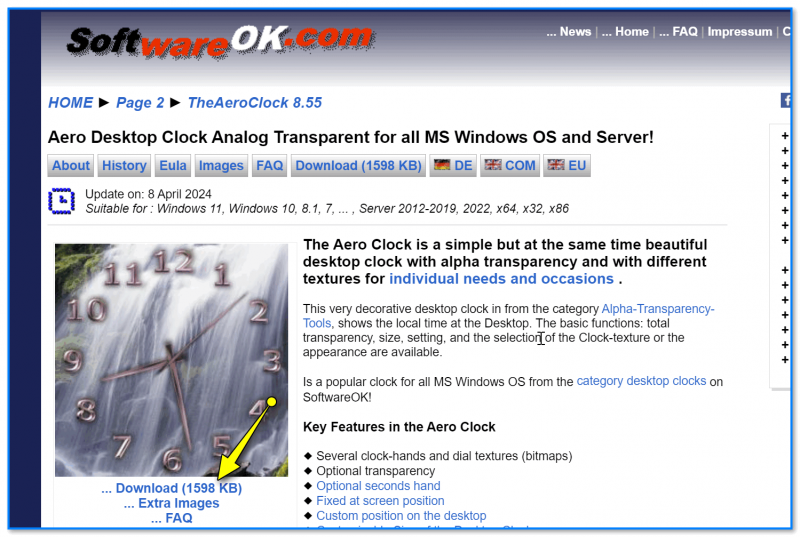
Загрузка TheAeroClock
Чтобы открыть настройки часов — откройте трей и нажмите ПКМ по значку TheAeroClock, а затем откройте настройки этого ПО. См. скрин ниже. 👇
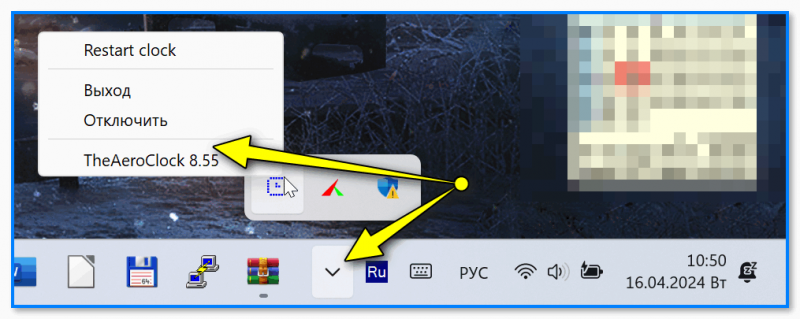
TheAeroClock — в трее будет значок для запуска настроек
Далее можно выбрать тему часов (см. вкладка «Изображения\текстура»), выбрать вариант отображения (поверх всех окон или только на раб. столе // «Only on the desktop»), вкл. секундную стрелку, вкл. запуск вместе с Windows и т.д.
В общем, часики очень удобные и простые (да и работают шустро, без нареканий). Рекомендую к знакомству! 👌😉
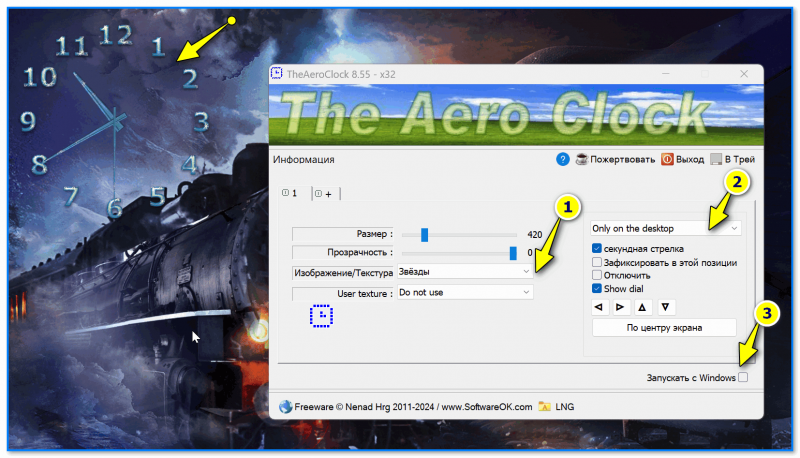
TheAeroClock — скрин часиков и их настроек
*
Если есть какое-нибудь другое интересное ПО для решения текущей задачи — поделитесь пожалуйста им в комментариях (форма ниже).
За сим откланяюсь, удачи!
👋
Introduction
Looking to add a functional and stylish touch to your Windows 11 desktop? This tutorial will guide you through the simple steps of adding a clock widget, a perfect blend of utility and personalization for your computer’s workspace. We’ll use the lightweight and user-friendly ‘Widget Launcher’ app from the Microsoft Store, offering various clock styles and customization options to suit your style and needs
Installing Widget Launcher for Clock Widgets on Windows 11
Adding a clock widget to your Windows 11 desktop is made simple with the Widget Launcher app. Here’s how to install it:
Step-by-Step Installation Guide
-
Open the Microsoft Store:
-
Click on the Start Menu.
-
Search for ‘Microsoft Store’ and open it.
-
-
Find Widget Launcher:
-
In the Microsoft Store, use the search bar at the top.
-
Type in ‘Widget Launcher’ and press Enter.
-
-
Download and Install the App:
-
From the search results, select ‘Widget Launcher’.
-
Click on ‘Get’ or ‘Install’ to download and install the app on your computer.
-
With Widget Launcher installed, you are all set to customize your desktop with a variety of clock widgets, enhancing both the functionality and aesthetic of your Windows 11 workspace.
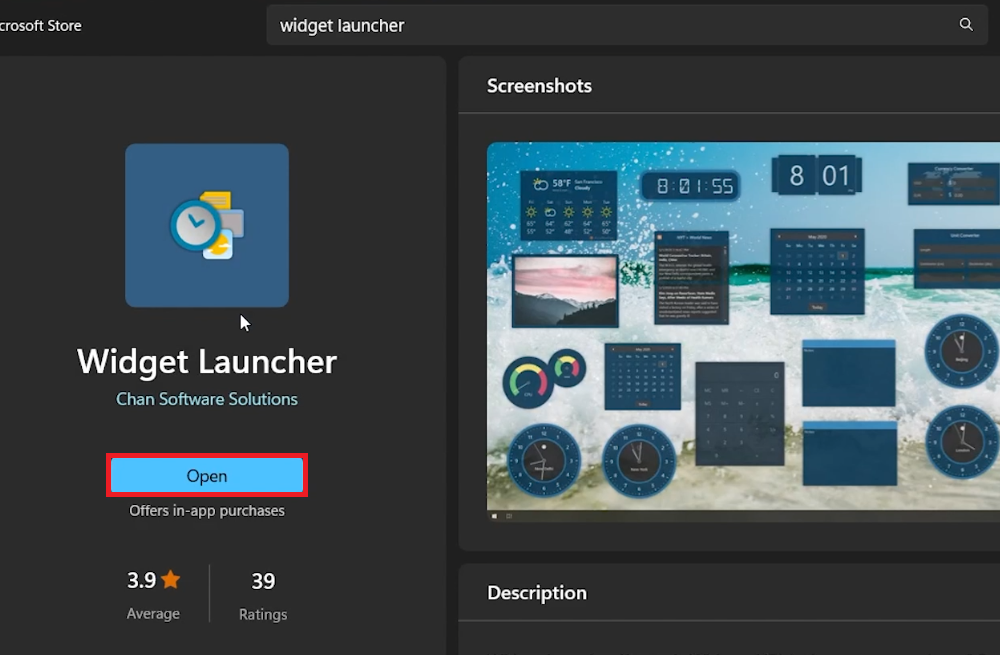
Install Widget Launcher via the Microsoft Store
Selecting and Customizing a Clock Widget in Widget Launcher
After installing Widget Launcher on your Windows 11 PC, it’s time to pick and personalize your clock widget. Here’s how you can do it:
Choosing Your Clock Widget Style
-
Open Widget Launcher:
-
Find ‘Widget Launcher’ in your Start Menu and open it.
-
-
Select a Clock Style:
-
Widget Launcher offers three clock styles:
-
Digital Clock: For a modern, digital display.
-
Square Clock: A classic, analog-style clock.
-
World Clock: Ideal for tracking different time zones, perfect for those working internationally or with global teams.
-
-

Select the clock style and settings
Personalizing Your Clock Widget
-
Customize Widget Appearance:
-
In Widget Launcher, you can adjust various aspects to match your desktop’s theme or your personal style:
-
Theme: Choose a general style for your widget.
-
Background and Accent Colors: Select colors that complement your desktop.
-
Border and Font Color: Further fine-tune the widget’s appearance.
-
Transparency Value: Adjust how transparent the widget appears on your desktop.
-
-
Positioning and Sizing the Widget
-
Launch and Adjust Your Widget:
-
Once you’re satisfied with the settings, click ‘Launch Widget’.
-
Your chosen clock widget will appear on your desktop.
-
Move and Resize: You can drag the widget to your preferred spot and resize it for prominence or subtlety.
-
By following these steps, you can effortlessly add a functional and aesthetically pleasing clock widget to your Windows 11 desktop, enhancing both its utility and visual appeal.
Adjust clock widget size and position on screen
-
Widget Launcher is a free app available on the Microsoft Store that allows you to add various widgets, including different styles of clock widgets, to your Windows 11 desktop.
-
Yes, Widget Launcher offers customization options like theme, background color, accent, border, font color, and transparency value, allowing you to personalize the clock widget to your liking.
-
There are three styles: Digital Clock, Square Clock, and World Clock, each with its unique design. You can choose one that best suits your desktop’s theme or personal preference.
-
Yes, once you’ve launched the clock widget on your desktop using Widget Launcher, you can easily move it around and resize it to fit your needs.
-
Yes, the World Clock widget is designed to show different time zones, making it a handy tool for those working with international teams or across various regions.
Although Windows 11 introduces a new widget feature, the widgets offered cannot be attached to the desktop. You can open the Windows 11 built-in widget board by pressing the Win + W keys, or learn more from this article: How to add or remove Windows 11 widgets. However, as mentioned, these widgets cannot be placed on the desktop. If you need widgets that can stick to the desktop in Windows 11, you need to use a different widget app.
This guide will show you how to add widgets to desktop in Windows 11 using a custom widget app called BeWidgets which can be installed via Microsoft Store.
How to put widgets on desktop in Windows 11
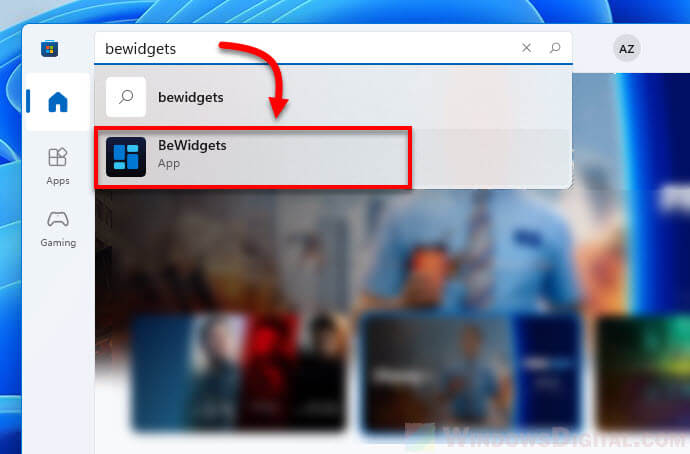
1. Open Microsoft Store from the taskbar and search for BeWidgets.
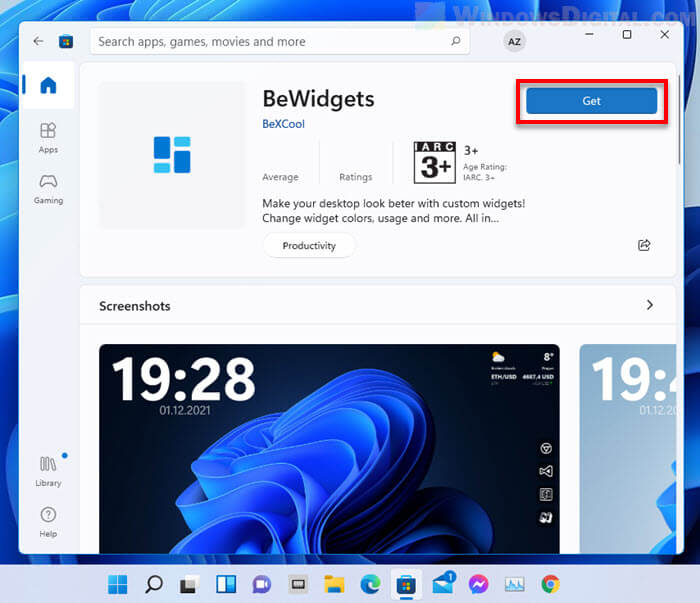
2. Select BeWidgets to open its store page. Then, click the Get button to install the app.
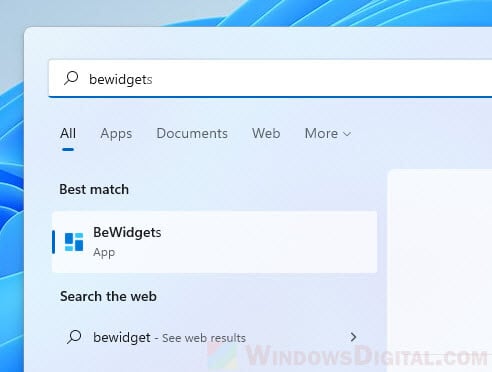
3. Once installed, you can launch the app directly from Microsoft Store by simply clicking the Open button. To open the app again next time, you can search for the app via Start and alternatively pin it to Start or taskbar for quick access.
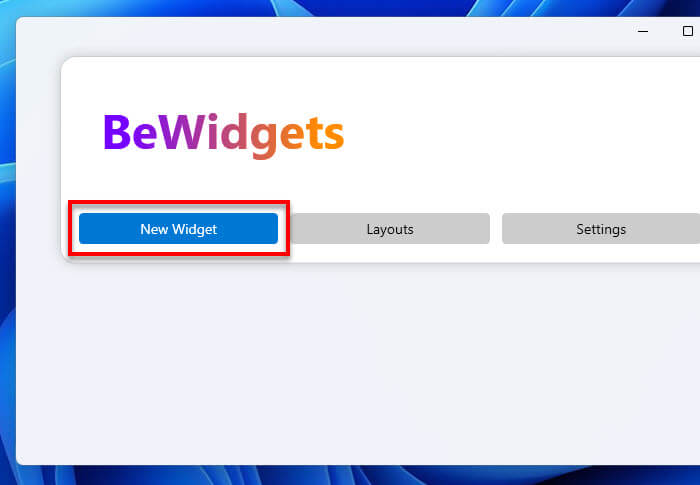
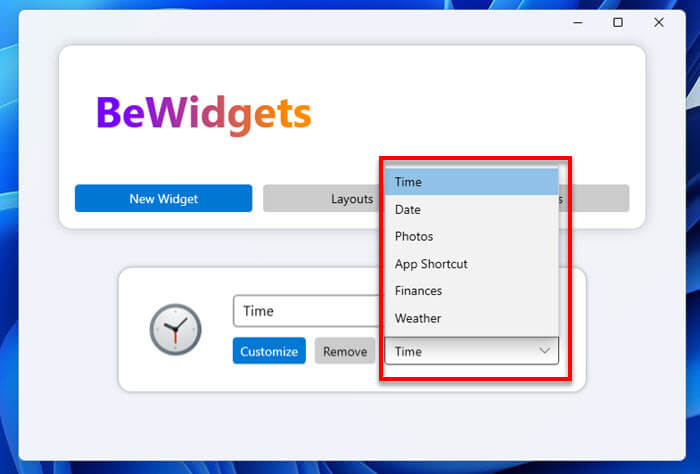
4. In the BeWidgets app’s window, click New Widget to create a new widget.
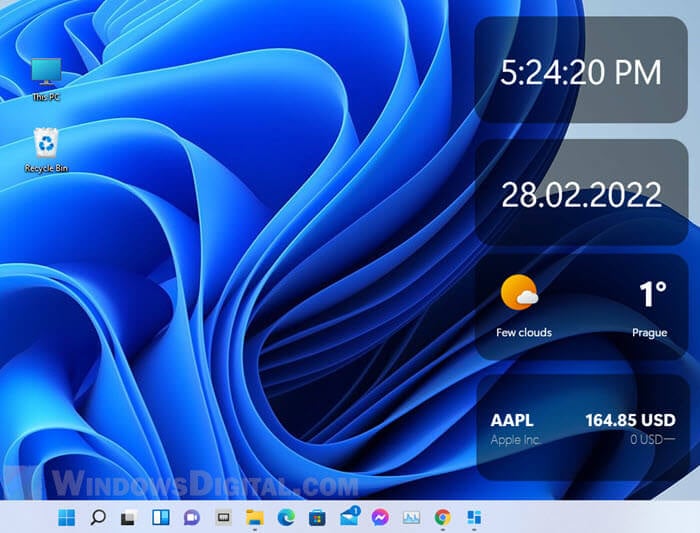
5. The default widget will always be the Time widget. To change this widget to another different widget, click the drop-down menu of the widget and select a different widget. The available widgets for now are: Time, Date, Photos, App Shortcut, Finances and Weather. The developer of this app may add more widgets in the future.
6. To customize a widget, for example, the Time widget, click Customize. In the Customize window, you can configure various options and preferences such as whether or not to show seconds in the widgets, changing to 12 hour format, making the widget unclickable, etc.
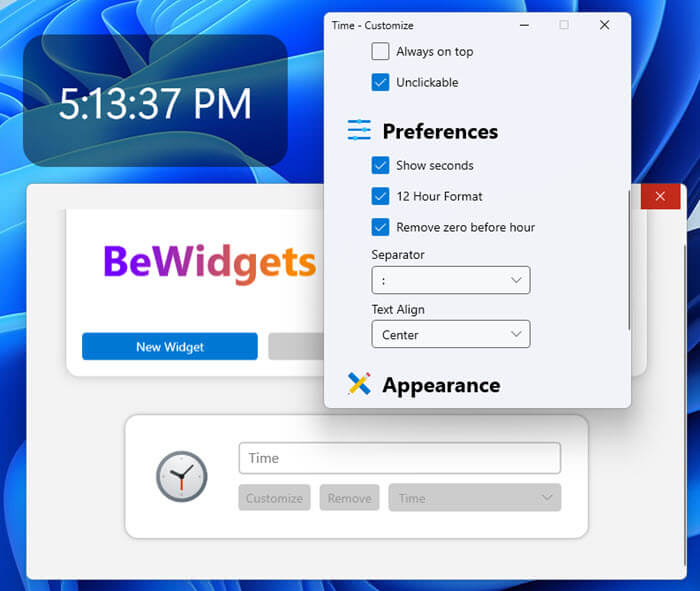
7. You can freely move the added widget on the desktop by clicking and dragging it to anywhere you want to place it on the desktop. However, if the unclickable option is enabled via Customize, the widget will no longer be clickable or moved. The unclickable option is recommended after you’ve placed your widget to prevent accidental clicking or moving of the widget.
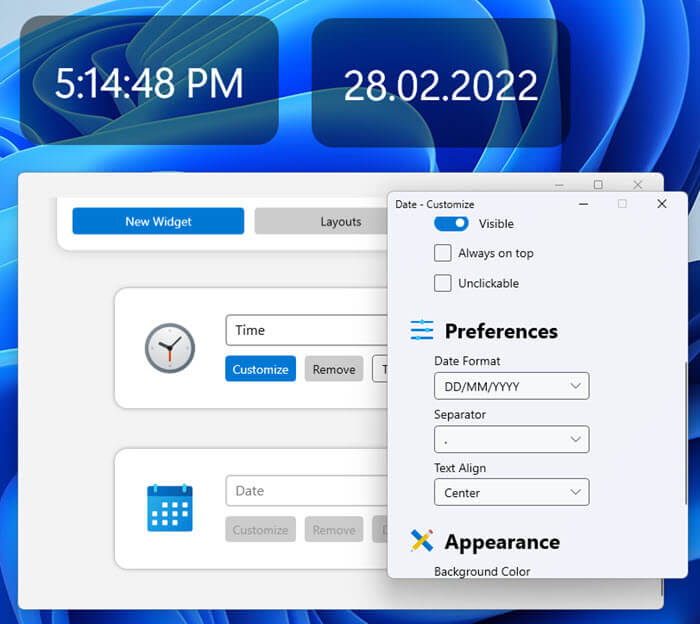
Add a date widget to desktop in Windows 11
To add a widget that shows the date, click New Widget and change the default widget to Date via the drop-down menu. To customize how the date is displayed, click Customize in the Date widget. From there you can configure preferences such as Date Format (e.g. DD/MM/YYYY), separator used, text alignment, and appearance settings such as background color, etc.
Add a weather widget to desktop
To add a weather widget, click New Widget, then select Weather from the drop-down menu. To change the location the weather widget shows and to configure other settings for the weather widget, click Customize.
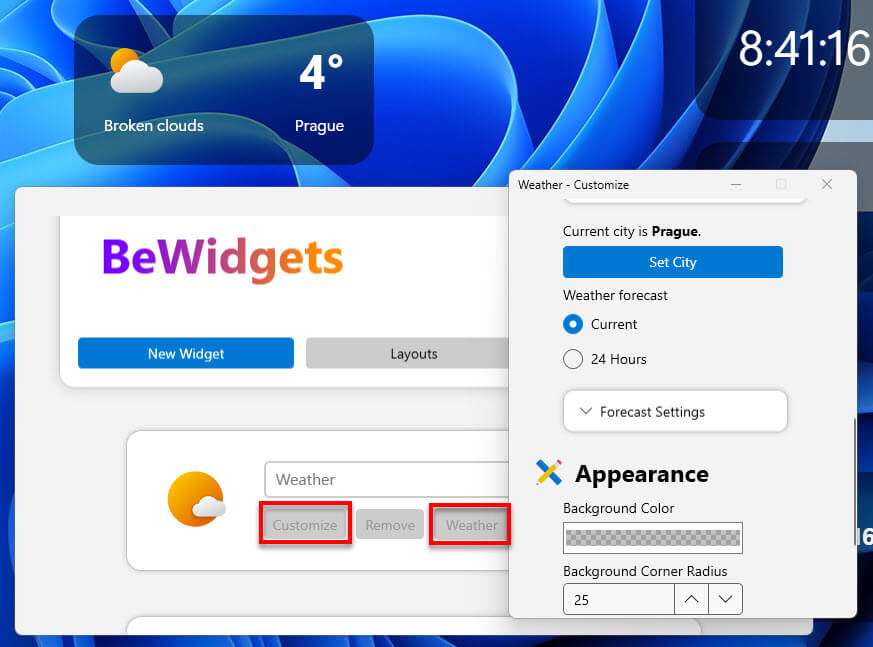
From there you can change the weather location by clicking the Set City button under “Current city is” setting. You can also configure other settings such as “Weather forecast” to choose if the widget should show only current weather or weather in 24 hours, as well as appearance settings such as background color of the weather widget.
Add a rotating photo display widget in Windows 11
BeWidgets Photo widget is a widget that can display photos from a photo folder. When there are multiple photos in the selected folder and its subfolders, the widget will use the photos and display them as a slideshow.
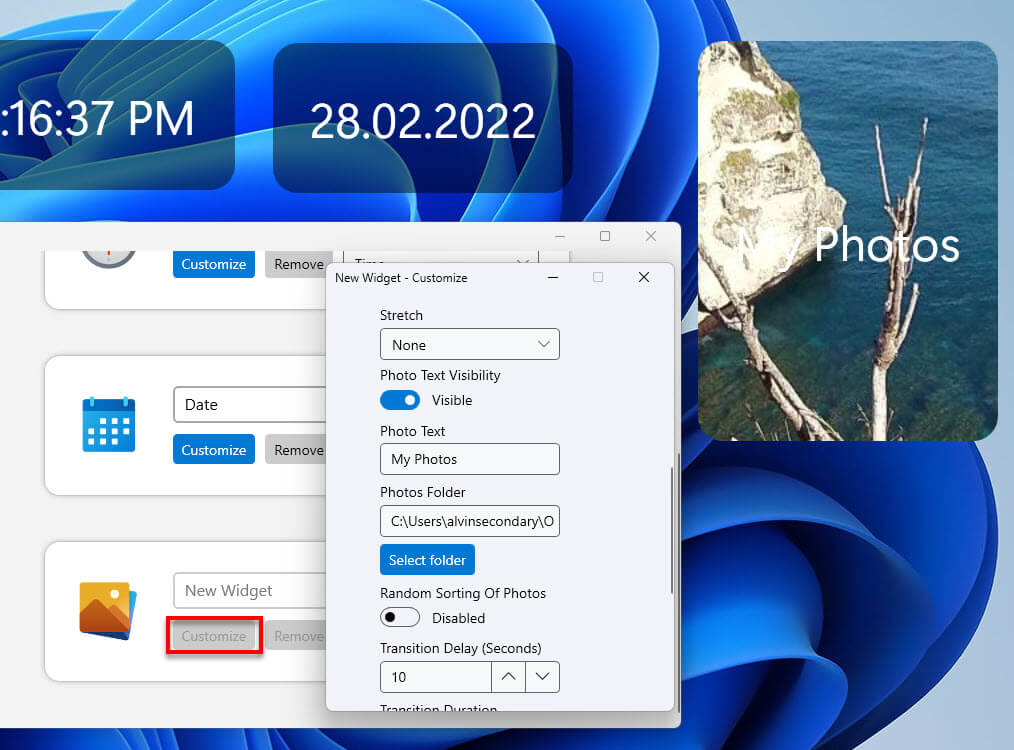
You can configure from which folder should the widget use photos from, the photos’ transition delay in seconds, the text on the photo widget, and other settings, via Customize.
Create layout to backup and restore widgets
BeWidgets also allows you to save your widget layout with all their settings and positions. You can create a layout of your current widgets by first clicking the Layouts button in the app, then select Create Layout From Current Widgets.
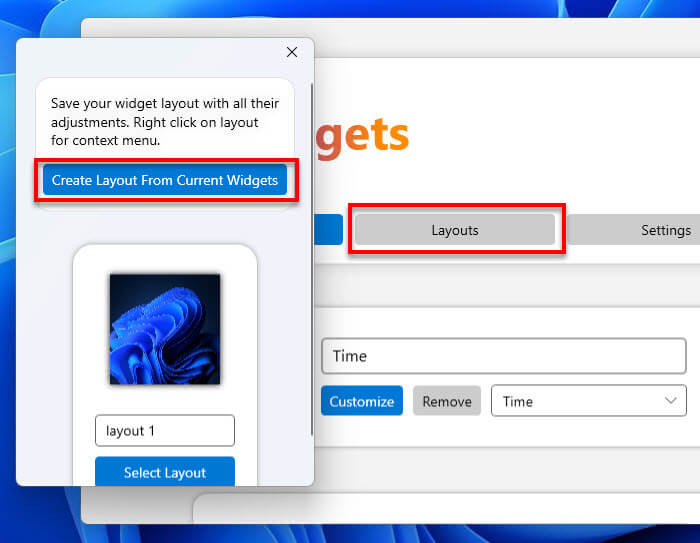
To restore a widget layout, click the Select Layout button on a saved layout.
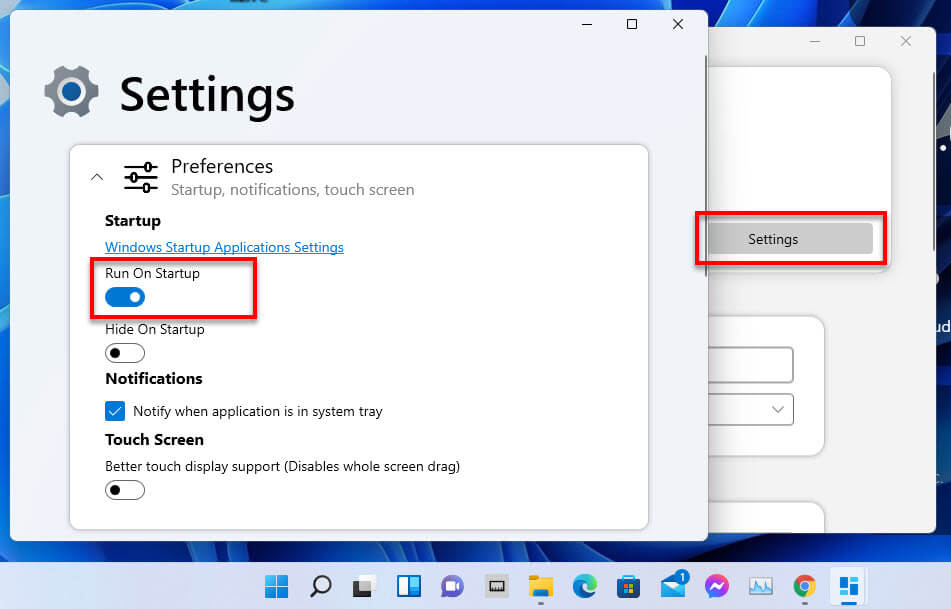
Enable automatic launching of BeWidgets on startup
The widgets will only show up on the desktop if BeWidgets is running. Thus, it is recommended to allow BeWidgets to run on startup automatically so that you don’t have to open it every time you start up computer.
To enable BeWidgets to run on startup, click Settings in the app, and make sure the “Run On Startup” option is enabled. The “Hide On Startup” option tells BeWidgets to hide the app’s window (while showing only widgets) when it runs on startup.
Adding a clock widget to Windows 11 is a straightforward process that will enhance your desktop’s functionality. You’ll need to access the Widgets feature, find the clock, and customize it to your liking. This quick guide will walk you through the steps to seamlessly integrate a clock widget into your Windows 11 desktop.
In this section, we’ll cover the detailed steps to add a clock widget to your Windows 11 desktop. Each step is designed to be easy to follow, ensuring you can complete the task with ease.
Step 1: Open the Widgets Panel
The first step is to open the Widgets panel.
You can do this by clicking the Widgets button on the Taskbar or using the Windows key + W keyboard shortcut.
Step 2: Click on the “Add Widgets” Button
Next, you need to find and click the “Add Widgets” button.
This button is located at the bottom of the Widgets panel and allows you to add new widgets to your collection.
Step 3: Find the Clock Widget
Once you’re in the Add Widgets menu, locate the Clock Widget.
Scroll through the list of available widgets until you find the Clock Widget. This may take a moment as there are various widgets to choose from.
Step 4: Click the Plus (+) Sign
After finding the Clock Widget, click the plus (+) sign next to it.
This action will add the Clock Widget to your Widgets Panel, making it easily accessible.
Step 5: Customize Your Clock Widget
Finally, you’ll want to customize the Clock Widget to suit your needs.
You can do this by clicking on the clock widget in the panel and adjusting settings such as time zone, format, and appearance.
After completing these steps, the Clock Widget will be added to your Widgets Panel, providing you with a convenient way to keep track of the time directly from your desktop.
Tips for How to Add Clock Widget in Windows 11
Here are some extra tips to make sure you get the most out of adding a clock widget to Windows 11:
- Make sure Windows 11 is updated to the latest version for the best widget compatibility.
- Explore other widgets available in the panel; there might be additional tools that suit your needs.
- Customize the position of your widgets in the panel for better accessibility.
- If the Clock Widget is not immediately visible, use the search bar in the Add Widgets menu.
- Check for third-party clock widgets if you need more customization options or unique designs.
Frequently Asked Questions about How to Add Clock Widget in Windows 11
How do I remove a widget from the Widgets panel?
To remove a widget, open the Widgets panel, click on the three dots at the top-right corner of the widget, and select “Remove widget.”
Can I resize the Clock Widget?
As of now, Windows 11 does not offer resizing options for individual widgets in the Widgets panel.
How do I change the time zone on the Clock Widget?
Click on the Clock Widget in the Widgets panel and navigate to the settings to adjust the time zone.
What if the Clock Widget is not showing the correct time?
Ensure your system time settings are correct by going to Settings > Time & Language > Date & Time.
Are there any third-party clock widgets available?
Yes, you can find third-party clock widgets from various developers. These can offer additional customization options and features.
Summary
- Open the Widgets Panel.
- Click on the “Add Widgets” Button.
- Find the Clock Widget.
- Click the Plus (+) Sign.
- Customize Your Clock Widget.
Conclusion
Adding a clock widget to your Windows 11 desktop is a simple yet effective way to enhance your productivity. By following these steps, you can quickly keep track of time without the need to open another app or look at your phone. It’s a small change, but it can make a big difference in how you manage your day. Plus, with added tips and FAQs, you’re well-equipped to troubleshoot and customize the clock widget to fit your needs perfectly. So go ahead and add that clock widget now – it’s time to make your Windows 11 experience even better!
Matthew Burleigh has been writing tech tutorials since 2008. His writing has appeared on dozens of different websites and been read over 50 million times.
After receiving his Bachelor’s and Master’s degrees in Computer Science he spent several years working in IT management for small businesses. However, he now works full time writing content online and creating websites.
His main writing topics include iPhones, Microsoft Office, Google Apps, Android, and Photoshop, but he has also written about many other tech topics as well.
Read his full bio here.
First introduced with Windows 7, widgets have been sidelined in recent updates. Although Windows 11 offers a dedicated widget board to give access to some of these tools, some of us still miss the classic desktop clock widgets. They not only provide a unique look to your computer desktop but are also helpful in staying productive. In this guide, we will find out how to add a clock widget to Windows 11 desktop.
Clock widgets were popular back in the day, as they could be added to the desktop on Windows 7 computers. Many users appreciated it as it allowed them to keep track of the time they were spending on computers. In new versions of Windows, however, this feature was let go of.
During Microsoft Build 2023 the company introduced new changes in the user interface including a dedicated Widget Board for Windows 11. Unfortunately, the new widget board didn’t include a dedicated clock widget for desktop, but you can still install the feature using third-party providers. In this guide, we will be using the clock widget by Rainmeter, a desktop customization tool. Follow these simple steps to figure out how to add and set the clock Widget in Windows 11:
Note: We do not endorse or support any third-party tools as using them may harm your computer. User discretion is advised.
1. Open your web browser and go to Rainmeter.
2. Click on Download to install the tool on your system.

3. Open the setup and follow the on-screen instructions to finish the installation.
4. Now, again open the web browser and visit VisualSkins and download a Clock Skin of your choice.

5. Locate the downloaded file and double-click on it, and select Install from the pop-up.
6. Once the process is finished the new clock widget will be applied to your desktop.
Also Read: Windows 10 Clock Time Wrong? Here is how to fix it!
Does Windows 11 Have a World Clock Widget?
No, Windows 11 computers don’t provide a dedicated clock or world clock widget. However, you can certainly access a world clock on Windows 11 computers. Follow the instructions below to know how:
1. Search and open Clock App from the Start menu.
2. From the left-side panel, go to World clock.

You can add new cities and locations to the world click by selecting the Add a new city + button. You can also Compare time between two different locations.
Also Read: How to Remove Weather Widget from Taskbar in Windows 11
We hope this guide was helpful to you and you were able to figure out how to add and set the clock widget in Windows 11. Let us know if this method helped you. If you have any suggestions or queries for us, please let us know in the comment section.