
Найдите файлы в Windows 11 с помощью одного из этих методов.
-
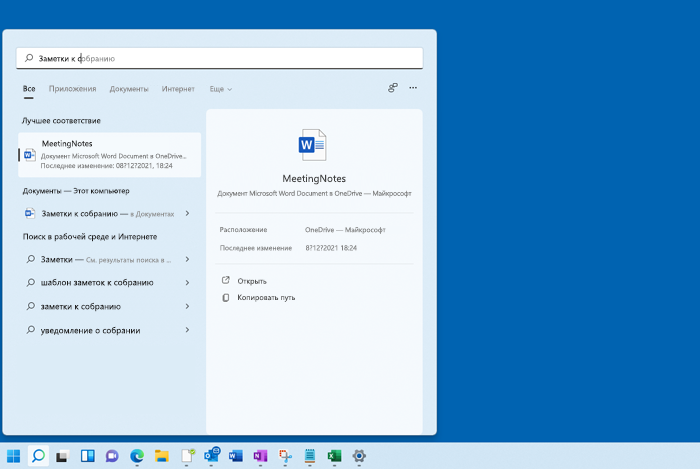
Выполните поиск на панели задач: Введите имя документа (или ключевое слово из него) в поле поиска на панели задач. Появятся результаты для документов на компьютере и в службе OneDrive. Чтобы отфильтровать поиск, перейдите на вкладку Документы , и в результатах поиска будут отображаться только документы.

-
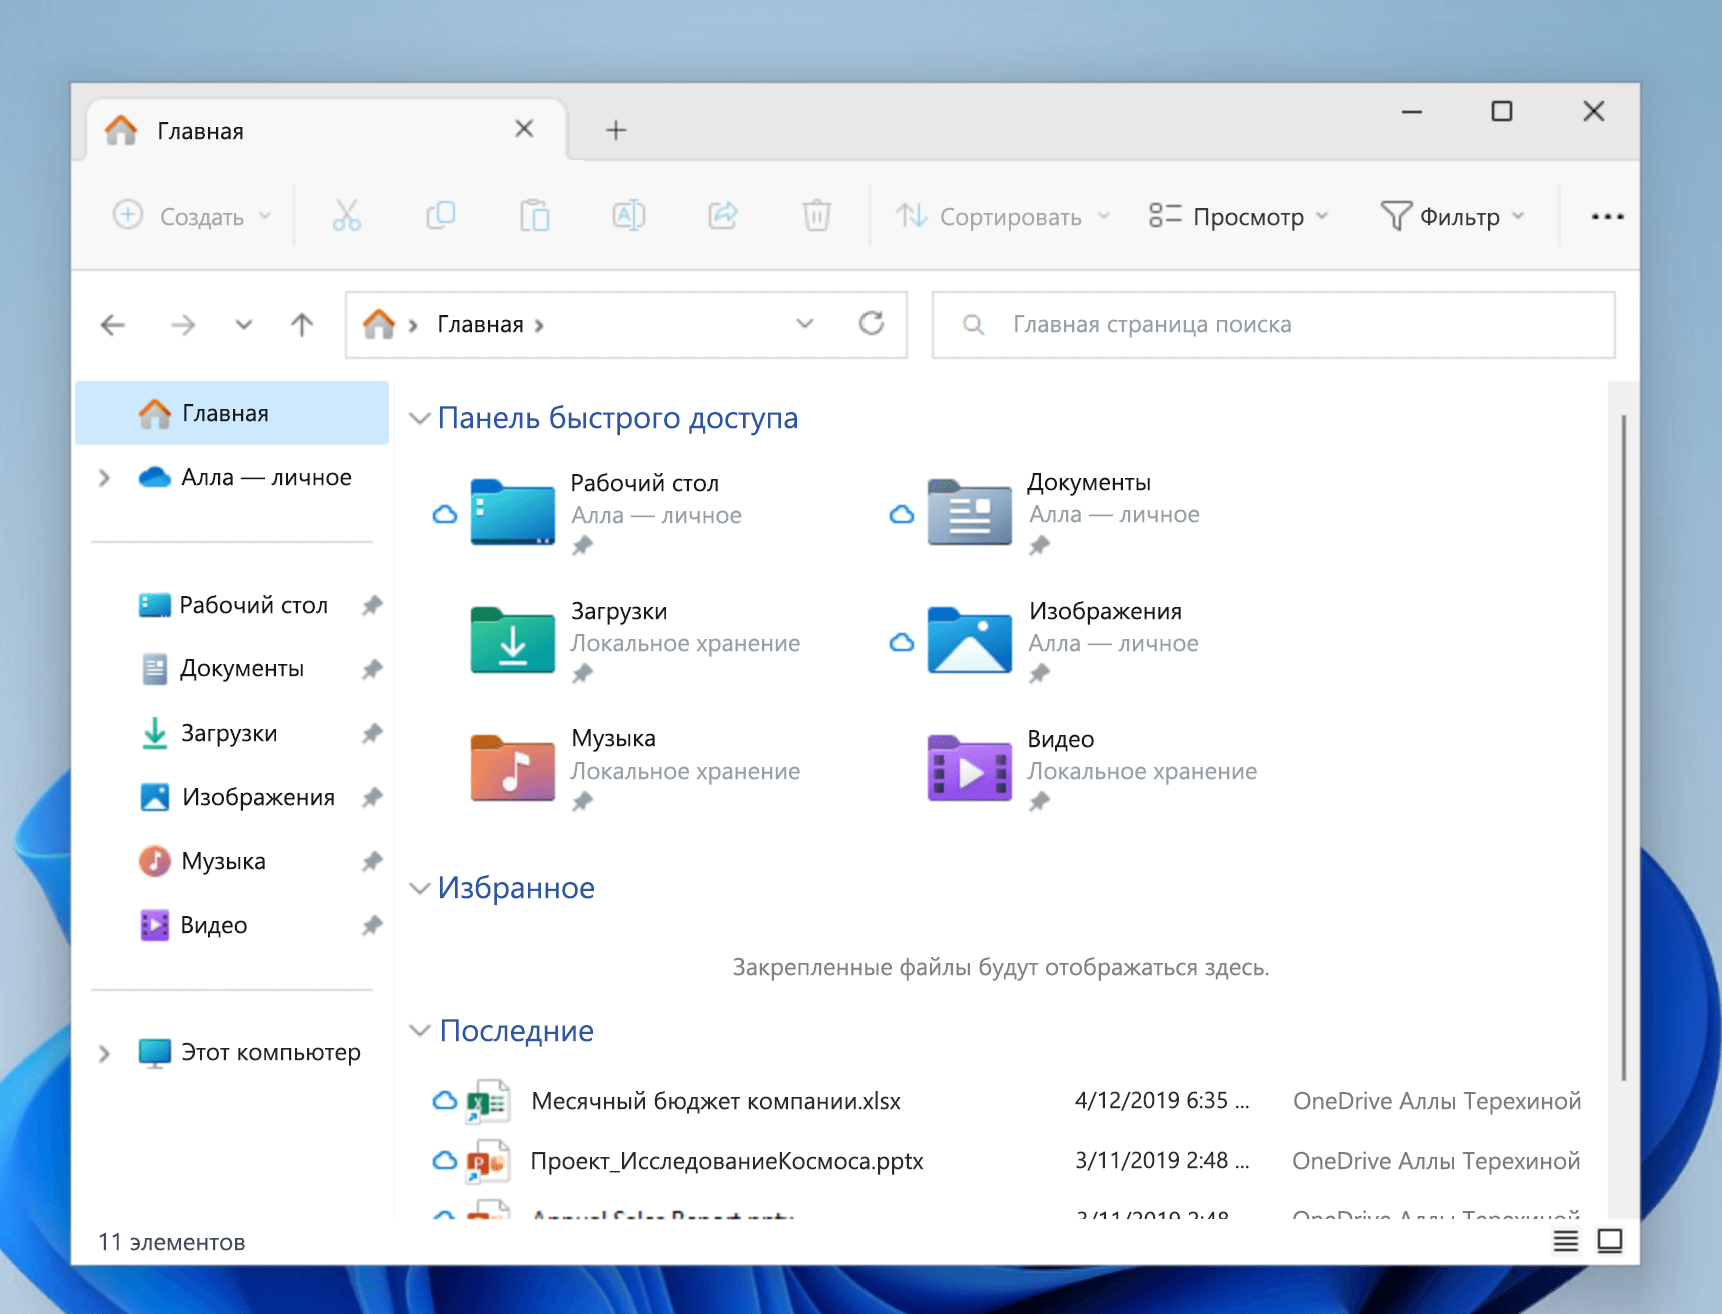
Поиск через проводник. Откройте проводник на панели задач или выберите и удерживайте меню Пуск (или щелкните правой кнопкой мыши), выберите проводник , а затем выберите расположение поиска:
-
Чтобы быстро найти нужные файлы с компьютера и облака, выполните поиск на главной странице.

-
Чтобы найти файлы, хранящиеся в папке, выполните поиск из папки , например Загрузки.
-
Чтобы выполнить медленный, но глубокий поиск, выполните поиск на этом компьютере , а не в разделе Главная.
-
-
Начиная с Windows 11 версии 22H2, файлы можно найти из Office.com в проводник Главная. Чтобы изменить этот параметр, выберите Дополнительные > параметры. На вкладке Общие в разделе Конфиденциальность выберите параметры для параметра Показать файлы из Office.com.
Существуют ли какие-либо улучшения для поиска на компьютерах Copilot+?
Для улучшения результатов поиска Copilot+ PC выполняют семантическую индексацию наряду с традиционной индексацией. Поддерживаемые форматы файлов включают .txt, .pdf, .docx, .doc, .rtf, .pptx, .ppt, .xls, .xlsx для документов и .jpg/.jpeg, .png, .gif, .bmp, .ico для изображений. Семантическое индексирование делает поиск более эффективным, поскольку элементы, которые близки и связаны с поисковыми терминами, также будут включены в результаты поиска. Например, если вы искали паста, вы также можете получить результаты по запросу лазанья, включая изображения, содержащие пасту или лазанью.
Все данные, собранные в результате семантического индексирования, хранятся локально на компьютере. Ничто из этого не отправляется в Майкрософт и не используется для обучения моделей ИИ. Семантическое индексирование включено по умолчанию на Copilot+ PC. Если вы хотите отключить индексацию и поиск определенных местоположений или типов файлов, вы можете сделать это, выбрав соответствующие параметры в разделе Настройки > Конфиденциальность и безопасность > Поиск в Windows > Расширенные возможности индексации.
Примечания:
-
Улучшенный поиск Windows теперь доступен в предварительной версии для Copilot+ PC через Программу предварительной оценки Windows. Дополнительные сведения см. в статье Предварительный просмотр улучшенного Windows Search на Copilot+ PC с участниками программы предварительной оценки Windows на канале Dev.
-
Для улучшения Windows Search на Copilot+ PC рекомендуется подключить Copilot+ PC для завершения начальной индексации поиска. Проверить состояние индексации поиска можно в разделе Настройки > Конфиденциальность и безопасность > Поиск в Windows.
Приверженность корпорации Майкрософт ответственному использованию ИИ
Майкрософт работает над ответственным развитием ИИ с 2017 года, когда мы впервые определили наши принципы в области ИИ, а затем ввели в действие наш подход с помощью Стандарта ответственного применения ИИ. Конфиденциальность и безопасность — главные принципы для нас при разработке и развертывании систем ИИ. Мы работаем над тем, чтобы помочь нашим клиентам ответственно использовать наши продукты ИИ, делимся накопленным опытом и строим доверительные партнерские отношения. Дополнительные сведения о наших усилиях в области ответственного применения ИИ, принципах, которыми мы руководствуемся, а также об инструментах и возможностях, которые мы создали для обеспечения ответственной разработки технологий ИИ, см. в разделе Ответственное применение ИИ.
Все способы:
- Вариант 1: Расположение файла неизвестно
- Способ 1: «Командная строка»
- Способ 2: «PowerShell»
- Вариант 2: Получение пути к файлу
- Способ 1: Контекстное меню
- Способ 2: Свойства объекта
- Способ 3: Пакетный режим
- Вопросы и ответы: 1
Вариант 1: Расположение файла неизвестно
Чтобы найти файл на компьютере, не обязательно запоминать его расположение — достаточно помнить его название или даже часть названия. Также при поиске файлов на компьютере можно использовать такие данные, как расширение, размер, дату создания и прочие атрибуты. Основных способов поиска два: возможностями самой Windows 10 и средствами сторонних приложений.
Приложений для поиска файлов существует достаточно много, среди них имеются как бесплатные, так и коммерческие. Наиболее быстрыми из них являются те, которые выполняют поиск по файловой таблице, куда заносятся имена всех объектов файловой системы. Такой подход обеспечивает почти мгновенный поиск без индексации.
Штатные средства поиска также могут быть эффективными, если уметь ими правильно пользоваться. В Windows 10 для поиска файлов и папок можно использовать функционал «Проводника», классической «Командной строки» и консоли «PowerShell».
Способ 1: «Командная строка»
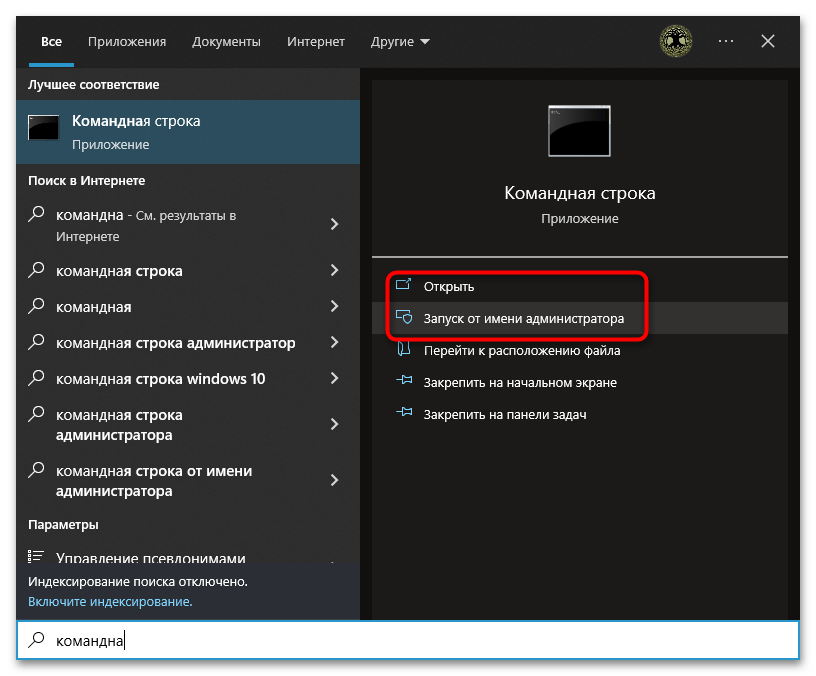
Если известно название файла и буква диска, на котором он предположительно находится, найти его можно с помощью «Командной строки».
- Запустите консоль «cmd» из поиска Windows или другим известным способом.
- Выполните команду
dir /a /s c:\file.name, где file.name – имя файла с расширением, например text.docx.
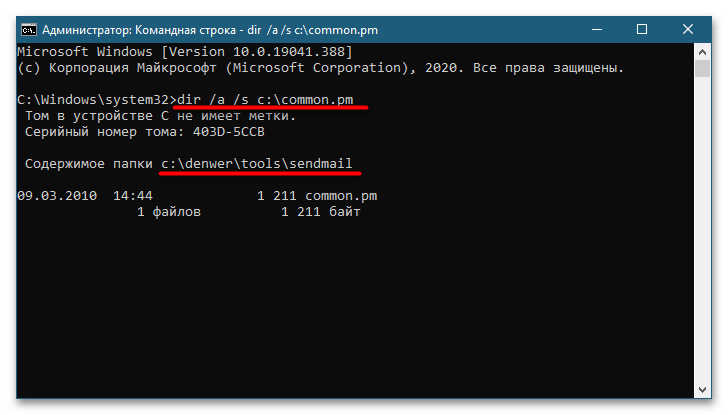
Если файл имеется на диске, команда выведет в консоль путь к нему.
Способ 2: «PowerShell»
Более широкими возможностями обладает консоль «PowerShell», способная искать файлы по разным параметрам. Далее приведен самый простой пример – поиск по имени и расширению.
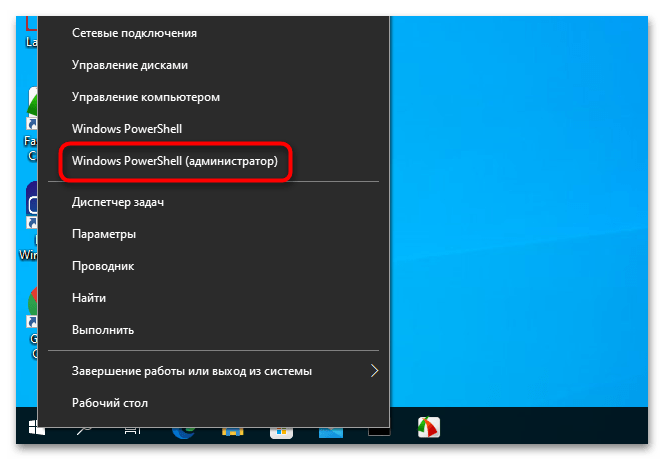
- Запустите «PowerShell» из контекстного меню кнопки «Пуск».
- Сформируйте и выполните команду
Get-ChildItem -Path C:\ "file.name" -Recurse -Force -ErrorAction SilentlyContinue, где file.name – имя файла с расширением, а C:\ — буква диска, на котором выполняется поиск.
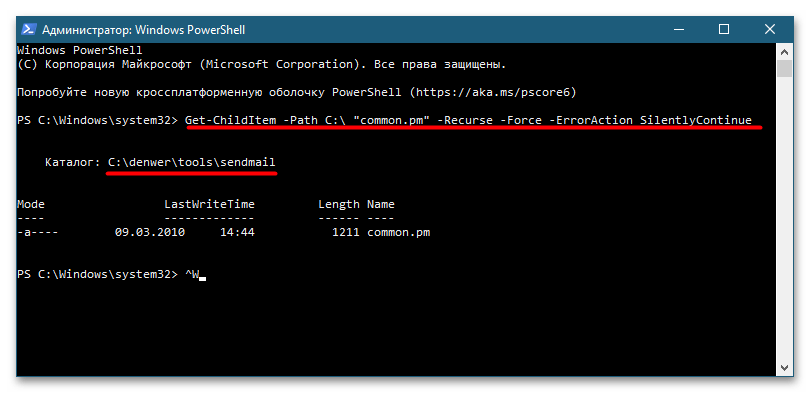
Результат будет выведен в консоль.
Подробнее: Способы поиска файлов в Windows 10
Вариант 2: Получение пути к файлу
Если нужно получить пути файлов, расположение которых уже известно, либо узнать расположение файла по его ярлыку, достаточно будет средств «Проводника». Способы, в свою очередь, можно использовать разные.
Способ 1: Контекстное меню
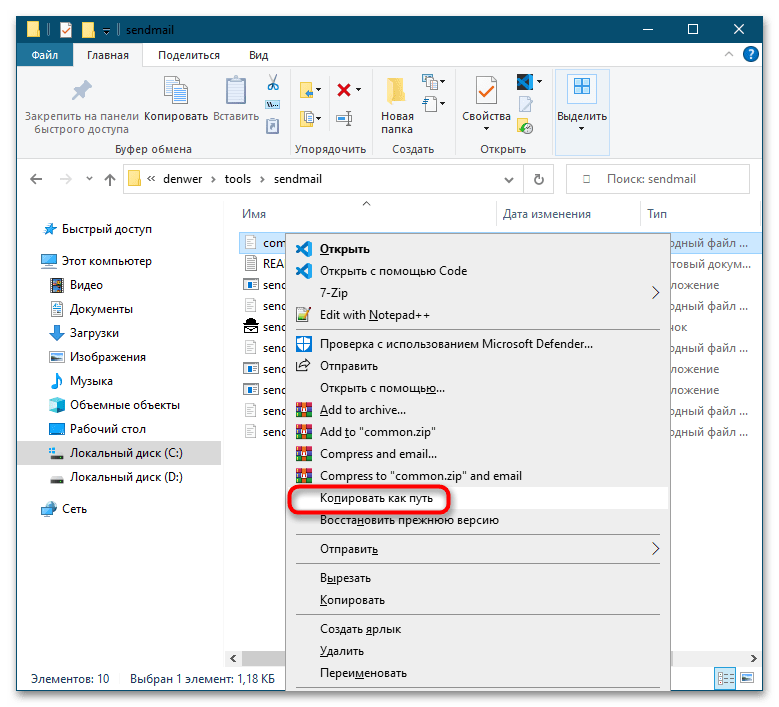
В расширенном контекстном меню файлов, папок и ярлыков имеется опция копирования полного пути к объекту. Зажмите на клавиатуре клавишу Shift, после чего кликните по файлу правой кнопкой мыши. Выберите опцию «Копировать как путь» — путь к файлу будет скопирован в буфер обмена.
Способ 2: Свойства объекта
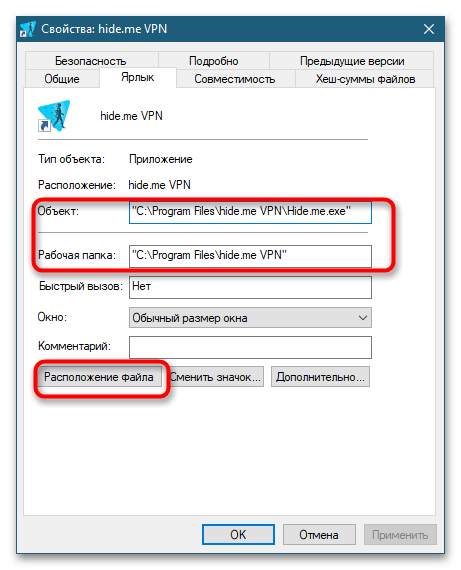
Если нужно определить месторасположение файла по его ярлыку, откройте «Свойства» данного ярлыка и посмотрите, что указано в поле «Объект». Это и будет путь файла в системе. В поле «Рабочая папка» указывается путь к папке, в которой искомый файл находится.
Обратите также внимание на кнопку «Расположение файла» — если ее нажать, будет открыт каталог с целевым файлом.
Способ 3: Пакетный режим
Если нужно получить пути к группе файлов, расположенных в конкретной папке, воспользуйтесь средствами той же консоли «PowerShell». Запустите приложение и выполните в нем команду Get-Childitem -File -Path D:\Folder | Out-File D:\filelist.txt.
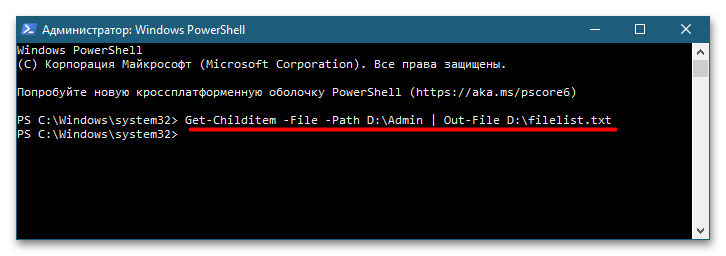
В этой команде имеется два пути: D:\Folder – путь папке с файлами, пути которых нужно получить, и D:\filelist.txt – путь к автоматически создаваемому текстовому логу, куда «PowerShell» запишет данные. Заметьте, что команда получает пути только в родительской папке, поэтому если каталог нужно исследовать рекурсивно, сразу перед ключом -File в команду нужно добавить ключ -Recurse.
Наша группа в TelegramПолезные советы и помощь
Description: Learn how to search the content of files in Windows 11. Windows 11 includes a built-in search feature that helps you find files, documents, and apps quickly. You can search a file by content and by its name on your computer and use keywords to search on the web using the search feature in Windows 11. In addition, you can manage search options to control what a search feature can find and how a search works in Windows 11.

There are not any noticeable changes to the overall working of Windows search in Windows 11 compared to Windows 10. However, it comes with many improvements to the search feature, such as dedicated file type search, search a file by content, support for cloud search in conjunction with cloud storage services, indexing options, faster and efficient results.
Continue reading to learn about different ways to search files in Windows 11. Additionally, you will learn how to find files by their type and content/text.
Following are some ways that you can use different options to search a file in Windows 11.
Keyboard shortcut
Press Windows+S on your keyboard to quickly search for files, apps, or on the web in Windows 11. A window will pop up, then start typing, and you will get the results listed below. You can even narrow down your results by category by clicking on the headings below the search bar, such as apps, documents, web, or more.
Search button on the Taskbar.
Click on the Search Icon (which looks like a magnifying glass) on the taskbar to open the Search Menu in Windows 11. It is the same menu as you get when you press Windows+S. But if you do not have a Search Icon on your Taskbar, you can add it. For this, open Settings and go to Personalization. Click on the Taskbar, then Taskbar Items, and turn ON the switch beside Search.
Click Start and type your search.
Click the Start button on the Taskbar, the Start Menu will appear. Then start typing, and the menu will turn into the Windows Search Menu, and you can search the same as the last two methods.
Search in File Explorer.
Another way to search files is within File Explorer. Open File Explorer by clicking on the folder icon on your desktop/taskbar or pressing Windows+E. Navigate to the folder you want to search. Then in the upper right corner of the window, click on the Search Bar and type your search query. You will get every matching result for files.

How to add file extensions to Windows Search Index?
You can find files using the search feature in Windows 11. However, you can search for text in a file for limited file types by default. But you can include other text-based files to expand your searching options in Windows 11.
- Press on the Search Icon in the Taskbar to open a Windows Search window.
- Type index and open the Indexing Options from results.
- Once the Indexing Options window opens, press the Advanced button.
- In the Advanced Options, press on the File Types tab. Mark the extensions for the file type that you want to include in your content searches. Then select the Option Index Properties and File Contents under the list to see the filter in the filter description that will be used to open a specific file type. For example, when you choose the bat extension, the plain text filter will be the filter type.
- However, if you do not have your required file type in the list, it means that the file type does not have an app as the default handler. You can add your new file type by typing the extension in the box under Add New Extension to list and then press Add. Because Windows Search does not have another app associated with those types of files, it will use a plain text filter to search their contents by default.
To search for a specific file extension/type.
Follow the given steps to search for a file type in file explorer.
- Open File Explorer by clicking on the folder icon on your desktop/taskbar or pressing Windows+E.
- Navigate to the folder you want to search. Then in the upper right corner of the window, click on the Search Bar and type the extension of the file you intend to search.
- You will get files matching your extension.

How to enable searching a file by content/text using Windows Search in Windows 11?
Use the following steps to enable searching a file by content/text using Windows Search in Windows 11.
- Click on Start, and open the Control Panel from the Start Menu.
- Once the Control Panel window opens, click on Folder Options.
- In the Folder Options window, click on the Search tab.
- Then under the What to Search option, select the Always Search File Names and Contents and press OK. It will enable searching a file by its name and content in Windows 11.
How to search a file by content/text using Windows Search in Windows 11?
Using Windows Search in Windows 11, you can search a file by content/text by following the steps below.
- Open File Explorer by clicking on the folder icon on your desktop/taskbar or pressing Windows+E.
- Navigate to the folder you want to search. Then in the upper right corner of the window, click on the Search Bar and type the string: content: “your phrase/text/content”. Window 11 will recognize this as a specific instruction, and the text color will change to light blue.
- You will get files matching your text. For example, if you type .pdf in the search box to find all the files with the pdf extension.
Bonus: Search Text in Files with AnyTxt
AnyTxt is a powerful tool that allows you to search text in files on your computer. You can use AnyTxt to find any document, email, ebook, or archive that contains the keywords you are looking for.

It supports multiple file formats, such as PDF, DOCX, EPUB, ZIP, and more. You can also customize the search options, such as case sensitivity, file size, and date range. AnyTxt is fast, accurate, and easy to use. It can help you search files by content in Windows 11/10/7.
Conclusion
To conclude, one can say that the search feature in Windows 11 makes the process of searching files and documents convenient and quick. You can find a file by its name, type, date, size, and even by its content using Windows Search in Windows 11.
Manage Indexing Options and Settings for Windows 11 – A Tutorial
Searching for specific file contents is a handy feature in any operating system, and Windows 11 offers a straightforward method to do so. Whether you’re looking for a specific phrase in a document or searching for a particular word in a text file, Windows 11’s search functionality can save you time and effort. In this tutorial, we’ll guide you through the steps to search file contents on Windows 11.
Step 1: Open File Explorer by clicking on the folder icon located on the taskbar or by pressing the Windows key + E on your keyboard.
Step 2: In the File Explorer window, navigate to the directory where you want to search for file contents. For example, if you want to search for a specific phrase in your Documents folder, select Documents in the left-hand navigation pane.
Step 3: Once you’re in the desired directory, click on the search bar located at the top-right corner of the File Explorer window.
Step 4: Type the keyword or phrase you want to search for within the files’ contents. As you type, Windows 11 will start displaying the search results in real-time.
Step 5: Once the search results are displayed, you can click on a specific file to open it or right-click on a file to access additional options like copying the file path or opening the file location.
| Pros | Cons |
|---|---|
| 1. Convenient way to locate specific content within files. | 1. May require indexing files for faster search results, which can consume system resources. |
| 2. Real-time search results, allowing you to see matches as you type. | 2. Limited to searching within the supported file types. |
| 3. Easy to use and accessible within the native File Explorer. | 3. Results might not be as comprehensive or accurate compared to specialized search tools. |
Searching file contents on Windows 11 can be a time-saving and efficient way to find the information you need within your files. Whether you’re a student searching for specific details in your notes or a professional looking for a particular code snippet, Windows 11’s file content search feature has got you covered. Give it a try and experience the convenience it offers.
Video Tutorial: How do I search files in Windows 11 with a specific date range?
How do I search for contents in Windows 11 not working?
If you’re experiencing issues with the content search feature in Windows 11, here are some steps you can follow to troubleshoot the problem:
1. Restart your computer: Sometimes, a simple restart can resolve minor software glitches or temporary issues.
2. Check for Windows updates: Ensure that your Windows 11 operating system is up to date with the latest patches and updates released by Microsoft. Outdated software can cause compatibility issues and affect various features, including content search.
3. Check Indexing settings: Make sure that the folders you want to search within are included in the indexing settings. Here’s how you can check:
a. Open the Start menu and search for «Indexing options» and open it.
b. Click on the «Modify» button and ensure that the folders containing the content you want to search in are selected.
c. If the folders are not listed, click on the «Show all locations» button and check the boxes next to the correct folders.
d. Click «OK» to save the changes.
4. Rebuild the search index: If the search problem persists, you can try rebuilding the search index. Here’s how:
a. Open the Indexing Options as explained in step 3 above.
b. Click on the «Advanced» button.
c. In the Advanced Options window, switch to the «Index Settings» tab and click on the «Rebuild» button under the Troubleshooting section.
d. Click «OK» and wait for the search index to be rebuilt (this may take some time).
5. Run the Windows Search troubleshooter: Windows 11 includes a built-in troubleshooter that can automatically detect and fix issues related to search functionality. Follow these steps:
a. Open the Settings app by pressing Windows key + I on your keyboard.
b. Select «System» and then click on the «Troubleshoot» tab in the left menu.
c. Scroll down and click on «Other troubleshooters.«
d. Under Find and fix other problems, locate «Search and indexing» and click on it.
e. Follow the on-screen instructions to run the troubleshooter and apply any recommended fixes.
6. Consider third-party search alternatives: If the built-in search functionality in Windows 11 continues to give you trouble, you may want to explore alternative search tools, such as Everything or Agent Ransack. These software options provide powerful and efficient search capabilities.
Remember to check official Microsoft forums or support pages for further guidance or assistance specific to your issue, as there may be known issues or updates from Microsoft addressing these problems.
Why is there no search bar on Windows 11?
Windows 11 introduced several changes to the user interface, including the absence of a traditional search bar in the taskbar. Here are some reasons why Microsoft may have made this design choice:
1. Centralized Search: Microsoft has shifted the search functionality to the Start menu in Windows 11. By doing so, they have consolidated the search experience into one location, creating a more streamlined and focused interface. Users can simply click on the Start button or press the Windows key on their keyboard to access the search feature.
2. Simplified Taskbar: Windows 11 aims to provide a cleaner and more centered taskbar experience. Removing the search bar allows for a more visually consistent layout, promoting a decluttered and minimalist design approach. This decision aligns with Microsoft’s goal of modernizing the overall user interface and optimizing the user experience.
3. Enhanced Search Integration: While the search bar may not be visible on the taskbar, Windows 11 brings improved search functionalities. The Start menu now includes an integrated search box, enabling users to search for files, applications, settings, and online content seamlessly. Additionally, the revamped Microsoft Store provides a dedicated search option for finding and installing apps.
4. Increased Focus on Microsoft 365 Web Integration: Windows 11 emphasizes cloud-based productivity and connectivity. The absence of a search bar on the taskbar may encourage users to leverage Microsoft 365 web services for searching and accessing their documents, emails, calendars, and other online resources. Integrating the search functionality within the Start menu supports this web-centric approach.
5. Customization and Flexibility: Windows 11 offers users more flexibility in customizing their taskbar layout. While the search bar is not present by default, users can choose to enable it or customize the taskbar to their preferences. Adding or removing the search bar from the taskbar can be done through the settings, allowing users to tailor their desktop experience according to their needs.
It’s important to note that Microsoft’s decisions regarding the design and features of Windows 11 are based on various usability studies, market trends, and a desire to adapt to the evolving technological landscape. The absence of a search bar on the Windows 11 taskbar represents a deliberate design choice aimed at enhancing productivity and providing an improved user experience.
How do I turn on search indexing in Windows 11?
To turn on search indexing in Windows 11, follow these steps:
1. Open the Settings app. You can do this by clicking on the Start button, selecting the gear icon for Settings, or by using the keyboard shortcut Windows key + I.
2. In the Settings app, click on the «System» category.
3. On the left side of the System settings, click on «Storage«.
4. In the Storage settings, click on the «Advanced storage settings» link.
5. Scroll down to find the «Indexing Options» and click on it.
6. In the Indexing Options window, click on the «Modify» button.
7. A new window will open with a list of included locations for indexing. By default, the main drive (usually C:) is indexed. However, you can click on the «Show all locations» button to include additional drives or specific folders for indexing.
8. Check the box next to the location(s) you want to include in the search index.
9. Click on the «OK» button to save the changes.
10. You may see a warning message that indexing will take some time to complete. Click on the «OK» button to proceed.
11. Finally, close the Indexing Options window.
After following these steps, search indexing will be enabled on your Windows 11 computer. This will allow the operating system to index the contents of the selected locations, making it faster and easier to search for files, apps, and other information on your computer.
How do I view the contents of a file?
To view the contents of a file, you can follow these steps:
1. Locate the file: Find the file on your device or within the file explorer/finder. It may be saved in a specific folder or directory.
2. Determine the file type: Identify the file extension to understand which program or app you need to open it. Different file types require specific software to view them.
3. Choose the appropriate application: Once you know the file type, select the appropriate application or software to open it. For example, if it is a text document, you can use a word processing program like Microsoft Word or Google Docs.
4. Open the file: Double-click on the file to launch it with the chosen application. If the application is already open, you can navigate to the «File» menu and select «Open» to choose the file you want to view.
5. Read the file contents: After the file is opened, you can read its contents within the application. Use the available tools and controls to navigate through the document, such as scroll bars, zoom options, or search functionalities.
6. Modify or save the file (optional): If necessary, you can make changes to the file using the editing features provided by the application. Remember to save any modifications you make by selecting the «Save» or «Save As» option in the file menu.
It’s worth noting that the specific steps may vary slightly depending on the operating system, file type, and applications installed on your device. However, the general process outlined above should guide you in viewing the contents of most files on various platforms.
How do I search for a specific file type?
To search for a specific file type on your computer, you can follow these steps:
1. Open the File Explorer or Finder on your computer. On Windows, you can do this by clicking on the folder icon in the taskbar, while on macOS, you can click on the Finder icon in the dock.
2. Once the File Explorer or Finder window is open, you will see a search box at the top right or top center of the window. This is where you can enter your search query.
3. To search for a specific file type, you can use the file extension in your search query. For example, if you want to search for all PDF files, you can type «*.pdf» (without quotes) in the search box. The asterisk (*) is a wildcard character that represents any combination of characters before the file extension. This search query will look for all files that end with «.pdf«.
4. As you type the search query, the File Explorer or Finder will start filtering the results in real-time. You should see the files matching your search criteria appearing in the file list.
5. If you want to refine your search further, you can combine the file extension with other search terms. For example, if you are looking for PDF files related to a specific topic, you can enter something like «keyword *.pdf» in the search box. Replace «keyword» with your desired search term.
6. Depending on your operating system, you may have additional search options available. For example, on Windows, you can use the Search Tools tab in the File Explorer to filter the search results by file size, date modified, and other criteria.
By using these steps, you should be able to effectively search for specific file types on your computer without relying on third-party software or complex commands.