
В этой статье мы рассмотрим типовые ошибки установки языковых пакетов в Windows 10 и 11.
В Windows вы можете установить языковые пакеты из панели управления: Settings ->Time and Language -> Language (URI команда для быстрого перехода в раздел Settings:
ms-settings:regionlanguage
).
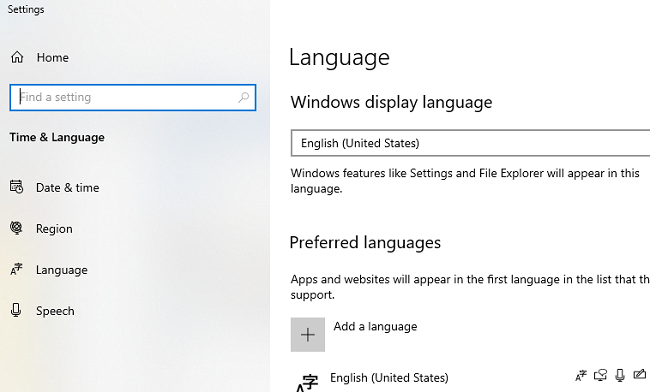
Нажмите кнопку Add a language, выберите язык и Windows должна загрузить языковой пакет с серверов Windows Update.
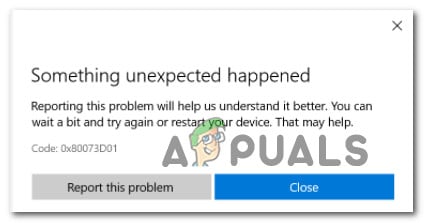
В моем случае при установке языкового пакета появилась ошибка:
Sorry, we’re having trouble getting this Windows display language installed. You can try later on the Language options page. Error code: 0x8073D01
Sorry, we’re having trouble getting this feature installed. Error code: 0x8034500C
При попытке установки языкового пакета с помощью PowerShell команды, также появляется ошибка:
Install-Language -Language de-de
Install-Language : Failed to install language. ErrorCode: -2145103860. Please try again.

Вы можете столкнуться с ошибкой 0x8073D01 при установке языкового пакета на компьютере, который находится в корпоративной сети и настроен на получение обновлений со внутреннего сервера Windows Server Update Service (WSUS) вместо WU.
В этом случае вы можете установить языковой пакет вручную с помощью DISM и образа FoD (Features on Demand). Если вы хотите разрешить получать прямой доступ к компонентам FoD на серверах Microsoft Update в Интернете, нужно настроить специальный параметр групповых политик.
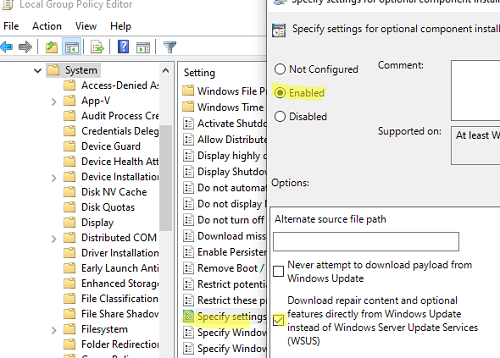
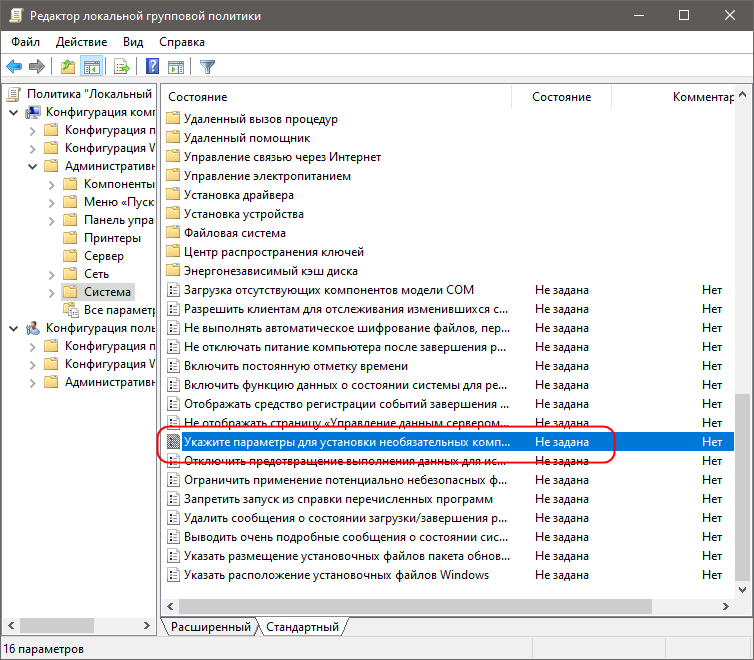
Откройте консоль локального (gpedit.msc) или доменного редактора GPO (gpmc.msc) и перейдите в раздел Computer Configuration -> Administrative Templates -> System.
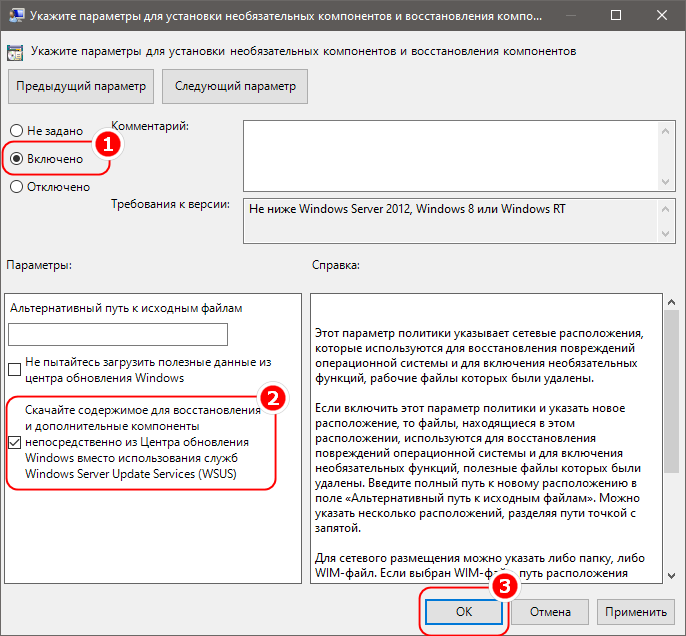
Включите параметр Specify settings for optional component installation and component repair и отметьте опцию Download repair content and optional features directly from Windows Updates instead of Windows Server Updates Services (WSUS) (Скачать содержимое для восстановления и дополнительные компоненты непосредственно из Центра обновления Windows вместо использования службы WSUS).
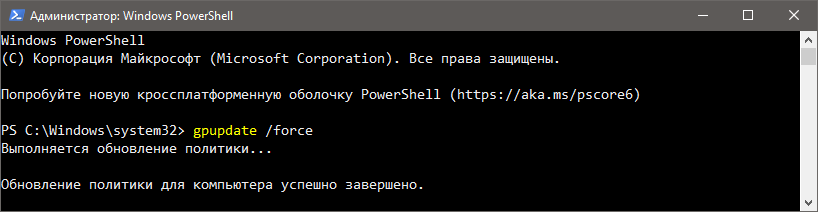
Обновите настройки групповых политик и перезапустите службу обновления Windows:
gpupdate /force
net stop wuauserv
net start wuauserv
После этого ваш компьютер должен успешно скачать и установить языковой пакет из Интернета.
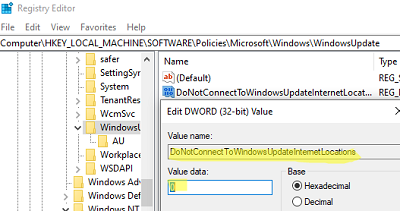
Если это не помогло, проверьте значение параметра реестра DoNotConnectToWindowsUpdateInternetLocations в ветке
HKEY_LOCAL_MACHINE\SOFTWARE\Policies\Microsoft\Windows\WindowsUpdate
. Если его значение равно 1, это будет блокировать подключение к интернету при получении компонентов FoD. Измените значение на 0 и перезапустите службу wuauserv
Если ваш сервер не должен получать обновления через WSUS, задайте также значение параметра реестра UseWUServer = 0 в
HKLM\SOFTWARE\Policies\Microsoft\Windows\WindowsUpdate\AU
.
Ошибка 0x800f0950 при установке LP решается аналогично.

При появлении ошибок 0x800F0908 или 0x800f0954 установки языковых пакетов в Windows нужно попробовать следующее:
- Проверьте, что для вашего сетевого подключения не включена опция Лимитное подключение (Metered Connection). Перейдите в Settings -> Network and Internet -> откройте свойства вашего подключения -> проверьте что опция Set as metered connection отключена.
- Возможно проблема связана с настроками агента Windows Update.
Сначала попробуйте очистить кэш обновлений из командной строки:
net stop wuauserv
net stop bits
net stop appidsvc
net stop cryptsvc
Ren %systemroot%\SoftwareDistribution SoftwareDistribution.bak
Ren %systemroot%\system32\catroot2 catroot2.bak
net start bits
net start wuauserv
net start appidsvc
net start cryptsvc
Если это не поможет, выполнить полный сброс настроек Windows Update на компьютере.
- Если ничего не помогло, проверьте целостность вашего образа Windows. Проверьте хранилище компонентов Windows с помощью команд:
Dism / Online / Cleanup-Image / RestoreHealth
sfc/scannow
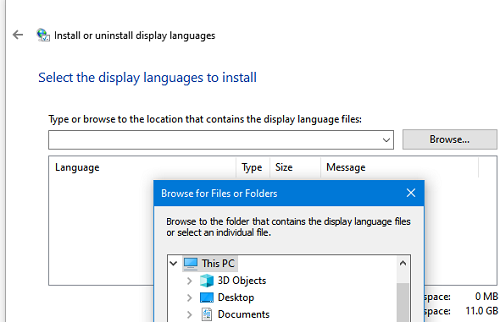
Также вы можете вручную скачать CAB файл с языковыми пакетами (ссылки есть в интернете) и установить их вручную с помощью встроенной утилиты
lpksetup.exe
.
Some Windows 10 users are always encountering the 0x80073d01 error when attempting to install or uninstall a UWP (Universal Windows Platform) app via the Windows Store.
After investigating this particular issue thoroughly, it turns out that there are several different common scenarios that might be triggering this error code whenever you want to install or uninstall a UWP app. Here’s a list of likely culprits:
- Applocker interference – As it turns out, a fairly common instance that will trigger this error is interference caused by Applocker. In this case, you should be able to fix the issue by temporarily disabling AppLocker while the installation or uninstallation of the problematic UWP update is complete.
- Common Windows Store Cache glitch – According to some affected users, this issue can also be caused by some type of Windows Store glitch that is preventing new installations from being fully registered. IN this case, running the Windows Apps Troubleshooter and applying the recommended fix should allow you to fix the issue. If this doesn’t resolve the issue, you also have the option to clear the store cache manually.
Now that you are familiar with every potential problem that might trigger this error, here’s a list of methods that other affected users have been successfully using to resolve the 0x80073d01 error and install or uninstall apps normally:
1. Disabling Applocker (if applicable)
As it turns out, you can expect to see this error code if you have previously enabled AppLocker on the affected computer.
Note: AppLocker is an application whitelisting technology that allows the user to restrict which programs can execute and which are prohibited to do so (under various circumstances).
While this is a great tool that will allow you to achieve full control over your apps, it can also conflict with the installation, uninstallation, and rendering of apps if you don’t really know what you’re doing.
Fortunately, there’s a simple way of confirming if the issue is indeed caused by Applocker or not:
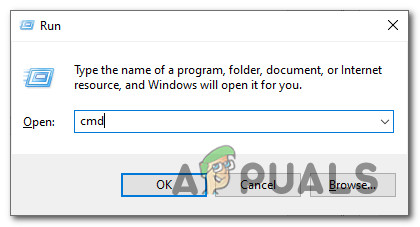
- Press Windows key + R to open up a Run dialog box. Next, type ‘cmd’ inside the text box and press Ctrl + Shift + Enter to open up an elevated Command Prompt. When you are prompted by the UAC (User Account Control), click Yes to grant admin access.

Opening a CMD prompt - Inside the elevated CMD prompt, type the following command and press Enter to check if the issue is caused by Applocker:
powershell -ExecutionPolicy Unrestricted Add-AppxPackage -DisableDevelopmentMode -Register $Env:SystemRoot\WinStore\AppxManifest.xml
- If running this command returns an error similar to “Add-AppxPackage : Deployment failed with HRESULT: 0x80073D01”, you’ve just concluded that the problem is actually caused by Applocker.
Note: If the command was processed successfully, it’s clear that AppLocker is not responsible for this issue – In this case, skip the next steps below and move directly to fix number 2.
If you got the 0x80073D01 when running the commands above, follow the instructions below to effectively disable AppLocker in order to avoid the error altogether:
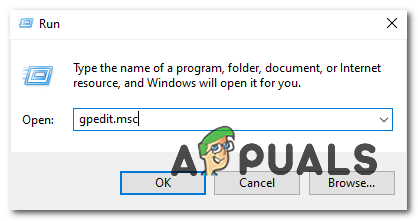
- Press Windows key + R to open up a Run dialog box. Next, type ‘gpedit.msc’ inside the text box, then press Enter to open up the Local Group Policy Editor. At the UAC (User Account Control), click Yes to grant admin access.

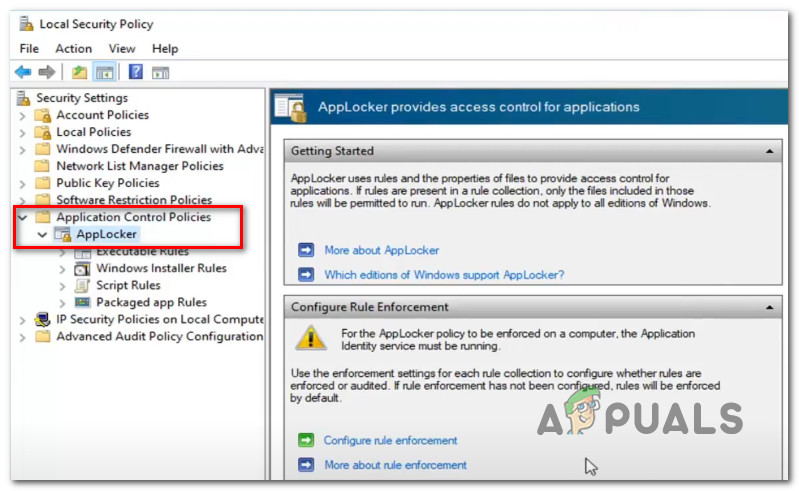
Opening the Local Group Policy Editor - Inside the Local Group Policy Editor, use the menu on the left to expand on the Application Control Policies menu, then click on AppLocker.

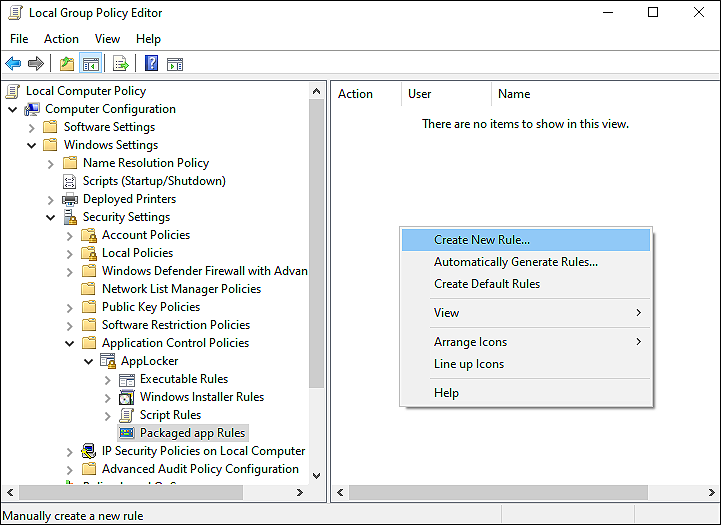
Opening the AppLocker policy - Next, from the AppLocker menu, click on Packaged app Rules, then move over to the right-hand pane.
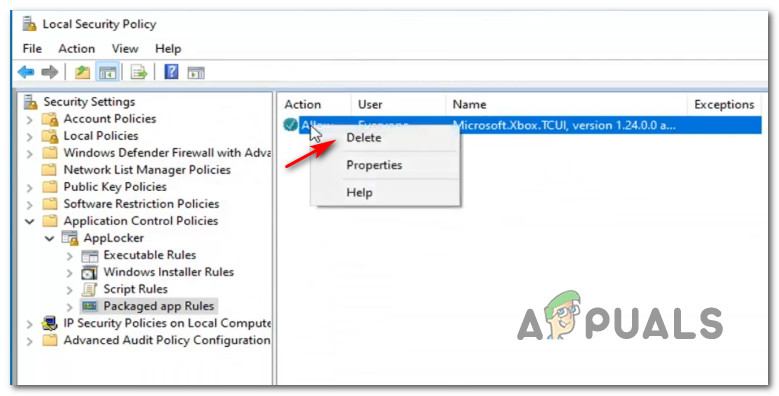
- Once you get to the right-pane, simply right-click any Applocker rules that are currently in place and choose Delete from the context menu.

Deleting the Applocker rule - Now that the Applocker has been effectively disabled, go back and repeat the installing or uninstalling operation that was triggering the 0x80073d01 previously.
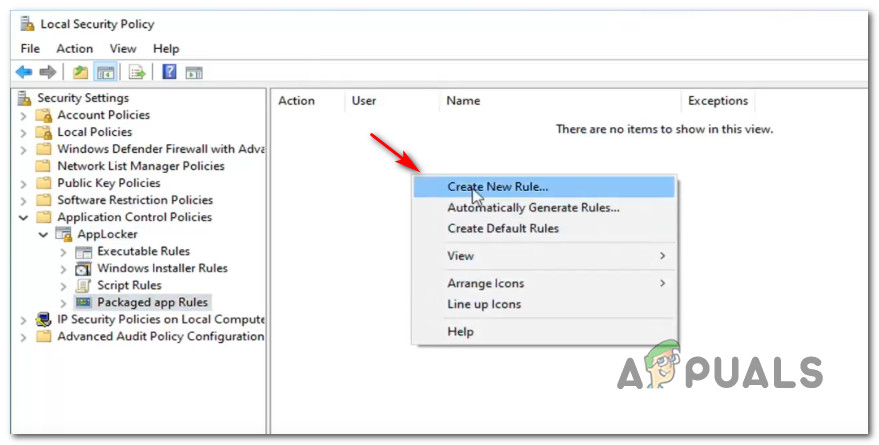
Note: In case the operation is successful and you want to re-enforce the Aplocker rules you had previously, return to the Packaged app Rules path inside Local Security policy. - From the context menu that just appeared, click on Create New Rule.

Creating a new Rules - At the first Create Packaged app Rules, click on the Next button at the first prompt as well as the second (on the Publisher tab).
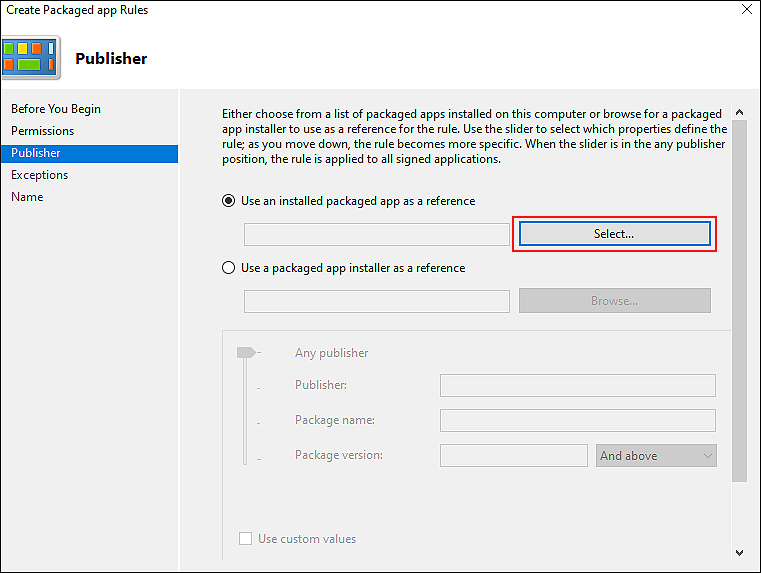
- Once you get to the Publisher section, check the Use an installed packaged app as a reference, then click on Select.

Using an installed package - Set your exceptions, permissions and name the rule however you want before hitting Save and enforcing the rule once again.

In case this method didn’t work for your or this scenario was not applicable, move down to the next potential fix below.
2. Running the Windows Apps Troubleshooter
If you previously made sure that Applocker is not causing the 0x80073d01 error, the next thing you should investigate is if this particular issue is related to an inconsistency with a built-in UWP (Universal Windows Platform) app like Windows Photos or Windows Movies & TV.
The best way to do this is to run the Windows App Troubleshooter and applying the recommended fix.
This is a utility that contains a series of generic automated fixes that will be effective for a variety of different errors including the 0x80073d01 error.
Several affected users have reported that new instances of the error have stopped appearing after running the Windows App Troubleshooter and applying the recommended fix.
If you’re looking for specific instructions on how to deploy this particular fix, follow the instructions below:
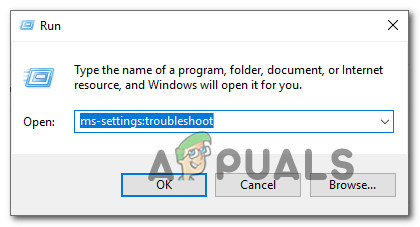
- Start by pressing the Windows key + R to open up a Run dialog box. Next, type ”ms-settings:troubleshoot” inside the text box and press Enter to open up the Troubleshooting tab of the Settings menu.
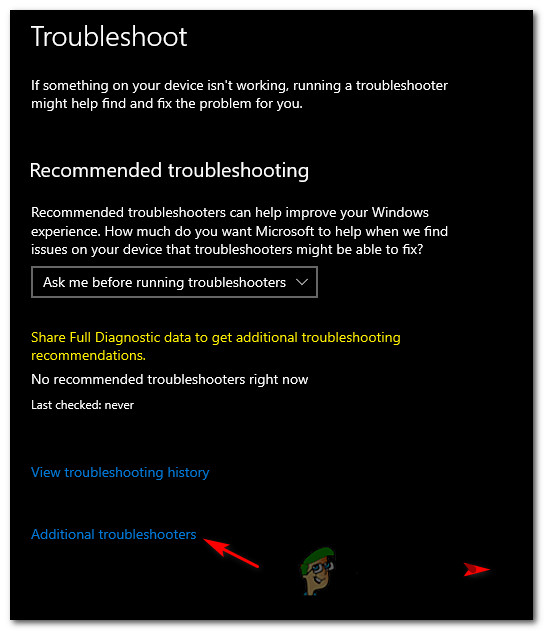
Opening the Troubleshooting app - At the first Troubleshoot window, click on Additional Troubleshooters at the bottom of the screen.

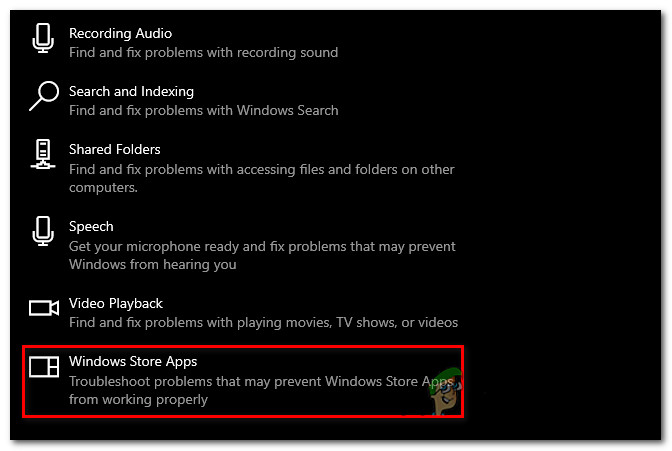
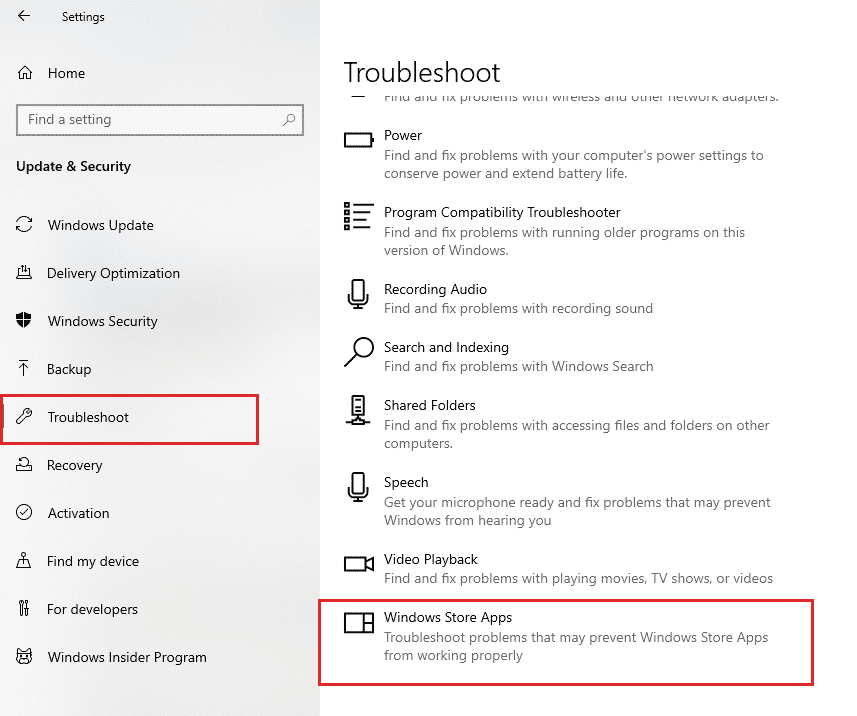
Opening the Additional Troubleshooting tabs - Once you’re inside the screen with every Windows 10 troubleshooter, the Find and Fix other problems section. Next, click on Windows Store Apps and click on the Run the Troubleshooter to open up the utility.

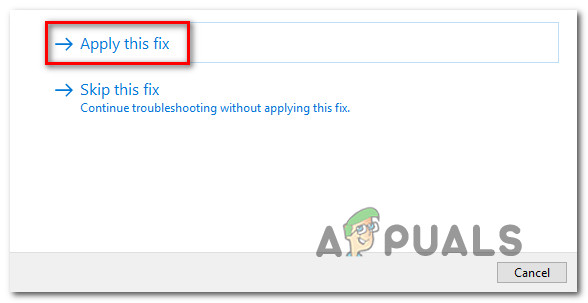
Opening the Windows Store Apps - Once you’re inside the Windows Store Apps utility, wait patiently until the initial scan is complete. If a viable repair strategy is found, follow the on-screen prompts to apply the recommended fix (depending on the issue that you’re dealing with). Click on Apply this fix to apply the recommended fix.

Applying the Fix Note: Depending on the problem that is identified, you might need to do a series of manual adjustments.
- Once the fix is successfully applied, restart your computer and see if the problem is resolved once the next startup is complete.
In case you’re still finding new instances of the ‘AppModel Runtime Error 0x490‘ error, move to the next potential fix below.
3. Resetting the Windows Store Cache
According to a lot of user reports encountering the 0x80073d01 when attempting to install or uninstall a Windows Store app, the issue is almost always related to some kind of corrupted Windows Store Cache.
If you feel like this scenario is applicable, the next thing you should do to fix the issue is to reset the Windows Store cache.
Note: This operation will not delete any application data – All it does is it removes any cached data related to UWP (Universal Windows Platform) applications.
To perform a reset of the Windows Store Cache, press Windows key + R to open up a Run dialog box. Next, type ‘wsreset.exe’ and press Ctrl + Shift + Enter to perform this action with admin access.
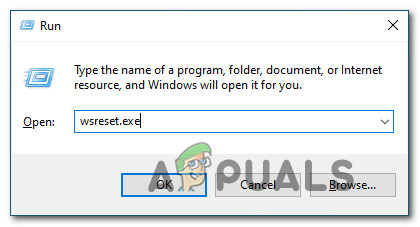
Note: After you initiate this operation, you’ll see a CMD prompt named wsreset.exe. Next, wait until the window auto-closes – That’s your cue that the cached data has been cleared.
Once the operation is complete, restart your computer and see if you’re able to complete the installation or the uninstallation of store apps without seeing the 0x80073d01.
Kamil Anwar
Kamil is a certified MCITP, CCNA (W), CCNA (S) and a former British Computer Society Member with over 9 years of experience Configuring, Deploying and Managing Switches, Firewalls and Domain Controllers also an old-school still active on FreeNode.
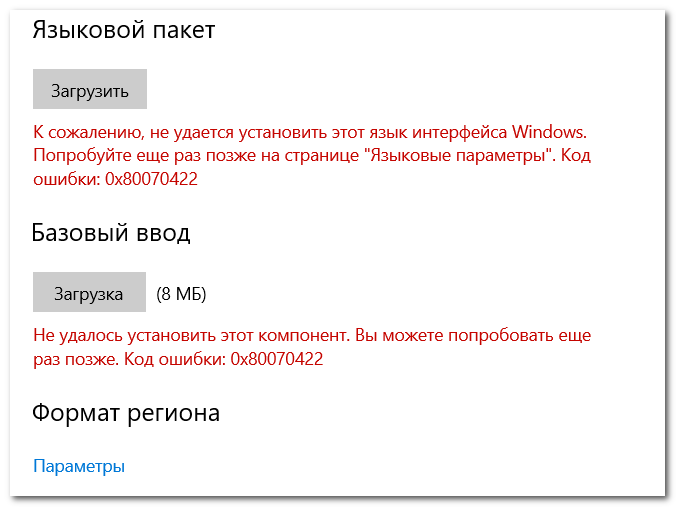
Самый простой и очевидный способ добавить в Windows языковой пакет – зайти в раздел «Время и язык» приложения «Параметры», нажать кнопку «Добавить язык» и выбрать нужную локализацию в предложенном списке. В большинстве случаев установка выполняется в штатном режиме, но нельзя исключать также и ошибок. Например, «Не удалось установить языковой пакет Windows. Попробуйте позже…».
Или «Не удалось установить компонент» код 0x8073D01, 0x8034500C либо 0x80070422 или 0x800f0950.
Вы можете попробовать установить язык из PowerShell командой:
Install-Language -Language название-пакета
Но, скорее всего, также получите ошибку.
Наиболее распространенная причина ошибки – особенности настроек получения обновлений, чаще с проблемой приходится сталкиваться пользователям корпоративных ПК, которые получают обновления с WSUS.
Решить ее можно путем изменения соответствующих политик.
Запустите командой gpedit.msc редактор локальных групповых политик, перейдите в раздел Конфигурация компьютера → Административные шаблоны → Система, найдите там политику «Укажите параметры установки дополнительных компонентов и восстановления компонентов» и откройте свойства.
Включив политику, активируйте в поле «Параметры» опцию «Скачайте содержимое для восстановления и дополнительные компоненты непосредственно из Центра обновления…».
Перезагрузите компьютер или обновите политики и перезапустите службу обновления вручную, выполнив в запущенной от имени администратора командной строке или PowerShell команды:
gpupdate /force, net stop wuauserv
И
net start wuauserv.
Можно пробовать устанавливать языковой пакет.
Если проблема не была решена, откройте редактор реестра командой regedit, перейдите в раздел:
HKLM\SOFTWARE\Policies\Microsoft\Windows\WindowsUpdate
И убедитесь, что параметр DoNotConnectToWindowsUpdateInternetLocations имеет значение 0. Если параметр отсутствует, создайте его вручную.
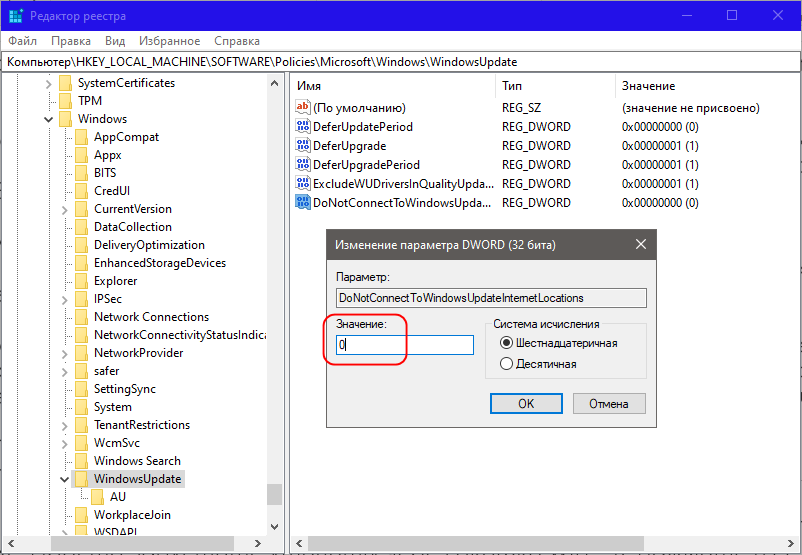
Значение 1 будет означать, что получение необязательных компонентов (FOD), в число которых входят языковые пакеты, заблокировано. Перезагрузите ПК или перезапустите службу обновления Windows.
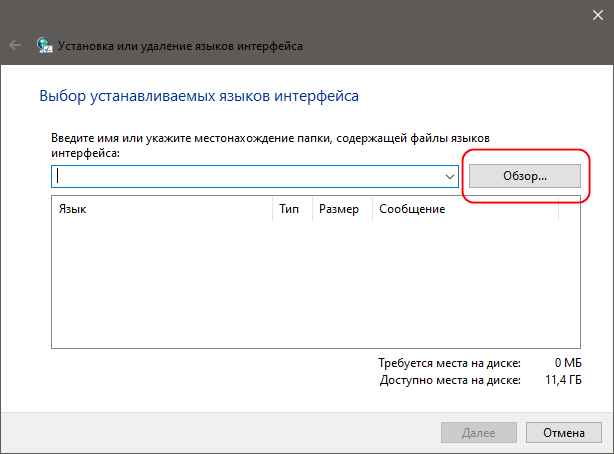
В крайнем случае нужный языковой пакет можно установить вручную средствами штатной утилиты lpksetup.exe.
Просто запустите утилиты через окошко Win + R, нажмите в ее окне кнопку обзора и укажите путь с заблаговременно скачанному из Интернета языковому файлу CAB.
Facing error 0x80073D01 when installing or uninstalling Windows 10 Store apps?
For the longest time, Windows was the only major platform not to have an official marketplace for apps. Now that it does, longtime users wonder why did Microsoft even bother to release an app store like this.
The dysfunctional app store is prone to errors, one of which is the error code 0x80073D01. This error code occurs when the users attempt to install or uninstall a UWP (Universal Windows Platform) app via the Windows Store.
Error 0x80073D01 can be caused by a number of reasons, including Applocker interference, corruption errors, and Windows Store cache glitch.
If you are facing a similar issue, you are in the right place because in this guide, we will walk you through the relevant troubleshooting steps in detail.
Let’s get started!
1. Run Windows Store Apps Troubleshooter.
Windows comes with several built-in troubleshooting utilities that are specifically designed to fix issues like the error code 0x80073D01.
One such handy utility is the Windows Store Apps Troubleshooter that scans and fixes any issues that might be preventing you from installing or uninstalling Windows 10 Store Apps is the Windows Store Apps Troubleshooter.
The Windows Store Apps Troubleshooter has been able to fix error code 0x80073D01 in the majority of cases, which is why if you are facing the error under discussion, then the first thing that you should do is run a scan using the Windows Store Apps Troubleshooter.
Here is how you can do that:
- Press Windows + R keys simultaneously to open a Run dialogue box.
- In the text field of the dialogue box, type ‘ms-settings:troubleshoot‘ and hit Enter. Doing so will launch the Troubleshooting tab.
- Scroll down the window and locate the Windows Store Apps option.
- Click on it and then hit the Run the Troubleshooter button.
- Wait for the troubleshooter to complete the scan. Your screen will be prompted with an alert if there are any problems detected by the troubleshooter. Select Apply this fix to proceed.
- Once the process completes, restart your PC.
Hopefully, running the Windows Store Apps Troubleshooter will resolve the issue at hand. You can also try running an SFC scan to eliminate the corruption errors within the system that might be preventing the Windows Store from performing the intended functions.
2. Reset Windows Store Cache.
Cached data refers to the temporary data stored in the operating system to help websites, browsers, and applications load faster. It helps the operating system retrieve data quickly and as a result, you enjoy a faster browsing experience.
However, there are times when cached data becomes corrupt, and causes issues like the one at hand.
Several users were able to fix the error code 0x80073D01 by resetting Windows Store Cache, which is why if running the Windows Store Troubleshooter did not work for you, we suggest trying to reset Windows Store Cache.
Here is how you can do that:
- Press Windows + R keys simultaneously to open a Run dialogue box.
- Inside the text field of the dialogue box, type ‘wsreset.exe‘ and press Ctrl + Shift + Enter keys to clear cache as an administrator.
That’s it.
If corrupt cached files were causing the issue, removing them will resolve it without any issues.
3. Disable AppLocker.
AppLocker helps the administrators control which apps and files can be run by standard users.
In case AppLocker is enabled on your PC, there is a high chance that this program is the culprit behind the error code 0x80073D01.
If this scenario is applicable, then try disabling AppLocker temporarily to install/uninstall apps using the Windows Store.
Here is how you can disable AppLocker on your PC:
- Type cmd in the search bar and click on Run as administrator to launch elevated Command Prompt.
- In the Command Prompt window, type the command mentioned below and hit Enter to execute it.
powershell -ExecutionPolicy Unrestricted Add-AppxPackage -DisableDevelopmentMode -Register $Env:SystemRoot\WinStore\AppxManifest.xml
Note: If while executing the command your screen displays an error similar to ‘Add-AppxPackage : Deployment failed with HRESULT: 0x80073D01’, it implies that the error is indeed caused by the AppLocker. In this case, proceed with Step 3.
However, if your screen did not display any error while executing the command, then you can skip this method.
- Open a Run dialogue box by pressing Windows + R keys simultaneously.
- Type ‘gpedit.msc’ in the text field of the dialogue box and hit Enter. Doing so will launch Group Policy Editor on your PC.
- In the Group Policy Editor, navigate to the location mentioned below.
Computer Configuration/ Windows Settings/ Security Settings/ Application Control Policies/ AppLocker/ Packaged app Rules
- Now delete all the contents in the right pane to disable AppLocker and repeat the action that was resulting in the error code 0x80073D01.
- If it did resolve the issue and now you want to enable AppLocker back, then navigate to the location mentioned in the 5th step again.
- Right-click anywhere in the right pane and select the Create New Rule option. This will launch a Create Packaged app Rules window on your PC.
- Click on Next in the next two windows that appear on your screen.
- In the next window, check the Use an installed packaged app as a reference option and click on Select.
- Now enter the exceptions and permissions according to your preferences and click on Save.
In case AppLocker was causing the issue under consideration, disabling it should allow installing/uninstalling UWP apps without any problems.
4. Try Using CleanMyPC.
Do you often clean your computer thoroughly? If you have not removed corrupted files in some time, now is the time, as they can do serious damage to your system. Additionally, junk files in your PC are most likely to blame for the issue at hand.
You can get rid of these files and the problems they cause by using a good PC cleaner.
Cleaners available online can scan your computer for errors, and fix them automatically as they find them. We tested some of the best online cleaners and found CleanMyPC to be the best.

With CleanMyPC, you can remove all kinds of junk files from your computer and increase its performance. CleanMyPC is also quite easy to use. As soon as CleanMyPC runs a scan, it will find the problems within minutes and fix them without needing your input much.
Give your PC a performance boost by installing CleanMyPC!
Try CleanMyPC Now!
5. Reinstall Windows Store.
If none of the methods mentioned above works for you, then try reinstalling the Windows Store. Reinstalling the application returns it to its initial state and addresses all of the application’s bug/corruptions errors.
However, you will lose all your app data, including your sign-in credentials. This is why before proceeding, make sure you note down your sign-in details somewhere safe. Hopefully, reinstalling the app will fix the issue once and for all.
This wraps up our guide on repairing the Microsoft Store error 0x80073D01 on your PC. We tried to walk you through the steps in detail and hope that our troubleshooting steps helped you fix the issue. If you have questions regarding the troubleshooting methods, please let us know in the comment section below.
If this guide helped you, please share it. 🙂
-
Zainab Falak is a staff writer for Saint and an expert in Microsoft Windows, having authored more than 200 posts. She has a Bachelors in Actuarial Sciences and her passion for computers extends to exploring various aspects, from UI customization to the Windows registry and exploring error codes. Twitter
LinkedIn
View all posts
The error code 0x80073d01 is a Store-related issue and it mostly occurs when installing apps over Microsoft Store on a Windows PC. This error occurs mostly when there is a problem with the installation, update, or removal of an application from the Windows Store. In this blog post, we will discuss the reasons first why it occurs, and five working solutions for it.

To solve an error code 0x80073d01 when installing new apps on Microsoft Store, attempt the below series of fixes. You may try these fixes in any order, however, we suggest following the fixes in the same order as they were put in –
- Check Your Network Connection
- Troubleshoot Windows Store Apps
- Reset Microsoft Store
- Reinstall Microsoft Store using PowerShell
- Uninstall and then Reinstall the faulty app
1] Check Your Network Connection
Installing new apps or upgrading the existing ones fails on an error code 0x80073d01 when your device is not connected to an active internet connection. You should check and reset your network, if required, using the below steps –
- Open the Settings app by pressing Win + I.
- Select Network & Internet from the left pane and check if your device is connected to some WiFi or Ethernet.
- If you don’t see any network connection, go to the WiFi icon and check if your network is listed there. Select the same and use the correct credentials to sign into the chosen network.
- In case you are not able to connect to the internet, go to Settings > Troubleshoot > Other troubleshooters > and click the Run button available beside Network and Internet. Click Next when the troubleshooter launches and follow the on-screen instructions.

After this is over, you must be able to connect to your network and receive internet over your Windows PC.
Alternatively, one may also check the network adapters, IP addresses, and other network-related details by opening CMD as administrator and running this code on it –
ipconfig
You may reset your Network connection by running the following series of codes on the same console –
ipconfig /release
ipconfig /flushdns

ipconfig /renew
netsh int ip reset
netsh winsock reset
After you run the above set of commands on the elevated console, check if you are now able to connect to your network.
2] Troubleshoot Windows Store Apps
If your device is well connected to an active internet, troubleshoot Windows Store apps for possible issues on it. This tool can check for underlying causes on your PC and resolve them. Here’s how to perform this task –
- Press Windows + I to launch Settings.
- Go to System and click Troubleshoot.
- Select Other troubleshooters, and locate Windows Store apps at the bottom.
- When found, click the Run button available on its right end.

- When the troubleshooter launches, click Next and follow the on-screen instructions.
- This tool will check for the underlying causes on your PC and repair the same.
After this is over, restart your PC. Wait for some time and sign back into your device again. Hopefully, this error code resolves now when installing apps using Microsoft Store.
3] Reset Microsoft Store
Sometimes, even the troubleshooting Microsoft Store fails as well. If that’s the case, you should repair or reset the Microsoft Store app. Follow the below instructions on how to carry out this process –
- Press Windows + R to launch the Run dialog.
- Type WSReset.exe on it and hit OK.

- Command Prompt will start next running the repairing code for Microsoft Store.
- Wait for this task to be over and once it completes, you will find Windows Store starting automatically.
4] Reinstall Microsoft Store using PowerShell
If you’re still experiencing an error code 0x80073d01 when installing apps over Microsoft Store, reinstalling this system app is totally worth a try. When you reinstall Microsoft Store, this reset the application to its factory settings. As a result of this, there’s a possibility that you don’t encounter the same error code again. Here’s how to proceed ahead with this solution –
- Press the Windows key + X on your keyboard and select “Terminal (Admin)” from the power menu.
- The terminal will launch next opening into Windows PowerShell (Admin).
- On the elevated console, type the following and press Enter.
Get-AppxPackage *WindowsStore* | Remove-AppxPackage
- Executing the above command will uninstall Microsoft Store from your Windows PC.
After the uninstallation completes, reinstall Microsoft Store by running the below command –
Get-AppxPackage -AllUsers| Foreach {Add-AppxPackage -DisableDevelopmentMode -Register "$($_.InstallLocation)\AppXManifest.xml"}
- Wait for this command to execute and when this is over, Microsoft Store will be successfully installed on your PC.
- After the installation completes, close the terminal, and restart your computer.
Sign back into your device again and launch Microsoft Store by pressing its icon. Hopefully, you must now be able to use the Windows Store app as usual without getting into some other error codes.
5] Uninstall and then Reinstall the faulty app
If this error was occurring when upgrading existing apps over Microsoft Store, the problem may lie within the app itself. To overcome this issue then, you must uninstall the faulty app, restart your PC, and then reinstall the buggy app again.
Here’s how to perform this task –
- Press Windows + X, and select Installed Apps.
- On the next screen, locate the faulty app, and click the three dots available next to it.
- A pop-up menu will appear next, select Uninstall.
- Wait for the app to uninstall successfully and once this is over, restart your PC.
Wait for some time and restart Microsoft Store. Check if you can now install the recently removed apps on your PC.