
The error “Sorry, we’re having trouble determining if your PC can run Windows 11” may be making you frustrated now. If you get the Windows 11 Setup error, how can you fix it to upgrade to Windows 11 successfully? Go to this post and you can find many solutions offered by MiniTool Solution.
Sorry We’re Having Trouble Determining If Your PC Can Run Windows 11/10
Windows 11 has been released to the public for several months and some of you choose to upgrade to Windows 11. However, the update or installation process is not successful and you may get some errors, for example, Windows 11 installation has failed, error code 0xC1900101, error code 0x80070070, etc.
Besides, you may run into another common error “Sorry, we’re having trouble determining if your PC can run Windows 11. Please close Setup and try again”. This error happens when you run the Setup tool using an ISO file to upgrade or install Windows 11 on your PC. Sometimes you get the error “We can’t tell if your PC is ready to continue installing Windows 11”.

Tip: Also, the same error “We’re having trouble determining if your PC can run Windows 10” can also happen when you run Windows 10 Setup to install Windows 10.
The common reasons for “trouble determining if your PC can run Windows 11” are various, including Windows partition not marked as active, disabled TPM, Windows Update inconsistency, 3rd party interference with the upgrading process, system file corruption, and corrupted BCD data.
Fortunately, you can easily fix this issue no matter which reason it is. In the following part, you can find some effective methods and now let’s go to see the troubleshooting tips for Windows 11.
Fixes for We’re Having Trouble Determining If Your PC Can Run Windows 11
Manually Check If Your PC Is Compatible with Windows 11
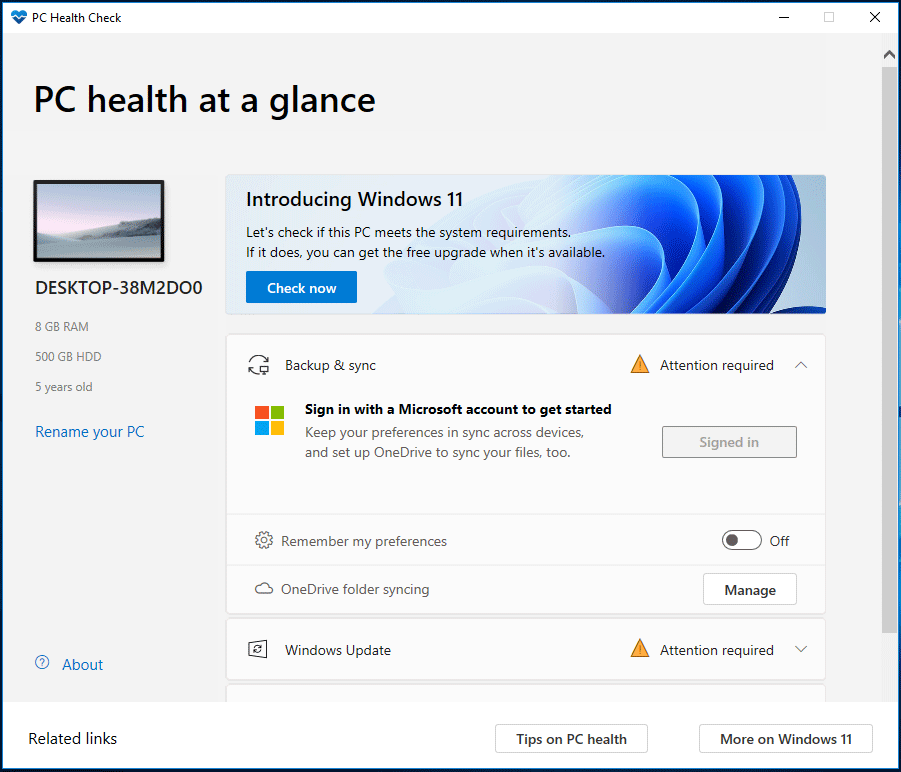
The message you get mentions that the Setup tool cannot determine if Windows 11 can run on the PC. So, first of all, you should perform a compatibility check. To do this work, you can use the PC Health Check app from Microsoft. This related post – Compatibility Test: How to Check if Your PC Can Run Windows 11 is recommended here.
However, most of the time, the hardware of the PC goes far beyond the required minimum system requirements and the update still fails with the error mentioned above. To fix this Windows 11 Setup error, go to try other ways below.
Mark Partition as Active
If your PC is set to dual boot, you may get the error “Sorry, we’re having trouble determining if your PC can run Windows 11” since the Windows partition (most likely the C: drive) may not be marked as active. In this situation, you should go to have a check.
To do this work, you can run Disk Management, and here is what you should do:
Step 1: Press Win + X to open a menu and choose Disk Management in Windows 11.
Step 2: Right-click on your system partition and click Mark Partition as Active from the context menu.
Tip: If this option is greyed out, this partition is active and it is not the reason for the error “we’re having trouble determining if your PC can run Windows 11”. If you don’t exactly know which one is the system partition, go to see which partition contains Boot, Page File, Crash Dump, and Basic Data Partition.
Step 3: After marking the Windows partition as active, restart your PC and try to perform the in-place upgrade using Windows 11 Setup to see if the error disappears.
Enable TPM
If your PC is equipped with a TPM (Trusted Platform Module) 2.0 chip but TPM is disabled, “we’re having trouble determining if your PC can run Windows 11” appears when upgrading to Windows 11 via the Setup tool. So, make sure TPM is enabled.
Tip: If you don’t know if your PC supports TPM 2.0, have a check – press Win + R, type tpm.msc and click OK. If the status says “The TPM is ready for use” and the version shows 2.0, TPM 2.0 is enabled. If not, go to enable it.
Step 1: Press F2, Del, or another key to enter BIOS. Depending on different manufacturers, the key to access BIOS is different.
Step 2: Navigate to the Security setting, look for an entry named Trusted Platform Module, TPM, or a similar one, and enable it.
Step 3: Save the change and boot up your PC. Then, install Windows 11 to see if the Setup error is removed.
Tip: In addition to TPM, you should make sure Secure Boot is also enabled. To do this work, follow the guide in this post – Windows 11 UEFI: Everything You Should Know Is Here!
Run Windows Update Troubleshooter
If you get the message “we’re having trouble determining if your PC can run Windows 11” when trying Windows 11 update, you may be dealing with a corrupted Windows Update component (typically, other pending updates also fail). In this case, you can fix your issue by running Windows Update troubleshooter.
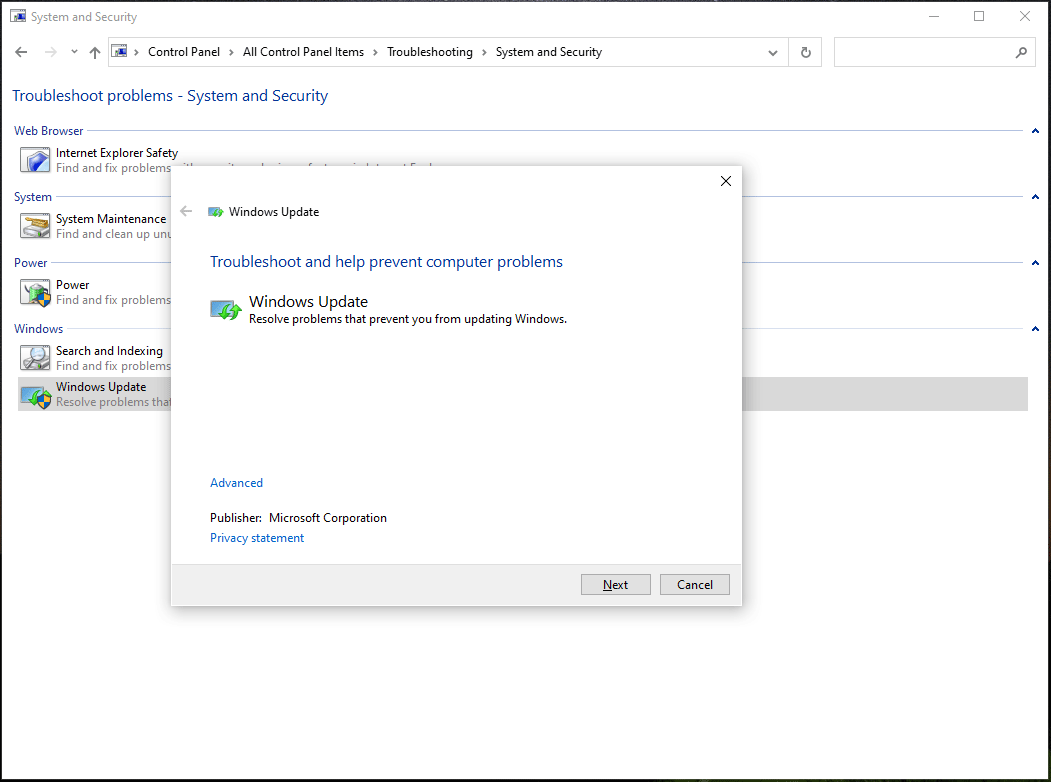
Step 1: Launch Control Panel via the search box and view all the items by icons.
Step 2: Click Troubleshooting > System and Security > Windows Update.
Step 3: Click Next and this troubleshooter will start detecting and fixing computer problems.
In Windows 10, you can alternatively go to Settings > Update & Security > Troubleshoot > Additional troubleshooters, click Windows Update, and choose Run the troubleshooter.
Rebuild BCD Data
Corrupted BCD (Boot Configuration Data) can be a reason that you every time get the Windows 11 Setup error when upgrading to Windows 11. The Setup tool will still check the integrity of the MBR and BCD files when upgrading the system to Windows 11. If there is any inconsistency, the upgrade process will stop with the error “we’re having trouble determining if your PC can run Windows 11”.
To fix your issue, rebuild BCD via the following steps.
Step 1: Type cmd to the search box and right-click on the tool to choose Run as administrator.
Step 2: Type in the following commands and press Enter after each one.
bootrec /fixmbr
bootrec /fixboot
bootrec /scanos
bootrec /rebuildbcd
Tip: If you get the bootrec access denied error during the fix process, go to find solutions from this post – Quickly Fix: Bootrec /Fixboot Access Is Denied in Windows 10.
Remove GPU Drivers
According to some users, Windows 11 can be upgraded successfully via the Setup tool after uninstalling graphics card drivers from your PC. So, you can also have a try to see if the issue “trouble determining if your PC can run Windows 11” can be fixed.
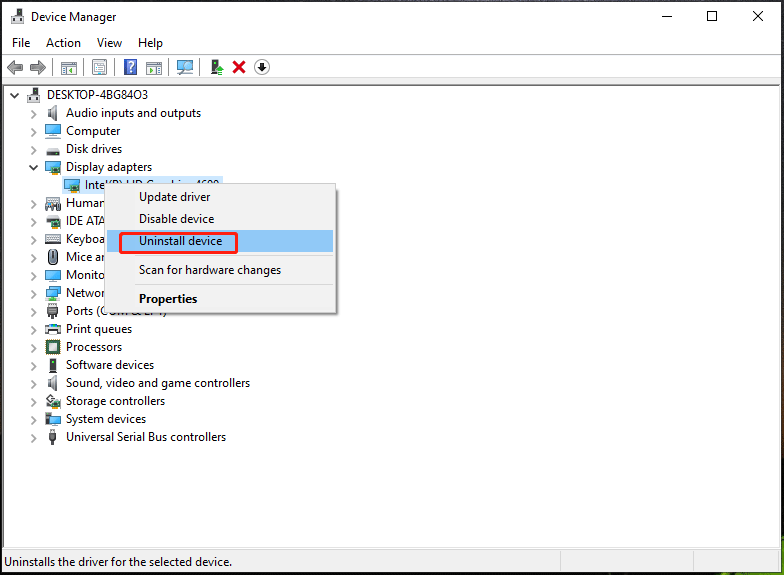
Step 1: Press Win + X and choose Device Manager to run this tool.
Step 2: Expand Display adapters and right-click on the GPU driver to choose Uninstall device.
Later, Windows will automatically install a new video card driver.
Perform a Clean Boot
If you still encounter the issue, you need to make sure no third-party processes or services interfere with Windows 11 Setup. The best way is to run a clean boot for your PC and perform the Windows 11 update without any interference. The clean boot only allows Windows to run basic Windows processes and startup items, helping exclude the possibility of a 3rd party interference.
How to clean boot your Windows 10? Follow the steps below:
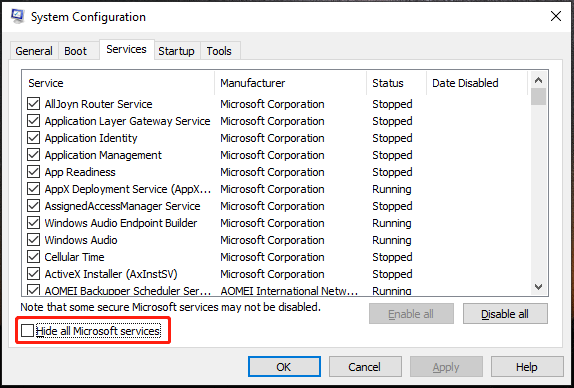
Step 1: Type Win and R to get the Run dialog, type in msconfig, and click OK to open the System Configuration window.
Step 2: Click Services, check the box of Hide all Microsoft services and click Disable all.
Step 3: Under Startup, open Task Manager and then disable all the startup items from here.
Free up Disk Space
To install Windows 11 on your PC, the disk space should be at least 64GB of storage and Windows will install some required updates during the setup. If there is not enough space on your hard drive, the Windows setup process will be interrupted by the error “we’re having trouble determining if your PC can run Windows 11”.
How to free up disk space in Windows 10? There are many ways for you and you can find some in this related article – 10 Ways to Free up Disk Space in Windows 10/11.
Run a Clean Install
If you cannot remove the Windows 11 Setup error after trying the solutions above, the last way you can try is to perform a clean install of Windows 11. This can lead to data loss, thus, you had better back up your important files on your drive, especially personal files on the desktop.
Back up Files Before Clean Install
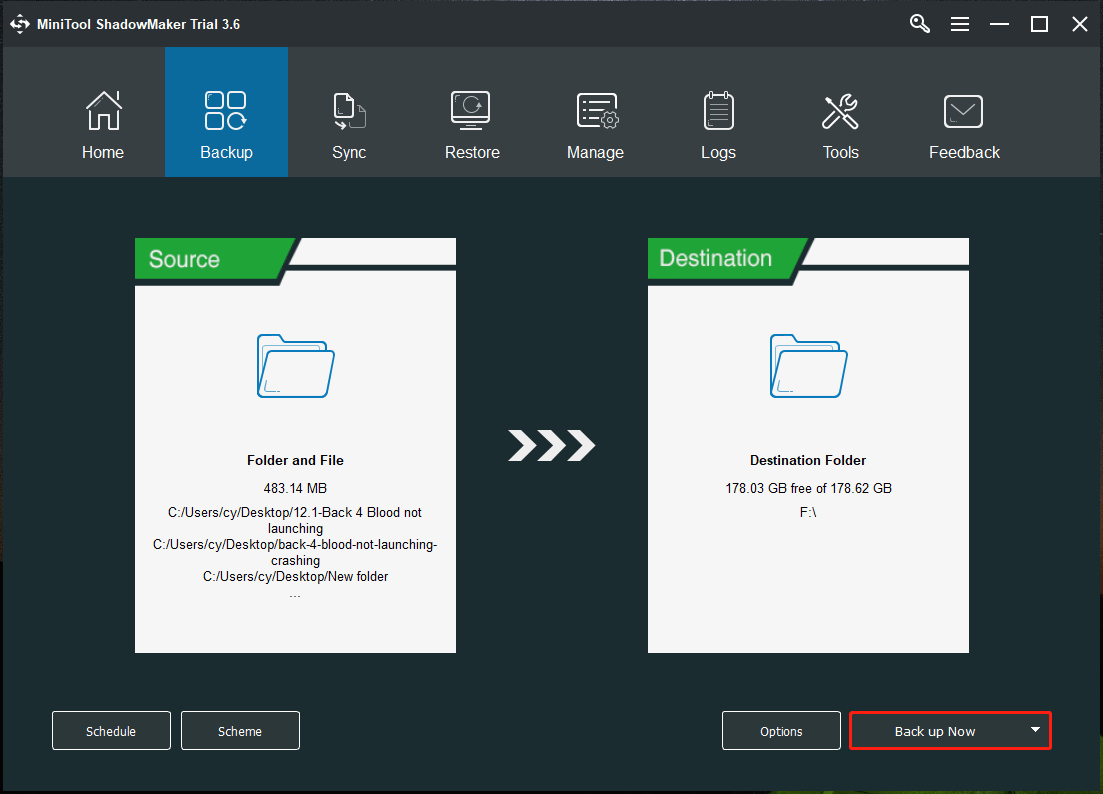
To back up your crucial data, you can choose to use a professional PC backup software for Windows 11/10/8/7 and MiniTool ShadowMaker is such a program. With it, you can easily back up files, folders, disks, drives, and Windows operating systems. Besides, incremental, differential backup, and scheduled backup are supported. Disk cloning and file sync can also be performed by this software.
Now, download MiniTool ShadowMaker by clicking the following button and install it on your PC for file backup.
MiniTool ShadowMaker TrialClick to Download100%Clean & Safe
Step 1: Double-click the icon of this program to launch it.
Step 2: Continue using the Trial Edition by clicking Keep Trial.
Step 3: Click the Backup option, tap on Source > Folders and Files, choose items you want to back up, and click OK.
Step 4: Choose a destination to save the backed-up data.
Step 5: Finally, click Back up Now to execute the file backup.
After backup, now you can start the clean install of Windows 11.
Clean Install of Windows 11
To do this work, follow the steps below:
Step 1: Go to Microsoft website to get Windows 11 ISO or Media Creation Tool.
- Or you can go to the Download Windows 11 Disk Image (ISO) section to download an ISO file of Windows 11 and then use Rufus to burn the ISO file to your USB drive to get a bootable drive. (Related article: Rufus Windows 11 Download & How to Use Rufus for a Bootable USB)
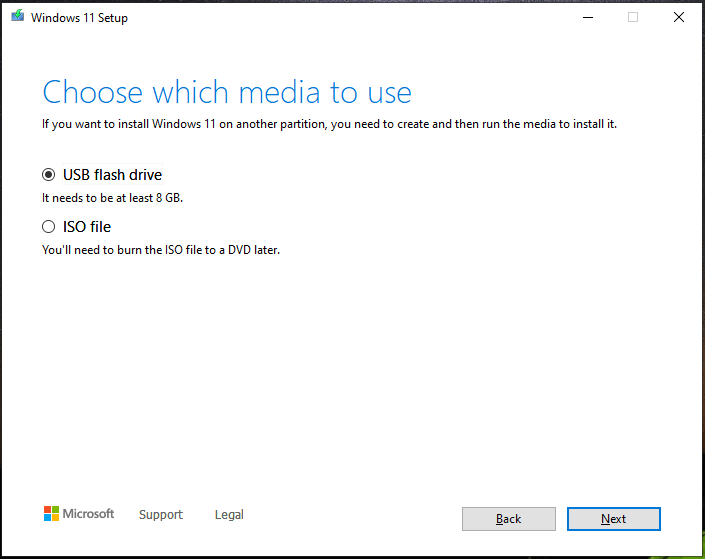
- You can download the media creation tool from the Create Windows 11 Installation Media Then, launch this tool to make a bootable USB or DVD. (Related article: How to Create Windows 11 Installation Media on PC, Mac, or Linux)
Step 2: Press a specific key like F2 or Del to boot your PC to the BIOS menu. Then, change the boot order to let Windows run from the bootable USB drive you have created.
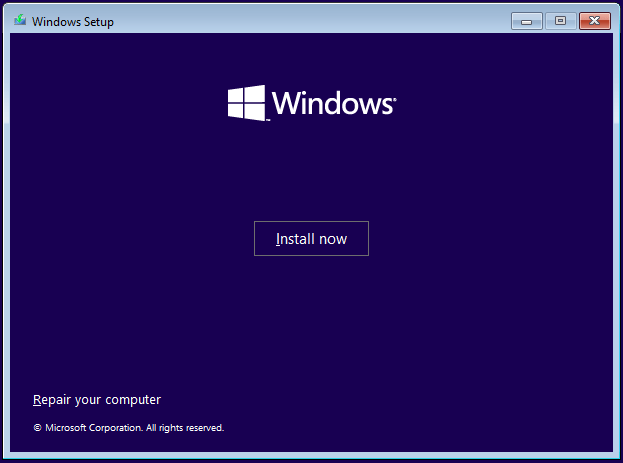
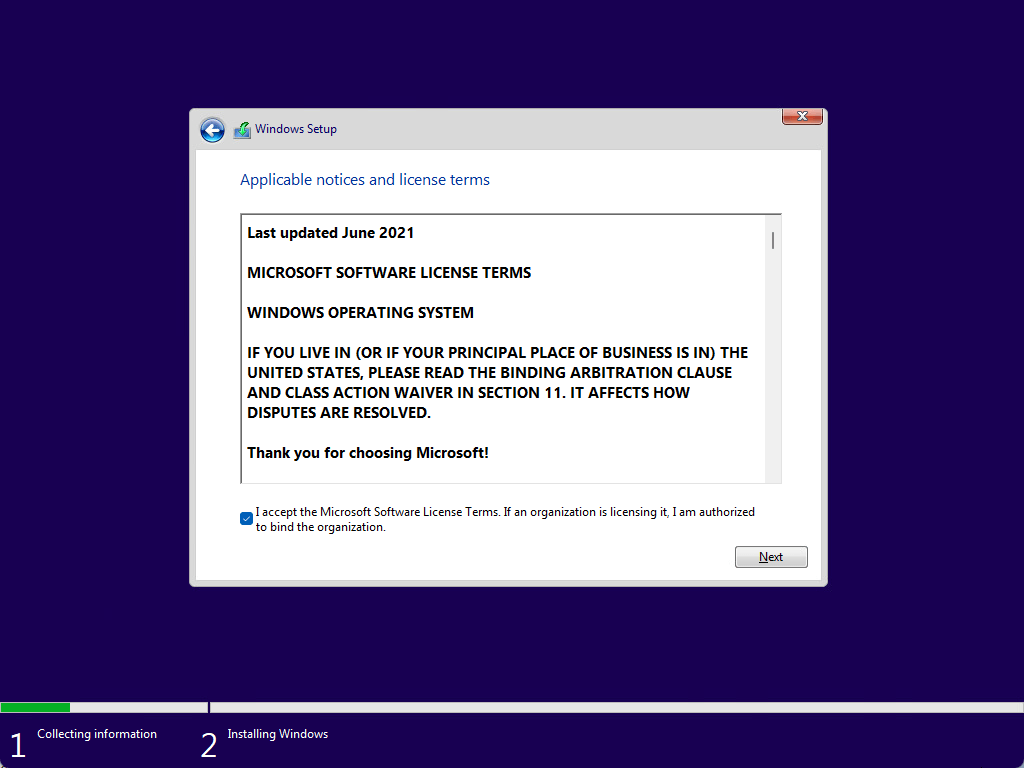
Step 3: In the Windows Setup interface, choose a language, keyboard method, time and currency format.
Step 4: Click Install now to continue.
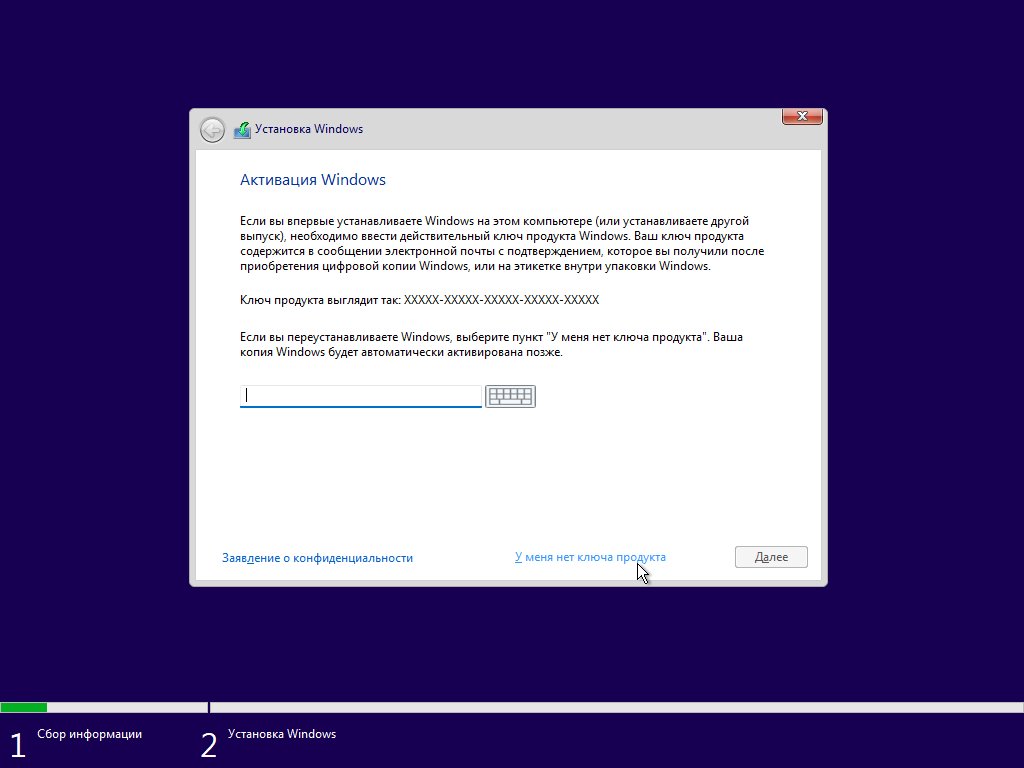
Step 5: Choose I don’t have a product key > Custom to install Windows only.
Step 6: Choose the partition on which you want to install Windows 11.
Step 7: Start the installation process by following the on-screen instructions.
Bottom Line
That’s all the methods to fix the error “Sorry, we’re having trouble determining if your PC can run Windows 11”. If you are bothered by this issue now, try these ways and you can easily get rid of the trouble. Note that before you install or upgrade to Windows 11, your PC should meet the system requirements.
If you have any other useful solutions to fix this Windows 11 Setup error, you can let us know by leaving a comment in the following part. Thanks in advance.
- Updated on April 7, 2025
- Other
We like to install Windows 11 on a Virtual Machine (VM). After booting from the ISO, we go through the Windows Setup. After selecting the Windows 11 version, a message shows: This PC can’t run Windows 11. This PC doesn’t meet the minimum system requirements to install this version of Windows. Why do we get this message, and what is the solution for this PC can’t run Windows 11?
Table of contents
- This PC can’t run Windows 11
- Solution for this PC can’t run Windows 11
- Step 1. Go to previous Windows Setup step
- Step 2. Open Command Prompt
- Step 3. Open Registry Editor
- Step 4. Create registry key and values
- Step 5. Close windows
- Install Windows 11
- Conclusion
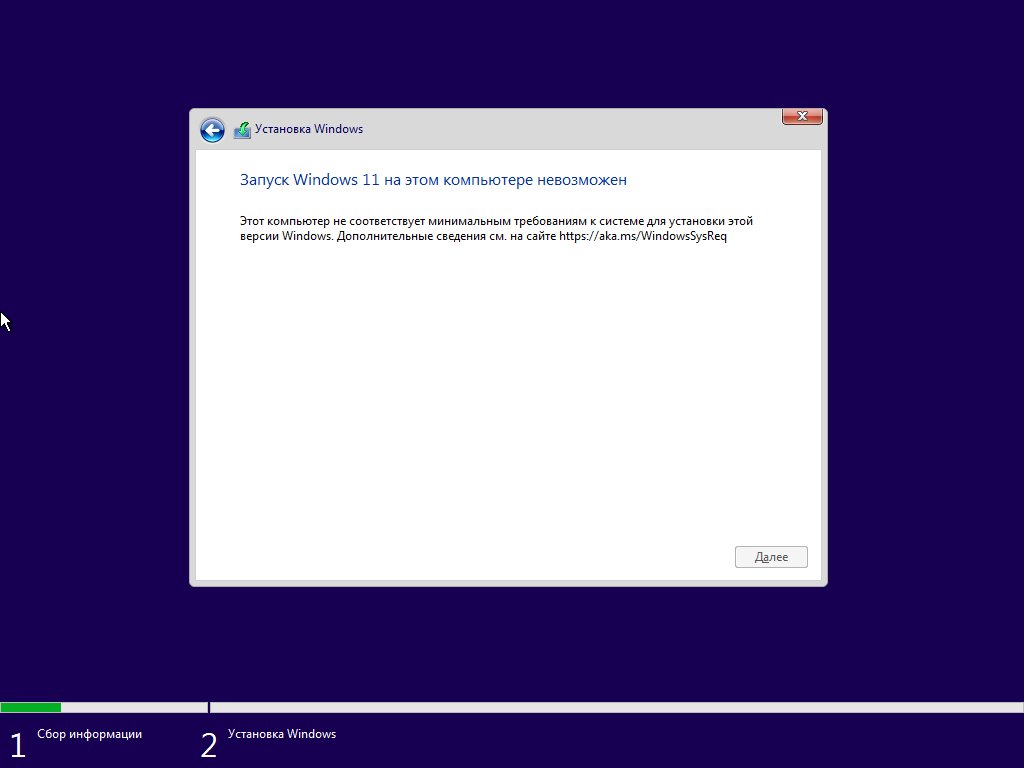
After we boot the VM with the Windows 11 ISO, we go through the first steps in the Windows Setup. After we select the Windows OS that we want to install, we can’t go further because we get the message:
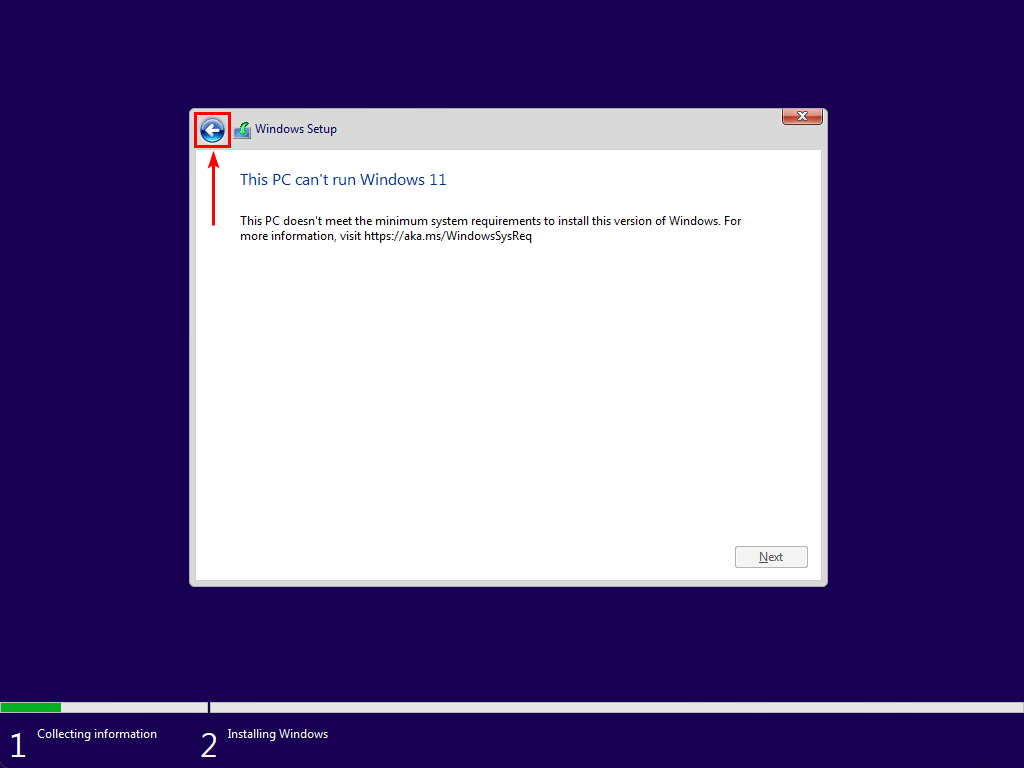
This PC can’t run Windows 11
This PC doesn’t meet the minimum system requirements to install this version of Windows. For more information, visit https://aka.ms/WindowsSysReq.
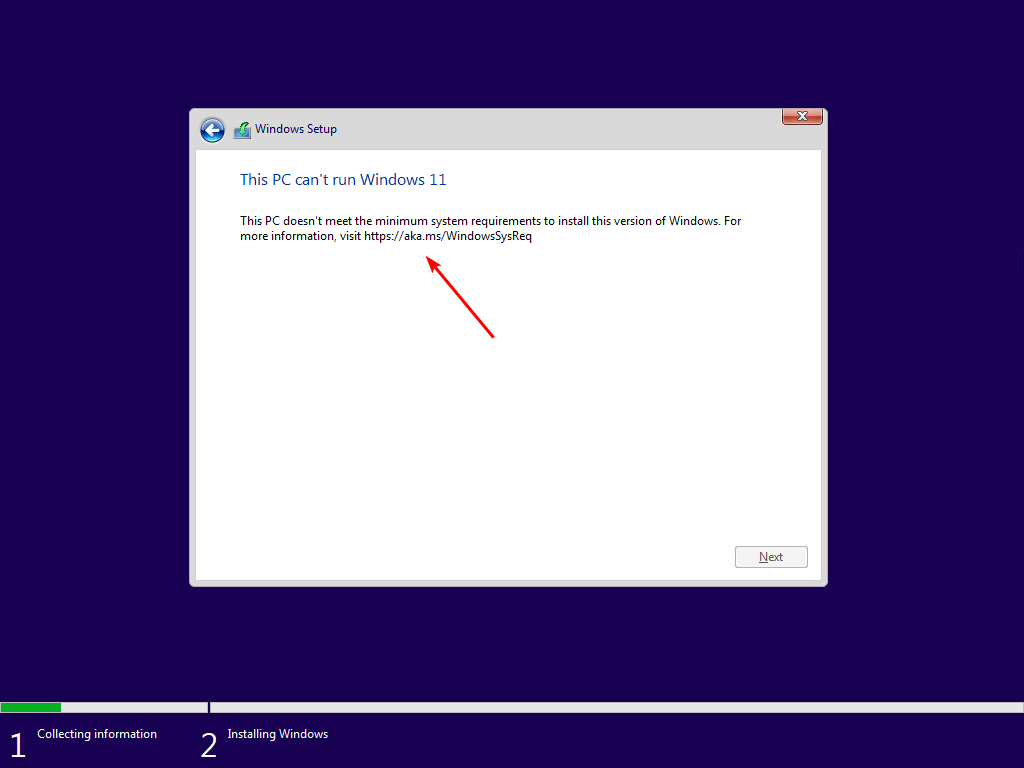
Why do we get this message, and what is the solution for this PC can’t run Windows 11?
Solution for this PC can’t run Windows 11
The solution to bypass the PC can’t run Windows 11 message is to add three DWORD values in Registry Editor to bypass the checks. Let’s find out how to do that step by step.
Step 1. Go to previous Windows Setup step
Click on the previous button on the left top.
Note: If you don’t have the previous button, you’re using the new version of the Windows 11 setup. Restart your computer, and once you are in the setup, don’t proceed further. Go to the next step in this article.
Step 2. Open Command Prompt
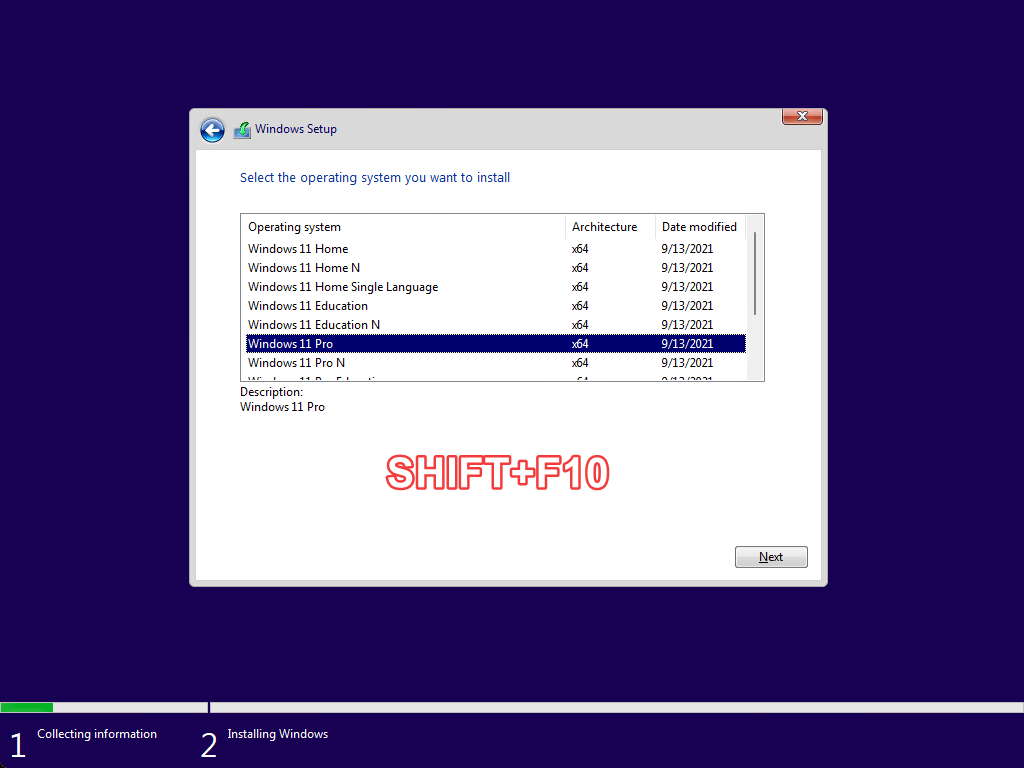
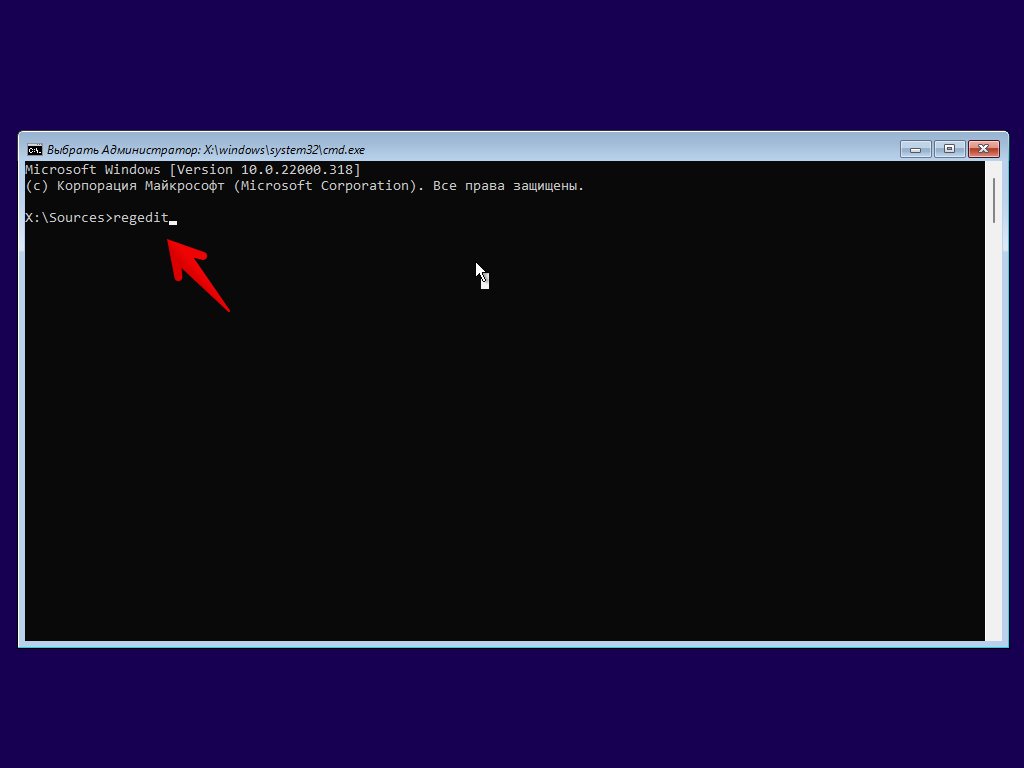
Press Shift+F10 on the keyboard to open a Command Prompt.
Step 3. Open Registry Editor
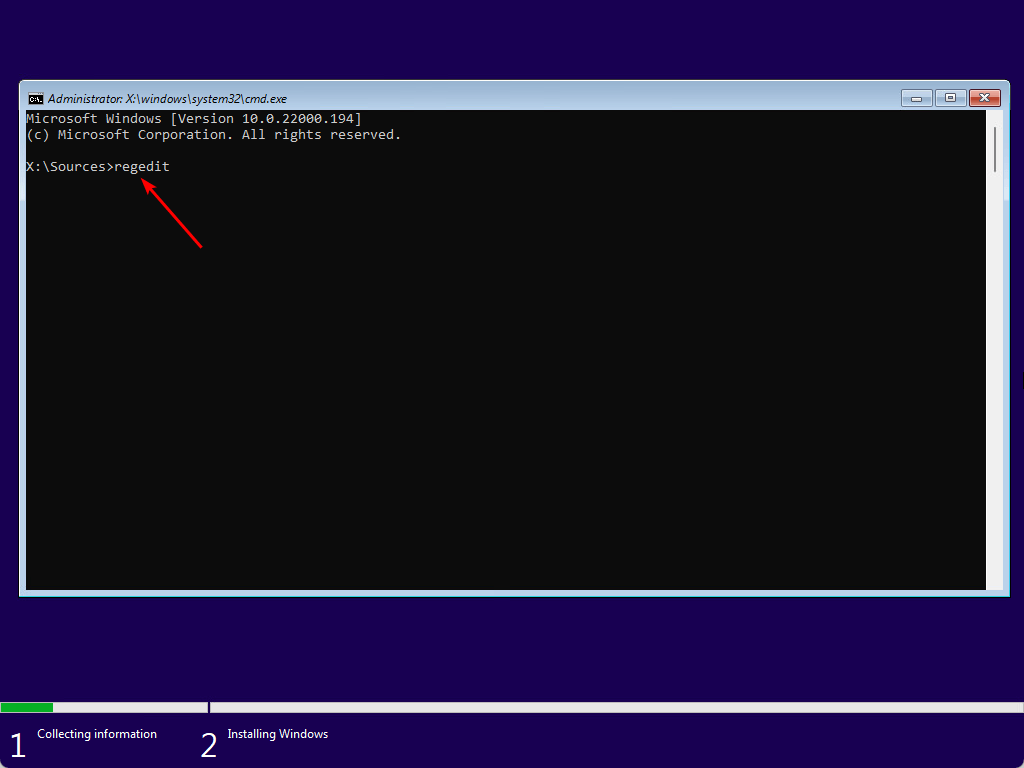
Type regedit in the Command Prompt to open the Registry Editor.
Step 4. Create registry key and values
Navigate to HKEY_LOCAL_MACHINE\SYSTEM\Setup. Create a new Key with the name LabConfig. After that, add the following five DWORD (32-bit) Values with value data 1.
- BypassCPUCheck
- BypassRAMCheck
- BypassSecureBootCheck
- BypassStorageCheck
- BypassTPMCheck

Step 5. Close windows
Get back to the Windows Setup screen by clicking on the close buttons to close the Registry Editor and Command Prompt window.
Install Windows 11
After completing the steps, let’s verify that we can proceed further and install Windows 11 without the message that this PC can’t run Windows 11.
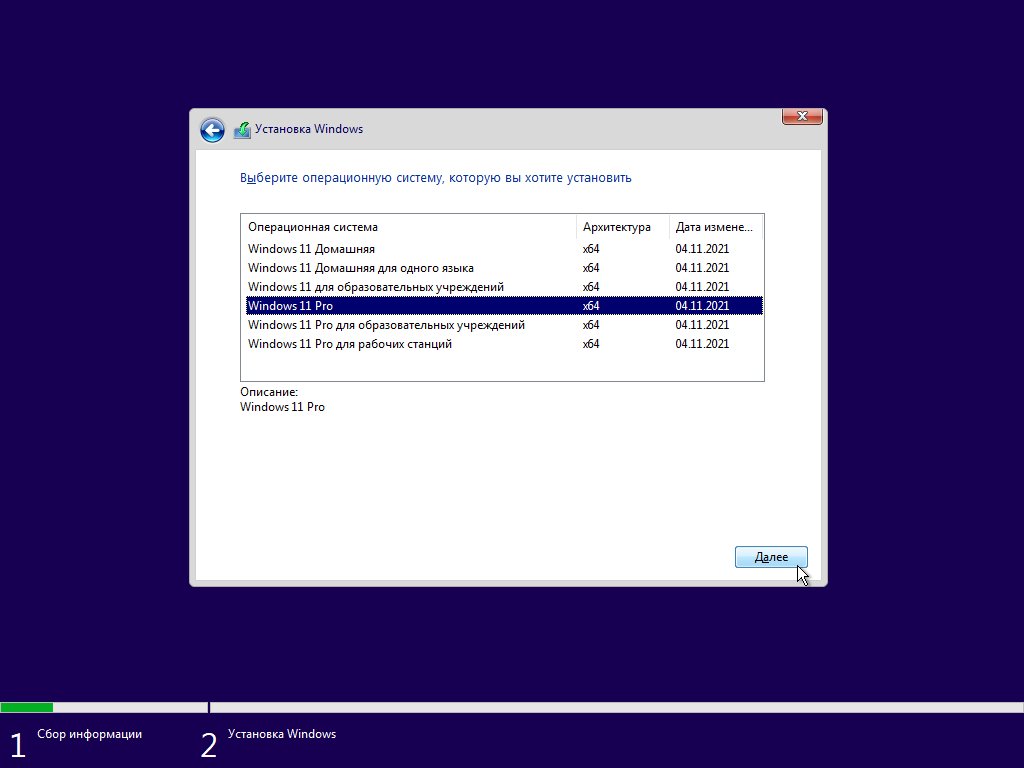
Select the operating system you want to install. Click Next.
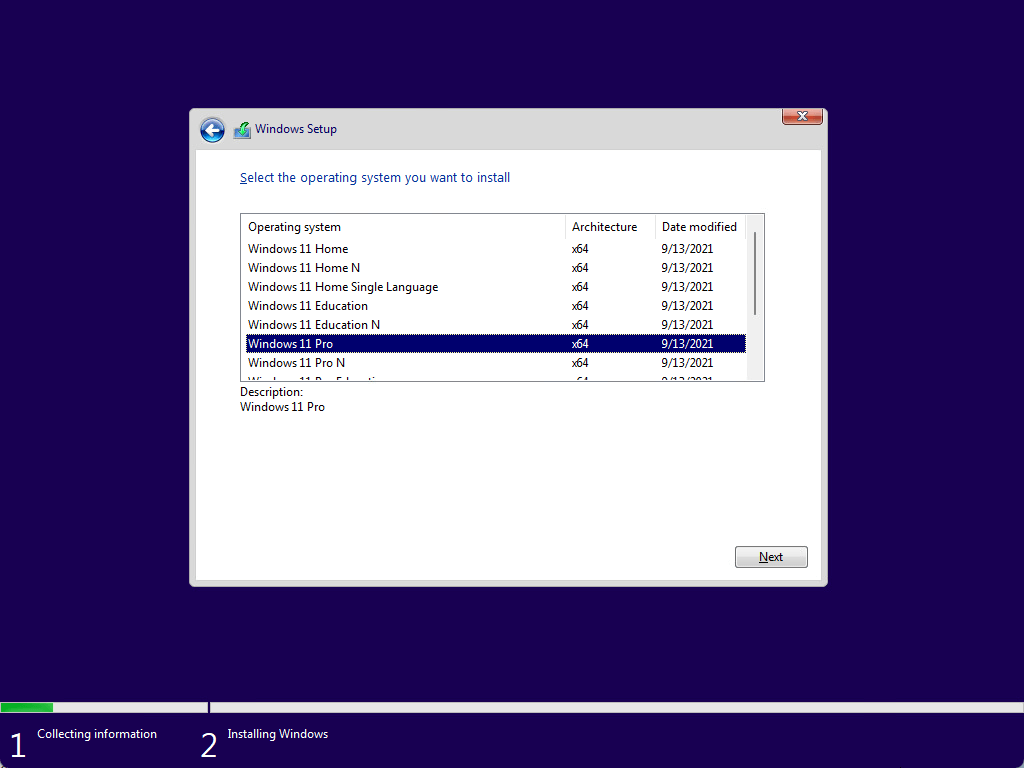
You can proceed with the Windows Setup and install Windows 11.
Windows 11 message, this PC can’t install Windows 11, successfully bypassed. Did this work for you?
Read more: Turn off Windows Defender in Windows 11 permanently »
Conclusion
You learned why you are unable to install Windows 11. The solution to this problem is to add five registry values to bypass the check. After that, you can install Windows 11 on the system. It can be a Virtual Machine (VM) or a physical machine.
Did you enjoy this article? You may also like Disable Windows Firewall with PowerShell. Don’t forget to follow us and share this article.
ALI TAJRAN is a passionate IT Architect, IT Consultant, and Microsoft MVP. He started Information Technology at a very young age, and his goal is to teach and inspire others. Read more »
Этот компьютер не соответствует минимальным требованиям — Как установить Windows 11? Обходим ограничение мастера установки Windows 11
Как установить Windows 11 на несовместимое железо? Проблема заключается в том, что при попытке установить Windows нас встречает ошибка «Запуск Windows 11 на этом компьютере невозможен».
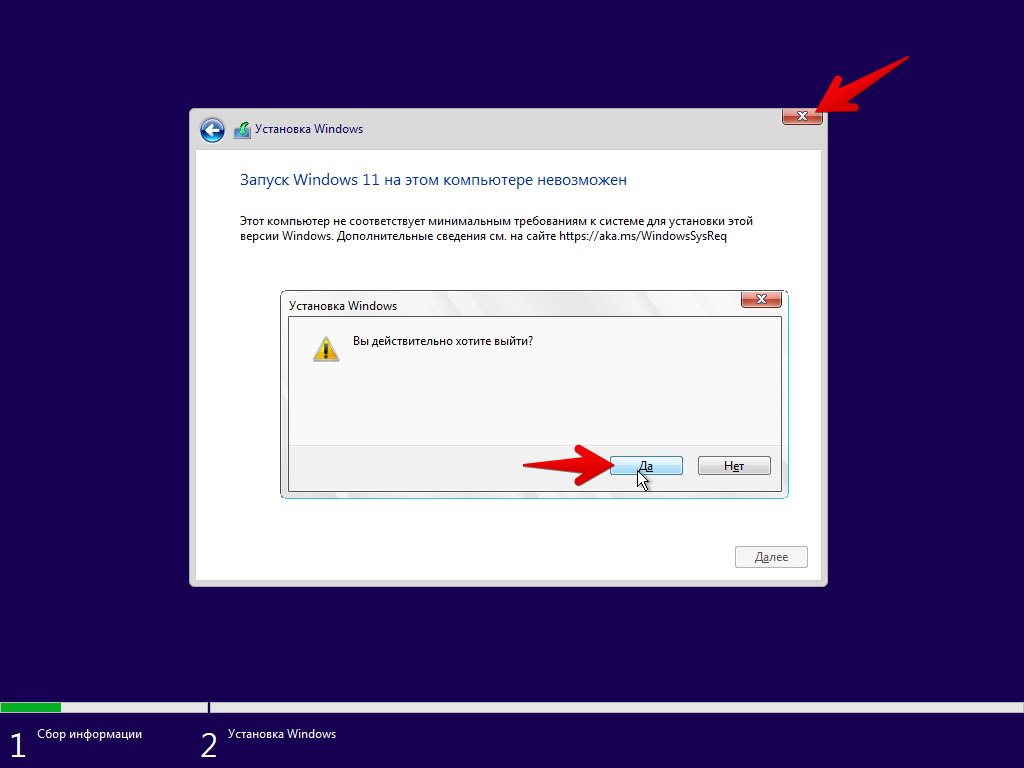
Решается данная проблема легко. Исправить ошибку можно прямо из среды установки без дополнительных манипуляций с образом. Сперва, закрываем установку Windows 11.
На начальном экране нажимаем на клавиатуре горячие клавиши «Shift+F10» для десктопных версий ПК и «Shift+FN+F10» для мобильных версий ПК.
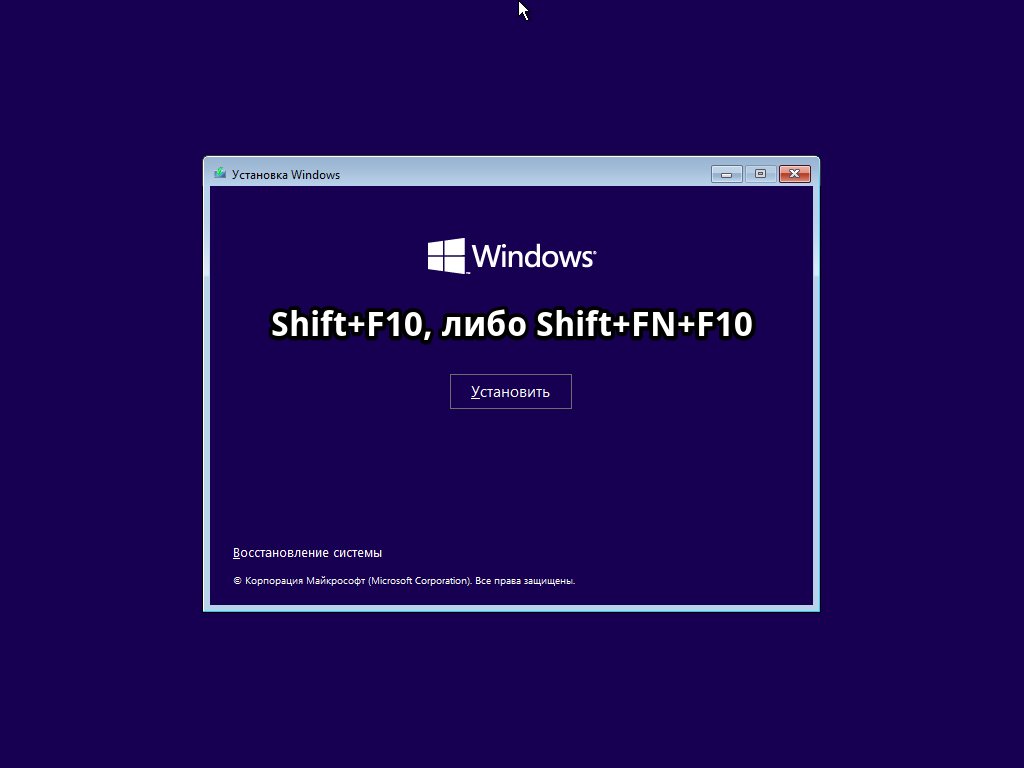
В появившейся командной строке набираем команду «regedit» и нажимаем клавишу ввода (Enter) для вызова окна редактора реестра.
В окне редактора реестра переходим в раздел «Setup»:
Компьютер\HKEY_LOCAL_MACHINE\SYSTEM\Setup
И создаем в нем новый раздел «LabConfig». Затем, в данном разделе создаем два параметра «DWORD (32 бита)» со значениями «1» — «BypassTPMCheck» и «BypassSecureBootCheck».

Закрываем окна редактора реестра и командной строки и запускаем установку еще раз.

Теперь установка продолжается без каких либо ошибок.
| Автор | Сообщение | |||
|---|---|---|---|---|
|
||||
|
Member Статус: Не в сети |
#77 Дата выхода: 05.10.2021 КРАТКОЕ ВВЕДЕНИЕ | ЗАГРУЗКА ОБРАЗОВ | ТРЕБОВАНИЯ К СИСТЕМЕ Windows 11 — операционная система следующего поколения для персональных компьютеров и рабочих станций, разработанная корпорацией Microsoft в рамках семейства Windows NT, является наследницей Windows 10. ПОЛЕЗНАЯ ИНФОРМАЦИЯ
ПОЛЕЗНЫЕ ТВИКИ
Цитата: ВАЖНО! Системы которые не соответствуют требованиям — возможно не будут получать автоматические обновления.
|
| Реклама | |
|
Партнер |
|
drnik976 |
|
|
Member Статус: Не в сети |
Ребят. подскажите пожалуйста как убрать этот баг, может есть ветка в реестре где можно удалить этот пункт. Вообще не понятно откуда взялся. |
|
Allizard |
|
|
Junior Статус: Не в сети |
Всем привет. Пару недель назад купил m2 SSD и поставил на него винду 11, 21h2 (был старый ISO файл залитый на флэшку, скаченный с офиц сайта), настроил систему\проги\игры. А тут недавно вспомнил, что можно обновиться до 22h2. Зная, что майки ушли из России, включил VPN, проверил обновления — нашлось. Начал качать 22h2, потом оно началось устанавливаться, предложило перезагрузить ПК для применения изменений. Перезагрузился, но винда не обновилась, все так же осталась 21h2, сборка 22000.2360 и в центре обновления больше не появляется обнова для перехода, даже с ВПН. До этого стояла win11 22h2 на старом сатаSSD, все было нормально. |
|
Ханыга |
|
|
Member
Статус: Не в сети |
Allizard писал(а): Зная, что майки ушли из России, включил VPN А причем тут обновления? И без впн все работает прекрасно. Скачай последний образ и поставь поверх прямо из под винды. |
|
Agiliter |
|
|
Advanced member Статус: Не в сети |
Allizard Последний раз редактировалось Agiliter 07.09.2023 11:56, всего редактировалось 1 раз. |
|
Gordon Freeman |
|
|
Заблокирован Статус: Не в сети |
Я в 2021 году ставил Win11, а дальше она сама обновлялась и как-то незаметно стало 22H2. |
|
Allizard |
|
|
Junior Статус: Не в сети |
Ханыга писал(а): Скачай последний образ и поставь поверх прямо из под винды Так я писал выше. Как бы я не пытался установить\обновить винду — пишет всегда то, что на скриншоте. Gordon Freeman писал(а): Я в 2021 году ставил Win11, а дальше она сама обновлялась и как-то незаметно стало 22H2. Вот и у меня стояла тоже, всегда обновлялась. Тут установил по новой винду, на новый SSD. Качал кучу обнов и до сих пор качает обновления для безопасности, последнее обновление поставило вчера «Обновление для Windows 11 для систем на базе процессоров x64 (KB4023057), 08.2023» , а вот переходить на 22h2 не хочет. Agiliter писал(а): На что ругается Win11RCT Вроде все норм |
|
Gordon Freeman |
|
|
Заблокирован Статус: Не в сети |
Allizard писал(а): Тут установил по новой винду, на новый SSD А ты скачай Windows11_22H2. Её и ставь. |
|
Ханыга |
|
|
Member
Статус: Не в сети |
Allizard писал(а): Так я писал выше. Как бы я не пытался установить\обновить винду — пишет всегда то, что на скриншоте. Значит ты что-то накрутил в винде, твикерами или еще чем. Норм винда не сборка должна нормально обновляться без танцев с бубнами. |
|
Allizard |
|
|
Junior Статус: Не в сети |
Ханыга писал(а): Значит ты что-то накрутил в винде Твиков не ставил. Ничего не накручивал и не блокировал. Ханыга писал(а): Норм винда не сборка должна нормально обновляться без танцев с бубнами. В том то и дело, стоит винда с официального ISO образа, скаченного с сайта майков. Поэтому и обратился сюда, с надеждой, что кто нибудь сможет дать направление куда думать. Потому, что все что я нашел в гугле — уже переделал. |
|
spanjokus |
|
|
Junior Статус: Не в сети |
На той неделе накатил себе Windows11_22H2, полет нормальный, не понимаю, что людей не устраивает в данной ОС |
|
CHiCHo |
|
|
Member Статус: Не в сети |
Allizard скачай образ 21Н2 сначала, поставь с флешки. Сразу потом, без скачивания любых обнов, с флешки установи 22Н2. |
|
Gordon Freeman |
|
|
Заблокирован Статус: Не в сети |
CHiCHo писал(а): скачай образ 21Н2 сначала, поставь с флешки. Сразу потом, без скачивания любых обнов, с флешки установи 22Н2. Это ещё зачем? Логичнее было бы сразу ставить крайнюю версию, а на заниматься мастурбацией. |
|
Genrix |
|
|
Member Статус: В сети |
В мае 2023 года было крупное закрытие дыр в ОС, и это закрытые как-то коснулось самих дистрибутивов и обратной совместимости апдейтов. Поэтому чтобы не наступать на мутные грабли, при чистой установке, ставьте дистрибутивы собранные июнь 2023 или еще свежее. Последний раз редактировалось Genrix 07.09.2023 17:45, всего редактировалось 1 раз. |
|
CHiCHo |
|
|
Member Статус: Не в сети |
Gordon Freeman так ты пост перечитай |
|
Gordon Freeman |
|
|
Заблокирован Статус: Не в сети |
Прочитал, но тонкости юмора не увидел. |
|
Rm76 |
|
|
Заблокирован Статус: Не в сети |
Allizard писал(а): Поэтому и обратился сюда, с надеждой, что кто нибудь сможет дать направление куда думать. Потому, что все что я нашел в гугле — уже переделал. Оставь надежду, всяк сюда входящий. Здесь тебе могут сказать только что ты всё не так делаешь, криворукий и вообще троль |
|
CHiCHo |
|
|
Member Статус: Не в сети |
Gordon Freeman Allizard писал(а): Как бы я не пытался установить\обновить винду — пишет всегда то, что на скриншоте. |
|
Gordon Freeman |
|
|
Заблокирован Статус: Не в сети |
CHiCHo Поэтому я и говорю что надо было сразу ставить 22H2 и не было бы этой проблемы. А ты предлагаешь сделать тоже самое что у него не получается. |
|
Allizard |
|
|
Junior Статус: Не в сети |
Rm76 писал(а): Оставь надежду, всяк сюда входящий. Здесь тебе могут сказать только что ты всё не так делаешь, криворукий и вообще троль По всей видимости так и есть. Genrix писал(а): В мае 2023 года было крупное закрытие дыр в ОС, и это закрытые как-то коснулось самих дистрибутивов и обратной совместимости апдейтов. Поэтому чтобы не наступать на мутные грабли, при чистой установке, ставьте дистрибутивы собранные июнь 2023 или еще свежее. Да, я уже пожалел, что не позаботился об этом заранее. Но ктож знал, что оно все так обернется, раньше винда нормально обновлялась до 22h2. Еще пол года назад обновил 2 других ПК со своей флешки, поэтому и не думал, что у меня будут проблемы. |
|
omberbom |
|
|
Member Статус: Не в сети |
Вопрос по Armoury Crate можно сюда задать? Эта зараза не хочет мне дрова обновлять под Вин11. На вкладке с обновлениями пустой экран — типа ищет, но ничего не находит. Под Вин10 такой проблемы нет. Пробовал на свежеустановленных системах. Кто знает, отчего так? |
—
Кто сейчас на конференции |
|
Сейчас этот форум просматривают: Genrix, sg999570 и гости: 19 |
| Вы не можете начинать темы Вы не можете отвечать на сообщения Вы не можете редактировать свои сообщения Вы не можете удалять свои сообщения Вы не можете добавлять вложения |