
The Java Development Kit (JDK) is a set of software tools for developing Java applications. The toolkit includes a compiler for converting Java code into bytecode, a collection of class libraries, documentation for integrating Java APIs, and the Java Runtime Environment (JDE) for executing Java code.
The JDK provides developers the resources they need to create Java applications and applets in one neat package.
Find out how to install the Java Development Kit on Windows.
Prerequisites
- A system running Windows 10.
- A network connection.
- Administrator privileges.
Note: Develop your core app services on PNAP’s Bare Metal Cloud servers to ensure superior performance. It is cloud native and the perfect environment for the entire SDLC.
Check if Java Is Installed
Multiple Java versions on the same system can cause conflicts, as applications may attempt to use different versions. Additionally, outdated versions can pose significant security risks over time.
Before installing the latest Java Development Kit, check if a Java version is already installed on Windows:
1. Type cmd in the Windows search bar.
2. Open the command prompt.
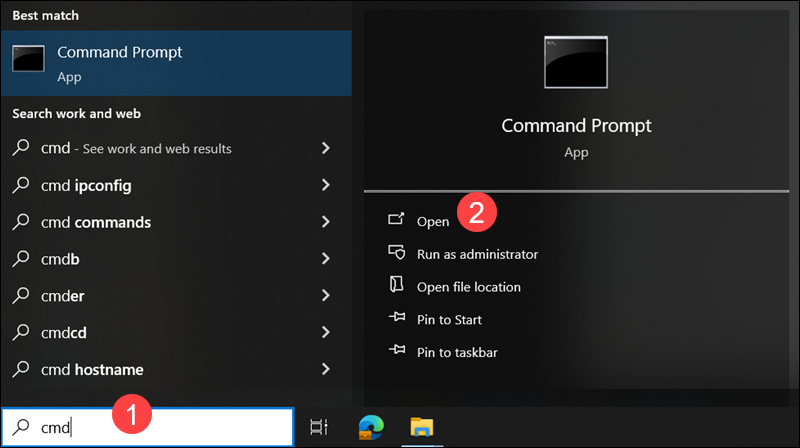
3. Enter the following command to check the Java version in Windows:
java -version
In this example, the message states that Java is not recognized as an internal or external command, which indicates that Java is not installed. If the system displays a Java version number, remove the old Java installation before proceeding.
Download Java for Windows 10
OpenJDK is an open-source project that provides source code for implementing the Java platform. Many companies, including Oracle, offer distributions of OpenJDK in the form of installers or binaries.
Note: While OpenJDK and Oracle JDK are similar in build, keep in mind that Oracle JDK is a commercial product and that Oracle offers paid support plans.
To download the latest Java Development Kit installation file for Windows 10:
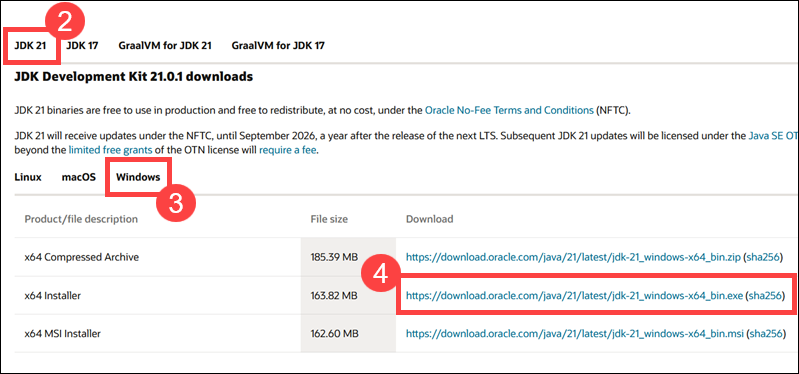
1. Open a web browser and navigate to the Oracle Java Downloads page.
2. Select the latest JDK version. In this example, the latest available version is JDK 21.
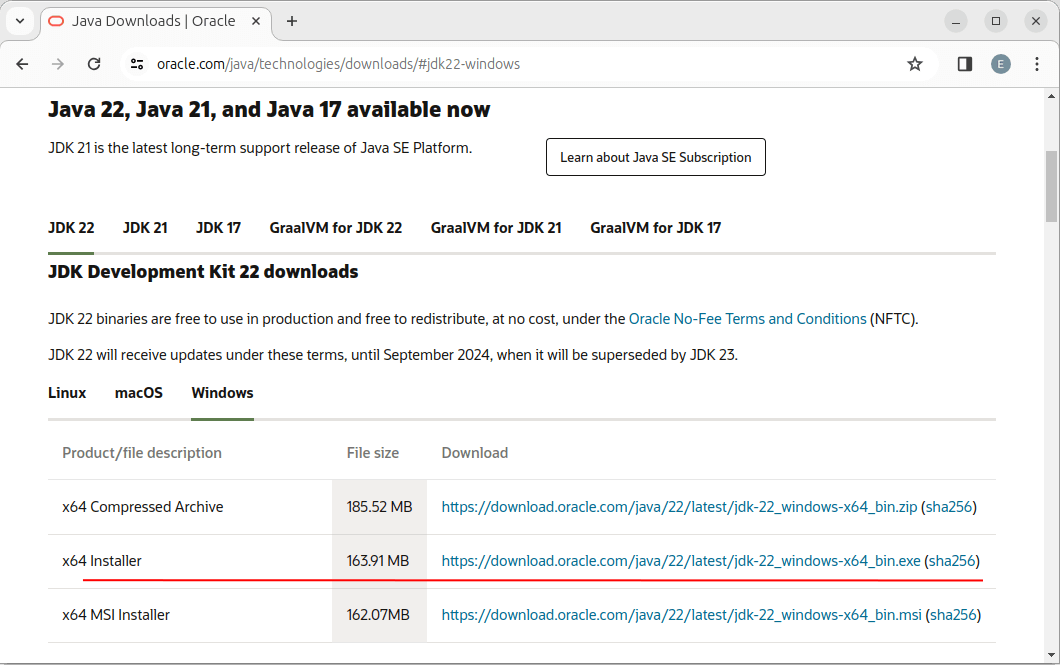
3. Access the Windows tab.
4. Click the x64 Installer download link.
Wait for the download to complete.
Install Java on Windows 10
To install Java on your Windows system:
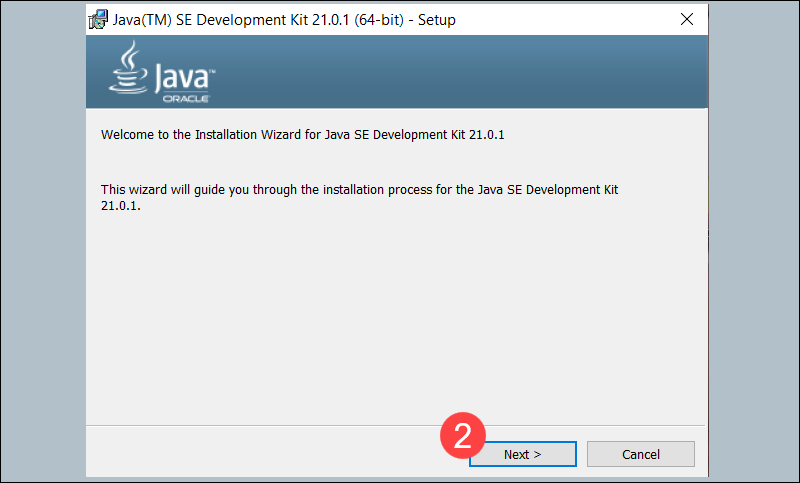
1. Double-click the downloaded Java file to start the installation.
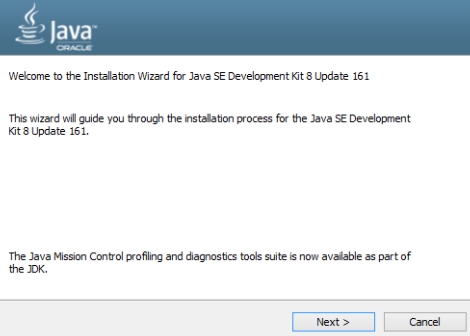
2. Once the installation wizard welcome screen appears, select Next to proceed.
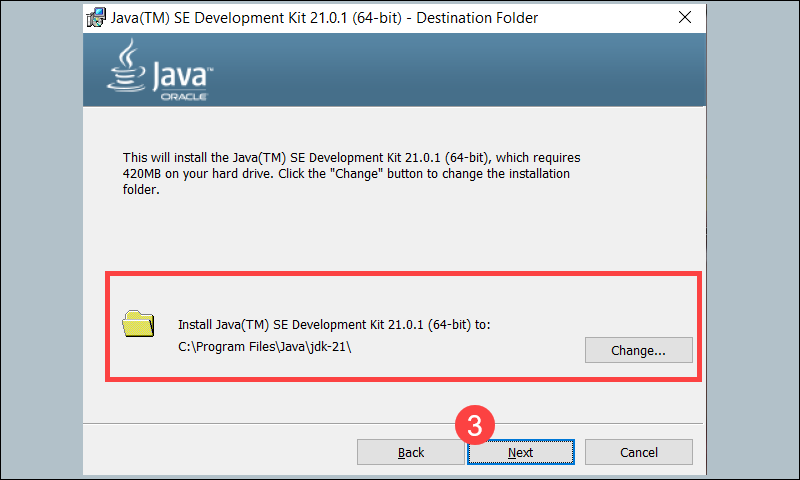
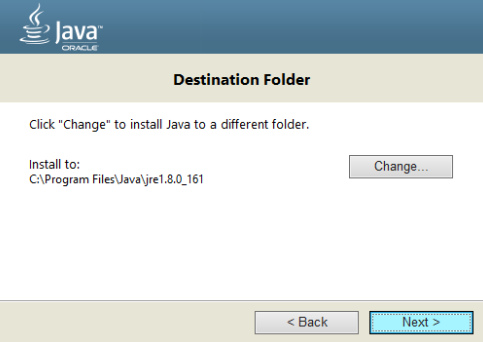
3. Choose the destination folder for the Java installation files, or stick to the default path and click Next.
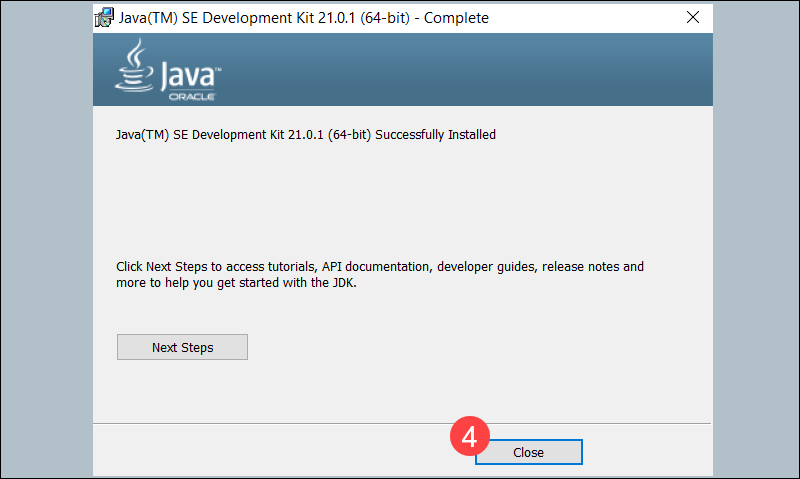
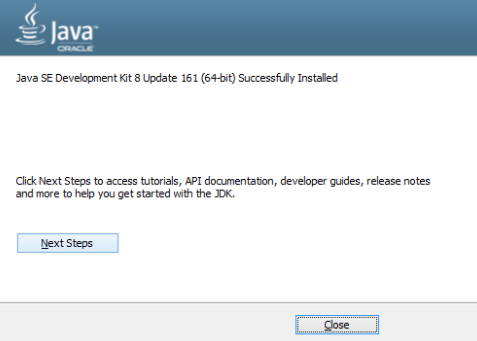
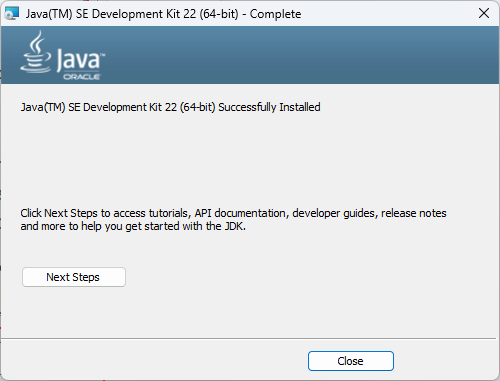
4. The installation process is complete when the Successfully Installed message appears. Click Close to exit the wizard.
You have successfully installed JDK 21 on your Windows system. To enable program compiling from any directory, you must set up Java environment variables.
Set Environmental Variables in Java
Follow the steps in the sections below to configure Java environment variables in Windows.
Step 1: Add Java to System Variables
This step ensures that Java is accessible from the command line in any directory.
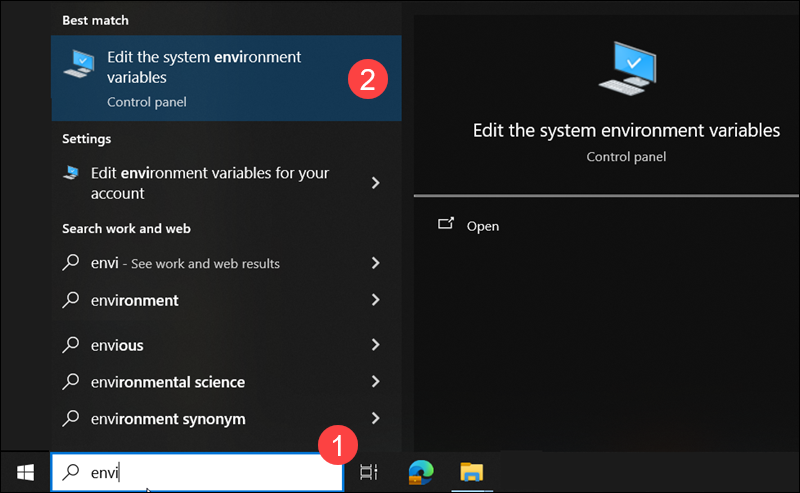
1. Open the Start menu and search for environment variables.
2. Select Edit the system environment variables.
3. Select Advanced in the System Properties window.
4. Click Environment Variables.

5. Select the Path variable in the System variables category and click Edit.

6. Click New.
7. Enter the path to the Java bin directory.
8. Click OK to save the changes and exit the variable editing window.
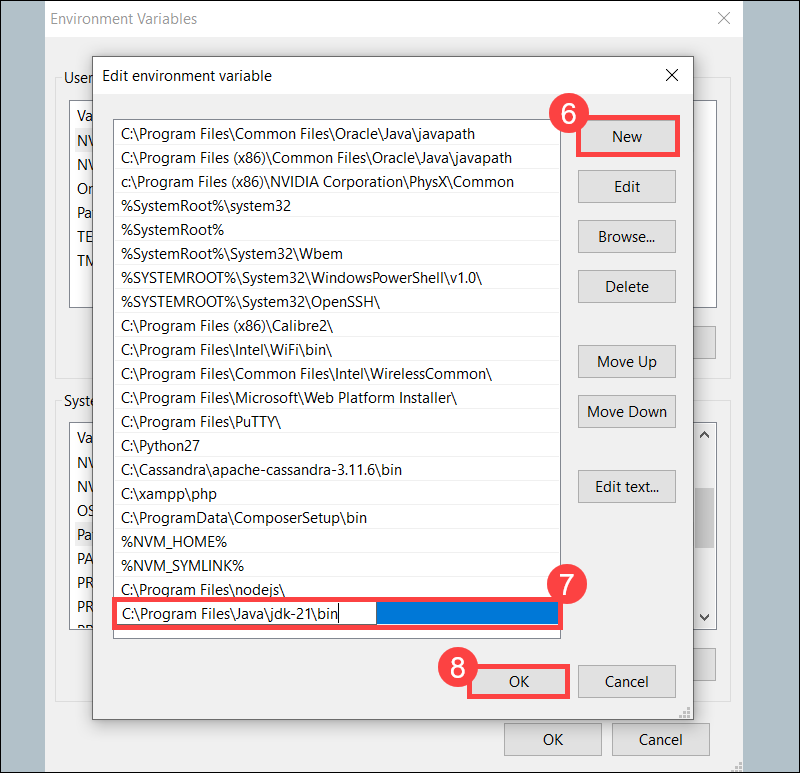
Note: The default path for JDK 21 is C:\Program Files\Java\jdk-21\bin.
Step 2: Add JAVA_HOME Variable
Some applications require the JAVA_HOME variable to point to the JDK installation directory. Follow the steps below to create the variable:
1. Click New under the System variables category to create a new variable.
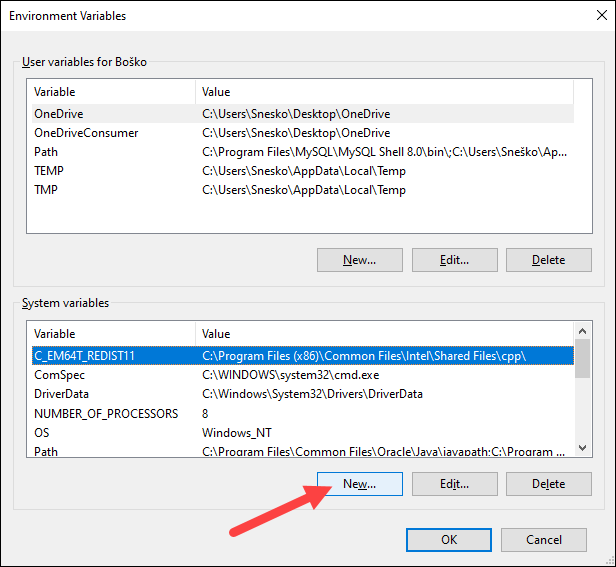
2. Name the variable JAVA_HOME.
3. Enter the path to your Java JDK directory in the variable value field.
4. Click OK.

Confirm the changes by clicking OK in the Environment Variables and System properties windows.
Test Java Installation
Verify that Java is installed by entering the java -version command in the command prompt:

If installed correctly, the command outputs the Java version. To ensure everything works, write and compile a simple Java program by following the steps in the sections below.
Step 1: Write Test Java Script
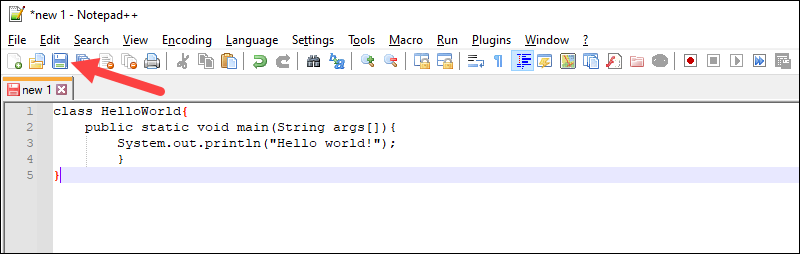
1. Open a text editor like Notepad or Notepad++ and create a new file.
2. Enter the following code and click Save:
class HelloWorld{
	public static void main(String args[]){
		System.out.println("Hello world!");
		}
}
3. Name the file and save it as a Java source file (*.java).
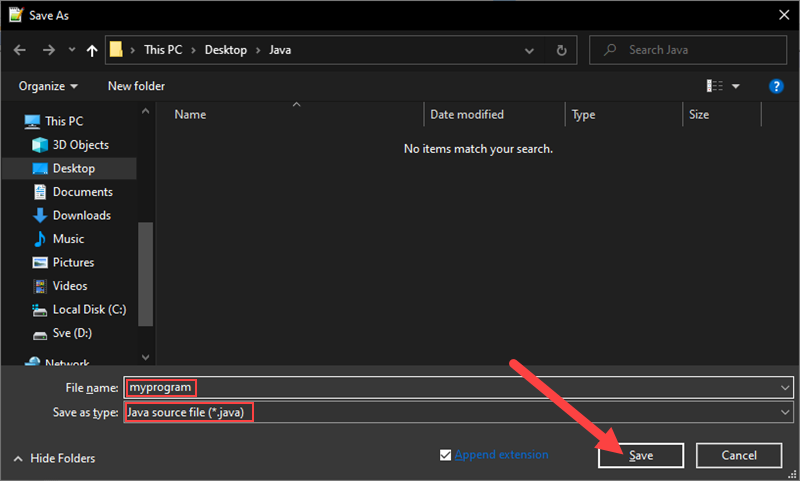
Note: When using Notepad, select All files for the Save as type option and add the .java extension to the file name.
Step 2: Compile Test Java Script
Access the Windows command prompt and complete the following steps:
1. Navigate to the directory where your Java file is saved.
2. Use the following command to compile the program:
javac myprogram.javaReplace myprogram.java with your file name.

After a successful compilation, the program generates a .class file in the same directory.
2. Run the program using the following syntax:
java HelloWorld
The output shows that the program runs correctly, displaying the Hello world! message.
Conclusion
This tutorial showed how to install the Java Development Kit on a Windows system and provided an example Java sricpt.
To learn more about Java, read our list of best Java IDEs or learn how to convert string to integer in Java.
Was this article helpful?
YesNo
Introduction
One of the most popular programming languages, Java is an object-oriented, multi-platform, versatile, network-based language. Irrespective of whether you are an amateur programmer or an expert in programming languages, Java is the perfect programming language to start your programming journey. This is because of its features like vast community support, simplicity of learning, reusability, and so on.
Here’s your guide on how to install Java in Windows 10, diving into which you’d learn about its installation and can use it for app development, scientific applications, etc.
Overview
The tutorial provides a comprehensive guide on how to install Java in Windows 10. It will explain the importance of installing and setting up the Java Development Kit (JDK). We will then explore the installation process in a step-by-step manner. It begins with verifying if Java is already installed, and if not, we will begin by first downloading the JDK from the Oracle website.
Additionally, the tutorial will cover how to set the permanent path for Java, enabling the execution of Java commands from the command line. It provides instructions on accessing system properties, advanced system settings, and environment variables to set up the Java path.
Features of Java
Let’s look at some features of Java which help it to stand out from other programming languages:
- It is a simple programming language with similar syntaxes used in C++ or C.
- Java doesn’t have any ‘pointers’ concept, thus removing any confusion for the learners.
- It is a platform-independent programming language. This means you can use the codes you’ve written on Java in another system.
- It is an object-oriented language where everything is defined with respect to objects and classes.
- It is a robust programming language. This indicates that if your program is terminated unexpectedly, Java can handle it without struggle.
- Being network-centric, Java allows distributed computing.
JavaFX Environment
Before you install Java Windows, the primary step is to set up the JavaFX environment. It is a platform that helps to create and deliver applications that run smoothly across multiple devices. It supports desktops, web browsers on any platform, like Linux, Windows, macOS, etc. You need to install Java JDK because all the successors of Java JDK 1.8 support JavaFX.
Install Java
Here are the simple steps for Java JDK download and how you can install Java JDK in your system.
Step 1: Verify that it is already installed or not
Before you can install Java in your system, you need to check whether it is already in the system. To do so, type ‘cmd’ in the search bar and tap ‘enter’. This opens up the command prompt.
Run the command ‘java –version’, and it will return an output message stating if Java is already installed.

Step 2: Download JDK
For the latest Java JDK download, visit the Oracle Java page, and navigate to the Downloads section. Once you reach the Downloads page, look for the x64 Installer download link and click on it. You will find it under the Windows category.
Step 3: Install JDK
Once you have downloaded the file, move to these next steps:
- Look for the ‘downloaded file’ option and click on it.
- Select option ‘Next’.
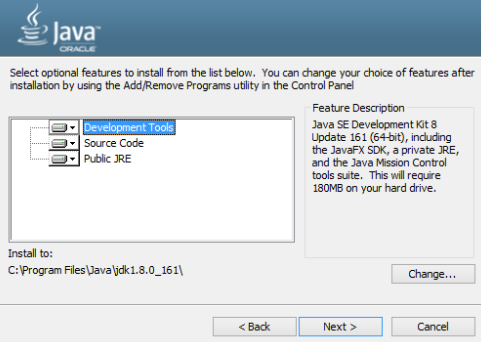
- Choose the option ‘Development Tools’ and select the option ‘Next’.
- Wait while the setup is finished.
- Choose your preferred destination folder to install Java Windows. Select ‘Next’.
- Wait while installation is completed.

- Now the Java SE development kit is successfully installed in your system. Click on the ‘Close’ option, and you’re ready to run Java.
Step 4: Set the Permanent Path
To install Java from the command line of Windows 10, you need to fix the Java Path. To set it up, you should follow the given steps:
- Open the File Explorer by pressing Win + E.
- Right-click on «This PC» or «My Computer» and select «Properties» from the context menu.
- Click «Advanced system settings» in the System window on the left sidebar. This will open the System Properties window.
- Click the «Environment Variables» button at the bottom in the System Properties window.
- You’ll see two sections in the Environment Variables window: User variables and System variables.
- Scroll down under the System variables section and find the «Path» variable. Select it and click on the «Edit» button.
- Click the «New» button and add the path to your Java installation directory. For example, if you installed Java in the default location, you can add «C:\Program Files\Java\jdk1.8.0_161\bin» (replace the version number with your installed version).
- Click «OK» to save the changes and close all the windows.
- With this step, you have successfully set up Java Path. Now you need to reopen the Command Prompt and write the command ‘javac’.
- Another new window appears, and now Java download for Windows 10 and its installation is completed. To run JavaFX applications, you must configure the IDEs or Integrated Development Environments.
Conclusion
Here in this tutorial, we have explained how you can install Java in simple and easy steps. Once you have installed Java on your device, you can explore it and its range of applications. You can use it to develop any mobile application, desktop application, web development, enterprise software, and more. Once you have installed Java, you can learn its fundamentals and advanced concepts on a reliable online platform like upGrad.
FAQs
1. How to install Java in Windows 11?
The installation process for Java in Windows 11 is the same as in Windows 10. You can also follow the steps in this tutorial for Windows 11.
2. Is Java for Windows available free of cost?
Yes, you can download and install Java free of cost. You only have to go to its official website and download it following the steps given in this guide.
3. Does Java run on all platforms?
Yes, Java can run smoothly on a range of platforms. It is the simplest programming language, which you can run on Mac OS, Windows, Linux, Ubuntu, and so on.
In this tutorial, we will study how to install java on windows 10, Java installation in Windows Operating System, How to check the version of installed and Setting up Environment Variable. So let’s start.
Java has support for many platforms like Windows, Linux, Solaris, etc. These platforms have their own installation methods. In this tutorial, we will be covering the installation procedure Windows operating system for both 32-bit and 64-bit OS.

Java installation in Windows Operating System
In the Windows Operating System, both 32-bit and 64-bit Windows OS have a similar way of installing Java. The main difference comes with their installation packages.
How to check the version of Java installed on the host machine?
Today’s software applications and programs need Java to run and execute properly. This software and programs require Java to be installed on the system to properly get executed. So if you have one of these applications or software installed on your computer then you possibly might also have Java already installed on your computer.
To check whether you have Java installed on your computer, follow this simple procedure,
- On your keyboard, press Windows + R. This will open up the Run dialog box on the bottom left of the screen.
- In the textbox on the Run dialog, type cmd and then click OK. This is open to the Command Prompt (CMD) window.

- In the Command Prompt, type java -version(make sure you type it correctly) and then press Enter.

- If you see the output similar to the output given below with some Java version, then you already have Java installed on your computer and there is no need to continue with the further installation steps.

- In the other case, if your output in the Command Prompt is not similar to the output given above, then continue with the next step.


Step 1: Know the type of operating system you have
An important step to installing Java is to know the type of operating system you have on your computer. The Windows operating system comes in 32-bit and 64-bit architecture in the market. At this point, if you know the operating system type of the host machine that needs Java installation, then you can continue to the next step. If you are not aware of the system type for your operating system, continue following these steps:
- Open File Explorer that comes with your Windows operating system.
- On the left side panel, Right-click on This PC to open the context menu and then click on Properties.

- This will open up the System Properties of your computer. Now, under the System section, check out the System type of your computer.


Step 2: Download the Java Development Kit (JDK)
- Go to the official Java website and browse through the JDK packages available in the given link below.
Link: https://www.oracle.com/
- After opening the given link, scroll down the page and click on the appropriate download link based on the host operating system that needs Java installation.

- A pop will appear for you to accept the license agreement. You can read it just in case you want to know more about their terms and conditions. If you are satisfied with the Terms and Conditions/License Agreement, then select the checkbox accepting the license agreement and click on the Download button (in green).


In case you don’t have an Oracle account, follow this link to create a new account. Link: (https://profile.oracle.com/)
- Once the Java installer is downloaded, open the installer package, and follow the installation wizard. You can configure the installation to change the installation path if needed. But it is recommended to let the default installation settings during installation.
After completion of the installation, just repeat the part ‘How to check the version of Java installed on your computer?’ to make sure everything went well.
Setting up Environment Variable for Java
Windows operating system uses Environment variables to access externally installed applications and programs. Environment variables are Key-Value pairs. Each Key represents one or more resources or applications or programs. These Environment Variables are mostly used by the operating system and other applications to access or use an external application or program.
In this section of the tutorial, we will set environment variables in Windows operating system so that the host system can have access to Java and its libraries. By setting up Environment Variables for Java, we enable Java to be used as a global command in the host machine.
Setting up the Environment Variables for Java in Windows 10?
- Locate the Java installation on your PC. By default, Java can be located in one of these directories:
C:/Program Files/Java/jdk-<version>/bin – For 64-bit OS
C:/Program Files (x86)/Java/jdk-<version>/bin – For 32-bit OS
You need to copy the location of the bin folder in the directory where Java is installed. You can make sure you have selected the right folder if it has both Java and javac.
- Click on the Environment Variables button under the Advanced tab.

- Under the System Variables section, locate the Path variable and double-click on it.

- Click on New and paste the location of the bin folder of the Java installation from step 1 and click on OK.

- You have successfully set the Java environment variable.


The object-oriented programming language Java offers advantages such as platform independence, security and multithreading, which you can also use in Windows 10. But, first, clarify whether you need a 32-bit or 64-bit version before installing Java on Windows 10.
Java is one of the most widely used Internet programming languages and is also suitable for users who are just learning programming-learning. In Windows it was already supported since the update 51 for Windows 8. Those who want to use Java on Windows 10 or also on Linux and macOS can download the installation files free of charge from the website of the Java developer Oracle Corporation.
Attention! The Edge browser does not support Java plug-ins, so Java cannot be used in Edge. Browser like Firefox or Safari again require a Java plugin or applet. In addition, you need to clarify whether you need Java as 32-bit or 64-bit for Windows, depending on your operating system.
If you want to get the most out of Java, you should get an overview of the most important Java commands and Java operators. Particularly handy is the comprehensive software development kit (SDK), which includes the Java Development Kit with a collection of utilities, tools and runtime environments.
Is Java already installed?
Before installing Java, you can check if Java is already on your system. This way you save the installation steps and can use Java directly. You can find out whether Java is already present via the display for installed software on the Windows system. To do this, enter “Control Panel” in the Windows search line and click on the corresponding result. Then go to “Programs” > “Programs and Features”. There you will find all installed programs listed alphabetically. If Java is installed, there is also an entry for Java.
You can check whether you need the 64-bit version of Java by pressing the Windows-Shortcut [Windows] + [i] for the Windows settings. In the opened settings you get to the “Device specifications” via “System” > “About”. If it says “64-bit” in the “System Type” section, you can use both the 32-bit and 64-bit versions.
Java has stopped supporting 32-bit systems, so Java only runs on 64-bit operating systems. However, both the 32-bit and 64-bit versions will work fine in these. Therefore, both Java versions are recommended if you alternate between using a 32-bit and 64-bit browser. On the other hand, Oracle Corporation advises using a standard 32-bit browser and the 32-bit Java version for best performance.
Download Java for users
Follow the steps below to install the latest version of Java in Windows 10:
Step 1: In your default browser, open the Java download page from Oracle Corporation java.com. Here you will find the appropriate latest Java version for operating systems such as Windows, macOS, Linux or Solaris.
Step 2: Download the latest Java version for the applicable operating system.
Step 3: Decide whether you want to perform an online download using an executable IFTW file (“Install from the Web”) or as an offline download using an executable file. In the Java setup prompt, confirm that you really want to install Java. By doing so, you automatically agree to Java’s license agreement.
Step 4: With the Java download, you also get the Java Runtime Environment (JRE), which allows you to use Java plug-ins and run Java applets in a compatible browser. The JRE also includes the Java Virtual Machine, the Java main classes and Java libraries.
Have you upgraded your Windows operating system to Windows 11 and wondered if Java can be used with it? Then don’t worry: You can easily install Java on Windows 11.
Download Java: For developers
If you would like to use Java not only in the browser, but also as a programming language including tools, you can download the Java Development Kit (JDK) from the Java website. The JDK includes helpful tools and programs such as a Java editor, a compiler and interpreter, a debugger as well as documentation tools, API classes, archivers, signing programs, tools for applets and performance monitoring, and a web service importer. The Java Runtime Environment (JRE) is also included in the JDK.
Follow these steps to install Java in Windows 10 as a developer:
Step 1: Open the Developer website of Java. On the landing page, you will already see the download button for the current version of Java (as of 2022: Java 18). If you want to use the Java Development Kit, go to the Oracle website for Java downloads.
Step 2: Choose between options like “x64 Compressed Archive” as ZIP file, “x64 Installer” as EXE file or “x64 MSI Installer” as MSI file for the download. Confirm the Oracle Java license agreement for the download.
Step 3: Open the downloaded file and extract the ZIP files first or double-click on the installation file. The installation wizard will now guide you through the simple installation steps. The installation itself takes only a few minutes.
Was this article helpful?
Последнее обновление: 23.03.2024
Для разработки программ на Java нам потребуется специальный комплект для разработки JDK
(Java Development Kit). JDK включает ряд программ и утилит, которые позволяют компилировать, запускать программы на Java,
а также выполнять ряд других функций.
JDK от Oracle для Windows (x64), Linux (x64, ARM64) и MacOS (x64, ARM64) доступны по адресу https://www.oracle.com/java/technologies/downloads/
OpenJDK для Windows (x64), Linux (x64, ARM64) и MacOS (x64, ARM64) доступны по адресу https://jdk.java.net/21/
OpenJDK предоставляет только архивы, Oracle также предоставляет установочные пакеты. Рассмотрим установку JDK для различных систем.
Установка на Windows
Установка с помощью установщика
Наиболее распространенный вариант установки JDK на Windows — это применение установщика с официального сайта Oracle. В частности, перейдем на страницу:
https://www.oracle.com/java/technologies/downloads/#jdk22-windows
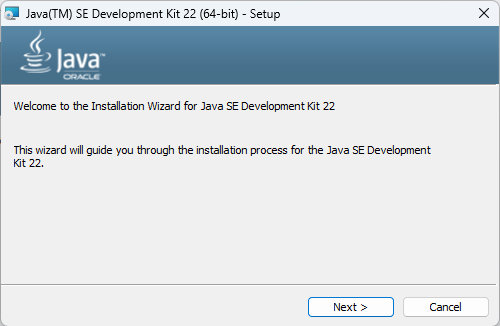
Нажмем на кнопку Next. На следующем экране необходимо указать, в какую папку будет производиться установка:
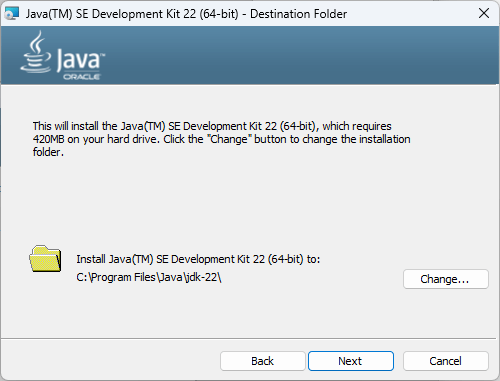
Оставим выбор папки по умолчанию и нажмем на Next для выполнения установки.
После завершения установки JDK мы увидим вот такое окно:
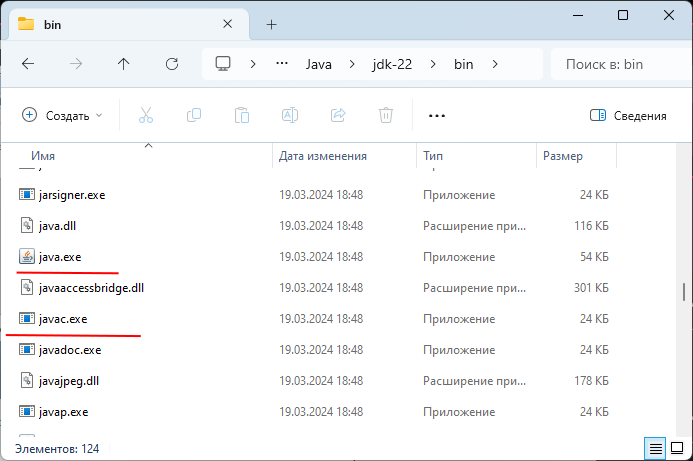
При установке JDK все файлы по умолчанию помещаются в каталог C:\Program Files\Java\jdk-[номер_версии] (если при установке не было изменено расположение).
Так, если мы откроем в нем подкаталог bin, то мы сможем увидеть в нем ряд утилит.
Нас прежде всего интересует утилита компилятора javac и утилита java.exe. javac компилирует код на языке Java в бинарный файл, а
java.exe позволяет запускать скомпилированный файл:
Установка через пакетный менеджер
Через пакетный менеджер winget также можно установить OpenJDK от Microsoft. Для этого в командной строке/PowerShell надо выполнить команду:
winget install Microsoft.OpenJDK.21
В данном случае устанавливается 21-версия JDK.
Установка на Linux
Если мы используем JDK от Oracle, то в данном случае нам доступен ряд вариантов установки. В частности, перейдем на страницу:
https://www.oracle.com/java/technologies/downloads/#jdk22-linux
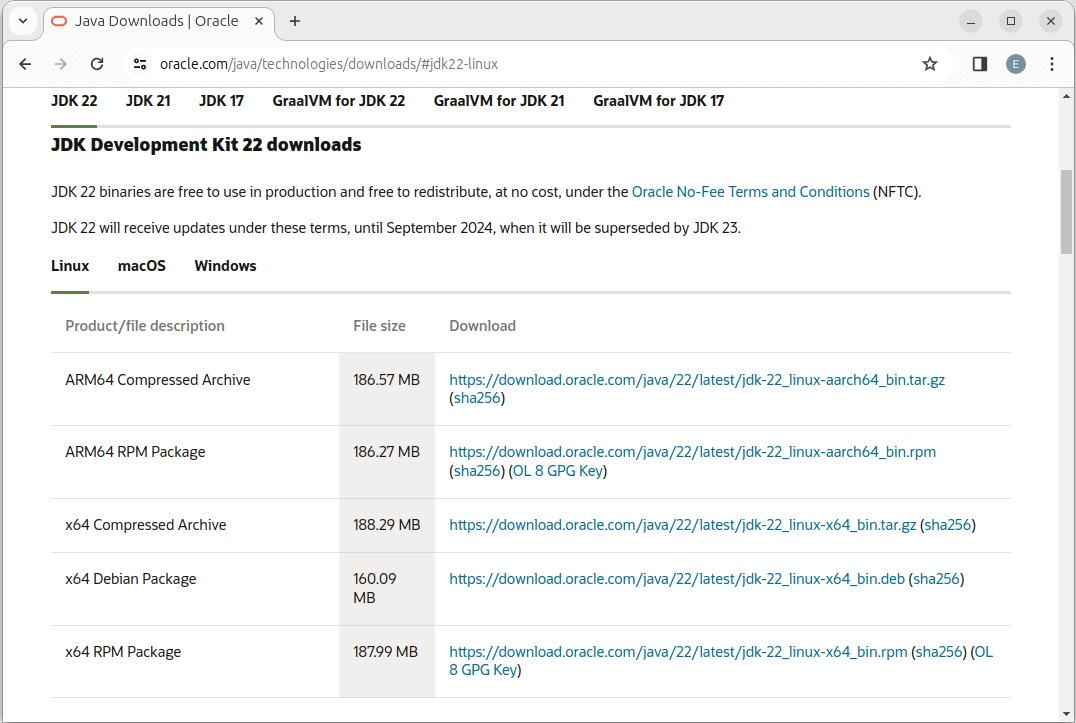
-
ARM64 Compressed Archive: архив для систем на архитектуре ARM64
-
ARM64 RPM Package: RPM-пакет для систем на архитектуре ARM64, которые для управления пакетами применяют RPM (например, Fedora, Suse и т.д.)
-
x64 Compressed Archive: архив для систем на архитектуре Intel x86-64
-
x64 Debian Package: Debian-пакет для систем на архитектуре Intel x86-64 (например, Ubuntu, Debian и т.д.)
-
x64 RPM Package: RPM-пакет для систем на архитектуре Intel x86-64, которые для управления пакетами применяют RPM (например, Fedora, Suse и т.д.)
Если наша операционная система Ubuntu (на платформе Intel x86-64), то выберем пункт x64 Debian Package, и нам загрузится debian-пакет (в моем случае файл «jdk-22_linux-x64_bin.deb»).
Для его установки выполним команду
sudo dpkg -i jdk-22_linux-x64_bin.deb
Если у нас операционная система, которая для управления пакетами применяет RPM, например, Fedora, Suse и др, на платформе Intel x86-64,
то необходимо выбрать пункт x64 RPM Package. И затем установить загруженный пакет командой
sudo rpm -ivh jdk-22_linux-x64_bin.rpm
Если у нас ОС Fedora, Suse и др, на платформе ARM64, то необходимо выбрать пункт ARM64 RPM Package. И затем установить загруженный пакет командой
sudo rpm -ivh jdk-22_linux-aarch64_bin.rpm
Также для различных операционных систем в репозиториях могут быть доступны пакеты JDK для установки. Например, установка с помощью пакетного менеджера snap:
sudo snap install openjdk
Установка с помощью пакетного менеджера apt:
sudo apt install default-jdk
Установка определенной версии JDK с помощью пакетного менеджера apt:
sudo apt install openjdk-22-jdk-headless
В случае с установкой архивов все идентично для всех основных систем на базе Linux — загружается архив, распаковывается в определенное место. Затем в переменные среды добавляется путь к папке bin распакованного архива.
Установка Java на MacOS
Для установки Java на MacOS перейдем на страницу загрузок на сайте Oracle по адресу https://www.oracle.com/java/technologies/downloads/#jdk21-mac:
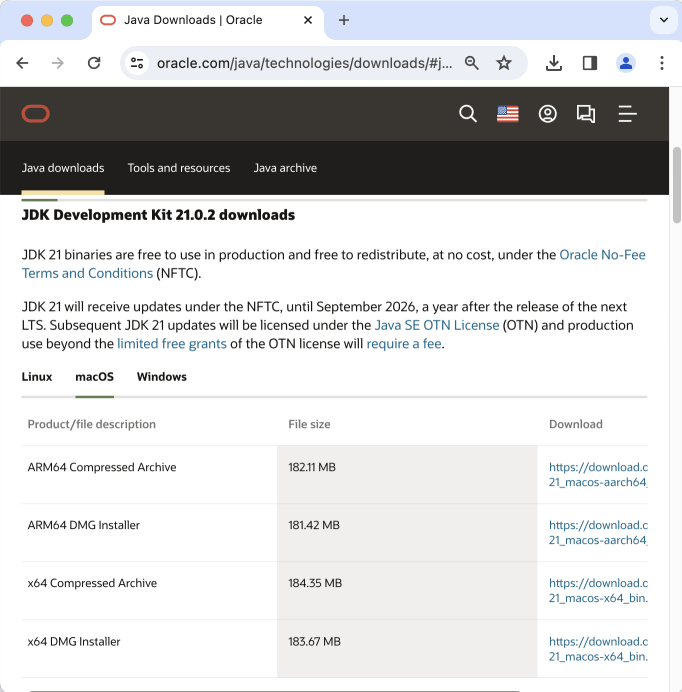
Здесь нам доступно 4 варианта пакетов:
-
ARM64 Compressed Archive: архивный пакет для MacOS на ARM
-
ARM64 DMG Installer: установщик для MacOS на архитектуре ARM
-
x64 Compressed Archive: архивный пакет для MacOS на архитектуре Intel x86-64
-
x64 DMG Installer: установщик для MacOS на архитектуре Intel x86-64
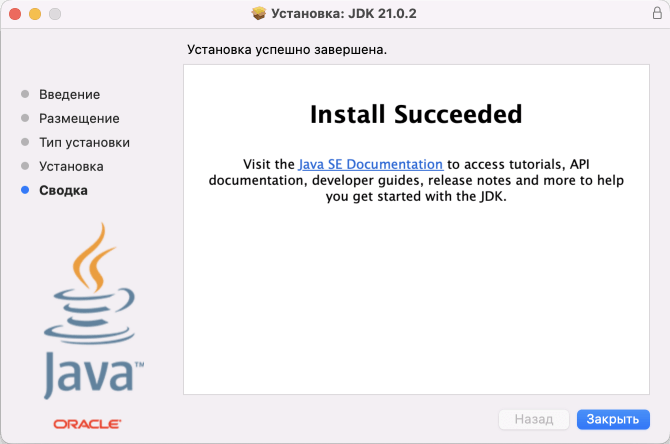
Загрузим и после загрузки запустим пакет установщика. Вначале нам отобразится приветственное окно.
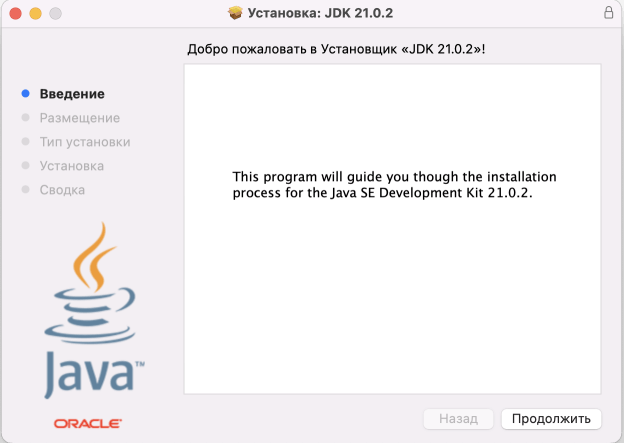
Далее на всех последующих шагах оставим все опции по умолчанию. И после установки нам отобразится окно об ее успешном окончании:
Проверка установки
После установки Java перейдем к командной строке/терминалу и для проверки версии введем команду
java -version
Консоль нам должна в ответ ввести номер только что установленной версии JDK (в моем случае 22-й версии):
java 22 2024-03-19
Java(TM) SE Runtime Environment (build 22+36-2370)
Java HotSpot(TM) 64-Bit Server VM (build 22+36-2370, mixed mode, sharing)
Итак, после установки JDK создадим первую программу на Java.