
Все способы:
- Меняем имя ПК
- Способ 1: «Свойства системы»
- Способ 2: «Командная строка»
- Вопросы и ответы: 0
Не все пользователи знают, что каждый компьютер под управлением Виндовс имеет свое имя. Собственно, важность это приобретает только тогда, когда вы начинаете работать в сети, в том числе и локальной. Ведь название вашего устройства у других подключенных к сети юзеров будет отображаться именно так, как оно прописано в настройках ПК. Давайте выясним, как сменить имя компьютера в Windows 7.
Читайте также: Как изменить имя компьютера в Виндовс 10
Меняем имя ПК
Прежде всего, давайте выясним, какое имя можно присвоить компьютеру, а какое нельзя. В наименование ПК можно включать символы латиницы любого регистра, цифры, а также дефис. Использование спецсимволов и пробелов исключается. То есть вы не сможете включить в название такие знаки:
@ ~ ( ) + = ` ? ^! $ « “ . / , # % & : ; |\ { } [ ] * №
Также нежелательно использовать буквы кириллических или других алфавитов, кроме латиницы.
Кроме того, важно знать, что успешно выполнить описанные в данной статье процедуры можно только зайдя в систему под учетной записью администратора. После того как вы определились, какое название присвоите компьютеру, можно переходить к изменению имени. Для этого существует два способа.
Способ 1: «Свойства системы»
Прежде всего, разберем вариант, где наименование ПК меняется через свойства системы.
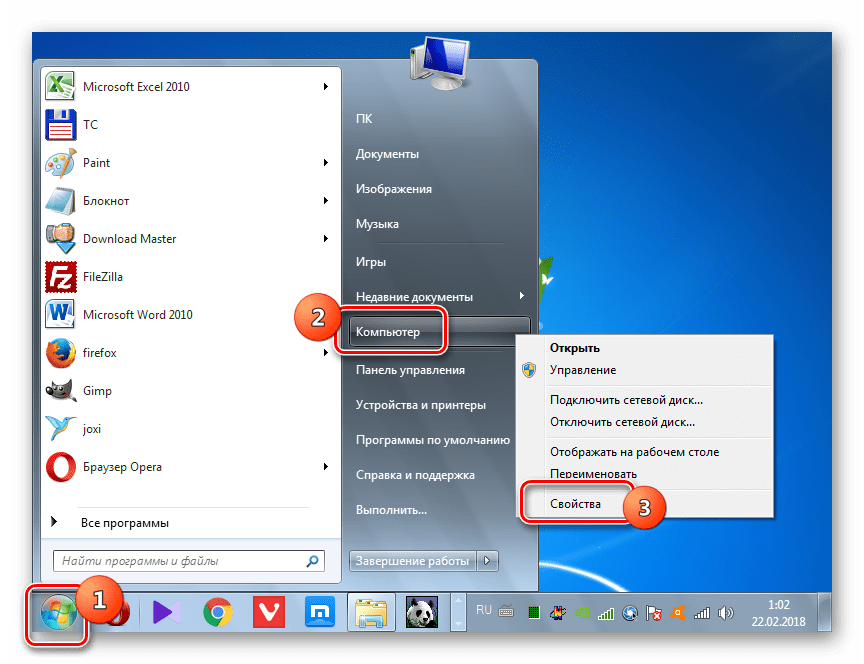
- Жмите «Пуск». Щелкните правой кнопкой мышки (ПКМ) на появившейся панели по наименованию «Компьютер». В отобразившемся перечне выберите «Свойства».
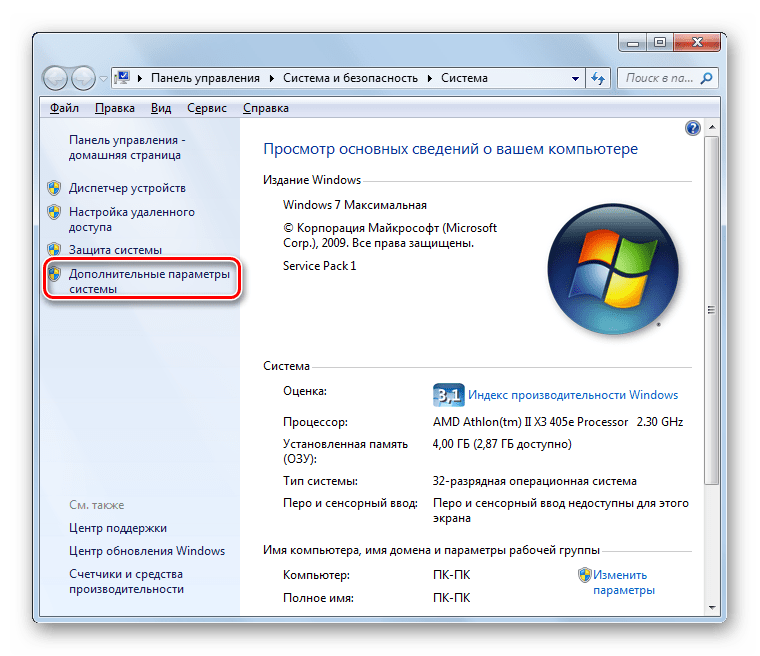
- В левой области отобразившегося окна переместитесь по позиции «Дополнительные параметры…».
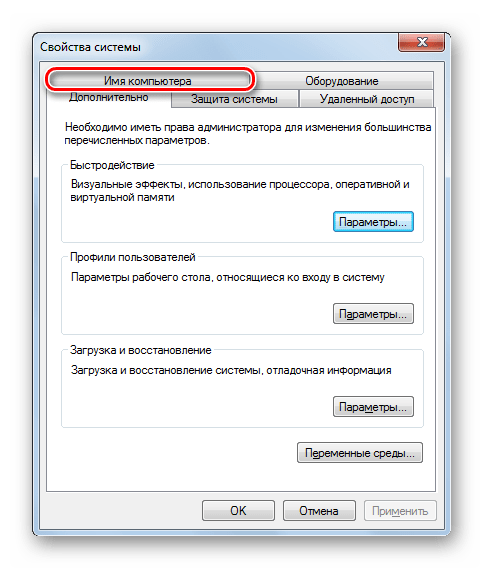
- В открывшемся окошке жмите по разделу «Имя компьютера».

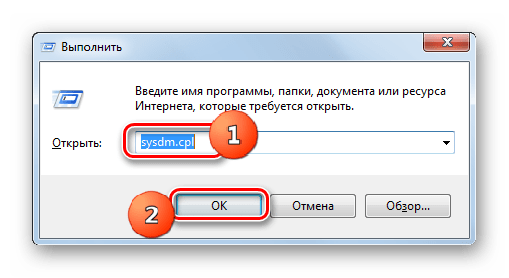
Существует и более быстрый вариант перехода к интерфейсу редактирования имени ПК. Но для его осуществления требуется запомнить команду. Наберите Win+R, а затем вбейте:
sysdm.cplЩелкайте «OK».
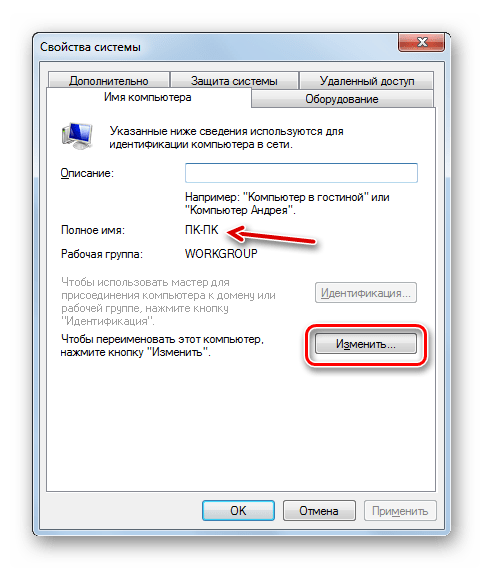
- Откроется уже знакомое нам окошко свойств ПК прямо в разделе «Имя компьютера». Напротив значения «Полное имя» отображено текущее наименование устройства. Чтобы его заменить на другой вариант, жмите «Изменить…».
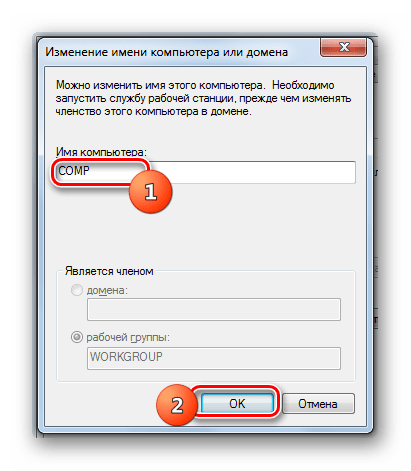
- Отобразится окошко редактирования названия ПК. Тут в области «Имя компьютера» впишите любое название, которое считаете нужным, но придерживаясь озвученных ранее правил. Затем жмите «OK».
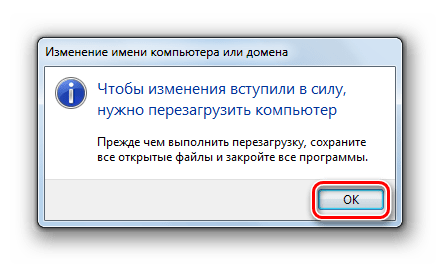
- После этого отобразится информационное окно, в котором будет рекомендовано перед перезагрузкой ПК закрыть все открытые программы и документы во избежание потери информации. Закрывайте все активные приложения и жмите «OK».
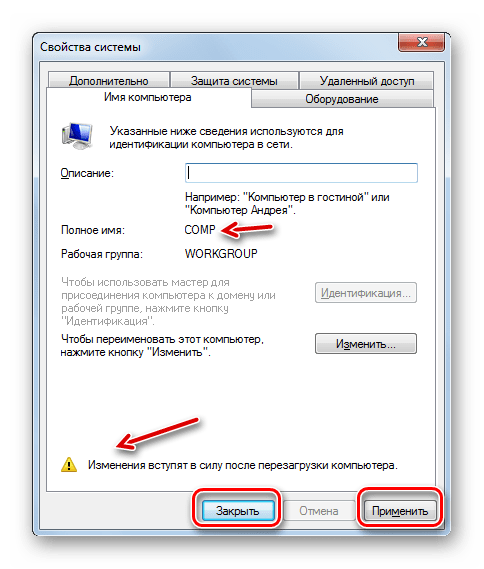
- Теперь вы вернетесь в окошко свойств системы. В нижней его области отобразится информация, сообщающая о том, что изменения станут актуальными после перезапуска ПК, хотя напротив параметра «Полное имя» уже будет отображено новое название. Перезапуск нужен, чтобы сменившееся наименование увидели также и другие участники сети. Жмите «Применить» и «Закрыть».
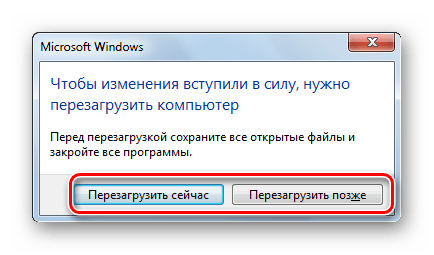
- Откроется диалоговое окно, в котором вы сможете выбрать, перезагрузить ПК сейчас или же позже. При выборе первого варианта компьютер будет перезапущен тут же, а при выборе второго вы сможете совершить перезагрузку стандартным методом после того, как закончите текущую работу.
- После перезапуска название компьютера сменится.
Способ 2: «Командная строка»
Сменить название ПК можно также используя ввод выражения в «Командную строку».
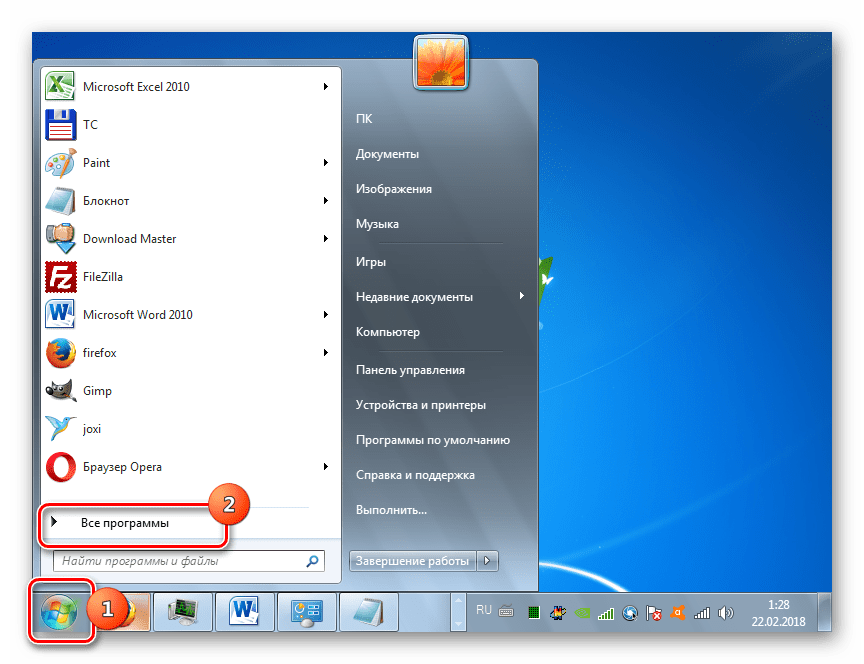
- Жмите «Пуск» и выбирайте «Все программы».
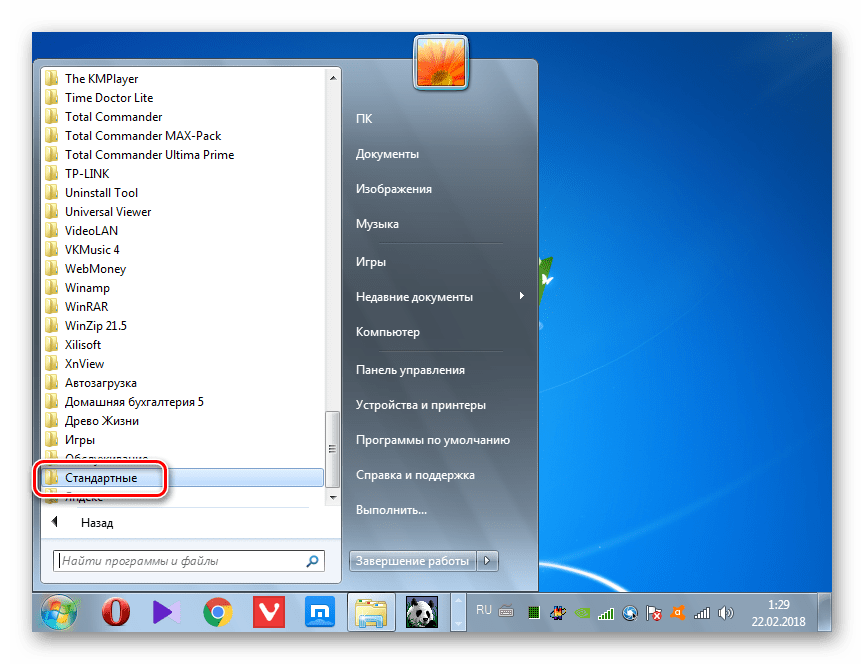
- Заходите в каталог «Стандартные».
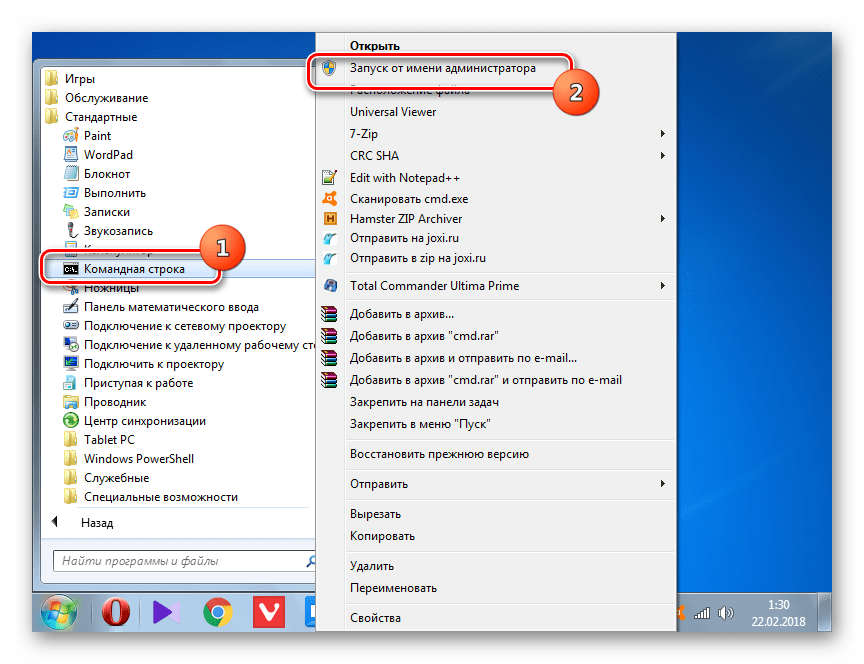
- Среди перечня объектов отыщите название «Командная строка». Щелкайте по нему ПКМ и выбирайте вариант запуска от лица администратора.
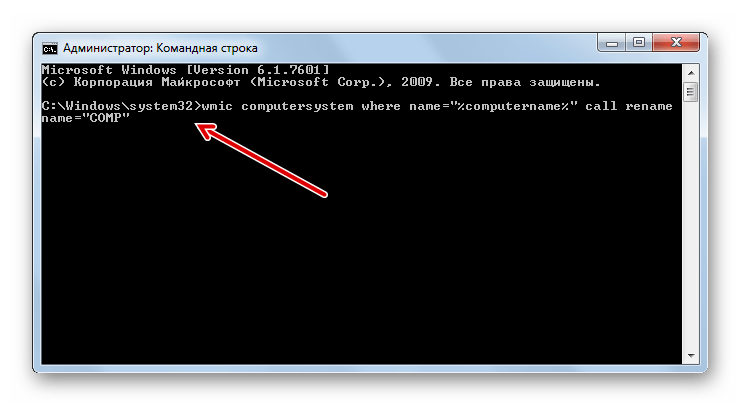
- Активируется оболочка «Командной строки». Введите команду по шаблону:
wmic computersystem where name="%computername%" call rename name="новый_вариант_наименования"Выражение «новый_вариант_наименования» замените именем, которое посчитаете нужным, но, опять же, придерживаясь озвученных выше правил. После ввода жмите Enter.
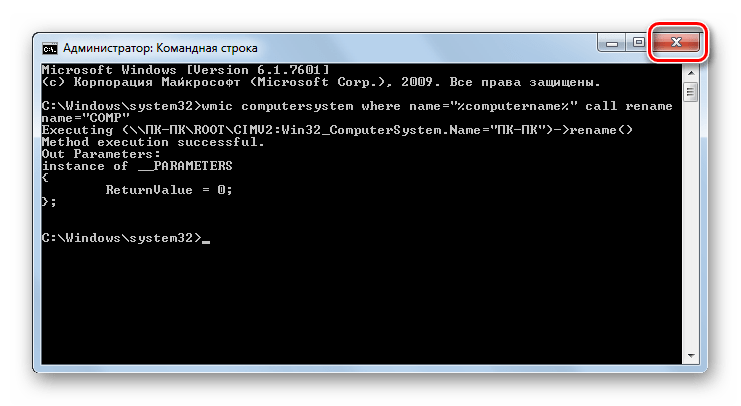
- Команда по переименованию будет выполнена. Закрывайте «Командную строку», нажав стандартную кнопку закрытия.
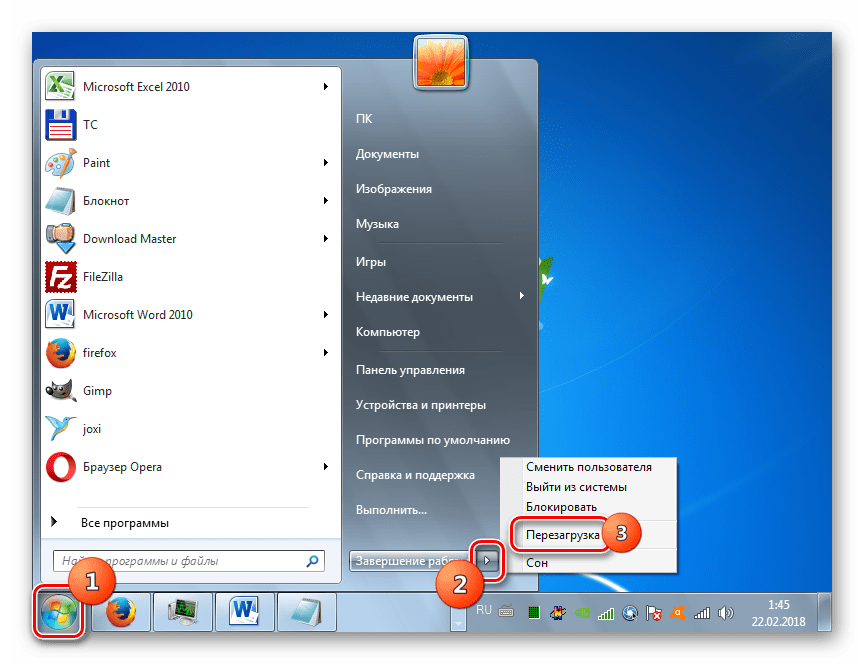
- Далее, как и в предыдущем способе, для полного завершения задачи нам требуется перезагрузить ПК. Теперь придется сделать это вручную. Жмите «Пуск» и щелкайте по треугольной иконке справа от надписи «Завершение работы». Выберите из списка, который отобразится, вариант «Перезагрузка».
- Компьютер перезапустится, а его название окончательно будет сменено на присвоенный вами вариант.
Урок: Открытие «Командной строки» в Виндовс 7
Как нами было выяснено, изменить название компьютера в Виндовс 7 можно двумя вариантами действий: через окошко «Свойства системы» и при помощи интерфейса «Командной строки». Эти методы полностью равнозначны и пользователь сам решает, какой использовать ему удобнее. Главное требование состоит в том, чтобы выполнять все операции от имени администратора системы. Кроме того, нужно не забыть правила составления корректного наименования.
Наша группа в TelegramПолезные советы и помощь
Обновлено:
Опубликовано:
В статье представлены распространенные способы смены имени компьютера:
Через графический интерфейс
В Windows 10
Через командную строку
С помощью Powershell
Через реестр
Читайте также
Данные рекомендации подойдут для разных версий операционной системы Windows от XP до 10.
Универсальный через графический интерфейс
Открываем свойства компьютера. Для этого открываем проводник и кликаем правой кнопкой мыши по Компьютер и выбираем Свойства:
… или вводим команду:
control /name microsoft.system
В открывшемся окне в разделе «Имя компьютера, имя домена и параметры рабочей группы» нажимаем Изменить параметры:

В следующем окне на вкладке Имя компьютера нажимаем Изменить:
Вводим имя компьютера:
* если кликнуть по кнопке Дополнительно, мы сможем добавить DNS-суффикс и поменять NetBIOS-имя компьютера.
Нажимаем OK два раза и перезагружаем компьютер.
Графический интерфейс Windows 10
В Windows 10 появился дополнительный вид панели управления. Ее также можно использовать для смены имени компьютера.
Кликаем по Пуск и нажимаем на изображение шестеренки:
Кликаем по Система:
В разделе О системе:
… кликаем по Переименовать этот ПК:
Вводим новое имя и нажимаем Далее:

Перезагружаем компьютер.
Через командную строку
Запускаем командную строку от имени администратора и вводим следующую команду:
> netdom renamecomputer %COMPUTERNAME% /Newname «computername»
* computername — новое имя компьютера
После ввода система запросит подтверждение — отвечаем Y и нажимаем Enter.
Для вступления изменений в силу, перезагружаем компьютер.
С помощью Powershell
Что такое Powershell простыми словами.
Запускаем Powershell от имени администратора и вводим следующую команду:
> netdom renamecomputer «$env:COMPUTERNAME» /Newname «computername»
Как и с командной строкой, система запросит подтверждение операции, на которое отвечаем Y.
После перезагружаем компьютер для завершения операции.
Через реестр
Для изменения компьютера в реестре нам нужно отредактироват два параметра:
- Ветка HKEY_LOCAL_MACHINE\SYSTEM\CurrentControlSet\Control\ComputerName\ComputerName, параметр ComputerName, значение — имя компьютера.
- Ветка HKEY_LOCAL_MACHINE\SYSTEM\CurrentControlSet\Services\Tcpip\Parameters, параметр NV HostName, значение — имя компьютера.
Для внесения изменений можно воспользоваться утилитой regedit или командами:
reg add «HKLM\SYSTEM\CurrentControlSet\Control\ComputerName\ComputerName» /v ComputerName /t REG_SZ /d «Office-3» /f
reg add «HKLM\SYSTEM\CurrentControlSet\Services\Tcpip\Parameters» /v ComputerName /t REG_SZ /d «Office-3» /f
* в данном примере мы задаем имя компьютеру Office-3.
После перезагружаемся.
Читайте также
Создание нового пользователя в Windows 10
Три способа добавить компьютер с Windows к домену
To show a computer’s name in Windows, simply execute the hostname command from a Windows command prompt (CMD) or PowerShell.
There may be multiple reasons to rename the computer.
In this article, i will show you how to change your computer’s name in Windows using the CMD and PowerShell.
Rename Computer using PowerShell
The name of the computer can be changed from the elevated PowerShell using the Rename-Computer command.
Press ⊞ Win + X to open the Start menu flyout and then click on “Windows PowerShell (Admin)”.
Enter the following PowerShell’s command, substituting <NewHostname> with your preferred name, and press the “Enter” to rename the computer:
PS C:> Rename-Computer -NewName "<NewHostname>"
- sample output -
WARNING: The changes will take effect after you restart the computer <OldHostname>.
Restarted the computer to complete the name changing.
Change Hostname using CMD
Alternatively, you can change the computer’s name from the elevated Windows command prompt (CMD).
Press ⊞ Win keybutton to open the Start menu, type in cmd to search for the command prompt and press Ctrl + Shift + Enter to start the CMD as administrator.
To change the computer’s hostname, execute the following command from the elevated Windows command prompt:
C:> wmic computersystem where name="%computername%" call rename name="<NewHostname>"
- sample output -
Executing (\\<OldHostname>\ROOT\CIMV2:Win32_ComputerSystem.Name="<OldHostname>")->rename()
Method execution successful.
Out Parameters:
instance of __PARAMETERS
{
        ReturnValue = 0;
};
As well as with the PowerShell, you need to restarted the computer to complete the name changing.
Was it useful? Share this post with the world!
on October 23, 2011
We can rename a windows computer from command line using WMIC computersystem command. Please see the command below
WMIC computersystem where caption='currentname' rename newname
Example: If the current computer name is XP-PC, to change it to Windows7-PC, we can run the below command.
wmic computersystem where caption='xp-pc' rename windows7-pc
After running the command, you need to reboot the computer to make the changes effective.
This command works on XP, Vista, Windows 7 and also on Server 2003 and Server 2008 editions. This command can also be used from a batch file to rename computer. On Vista and Windows 7, this rename command can be run only from elevated administrator command prompt. If you run it from a normal command prompt, you would get the below error.
C:\>wmic computersystem where caption='xp-pc' call rename windows7-pc
Executing (\\XP-PC\ROOT\CIMV2:Win32_ComputerSystem.Name="XP-PC")->rename()
Method execution successful.
Out Parameters:
instance of __PARAMETERS
{
        ReturnValue = 5;
};
C:\>
IF you are trying to rename a computer joined to a domain, then the computer should be online when you run the command. Otherwise you would get error 1355 as below.
C:\>wmic computersystem where caption='xp-pc' rename windows7-pc
Executing (\\XP-PC\ROOT\CIMV2:Win32_ComputerSystem.Name="XP-PC")->rename()
Method execution successful.
Out Parameters:
instance of __PARAMETERS
{
        ReturnValue = 1355;
};
Error 1355 means that the specified domain can’t be contacted. On successful execution of the command, the return value would be ‘0’.
Whatever the reason you want to change computer name from the command line, Control Panel or PC Settings here’s our step-by-step tutorial showing three different ways how to do it.
How to get computer name from cmd
Before diving into three different ways how to change a computer name from the command line, the first thing you need to know is: how to get computer name?
In your workplace where the same computer can be used by many people or one person may be using multiple computers, it’s important to be able to tell your IT team which computer is experiencing the issue you’re reporting. Although your IT team should be able to walk you through finding this information, knowing it in advance will save you time and solve the problem more quickly. Once you’re familiar with the process, it will only take you a few seconds to locate the name of any computer. Here are three different ways how to get computer name:
Method 1 – How to get computer name from cmd
- Use the search bar in your taskbar and type in Command Prompt.
- Right-click on Command Prompt from the results and choose Run as administrator. If prompted, enter your password.
- Type in one of the commands such as cmd hostname or cmd computer name below and hit enter on your keyboard.
-
- cmd /k hostname
cmd computer name
-
- hostname
cmd hostname
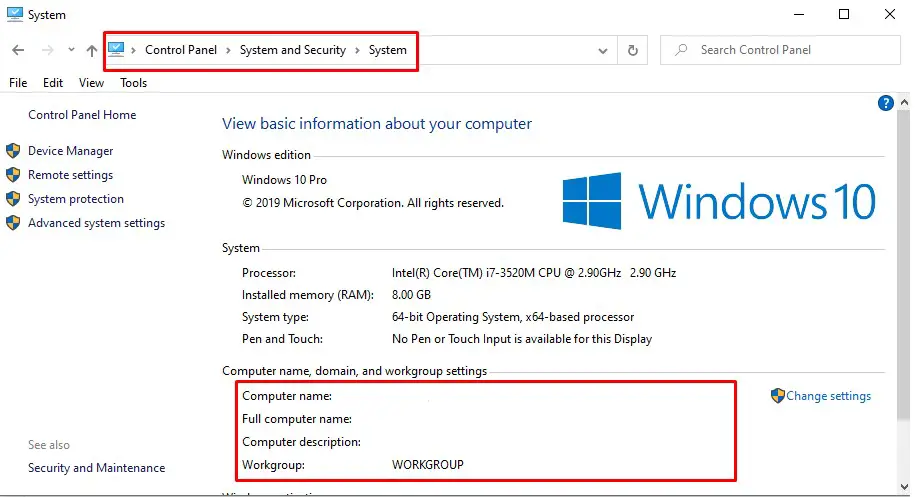
Method 2 – How to get computer name from Control Panel
- Open the Control Panel.
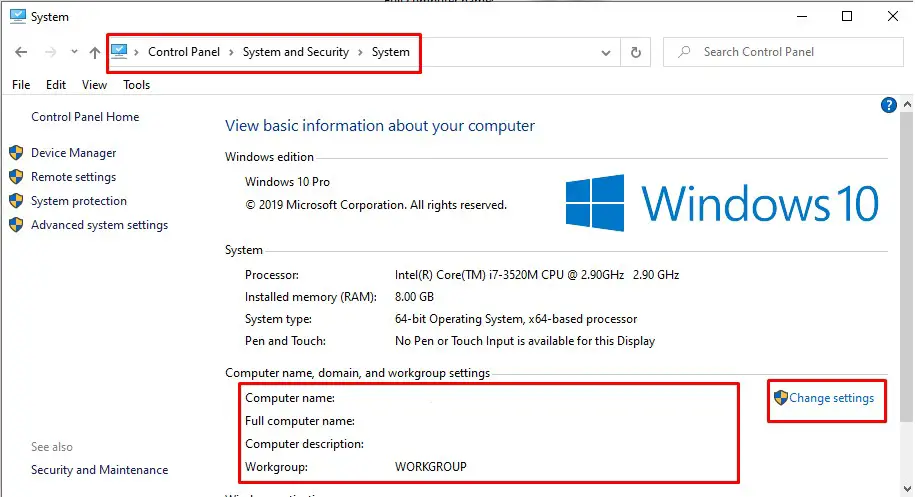
- Click System and Security > System.
- On the View basic information about your computer page, see the Full computer name under the section Computer name, domain, and workgroup settings.
How to get computer name from Control Panel
Method 3 – How to get computer name from This PC
- Use the search bar in your taskbar and type in This PC
- Right-click and then click Properties.
The computer name appears under Computer name, domain, and workgroup settings.
How to Change computer name from the command line
Now that you have found your computer name you can change computer name from the command line, Control Panel, or PC Settings.
Method 1.1 – How to change computer name from the command line of your own computer
- Use the search bar in your taskbar and type in Command Prompt.
- Right-click on Command Prompt from the results and choose Run as administrator. If prompted, enter your password.
- Type in the command line the following command and hit enter on your keyboard.
WMIC computersystem where caption='OldComputerName' rename NewComputerName
Note: Replace “OldComputerName” with your current Computer Name and “NewComputerName” the new name you would like to have. After running the command, you need to reboot the computer to make the changes effective. This command works on all types of Windows editions. This command can also be used from a batch file to rename the computer.

Change computer name from the command line
Note: If you run it from a normal command prompt, you would get the below error.
C:\>wmic computersystem where caption='xp-pc' call rename windows7-pc

Executing (\\XP-PC\ROOT\CIMV2:Win32_ComputerSystem.Name="XP-PC")->rename()

Method execution successful.

Out Parameters:

instance of __PARAMETERS

{
ReturnValue = 5;
};

C:\>
Method 1.2 – How to change computer name from the command line of a remote computer
Besides changing the name of a local computer, you can also use the WMIC command to rename a remote computer on the same network. For example, if want to rename a remote PC named Alis-Laptop to Tom-Laptop and you know the login credentials:
- Use the search bar in your taskbar and type in Command Prompt.
- Right-click on Command Prompt from the results and choose Run as administrator. If prompted, enter your password.
- Type in the command line the following command and hit enter on your keyboard.
WMIC /node:"Alis-Laptop" /user:Admin /password:password123 computersystem call rename "Tom-Laptop"
The value following /node: indicates the name of the remote computer on the LAN. The value following /user: must be an admin account on the remote computer.
Method 2– From Control Panel
- Open the Control Panel.
- Click System and Security > System.
- On the View basic information about your computer page, see the Full computer name under the section Computer name, domain, and workgroup settings.
- Click Change Settings. Note: You need to be an Administrator in order to perform changes.
How to change computer name from Control Panel
- 5-The System Properties screen will open with the “Computer Name” tab already selected. Click on the Change… button.
How to change computer name from Control Panel
- 6- Now type the new name you want in the “Computer name” box and click OK.
How to change computer name from Control Panel
- 7- A restart will be required to complete the name change, and after that, you’re all set!
Method 3– From PC Settings
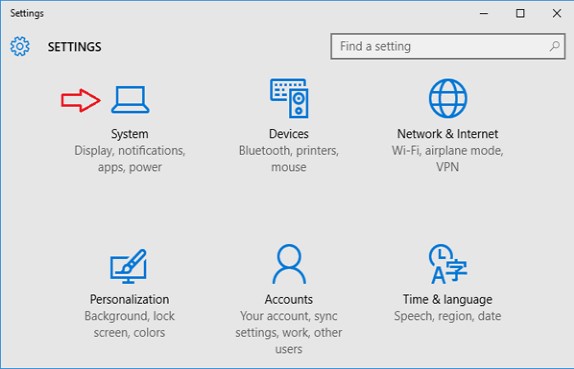
- Click on Start to access the Start Menu. Select Settings.
Settings
- When the PC Settings app opens, click on System.

System
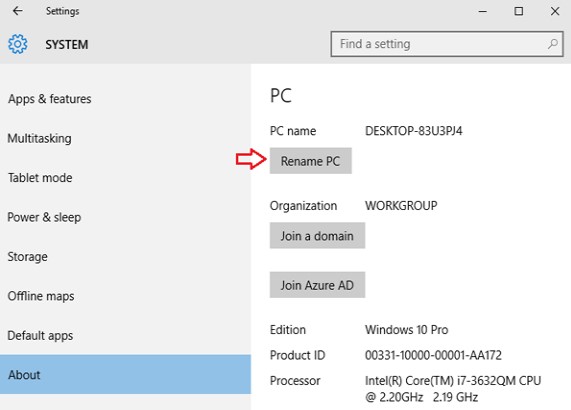
- Go to the About section and then click on “Rename PC“.

Rename PC
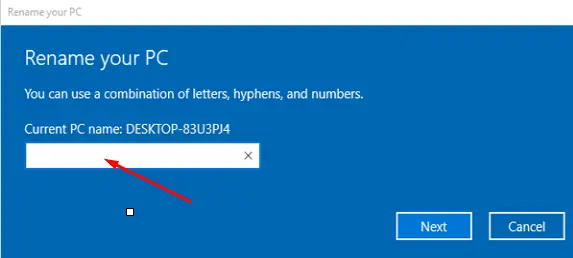
- Type the new name you want to use and click on Next.

Rename PC
- You will be prompted to restart your PC to apply your new settings, click on Restart Now to proceed.
Conclusions
Dear followers of Get IT Solutions, these are all the methods of how to change a computer name from the command line, Control Panel, or PC Settings. We hope you will find this method helpful. Have you managed to change it? Please let us know in the comments below.