
Если у вас есть внешние дисплеи, подключенные к компьютеру, до начала работы не забудьте выбрать, какие дисплеи нужно изменить.
-
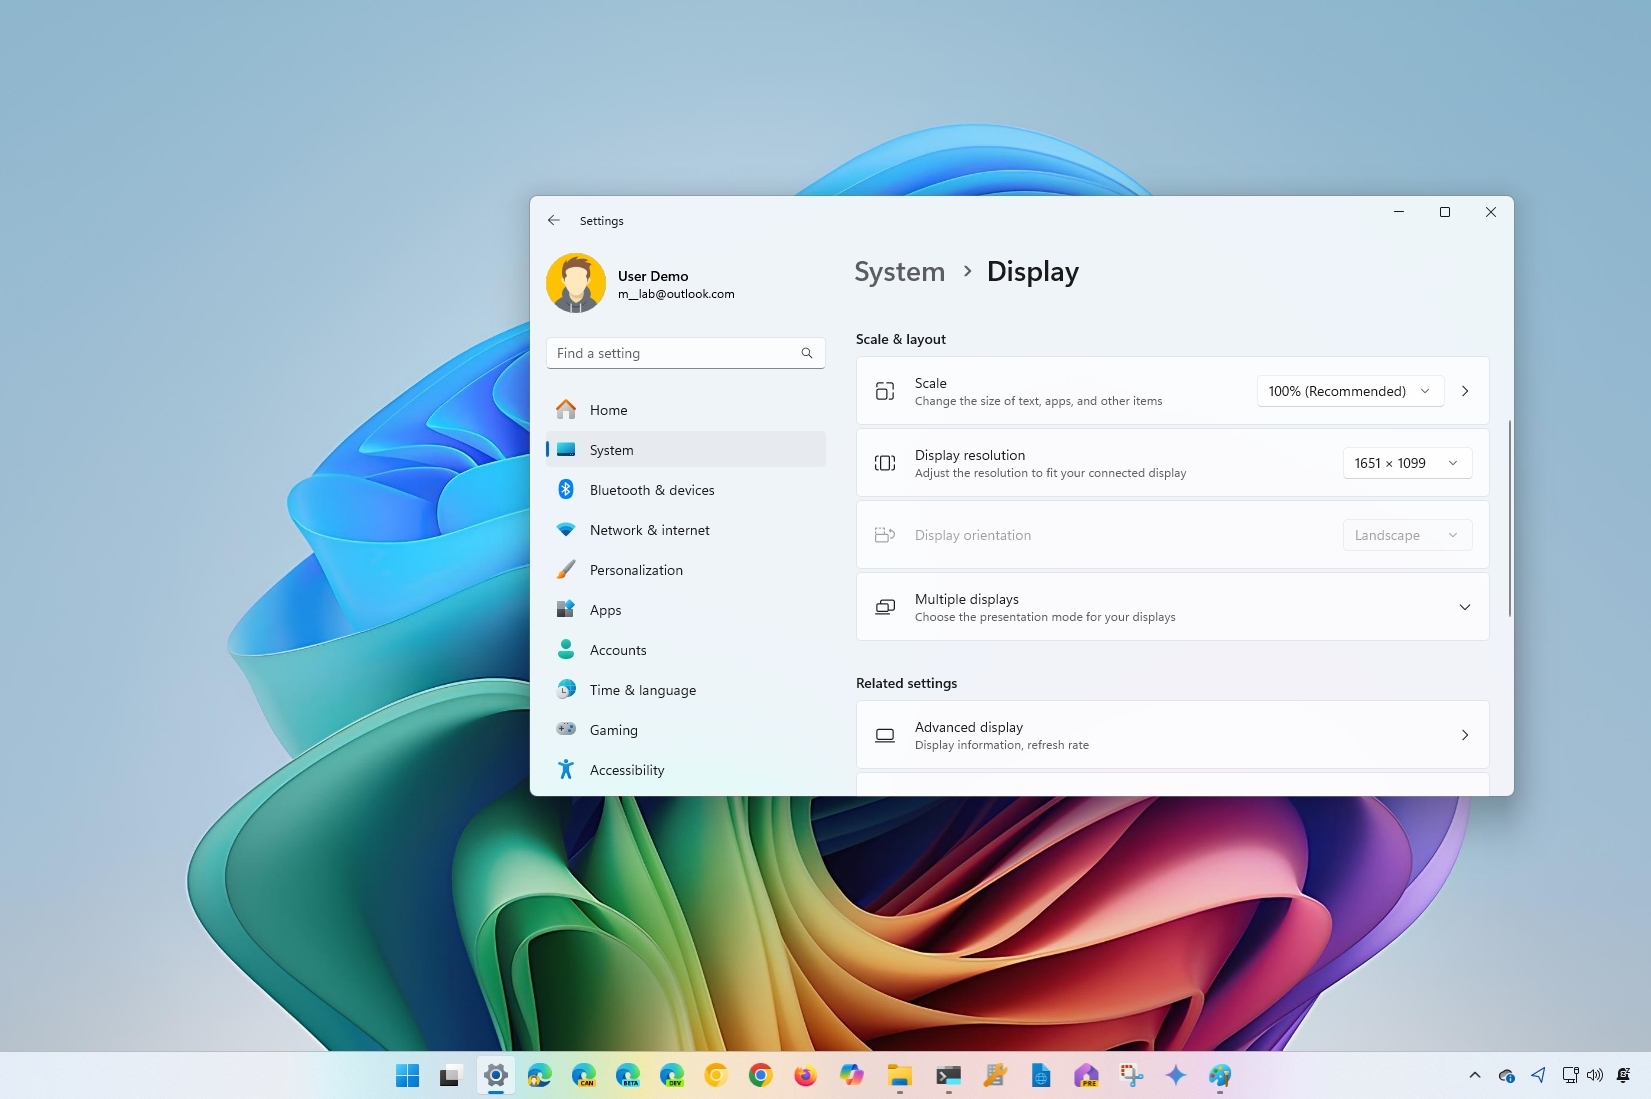
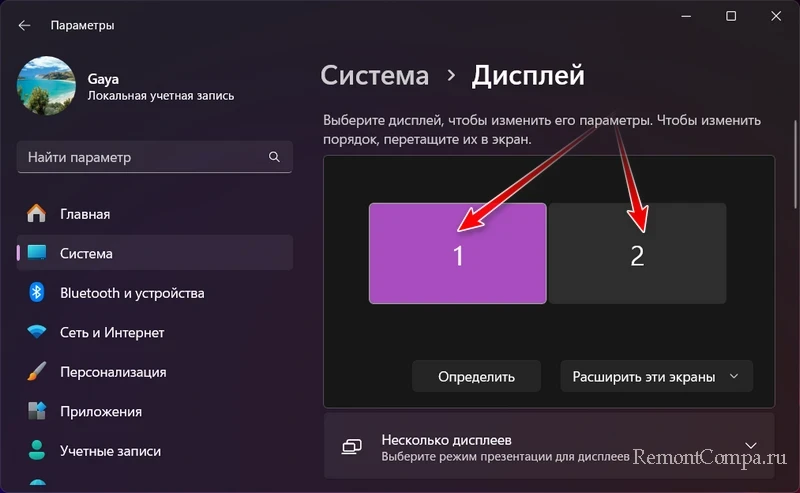
Выберите Пуск > Параметры > Системный > Дисплей и просмотрите раздел, в котором отображаются ваши дисплеи.
-
Выберите дисплей, который необходимо изменить. После этого следуйте приведенным ниже инструкциям.

«Изменение размера текста, приложений и прочих элементов»
-
Оставайтесь на экране или откройте параметры дисплея.Откройте параметры дисплея
-
Прокрутите до раздела Масштаб и макет.
-
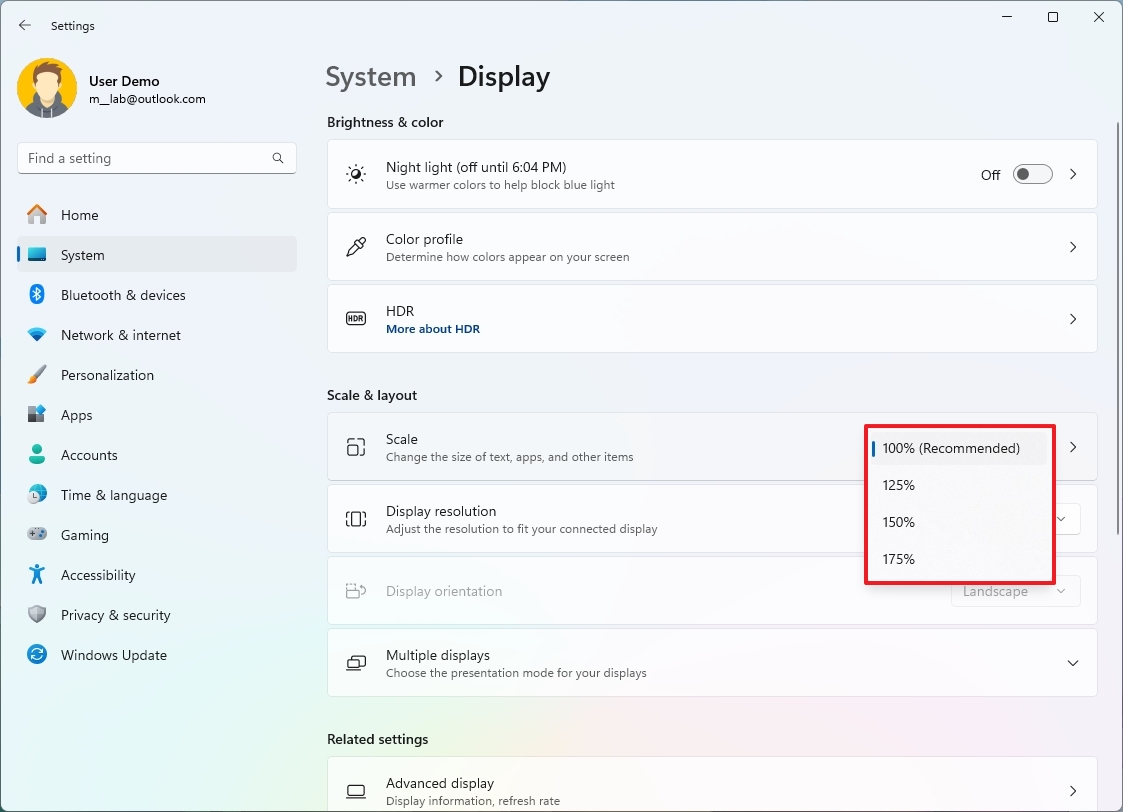
Выберите Масштаб, а затем выберите параметр. Как правило, лучше всего выбрать один из помеченных как (Рекомендуется).
Изменение разрешения дисплея
-
Оставайтесь на экране или откройте параметры дисплея.Откройте параметры дисплея
-
В строке Разрешение экрана выберите список и параметр. Как правило, лучше всего использовать тот, который помечен (рекомендуется). Мониторы могут поддерживать разрешение ниже основного, но в этом случае текст будет менее четким, а изображение может занимать не весь экран, быть растянутым или располагаться по центру черного экрана.
Примечание: Если в разрешении экрана есть непредвиденные изменения, возможно, потребуется обновить графический драйвер. Чтобы просмотреть и установить доступные обновления, выберите Пуск > Параметры > Центр обновления Windows > Проверить наличие обновлений.
Изменение ориентации дисплея
Нажмите кнопку Пуск и введите параметры. Выберите Параметры > Системный > Дисплей и выберите ориентацию экрана в раскрывающемся списке рядом с пунктом Ориентация экрана.
Windows порекомендует ориентацию для вашего экрана. Если вы измените ориентацию монитора, вам также потребуется физически повернуть экран. Например, вам нужно будет повернуть свой внешний монитор, чтобы использовать его в книжной ориентации вместо альбомной.
Изменение ориентации экрана
Although Windows 11 can automatically adjust the display scaling settings to ensure that elements (text, icons, navigations, and others) are the right size and readable, it’s not perfect, and sometimes, adjusting the settings manually may be necessary.
For example, if you do not have perfect eyesight, making the elements bigger on the screen could make things easier to see and use, avoiding stressing your eyes. If you connect an external monitor, using a custom scale setting can help increase the size of the text, icons, and menus across the displays. Changing the display scale may also improve content visibility while showing a PowerPoint presentation on a projector.
In this how-to guide, I will explain how to change the scale settings on a desktop monitor or laptop display.
Recent updates
This guide has been updated to reflect changes and make sure the instructions are still accurate.
How to change display scale with recommended settings on Windows 11
To change a Windows 11 display scale size using the recommended settings, use these steps:
- Open Settings.
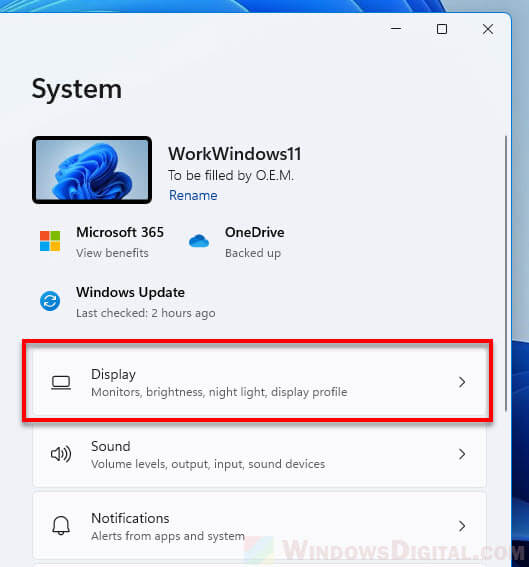
- Click on System.
- Click the Display page on the right side.
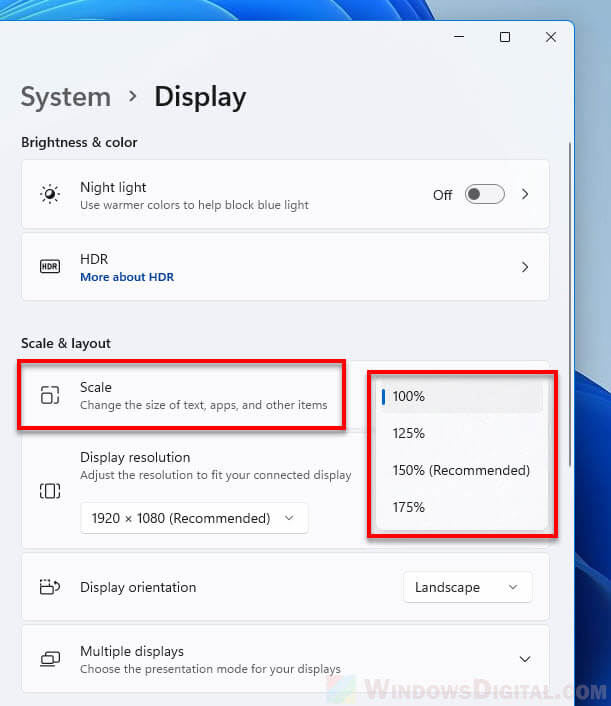
- Under the «Scale & layout» section, use the Scale drop-down menu and select the scale setting — for example, 100%, 125%, 150%, and 175%.
Once you complete the steps, the new scale configuration will apply. Although it’s not required, you may need to restart the computer to make sure the setting applies correctly for all supported applications.
How to change display scale with custom settings on Windows 11
You shouldn’t change the scale settings using custom values because it affects the viewing experience. However, if it’s necessary, and you do it correctly, it may help you hit that sweet spot.
To set a custom scale size of a display, use these steps:
All the latest news, reviews, and guides for Windows and Xbox diehards.
- Open Settings.
- Click on System.
- Click the Display page on the right side.
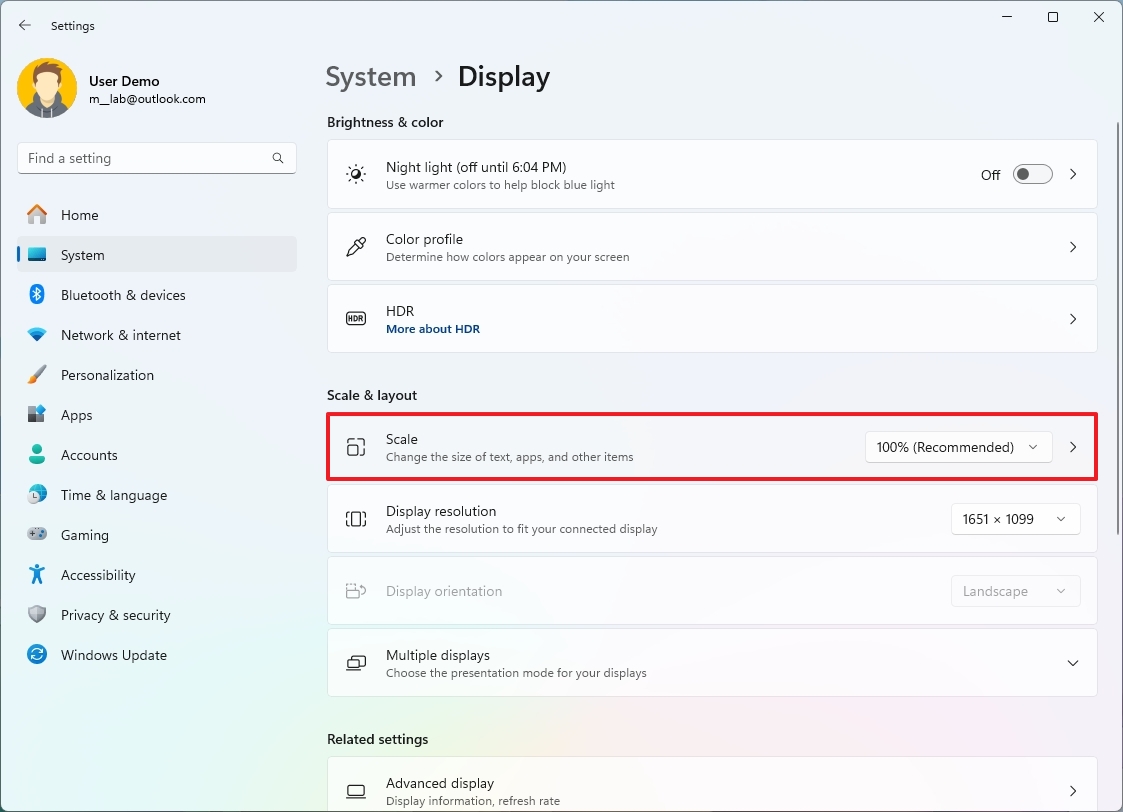
- Select the Scale setting under the «Scale & layout» section.
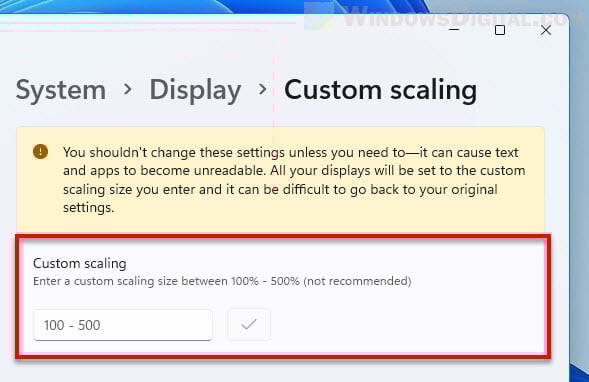
- Configure a custom scaling size between 100% and 500% under the «Custom scaling» section.
- Quick tip: If you want to increase the size of text, apps, and other items, you can try using 110% as the new scale value.
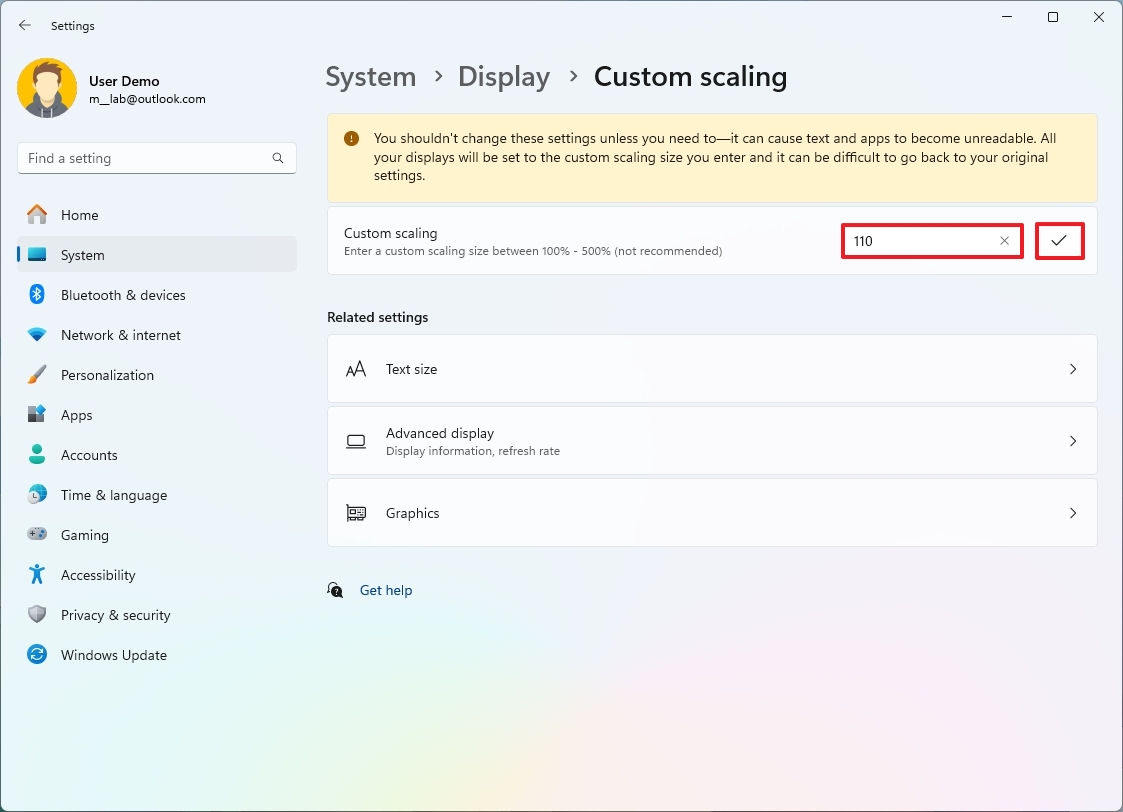
- Click the Check button.
- Click the Sign out now button.
- Sign back into the account.
After you complete the steps, the system will apply the setting you specified.
If the system isn’t scaling elements correctly, repeat the steps to select a different value to increase or decrease the scaling value until you reach the correct configuration.
You can always revert the changes using the same instructions outlined above, but in step 4, click the «Turn off custom scaling and sign out» option.
How to make text bigger without changing scale settings on Windows 11
If you want to make the text more readable, you should not adjust the scale settings. Instead, you should change the text size settings.
To make text bigger across the desktop, use these steps:
- Open Settings.
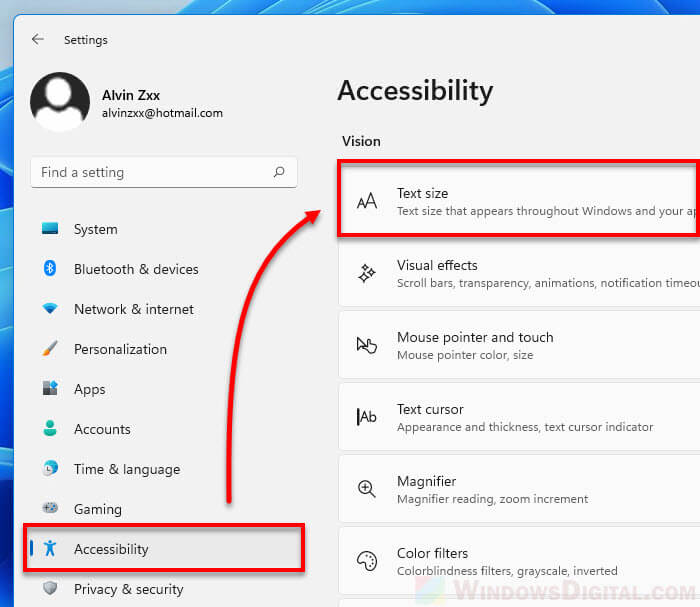
- Click on Accessibility.
- Click the Text size page on the right side.

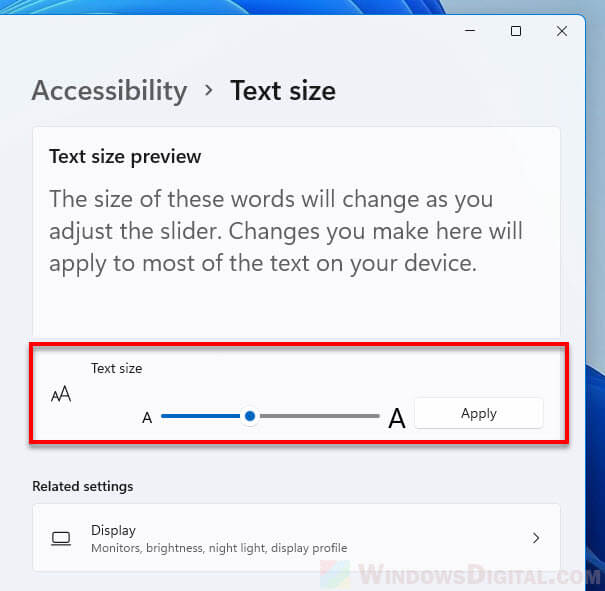
- Use the «Text size» slider to make the font size across the desktop bigger.
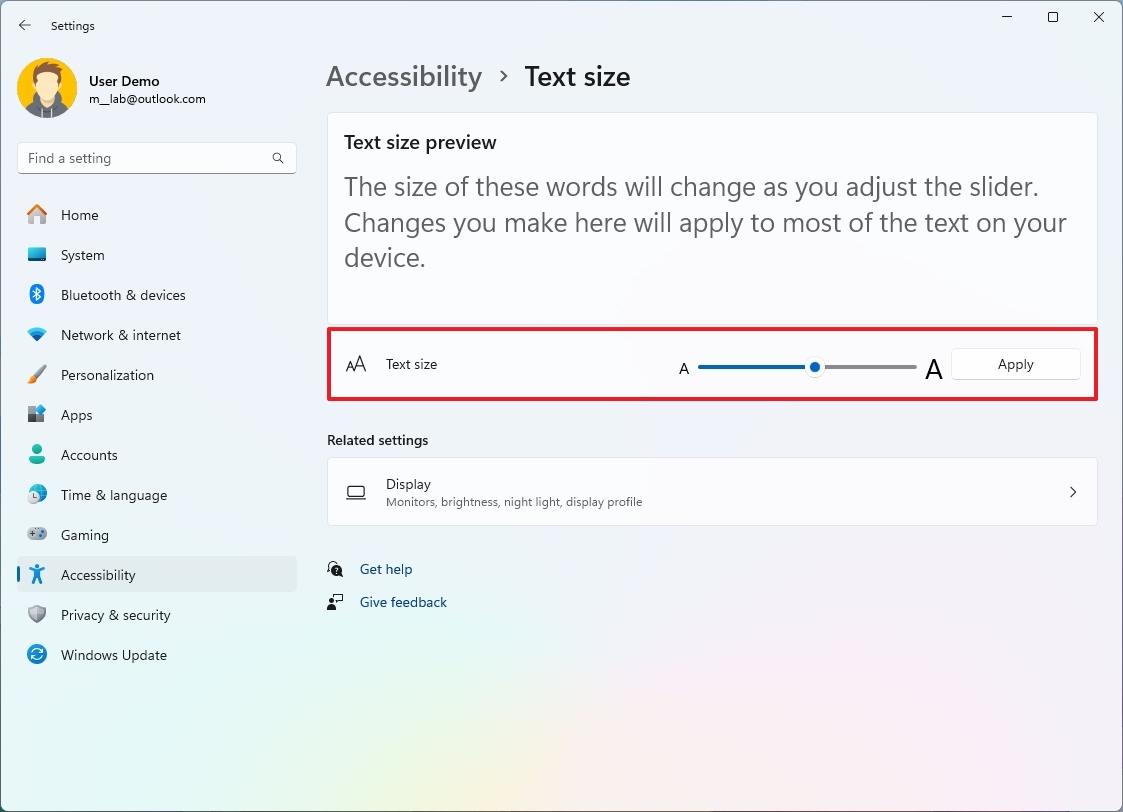
- Click the Apply button.
Once you complete the steps, the screen will flash a «Please wait» message to apply the new text size.
More resources
For more helpful articles, coverage, and answers to common questions about Windows 10 and Windows 11, visit the following resources:
- Windows 11 on Windows Central — All you need to know
- Windows 10 on Windows Central — All you need to know
Mauro Huculak has been a Windows How-To Expert contributor for WindowsCentral.com for nearly a decade and has over 15 years of experience writing comprehensive guides. He also has an IT background and has achieved different professional certifications from Microsoft, Cisco, VMware, and CompTIA. He has been recognized as a Microsoft MVP for many years.
В этой публикации, друзья, рассмотрим, как изменить масштаб в Windows 11. Как сделать его больше, чем исходный 100%-ный масштаб. И как установить нужный масштаб для интерфейса отдельных программ и игр. С исходным масштабом на экранах с высоким разрешением текст и элементы интерфейса операционной системы могут отображаться слишком мелкими, что затрудняет их восприятие. В особенности для пользователей с проблемами зрения. Увеличение масштаба сделает интерфейс более читаемым, более удобным для восприятия. И наши глаза будут меньше напрягаться.
Как изменить масштаб в Windows 11
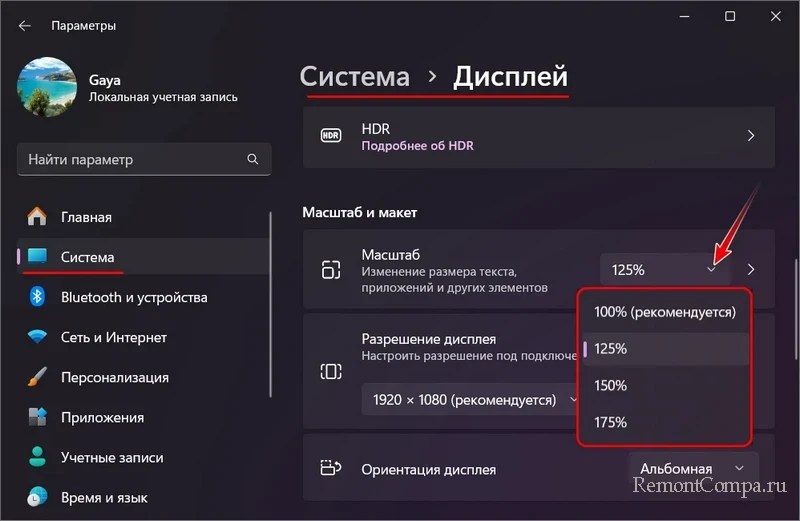
Изменение масштаба в Windows 11 доступно в системном приложении «Параметры», в настройках экрана. Можно открыть в приложении путь:
И можно этот путь открыть через контекстное меню на рабочем столе, выбрав «Параметры экрана».
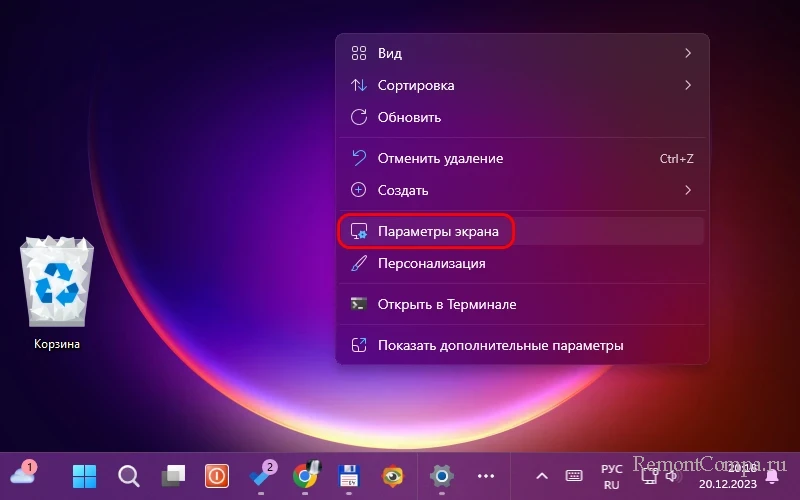
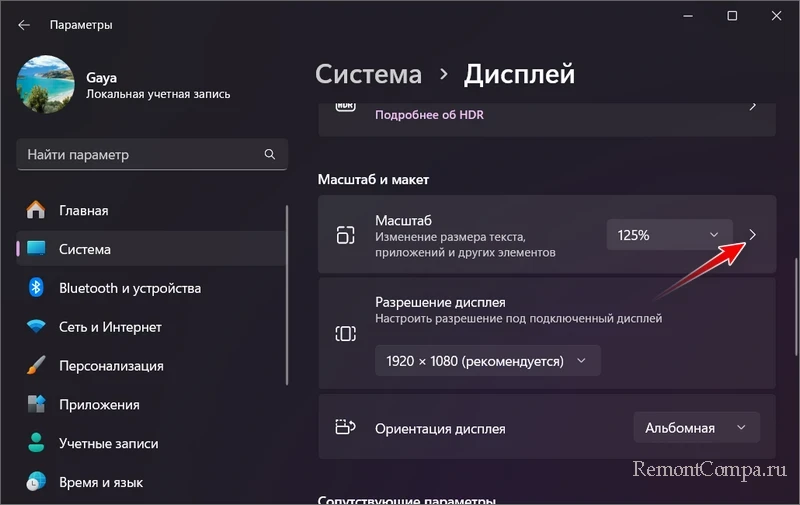
В настройках экрана смотрим блок «Масштаб и макет». Из выпадающего перечня выбираем тот или иной масштаб, обозначенный процентами увеличения. Для экранов с высоким разрешением это обычно значения, помимо исходного 100%, 125%, 150%, 175%.
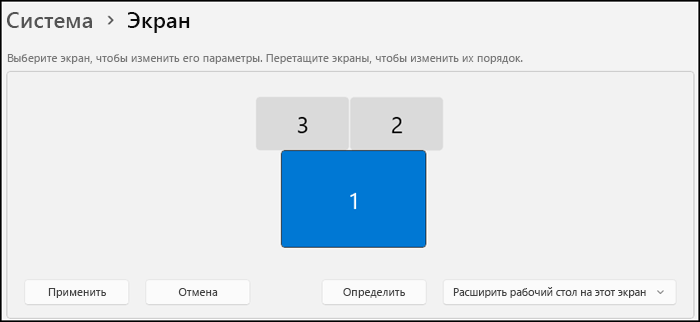
Друзья, если у вас два или более экрана подключено к компьютеру, масштаб нужно настроить для каждого экрана в отдельности. Вверху этих же настроек выберите настраиваемый экран. И установите для каждого нужное значение увеличения масштаба.
Windows 11 предлагает, как видим, большие шаги увеличения масштаба и ограниченный перечень его значений. Но мы можем установить масштаб с любым шагом от 100% до 500%, тонко настроив интерфейс операционной системы под свои предпочтения. Раскрываем блок дополнительных настроек масштаба.
И в блоке «Настраиваемое масштабирование» указываем цифру процента увеличения масштаба от 100 до 500. Жмём галочку применения.
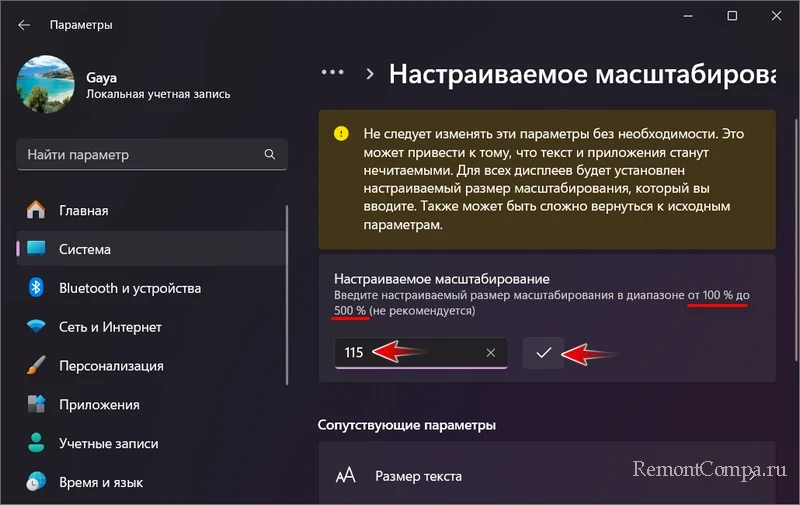
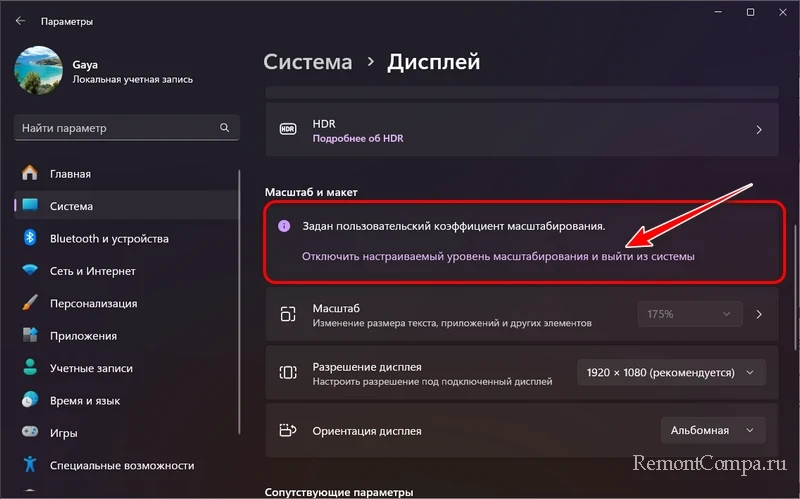
Далее выполняем выход из Windows 11 на экран блокировки и входим вновь в операционную систему. Тогда как обычное масштабирование применяется сразу, для настраиваемого масштабирования нужен перезаход в Windows 11. Для отмены настраиваемого масштабирования нужно там, где настраивается обычный масштаб (в приложении «Параметры» по пути «Система → Дисплей»), отключить такое настраиваемое масштабирование. Перезайти в систему. И только потом нам будет доступно изменение обычного масштаба.
Друзья, не всегда есть смысл устанавливать слишком большой системный масштаб, можно сбалансировано увеличить масштаб и размер текста, т.е. системного шрифта. Детали – в статье «Как изменить шрифт в Windows 11».
Ещё в Windows 11 можно установить масштаб отдельно от того, что настроен для всей операционной системы, выборочно для каких-то программ и игр. Для них может не подходить установленный во всей системе масштаб. Детали – в статье «Как установить для программы или игры отдельный от всей Windows масштаб».
В числе прочих возможностей Windows, помогающих сохранить зрение, либо решающих имеющиеся проблемы со зрением — функция «Ночной свет» и различные функции в рамках специальных возможностей.
Although Windows 11 automatically sets the elements (text, desktop icons, taskbar, etc.) to the right size to make sure they are readable for most people, depending on the person, these elements may still look too big or too small on the screen. Fortunately, there are settings you can adjust to make things bigger or smaller in Windows 11.
This short tutorial will show you how to make everything look bigger or smaller on Windows 11.
Also see: How to Zoom Out Desktop Screen on Windows 11
Adjust display scale to make everything bigger or smaller in Windows 11
In Windows 11, to change the size of text, icons and other items, the first setting you should adjust is the “Scale” setting. The Scale setting controls the general size of pretty much every element on Windows 11. Increasing or decreasing the scale percentage value will affect the size of most elements such as icons, text, taskbar, app’s window, etc. on Windows 11. To adjust the display scale, follow the steps below.
1. First, press Win + i keys to open Settings app, or open it via Start.
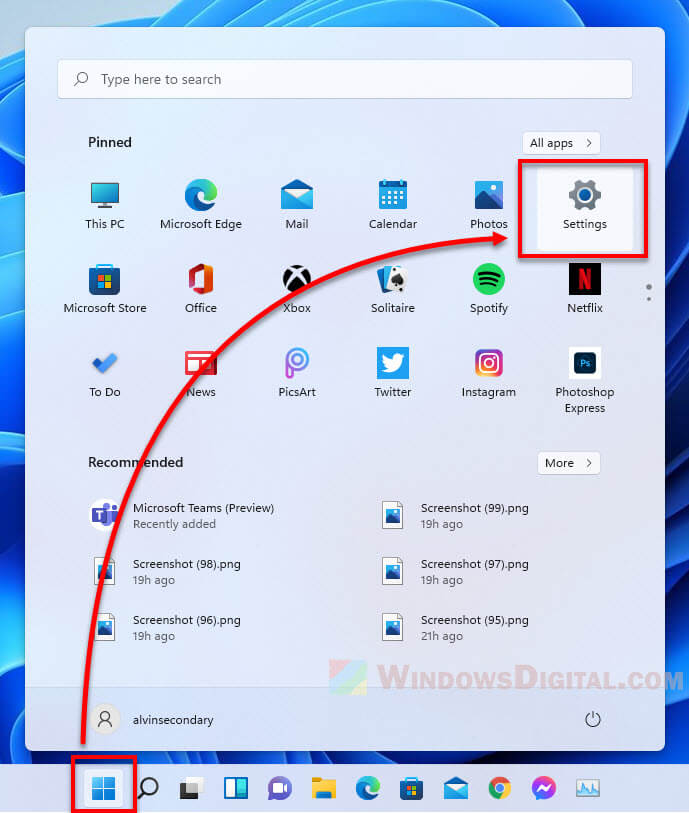
2. In the Settings app, select Display on the right pane.
3. Under Scale & layout section, click the drop-down menu next to Scale and select a scale percentage you would like to use. The higher the scale, the larger the items will be. The default value of the scale option is 100%.
To enter a custom scaling that is not listed in the scale option’s drop-down menu or if you need to use a display scaling larger than just 175%, click the right arrow in the Scale option.
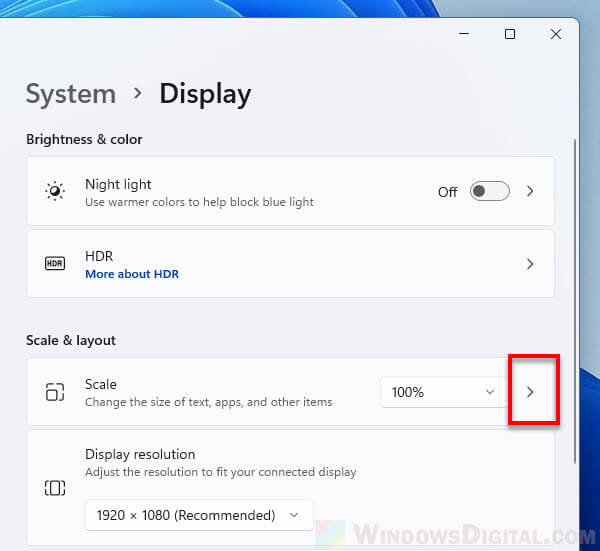
Under Custom scaling, enter a value between 100% – 500%. Note that changing the display scaling to an unusual size may cause text and apps to become unreadable (sometimes).
Make text bigger or smaller in Windows 11
To adjust only the text size, follow step 1 in the instructions above to open Settings app. Next, select Accessibility from the left pane, then select Text size on the right pane.
In the Text size column, use the slider to increase or decrease the size of text. The text size preview column will show you the change preview as you adjust the slider.
Make desktop icons smaller or bigger in Windows 11
To manually change the size of desktop icons in Windows 11, right-click anywhere on the desktop, select View and choose a size for all desktop icons. Available sizes are Large icons, Medium icons or Small icons.
Also read: How to Change Desktop Icon Spacing in Windows 11
How to change taskbar size in Windows 11
Though there is no option in the Settings app to adjust the size of taskbar in Windows 11, you can manually change the taskbar size by simply editing a registry key. Here’s how.
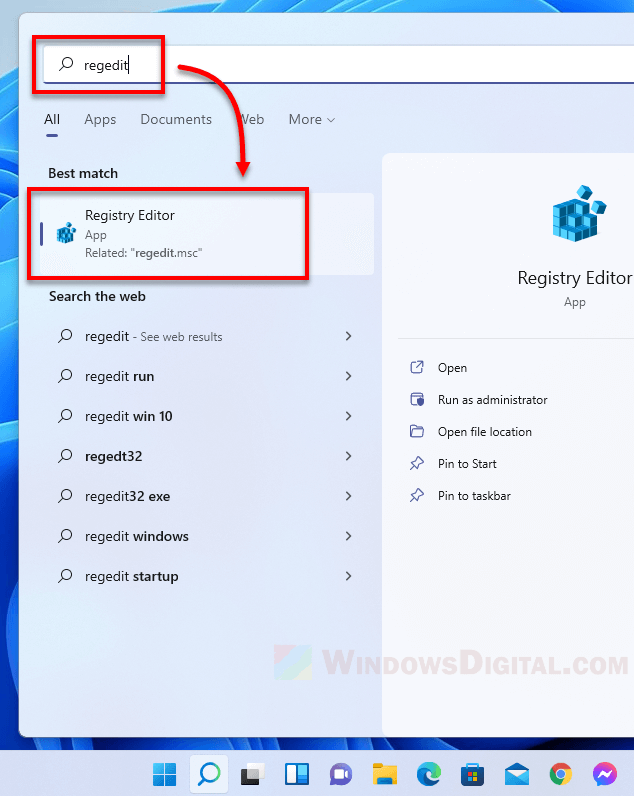
1. Search for and open Registry Editor or regedit via Start.
2. In the registry editor, navigate to the following registry key. You can copy and paste the following path to the address bar in registry editor and press Enter to go directly to the registry path.
HKEY_CURRENT_USER\Software\Microsoft\Windows\CurrentVersion\Explorer\Advanced3. Next, right-click the Advanced folder and select New > DWORD (32-bit) Value.
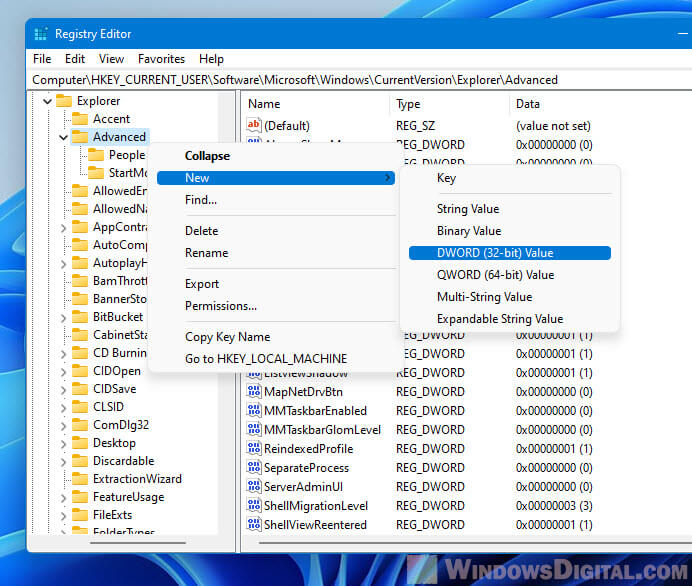
4. Name the newly created key “TaskbarSi“.

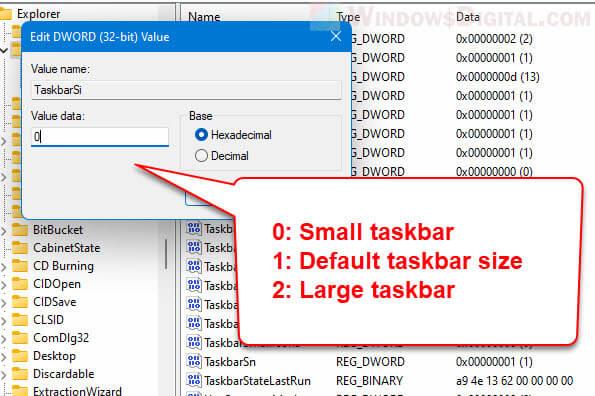
5. Double-click the newly created TaskbarSi key and enter 0, 1 or 2 in the Value data field depending on what size you want the taskbar to be (refer below).
- 0: Small Taskbar size
- 1: Default Taskbar size
- 2: Large Taskbar size
6. Click OK to save the changes and restart your PC for the changes to take effect.
Change screen resolution to make everything look bigger or smaller
If everything (scale, text, icons, taskbar, etc.) is already at its smallest value, the only way left to make things look smaller is by changing to a larger screen resolution. Similarly, if everything is already at its largest size, the only way to make them even bigger is by changing to a smaller screen resolution.
To change screen resolution in Windows 11, right-click anywhere on the desktop and select Display settings. Under Scale & layout, click the drop-down menu in the Display resolution setting and choose a resolution you want to change your screen to.
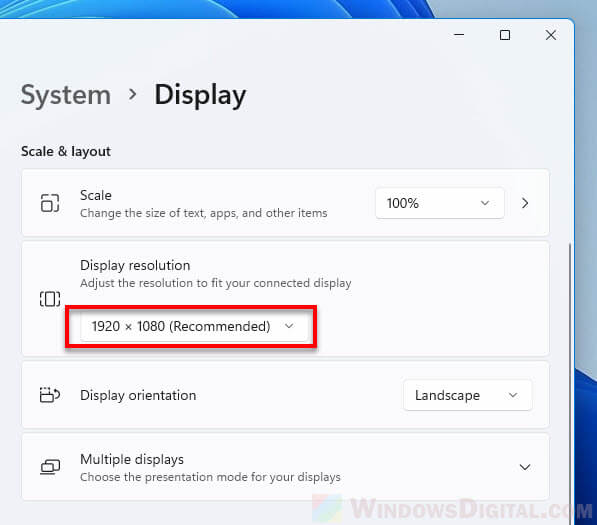
The bigger the screen resolution, the smaller the elements and objects (icons, text, taskbar, etc.) will be. Similarly, the smaller the resolution, the bigger the items will be.
-
Home
-
News
- [Guide] How to Zoom in and Zoom out Screen in Windows 11?
By Helen | Follow |
Last Updated
This post produced by MiniTool Software Ltd. mainly teaches you how to enlarge and reduce screen in the newest Windows 11 operating system (OS). It also includes the contents for zooming in/out the browser and changing screen resolution.
In the latest Windows 11 and its applications, users are allowed to zoom in on the screen to enlarge the area that they can’t see clearly. Once figure out what is in the specific area, you can zoom out to revert to the normal screen.
How to Custom Zoom Size for Windows 11?
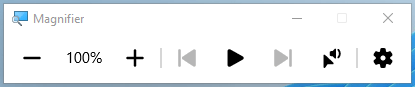
There is an embedded feature known as Magnifier in Windows 11 that enables you to zoom in and zoom out the desktop screen. It can be triggered using a keyboard shortcut no matter the Magnifier app is open or not.
How to Zoom in in Windows 11?
If the Magnifier tool havsn’t been opened, pressing Windows + + keys will launch it. If the program is already running, use Win + + will amplify your screen. Holding the Windows key, each time you press the plus (+) key, your screen will magnify 100%. The default is 100%, with the pressing of “+”, it increases to 200%, 300%, 400%, 500%…
Also, you can zoom in on your screen by pressing Ctrl + Alt and rolling up your mouse wheel.
How to Zoom out on Windows 11 Computer?
On the contrary, if you want to narrow your screen, you should press Windows and – hotkey. To go back to the default zoom size, just hold the Windows key and press minus “-“ several times. Or, you can directly and quickly revert to the default 100% zoom size using Win + Esc key combination.
Besides, you are able to zoom out your screen by holding Ctrl + Alt and rolling down your mouse wheel.
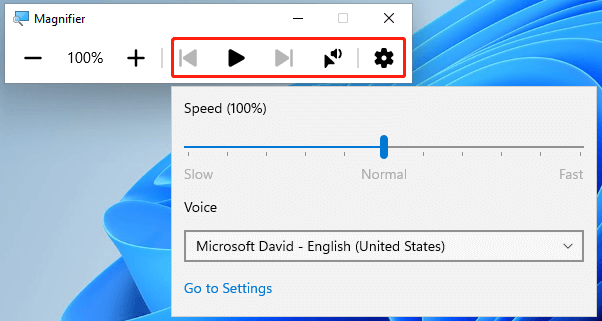
How to Hear the Text You Can’t See Clearly?
Also, you can rely on Windows 11 Magnifier to read out the words you can’t see clearly. Just click on the arrow plus speaker icons next to the settings icon. Or, you can use Ctrl + Alt shortcut and left-click on the area where the text locates. You can further start and stop the reading, as well as manage the volume of the reading.
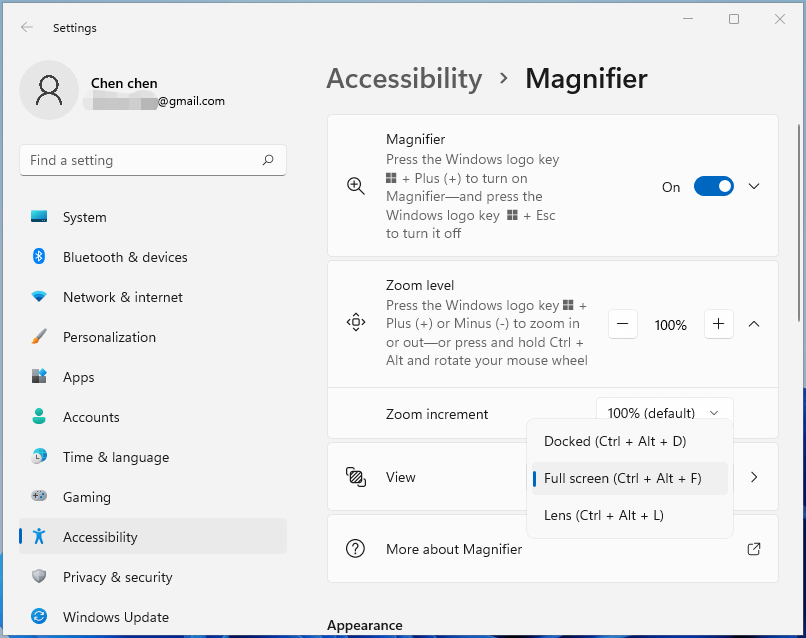
How to Customize Zoom Settings Within Windows 11?
Besides, you can also access the zoom feature and manage it via system settings. Just navigate to Windows 11 Settings > Accessibility > Magnifier. There, you can turn on or turn off Magnifier, change zoom level, specify zoom section, and many other settings.
How to Zoom in and Zoom out with Other Methods?
Besides the Magnifier utility in Windows 11, you can rely on some other functions to change the size of your screen. For example, you can adjust your screen size by altering screen resolution. Just go to Settings > System > Display and personalize your display resolution.
If you are using a touch device, you can pinch-zoom Windows 11 using your fingers.
If you want to zoom in or zoom out within your browser, there is a special Zoom setting for that. No matter what browser you are using, Chrome or Edge, you can easily enlarge or minify the window with the function.
Windows 11 Assistant Software Recommended
The new and powerful Windows 11 will bring you many benefits. At the same time, it will also bring you some unexpected damages such as data loss. Thus, it is strongly recommended that you back up your crucial files before or after upgrading to Win11 with a robust and reliable program like MiniTool ShadowMaker, which will assist you to protect your increasing data automatically on schedules!
MiniTool ShadowMaker TrialClick to Download100%Clean & Safe
About The Author
Position: Columnist
Helen Graduated from university in 2014 and started working as a tech editor in the same year. Her articles focus on data backup & recovery and disk management. Through an in-depth exploration of computer technology, Helen has successfully helped thousands of users solve their annoying problems.