
For an optimistic user of Windows 8, sometimes the issue governing too big or too small size of Start Screen tiles arise. This graphical user interface connected issue is relatively effective for monitor sizes. However making some sort of modification in the registry keys can help you to fix this.
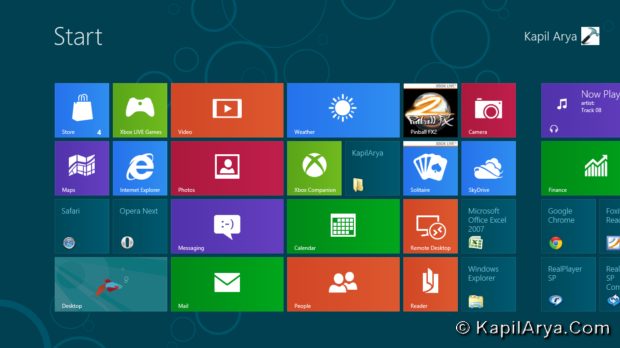
By modifying registry you can change the DPI (which controls the size of the Start Screen UI) by changing the monitor size detected by Windows. This will be beneficial in case of television projection. So using the trick of this article, you can easily project the tiles from a 10” monitor to 42” television without losing relative proportion of tiles.
So without wasting your time anymore, let us share the way…
Configure DPI Settings In Windows 8 Using Registry Editor
1. Press + R and put regedit in Run dialog box to open Registry Editor (if you’re not familiar with Registry Editor, then click here). Click OK.
2. Navigate to this location:
HKEY_LOCAL_MACHINE\SOFTWARE\Microsoft\Windows\CurrentVersion\Explorer
3. In the left pane of this location, create a subkey named as Scaling using Right Click -> New -> Key. If this subkey already exists, then skip this step and move to next step.
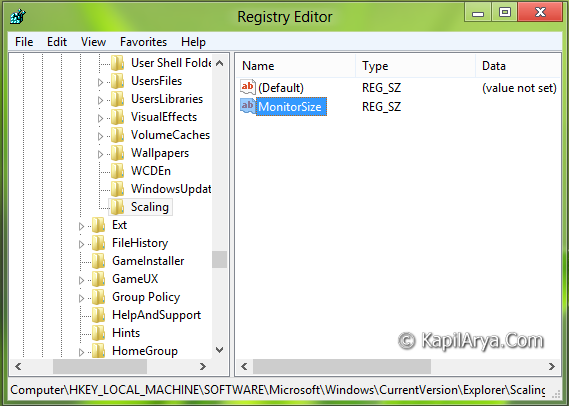
4. In the right pane of subkey Scaling, create a new string by navigating Right Click -> New -> String Value. Name this string as MonitorSize. Double click on it to modify, you’ll get this prompt:
5. Finally in the field of Value data, input 12.1. That’s it. Please make sure that we’ve used periods here, so avoid the comma for inches.
Close the Registry Editor and reboot to get results!
RELATED ARTICLES
This guide will show you how to adjust your display so that Windows 8 looks it’s best – particularly for those with high DPI displays.
The Rise In High DPI Displays
Sometimes hardware advances outpace software advances and vice versa. One area of technology that is constantly showing signs of this happening is the display arena. Even today , alot of current software was designed back when high resolution displays automatically meant that you had a huge display screen.
Of course that is no longer the case and is now becoming a lot more common for smaller displays to feature high-density pixelation.
One area where you can see the rapid rise in technology in this area is with smartphones. If you get the chance, take a look at what was deemed a cutting edge display from the original iPhone and compare it to what we have today among the smartphone market.
The trend in the computer market was for displays to continue getting bigger but we are now seeing display sizes remain the same or even smaller and instead feature higher quality and high density displays. This is also a current trend in the laptop market and is certainly a welcome one.
The problem is that some operating systems such as Windows 7 and Windows 8 are not setup to cater for such high density displays and small screens and end up showing tiny icons,graphics and text.
Follow this guide to adjust your operating system by your high-density display
Step by Step
1. Step
Windows has a built in custom scaling utility. This is definitely one of the best ways to fix the problem. By using Windows scaling feature you will be able to enlarge all programs and system user interface visuals.
It’s also pretty easy to configure. Simply open up Control Panel and click on display. From here choose custom sizing options. Should now bring you to an options window where you should see a zoom percentage and a visual on screen ruler.
If you have a ruler at hand -you can hold it up against this ruler so that it matches up and this will give you to proportion zoom for your display.
Depending on your level of eyesight you can also simply adjust it to your own personal preferences!
If you only want to enlarge text then there is also an option for that in the Display menu.
2. Step
The problem with Windows built-in scaling utility is that it does not work that great with every program. Some programs will have their own built-in scaling utilities.
This can of course cause issues if your already scaling through Windows’ program. The best way around any potential problems here is to make such a program an “exception”.
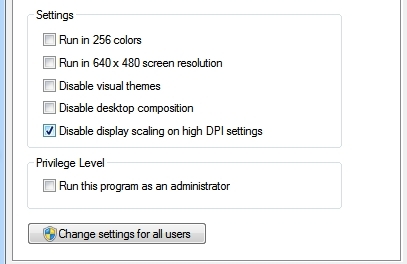
This will stop any scaling being performed on that programme and allow you to adjust it to your preferences within a program itself. Simply access the programs executable file which should be located on the root of your hard drive. Right click on it and select properties and under compatibility tab make sure the box for “Disable Display Scaling on High DPI Settings is checked” and your good to go.
We advise doing this for your browser in most cases as Chrome and Firefox often have compatibility issues with Windows Scaling utility.
3. Step
If you come across a program that seems to have some display issues with your computer or laptop screen you might want to try using Zoom. In nearly all programs zoom can be accessed by holding down the control key and using the scroll on your touchpad or mouse.
4. Step
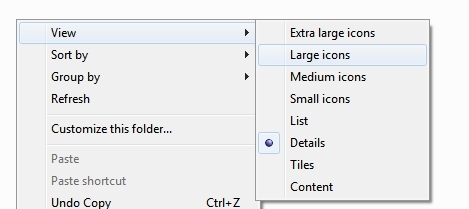
May also be a good idea to change the icon sizes if they are appearing too small on your display. Changing icon sizes is a really simple. Simply right click it and under the view tab at the top you can choose large or extra large icons .
Conclusion
Using the above steps should fix most issues that you could possibly run into with your high DPI display. As stated at the beginning of this guide – sometimes hardware outpaces software. Luckily Microsoft have moved to rectify this issue with and their new operating system update – Windows 8.1 – they integrated more High DPI friendly features.
If you are still running into issues then it’s probably worth looking at upgrading to Microsoft’s latest operating system.
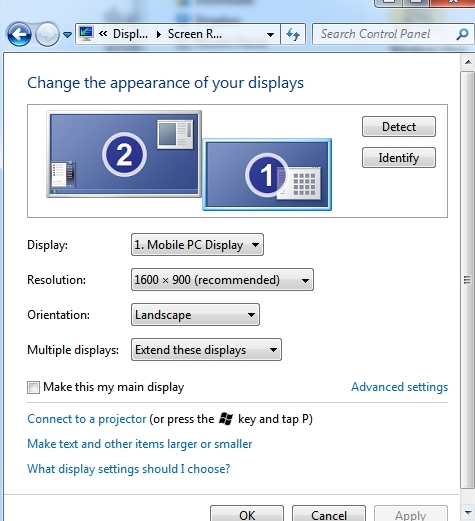
Windows 8.1 is providing us the Dots Per Inch (DPI) Scaling to be configured for consistent experience on display. This DPI Scaling handles the way your computer give the size to fonts, icons etc. per display. For an instance, if you’re running your device at resolution at or above 1366×768 pixels, then DPI Scaling in your case should be a hundred of percent. Here is the window, form where you can configure DPI Settings in Windows 8.1:

In Windows 8, there exists only two options to configure DPI Settings between 100 & 150 percents. Fortunately, Windows 8.1 has got the per display DPI Settings feature support, so you can select from 8 different ways to let DPI Scaling handle your device. This article will provide the advanced way to fix DPI Scaling using registry modification.
Why do You Need to Change Windows DPI ?
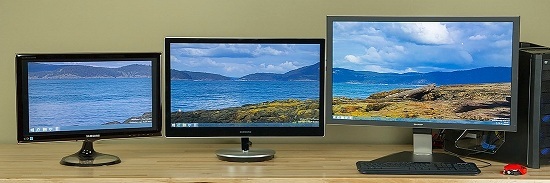
DPI Scaling becomes an important consideration while you’re running the operating system in order to project it on a television. While projecting it on the television screen, the relative size of the tiles from Start Screen may be non-uniform, which looks cumbersome. So if you have configured DPI Scaling to its best, you can easily project the tiles from a 10” monitor to 42” television without losing relative proportion of tiles.
So without wasting your time anymore, lets see the how to part:
Modify DPI Scaling Using Registry Editor
1. Press Windows Key + R and put regedit in Run dialog box, click OK to open Registry Editor.

2. Navigate here:
HKEY_CURRENT_USER\Control Panel\Desktop

3. In the right pane of this location, look for the DWORD name LogPixels (refer to above screenshot). Double click on it to modify, so that you’ll got this:
4. Put the following Value data as per your requirement and click OK.
96 – Smaller 100%
120 – Medium 125%
144 – Larger 150%
192 – Extra Large 200%
240 – Custom 250%
288 – Custom 300% –
384 – Custom 400%
480 – Custom 500%
That’s it. Reboot to see changes. So you have configured the DPI Scaling using registry which overrides the manual way. Hope you enjoyed the tip!
Last Update date : Apr 23. 2025
DPI Scaling
DPI Scaling settings can be adjusted to change the size of desktop icons, text, and other items on the monitor screen. This is a feature built into Windows.
Adjusting DPI Scaling Setting
1
Move your mouse pointer to the top right corner of your screen. A menu will come in from the side.

2
Click on «Settings.»

3
Click on «Control Panel.»

4
Click on «Display.»

5
Choose what you would like to adjust:

• If you check the box that says «Let me choose one scaling level for all my displays,» you can adjust the size of everything (desktop icons, text, etc.) with preset sizes or custom sizing options.
• If you uncheck «Let me choose one scaling level for all my displays,» you can adjust the text size by itself.
6
Click «Apply.» Windows will require you to restart your computer, after which the settings will be applied.

Thank you for your feedback!
RC01_Static Content : This text is only displayed on the editor page