
Все способы:
- Способ 1: Настройка методов входа через «Параметры»
- Способ 2: Редактирование локальных групповых политик
- Способ 3: Редактирование реестра
- Решение проблемы с отключением Windows Hello в Windows 11
- Вопросы и ответы: 2
Способ 1: Настройка методов входа через «Параметры»
Начнем со стандартной настройки Windows 11, которая подходит большинству пользователей. Она предназначена для быстрого изменения методов входа и отключения неиспользуемых. Практически все они относятся к Windows Hello, поэтому вы самостоятельно решаете, от каких доступных вариантов стоит отказаться, какие сохранить или же вообще — обеспечить автоматический вход в систему при включении компьютера.
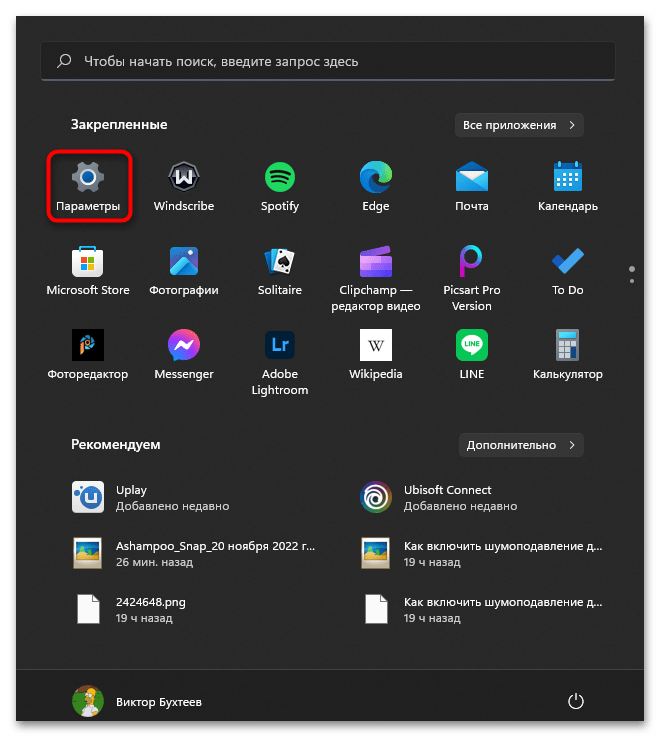
- Откройте меню «Пуск» и нажмите по значку с шестеренкой для перехода в «Параметры».
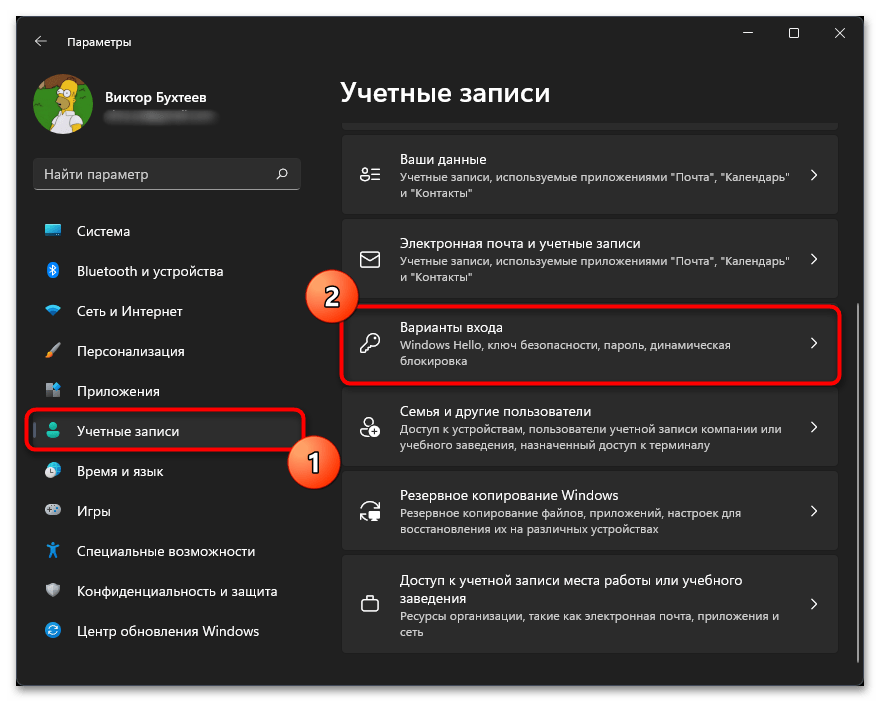
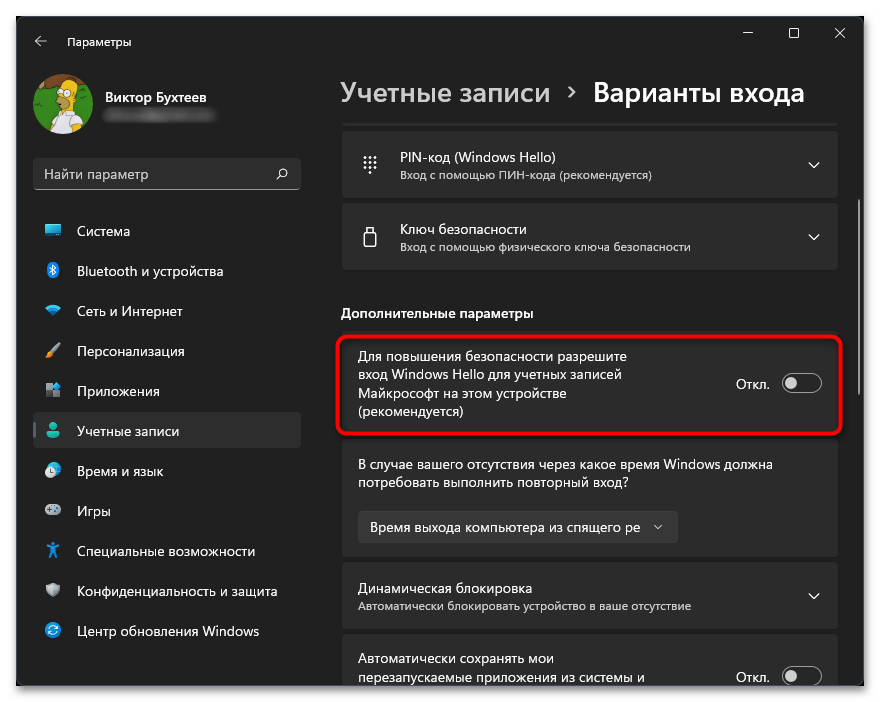
- В новом окне на панели слева выберите раздел «Учетные записи» и перейдите к категории «Варианты входа».
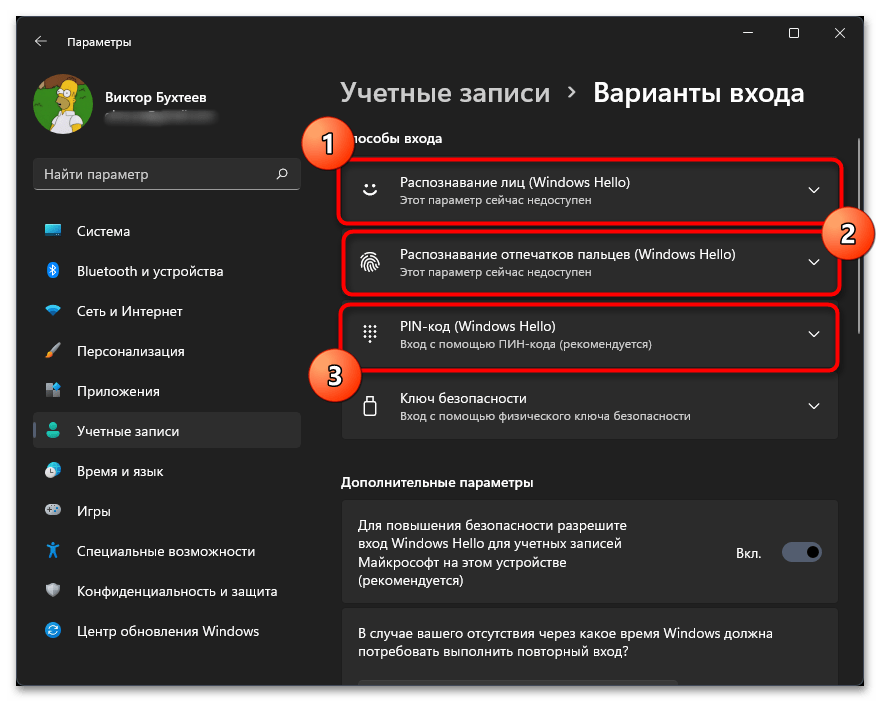
- Обратите внимание на то, что под Windows Hello подпадают сразу три разных варианта входа. По умолчанию PIN-код доступен на всех устройствах, а вот распознавание отпечатков и лиц — только на определенных моделях ноутбуков.
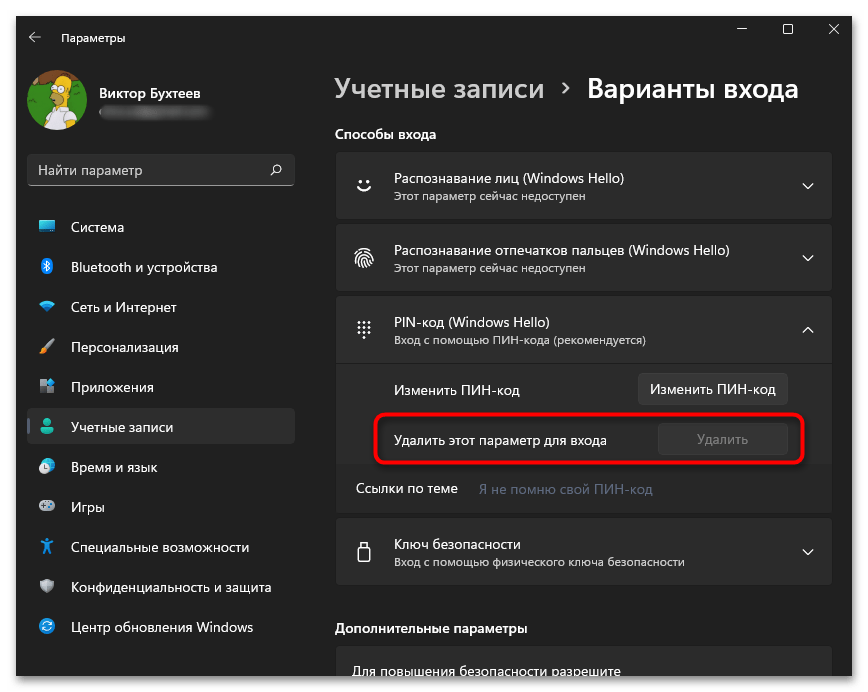
- Разверните один из блоков методов входа и нажмите «Удалить» в строке «Удалить этот параметр входа».
- Если выбранный метод авторизации является единственным или вы хотите отключить все варианты, понадобится в блоке «Дополнительные параметры» установить состояние «Откл.» для переключателя «Для повышения безопасности разрешите вход Windows Hello для учетных записей Майкрософт на этом устройстве (рекомендуется)».
Теперь, когда все изменения внесены, остается только выйти из системы или отправить компьютер на перезагрузку, чтобы проверить результативность выполненных действий. Если Windows Hello отключена, значит, вход в операционную систему должен выполниться автоматически при выборе учетной записи (если она одна, то рабочий стол загрузится сразу же без экрана профилей).
Способ 2: Редактирование локальных групповых политик
Примерно те же самые настройки можно выполнить через «Редактор локальных групповых политик», но с дополнительными параметрами, которые будут применены. Редактирование политик подразумевает полное отключение даже возможности использования конкретных методов входа Windows Hello или всех их сразу. Доступ к этим настройкам есть у обладателей версий Виндовс 11 Pro и Enterprise.
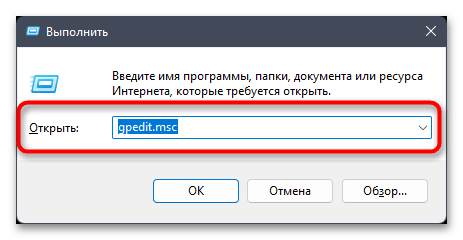
- Вызовите утилиту «Выполнить», используя для этого стандартное сочетание клавиш Win + R. В поле ввода напишите
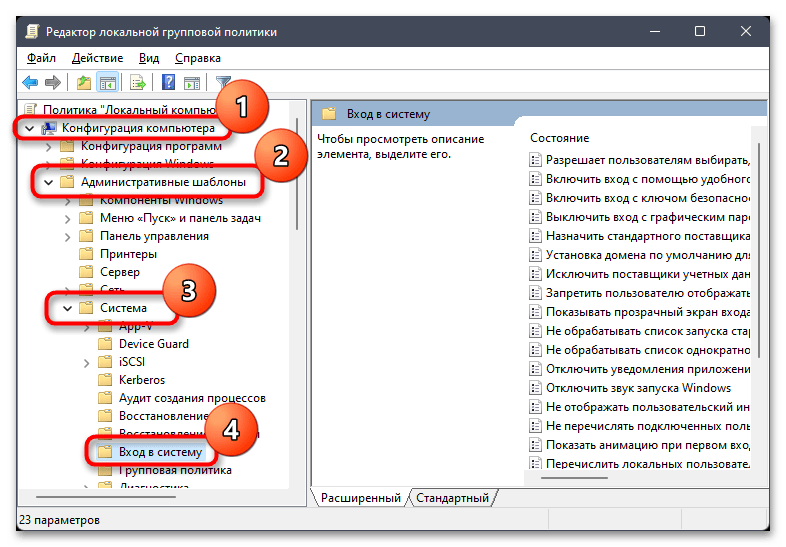
gpedit.mscи нажмите Enter, чтобы подтвердить выполнение команды. - После загрузки окна «Редактора локальной групповой политики» перейдите по пути «Конфигурация компьютера» — «Административные шаблоны» — «Система» и выделите левой кнопкой мыши директорию «Вход в систему».
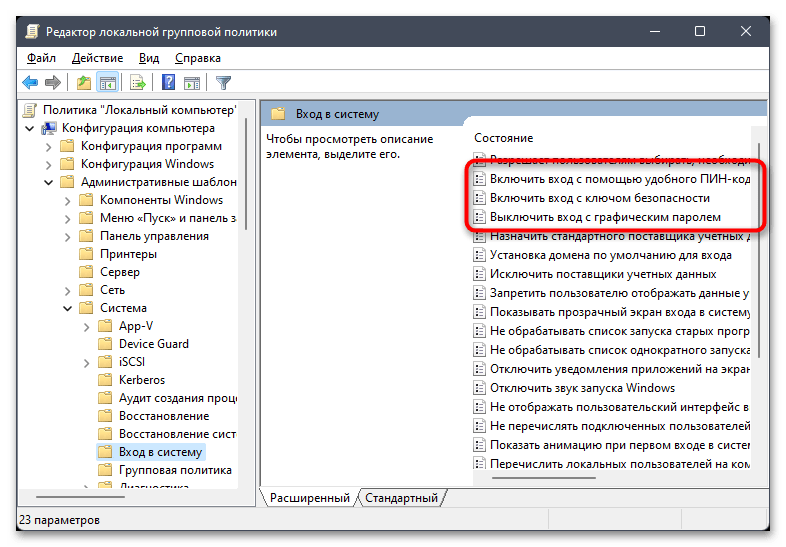
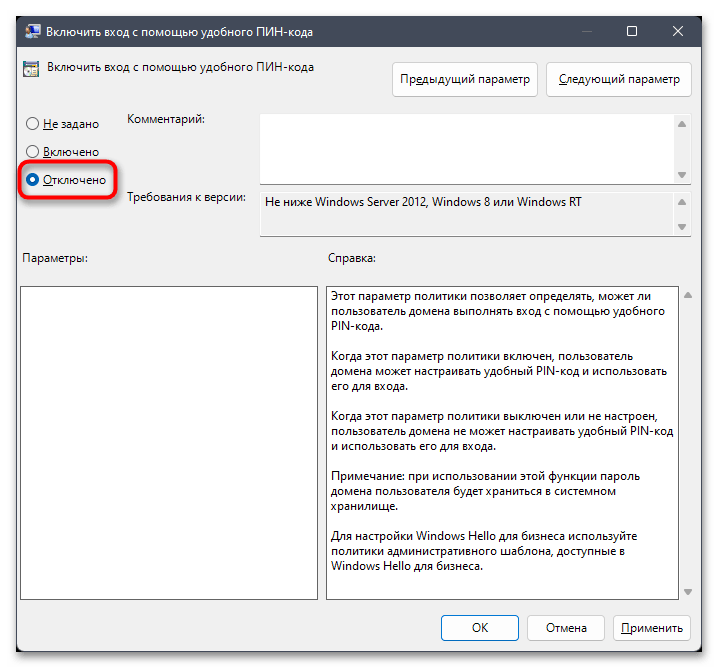
- Справа вы увидите список всех доступных политик, среди которых будут три разных метода входа, относящихся к Windows Hello. Дважды кликните левой кнопкой мыши по требуемому пункту, чтобы открыть окно настройки его состояния.
- Установите значение «Отключено» и примените изменения. Сделайте то же самое для других вариантов входа, если это нужно. Обязательно перезагрузите компьютер, чтобы соответствующие системные настройки вступили в силу.
Способ 3: Редактирование реестра
Если редактирование локальных групповых политик вам недоступно или описанный выше метод не подходит, можно изменить параметр реестра, чтобы отключить защиту при авторизации в системе. Настройка относится абсолютно ко всем типам ключей и паролей, поэтому позволит сразу организовать автоматический вход в операционную систему при включении компьютера.
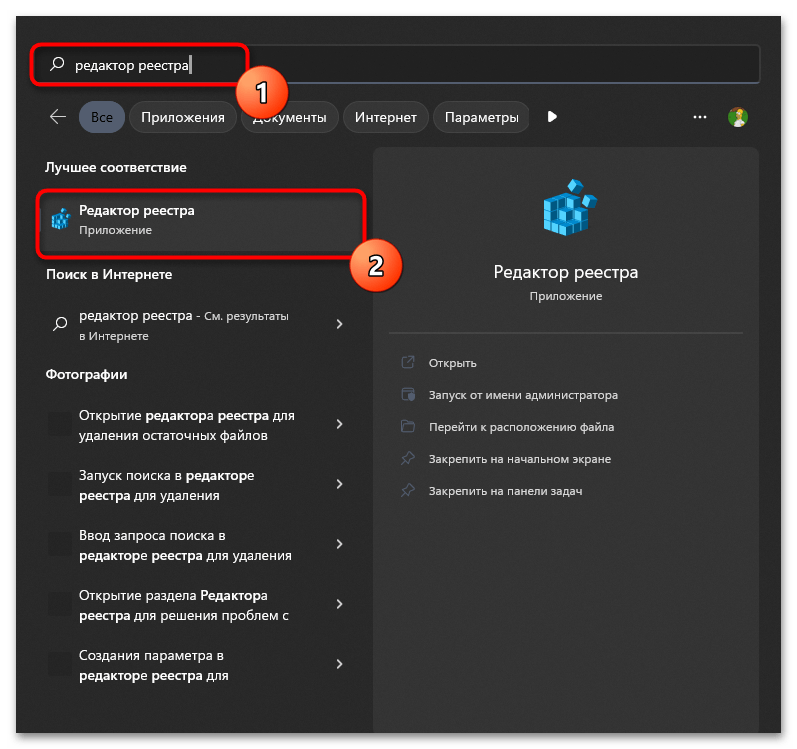
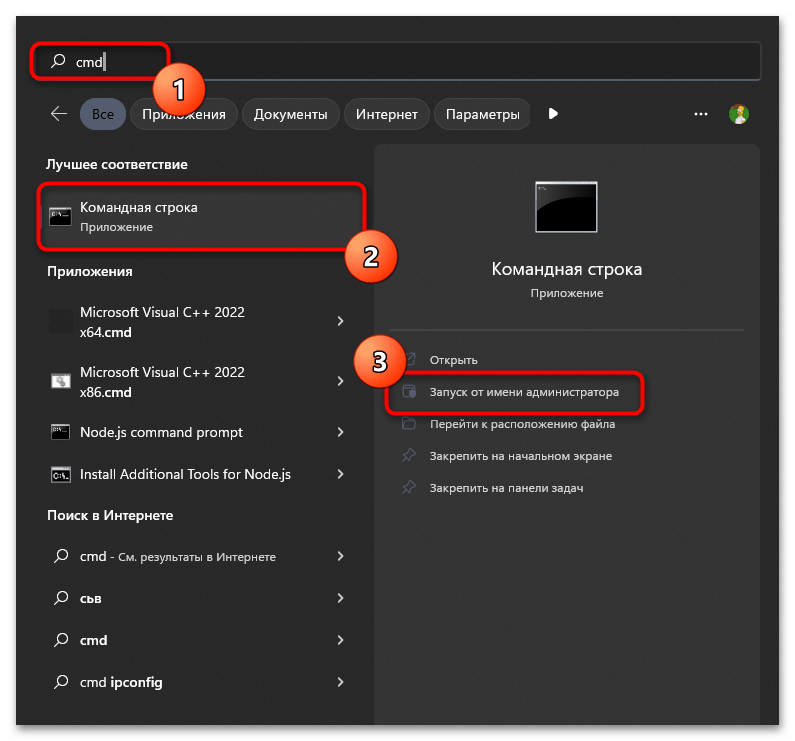
- В поиске «Пуска» отыщите приложение «Редактор реестра» и запустите его.
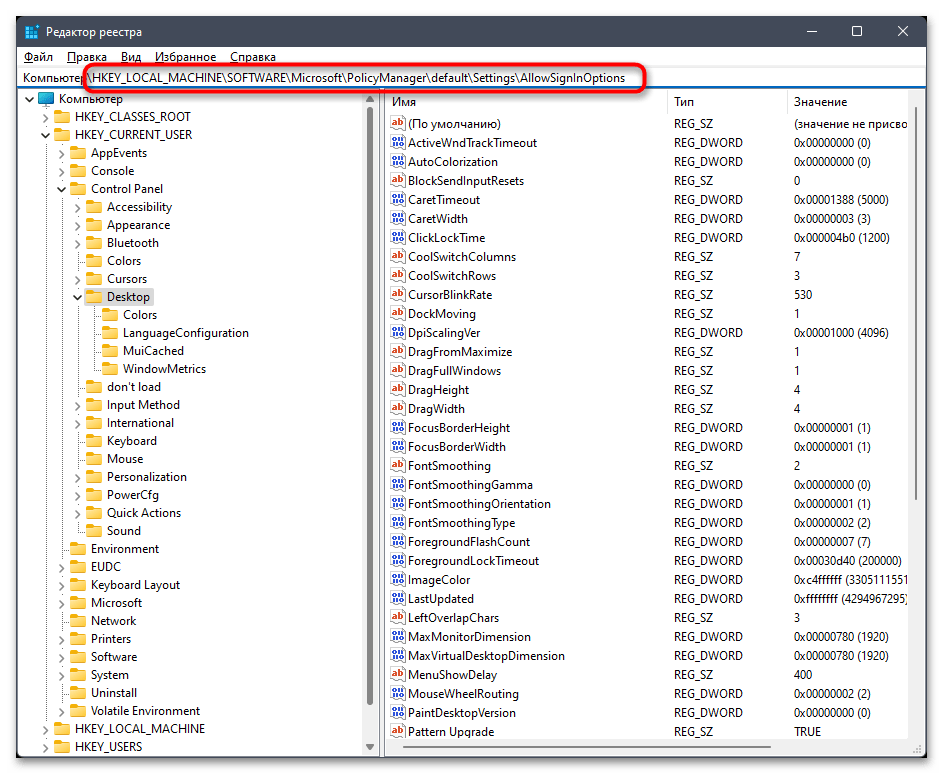
- В адресную строку вставьте путь
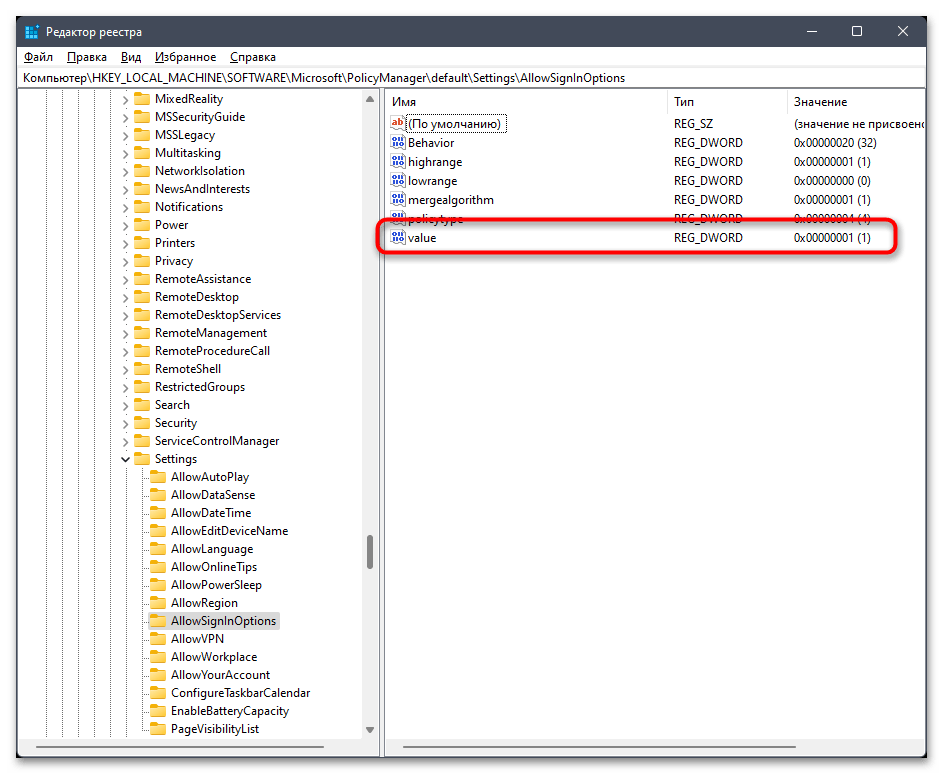
Компьютер\HKEY_LOCAL_MACHINE\SOFTWARE\Microsoft\PolicyManager\default\Settings\AllowSignInOptionsи нажмите Enter, чтобы перейти по нему. - После отображения конечной директории найдите параметр с названием «value» и дважды кликните по нему, чтобы открыть окно редактирования.
- Установите для него значение «0», подтвердите изменение, щелкнув по «ОК», затем произведите перезагрузку операционной системы.
Решение проблемы с отключением Windows Hello в Windows 11
В завершение рассмотрим комплексный метод отключения всех защитных вариантов входа в Виндовс 11, который стоит применять только в том случае, если по каким-то причинам ни один из перечисленных выше не принес должного результата. В следующей инструкции будет продемонстрировано изменение параметров реестра с дальнейшим отображением и изменением по умолчанию скрытой в ОС настройки. Давайте разберемся со всем этим по порядку.
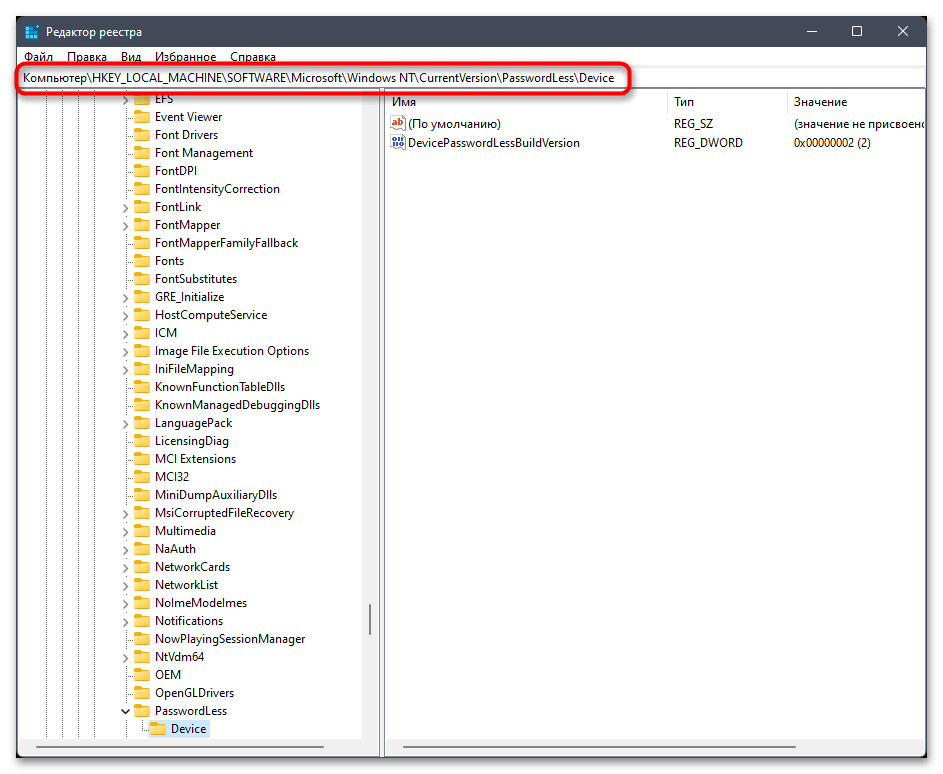
- Сначала в «Редакторе реестра» перейдите по пути
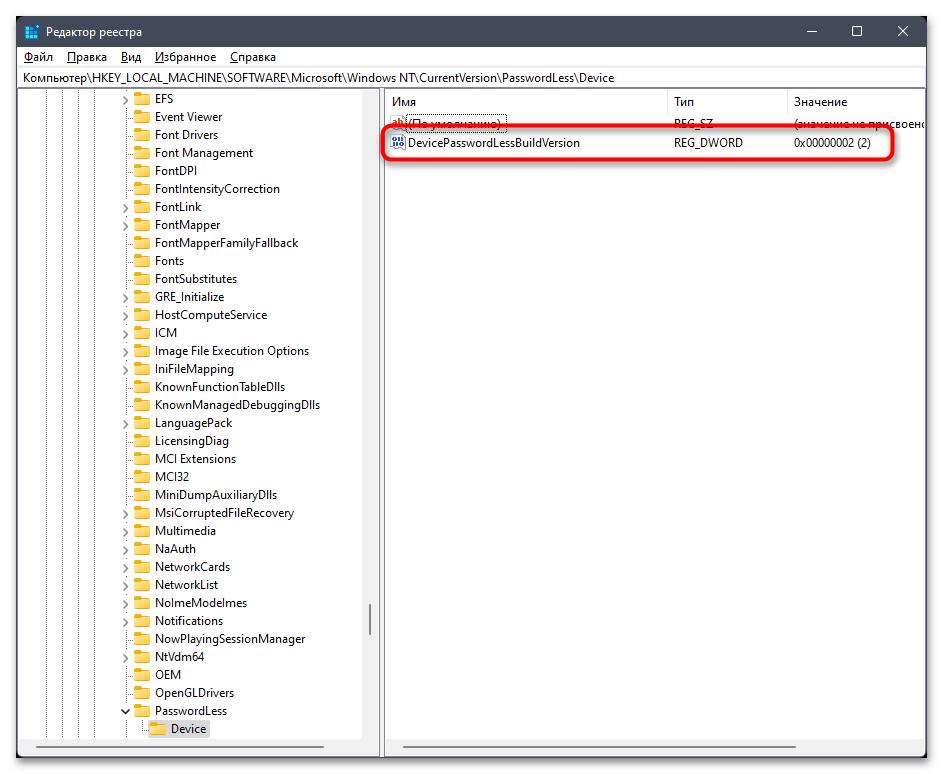
Компьютер\HKEY_LOCAL_MACHINE\SOFTWARE\Microsoft\Windows NT\CurrentVersion\PasswordLess\Device. - В папке найдите параметр с названием «DevicePasswordLessBuildVersion» и дважды щелкните по нему левой кнопкой мыши.
- Измените значение параметра на «0» и перезагрузите компьютер.
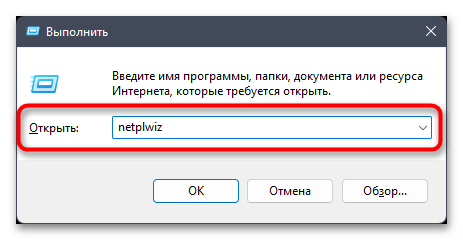
- При помощи выполненных только что действий вы открыли доступ к скрытой по умолчанию настройке пользователей в Windows 11. Для доступа к ней в новом сеансе вызовите «Выполнить» (Win + R) и вставьте команду
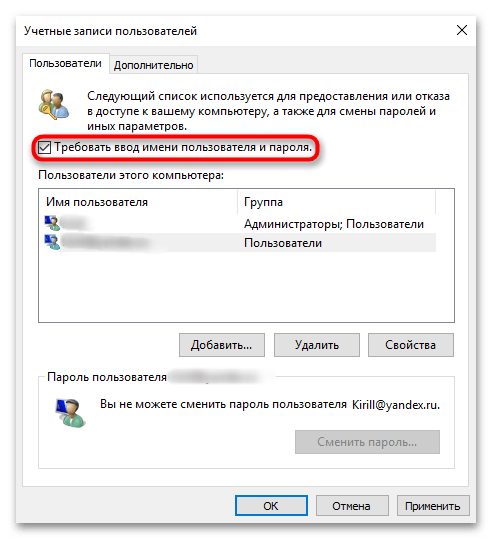
netplwiz, затем нажмите Enter для подтверждения ввода. - Снимите галочку с пункта «Требовать ввод имени пользователя и пароля», затем примените изменения и снова перезагрузите ПК.
- Остается только внести изменения в реестр путем создания нового параметра или редактирования уже существующего. Сделать это можно и вручную, но куда проще обратиться к «Командной строке». Найдите ее и обязательно запустите от имени администратора.
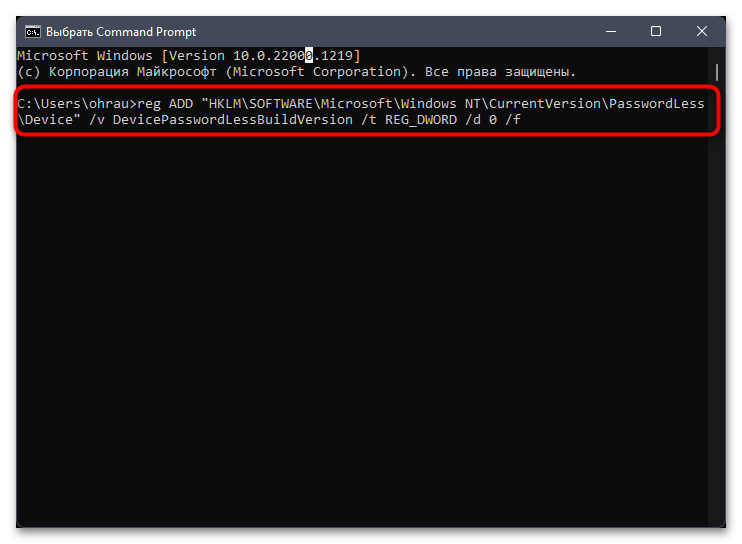
- Введите команду
reg ADD "HKLM\SOFTWARE\Microsoft\Windows NT\CurrentVersion\PasswordLess\Device" /v DevicePasswordLessBuildVersion /t REG_DWORD /d 0 /fи нажмите Enter для ее применения.
По завершении всех действий снова отправьте компьютер на перезагрузку, чтобы параметр реестра заработал корректно. При следующем входе в операционную систему никакие формы для подтверждения авторизации любым из методов Windows Hello появиться не должны.
Наша группа в TelegramПолезные советы и помощь
-
Home
-
News
- 3 Ways – Step-by-Step Guide on Disable Windows Hello
By Tina |
Last Updated
Windows Hello is a new feature in Windows 10 that allows users to sign into the operating system using biometric authentication. But some people do not use this feature and want to disable it. This post from MiniTool shows how to disable Windows Hello.
Windows Hello is a more personal, more secure way to get instant access to your Windows 10 devices using fingerprint, facial recognition or a secure PIN. Most PC’s with fingerprint readers already work with Windows Hello, making it easier and safer to sign into your PC.
Windows Hello feature also enables users to sign into the operating system using biometric authentication. But some users do not use this feature and wonder whether it is possible to disable it.
There is no doubt that you can disable Windows Hello. So, in this post, we will show you how to disable Windows Hello.
3 Ways – Step-by-Step Guide on Disable Windows Hello
In this section, we will show you how to disable Windows Hello. If you want to disable Windows Hello pin, the following methods would be very effective.
Way 1. Disable Windows Hello via Settings
At first, Windows Settings allows you to disable Windows Hello. Now, we will show you the tutorial.
- Press Windows key and I key together to open Settings.
- Then choose Accounts.
- On the left panel, choose Sign-in options.
- On the right side, click Remove under Windows Hello section.

When all steps are finished, you have successfully disabled Windows Hello. Some users may say that there is no Windows Hello option in the Windows Settings. So, in order to disable Windows Hello, you can try other ways.
Way 2. Disable Windows Hello via Group Policy
To disable Windows Hello, here is the second way. You can choose to disable it via Group Policy.
Now, here is the tutorial.
- Press Windows key and R key together to open Run box.
- Then type gpedit.msc in the box and click OK to continue.
- Navigate to this path: Computer Configuration -> Administrative Templates -> System -> Logon.
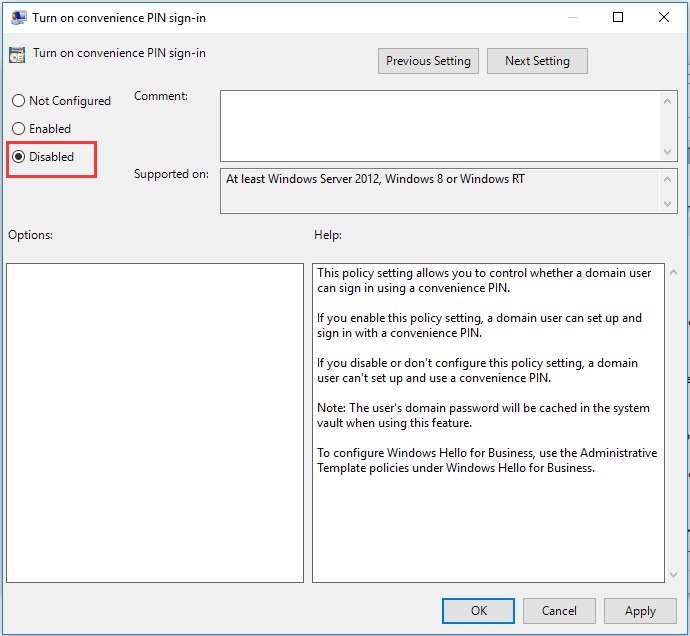
- On the right side, double-click on the Turn on convenience PIN sign in.
- In the pop-up window, click Disabled.
- Then click Apply and OK to save the changes.
Then disable other Windows Hello options. After that, exit the Group Policy window and reboot your computer to check whether the Windows Hello is disabled.
Tip: If your computers are connected to Azure Active Directory, the correct location for that in gpedit.msc is Computer Configuration | Administrative Templates | Windows Components | Windows Hello for Business. In the right side, set “Use Windows Hellow for Buiness” to Disabled.
Way 3. Disable Windows Hello via Registry
To disable Windows Hello, you can do that via the Registry. Now, here is the tutorial.
Tip: Modifying the registry may be a risky thing. So, before proceeding, please back up registries first.
- Press Windows key and R key together to open Run dialog.
- Type regedit in the box and click OK to continue.
- Navigate to the path: HKEY_LOCAL_MACHINE\SOFTWARE\Microsoft\PolicyManager\default\Settings\AllowSignInOptions.
- In the right panel, double-click on the DWORD entry named value and set it to 0.
When all steps are finished, reboot your computer and check whether the Windows Hello is disabled.
Final Words
To sum up, this post has shown 3 ways to disable Windows Hello. If you want to do that, try these solutions. If you have any better idea to disable Windows Hello PIN, you can share it in the comment zone.
About The Author
Position: Columnist
Tina is a technology enthusiast and joined MiniTool in 2018. As an editor of MiniTool, she is keeping on sharing computer tips and providing reliable solutions, especially specializing in Windows and files backup and restore. Besides, she is expanding her knowledge and skills in data recovery, disk space optimizations, etc. On her spare time, Tina likes to watch movies, go shopping or chat with friends and enjoy her life.
,
In this tutorial you’ll find instructions to disable the Windows Hello for Business prompt (aka: Windows Hello for Business provisioning), «Use Windows Hello with your account» after adding a PIN and to remove the message «Your organization requires Windows Hello” during OOBE.
When adding a Windows Hello PIN/Fingerprint/Face as sign-in option on a computer joined to Azure AD, or in a Active Directory Domain (on local premises), you must setup a Microsoft Account to access your Organization resources. This is required because, when a device is set up for use in an organization, Windows Hello for Business is automatically enabled.
If for any reason, you don’t setup a Microsoft Account for Windows Hello for Business, you’ll face the following symptoms and problems on your PC:
- In the Windows Hello PIN you’ll face the error: «This option is currently unavailable» with description «Sorry, this PIN isn’t working for your organization’s resources. Tap or click here to fix it».

-
You’ll prompted to «Use Windows Hello with your account», when you setup a PC for first time (Out of the box experience (OOBE)), or after clicking «Tap or click here to fix it» in the Windows Hello PIN options (see the above screenshot).

- You’ll get the Windows Hello PIN error: «Something went wrong. We aren’t able to setup your PIN. 0x801c044f» after trying to fix the problem without adding a MS account.

If you don’t want to use a Microsoft Account in Windows Hello for Business (e.g. in case where a single device is used by several users or if you do not have Azure AD/Office365 accounts in your organization), then you can disable the Windows Hello Provisioning, by using the instructions below.
How to Disable the Windows Hello requirement to use a Microsoft Account in Windows Hello PIN or during OOBE. (FIX:Windows Hello PIN error 0x801c044f).
To force Windows to not ask for a Microsoft Account in Windows Hello PIN/Fingerprint/Face, proceed and disable the Windows Hello for Business provisioning. This will remove both the «Use Windows Hello with your account» prompt in Windows Hello PIN, and will disable the «Your organization requires Windows Hello” prompt during OOBE.
Windows Hello for Business provisioning can be disabled using Group Policy, either locally or in an Active Directory domain, or in Microsoft Intune. According your situation proceed to the corresponding part below.
- Part 1. Disable Windows Hello Provisioning in Windows 10/11 Pro.
- Part 2. Disable Windows Hello Provisioning in Active Directory.
- Part 3. Disable Windows Hello Provisioning in Microsoft Endpoint Manager (INTUNE).
Part 1. How to Disable Windows Hello prompt «Use Windows Hello with your account», in Local Group Policy (Windows 10/11 Pro).
If you want to remove the «Use Windows Hello with your account» prompt, on a standalone computer (not joined to a domain), or to specific domain PCs, proceed as follows:*
* Note: If you want to disable the Windows Hello provision to entire AD domain, follow the instructions on part-2.
1. Run gpedit.msc to open the Local Group Policy Editor.
2. In Local Group Policy, navigate to:
- Computer Configuration\Administrative Templates\Windows Components\Windows Hello for Business
3. At the right open the Use Windows Hello for Business policy.

4. Set the policy to Enabled* and check the option Do not start Windows Hello provisioning after sign-in.

* Note: If you disable this policy, users won’t be able to setup a Windows Hello for Business PIN and they will receive the following message in Windows Hello PIN options: «This option is currently unavailable. Something went wrong».

5. Restart the PC to apply the change.
Part 2. How to Disable Windows Hello prompt in Active Directory (On Premises).
To disable the Windows Hello for Business provisioning in entire AD domain, proceed as follows:
Step 1. Create a new Domain Policy for Hello for Business. *
* Note: In this guide I’ll create a new Domain Policy for the Windows Hello for Business. If you don’t want to create a new policy and you want to apply the changes to the Default Domain Policy, skip to step-2.
1. On your Domain Server, open the Server Manager and from Tools open the Group Policy Management.
2. Under the ‘Domains’ object, right-click on your domain and select Create a GPO in this domain and Link it here.

3. Type a name for the new GPO (e.g. «Hello_Provisioning») and click OK.
Step 2. Enable Windows Hello for Business.
1. Right-click at the new GPO (or in Default Domain Policy), and click Edit.

2. At the left pane navigate to:
- Computer configuration\Policies\Administrative Templates\Windows Components\Windows Hello for Business
3. On the right side, open the Use Windows Hello for Business policy and set it to Enabled and then click Apply > OK. *
* Notes:
1. By setting this policy Enabled you’ll allow users to sign-on with a Windows Hello PIN.
2. If you disable this policy, users won’t be able to setup a Windows Hello PIN and they will receive the message in Windows Hello PIN options: «This option is currently unavailable. Something went wrong».

4. Proceed to next step to disable the Windows Hello for business provisioning.
Step 3. Disable «Use Windows Hello with your account» prompt.
Finally proceed and deploy the following registry change to all computers in Active Directory, in order to disable the Windows Hello provisioning:
1. On the «Hello_Provisioning» GPO (or in default domain policy), navigate to:
- Computer Configuration\Preferences\Windows Settings\Registry
2. Right-click at Registry and select New > Registry item.

3. At the ‘New Registry Properties’ window, apply the following settings and click OK:
- At Action choose: Create
- At Hive select: HKEY_LOCAL_MACHINE
- At Key path type: SOFTWARE\Policies\Microsoft\PassportForWork
- At Value Name type: DisablePostLogonProvisioning
- Value type: REG_DWORD
- Value data: 1
4. Close the Group Policy Management Editor and restart any domain computer to see if the registry change has applied. *
* Note: To see if the registry change has been applied to the workstations:
1. Restart any AD computer (workstation) and login to the Domain.
2. Open Registry Editor and navigate to:
- HKEY_LOCAL_MACHINE\SOFTWARE\Policies\Microsoft\PassportForWork
3. See at right-pane if the DisablePostLogonProvisioning & Enabled REG_DWORD values exist and has Value Data 1. *
* Info: The «Enabled» DWORD value is created automatically when you enable the Windows Hello for Business (Step-1). If the value is not there, follow the same steps above and created it using GPO.


Part 3. How to Disable Windows Hello prompt in Microsoft Endpoint Manager (INTUNE).
To disable the Windows Hello Provisioning in Microsoft Intune:
1. Sign to Microsoft Endpoint Manager admin center with an Intune Administrator role.
2. Select Devices on the left and at the right go to Windows -> Windows enrollment.
3. Open Windows Hello for Business and under Configure Windows Hello for Business, select Enabled.
4. Now create the following PowerShell script and push to the clients the following Registry change via Intune: *
- Set-ItemProperty -Path «HKLM:\SOFTWARE\Policies\Microsoft\PassportForWork» -Name DisablePostLogonProvisioning -Value «1» -Type DWORD
* Note: Select ‘YES’ for «Run script in 64 bit PowerShell Host» when deploying it through Intune.
That’s it! Which method worked for you?
Let me know if this guide has helped you by leaving your comment about your experience. Please like and share this guide to help others.
If this article was useful for you, please consider supporting us by making a donation. Even $1 can a make a huge difference for us in our effort to continue to help others while keeping this site free:
- Author
- Recent Posts
Konstantinos is the founder and administrator of Wintips.org. Since 1995 he works and provides IT support as a computer and network expert to individuals and large companies. He is specialized in solving problems related to Windows or other Microsoft products (Windows Server, Office, Microsoft 365, etc.).
Disabling Windows Hello on Windows 11
Disabling Windows Hello on Windows 11 is quite simple and can be done in a few steps. First, open the Settings app, navigate to Accounts, and then to Sign-in options. From there, you can turn off various Windows Hello features like Face, Fingerprint, or PIN.
Step-by-Step Tutorial for Disabling Windows Hello on Windows 11
These steps will guide you through turning off Windows Hello features on your Windows 11 device. You’ll be able to disable Face, Fingerprint, and PIN sign-ins.
Step 1: Open Settings
Open the Settings app by clicking on the Start menu and selecting the gear icon.
Opening the Settings app is the first move. This app is where you can control most of your computer’s configurations.
Step 2: Navigate to Accounts
In the Settings app, click on ‘Accounts.’
Finding the ‘Accounts’ section is crucial because it houses all settings related to your user profile, including sign-in options.
Step 3: Go to Sign-in Options
Click on ‘Sign-in options’ under the Accounts menu.
The ‘Sign-in options’ section is where all Windows Hello features are managed. This includes Face, Fingerprint, and PIN.
Step 4: Disable Windows Hello Face
Under ‘Windows Hello Face,’ click ‘Remove.’
Disabling Windows Hello Face will stop your device from using facial recognition for sign-ins. If you don’t see this option, it means it’s not set up.
Step 5: Disable Windows Hello Fingerprint
Under ‘Windows Hello Fingerprint,’ click ‘Remove.’
If you have a fingerprint set up, this will remove it, stopping your device from using fingerprint recognition.
Step 6: Disable Windows Hello PIN
Under ‘Windows Hello PIN,’ click ‘Remove.’
Removing the PIN will disable this quick sign-in method. Make sure you remember your Microsoft account password, as you’ll need it to sign in now.
After you complete these actions, your computer will no longer use Windows Hello for sign-ins. You’ll revert to the traditional password method.
Tips for Disabling Windows Hello on Windows 11
- Backup Your Data: Before making changes, always back up important data.
- Remember Your Password: Ensure you remember your Microsoft account password since you’ll use it to sign in.
- Verify Settings: Double-check that all Windows Hello features are disabled to avoid any issues.
- Check Device Compatibility: Some devices might not show all Windows Hello options due to hardware limitations.
- Consider Security: Disabling Windows Hello might reduce your device’s security, so weigh the pros and cons.
Frequently Asked Questions
Can I disable only one Windows Hello feature?
Yes, you can choose to disable just one feature, like Face or Fingerprint, and keep others enabled.
Will disabling Windows Hello affect my Microsoft account?
No, it only affects how you sign in on your device, not your Microsoft account itself.
Is it possible to re-enable Windows Hello later?
Yes, you can re-enable Windows Hello anytime by going back to the Settings and setting it up again.
Do all Windows 11 devices support Windows Hello?
Not all devices support Windows Hello features like Face or Fingerprint due to hardware requirements.
Will I lose my data by disabling Windows Hello?
No, disabling Windows Hello will not affect your data. It only changes your sign-in method.
Summary
- Open Settings
- Navigate to Accounts
- Go to Sign-in options
- Disable Windows Hello Face
- Disable Windows Hello Fingerprint
- Disable Windows Hello PIN
Conclusion
Disabling Windows Hello on Windows 11 is straightforward and can be completed in just a few steps. Whether you’re looking to revert to a traditional sign-in method for simplicity or security reasons, knowing how to manage your sign-in options is always handy. Remember, you can always re-enable Windows Hello if you change your mind.
It’s also worth considering the security implications of disabling these features. While traditional passwords are functional, they may not offer the same level of security as biometric methods. For those interested in learning more about Windows Hello and other security features, Microsoft’s official documentation provides a wealth of information.
So, go ahead, tweak your settings, and use this newfound knowledge to optimize your Windows experience.
Matt Jacobs has been working as an IT consultant for small businesses since receiving his Master’s degree in 2003. While he still does some consulting work, his primary focus now is on creating technology support content for SupportYourTech.com.
His work can be found on many websites and focuses on topics such as Microsoft Office, Apple devices, Android devices, Photoshop, and more.