
Майкрософт позволяет скачать образы Windows 11 и Windows 10 со своего официального сайта, однако для пользователей из РФ доступен лишь способ с помощью утилиты Media Creation Tool (Обновление: с недавних пор, уже после написания статьи был заблокирован и этот метод), которая работает только в Windows.
CrystalFetch — простой бесплатный инструмент, позволяющий загрузить оригинальные образы ISO Windows 11/10 x64 (для Intel/AMD) или ARM64 (для Apple Silicon или других ARM-процессоров) в Mac OS, для последующего использования для установки в виртуальную машину, Boot Camp или на другом компьютере.
Использование CrystalFetch
Скачать CrystalFetch можно в App Store или с GitHub проекта.
После установки и запуска приложения шаги для загрузки ISO Windows 11/10 будут следующими:
- Выберите необходимую версию Windows, архитектуру процессора (Apple Silicon для M1, M2, M3) или Intel x64 для Intel и AMD, выберите язык системы и выпуск.

- Нажмите кнопку «Download», примите лицензионное соглашение и дождитесь завершения загрузки. В процессе скачивается файл ESD с официального сайта Майкрософт. К сожалению, для РФ загрузка может блокироваться.
- После загрузки файл ESD будет автоматически преобразован в установочный образ ISO
- Укажите папку для сохранения ISO-образа на вашем Mac и нажмите кнопку «Move».


Готово, теперь у вас есть оригинальный образ ISO с Windows, который вы можете использовать для установки Windows в виртуальной машине на Mac OS (или в Boot Camp для MacBook, iMac или Mac Mini с процессорами Intel), для создания загрузочной флешки и последующей установки системы на ПК или ноутбуке и любых других задач. Если ваша задача — создать загрузочный накопитель для обычного ПК на Mac, лучший способ для этого — WinDiskWrtiter.
Установка операционной системы Windows 10 на компьютеры Mac с процессорами M1, M2, M3 или M4 невозможна через стандартный инструмент Boot Camp, так как эти процессоры основаны на архитектуре ARM. Для решения этой задачи используется виртуальная машина UTM, которая эмулирует архитектуру x86-64, необходимую для запуска Windows 10 и программ, таких как EasyCAD. В этом руководстве мы подробно разберем процесс подготовки, настройки виртуальной машины и установки системы, а также дадим рекомендации по устранению возможных проблем.
Приобрести оригинальные ключи активации Windows 10 можно у нас в каталоге от 1490 ₽
Подготовка необходимых файлов
Перед началом установки Windows 10 убедитесь, что на вашем Mac достаточно свободного места (рекомендуется минимум 30 ГБ) и есть стабильное подключение к интернету. Вам потребуется скачать несколько файлов.
1. Загрузка ISO-образа Windows 10:
– Скачайте 64-разрядную версию Windows 10 с нашего сайта.
– Сохраните ISO-файл в папку Загрузки.
2. Установка программы UTM:
– Перейдите на официальный сайт UTM
– Скачайте последнюю версию UTM в формате DMG.
– Откройте DMG-файл и перетащите UTM в папку Программы.
– После установки удалите DMG-файл из Загрузок и очистите Корзину для освобождения места.
Настройка виртуальной машины в UTM
Программа UTM позволяет создавать виртуальные машины с поддержкой эмуляции x86-64 на процессорах Apple Silicon (M1, M2, M3, M4). Эмуляция необходима, так как эти процессоры не поддерживают нативную виртуализацию Windows 10.
1. Откройте UTM из папки Программы.
2. При появлении сообщения «UTM скачан из интернета» выберите Открыть.
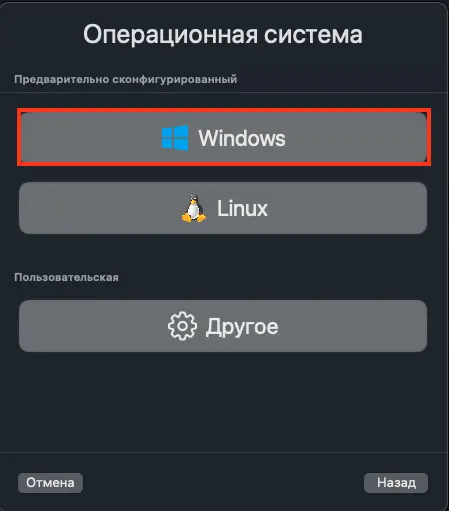
3. Нажмите Создать новую виртуальную машину.

4. Выберите режим Эмуляция для Mac с Apple Silicon.

– Для Mac с процессорами Intel используйте Виртуализация для повышения производительности.
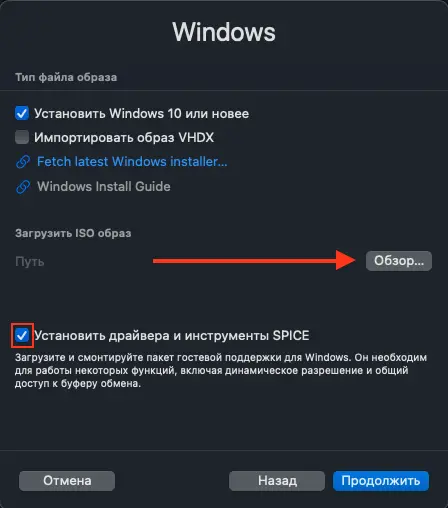
5. Настройте параметры виртуальной машины:
– Активируйте опцию Установить Windows 10 или выше.
– В разделе Загрузочный ISO-образ нажмите Обзор и выберите ISO-файл Windows 10 из папки Загрузки.
– Убедитесь, что включена опция Установить драйверы и инструменты SPICE для улучшения графики и производительности.
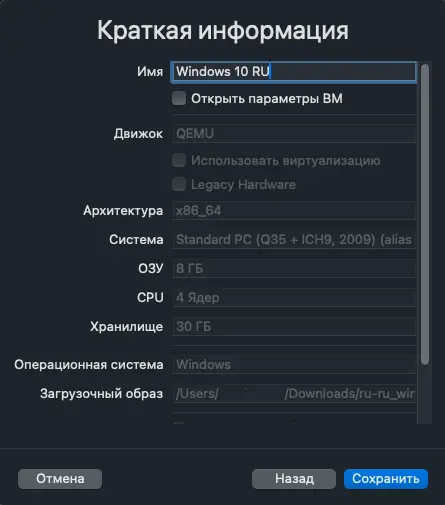
6. Укажите ресурсы и архитектуру:
– Архитектура: x86_64.
– Оперативная память: Выделите 8 ГБ (или половину доступной памяти Mac).
– Ядра процессора: Установите 4 ядра для приемлемой скорости работы.
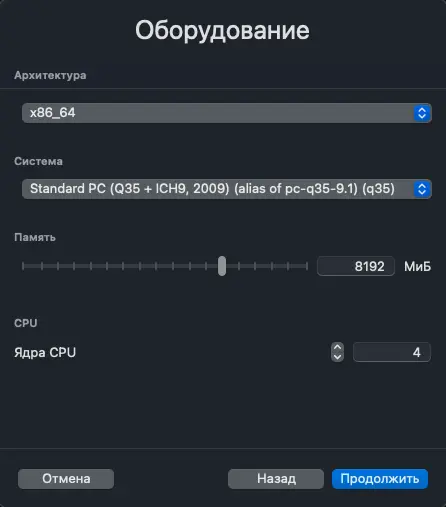
– Хранилище: Выделите 32 или 64 ГБ (увеличьте до 128 ГБ, если планируете хранить большие файлы).

7. Настройте общую папку:
– В разделе Общая папка выберите папку Загрузки.
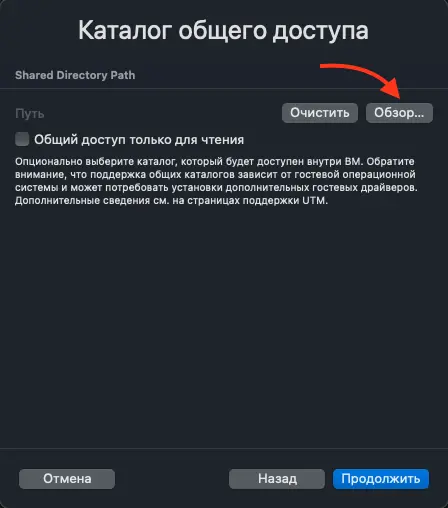
– Это позволит Windows 10 получить доступ к файлам, без их загрузки внутри виртуальной машины.
8. Задайте имя виртуальной машине, например Windows 10, и нажмите Сохранить.
Точная настройка UTM
Перед запуском виртуальной машины выполните дополнительные настройки для повышения стабильности:
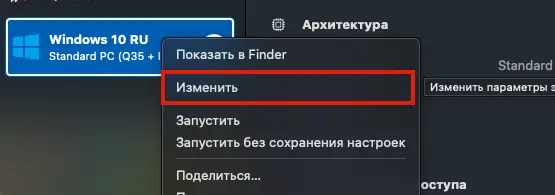
1. Щелкните правой кнопкой мыши на виртуальной машине в UTM и выберите Изменить.
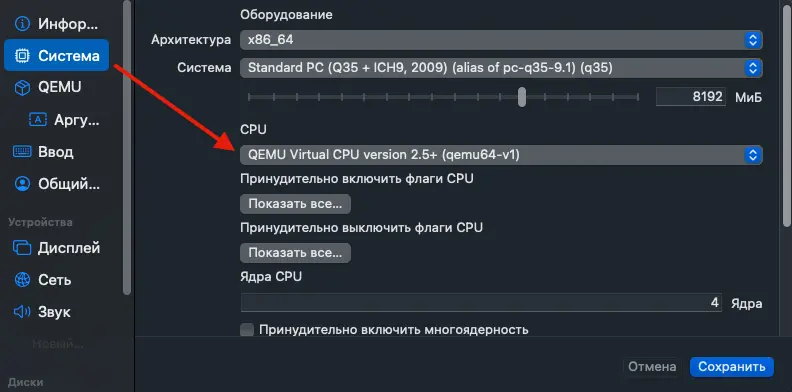
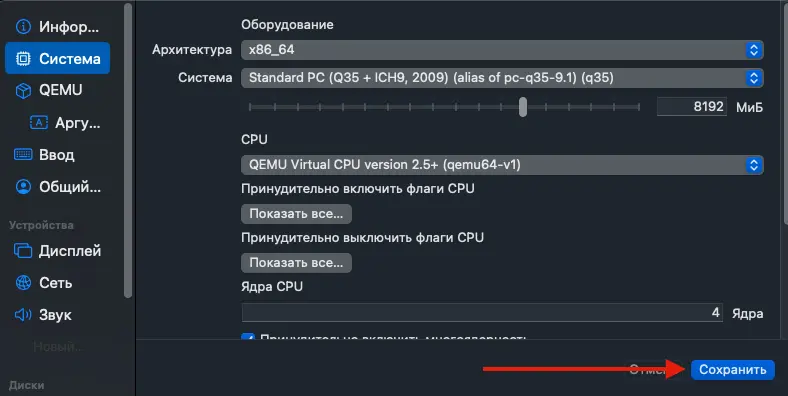
2. В разделе Система:
– Выберите CPU QEMU Virtual CPU (версия 2.5+) в режиме 64-bit.
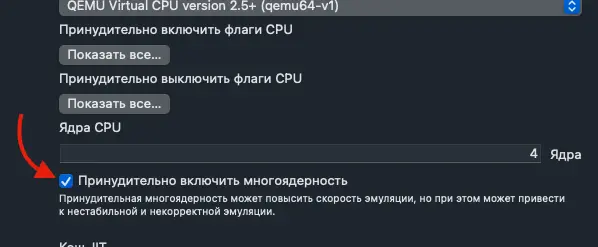
– Активируйте Принудительное использование нескольких ядер.
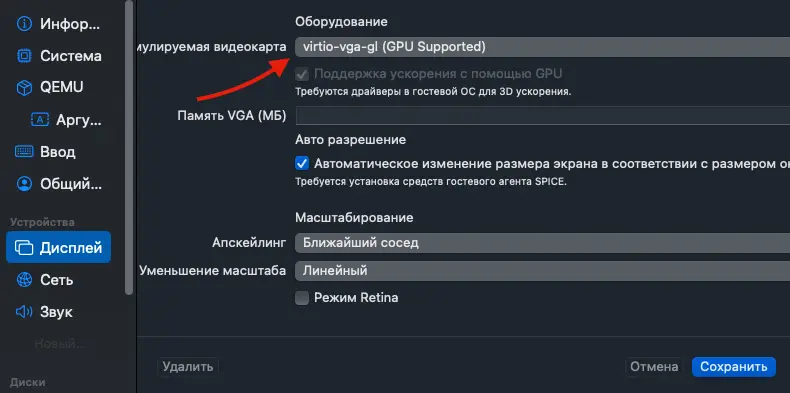
3. В разделе Дисплей:
– Установите VirtIO-VGA для оптимального отображения.
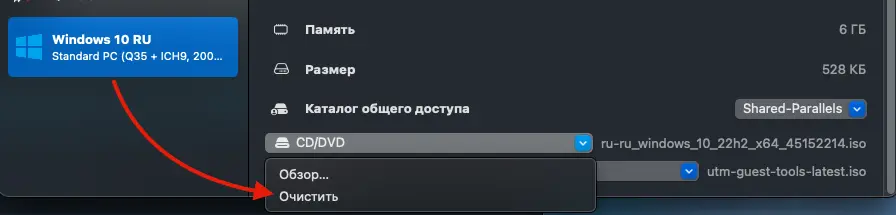
4. В разделе Диски:
– Проверьте, что ISO-образ Windows 10 подключен как CD/DVD.
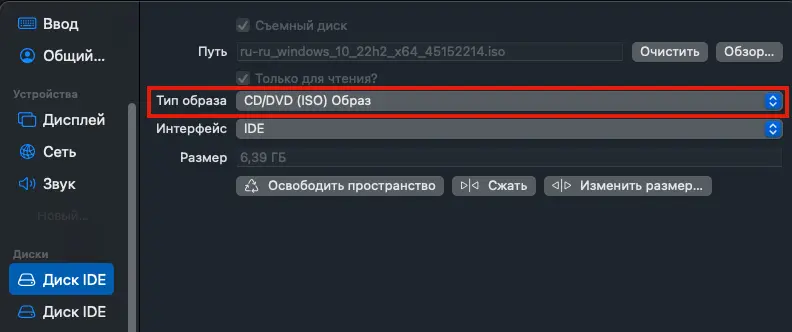
– При проблемах с загрузкой измените интерфейс на USB.
5. Нажмите Сохранить.
Процесс установки Windows 10
Установка Windows 10 на эмулируемой машине может занять от 1 до 2 часов из-за особенностей эмуляции. Подключите Mac к источнику питания и не прерывайте процесс.
1. В UTM выберите виртуальную машину и нажмите Запустить.

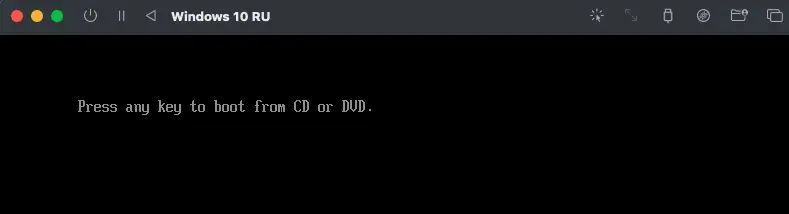
2. При появлении сообщения «Нажмите любую клавишу для загрузки с CD/DVD» нажмите клавишу, например Enter.
3. Дождитесь запуска установщика. Экран загрузки может отображаться от 30 секунд до 40 минут.
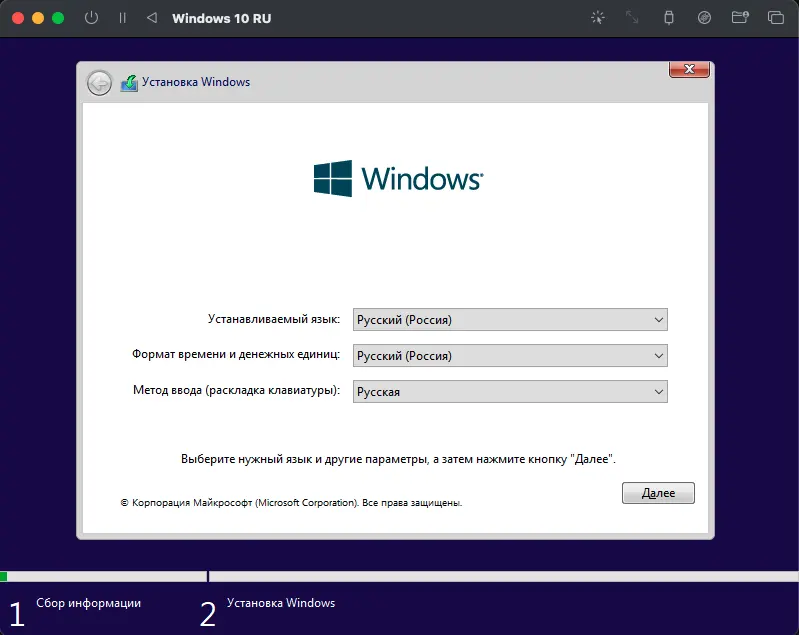
4. Настройте параметры установки:
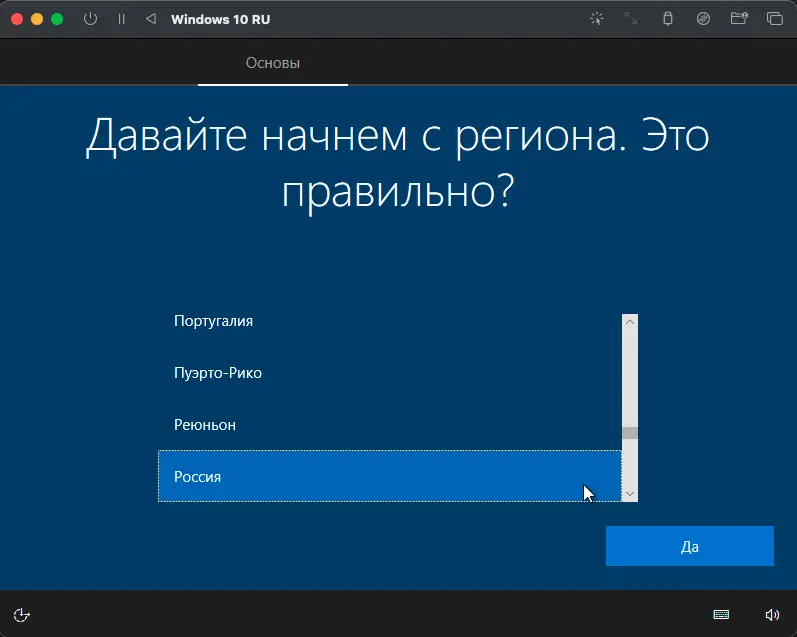
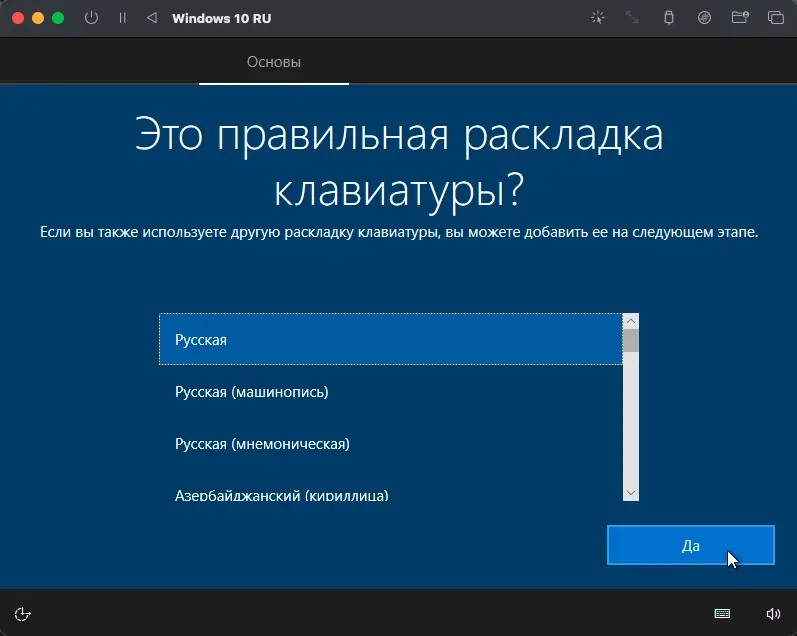
– Выберите язык, регион и раскладку клавиатуры (например, Русский, Россия, Русская).
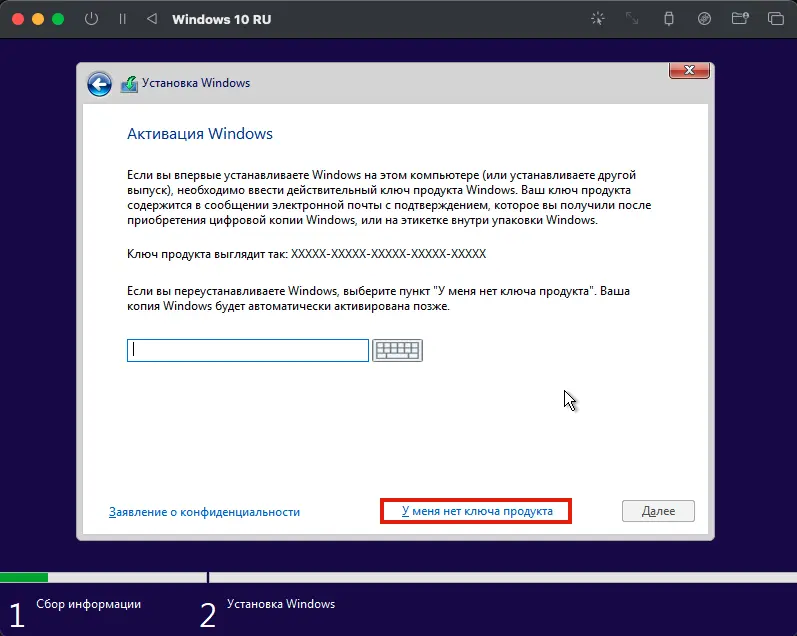
– Введите ключ продукта или выберите У меня нет ключа продукта.
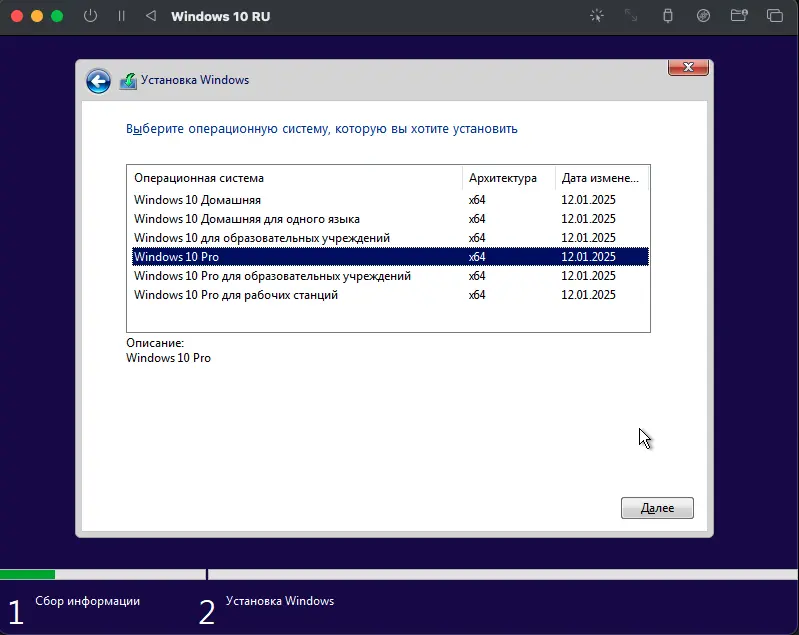
– Выберите редакцию, например Windows 10 Pro.
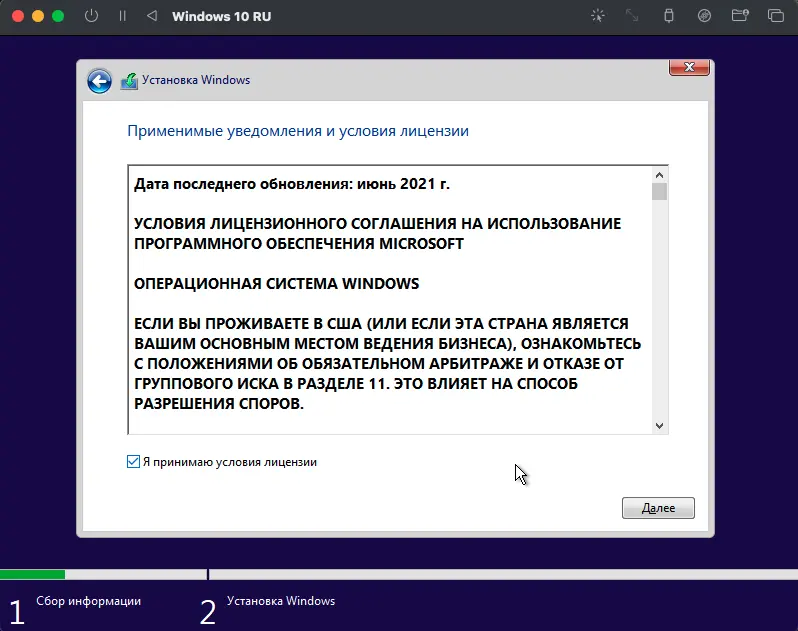
– Примите условия лицензии и нажмите Далее.
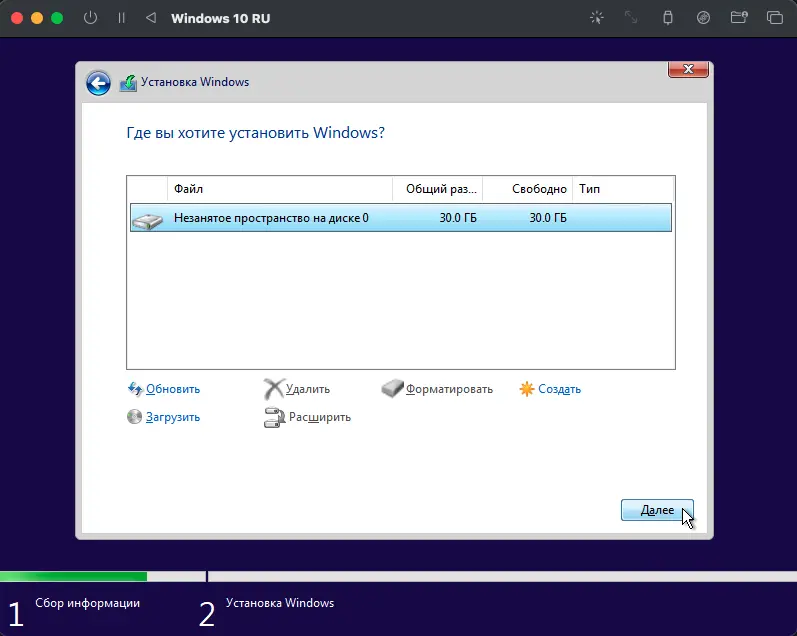
– Выберите виртуальный диск и нажмите Далее.
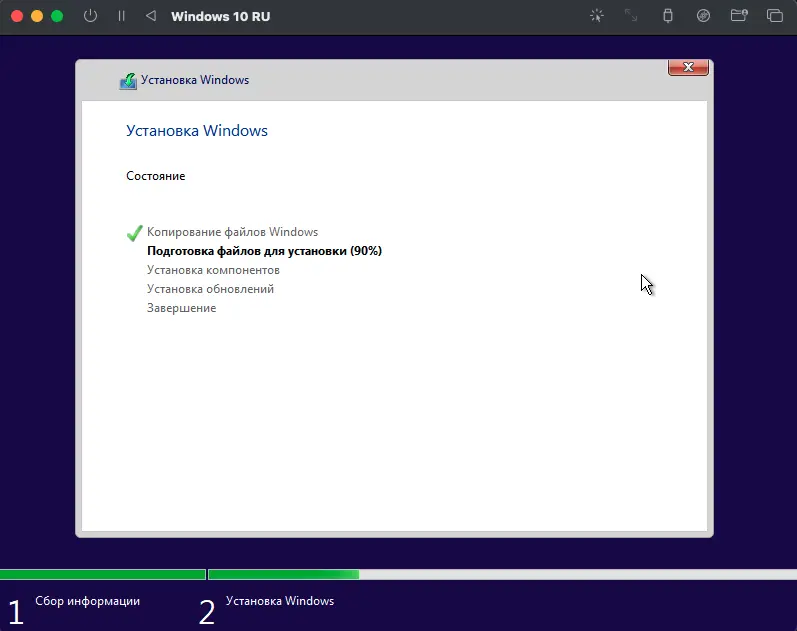
5. Установка включает несколько этапов:
– Копирование системных файлов.
– Подготовка к запуску.
– Многократные перезагрузки.
Не нажимайте клавиши во время перезагрузок, чтобы избежать повторного запуска установщика. Процесс может занять 20–60 минут, а временные графические сбои (мерцание) являются нормой.
6. После завершения базовой установки:
– Укажите регион, например Россия.
– Подтвердите раскладку клавиатуры.
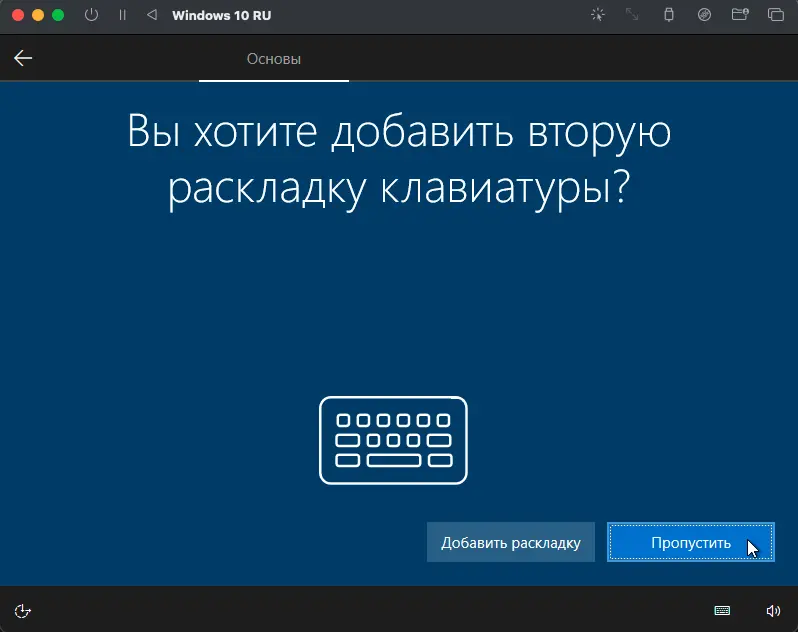
– Пропустите добавление дополнительной раскладки.
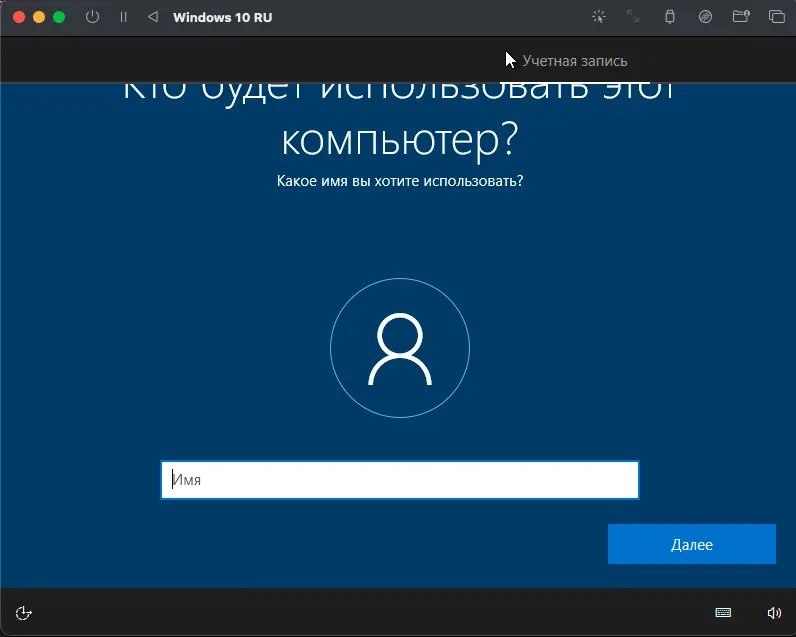
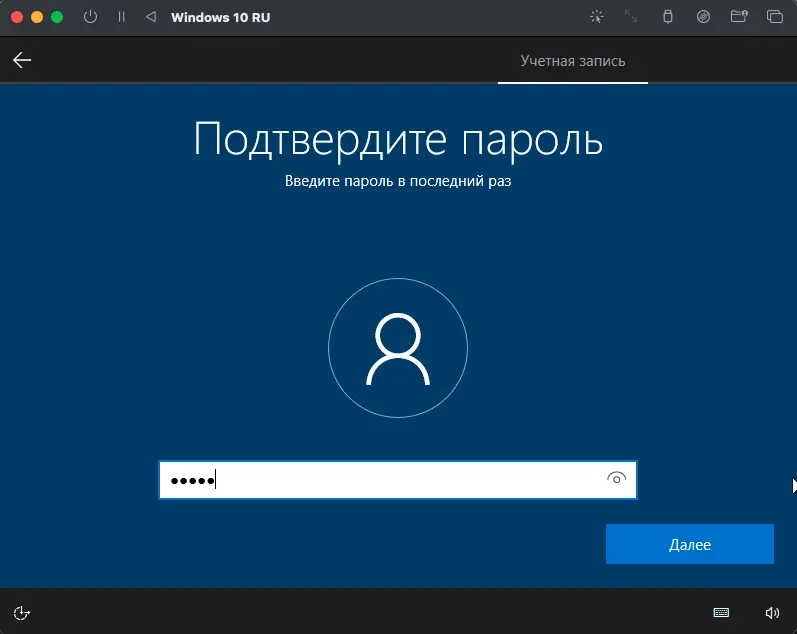
– Создайте учетную запись, указав имя и пароль.
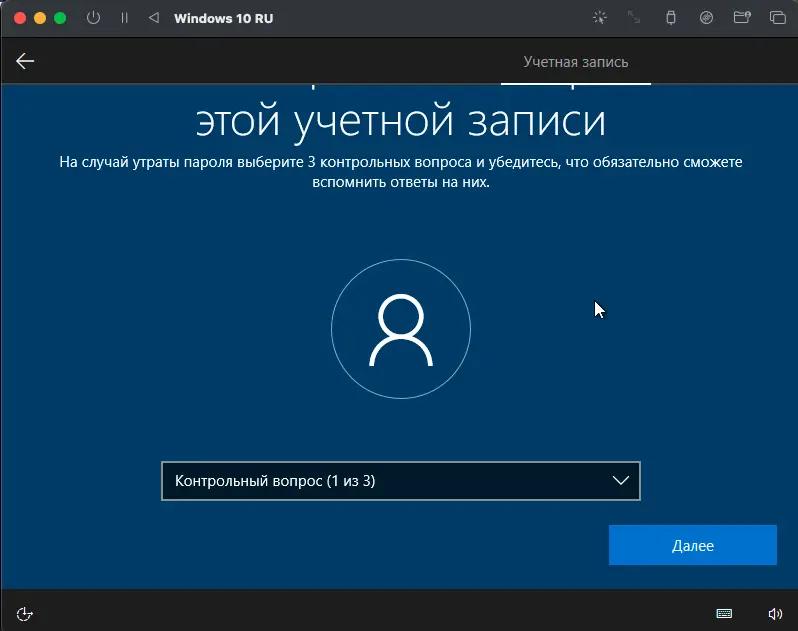
– Настройте контрольные вопросы для восстановления доступа (например, «Имя первого питомца»).
– Откажитесь от активации Кортаны, чтобы снизить нагрузку на эмулятор.
7. После финальной перезагрузки вы увидите рабочий стол Windows 10.
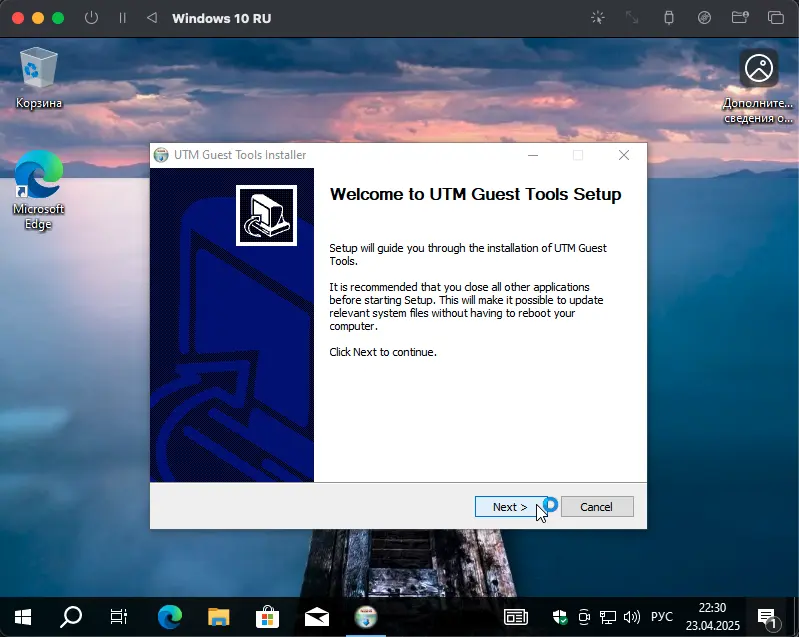
Установка SPICE Guest Tools
После загрузки Windows 10 автоматически запустится установка SPICE Guest Tools, которая улучшает качество графики и общую производительность:
1. Нажмите Далее в окне установщика.
2. Примите условия и дождитесь завершения (процесс занимает несколько минут).
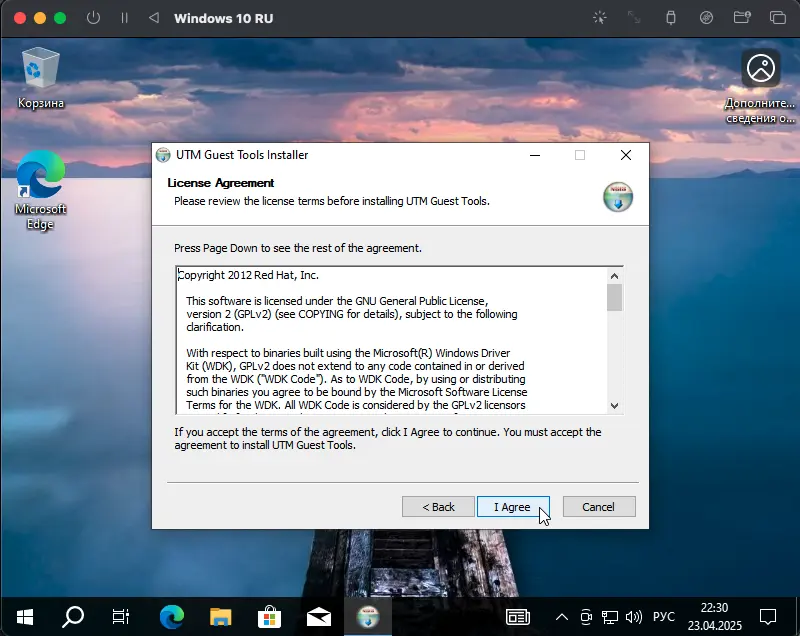
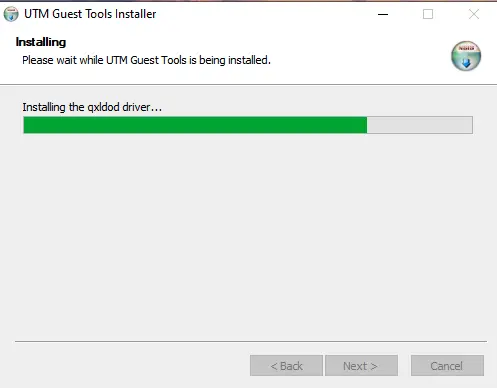
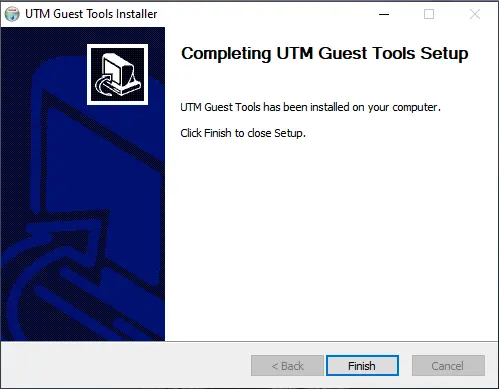
3. Нажмите Готово.
Если установка не началась, откройте Проводник, найдите виртуальный CD-диск с SPICE Guest Tools и запустите программу вручную.
Финальная настройка и проверка
После установки выполните следующие шаги для оптимизации работы Windows 10:
1. Проверка производительности:
– Движение курсора может быть слегка замедленным из-за эмуляции, что нормально.
– Убедитесь, что разрешение экрана настроено корректно после установки SPICE Guest Tools.
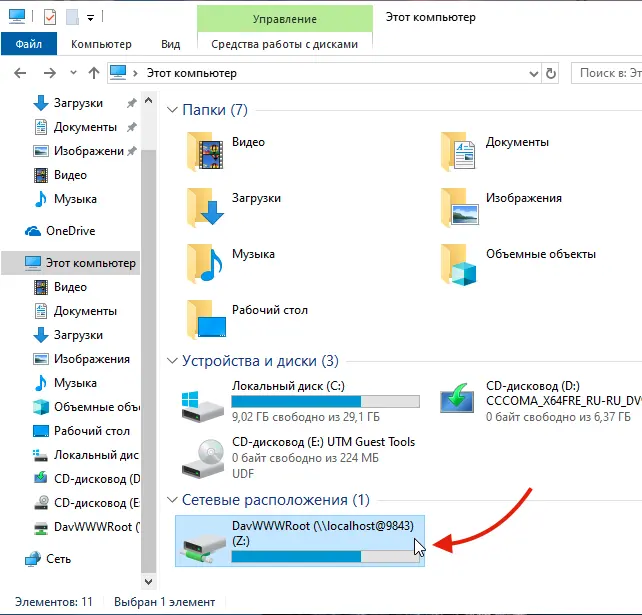
2. Доступ к общей папке:
– В Проводнике найдите общую папку (отображается как сетевой диск).
– Проверьте наличие файлов если вы туда перемещали что либо.
3. Отключение загрузки с ISO:
– В UTM отредактируйте виртуальную машину.
– В разделе Диски удалите ISO-образ Windows 10, чтобы избежать сообщения о загрузке с CD при запуске.
4. Корректное выключение:
– Не закрывайте окно UTM напрямую.
– В Windows 10 выберите Пуск → Выключение → Завершение работы.
– После выключения закройте UTM.
Рекомендации и устранение проблем
– Медленная установка: Эмуляция на процессорах M1, M2, M3, M4 может быть длительной. Убедитесь, что Mac подключен к питанию, и не прерывайте процесс.
– Графические артефакты: Мерцание экрана или задержки нормальны. Установка SPICE Guest Tools устраняет большинство проблем.
– Низкая производительность: Если виртуальная машина работает медленно, увеличьте выделенную память до 12 ГБ или ядра процессора до 6.
– Проблемы с загрузкой: Если Windows 10 не загружается с CD, измените интерфейс диска на USB в настройках UTM.
Установка Windows 10 на Mac с процессорами M1, M2, M3 или M4 с использованием UTM позволяет запускать Windows-приложения, такие как EasyCAD, на архитектуре Apple Silicon. Процесс установки требует времени из-за эмуляции, но результат обеспечивает стабильную работу виртуальной машины. Следуя этому руководству, вы сможете подготовить Mac, настроить виртуальную машину и установить Windows 10 для дальнейшей работы с необходимым программным обеспечением.
If you want to enjoy Windows 10 /11 on your Mac computer, you can download Windows 10/11 ISO for Mac, then install Windows on Mac via Boot Camp Assistant. In this article, MiniTool Software will show you how to download Windows ISO for Mac free for installation.
Can you run macOS on a Windows computer? Of course, the answer is yes. You can run macOS on a Windows PC using VMware. On the other hand, can you run Windows on a Mac computer? The answer is also yes. You can easily install Windows on your Mac computer with the help of Boot Camp Assistant. After that, you can switch between macOS and Windows as per your needs.
Before installing Windows 10/11 on your Mac computer, you need to download Windows 10/11 ISO for Mac. Now, let’s first talk about downloading Windows 10/11 ISO images for Mac.
Download Windows ISO for Mac Free
In this part, we will introduce how to download Windows 10 ISO for Mac and download Windows 11 ISO for Mac separately.
Download Windows 10 ISO for Mac Free
To protect your computer from viruses, malware, and spyware, you should download a Windows 10 ISO image for Mac using a reliable download source. Fortunately, Microsoft now enables you to directly download Windows 10 ISO image files for free from its official site. The Windows 10 ISO image direct download is only available when your computer agent is not Windows. So, it is very lucky. You can directly download a Windows 10 ISO image from Microsoft’s official site on your Mac computer and use it to install Windows 11 on Mac.
Tips:
If you are using a Windows PC, you can also directly download a Windows 10 ISO file from Microsoft by changing the user agent under the developer mode of your Chromium browser like Google Chrome or Microsoft Edge. See this post: Windows 10 ISO Images Direct Download via Microsoft’s Website.
Step 1: Go to the Download Windows 10 Disc Image (ISO File) page from Microsoft’s official site on your Mac.
Step 2: Click the Select edition menu and select Windows 10 (multi-edition ISO) option from the drop-down list.
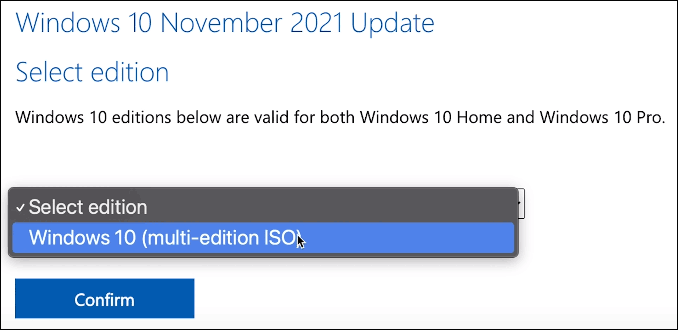
Step 3: Click the Confirm button and wait for your request to be verified
Step 4: Choose your language and click the Confirm button to continue.
Step 5: On the next page, you will see two available download buttons: 64-bit Download and 32-bit Download. Your Mac computer only allows you to install Windows 10 Home 64-bit edition or Windows 10 Pro 64-bit edition. So, you need to click the 64-bit Download button to start downloading Windows 10 ISO file for Mac.
Step 6: The size of the Windows 10 64-bit ISO file is about 5.8 GB. So, it will take a while to complete the whole downloading process. You should wait patiently.
After downloading the Windows 10 ISO file on Mac, you should let it stay in the download folder, move to the install section, and follow the steps to install Windows 10 on your Mac computer.
Download Windows 11 ISO for Mac Free
Microsoft has released a direct download link for all users since the official initial release of Windows 11. It is also free to download a Windows 11 ISO file for Mac from Microsoft.
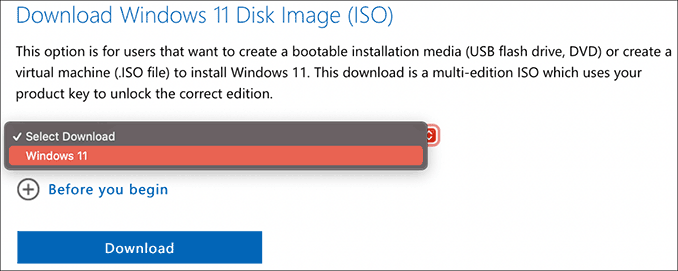
Step 1: Go to the Download Windows 11 Disc Image (ISO File) page from Microsoft’s official site using your Mac.
Step 2: Scroll down to the Download Windows 11 Disk Image (ISO) section. Then, click the Select Download menu and select Windows 11 option from the drop-down list.
Step 3: Click the Download button and wait for your request to be verified.
Step 4: Choose your language and click the Confirm button to continue.
Step 5: Windows 11 only has 64-bit editions. So, there is only one available download button: 64-bit Download. Click that button to download the Windows 11 ISO file on your Mac.
Step 6: The Windows 11 64-bit ISO file is 5.1 GB in size. You should wait patiently until the whole download progress ends.
Likewise, you should let the downloaded Windows 11 ISO image stay in the download folder, move to the install section, and follow the steps to install Windows 10 on your Mac computer.
Want to download Windows 10/11 ISO for Mac? This post introduces how to directly download one from Microsoft’s official site.Click to Tweet
Install Windows 10/11 on a Mac Computer
How to Install Windows 10 on Mac?
Preparations:
1. Windows 10 installation on Mac needs a Boot Camp Assistant and Boot Camp requires a Mac with an Intel processor. So, you need to have one of the following Mac computers:
- MacBook released in 2015 or later
- MacBook Air released in 2012 or later
- MacBook Pro released in 2012 or later
- Mac mini released in 2012 or later
- Mac Pro released in 2013 or later
- iMac released in 2012 or later1
- iMac Pro (all models)
2. You also need to install the latest macOS updates because they include the updates to Boot Camp Assistant.
3. To store the Windows 10 installation files, your Mac startup disk should have at least 64 GB of free storage space. Of course, more is better. For example, 128 GB of available storage space can provide the best experience because Windows updates will take up more space.
4. An external USB flash drive, which has at least 16 GB of space. However, if you are using one of the following Mac computers, it will not need a USB flash drive to install Windows 10:
- MacBook released in 2015 or later
- MacBook Air released in 2017 or later3
- MacBook Pro released in 2015 or later3
- Mac Pro released in late 2013 or later
- iMac released in 2015 or later
- iMac Pro (all models)
5. A Windows 10 Home 64-bit ISO file or Windows 10 Pro 64-bit ISO file. We have mentioned the download method above. If it is the first time to install Windows 10 on your Mac, you need to have a full version of Windows 10 rather than an upgrade.
Steps to install Windows 10 on Mac
To install Windows, use Boot Camp Assistant, which is included with your Mac.
Step 1: Change the Secure Boot settings if necessary. You need to use Full Security to install Windows 10 on Mac. After the Windows 10 installation, the Secure Boot setting will not affect the Windows startup.
Step 2: Open the Utilities folder of the Application folder. Then, open Boot Camp Assistant.
Step 3: Connect your external USB flash drive to your computer if you are required.
Step 4: Boot Camp Assistant will begin to create a Windows 10 bootable USB flash drive for installation.
Step 5: Boot Camp Assistant needs to create a BOOTCAMP partition for the Windows installation, which size should be at least 64 GB. You should not forget this. However, you should set the partition size as large as possible because you can’t change the size later.
Step 6: When Boot Camp Assistant ends the process, you need to restart your Mac to the Windows installer. In general, the installer will automatically select and format the BOOTCAMP partition. If not, the installer will ask where to install Windows. Then, you should select the BOOTCAMP partition manually and click Format to format it.
Step 7: Remove all unnecessary external drives from your Mac. Then, click the Next button and follow the onscreen instruction to install Windows 10.
Step 8: When the installation ends, your Mac machine will start up in Windows with a Welcome to the Boot Camp installer window. You need to follow the instructions to install Boot Camp and the necessary Windows support software drivers on Mac. You will be asked to restart your Mac when everything is done. Just do it.
Here is how to install Windows 10 on Mac.Click to Tweet
How to Install Windows 11 on Mac?
Windows 11 has new hardware and system requirements. Is it possible to install Windows 11 on your Mac computer? Of course, yes. But you need to use some extra steps to make the installation think your Mac device is compatible with Windows 11.
Step 1: You can also use the steps introduced in the How to Install Windows 10 on Mac section to install Windows 11 on Mac, but only when you see the Windows Setup interface pops up, you need to press Shift+F10 to call out the Command Prompt to make some changes to the related Registry key.
Step 2: Type regedit in Command Prompt and press enter to open Registry Editor.
Step 3: Go to HKEY_LOCAL_MACHINE\SYSTEM\Setup.
Step 4: Right-click the Setup folder and then select New > Key.
Step 5: Name the new key LabConfig.
Step 6: Right-click the newly created key and go to New > DWORD (32-bit). Then, name it BypassTPMCheck. After that, you should open this key and set the value to 1.
Step 7: Repeat the above steps to create two other new keys to bypass the RAM check and Secure Boot check. These two new keys should be named ByPassRAMCheck and ByPass SecureBootCheck. And their values should also be 1.
Step 8: Close the Registry Editor and Command Prompt to go back to the Windows setup interface. Then, click the Install Now button and follow the onscreen instructions to install Windows 11 on your Mac.
Here is how to install Windows 11 on Mac.Click to Tweet
Recover Lost and Deleted Files on Windows 10/11
MiniTool Power Data Recovery is a piece of professional data recovery software that works on all Windows versions, including Windows 11, Windows 10, Windows 8/8.1, and Windows 7. You can use it to recover all types of files like images, videos, music files, documents, and more.
This MiniTool data recovery software can recover data from different kinds of data storage devices like computer internal hard drives, external hard drives, memory cards, USB flash drives, pen drives, and more.
This software has a trial edition. If you are not sure if it can find the files you want to recover, you can use this trial edition to scan the drive you want to recover data from and then check the scan results for your needed files.
MiniTool Power Data Recovery TrialClick to Download100%Clean & Safe
Here is how to use this free file recovery tool to scan your drive for lost files:
Step 1: Download and install MiniTool Power Data Recovery Trial on your device.
Step 2: Open it to enter its main interface.
Step 3: Find the drive you want to recover data from under the Drives section. Hover over it and click the Scan button to start scanning that drive. If you don’t know which the target drive is, you can switch to the Devices section and select the entire disk to scan.
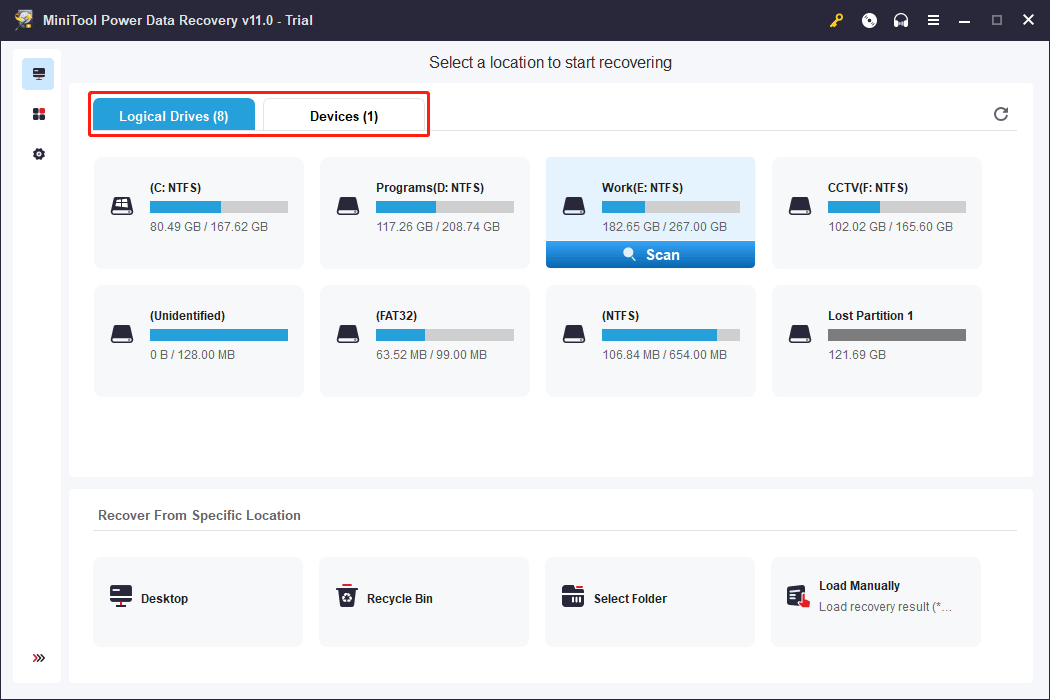
Step 4: Wait until the scanning ends. Then, check the scan results to find your needed files.
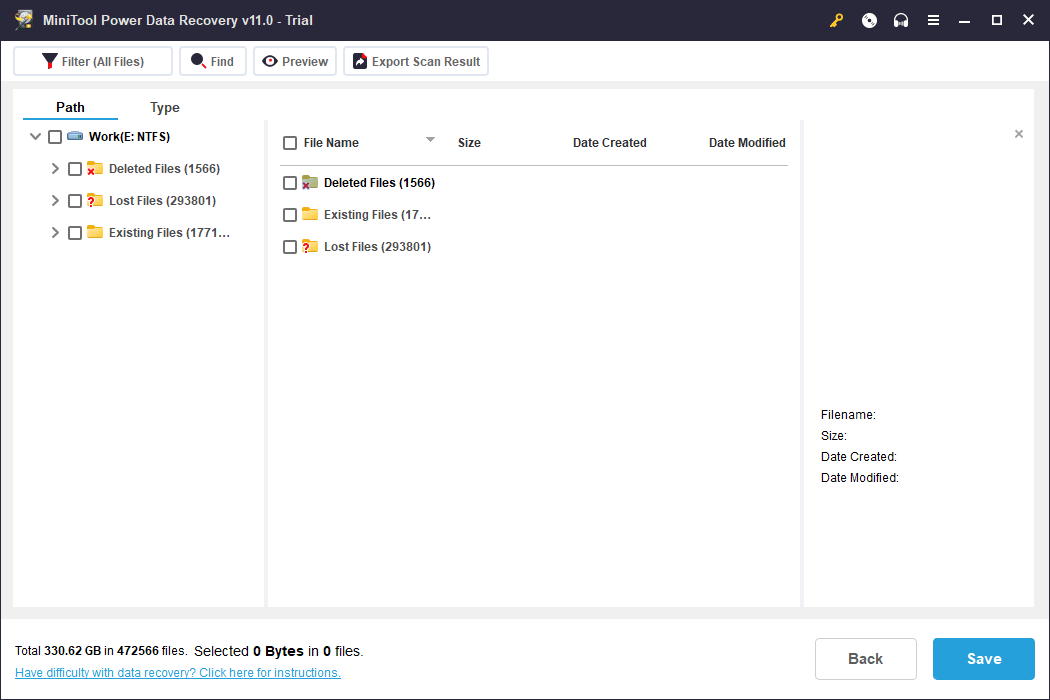
If you want to use this tool to recover your files, you need to use a full edition. You can just upgrade the software to a full edition in the scan results interface. So, you don’t need to take time to scan the drive again. After that, you can select all your needed files at once, click the Save button, and select a suitable folder to save files.
The End
Want to download Windows 10 ISO for Mac or download Windows 11 ISO for Mac? You can just get a Windows 10/11 ISO file from Microsoft’s official site on your Mac computer. This article shows you two related guides.
Additionally, you can also know how to install Windows 10 on Mac and how to install Windows 11 on Mac separately.
If you have other related issues to be fixed or have other good suggestions, you can let us know in the comment. You can also contact us via [email protected].
Будем честны, запись загрузочных USB флешек с Microsoft Windows на macOS — боль. Особенно для рядового пользователя, который, вероятно, никогда ранее не видел Терминал и не использовал виртуальные машины.
Без длительного вступления, хочу презентовать программное обеспечение собственной разработки, задачей которого является максимально упростить процесс записи флешек с Windows на macOS.
Стоит заранее отметить, что данное программное обеспечение является полностью бесплатным продуктом с открытым исходным кодом.
- Поддержка UEFI и Legacy загрузочных режимов (даже для Windows 11)
- Поддержка x64 и x32 образов
- Возможность удаления проверок TPM 2.0 и Secure Boot с образов Windows 11
- Оптимизация оригинальных образов Microsoft Windows для загрузки c FAT32 разделов (автоматическое разделение install.wim на части)
- Оптимизация образов Windows 7 и Vista для загрузки в EFI режиме
- Windows 11
- Windows 10
- Windows 8.1
- Windows 8
- Windows 7
- Windows Vista
На любой версии системы, начиная с Mac OS X Snow Leopard 10.6 и вплоть до последней на текущий момент — macOS Sonoma 14.0.
Поддерживаются компьютеры с процессорами Intel и Apple silicon.
Для начала необходимо загрузить образ нужной вам редакции Windows в .iso формате.
Стоит отметить, что на данный момент упор делался только на оригинальные сборки Microsoft Windows. Поэтому желательно использовать официальные релизы.
· Страница репозитория: Открыть на GitHub
· Страница с последней версией приложения: Открыть на GitHub
При первоначальном запуске вас может встретить сообщение вида:
Почему это происходит? Apple просит $100 за сертификат разработчика для подписи приложения. Платить я не готов, поэтому обходим это предупреждение.
После чего у нас появляется опция запуска приложения.
Приложение на данный момент доступно на двух языках: английский и русский. В качестве примера будет использована международная английская версия.
- Windows Image: Путь к образу с Microsoft Windows в .iso формате
- Target Device: Устройство назначения (USB флешка)
Если устройство не отображается (в основном происходит, если у вас Hackintosh с некорректно настроенной разметкой USB-портов), то в верхнем меню нажмите на «Отладка» → «Сканировать все диски». - Patch Installer Requirements: Включите, если хотите установить Windows 11 на компьютер, который не соответствует требованиям установщика (TPM 2.0 & Secure Boot)
- Install Legacy BIOS Boot Sector: Включите, если записываете образ для компьютера, который не поддерживает UEFI загрузку. Работает даже для Windows 11. (Данная опция требует перезапуска приложения с правами администратора, так как необходимо осуществлять прямую запись бут-сектора на диск)
- File System: Файловая система, в которую будет отформатирована флешка. Оставьте FAT32. exFAT не поддерживается на большинстве прошивок материнских плат.
Нажимаем на «Start«.
Если всё прошло без ошибок — поздравляю!
У вас теперь есть рабочая флешка с Microsoft Windows, которую вы создали на своём компьютере Mac!
Теперь вы можете загрузиться с установочной флешки на вашем ПК.
В качестве примера на скриншоте выше, я записал флешку с Windows 11 с поддержкой UEFI и Legacy, а также с пропатченными требованиями к железу!
I should emphasize that I am providing these instructions so Mac users can enjoy the benefits of Windows 11 in their Boot Camp installs, not so that the product is downloaded for free.
Prerequisites of this guide
The first step to installing Windows 11 on your Mac with this guide is having Windows 10 already set up in Boot Camp. If you need help with this initial step, Apple provides instructions on its Boot Camp Support Page. This entire guide is meant to be followed while running your Windows 10 Boot Camp.
Guide Compatibility
It should be noted that in order to install any version of Windows with Boot Camp, your Mac needs to have an Intel chip. With that established, these steps should work on any Mac that can run Windows 10. This includes any MacBook Pro, MacBook Air or iMac with an Intel chip.
The Magic Tool
The program that makes installing Windows 11 on your Mac possible is called “MediaCreationTool.” I previously wrote about it in my 2021 article “Install Windows 11 on a 2015 MacBook Pro.” Since then, the program has been greatly improved and the install method is way simpler. Plus, it’s been so streamlined, I’m confident the steps will work on any Intel Mac that can run Windows 10 in Boot Camp. I’ve tested it on a 2013 iMac, 2015 MacBook Pro, 2015 MacBook Air and a 2019 MacBook Pro. As a bonus, these steps will also work for any Windows 10 virtual machine, such as those created by Parallels. Let’s get started.
Download MediaCreationTool.bat from GitHub
MediaCreationTool needs to be downloaded from its official project repo on GitHub. Don’t downloaded it from anywhere else.
The first link below is to the exact version of the program I used for this guide. Alternatively, you can use the second link, which is to the latest version of the program. Since MediaCreationTool could update at any time though and potentially break this install method, if you want to follow the steps in this guide exactly, use the first link.
Guided Version – 2024/01/04
https://github.com/AveYo/MediaCreationTool.bat/tree/2f1f304652175d1d8c9a3a2f8eff6bb0ff881b13
Latest Version
https://github.com/AveYo/MediaCreationTool.bat
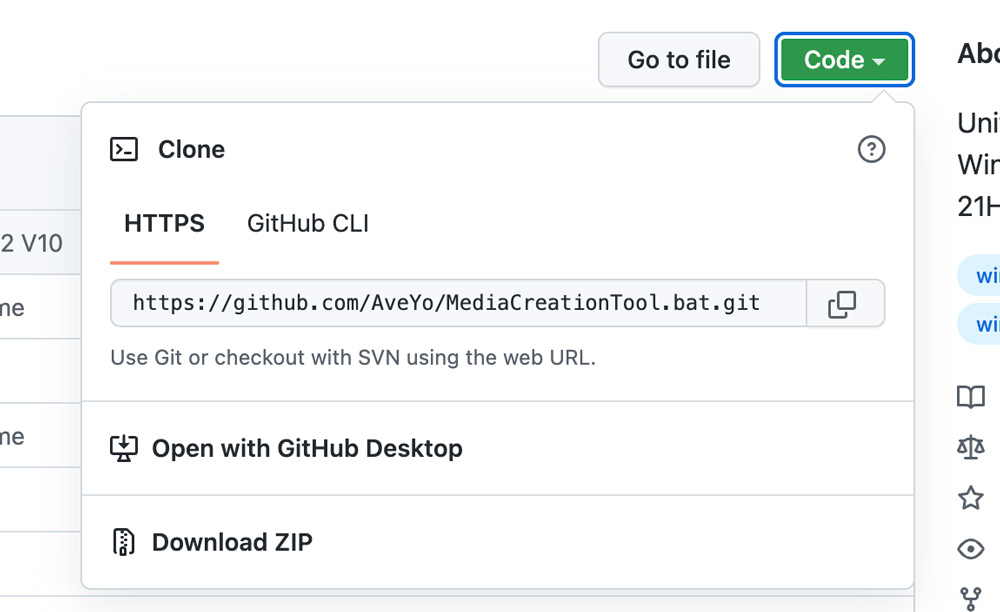
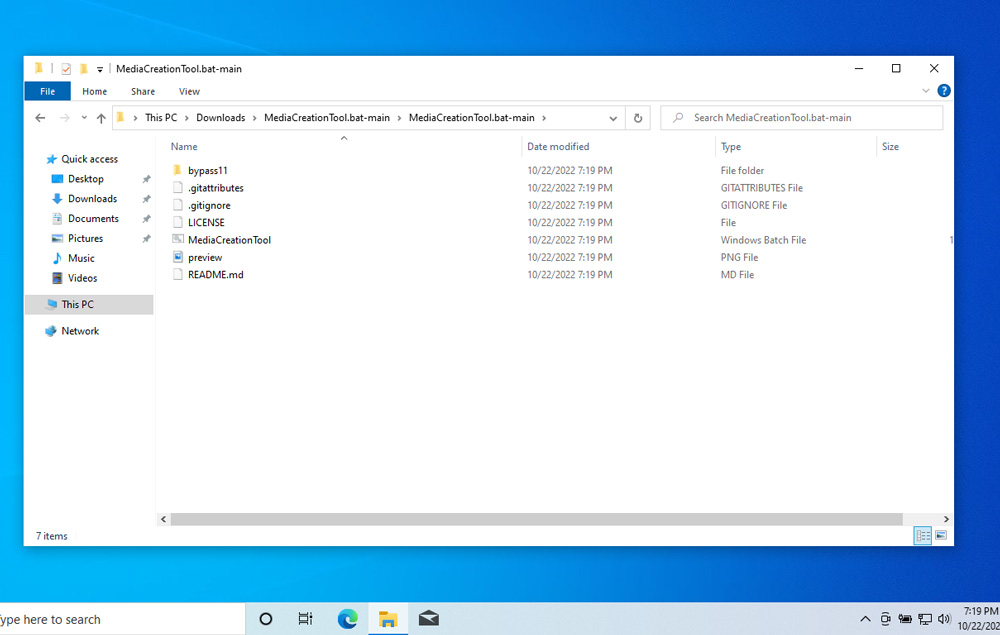
Once you’re on the program’s GitHub repo page, click the big green Code button and select “Download ZIP” from the drop-down. The image below should match what you’ve downloaded and unzipped.
Download the official Windows 11 23H2 ISO from Microsoft
Official Download Page
https://www.microsoft.com/software-download/windows11
- Scroll down to “Download Windows 11 Disk Image (ISO) for x64 devices”
- Select “Windows 11 (multi-edition ISO for x64 devices)” from the drop-down
- Click “Download Now”
- Select your language from the next drop-down
- Click “Confirm”
- Click “64-bit Download” and the ISO will begin downloading, most likely to your
Downloadsfolder
Pro Tip
Never download an ISO (a Windows file format) or DMG (a Mac file format) from a website you don’t completely trust.
Disable User Account Control (UAC)
Before using MediaCreationTool, disable User Account Control. It isn’t necessary, but it will save you from having to click confirm on a safety prompt after every single step. Open Windows Start menu, type UAC, and select “Change User Account Control settings.” Control Panel will open, and then move the slider to “Never notify” at the bottom and click OK.
Disabling User Account Control (UAC)
(If any of the Youtube videos fail to load, just refresh the page)
Time for MediaCreationTool
Unzip your downloaded folder and navigate into the directory bypass11. Double-click on Skip_TPM_Check_on_Dynamic_Update. A blue “Windows protected your PC” prompt will appear. Click “More info” and then “Run anyway.” A command prompt will appear saying “Installed.” Wait 6 seconds for the window to close on its own or hit Enter.
MediaCreationTool.bat folder and running Skip_TPM_Check_on_Dynamic_UpdateTime to install Windows 11 23H2
Locate your downloaded Windows 11 ISO (most likely it’s in your Downloads folder, right next to your MediaCreationTool.bat folder). Double-click the file – it will mount and then display its disc contents. Double-click setup, and after a brief pause, the “Install Windows 11” wizard will appear. Click “Change how Setup downloads updates” towards the top, select “Not right now”, and then “Next”. “Accept” the license, and it will then say “Making sure you’re ready to install”.
When it gets to “Ready to install”, it recaps that it will “Install Windows 11 Home” and “Keep personal files and apps”. Most likely you want to keep your existing files, but just in case you want a fully clean install, select “Change what to keep”. Finally click “Install” and a blue “Installing Windows 11” view will take over the whole screen. For the remainder of the install you don’t need to click anything.
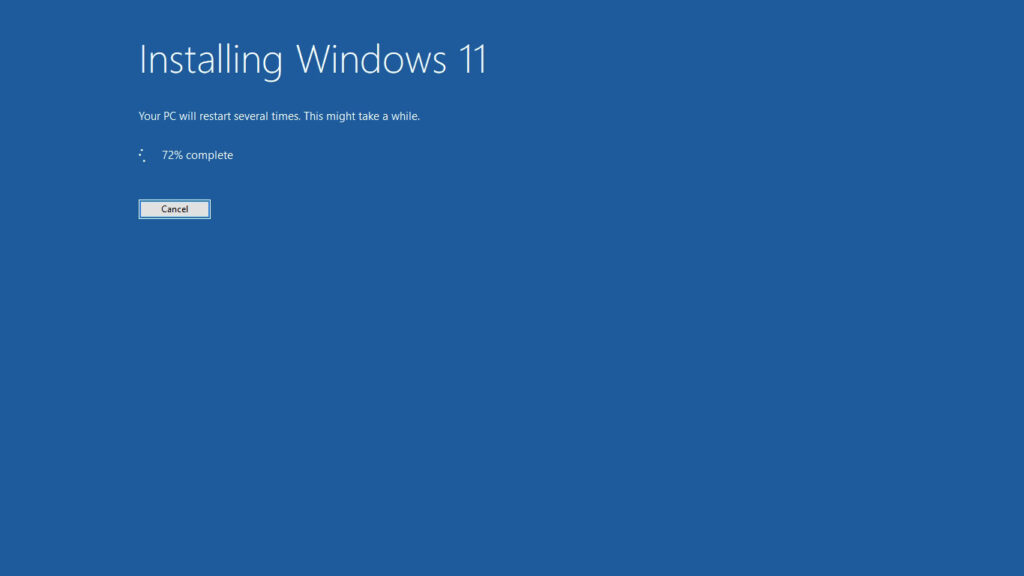
Eventually it will restart, and you will be greeted by the new Windows 11 logo.
Then a black screen will appear with a “Working on updates” percentage-completion measure.
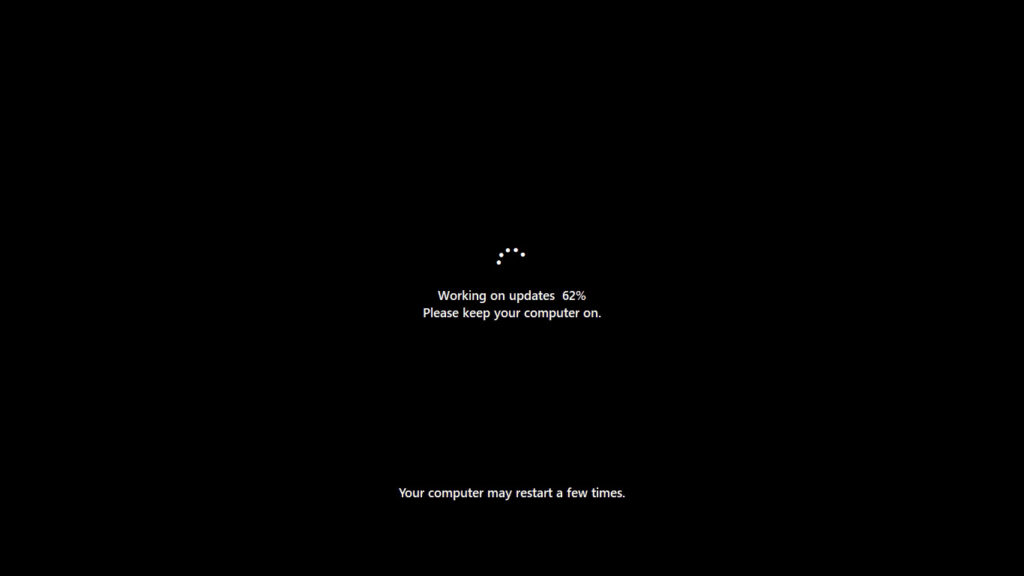
Once those updates are finished, you’ll be greeted by some “Please hold” messages over a color-changing background.

After the hold prompts are over, you’ll be logged into your new Windows 11 desktop.
If you found this guide helpful then spread the word! Enjoy your Windows 11 23H2 Boot Camp install.
I’m a web developer by trade and Mac enthusiast at heart. If you ever need help with either of those things you can always reach me at nico@studioncreations.com.