
Adjusting the left/right audio balance on Windows 10 system-wide is fairly straightforward and can be done in a few steps.
At the end of the article, you can find a section that lets you change audio balance in Windows 10 on an app-by-app basis.
System-Wide Windows 10 sound balance adjuster
Method 1: Use System settings
Step 1: Go to Settings -> System.
Step 2: Click on the Sound tab, then choose your sound output device (headphones, speakers etc.), then click on the Device Properties link.
Step 3: In the Device Properties window, adjust the Left and Right audio balance so that it’s comfortable with you.
Step 4: Close settings.
Method 2: Use the Control Panel Device settings
Step 1: Open Control Panel, click on Hardware and Sound.
Step 2: click on Manage audio devices, in the Sound category.
Step 3: In the Playback tab, double click on the sound output device (headphones, speakers etc.), that you use.
Step 4: In the Sound Device properties, click on the Levels tab, then on Balance. In the new window, adjust left and right audio balance to your liking.
Step 5: Click Ok on all the Windows to apply these settings.

Method 3: Disable Windows Absolute Volume feature
For certain devices, it’s possible the left and right audio channels are locked together, meaning you can’t adjust them individually.

In this situation, changing the volume of the right channel will change the volume of the left channel as well, and vice versa.
This is caused by a Windows setting called Absolute volume. Fortunately, there is an easy way to disable it.
Step 1: Press Win + R to bring up a Run dialog.
Step 2: Type cmd and press Enter.
Step 3: In the Command Prompt window, copy and paste the following command:
reg add HKLM\SYSTEM\ControlSet001\Control\Bluetooth\Audio\AVRCP\CT /v DisableAbsoluteVolume /t REG_DWORD /d 1 /fStep 4: Press Enter to run the command.

Step 5: Restart your computer to bring the change into the system.
In case you are worried, you can reverse this change anytime you want.
Simply go through steps 1 to 3, but at step 3 copy and paste this text command:
HKLM\SYSTEM\ControlSet001\Control\Bluetooth\Audio\AVRCP\CT /v DisableAbsoluteVolume /t REG_DWORD /d 0 /fThen press enter and restart your computer.
Method 4: Use a simple hardware audio mixer
Hardware audio mixers are specialized devices that give you greater control over your headphones, speakers and similar devices.
Purely as an example, a $25 audio mixer from Saramonic will allow you to manually adjust the left / right audio balance on your sound device.

Simply connect your headphones or speakers to the audio mixer, and then connect the audio mixer to your computer.
Once that is done, just turn the knobs for each audio channel until you find the right settings for your ear.
Solutions if you can’t change left right audio balance with the above methods
Fix 1: Update the drivers for your headphones
If you’re using headphones and still have issues balancing the left/right audio channels, then do a firmware update for your headphones.
As with most devices, some issues aren’t caused by the actual hardware, but by faulty drivers.
Just search for “[your headphone model] firmware update”, find the link provided by your headphone manufacturer and install the firmware and see if that fixes anything.
Note: Sometimes you might need to restart your system for the changes to take effect.
Fix 2: Check the wiring on your headphones
If you’re using wired headphones, it’s possible the left/right audio balance might be messed up because of faulty wires and connections.
To test this, try all of the following tests at least a few times while listening to a sound source:
- Connect your headphones to the PC using a different 3.5 millimeter jack or USB port.
- If your headphones use a 3.5 jack, try twisting and turning the jack and listen to any distortions.
- If your headphones have hardware controls, be sure you aren’t accidentally activating them.

If you encounter any sort of distortions, then it’s possible your problems might be more hardware related.
Finally, double check you’re using the right headphone on the right ear, and left headphone on the left ear. Most headphones should have markings that indicate which ear piece is right and which is left.

This shouldn’t matter if you’re just listening to music, but movies and games usually have spatial audio to indicate where sound is coming from.
If your headphone orientation is flipped you might feel the need to change headphone orientation to compensate.
Fix 3: Disable Sound Enhancements in the Audio Devices Tab
In some cases, it’s possible your settings prevent adjusting the L/R audio balance individually.
For example, if you try to change the left balance, the right balance also changes to match the left balance.
In most cases, this should be an easy fix.
Step 1, 2 and 3: Here, follow the first three steps from Method 2 above until you reach the screen below:
Step 4: Click on Enhancements tab, and then activate Disable all enhancements.
Step 5: Click Apply, then go to Levels and try adjusting left / right sound balance again.
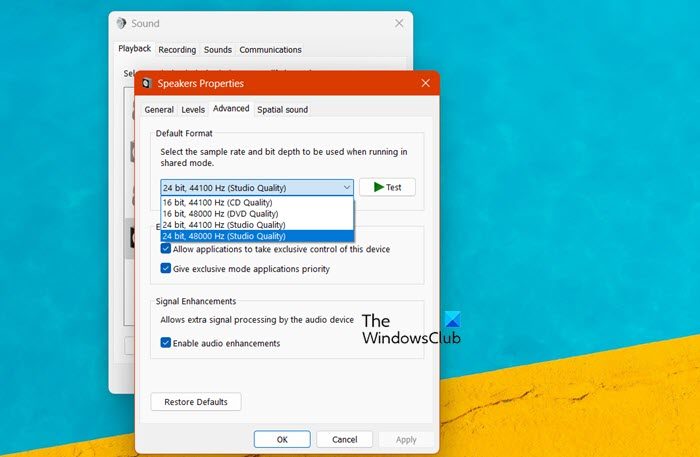
Fix 4: Change your audio quality settings
Step 1, 2 and 3: Here, follow the first three steps from Method 2 above until you reach the screen below:
Step 4: Click on Advanced tab, expand the Default Format tab and choose a different audio format. Be sure to also activate both options present in Exclusive mode.
Step 5: Click Apply, then go to Levels and try adjusting left / right sound balance again.
Fix 5: Run Windows Troubleshooter
Use Troubleshooter: Windows 10 has a built-in troubleshooter that can detect and fix issues with audio. Here’s how you can use it:
Step 1: Right-click on the speaker icon in the system tray and select “Troubleshoot sound problems“.
Step 2: Follow the prompts and apply any fixes recommended by the troubleshooter.
If this doesn’t work, then try checking with a different audio device. If you’re using headphones or external speakers, try using a different device to see if the issue persists. This can help you determine whether the problem is with your PC or the audio device you’re using.
Fix 6: Reinstall / Update drivers
Update Audio Drivers: Outdated drivers could cause issues with audio balance. You can update your audio drivers by:
Step 1: Right-click on the Start button and choose “Device Manager”.
Step 2: Expand “Sound, video and game controllers”, then right-click on your audio device and select “Update driver”.

Step 3: Follow the prompts to search for and install any available updates.
Reinstall Audio Drivers: If updating the drivers didn’t work, you could try reinstalling them. To do this:
Step 1: Go to “Device Manager” as before, right-click on your audio device, and select “Uninstall device”.
Step 2: Restart your PC. Windows should automatically reinstall the audio drivers on startup.
Adjust Windows 10 Sound balance on a per app basis
NirSoft SoundVolumeView
Download Link (scroll all the way to the bottom).
SoundVolumeView is a completely free program that gives you a huge amount of control over the sound settings of your computer.
For example, you can adjust your settings so that your sound volume is higher in Chrome, but lower in video game.
You can also use SoundVolumeView to adjust L/R balance in one program, but keep it different in another.
The interface is a bit clunky at first, but becomes easy to use once you understand the logic of it.
Here are the steps required to adjust sound balance on a per-app basis:
Step 1: Download SoundVolumeView and extract it into a folder.
Step 2: Open the SoundVolumeView.exe application.

Step 3: Click once on the app you want to change the L/R audio sound balance. Make sure the direction is Render (Capture usually means microphones).

Step 4: While the app is highlighted with the blue bar, click on Options -> Selected Channels. Channel 1 is left, while Channel 2 is right. Click on which channel you want to make louder/quieter.

Step 5: Move the bottom slider to the right until you can see the Channels Percent column. Notice how the sound balance is currently at 100% for each channel.

Step 5: Use the following commands to make certain channels louder/quieter:
- Decrease volume 1% – Ctrl+1
- Increase volume 1% – Ctrl+2
- Decrease volume 5% – Ctrl+3
- Increase volume 5% – Ctrl+4
- Decrease volume 10% – Ctrl+5
- Increase volume 10% – Ctrl+6
The image below shows how the left channel for the game Battlefield V is now at 70%, without affecting the sound balance for other programs.

Now follow the same steps above, but for the other channel.
That’s it. If you want to read more about SoundVolumeView and how it works, go to this link and scroll almost to the bottom. You should see a list of how-to and other guides for this program.
VB-CABLE- virtual audio cables
This software is much more technical and advanced than SoundVolumeView, but we’re putting it here just in case you’re a sound enthusiast.
In essence, VB-CABLE is a virtual audio device that works as a virtual audio cables. This gives you a ton of flexibility in how you can setup your sound systems.
Here is the download link in case you want to get crazy with this.
- Author
- Recent Posts
Paul Bonea is the founder of Datasourse (formerly Perfect Data) and is a fullstack digital marketing professional with a wealth of knowledge in SEO, PPC, Social Media, and Data Analytics.
There are a few different ways that you can reverse the left and right audio channels in Windows 10. One way is to use the built-in audio player, Windows Media Player. To do this, open Windows Media Player and click on the Tools menu. From the Tools menu, select Options. In the Options window, click on the Devices tab. In the Devices tab, select your sound card from the list of devices and click the Properties button. In the Properties window, click on the Advanced tab. In the Advanced tab, you will see a checkbox labeled «Reverse left and right channels.» Check this box and click OK.
Another way to reverse the left and right audio channels is to use the Windows Sound Recorder. To do this, open the Windows Sound Recorder and click on the File menu. From the File menu, select Open. In the Open window, select your sound card from the list of devices and click the Properties button. In the Properties window, click on the Advanced tab. In the Advanced tab, you will see a checkbox labeled «Reverse left and right channels.» Check this box and click OK.
You can also use a third-party audio editing program to reverse the left and right audio
How do I change left audio to right?
There are a few different ways that you can change the left audio to right, depending on what you are trying to do.
If you are trying to change the left audio to right in a video editing program, such as Adobe Premiere Pro, you can simply click on the audio track that you want to change and then click on the «Invert» button. This will swap the left and right audio channels.
If you are trying to change the left audio to right in an audio editing program, such as Audacity, you can click on the track that you want to change and then click «Effects > Invert.» This will invert the waveform, effectively swapping the left and right audio channels.
If you are trying to change the left audio to right on a physical piece of audio equipment, such as a mixer or soundboard, you will need to consult the manual for that specific piece of equipment to see how to change the audio channels.
Can you swap left and right speakers?
Yes, you can swap left and right speakers. The process is relatively simple and only requires a few steps. First, you’ll need to identify the left and right speakers. This can be done by looking at the back of the speakers or by using a multimeter to test the polarity of the speaker terminals. Once you’ve identified the left and right speakers, you can then disconnect the wires and swap the speakers.
How do you switch left and right headphones on Windows?
To switch left and right headphones on Windows, you can use the following steps:
1. Right-click on the speaker icon in the taskbar and select «Open Sound Settings«.
2. In the Sound Settings window, scroll down to the «Output» section and click on the drop-down menu.
3. Select the headphones that you want to use as your default output device.
4. Close the Sound Settings window.
How do I reverse audio in Windows?
There are a few different ways that you can reverse audio in Windows. One way is to use the built-in audio editor that comes with Windows. To do this, open the audio file that you want to reverse in the editor and then click on the «Effects» tab. From here, you can select the «Reverse» option and then click «OK» to save your changes.
Another way to reverse audio in Windows is to use a third-party audio editing program. There are a number of different programs that you can use for this, and many of them are available for free. Once you have downloaded and installed one of these programs, simply open the audio file that you want to reverse and then use the program’s built-in tools to reverse it.
Finally, if you want to reverse audio that is already playing, you can use the Windows Media Player. To do this, open the audio file in Windows Media Player and then click on the «Play» button. Once the audio starts playing, click on the «Stop» button and then click on the «Rewind» button. This will cause the audio to play in reverse.
How do I change left and right audio on Windows 11?
There are a few different ways that you can change the left and right audio on Windows 11. One way is to go into the sound settings and change the balance. Another way is to use a third-party audio editing program to change the audio levels.
How do I separate left and right audio?
There are a few ways to separate left and right audio, depending on what you’re trying to do.
If you’re trying to create two separate audio tracks from a single stereo track, you can use a stereo separation plugin. This will allow you to split the left and right audio into two separate tracks, which you can then edit and mix independently.
If you’re trying to edit the left and right audio separately, you can use a stereo editing plugin. This will allow you to edit the left and right audio independently, allowing you to make changes to one side without affecting the other.
If you’re trying to isolate the left and right audio for analysis or processing, you can use a stereo isolation plugin. This will allow you to route the left and right audio to separate channels, allowing you to process each side independently.
How do I change the audio channel on my computer?
There are a few different ways that you can change the audio channel on your computer, depending on what type of computer you have and what type of audio setup you are using. If you are using a desktop computer, you can usually change the audio channel by going into the sound settings in the control panel and selecting the desired channel. If you are using a laptop, you may be able to change the audio channel by using the function keys on your keyboard. If you are using an external audio setup, such as speakers or headphones, you can usually change the audio channel by using the buttons on the audio device itself.
Can you reverse polarity on speakers?
Yes, you can reverse polarity on speakers. This is done by reversing the positive and negative wires on the speaker.
What happens if you reverse polarity of speakers?
If you reverse the polarity of your speakers, the sound will be out of phase and will not sound as intended. To fix this, simply reverse the wires on your speakers so that the positive and negative are switched.
How do I change my headphones from left to right?
If you would like to change the headphones from left to right, you can do so by following these steps:
1. Locate the audio jack on your device.
2. Insert the headphone jack into the audio jack.
3. Twist the headphone jack to the right to lock it in place.
4. Enjoy your music!
How do you reverse left and right?
There is no one-size-fits-all answer to this question, as the best way to reverse left and right may vary depending on the specific situation. However, some tips on how to reverse left and right may include:
-Identifying the left and right sides. This can be done by looking at a map, using landmarks, or using other orienting cues.
-Determining which way is north. This can be done by using a compass, looking at a map, or using other orienting cues.
-Once the left and right sides have been identified and north has been determined, reverse your direction of travel. So, if you were previously traveling to the right, start traveling to the left instead.
How do you reverse audio easily?
There are a few ways to reverse audio easily. One way is to use an audio editing program like Audacity. Another way is to use an online audio editor like Soundation.
How do you fix reverse audio?
There are a few things that could be causing reverse audio. The first thing to check is the audio settings in your media player. If the audio is set to play in reverse, you can simply change the setting to play normally.
If the audio settings are fine, the next thing to check is the audio drivers. Outdated or corrupt audio drivers can cause all sorts of audio problems, including reverse audio. You can update your drivers automatically using a driver update tool, or you can manually update them by going to the manufacturer’s website.
If you’re still having audio problems, the next thing to check is the audio cable. If the cable is loose or damaged, it could be causing the audio to play in reverse. Try unplugging and replugging the cable to see if that fixes the problem.
If you’re still having trouble, the last thing to check is the audio hardware. If the audio hardware is damaged, it will need to be replaced.
Все способы:
- Способ 1: Equalizer APO
- Способ 2: Media Player Classic Home Cinema (MPC-HC)
- Способ 3: Использование кабелей
- Вопросы и ответы: 12
Способ 1: Equalizer APO
Универсальным методом решения рассматриваемой задачи является использование стороннего программного обеспечения – приложения Equalizer APO, которое действует в системе на глобальном уровне.
Скачать Equalizer APO из репозитория SourceForge
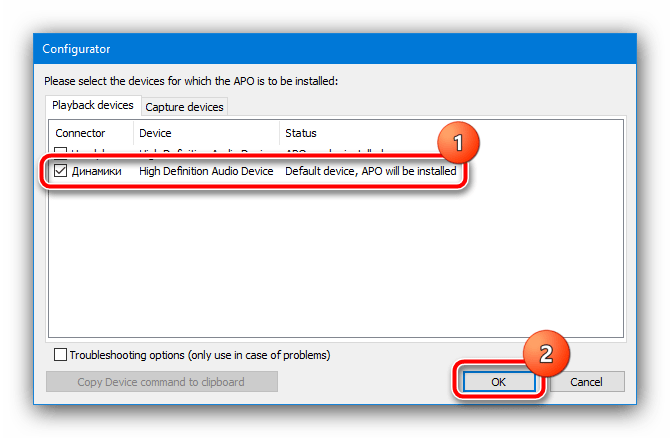
- Скачайте инсталлятор, запустите его и выполните установку на компьютер. В конце появится окно, в котором нужно выбрать основное звуковыводящее оборудование – укажите требуемое.

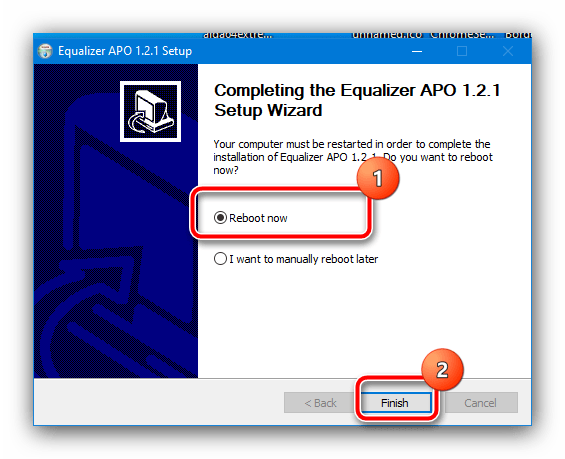
Закройте все открытые программы и перезагрузите ваш ПК или ноутбук.
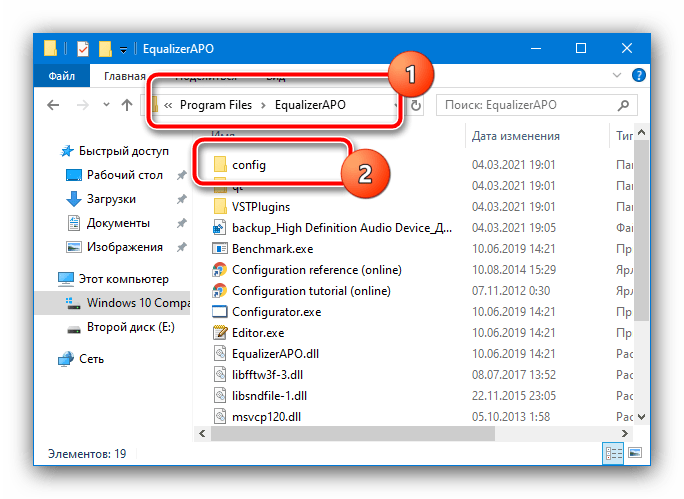
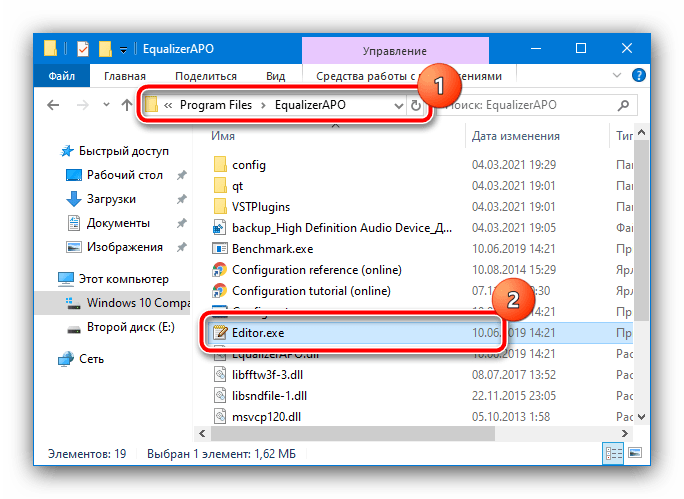
- Перейдите в корневой каталог установки, по умолчанию это
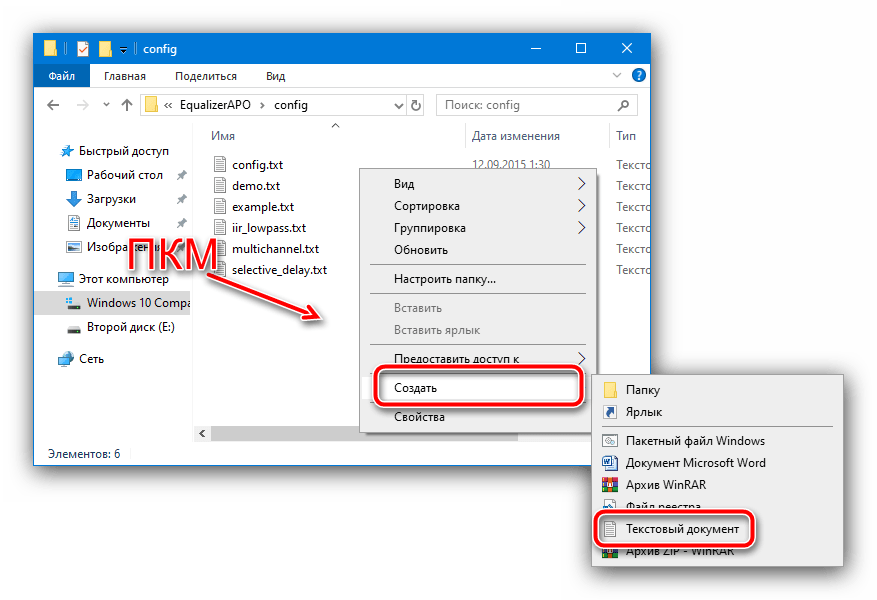
C:\Program Files\EqualizerAPO, где откройте директорию config. - Кликните правой кнопкой мыши по пустому пространству, и выберите опции «Создать» – «Новый текстовый документ».

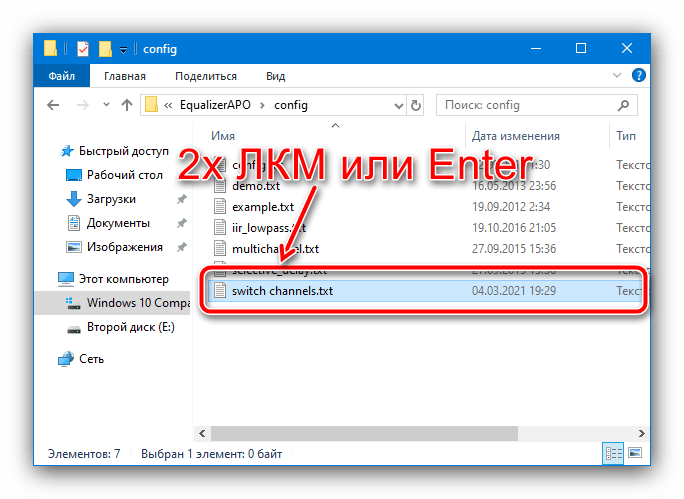
Задайте ему произвольное имя и сразу же откройте, нажатием на клавишу Enter или дважды кликнув по документу левой кнопкой мышки (ЛКМ).
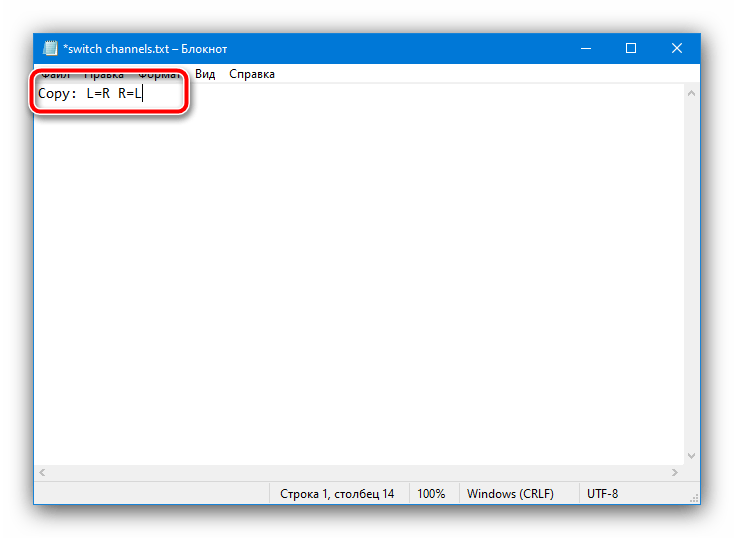
- Запустится стандартное окно «Блокнота», в котором впишите либо скопируйте и вставьте следующий текст:
Copy: L=R R=L
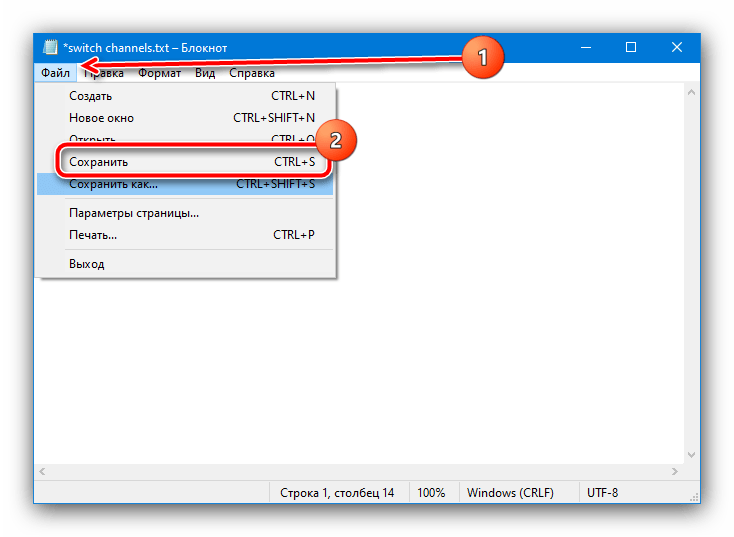
Сохраните изменение, воспользовавшись пунктами «Файл» – «Сохранить», после чего закройте документ.
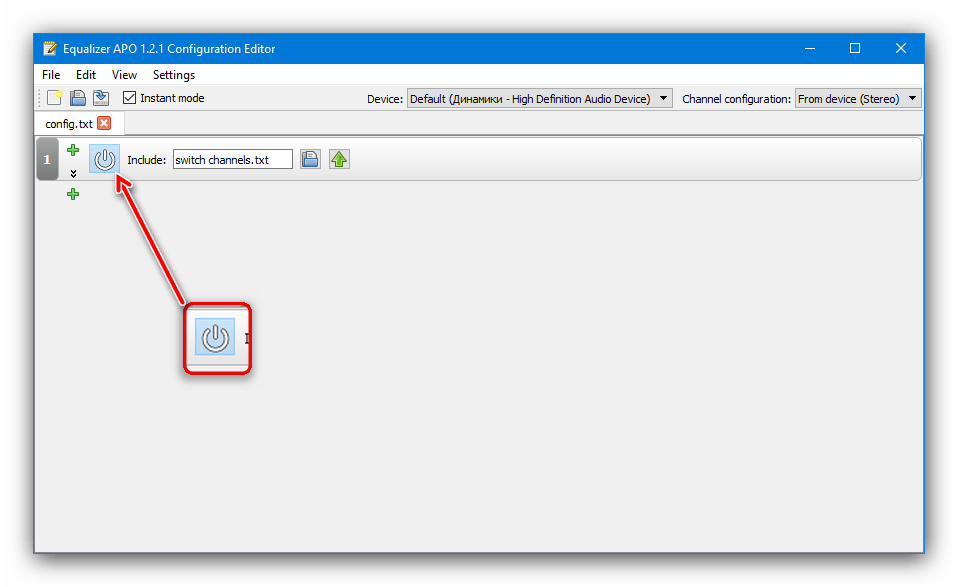
- Перейдите на уровень выше, обратно в корневую директорию приложения, и запустите исполняемый файл Editor.exe.

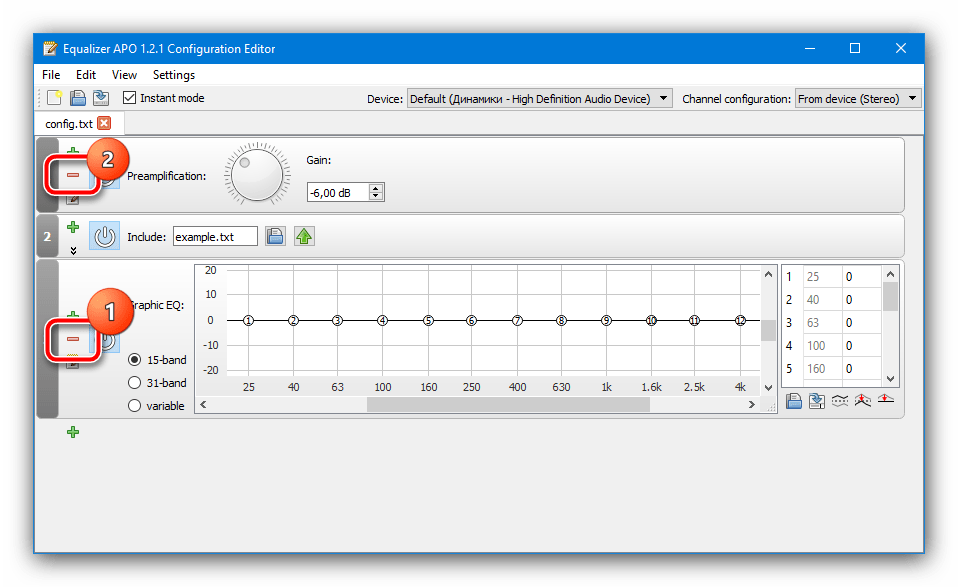
В главном окне программы уберите панели настроек 1 и 3 нажатием на кнопки с минусом, пока не останется только панель с обозначением 2.
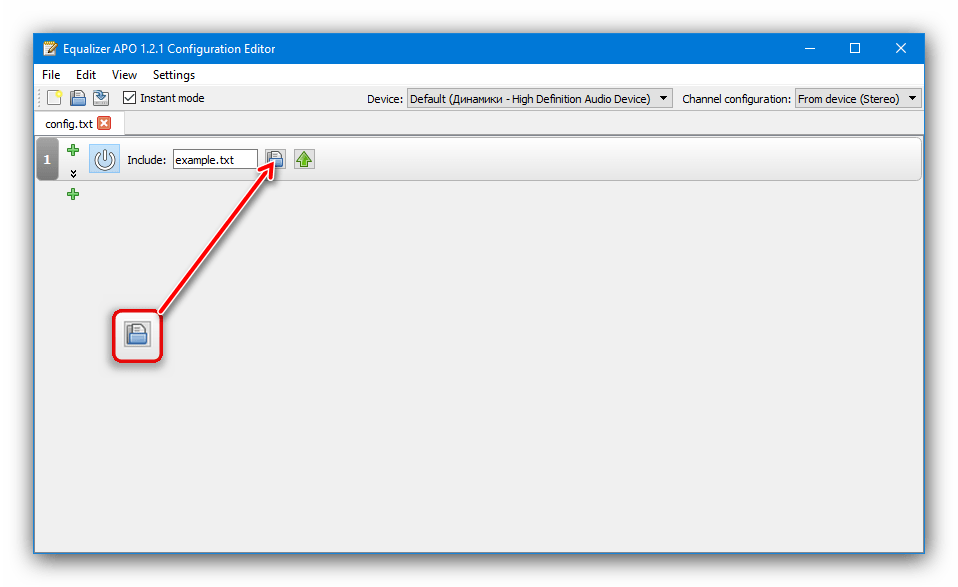
- Кликните по элементу открытия конфигурационного файла.

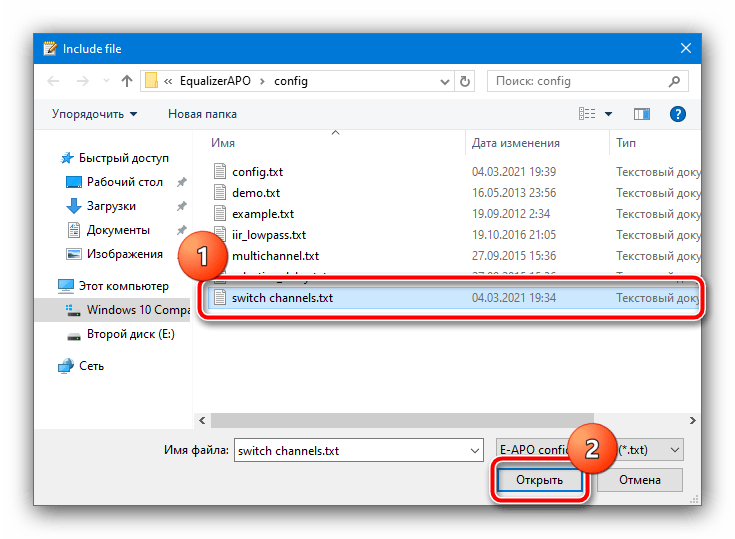
Далее с помощью диалогового окна «Проводника» перейдите в папку config и выберите документ, который мы создали на шагах 3-4.
- Теперь воспользуйтесь кнопкой со значком включения – она должна находиться в затенённом состоянии.
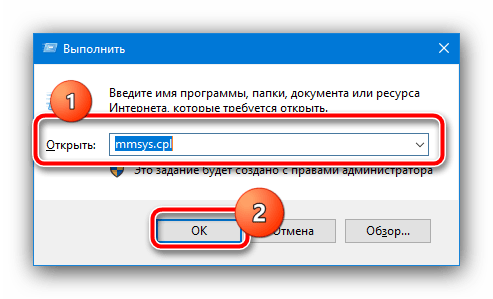
- Проверим результаты проделанной работы. Вызовите окно «Выполнить», введите в него запрос mmsys.cpl и нажмите «ОК».

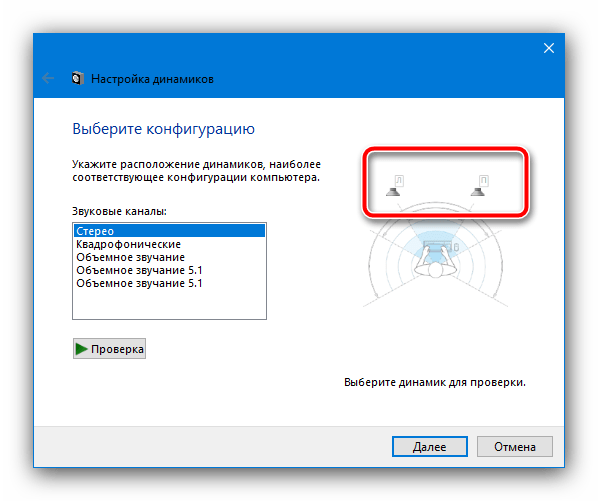
В следующем окне выделите звуковыводящее устройство, кликните по нему ПКМ и выберите пункт «Проверка».

По очереди щёлкните по значку левой и правой колонок – теперь исходящий из них звук должен соответствовать каналу.

Как видим, этот метод достаточно прост, и не требует каких-либо особых навыков, однако Equalizer APO представляет собой стороннюю программу, которая должна постоянно работать в фоне, иначе изменение применяться не будет – последнее некоторые пользователи могут счесть неудобным и небезопасным.
Способ 2: Media Player Classic Home Cinema (MPC-HC)
Чуть более специализированный метод, который подходит любителям смотреть кино и сериалы, заключается в использовании приложения для проигрывания видео с возможностью смены каналов местами. Одним из таковых является Media Player Classic Home Cinema.
Скачать Media Player Classic Home Cinema
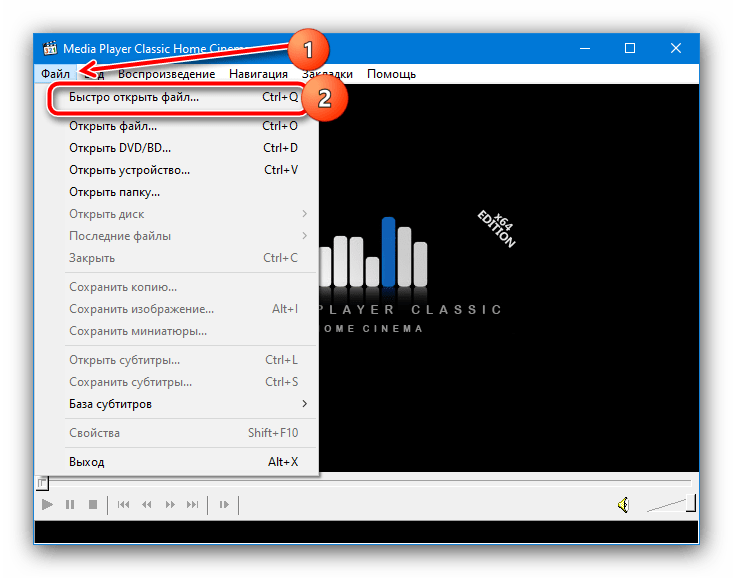
- После скачивания и установки запустите проигрыватель видео и воспользуйтесь пунктами «Файл» – «Быстро открыть файл».

С помощью «Проводника» выберите видеофайл со звуковой дорожкой в стерео и откройте.
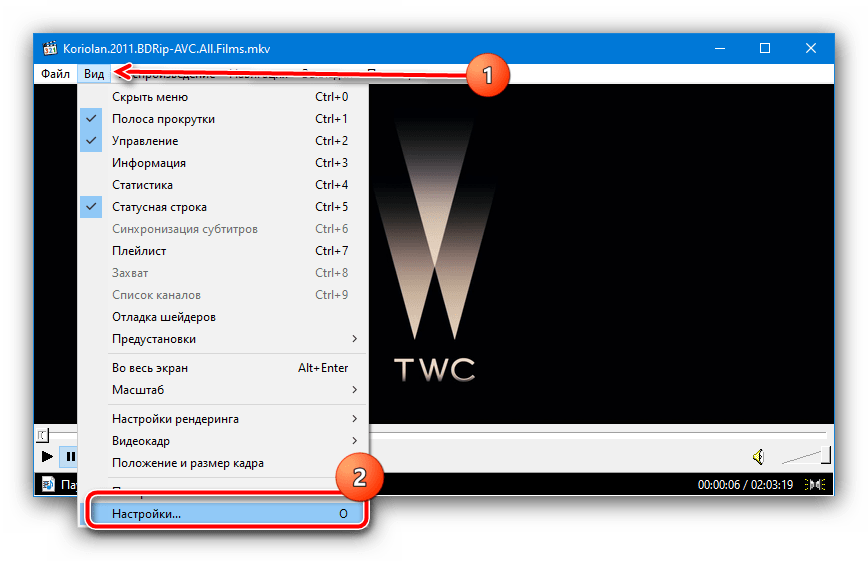
- Поставьте воспроизведения на паузу клавишей Пробел, затем воспользуйтесь пунктами «Вид» – «Настройки».
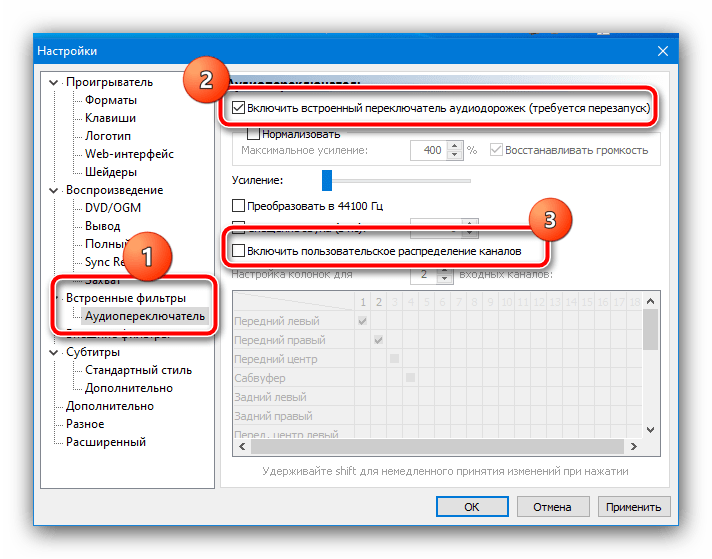
- Здесь откройте раздел «Встроенные фильтры» и перейдите к блоку «Аудиопереключатель». Активируйте опцию «Включить встроенный переключатель аудио», затем – «Включить пользовательское распределение каналов».

Когда станет активным меню «Настройка колонок для», выберите в нём «2», после чего в таблице ниже отметьте позиции как на скриншоте далее. Для применения настроек нажмите «Применить» и «ОК», после чего перезапустите проигрыватель.


Теперь при воспроизведении видеофайлов со стереозвуком каналы будут поменяны местами.
Способ 3: Использование кабелей
Последний, самый надёжный в плане эффективности вариант заключается в аппаратной замене каналов местами. Для этого нам пригодятся кабели-переходники – например, с разъёма 3.5мм на двухканальный RCA-male, и RCA-female на аудиоджек.
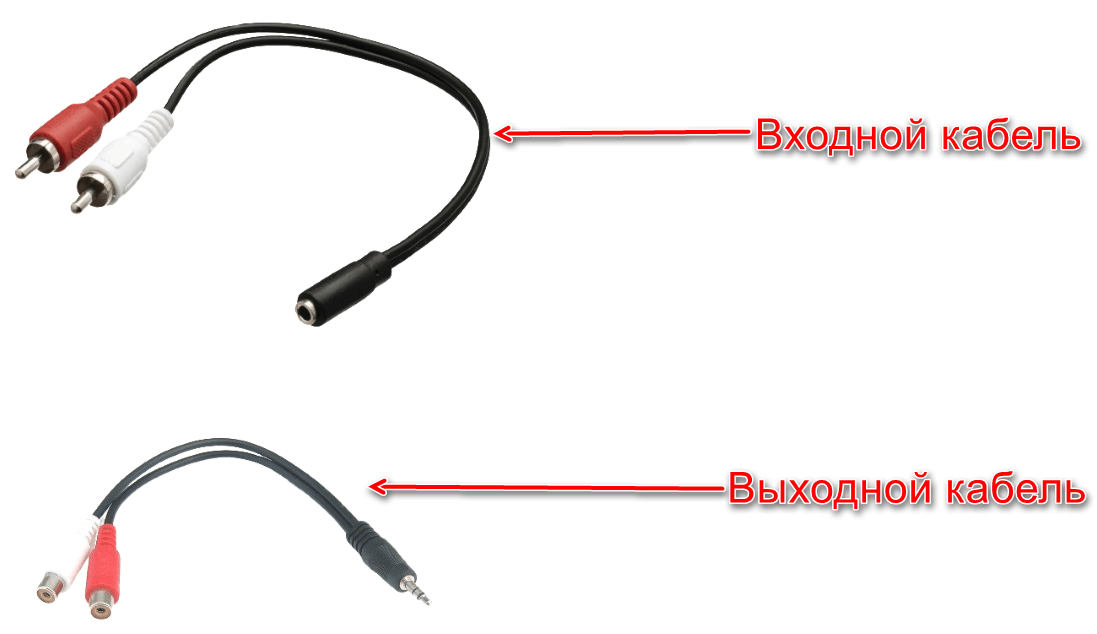
Дальнейшие действия достаточно простые: первый кабель, который выходит на RCA, соедините с наушниками. Затем RCA-выходы соедините с аналогичными разъёмами на втором проводе — белый выход в красный порт и наоборот — после чего всю эту конструкцию свяжите с компьютером и проверьте звук, каналы теперь должны соответствовать друг другу или, наоборот, быть поменяны местами, если в этом заключается ваша цель.
Этот метод сложнее предыдущих, и предполагает материальные траты, однако практически гарантирует положительный результат.
Наша группа в TelegramПолезные советы и помощь
21.08.2019, 09:18. Показов 7789. Ответов 5
Вообщем, ситуация крайне курьезная.
Комплектующие
1070ti 8gb, 16gb, i5 8600 основного пк. 5850 hd, 4gb, i3 2110 второго пк.
Сразу говорю, проверял на двух компьютерах, и трех парах наушников. Также, переустанавливал винду.
Первая пара наушей — Cloud Stinger. Вторая — Науши с али за 1к. Третья — Науши от айфона.
По дефолту, тобишь при чистой установки винды, происходит инверсия звуковых каналов и фиксится это только через EQO, но звук меняется ВЕЗДЕ.
Тоесть, у меня в наушниках все хорошо, а например при том же стриме становится наоборот и теперь инверсия у зрителей. С записью попроще, ибо можно в том же Вегасе реверснуть звук, но это только при записи.
Надеюсь на вашу отзывчивость.
Headphones are equipped with earbuds for both left and right ears to create a symphony. When either one is not working, the sound coming out of that device will be distorted. In this post, we will see what you can do if only one side of the headphone is working.

Why does only one side of my headphones work on my PC?
Only one side of the headphones works on your computer because it’s either not connected perfectly or it’s configured incorrectly. As for the former, all that one needs to do is plug the device in more firmly, and if that’s not happening, clean the port. However, the latter requires you to modify your system’s settings.
If Only one side of the headphones works, follow the solutions mentioned below.
- Check if the headphone is plugged in perfectly
- Plug the headphones into some other device to check
- Disable all enhancements
- Run playing audio troubleshooter
- Change the Sampling rate
- Adjust the sound settings to balance left and right audio
Let us talk about them in detail.
1] Check if the headphone is plugged in perfectly
If you are using a 3.5 headphone, check if it’s plugged into the port perfectly. You may have to apply a little more force to plug the device in. In case you are unable to do so, clean your port as there can be some dust and debris stuck in it, due to which your headphone is not connecting.
2] Plug the headphones into some other device to check
Before changing your system’s configuration, we need first to check if the headphone itself is malfunctioning. For that, plug the device into another computer or phone with a jack and check if you get the same error. In case the headphone is still paralyzed from one side, you either need to get a new one or consult its manufacturer. However, if both sides work when plugged into a different device, go to the next solution to resolve the issue.
3] Disable all enhancements
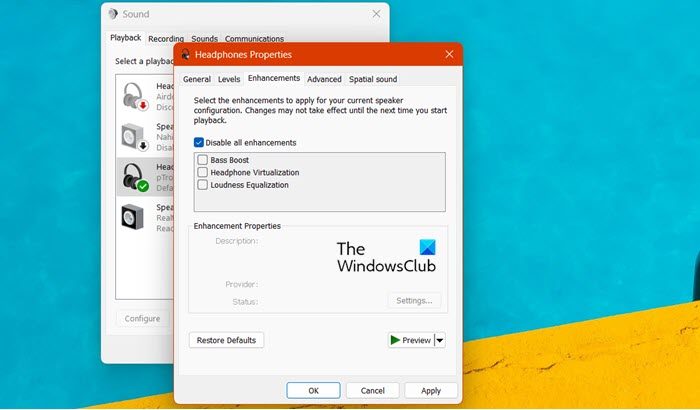
Microsoft has embedded some features into Windows that enhance the audio experience of the users. However, some headphones do not support any audio enhancements and show peculiar behavior. That is why one must disable all of them to resolve the issue. Follow the steps mentioned below to do the same.
- Open Control Panel.
- Change View by to Large icons.
- Now, click on the Sounds icon.
- Then, right-click on the headphones that you currently use and select Properties.
- Go to the Enhancements tab and then tick the box next to Disable all enhancements.
- Finally, click Apply > OK.
Hopefully, after making the changes, check if the issue is resolved.
4] Run playing audio troubleshooter
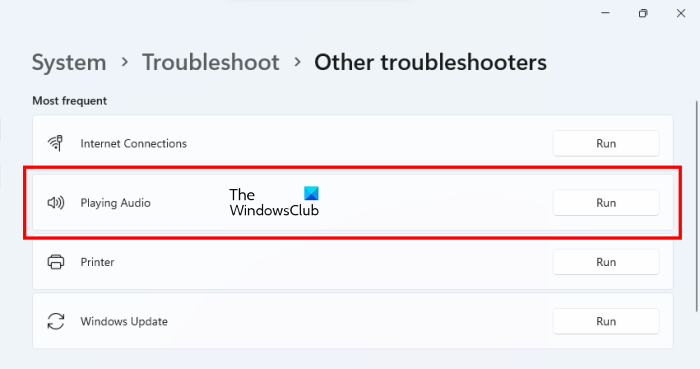
Another method to resolve the issue is by using the playing audio troubleshooter. It is a built-in tool that can scan your system to find out what’s wrong with it and then resolve it. To run the Audio troubleshooter, follow the steps mentioned below.
Windows 11:
- Open Settings.
- Go to System > Troubleshoot.
- Now, click on Other troubleshooters.
- Click on Run button next to Playing Audio.
Windows 10:
- Launch Windows Settings.
- Now, navigate to Update & Security > Troubleshoot.
- Click on Additional troubleshooters.
- Finally, click on Playing Audio and then click on Run the troubleshooter.
You have to follow the on-screen instructions to complete the process. Hopefully, after that, your issue will be resolved.
5] Change the Sampling rate
The sampling rate is the number of audio samples carried per second. We need to change the sampling rate for your device to make it compatible with your system. Follow the steps mentioned below to do the same.
- Hit Win + R, type mmsys.cpl and click Ok.
- Go to the Playback tab, right-click on the device, and select Properties.
- Now, navigate to the Advanced tab and then select the highest sampling rate.
- Finally, click Apply > OK.
Hopefully, this will do the job for you.
6] Adjust the sound settings to balance left and right audio
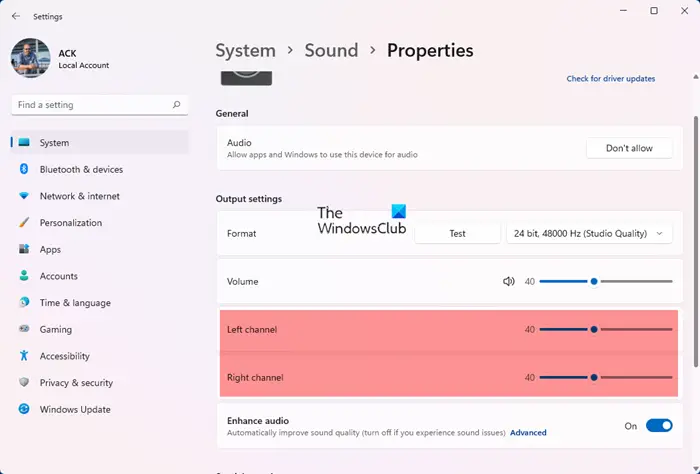
If nothing works, you must change the audio settings to balance the left and right channels.
Hopefully, you can resolve the issue using the solutions mentioned in this post.
Read: Loudness Equalization is missing in Windows 11
How do you fix unbalanced headphones on Windows?
If your headphone is unbalanced, you need to change its settings. For that, open Run (Win + R), type mmsys.cpl and click OK. Now, right-click on your headphone and click Properties. Then, go to the Levels tab and click on Balance. Finally, adjust the left and right channels, and you will be good to go.
Read: Best free Open Source Audio Editor Software for Windows.