Windows 11 contains lots of built-in customization options. You can easily change the wallpaper, accent colors, fonts, and even the style of the icons. But even after making those changes, Windows still looks like, well, Windows. What if you want to make Windows look like Linux?
There are many Linux distros, each with a distinct design style and UI. Ubuntu is widely considered one of the more attractive and usable versions. And with just a little work and some third-party software, it is possible to make Windows 11 look just like it.
But First, Create a System Restore Point
It is always a good idea to create a new system restore point before a project like this. Although customizing the UI and adding themes is relatively safe, there is potential for problems to occur.
A few minutes taken to create a restore point now can save hours of frustration later if things go wrong.
Make Windows 11 Look Like Ubuntu, the Quick Method
There are lots of good themes available for Windows 11 that will make it look like Ubuntu with a few clicks. But you’re going to have to pay for the convenience.
You can find some great Ubuntu skin packs on DeviantArt and Skinpacks.com. The exact installation method will vary, but they usually have clear instructions. The average price is between $4.99 and $9.99, so not a huge amount.
Make Windows 11 Look Like Ubuntu, the DIY Method
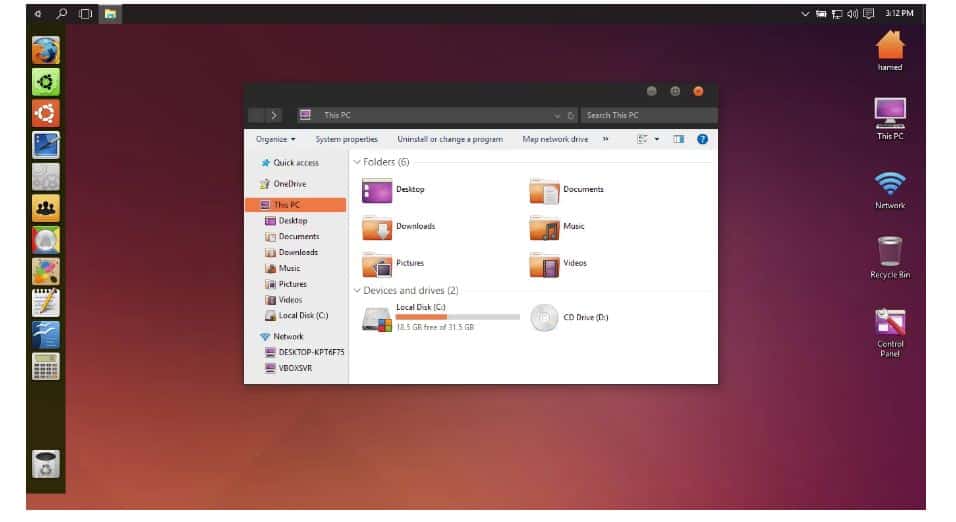
You can make Windows 11 more like Ubuntu without spending anything but time. This method aims to make Windows 11 look like a default install of Ubuntu, not one of the Ubuntu variations such as Budgie.
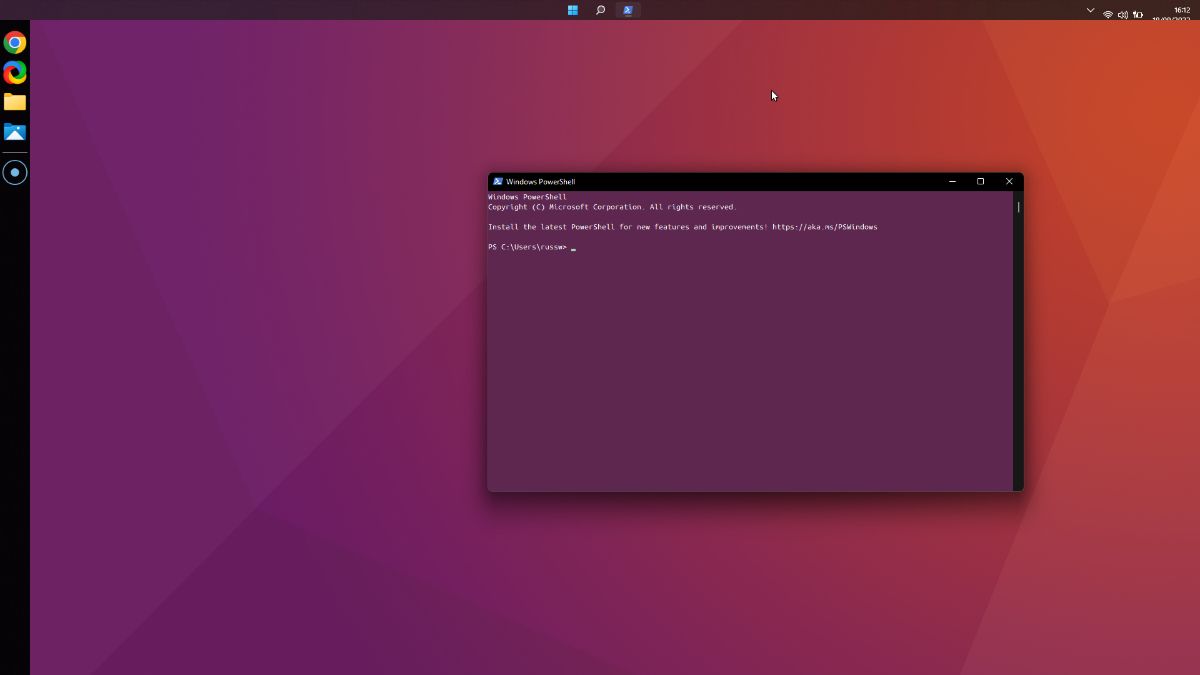
1. Change the Accent Color
Let’s start with the easiest change: the accent colors. Ubuntu uses a core set of colors, as shown on the official Ubuntu website.
- Open Settings > Personalization > Colors, and scroll down to Accent Color.
- Set the Accent Color to Manual and click View Colors.
- In the accent color picker, click on More and then enter #E95420 in the hexadecimal field. Click Done.
- Back in the Colors settings, make sure Transparency Effects are On.
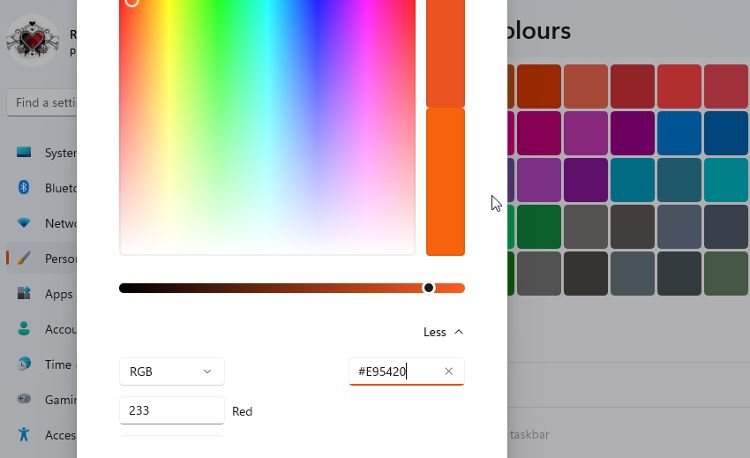
You can also change to Dark Mode, as it looks closer to how the current version of Ubuntu looks.
2. Hide the Desktop Icons
The Ubuntu desktop is generally much cleaner than the average Windows desktop. It doesn’t have app and file icons all over it.
Right-click anywhere on the desktop and choose View > Show desktop icons. Once this is deselected, your icons will vanish. You can get them back by repeating the process if you need to.
3. Change the Mouse Cursor
The mouse cursor style might seem a small change, but it helps give Windows 11 the look of Ubuntu. Download the Ubuntu Cursors pack and extract the files from the compressed folder.
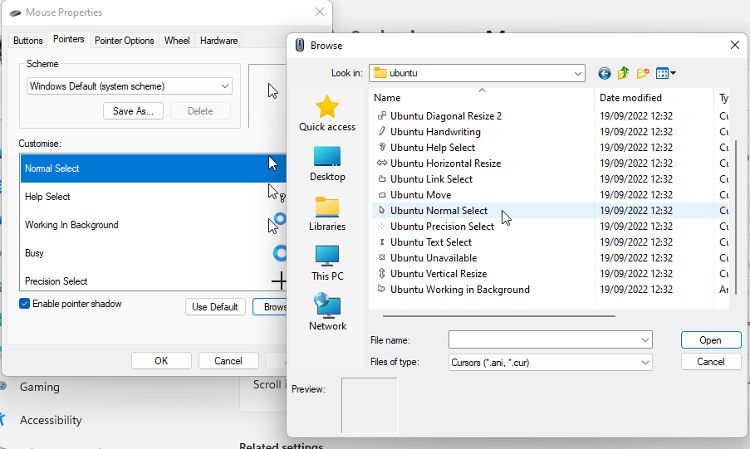
- Open Settings > Bluetooth & device > Mouse > Additional mouse settings.
- Select the Pointers tab, and with Normal Select highlighted, click Browse.
- Navigate to the extracted Ubuntu Cursors folder, select the Ubuntu Normal Select cursor, and click Open.
- Repeat this for all the other mouse cursors, then click Apply.
4. Customize the PowerShell Font and Color
The standard terminal in Ubuntu uses a particular font and color scheme. You can change the style of PowerShell to look like the Ubuntu terminal. You can get the official font from the Ubuntu website. Download the file and extract the contents to a folder.
- Open Settings > Personalization > Fonts.
- Select all the font files in the extracted folder, and drag them into the fonts window.
- Now open PowerShell. You can just search for it in Windows Search.
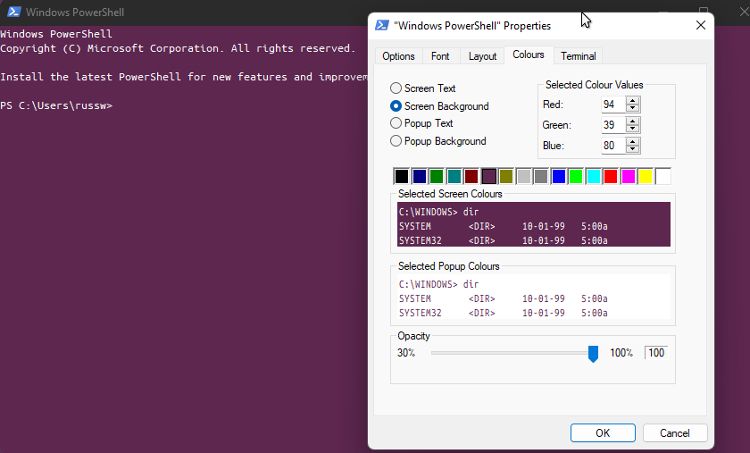
- Right-click on the top bar and select Properties from the menu.
- In the Font tab, select Ubuntu Mono.
- In the Colors tab, select Screen Text and change the color to White. Select Screen Background and change the RBG values to 94, 39, and 80.
- Click Ok and close PowerShell.
7. Hide the Taskbar
Now to deal with the Windows Taskbar. You can do this the quick and easy way or the more complete way.
The easy way is to open Settings > Personalization > Taskbar. Then select Automatically hide the taskbar. It will still be available should you need it, but it won’t be on the screen and spoiling the Ubuntu look.
The more complete way requires an extra bit of software: Taskbar Hider.
- Download the program version relevant to you (32-bit or 64-bit) and extract the file.
- Double-click the program file to run it, and choose the hotkey you want to use.
- You can also set it to automatically hide the Taskbar when Windows starts up.
- Click Ok, and then press the hotkey you chose to hide the Taskbar.
If you prefer, you can move the taskbar to the top of the screen to emulate the top bar of Ubuntu. You will need to use a tool like Taskbar11, which lets you change the location and size of the bar. It also allows you to remove most taskbar icons. It won’t look exactly right, but it can get quite close to the Ubuntu style.
8. Add a Linkbar
One of the key features of Ubuntu is the Linkbar. Luckily, you can download a very similar Linkbar tool for Windows.
- Download the Linkbar file and then right-click it and select Extract all.
- Double-click on the Linkbar64 file, and choose who can use it: everyone or just you).
- You have to select a folder. This is where items you add to the link bar will be stored. Then click Apply.
- Right-click in the Linkbar and choose Settings. Change the color to Black.
- Set the Position on screen option to Left and the Order of shortcuts to Up to down.
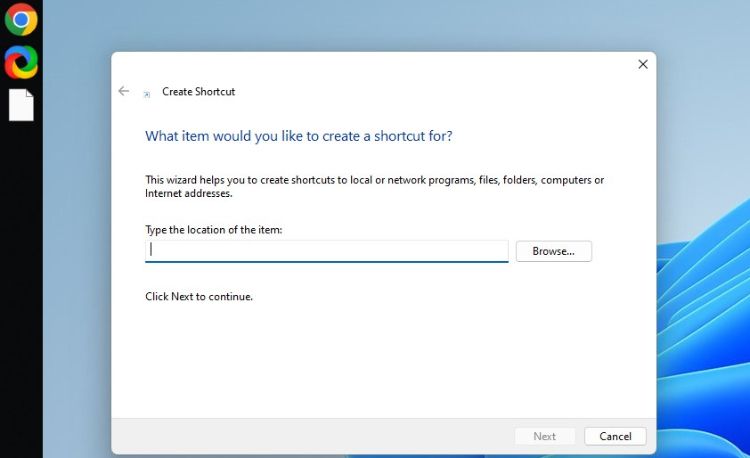
- To add items to the Linkbar, right-click on it and choose New > Shortcut.
- Click Browse and find the app you want to add. You can select a shortcut to the app or the app .exe file. Repeat this for all apps you want to add.
9. Change the Desktop Wallpaper
Changing the desktop wallpaper on Windows 11 is one of the quickest ways to make it look like Ubuntu. There are lots of suitable wallpapers available online that use the recognizable purple and orange Ubuntu color scheme. Our favorite collection can be found at Wallpaper Access.
10. Install WSL and Ubuntu
This final step is completely optional. If you are happy just having Windows look like Ubuntu, you don’t need to do anything more. But for the full Ubuntu experience, you will need WSL.
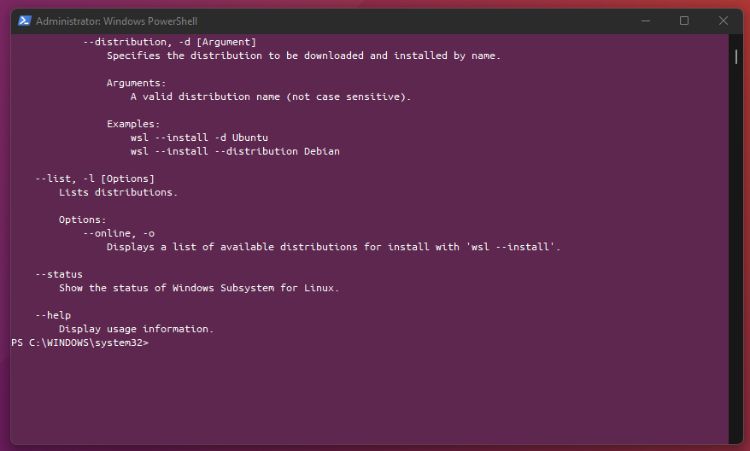
- Open PowerShell as an Administrator and type: wsl — install.
- Download and install Ubuntu from the Microsoft Store. This may take a while as it is around 600MB.
- Once it is installed, you can open Ubuntu from the Start Menu. You can also place a shortcut to it in the Linkbar.
- A terminal window will open, allowing you to enter Linux commands as if your Windows computer was a Ubuntu computer.
Reverting to Windows 11 Default Style
Hopefully, you created a restore point, as we recommended at the beginning. If so, you can restore Windows using System Restore if you don’t like the end result.
If you didn’t, or if you don’t want to lose other changes you have made, you can reset each step.
- Uninstall software such as the Linkbar and Taskbar Hider.
- Change the accent color to whatever you prefer.
- Change the mouse pointer back to default.
- Unhide the desktop icons.
- Revert the PowerShell style back to default.
If you went for the quick method of installing a Ubuntu skin pack or theme, you can usually uninstall it in Add or Remove Programs. Check the instructions for the individual theme or skin pack for additional uninstall advice.
Make Windows Look Like Ubuntu Linux
If you want to bring some of the Ubuntu style to Windows 11, you can do so quite easily. Buying a pre-made skin pack is the quickest and most complete method. But with a few pieces of free software and some easy style changes, anyone can make Windows 11 look more like Ubuntu without spending a cent.

Are you in the thought of shifting from Windows 11 to Linux? But, it might be your work or favorite game that wants you to keep on using the same OS. Is the wide variety of software, games and ease of use? Well, you can follow any of the 8 steps below to make Windows 11 look and feel like a Linux OS and even more specifically like Ubuntu or Mint. Doesn’t that sound real? It is!
As a comparison window does not provide users with more customization options than Unix but it doesn’t mean it cannot be tweaked to look better.
Today, many third-party applications are available in the market that claim that they can change how it looks, but the issue is that they don’t have much stability and can also break various services.
Let’s dive into it..
Before you change the look of Windows
#1 – Using a premium theme or skin
Many themes are designed by Deviantart for all versions of Windows which look much like Linux. You can find many freemium ones from authors who make them as a hobby.
#2 – Use a custom Distro
There are some complications when we go for the free alternative as need to collect pieces from different places. The worst part, the internet is loaded with fake apps. In all this, we don’t know if they are going to break the OS in forcing modification.
Windows on the other hand do not provide users with much flexibility in modifying its default settings. Therefore we need to make use of what is available and we cannot change the system font plus the taskbar has no customization as well.
So what we are left with are third-party applications. These might not integrate with the system well and are not what we seek. So, we have made for you a list of online resources in various sections in which each is used to tackle one aspect of customization.
If we say that we need to customize it to look like Linux, then it is quite a huge topic. Keep in mind that no two distributions look the very same so what we are left with is the customization to look like default Ubuntu.
You would ask, why not just download and install Ubuntu? You will need to learn Linux commands and how to navigate the terminal CLI. The choice is yours.
Prerequisite: Make sure your know-how themes and skin packs work and how to install them before you continue. This will make the guide much easier to follow.
Make your Windows 11 PC or Laptop Look Like Linux – Give it a Ubuntu or Mint Feel
Alter your mouse cursor
- You need to download Ubuntu cursors.
- Once done, head over to the “download” folder.
- Hit file download and choose “extract all”.
- After this click the “start menu” and type in “mouse settings”, this shall bring up a new window.
- Choose “additional mouse options” from under “related settings”.
- Head over to the “pointers” tab.
- With “normal select” choose, you need to click on “browse”.
- Now, go to the newly extracted folder.
- Choose “Ubuntu normal cursor file” and hit “open”.
- Hit “apply”, the cursor of the mouse should now change.
- For all cursor types just repeat steps 7-9.
- Hit “OK”.
Give your accents a new life
- You need to click right on the desktop and then choose “personalize”.
- Hit “colors”.
- Next, you need to enable “transparency efforts” if they are not enabled already.
- Go down to colors and then choose “custom color”.
- Choose “more”.
- Then you need to enter “#S6E349” as hex color code and hit “done”. This is the dominant color code used in Ubuntu according to their official site.
ALSO CHECK: The Best Ubuntu GTK-based Themes To Install.
Hideaway your icons
- You need to click right on the desktop and head to “View”.
- Choose “show desktop icons” from under the expanded view to uncheck it.
- The icons of the desktop should disappear. Now, to get them back all you need to do is repeat steps 1 and 2 plus you can also hide the recycle bin only.
Hide Taskbar
- You need to grab the “taskbar hider” app. Version 11 comes with a built-in way of permanently hiding the taskbar so we shall install this instead. You need to choose 32 or 64 bit as required.
- As it gets downloaded you need to extract the app to the “downloads” folder.
- Next, you need to open “PowerShell” or “Command Prompt” (from the keyboard press “Windows Key” + “X”.
- After this, go to this location by typing in “cd Downloads”.
- It would be best if you typed “TaskBarHider.exe –hide –exit”. This shall hide the taskbar.
- To get it back you need to type in “TaskBarHider.exe –show –exit”.
Give PowerShell a new look
- First, you need to download Ubuntu Fonts.
- Once downloaded, you need to extract the “downloads” folder.
- Click right on the “desktop” and choose “personalize”.
- Next, select “fonts” there from the next navigation pane.
- The open folder has been extracted.
- Then you must choose all the fonts and drag and drop them to the “fonts” window. After this, you need to wait until they finish the installation.
- Open “PowerShell”.
- Click right on the window bar and then choose “properties”.
- Next, choose the “font” tab.
- Go down and choose “Ubuntu Mono” there from the list of fonts.
- If required, increase size.
- Hit “OK”.
You need to change the colors so please do:
- First, you need to open the “PowerShell”.
- Click right on the window bar and then choose “properties”.
- Choose “colors”.
- After this choose “screen text” and hit “white palette”.
- Choose “screen background”.
- There under the red, green and blue values, enter in 94, 39, and 80 respectively. This shall present you with Ubuntu’s official color palette.
- Hit “ok”
Add Linkbar Launcher
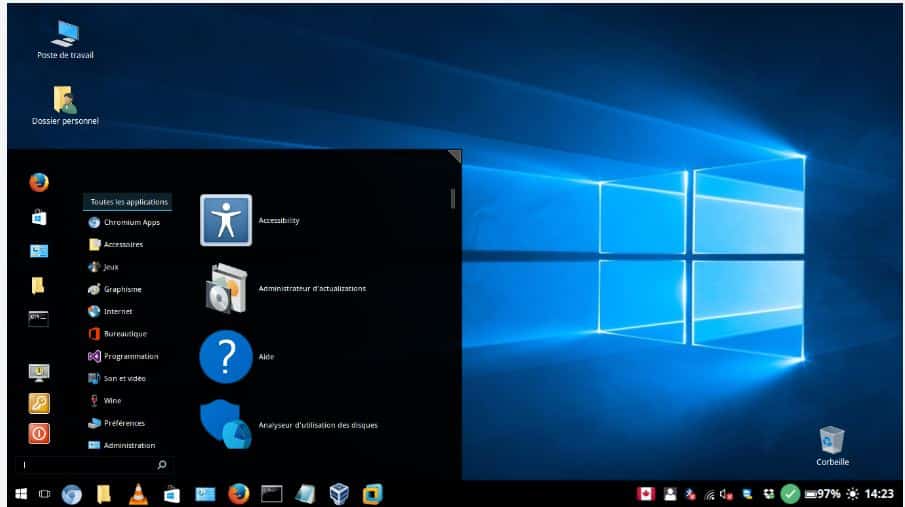
- First, you need to download the “Linkbar utility”.
- Once done, you need to extract the “downloads” folder.
- After this, you need to open up the extracted folder and then open “LinkBar.exe” or “LinkBar.exe (32-bit).
- For now, link bar appears on the screen’s left screen, on this click right and choose “settings”.
- You need to be sure that the style is set to “accent” in order to match with the color scheme of the window.
- Now if you wish to add a launcher, again click right on the “Linkbar” and then choose “shortcut” therefrom “new”.
- Hit “browse”
- Next, open up a folder location or browse to your desired app.
- Choose “ok”
- Hit “next”.
- You need to type in name of the new launcher and hit “finish”.
FEATURED: Best XFCE Themes for Ubuntu and Arch.
Add Ubuntu or Mint Wallpapers
- You need to get the “Ubuntu Wallpaper”.
- Head towards the “downloads” folder and click right on this.
- Choose “select as desktop background”. Dark wallpapers work well as well.
Tip: If you want to save time, look for a Linux Mint theme that you like and it will do all of this for you.
Use Windows Subsystem for Linux
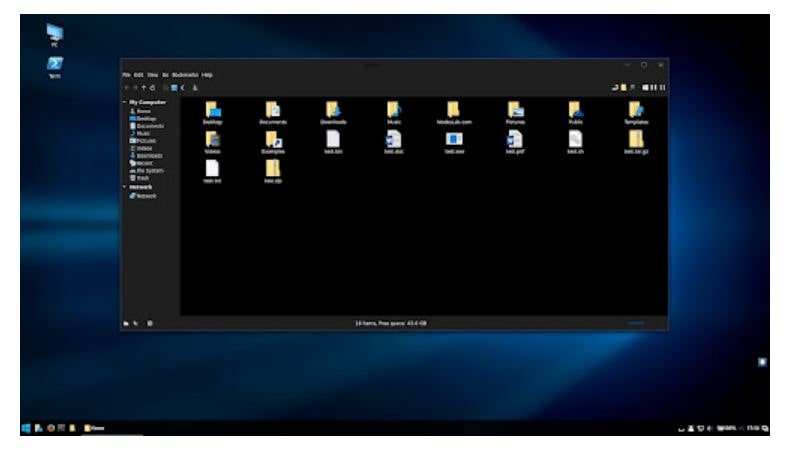
- First, you need to open “PowerShell” in “Administration mode”.
- Type in “wsl –install”. This might take some time to complete.
- Head towards “App Store”.
- You need to make search for “Ubuntu” and open it.
- Choose “install”.
- As the process of installation is completed, launch “Ubuntu” there from the “start menu”.
- You shall see a terminal window pop-up that can be used to enter commands on Windows as if Ubuntu were a machine.
One of the most ambitious projects given out by Microsoft is WSL. It is used to show its commitment to empowering Linux. Microsoft aims to make more contributions towards WSL so that it becomes even more powerful shortly. To put a long story short, it will feel more like Linux in upcoming new versions. You will need to change the colors in the terminal with the following steps:
- You need the first click right on the window bar of WSL and then choose “properties”.
- Choose “colors”.
- Choose “screen text” and then hit “white palette”.
- Choose “screen background”.
- From under red, green and blue values, you need to enter in values 94, 39 and 80 respectively.
- Choose “fonts”
- Choose “Ubuntu Mono”
- Hit “Ok”.
RECOMMENDED: Best Linux Distro To Use If you are switching from Windows.
Is it worth transforming Windows 11 to look like Ubuntu?
I know this is more tech and geek savvy when it comes to desktop customization. However, if you are an Ubuntu or Mint fanboy then it is a must I say. Windows 11 has many benefits hence why you would want to know how to make it look or feel like Linux. This will save you from actually having to use the terminal and be limited to a handful of alternative open-source software.
I am very interested in hearing your thoughts about this, please leave your desktop screenshots and feedback in the comments.
На сегодняшний день существуют сотни самых различных утилит для изменения внешнего вида Windows. C их помощью можно изменить практически любой элемент интерфейса системы, добавить новые панели, заменить стандартные иконки, использовать различные гаджеты Рабочего стола и многое другое. Более того, умело комбинируя возможности сторонних утилит и встроенные настройки системы, можно добиться почти полного визуального сходства с другой операционной системой, например MacOS или Ubuntu. Народные умельцы создают специальные пакеты для трансформации внешнего вида ОС (SkinPacks). Сегодня мы вам продемонстрируем самые интересные из них.
Надо сразу оговориться, что такое скинпаки и что от них можно ожидать. Как правило, это комплект хорошо известных утилит и интерфейсных твиков, собранные в один инсталляционный пакет. Установка скинпака обычно выполняется в виде пошагового мастера, так что вы можете сразу определить нужные вам опции. Так как в процессе модифицируются системные файлы, то для вступления изменений в силу требуется перезагрузка.
8 Skin Pack 10
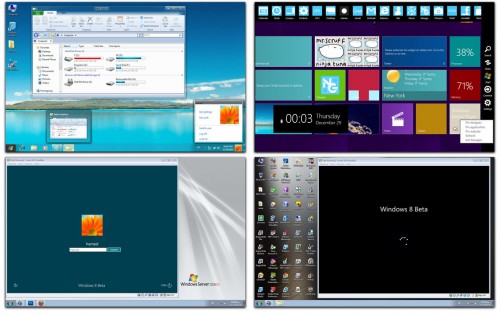
Придает вашей системе (Windows7, XP) вид будущей Windows 8.
Lion Skin Pack 13
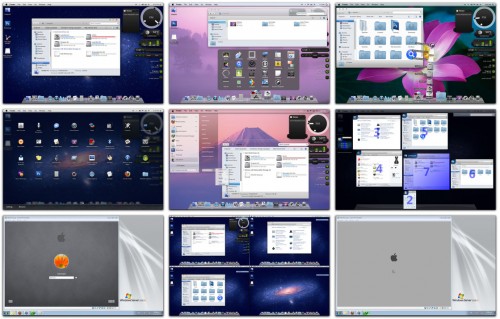
Превращение Windows 7 или даже XP в Mac OS X Lion.
ubuntu Skin Pack 8.0
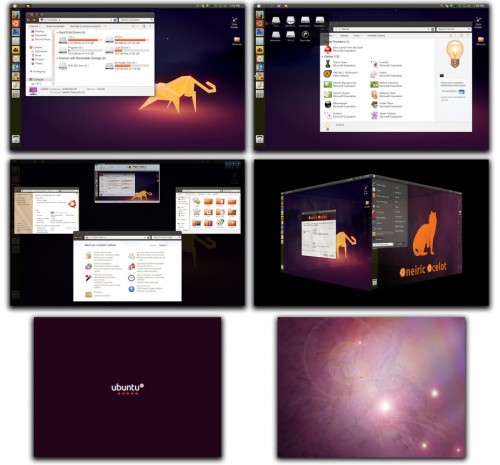
Ubuntu на вашем Рабочем столе (Windows 7 или XP).
Blue Mango Skin Pack 1.0
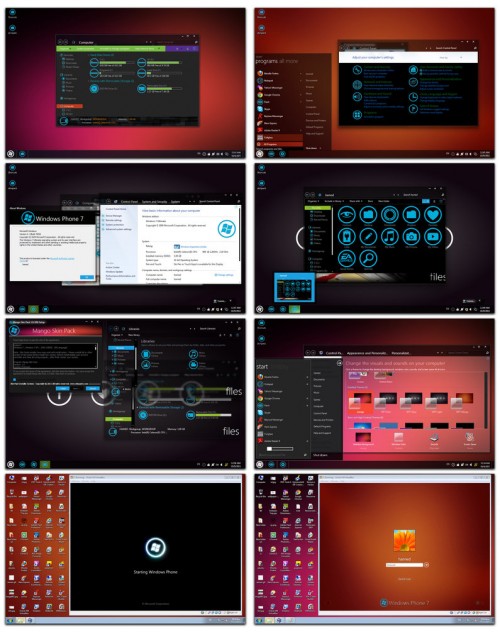
Этот скинпак позволяет трансформировать интерфейс Windows 7 в последнюю версии мобильной платформы от Microsoft. Доступен в двух вариантах — светлом и темном.
Другие варианты изменения оформления операционной системы, в том числе в стиле Android 4.0, iOS, Gnome и так далее, вы сможете найти на этой странице.
И в заключение, хотелось бы отметить два момента. Во-первых, применение скинпака производит лишь внешние изменения интерфейса и устанавливает некоторые дополнительные утилиты, имитирующие работу другой ОС, так что не надейтесь на чудесное превращение вашего компьютера в Mac. И второе, использование скинпака во многих случаях затрагивает важные системные файлы, так что теоретически существует, хотя и небольшая, возможность сбоев и ошибок. Поэтому предварительно лучше сделать копии важных данных и контрольную точку восстановления системы.
One of the best things about Windows is the ability to personalize its appearance to your heart’s content. With the release of Windows 11 just a day away, users are heavily customizing Windows Explorer and other elements of the user shell experience. If you’re a fan of Ubuntu and want Windows 11 to look like Ubuntu from the 2010s, here’s how to do so.
Windows 11 is chock-full of customizable options which, if the user has a particular visual element in mind, can be made to look like just about any other OS out there. Here are the steps you need to follow to make Windows 11 look like Ubuntu.
Step 1: Download necessary files
First things first, grab all the necessary files. There are about four things that you need to download. But don’t worry, we’ll go through them one by one so you know exactly what to do:
1. Ultra UX Theme Patcher
Firstly, download the Ultra UX Theme Patcher. Clicking on this link will take you to Manuel Hoefs’ website that hosts the theme patcher. Click on UltraUXThemePatcher at the top.
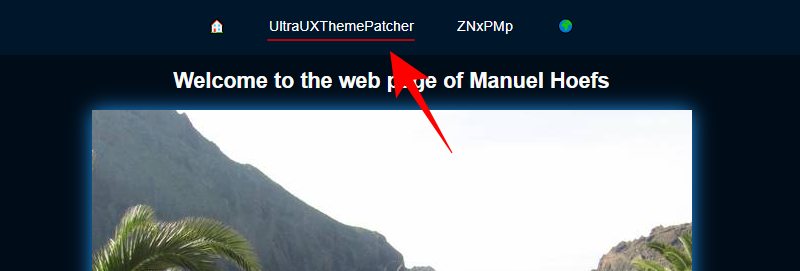
Then click on UltraUXThemePatcher under “Download”.
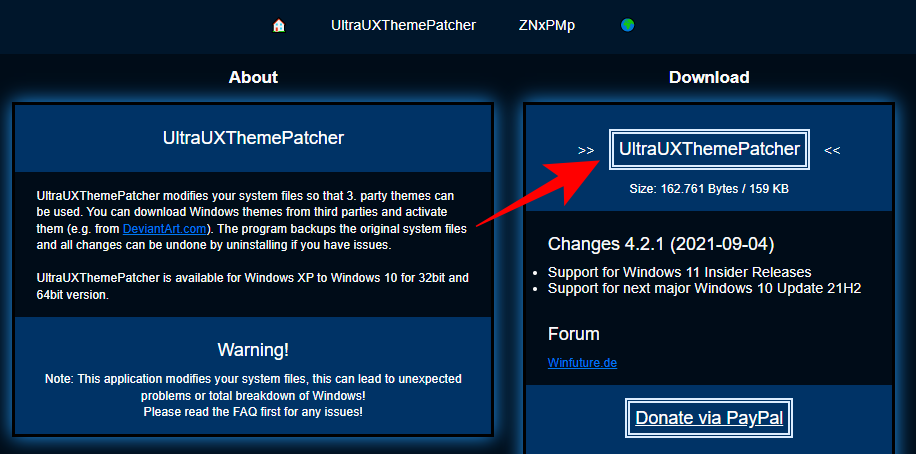
Once the download finishes, move on to the next file to download.
2. KOZ-Theme
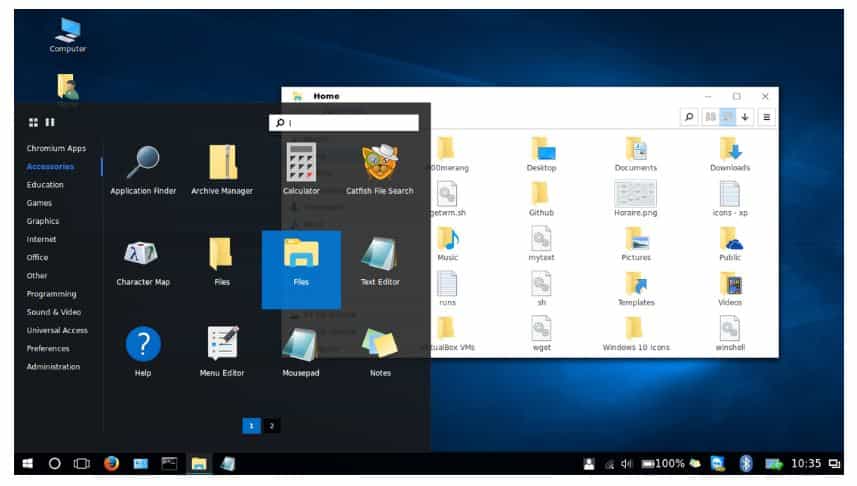
This is the Ubuntu theme that will make Windows 11 look like Ubuntu, or at least most of its constituents. Download the KOZ-Theme here.
You will require a DeviantArt account to download this theme so make sure you sign up and log in if you haven’t done so. Scroll down and click on the Download icon under the screenshots.
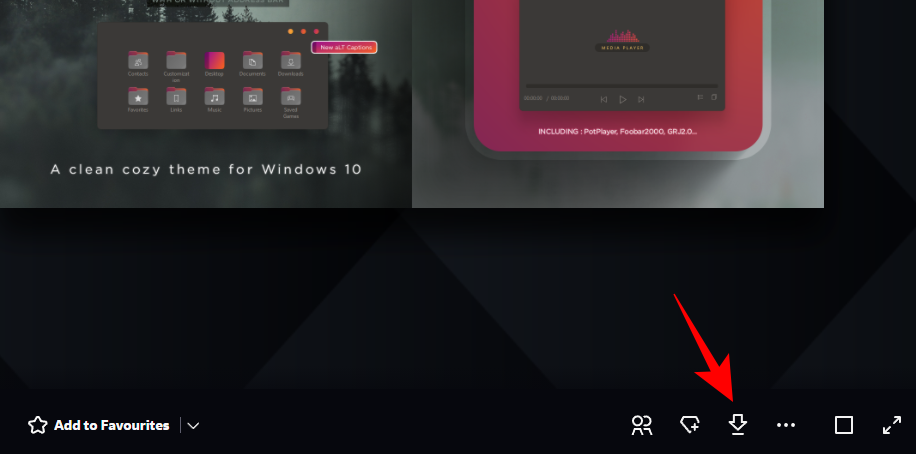
This will download the theme as a zip file.
3. 7TSP Icon Patcher
This is required to patch the icons that are found within the KOZ-Theme above. Download the 7TSP Icon Patcher here.
Again, click on the Download icon under the screenshots.
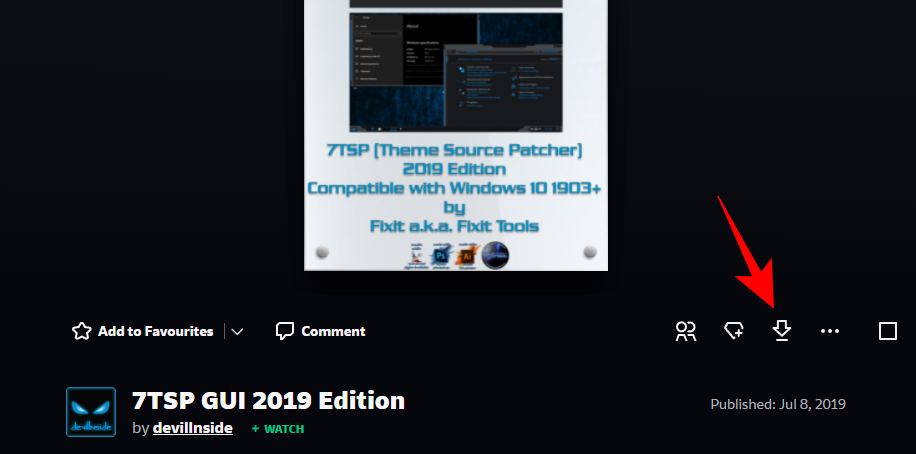
The file will be downloaded as a zip file.
4. Old New Explorer
This is required to modify the Explorer’s functions to make them look like that of Windows 7 and then the theme will further patch the Explorer to look like Ubuntu. Download the OldNewExplorer here.
Click on the Download now button on the page linked above.
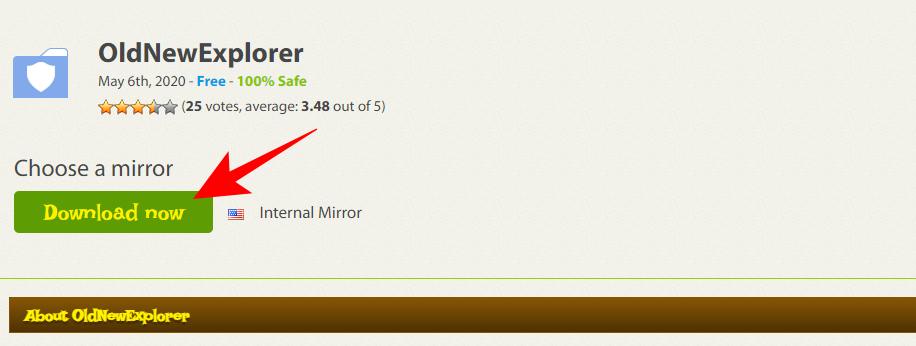
Step 2: Install Ultra UX Theme Patcher
Next, we’re going to install the UltraUXThemePatcher. Simply double-clicking it may not work and Windows will throw up a “Windows protected your PC” message and won’t allow you to run it.
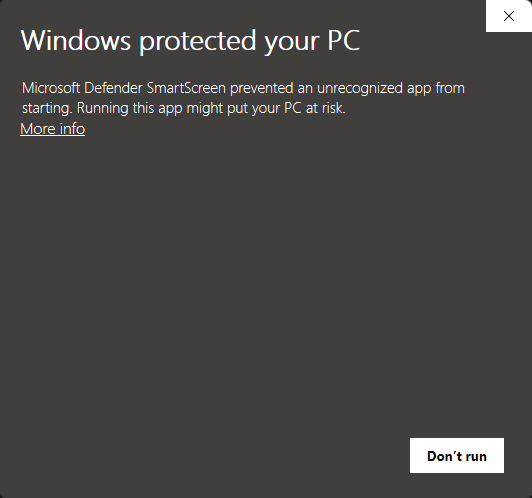
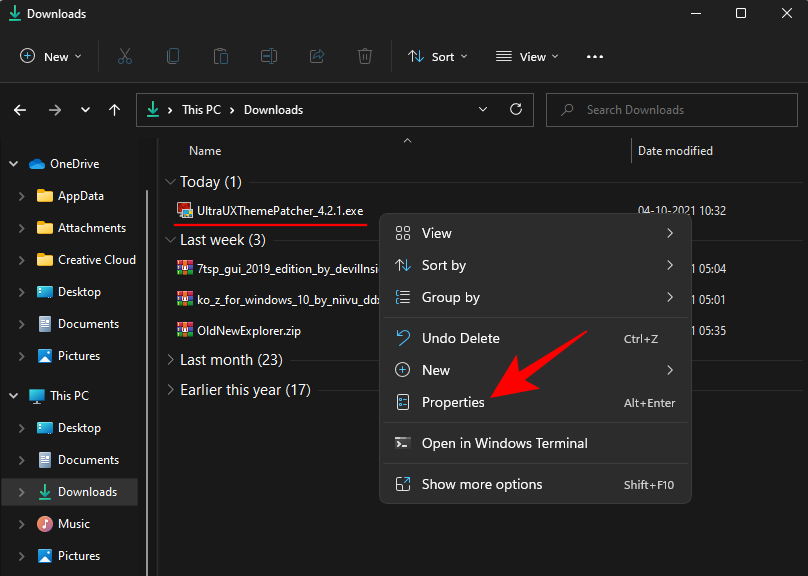
To bypass this, right-click the setup file and click Properties.
Under the “General” tab, next to “Security” at the bottom, you will see the Unblock option. Make sure there’s a check next to it. Then click OK.
Now you can double-click the executable to run the setup. Go through the on-screen prompts and install UltraUXThemePatcher.
Step 3: Unzip ‘Ko-Z’ zip and Apply Theme
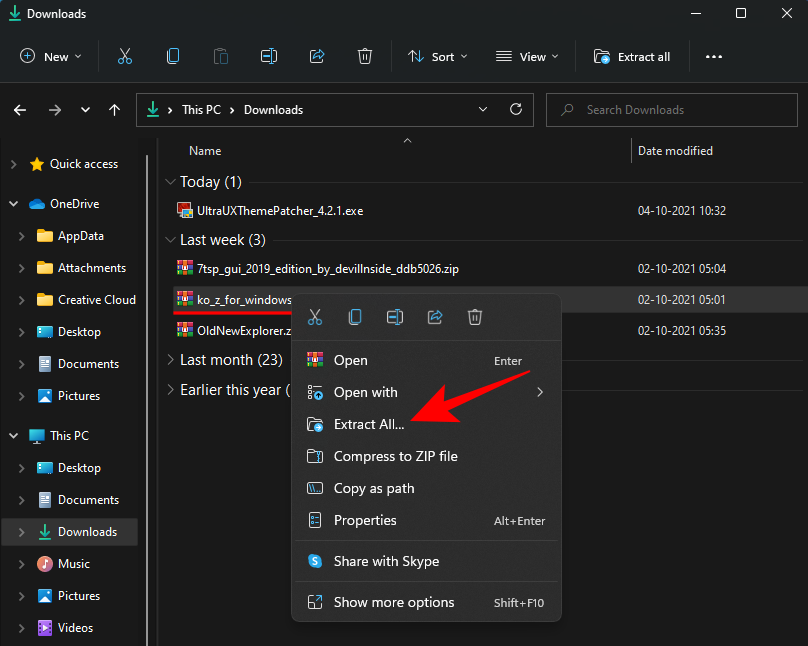
Now go to the folder location where the ‘Ko-Z’ zip file was downloaded. Then unzip it using a file archiver. If you don’t have one, right-click on the file and select Extract all.
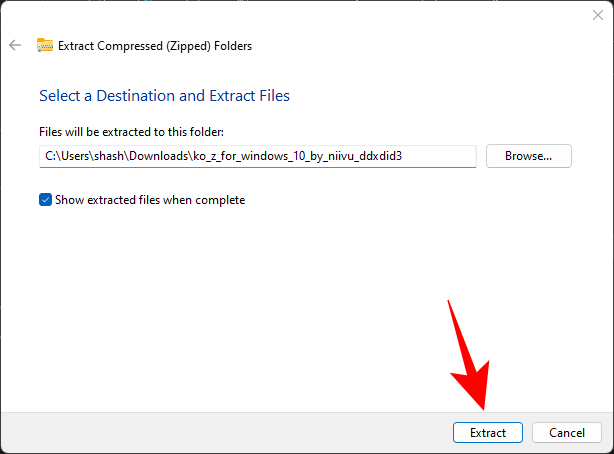
Click on Extract.
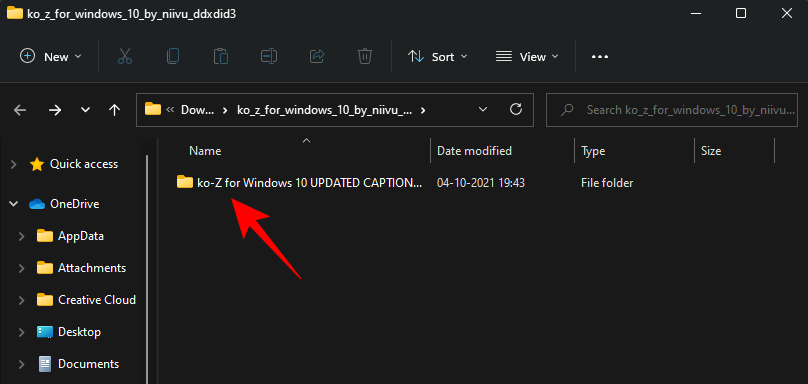
Once the files are extracted, double-click on the ‘ko-Z’ folder.
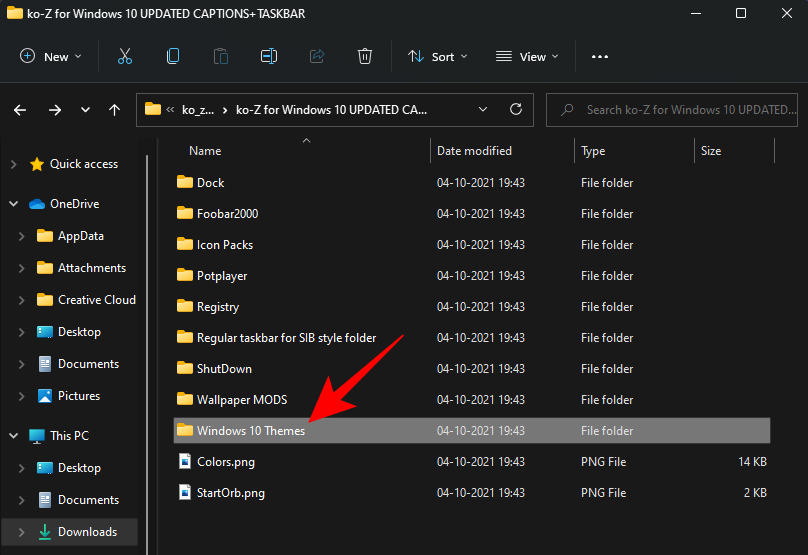
Then double-click on the ‘Windows 10 Themes’ folder.
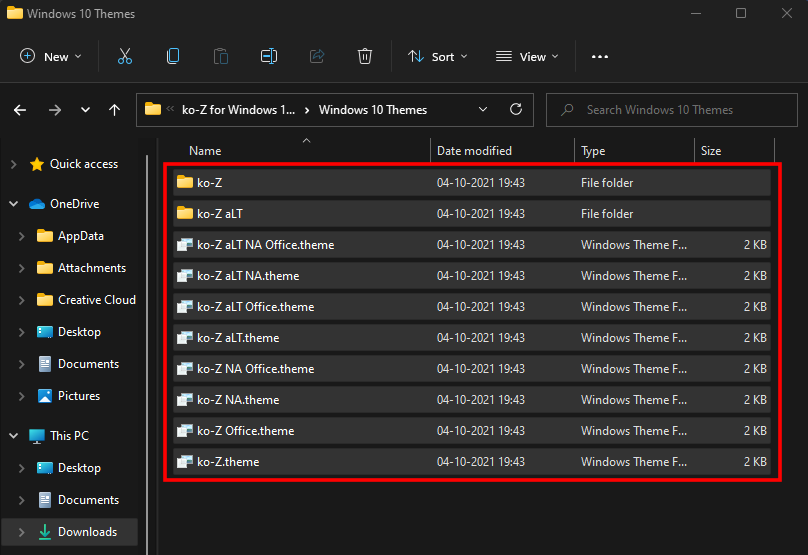
Copy all the files in this folder. An easy shortcut is to press Ctrl + A to select all, and then press Ctrl + C to copy the files.
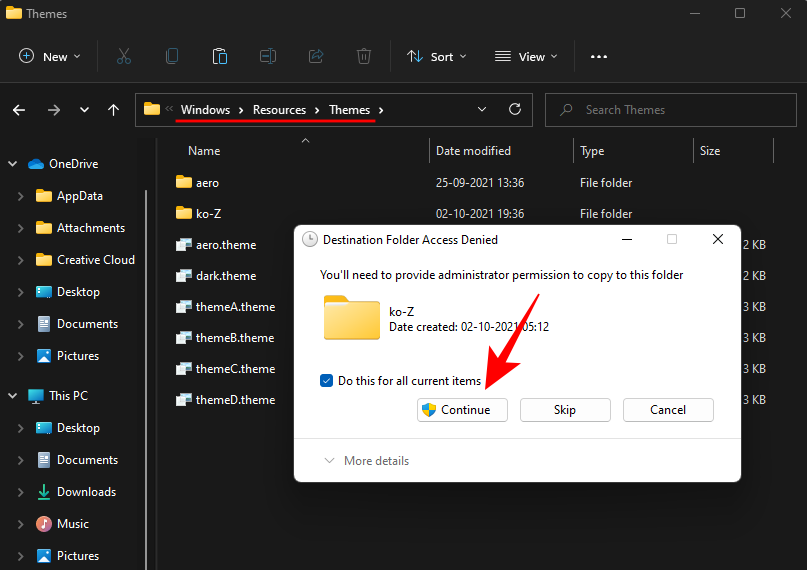
Now navigate to the following address:
C:\Windows\Resources\Themes
Paste the files here (press Ctrl + V). You’ll be asked to provide admission permissions. Check on the box “Do this for all current items”, then click Continue.
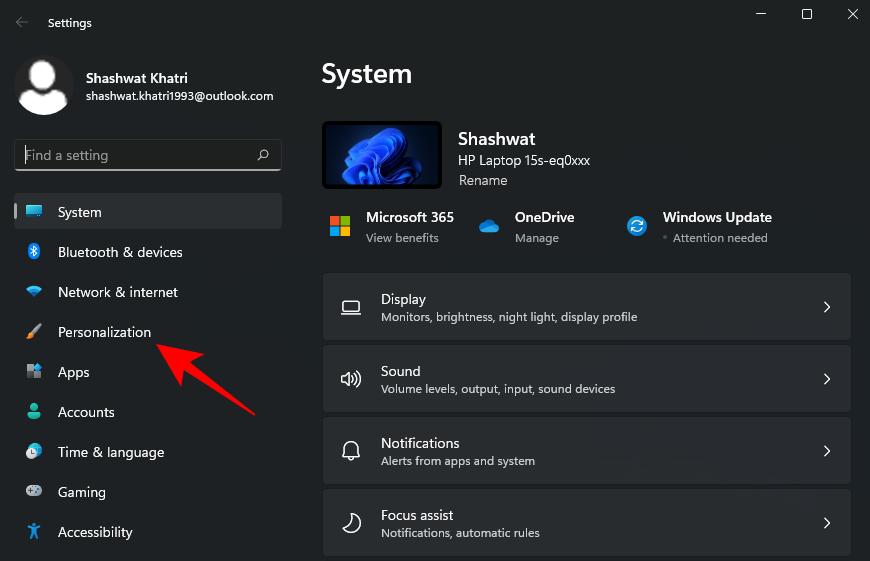
Once the files are pasted, press Win + I to open Settings and click on Personalization in the left pane.
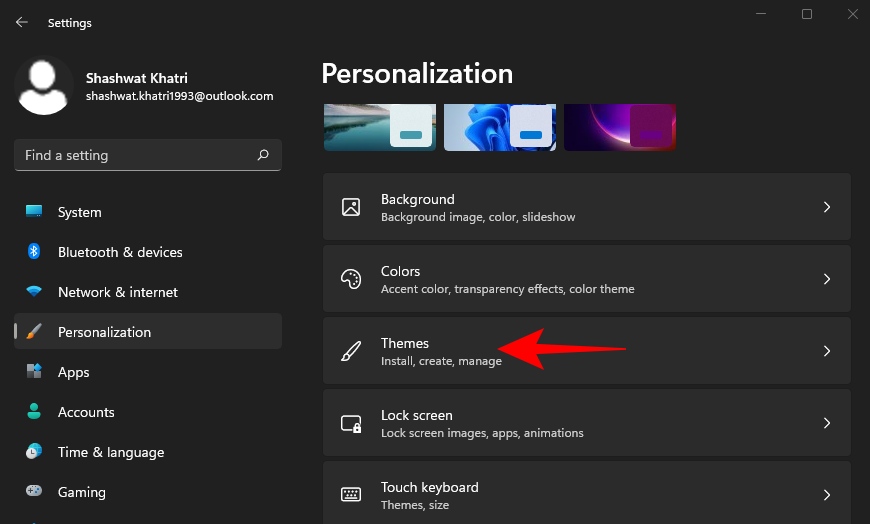
On the right, scroll down and click on Themes.
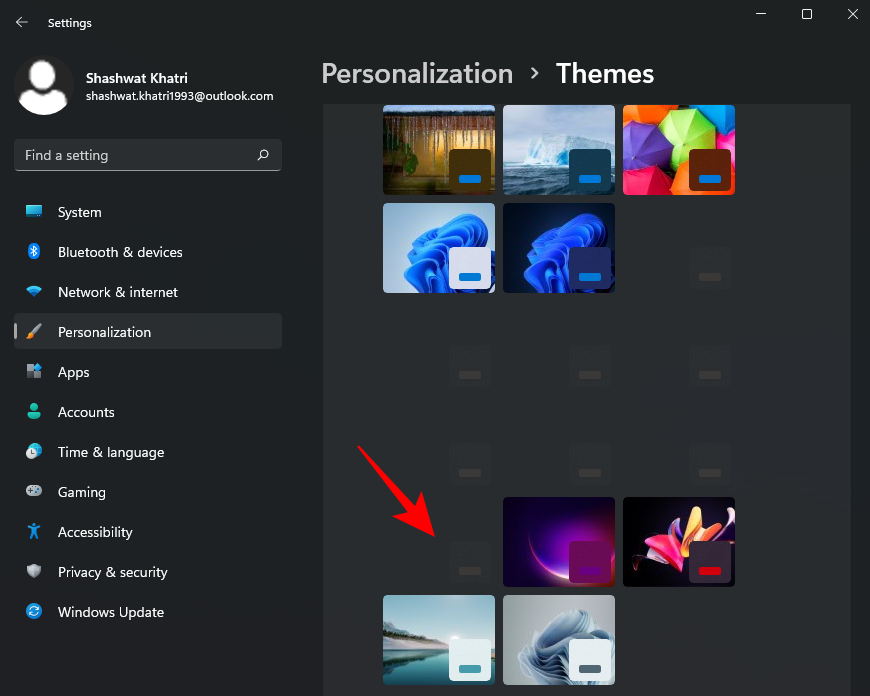
Here, you will see a bunch of themes. But the ones we have copied won’t have a preview. Select the last theme without a preview (this is the main ‘Ko-Z’ theme).
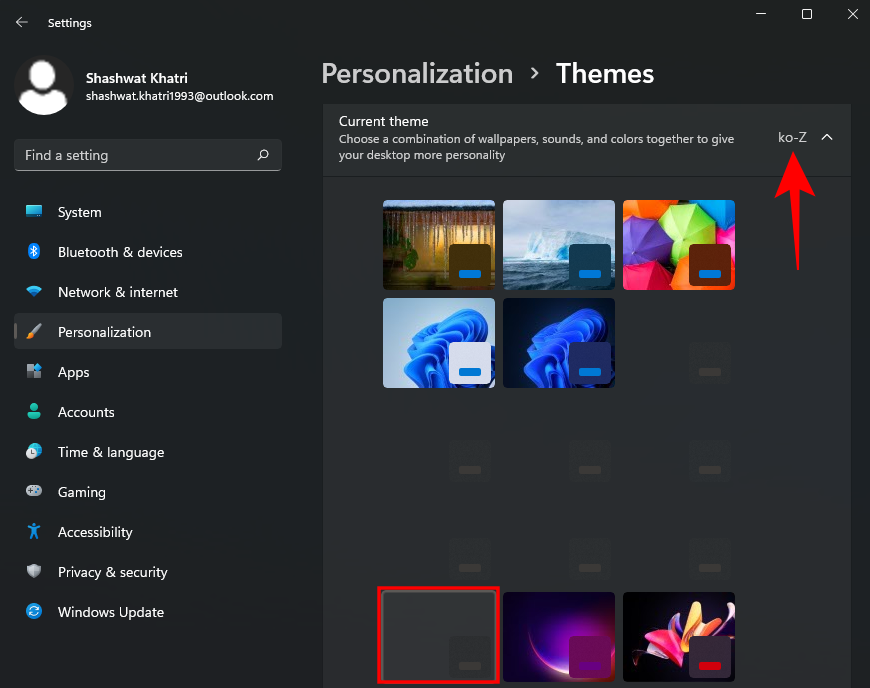
Once the theme is applied, make sure that it says ‘Ko-Z’ next to “Custome theme”.
Step 4: Unzip ‘7tsp GUI’ zip and apply Icons
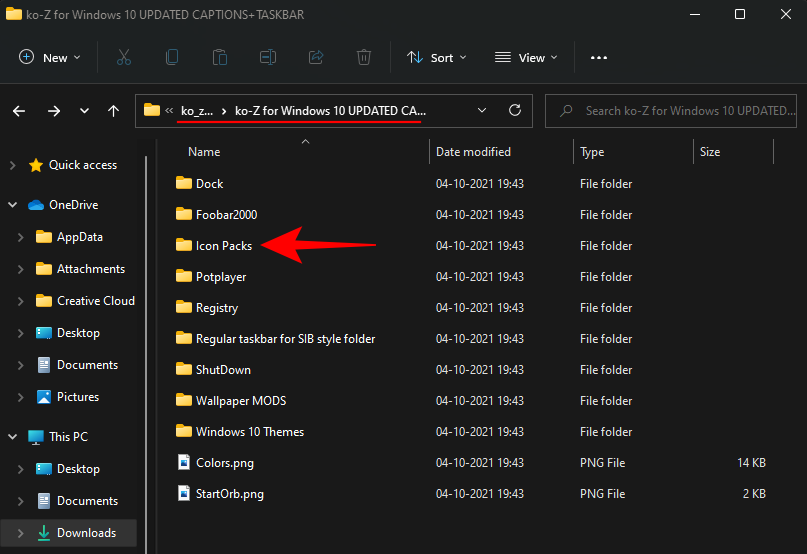
The icon pack is available in the same ‘Ko-Z’ theme folder that we extracted in the previous step. But we have to make a slight change to make sure it is recognized. So go back to the ‘Ko-Z’ folder and double-click on the ‘Icon Packs’ folder.
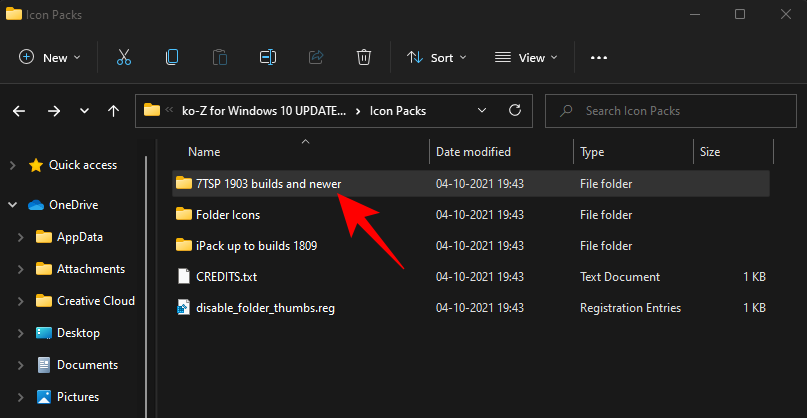
Then go into the ‘7TSP 1903 builds or newer’ folder.
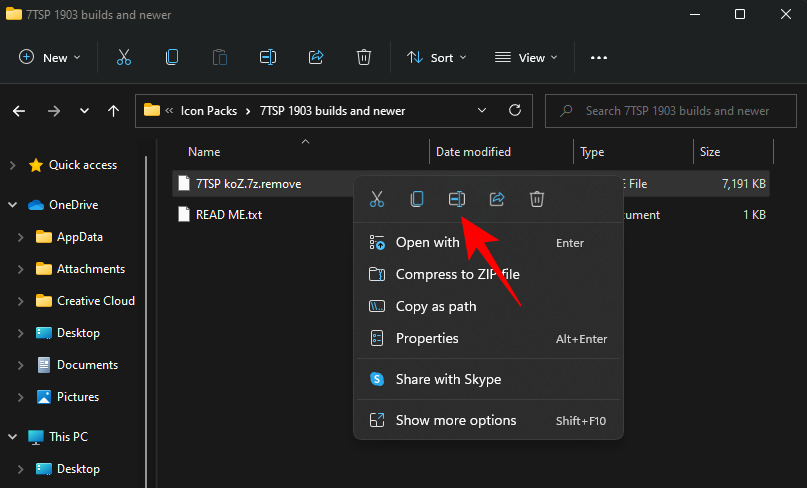
Now right click on the ‘7TSP’ file and click on the rename icon.
Delete the ‘.remove’ at the end of it and hit Enter. When prompted, click on Yes.
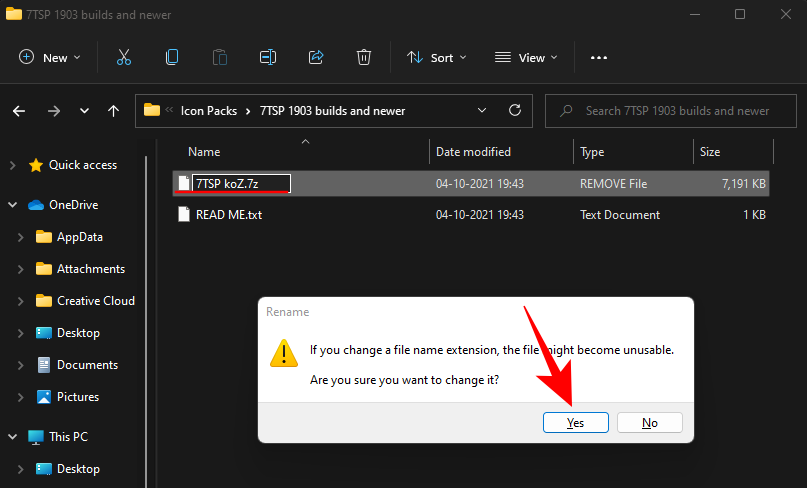
This will turn this into an archive. There’s no need to unzip this file and we will come back to it later. Instead, unzip the previously downloaded ‘7tsp gui’ zip file (use either a file archiver app or right-click on the file and select ‘Extract all’ as shown previously).
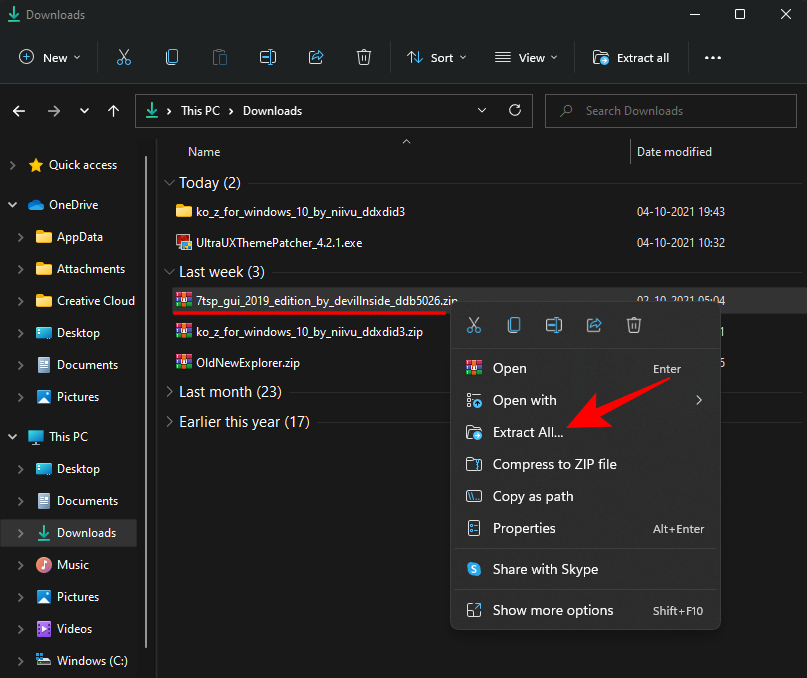
Once extracted, right-click on the ‘7tsp GUI’ file and click on rename.
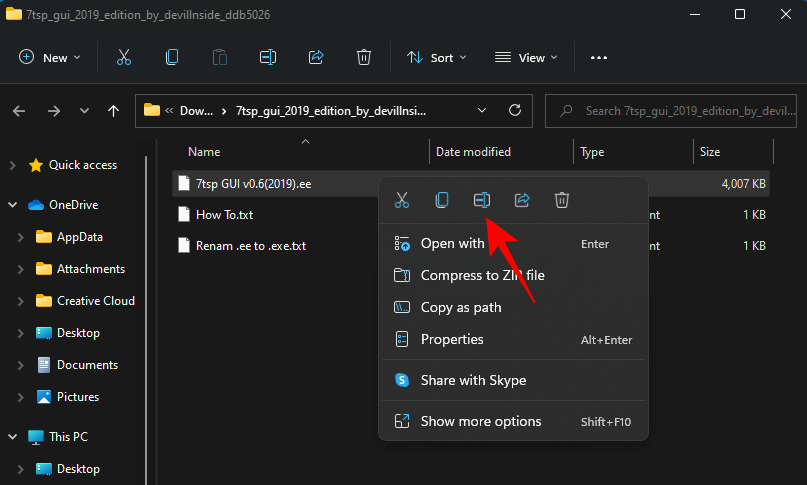
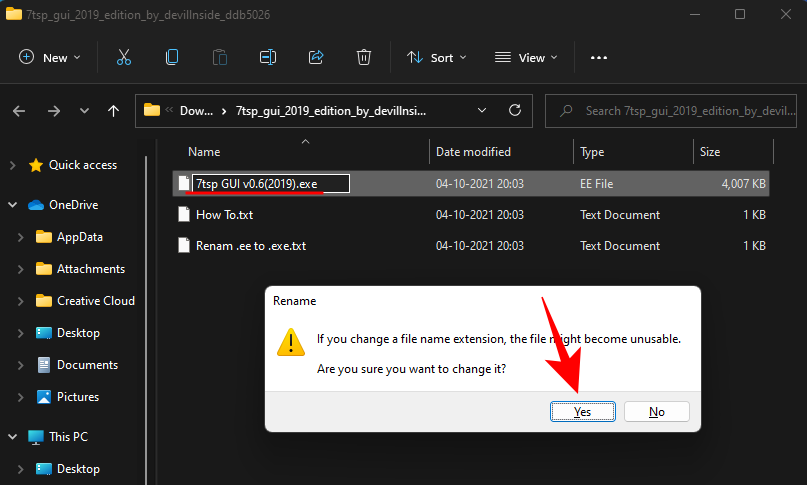
Change the ‘ee’ at the end to ‘exe’, then hit Enter. When asked to confirm, click Yes.
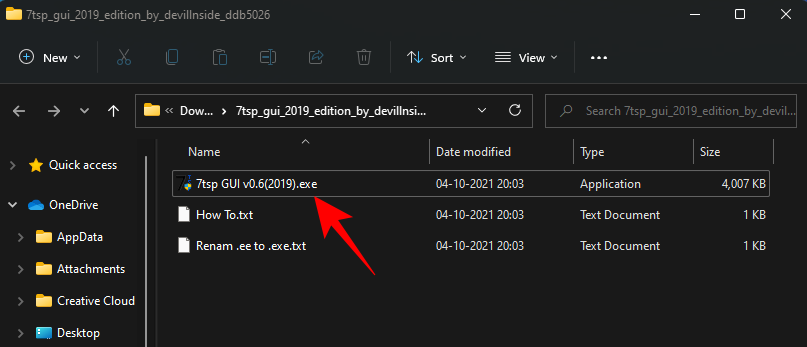
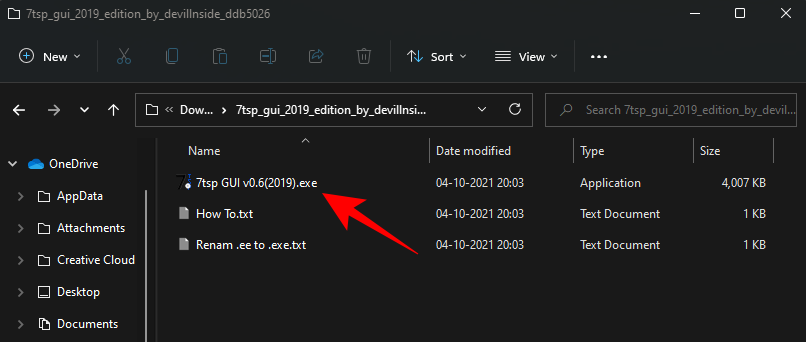
Now run this executable file.
Click on Yes.
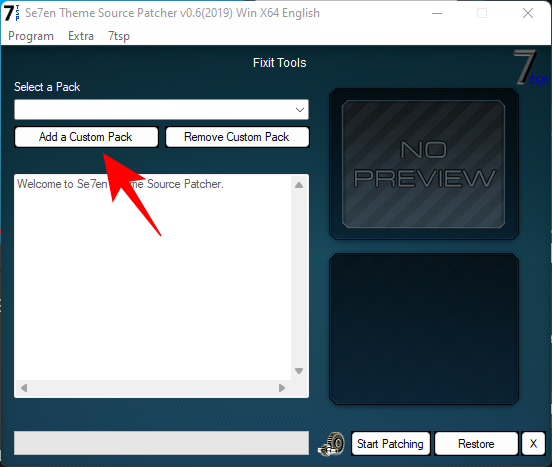
This will open the ‘Se7en Theme Source Patcher’. Click on Add a Custom Pack.
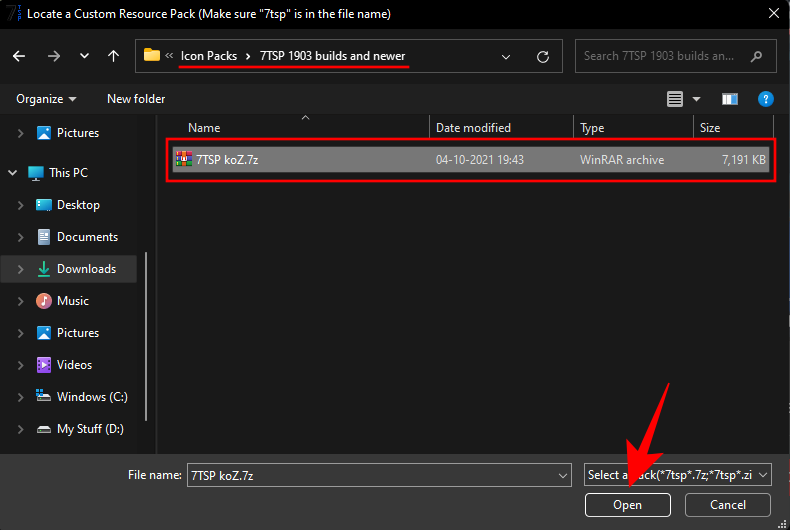
Now navigate to the ‘7tsp’ zip file that we renamed earlier in the ‘Icon Packs’ folder, select it, and click on Open.
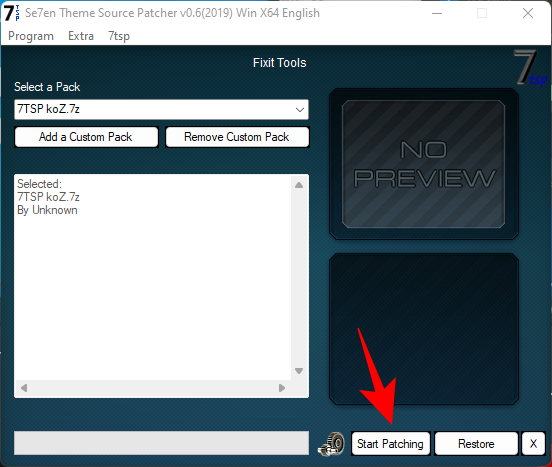
Click on Start Patching.
Then click Yes.
You will have to wait quite a while for the process to finish. Once complete, you’ll be asked to reboot your system. Click Yes.
Step 5: Change Registry files to get Folder icons
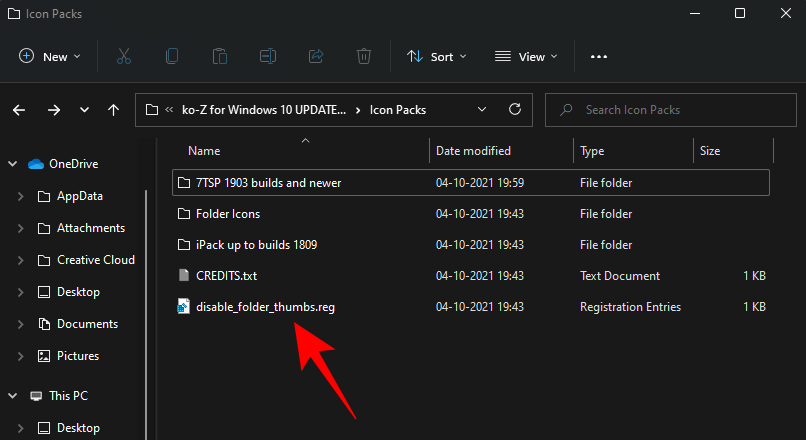
After the restart, you will see the changes applied to most icons. However, the folder icons would remain the same. That’s because this particular icon pack doesn’t change the thumbnail folder view. To change this, we have to execute a registry fix.
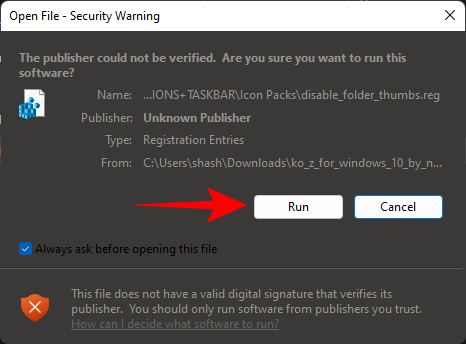
There’s already a file that can do this for you in the ‘Icon packs’ folder within the ‘Ko-Z’ folder that we unzipped earlier. Navigate to it and then double-click on disable_folder_thumbs.reg file.
Click on Run.
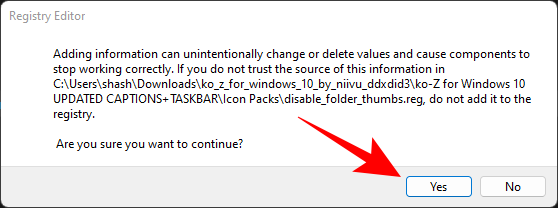
Click Yes.
Click OK.

Step 6: Refresh Icons with 7tsp GUI
Run the 7tsp GUI again.
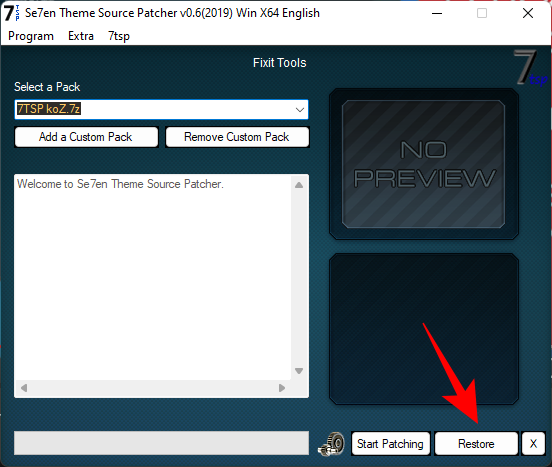
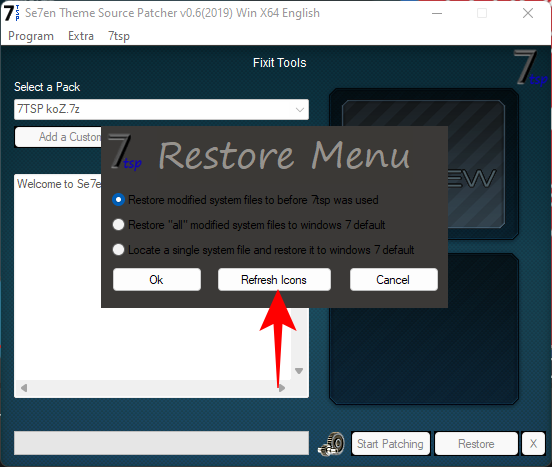
Click on Restore.
With “Restore modified system files to before 7tsp was used” selected (first option), click on Refresh Icons.
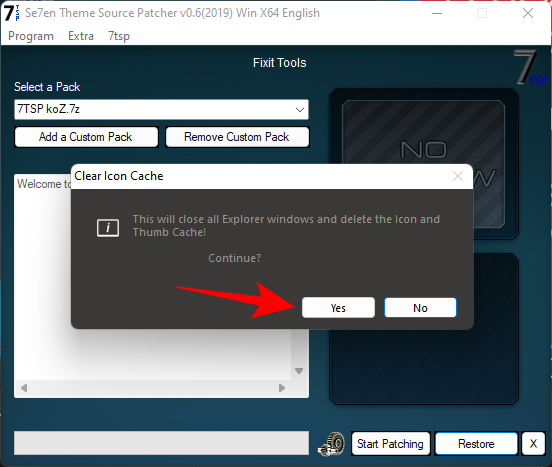
Click on Yes.
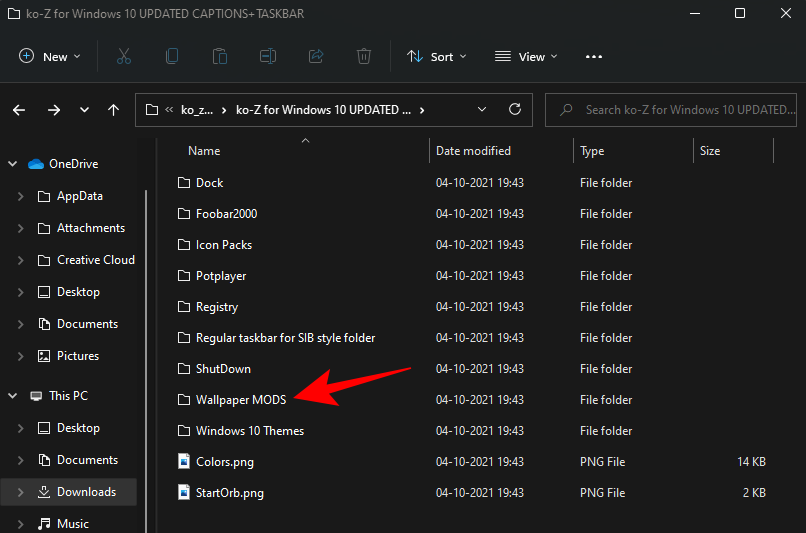
Step 7: Apply Wallpaper
The wallpapers are available in the ‘Wallpaper MODS’ folder inside the ‘Ko-Z’ folder.
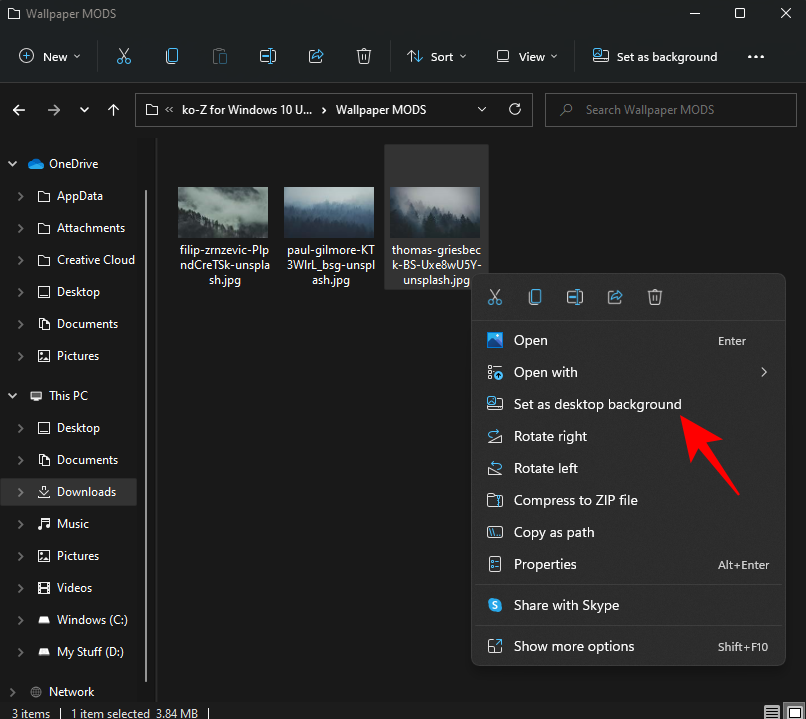
Choose a wallpaper, right-click on it and select Set as desktop background.
Step 8: Unzip OldNewExplorer
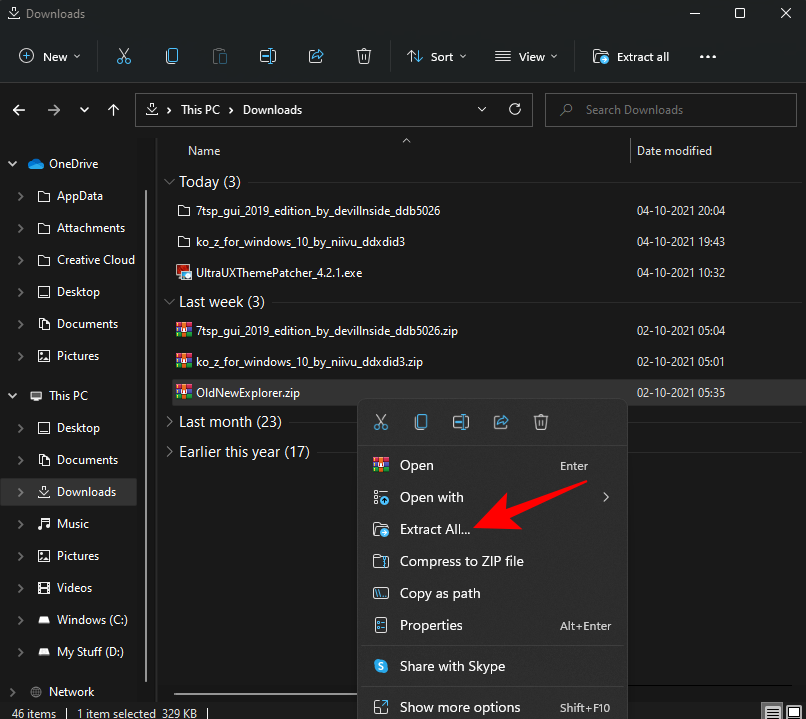
Lastly, we are left with unzipping and applying the old Explorer that we downloaded earlier. Right-click on the OldNewExplorer.zip and select Extract all.
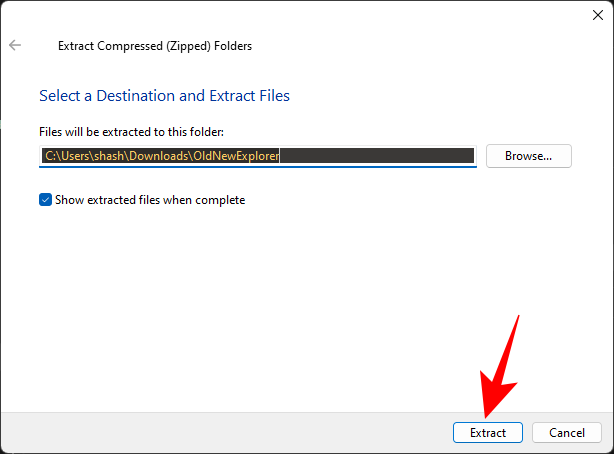
Then click Extract.
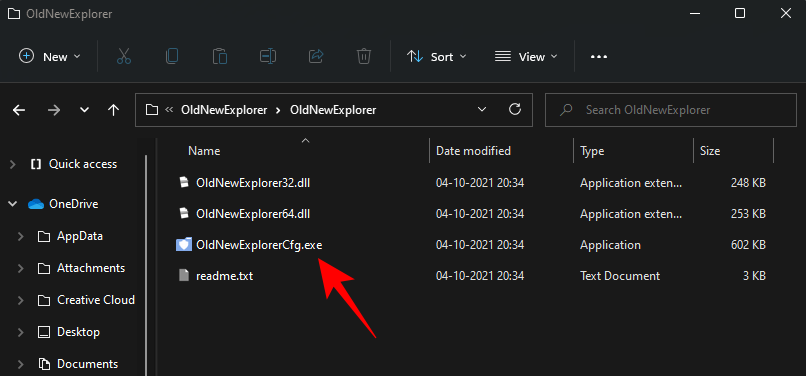
Once the files are extracted, run ‘OldNewExplorerCfg.exe’.
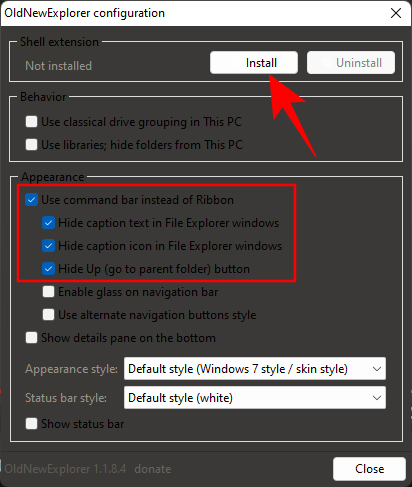
In the OldNewExplorer configuration window, select the following three options under ‘Appearance’:
- Hide caption text in File Explorer windows.
- Hide caption icon in File Explorer windows.
- Hide Up (go to parent folder) button.
Then click on Install.
Your Ubuntu theme is now complete.
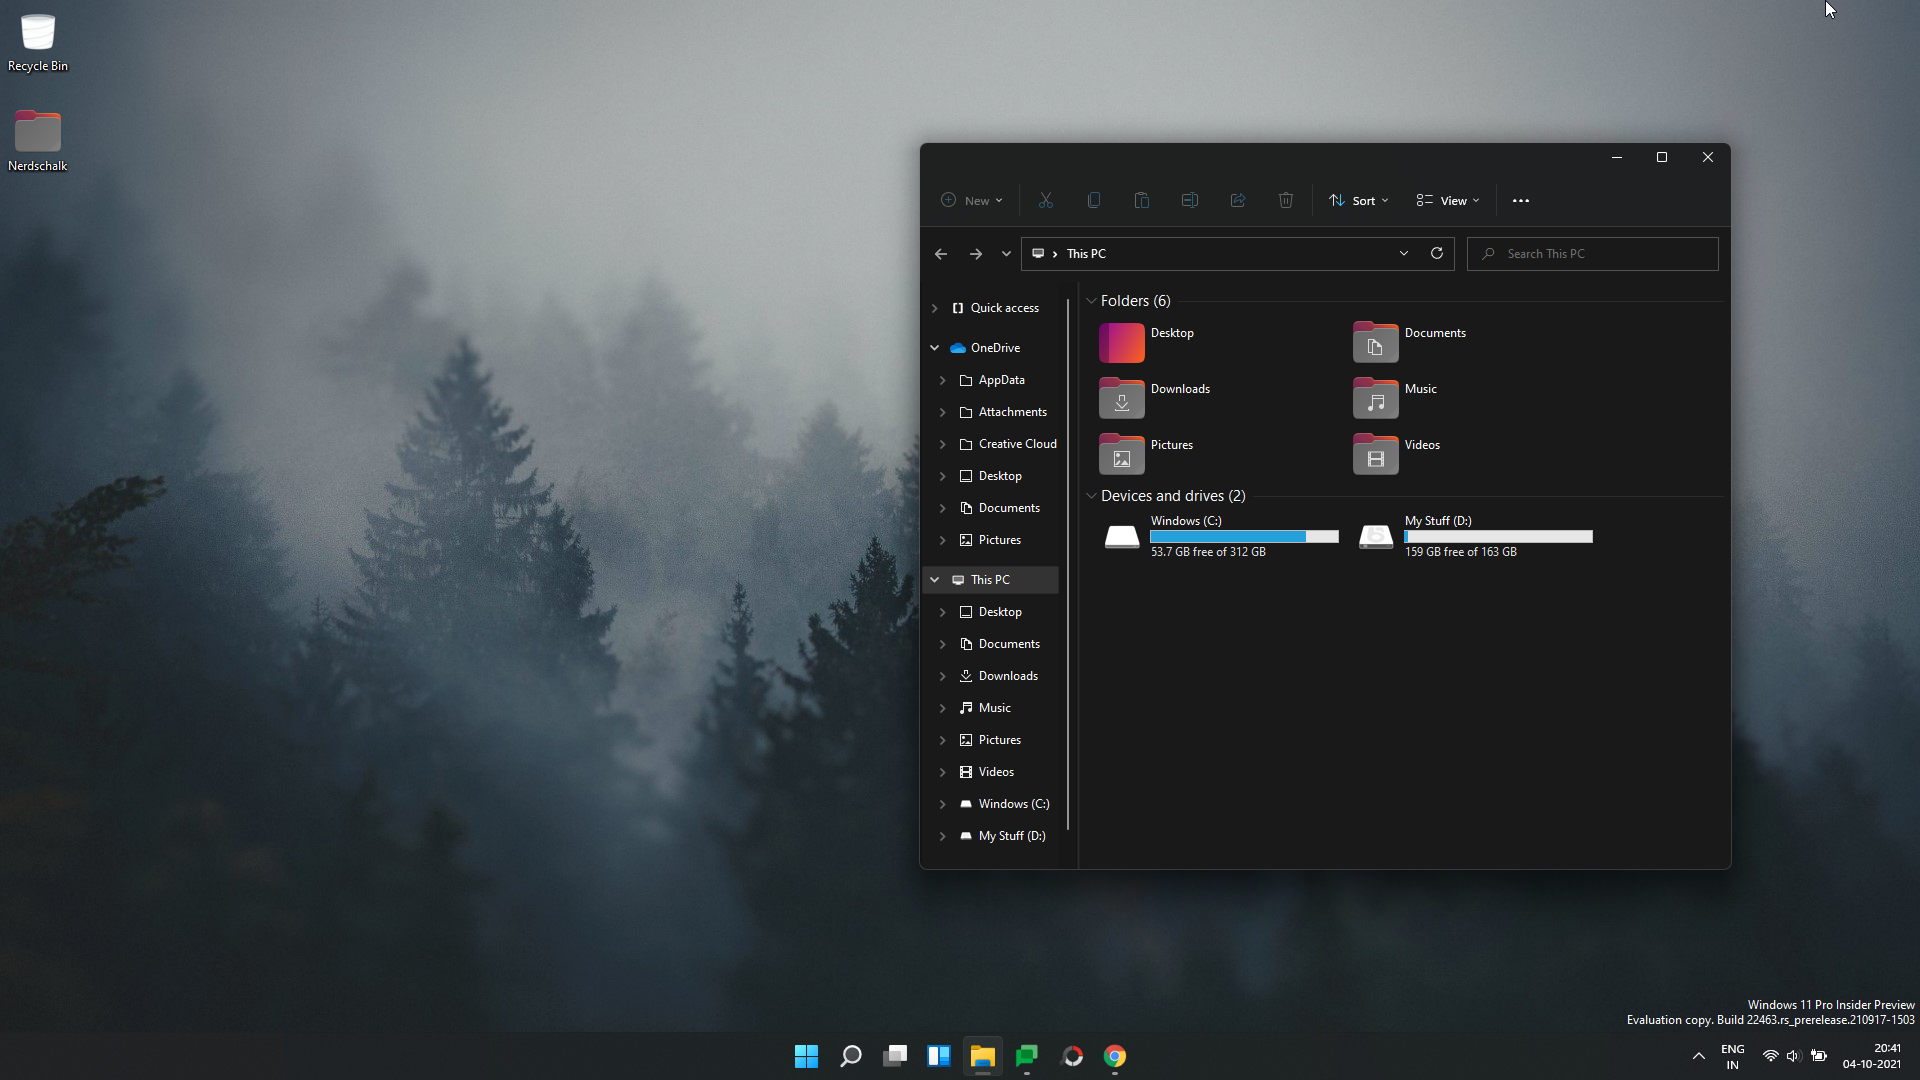
We hope you were able to get the Ubuntu theme on Windows 11 with the help of the guide above.
RELATED
- How to Change Mouse Wheel Behaviour in Photos App in Windows 11
- How to Force Quit a Program on Windows 11
- How to Find Computer Name on Windows 11
- Where is ‘My Computer’ on Windows 11? How to Find ‘This PC’ Easily
- How to Extend Volume Windows 11 or Windows 10
С релизом Windows 11 в 2021 году компания Microsoft сильно освежила дизайн своей системы. Однако кто-то может посчитать этот редизайн недостаточно кардинальным — именно поэтому я нашёл 10 обычных тем от сторонних разработчиков и одну особенную, максимально приближающую интерфейс к таковому в популярных дистрибутивах GNU/Linux. Они полностью преобразят интерфейс Windows 11. Покажу на фишки каждой из них, а затем расскажу, как их установить.
Темы
Все варианты оформления из этого материала устанавливаются с помощью программы UltraUXThemePatcher — о ней в конце статьи. Для начала нужно найти подходящую тему.
Everforest
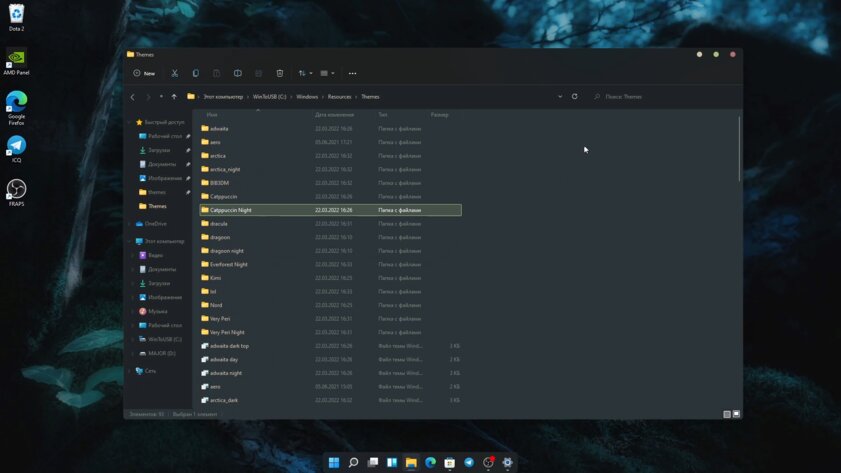
Одна из самых проработанных тем в подборке. Разработчик не просто сделал серое оформление с зелёными акцентами. Он подобрал к палитре минималистичные обои и сделал темы для сторонних приложений, часто использующихся при моддинге Windows. Например, есть модификации для Stardock Curtains, позволяющей ещё сильнее изменить внешний вид ОС, а также для плееров foobar2000 и PotPlayer и популярной программы StartIsBack для настройки «Пуска».
Macindows
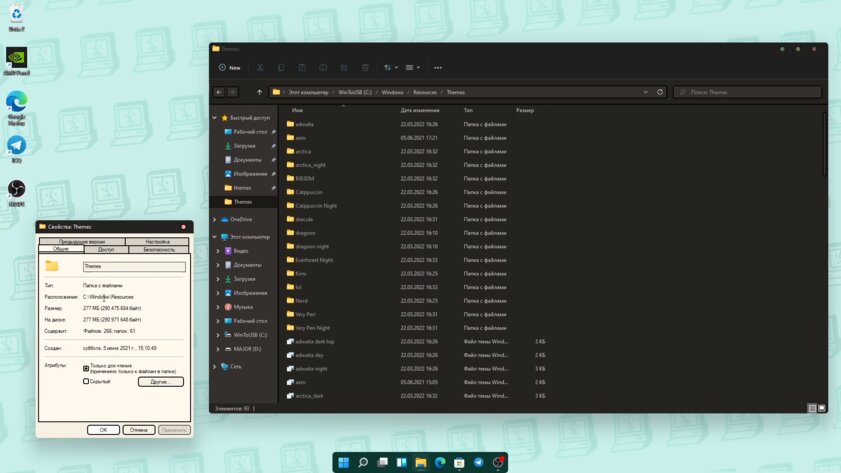
Тема Macindows выделяется использованием толстой обводки в интерфейсе и сочетанием тёплых и пастельных оттенков. Это позволяет частично приблизиться к ранним Mac OS X, где использовались похожие дизайнерские решения. Недаром тема так и называется, отсылая к первым компьютерам Macintosh. В комплекте с темой для Windows идут модификации для сторонних продуктов — плеера foobar2000 и док-баров Nexus или RocketDock. Кроме того, в архиве можно найти тонну стилизованных иконок для популярных программ.
Catppuccin
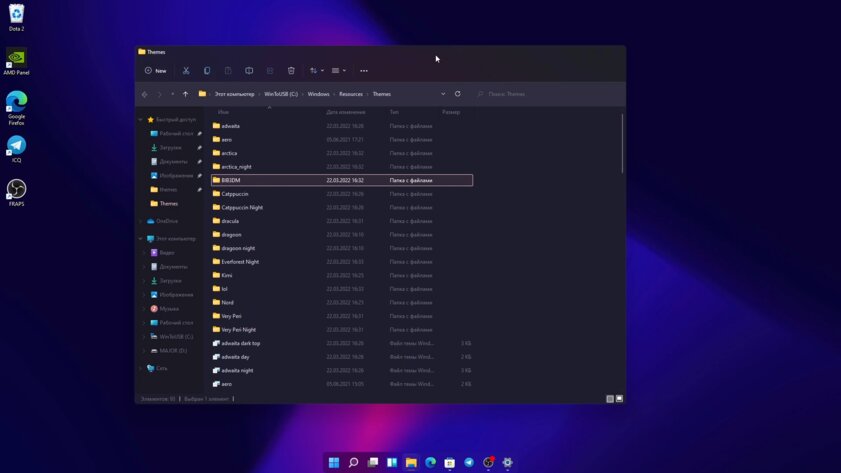
Catppuccin по цветовой палитре напоминает дизайн свежих macOS — тёмное оформление, граничащее с яркими акцентами и размытием. Фоном для окон служит отдающий фиолетовым серый, выделение и мелкие элементы окрашены в зелёный, оранжевый или пурпурный. В заголовках окон отчётливо видно размытый задний фон. Тема содержит в себе несколько видов иконок управления окнами, кастомизацию для сторонних программ, значки для папок и ярлыков, а также 26 заставок на рабочий стол.
Nord
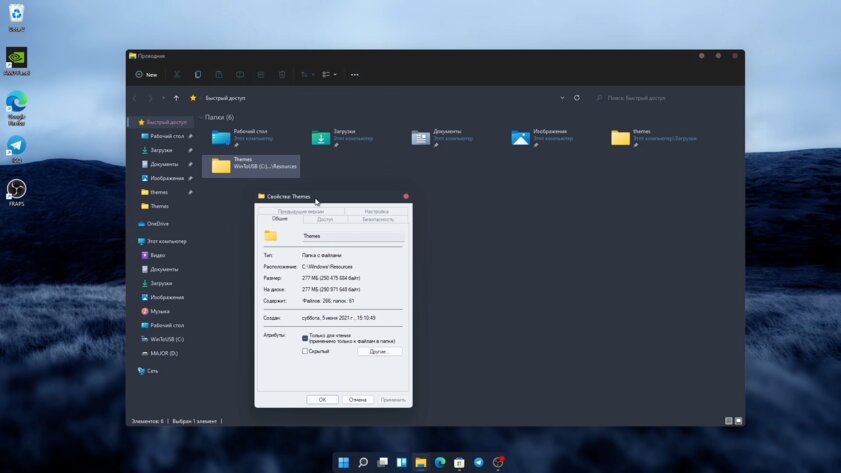
Эта тема использует популярную цветовую палитру Nord, которая нравится многим своими мягкими и холодными тонами. В честь неё пак оформления и получил своё название. Пользователям доступен как тёмный, так и светлый режим, а также три вида кнопок закрытия — из Linux, macOS и Windows. Nord устанавливает столь же спокойные как и общая цветовая гамма обои, всего доступно три вариации. Тема сделана качественно и подойдёт любителям минимализма.
Dragoon
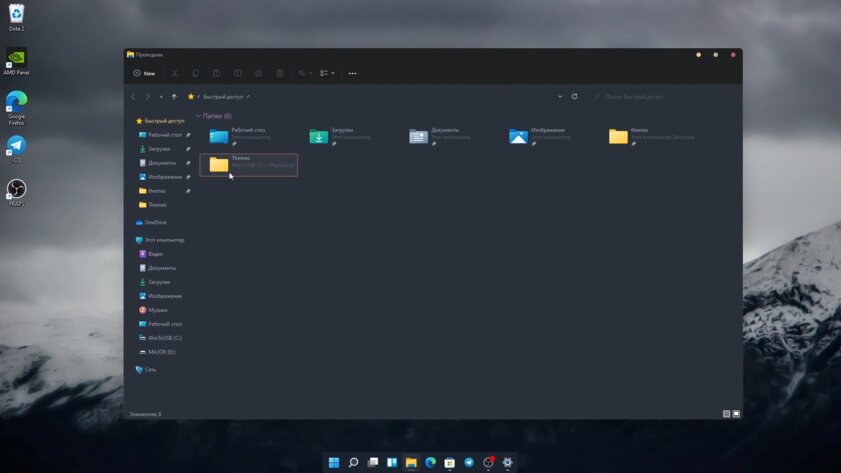
Ещё одно серое и холодное оформление для Windows. У него невысокая контрастность и несколько видов оформления: тёмный и светлый вариант. Тема заменяет фон на кастомный даже в дополнительных меню, но читабельность надписей ниже, чем у той же Nord. Dragoon содержит в себе набор настроек для утилит StartAllBack и Stardock Curtains.
Dracula
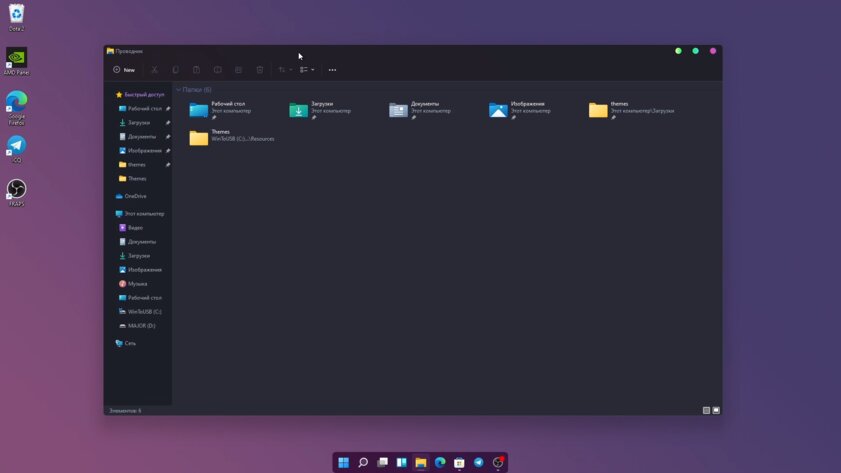
Dracula добавляет красок в интерфейс системы, не превращая его в цирк. Основным тоном является всё же серый, однако акцентными цветами служат розовый и фиолетовый. Иконки закрытия или сворачивания окон тоже заменяются на более яркие, нежели в стандартной Windows. Верхняя часть окон при этом поддерживает размытие. Обои продолжают сочетать в себе нейтрально-тёмные и ярко-насыщенные тона. А вот сторонним приложениям для кастомизации разработчик уделил не очень много внимания — есть тема только для StartAllBack.
Very Peri
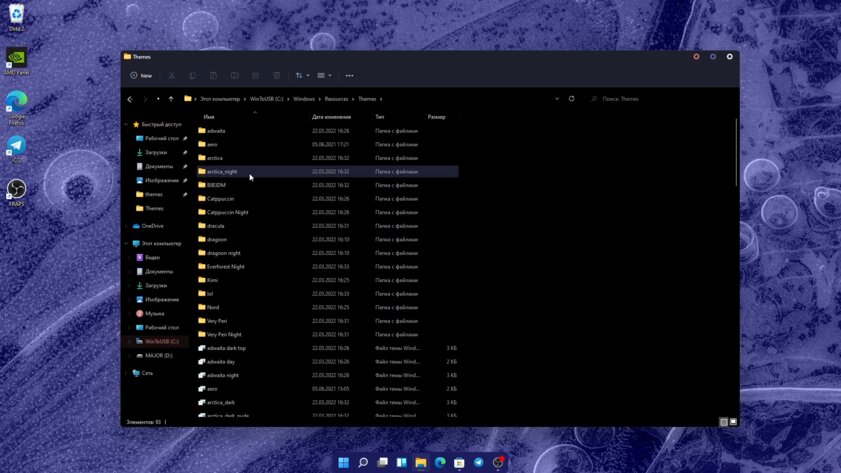
Компания Pantone признала Very Peri цветом 2022 года. Microsoft даже выпустила в честь этого коллекцию обоев для Windows 11 в сине-фиолетовых тонах. Энтузиасты пошли дальше и сделали одноимённую тему. Кроме обоев и фиолетовых акцентов оформление Very Peri добавляет чёрный фон в окно Проводника даже туда, где его нет в стандартном тёмном режиме, и меняет иконки управления. Впрочем, есть и светлый вариант. Как и в других темах из статьи, здесь есть моды для других приложений по кастомизации ОС.
BIB3
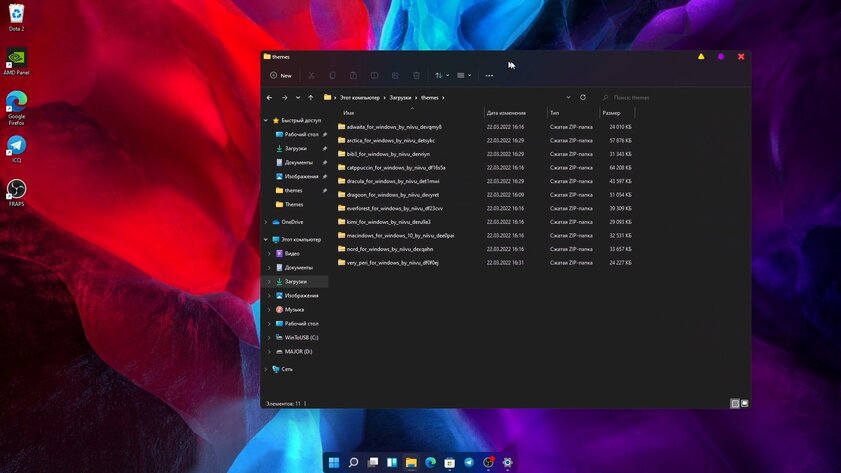
Оформление BIB3 очень похоже на ранее упомянутый Catppuccin. Главное отличие — в менее красочном основном цвете. Если в Catppuccin он тёмно-фиолетовый, то здесь исключительно серый. Кроме этого, BIB3 даёт выбрать иконки управления из macOS или Linux. Есть еще третий вариант от разработчика. В остальном же это довольно лёгкая тема — здесь нет ни фирменных обоев, ни модов для сторонних утилит.
Kimi
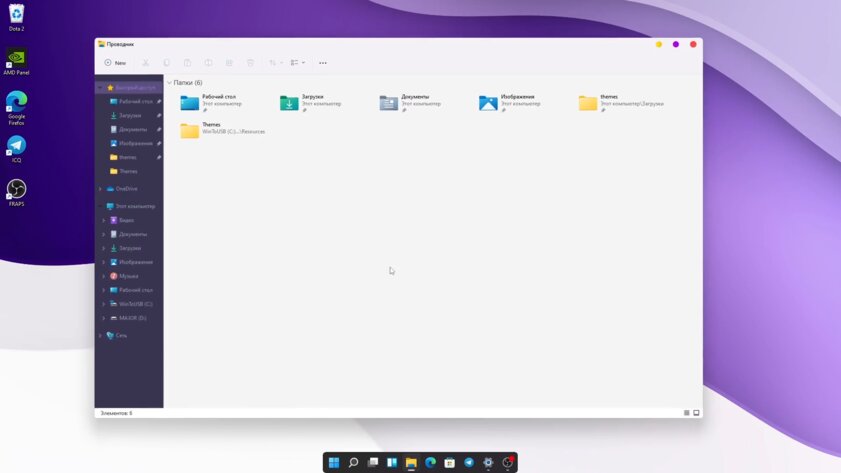
Kimi очень близка к предыдущему оформлению, BIB3. Схожие цвета, минимум изменений и модификаций. Однако у Kimi есть не только ночная, но и дневная тема с фиолетовыми акцентами и яркими значками.
Arctica
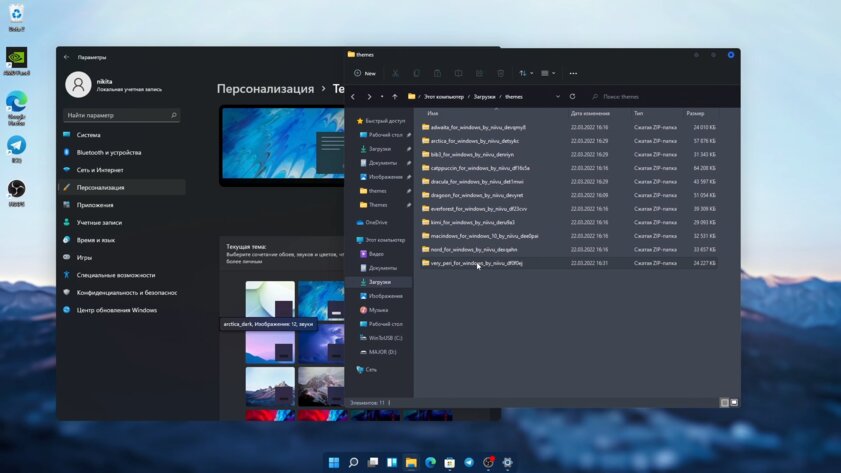
Тема Arctica не старается выглядеть сложно — простые и строгие цвета, никакой излишней красочности. Она подойдёт тем, кто устал от стандартного интерфейса, но не хочет превращать систему в зоопарк из разноцветных иконок и плашек. Arctica имеет при себе весь необходимый набор тем для сторонних программ и два цветовых варианта для разного времени суток.
Adwaita — та самая тема, которая превратит Windows в Linux
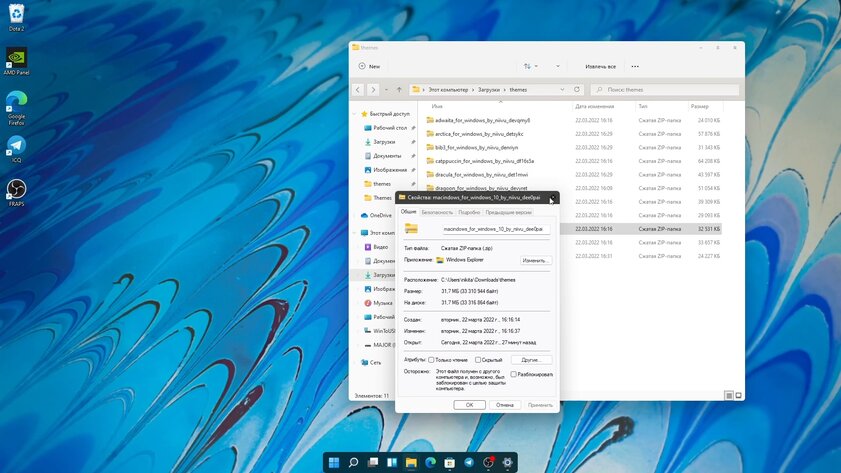
Это попытка перенести одноимённую тему, установленную по умолчанию для дистрибутивов GNU/Linux с оболочкой GNOME. Создатель этого оформления точно перенёс нейтральную цветовую палитру как для светлого, так и для тёмного режима. При этом остались некоторые фишки дизайна Windows 11 вроде полупрозрачной рамки окон. Adwaita меняет даже некоторые иконки интерфейса — например, кнопки закрытия или сворачивания приложений скопированы прямиком из Linux. Вдобавок идёт и набор из подходящих по стилю обоев, а также целый пак значков для папок и ярлыков.
Как установить
Прежде чем устанавливать темы, нужно поставить программу UltraUXThemePatcher. Запустившись, она создаст бэкап и попросит перезагрузить компьютер. После этого достаточно:
- открыть папку Windows/Resources/Themes/;
- перетащить туда файлы загруженной темы (обычно они находятся в подпапках Themes или Windows Themes — это зависит от создателей);
- открыть настройки персонализации самой Windows;
- сменить тему на нужную.
