In this guide, we will show you the steps to stop Windows 11 from automatically adding keyboard layout. Windows has bought in quite a few new features to its latest OS build this time around. But at the same time, it has also carried forward some of its weird behavior from its predecessor. One of them is the random addition of a new keyboard layout as and when it is deemed fit. For many, the keyboard layout menu is already filled with 6-7 languages and regions, although they haven’t explicitly added a single one.
So what is the reason for this issue? Well, it usually seems to happen when the language/keyboard combination is non-native. For example, if you have added a UK display language but with the French keyboard layout, then there’s a high chance of this issue. With that said, there do exist a few workarounds that have been known to stop Windows 11 from automatically adding keyboard layout. And this guide shall make you aware of just that. Follow along.
Table of Contents
Do note that there’s no universal fix as such. You will have to try out each of the below-mentioned workarounds and then check which one spells out success for you. So with that in mind, let’s get started.
FIX 1: Tweak the Welcome Screen and New User Account Setting
- Use the Windows+I shortcut keys to open the Settings menu,
- Then select Time and Language from the left menu and go to the Typing section.
- After that, go to the Language and Region section.
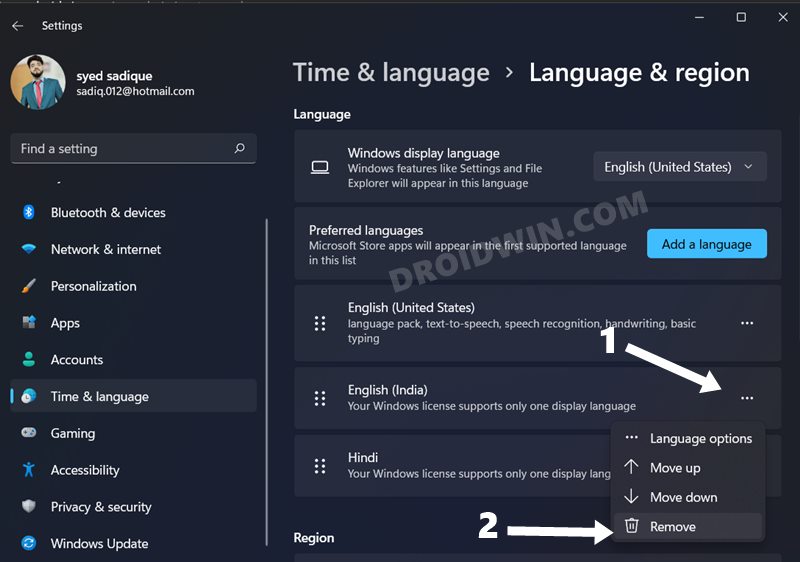
- Then click on the three dots icon next to the language that you wish to remove and select Remove.

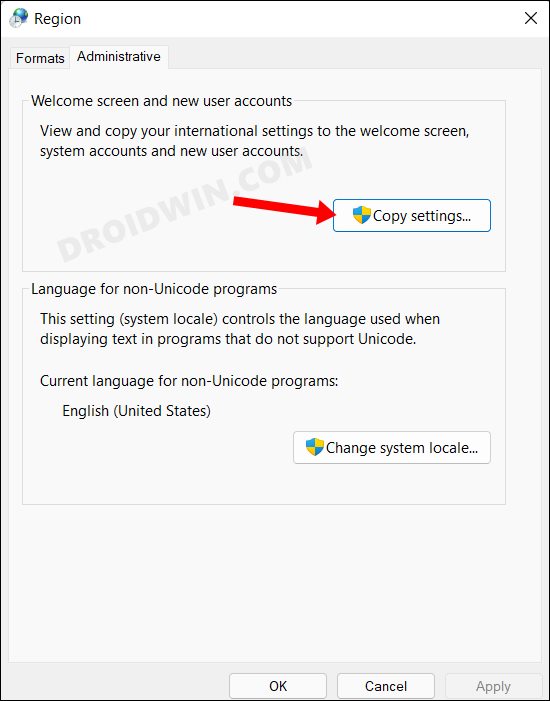
- Once done, launch Control Panel from the Start Menu, change its View By Type to Large icons and go to Regions.
- After that, go to the Administrative tab and click on the Copy Settings button.

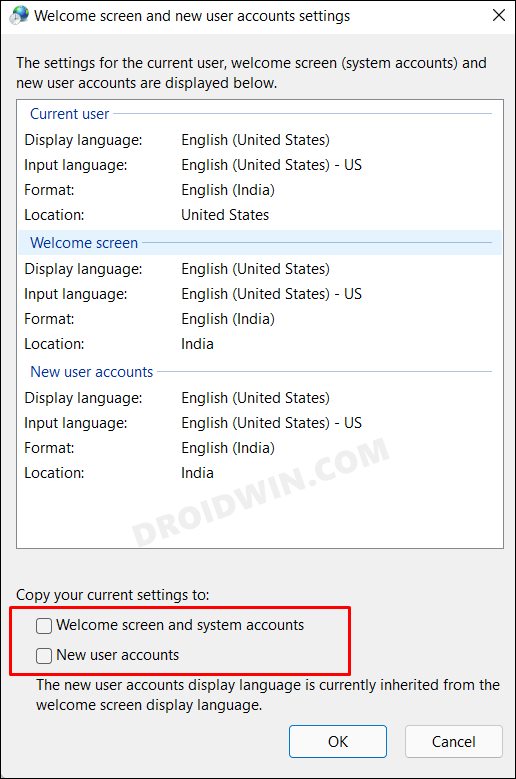
- Verify that the current user/welcome screen and new user account are only showing the languages of your choice. If that is not the case, change it from the Language and Region section, as explained above.
- If that’s all well and good, then checkmark the following two options: Welcome Screen and System Account and New User Accounts.

- Finally, click OK to save the changes and then check if manages to stop Windows 11 from automatically adding keyboard layout.
FIX 2: Modify the Language Registry Value
- Use the Windows+R shortcut to open Run. Then type in the below command and hit Enter to open Registry Editor
regedit
- Now copy-paste the below location in the address bar and hit Enter:
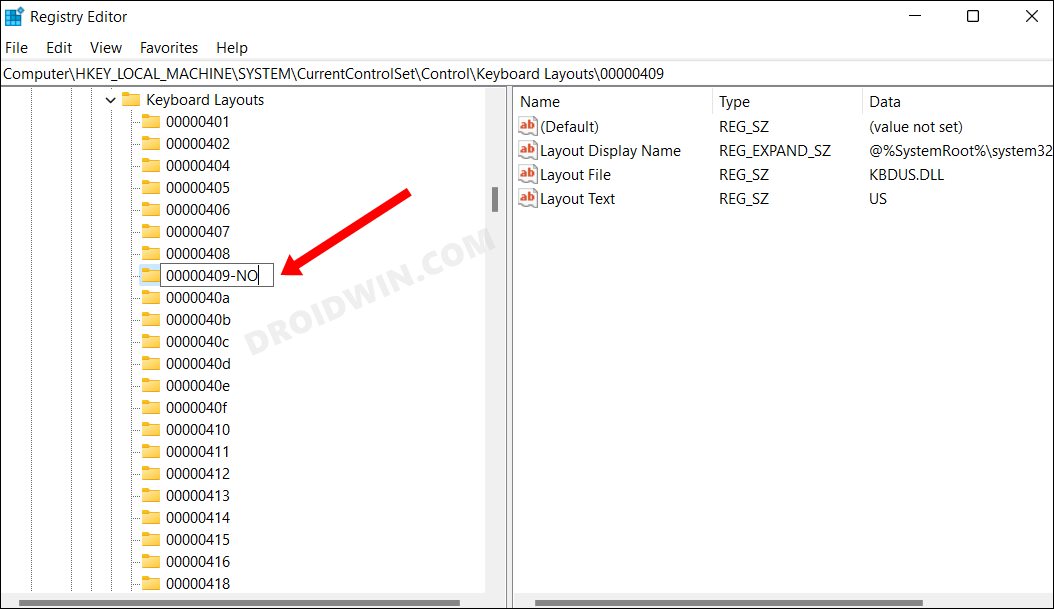
Computer\HKEY_LOCAL_MACHINE\SYSTEM\CurrentControlSet\Control\Keyboard Layouts

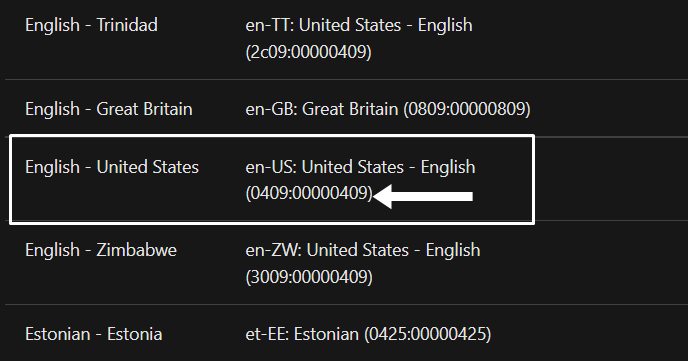
- You will now see a list of folders with numerical values. These are actually the names of language. To get hold of their actual names, check out this list from Microsoft and refer to the numerical value after the colon (:) for the language that you wish to remove from the keyboard layout menu.
- For example, if you wish to remove the US English language, then the value is (0409:00000409). And the value after colon is 00000409.

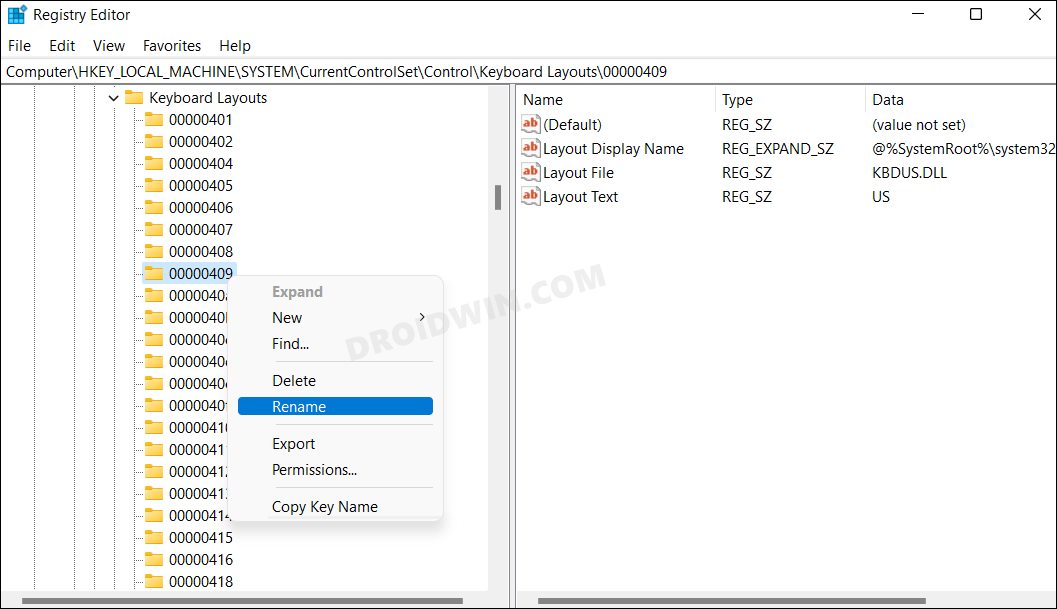
- Now check the same value under the Registry Editor, right-click on it, and select Rename.

- Then add -NO to the end of its name and save it. Windows will no longer be able to identify this language and hence wouldn’t show it under keyboard layout.

- As a result, this should now stop Windows 11 from automatically adding keyboard layout, and hence the issue stands rectified.

FIX 3: Add the IgnoreRemoteKeyboardLayout Registry
- Head over to the Start Menu and launch Registry Editor.
- Then copy-paste the below location in its address bar and hit Enter:
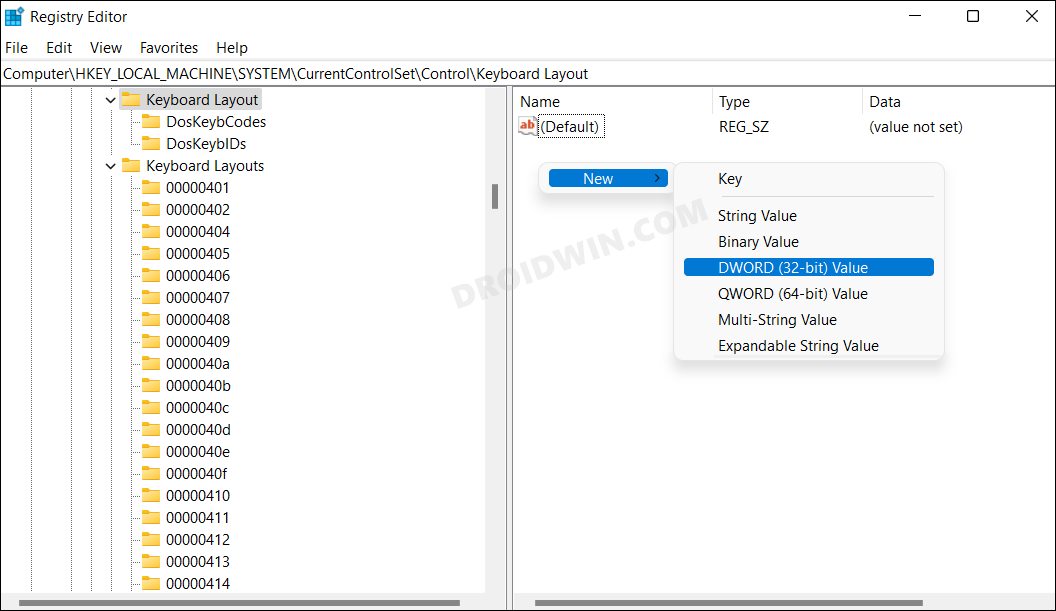
Computer\HKEY_LOCAL_MACHINE\SYSTEM\CurrentControlSet\Control\Keyboard Layout
- Now right-click in an empty place on the right-hand side and select New > DWORD (32-bit) Value.

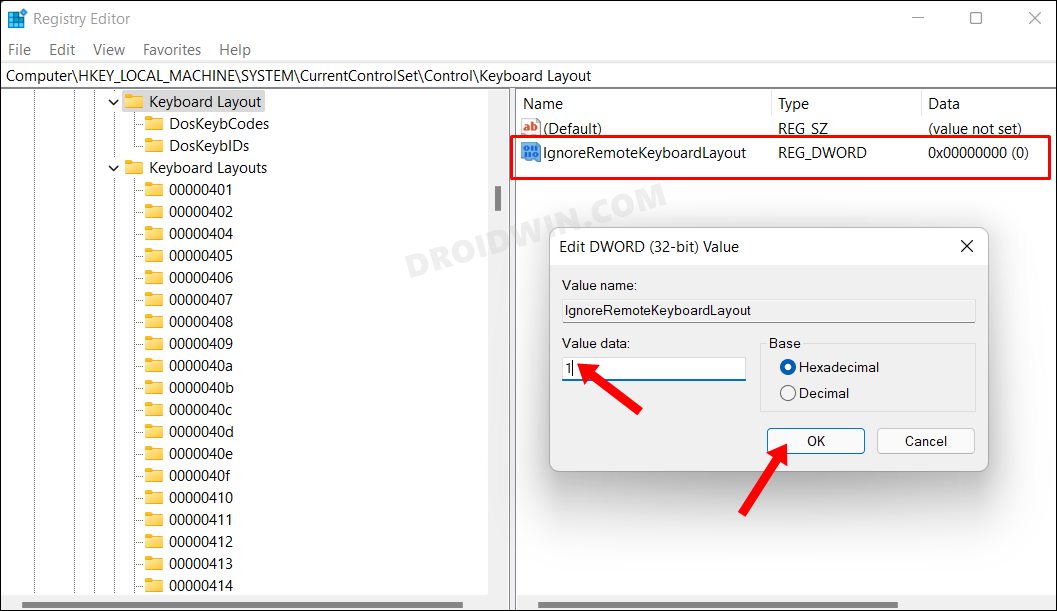
- Name it IgnoreRemoteKeyboardLayout and double-click to open it. Then type in 1 in the Value data field and hit OK to save it.

- Finally, restart your PC and then check if it is able to stop Windows 11 from automatically adding keyboard layout.
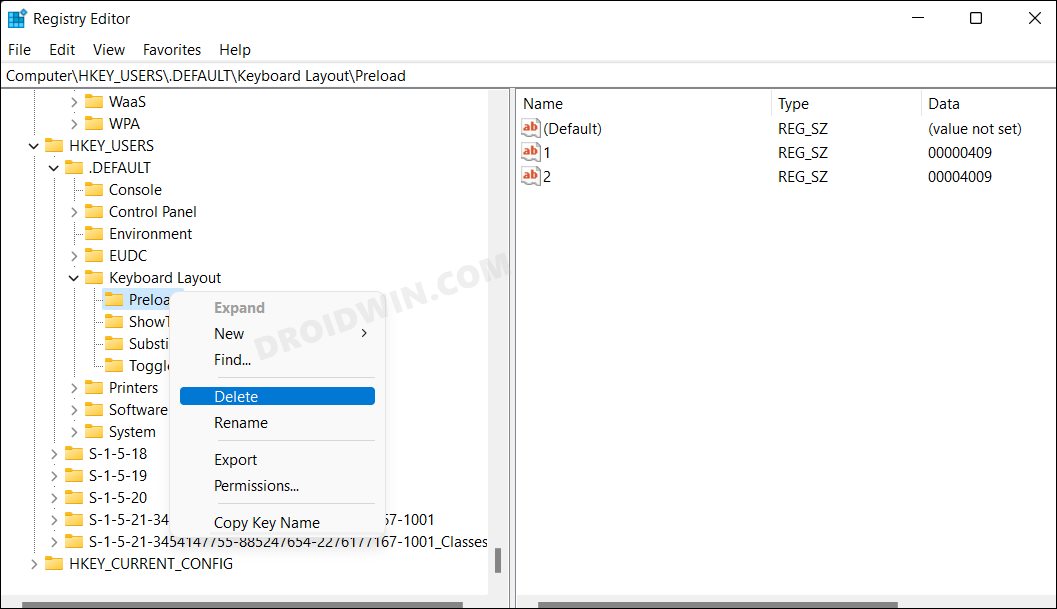
FIX 4: Delete Preload Registry
- Launch Registry Editor and head over to the below location:
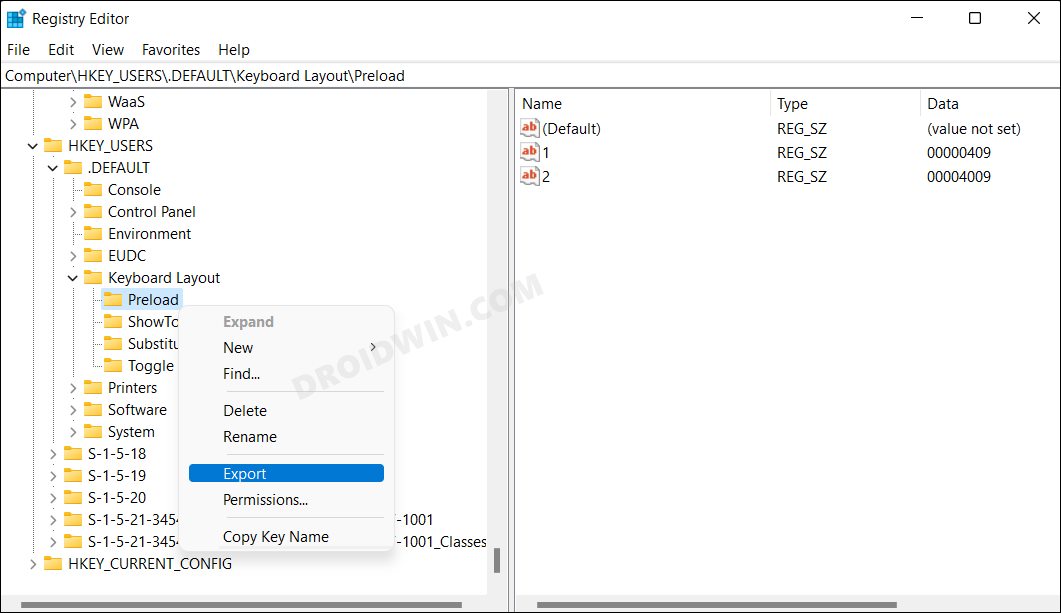
Computer\HKEY_USERS\.DEFAULT\Keyboard Layout\Preload
- Now let’s first take a backup of this preload folder. So right-click on it, select Export, and choose the desired location to save it.

- Once done, right-click on Preloader and select Delete. Then click YES in the confirmation dialog box.
- Finally, restart your PC and verify if it manages to stop Windows 11 from automatically adding keyboard layout.
If at any point in time, you wish to restore the backup, then click on File > Import and select the Preload file. For the location, it will be Computer\HKEY_USERS\.DEFAULT\Keyboard Layout\
FIX 5: Override Microsoft Automatic Language settings
Head over to the Start Menu and launch PowerShell as an administrator. Then copy-paste the below command (one at a time) and hit Enter. Do note that this is a temporary workaround and you will have to execute this command every time whenever the issue arises. It is due to this temporary nature that we decided to list it at the end of this guide.
Set-WinCultureFromLanguageListOptOut -OptOut 1
Set-WinUILanguageOverride -Language en-US
Set-WinDefaultInputMethodOverride -InputTip "0426:00040426"
Set-Culture lv-LV
So with this, we round off the guide on how you could stop Windows 11 from automatically adding keyboard layout. we have listed five different methods for the same. Do let us know in the comments section which one spelled out success for you. Likewise, all your queries are welcomed in the comments below.
- How to Remove Language Switcher from Taskbar in Windows 11
- How to Remove Language Switcher from Taskbar in Windows 11
- Windows 11 Taskbar Not Working: How to Fix
- Drag and Drop for Taskbar in Windows 11: Officially Removed?!
Download Windows Speedup Tool to fix errors and make PC run faster
On Windows 11/10, we see a lot of processes running in the background. They use a chunk of our system resources and help the programs run better. We can find all the processes listed in the Task Manager. Microsoft Text Input Application is also one such process running in the background. Some users are finding it using a lot of resources. In any case, if you want to disable the Microsoft Text Input Application in Windows 11/10, follow this guide.

What is Microsoft Text Input Application in Windows 11/10?
Microsoft Text Input Application is a system executable file that enables touch keyboard functionality along with the text input process. It is seen as TextInputHost.exe, and InputApp.exe under Microsoft Text Input Application in the Task Manager. Some of the major functions of Microsoft Text Input Application are enabling the Emoji keyboard, multi-clipboard, and advanced screenshots.
If it is causing any issues on your PC or using high CPU, you can disable it easily.
Renaming the system folder of the Microsoft Text Input Application is one of the simple ways to disable it. Renaming makes the task of locating the necessary files hard and the process won’t start without them.

To rename the system folder of the Microsoft Text Input Application,
- Open Task Manager using the Ctrl + Shift + Esc keyboard shortcut
- Find the Microsoft Text Input Application and right-click on it.
- Select Properties.
- In the General tab, copy the folder location. It could be located at C:\Windows\SystemApps\MicrosoftWindows.Client.CBS_cw5n1h2txyewy
- The location could vary based on your Windows version. Just remember the location and click OK.
- Again right-click on Microsoft Text Input Application and select End task.
- Open File Explorer. Navigate to the location you have seen earlier.
- Find the folder MicrosoftWindows.Client.CBS_cw5n1h2txyewy and right-click on it. Select Rename.
- Rename the folder in an easy-to-remember way to recover it again if necessary.
That’s it.
You have just disabled the Microsoft Text Input Application in Windows. It stays disabled until you get a Windows Update. After the update, missing files and folders will be installed which will again enable Microsoft Text Input Application. You need to repeat this process if you are facing any issues with it. If you have no issues with it running in the background, you can let it stay as it is.
Also read: Cannot switch between Input Languages in Windows
Can I disable the Microsoft Text Input Application?
Yes, you can disable Microsoft Text Input Application if it is causing any issues with the performance of your PC, or using high memory or CPU by running in the background. Generally, there won’t be a need to disable it. If you find any reason to disable it you can disable it in a few simple steps.
Related read: How to disable Speech Recognition in Windows.
Guru is a Communications graduate with hands-on experience with computers, cameras, and editing tools. A tech enthusiast and a movie buff who loves writing about computers, he dreams of living a life devoid of all tech and modern-day advancements in a forest.
В Windows Windows Input Experience необходима для плавного взаимодействия между пользователями и их устройствами. Утечки памяти, ошибочные обновления, конфликты стороннего программного обеспечения и фоновые процессы входят в число виновников, которые способствуют перерасходу ресурсов. Это руководство поможет вам устранить проблему с высоким использованием памяти Windows Input Experience, что позволит вам изучить и устранить каждый фактор, вызывающий проблему.
Windows Input Experience улучшает взаимодействие пользователей со своими устройствами. Он управляет различными методами ввода, такими как клавиатура, распознавание рукописного ввода и языковая обработка, обеспечивая плавный и отзывчивый пользовательский интерфейс. По сути, это делает общение между пользователями и их устройствами Windows более эффективным.
Причины высокого использования памяти
Вот несколько распространенных причин повышенного использования памяти в Windows Input Experience:
- Утечки памяти. Утечка памяти возникает, когда программе не удается освободить память, которая ей больше не нужна, и со временем постепенно потребляет все больше системных ресурсов.
- Неправильные обновления. Иногда обновления Windows могут содержать ошибки или проблемы совместимости, которые приводят к увеличению потребления ресурсов. Если проблема возникла после недавнего обновления, проверьте, является ли обновление основной причиной.
- Вмешательство стороннего программного обеспечения. Конфликты со сторонним программным обеспечением, особенно с приложениями, связанными с устройствами ввода (например, драйверами клавиатуры и мыши), могут привести к неправильному поведению Windows Input Experience.
- Фоновые процессы и службы. Другие фоновые процессы и службы, работающие в вашей системе, могут конкурировать за ресурсы, что влияет на производительность Windows Input Experience.
- Поврежденные системные файлы. Повреждение системных файлов, связанных с возможностями ввода Windows, может привести к ненормальному использованию памяти. Частью решения может быть обеспечение целостности системных файлов с помощью встроенных инструментов, таких как System File Checker (SFC).
- Вредоносное ПО и угрозы безопасности. Вредоносное ПО может маскироваться внутри системных процессов, вызывая аномальное потребление ресурсов. Очень важно регулярно сканировать вашу систему на наличие вредоносных программ и обеспечивать надежную настройку безопасности.
- Ресурсоемкие функции. Некоторые функции Windows Input Experience, такие как распознавание рукописного ввода и языковая обработка, могут быть ресурсоемкими.
- Недостаточно системных ресурсов. Если на вашем компьютере недостаточно оперативной памяти, Windows Input Experience, как и другие процессы, может работать с трудом.
Исправлено: высокая загрузка памяти при вводе Windows.
Ниже приведены три простых решения этой проблемы:
- Перезапустите службы ввода данных.
- Удалить языковые пакеты
- Отключить неиспользуемые методы ввода
Исправление 1. Перезапустите службу ввода данных.
1. Нажмите клавиши Windows+X и выберите «Диспетчер задач».
2. Перейдите на вкладку «Службы» и выберите опцию «Сервис сенсорной клавиатуры и панели рукописного ввода».
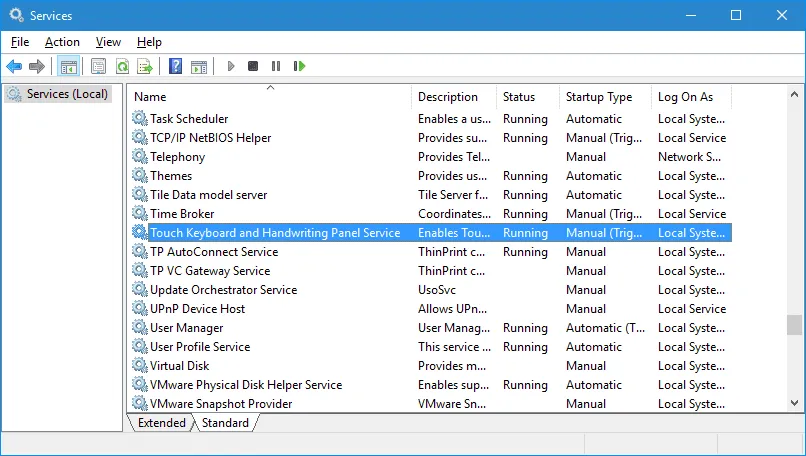
3. Щелкните правой кнопкой мыши параметр «Служба сенсорной клавиатуры и панели рукописного ввода» и нажмите «Перезапустить».
Исправление 2. Удаление языковых пакетов.
Языковые пакеты — это коллекции языковых ресурсов и файлов, предназначенные для обеспечения многоязычной поддержки в операционной системе. Удаление ненужных языковых пакетов освобождает ценное место в вашей системе.
Существует два способа удаления языковых пакетов:
- Настройки Windows
- Windows PowerShell
Ниже приведены инструкции по отключению языковых пакетов с помощью настроек Windows:
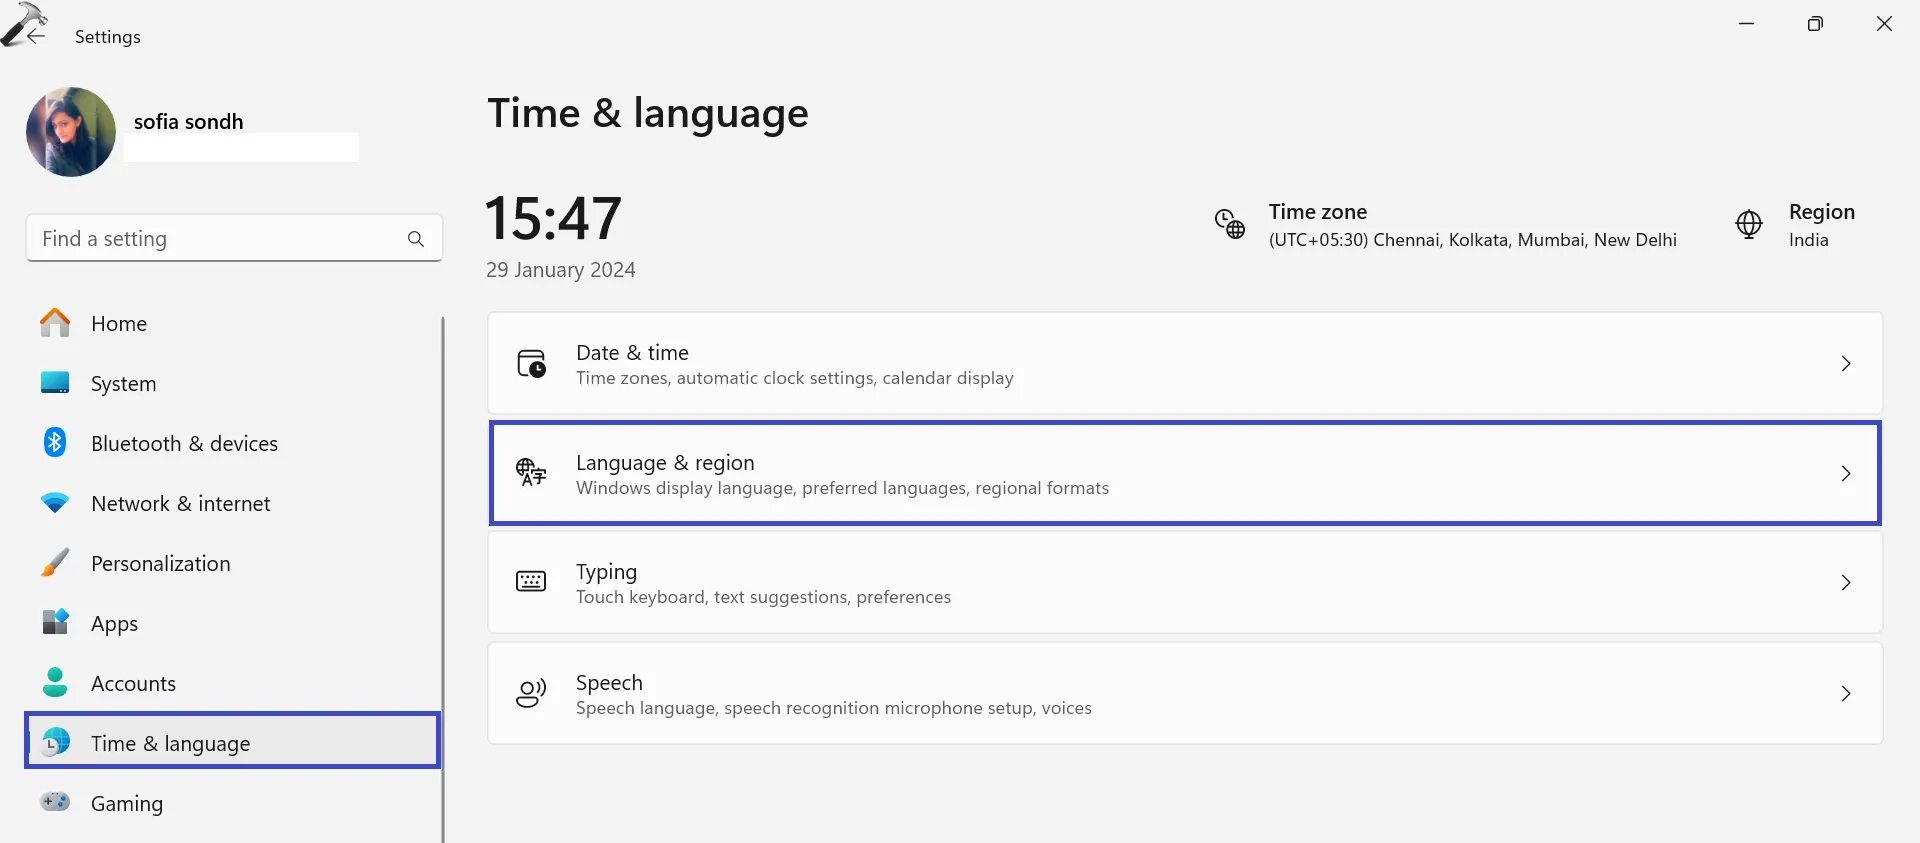
1. Откройте приложение «Настройки» и перейдите в «Время и язык».
2. Нажмите «Язык и регион».
3. Теперь нажмите (…) и выберите «Удалить».
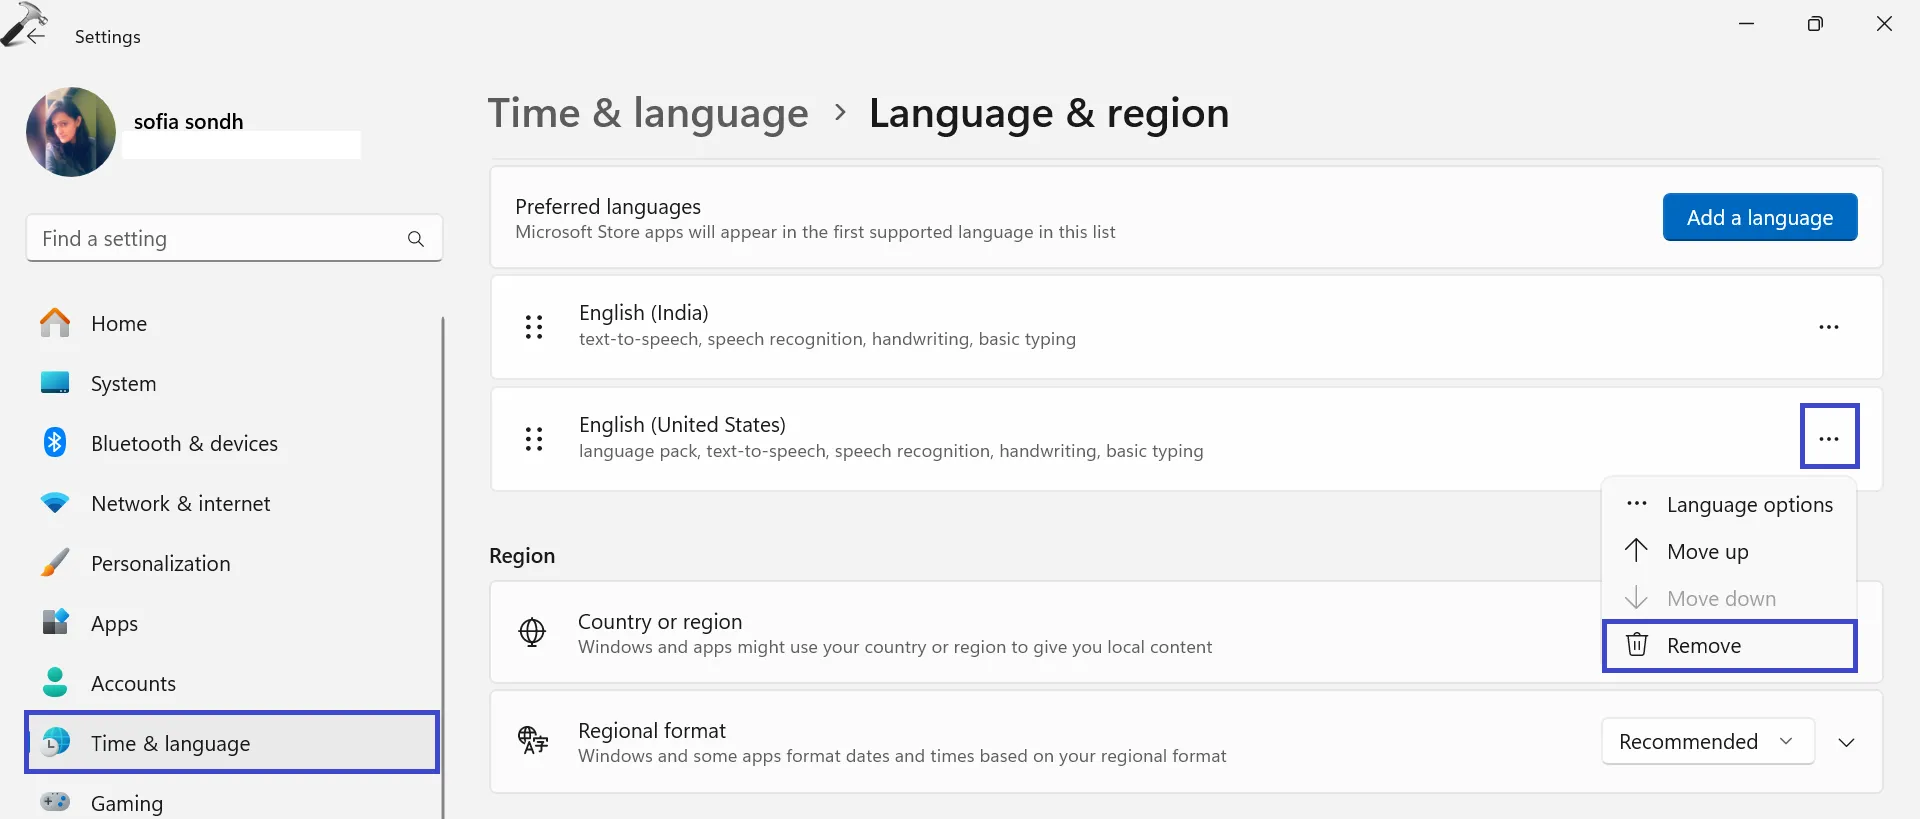
4. Перезагрузите компьютер, чтобы сохранить изменения.
Ниже приведены шаги по отключению языка с помощью Windows PowerShell:
1. Откройте Windows PowerShell и запустите от имени администратора.
2. Скопируйте и вставьте приведенную ниже команду и нажмите Enter:
Get-WinUserLanguageList
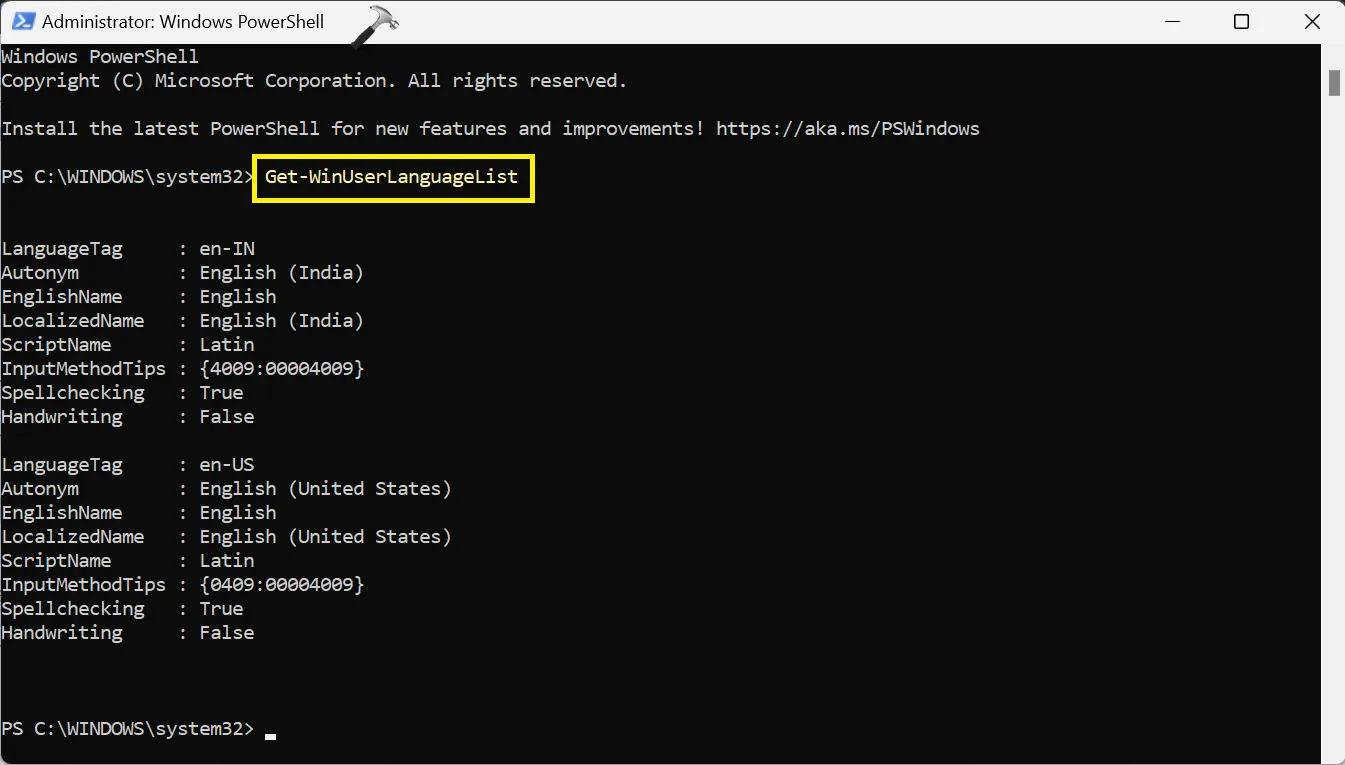
Отобразится список установленных языковых пакетов и их языковых тегов.
3. Чтобы удалить язык, скопируйте следующую команду:
Удалить –Language <language_tag>
Например, если вы хотите удалить английский (США) язык, скопируйте и вставьте следующую команду:
Удалить - Язык en-US
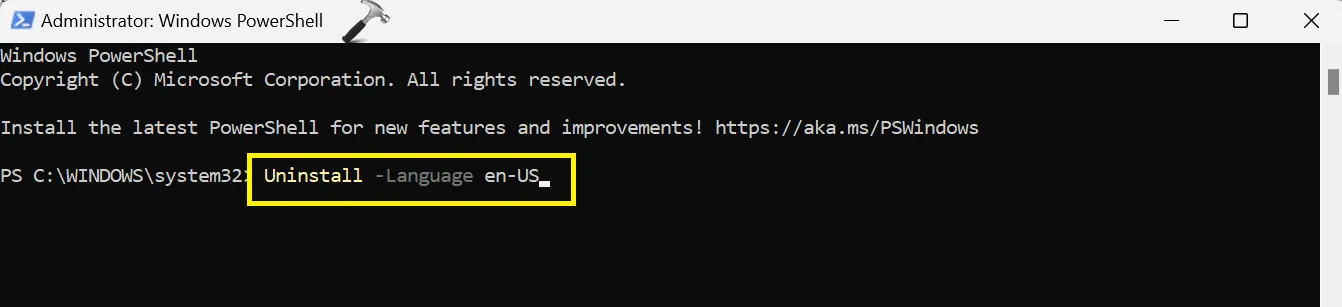
4. Закройте окно PowerShell и перезагрузите компьютер.
Исправление 3. Отключите неиспользуемые методы ввода.
Различные методы ввода и вспомогательные технологии, такие как экранная клавиатура и диктор, используют возможности ввода Windows. Как и языковые пакеты, каждый из этих методов имеет фоновые процессы, которые непрерывно выполняются во время работы системы, потребляя значительные системные ресурсы, особенно память.
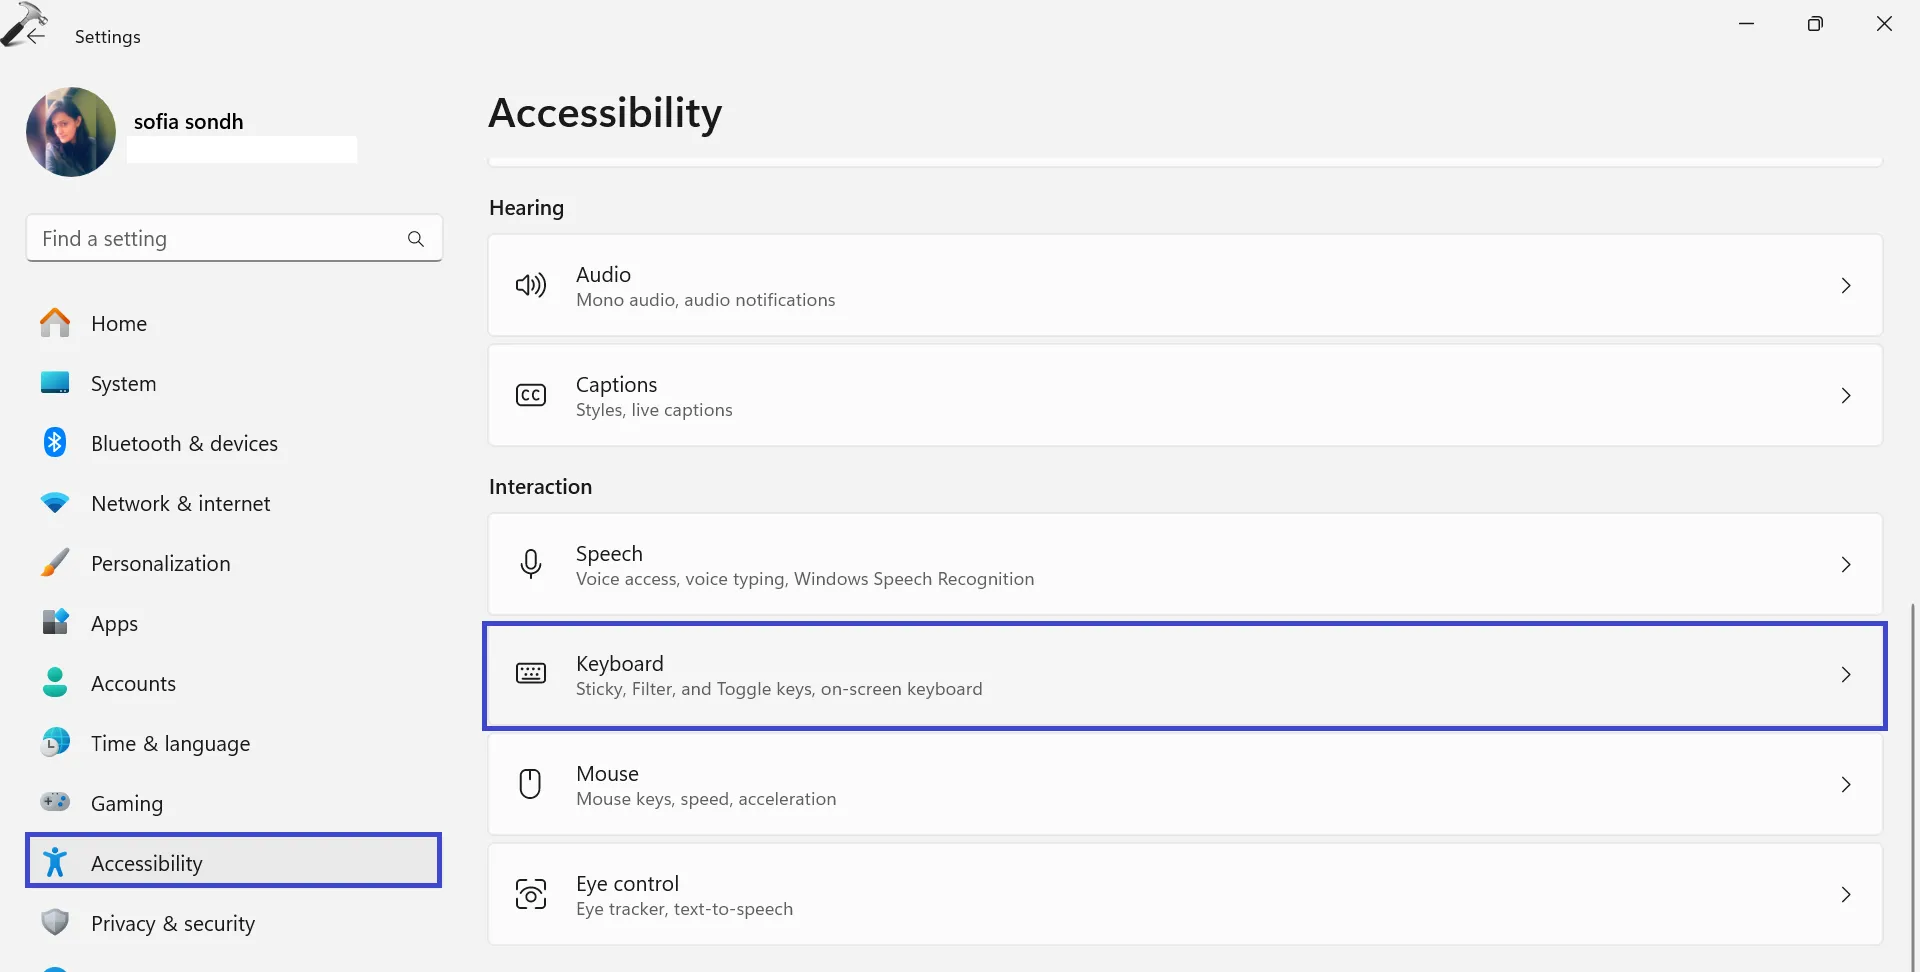
Вот шаги, чтобы отключить экранную клавиатуру:
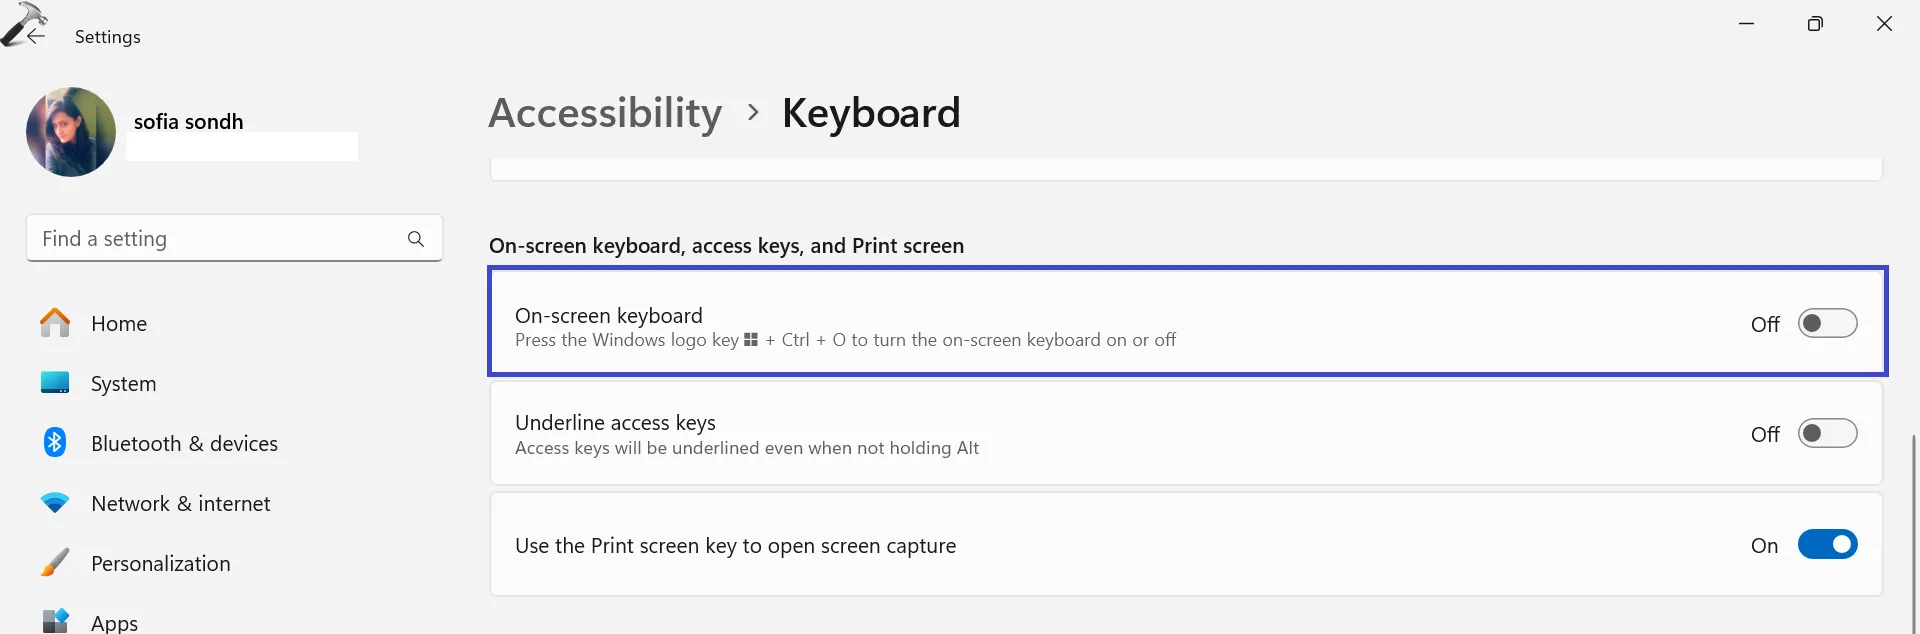
1. Откройте приложение «Настройки» и нажмите «Специальные возможности => Клавиатура».
2. Выключите переключатель «Экранная клавиатура».
Вот шаги, чтобы отключить экранного диктора:
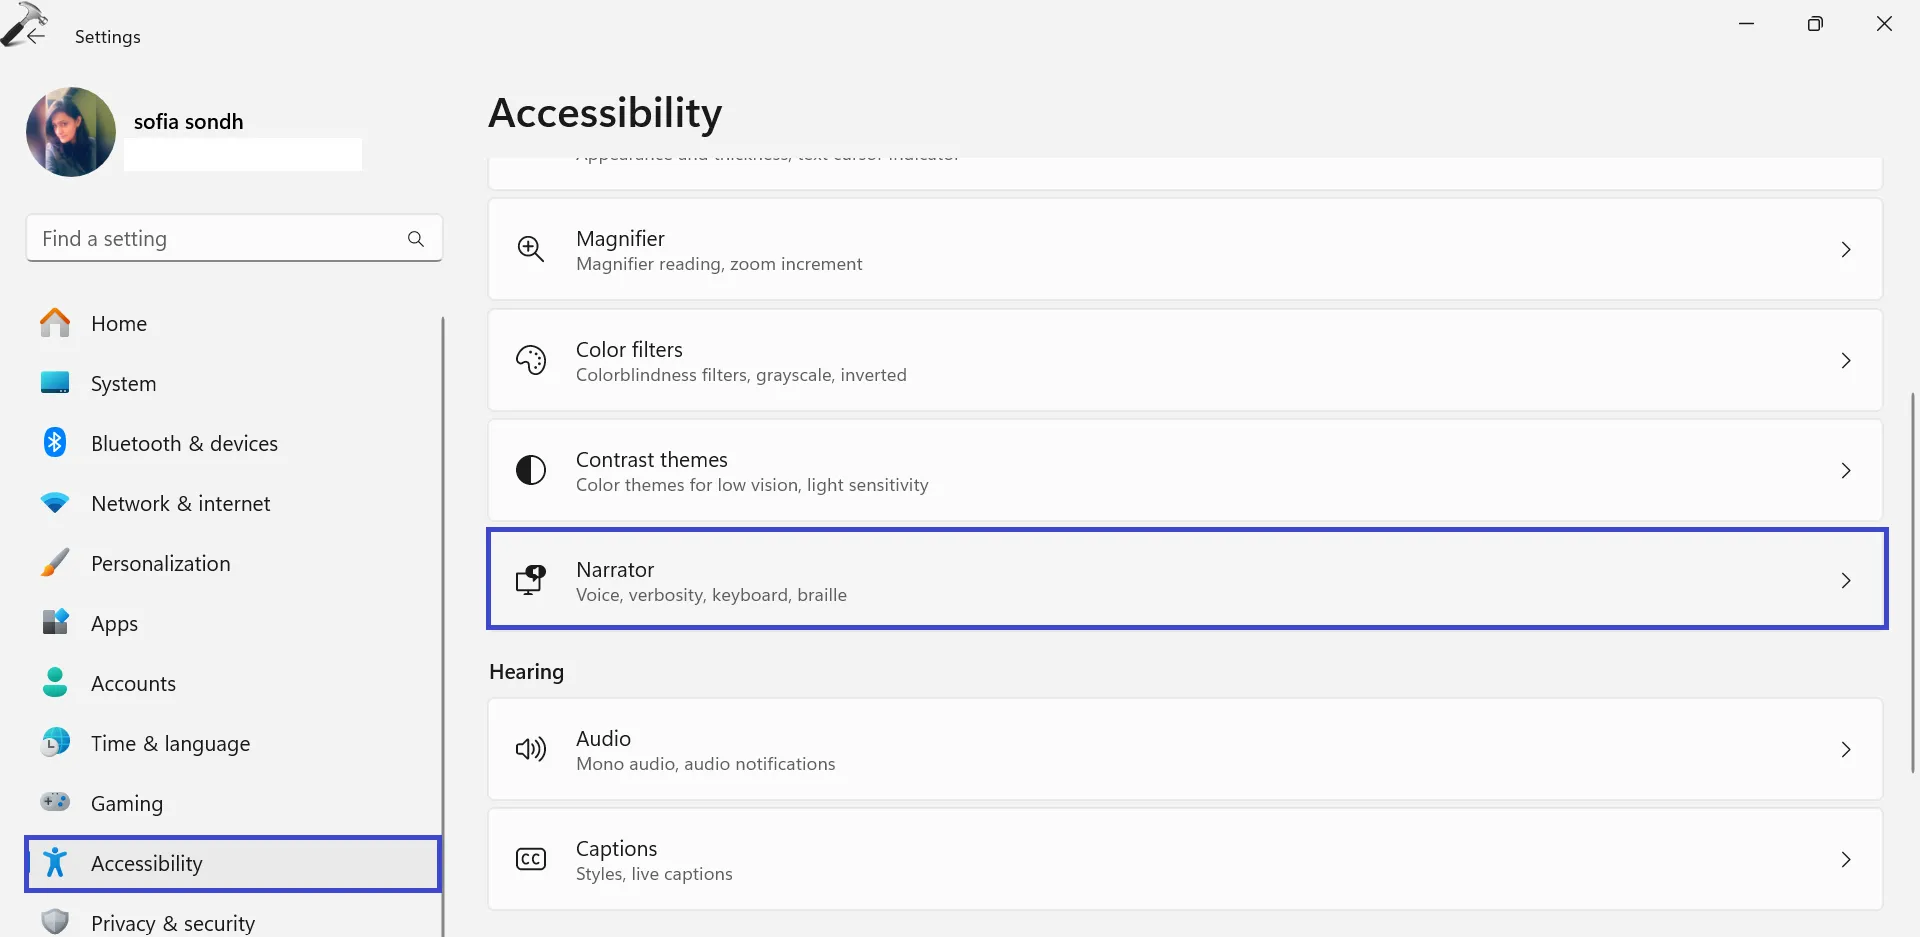
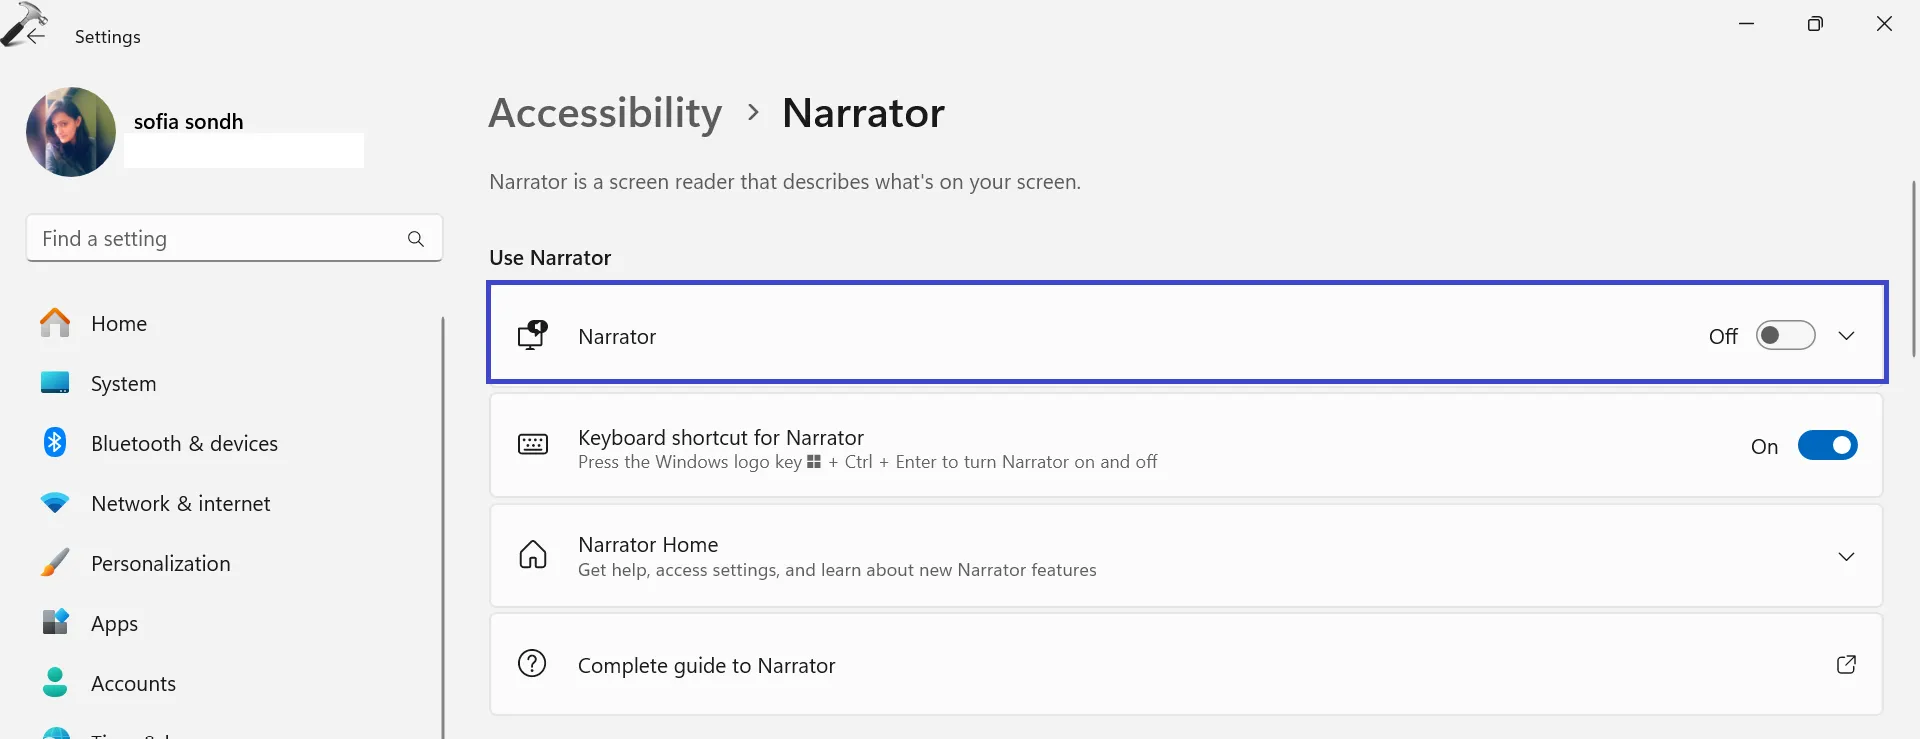
1. Откройте приложение «Настройки» и нажмите «Специальные возможности => Экранный диктор».