
В этой статье мы разберемся, как на базе Windows Server 2012 R2 установить и настроить связку Microsoft Deployment Toolkit 2013, Windows Assessment & Deployment Kit и роли WDS, и использовать этот набор для разворачивания образа Windows 10 на компьютеры клиентов по сети путем загрузки в режиме PXE (Preboot Execution Environment).
Нам понадобятся следующие компоненты:
- Windows Deployment Services – это роль Windows Server 2012, используемая для загрузки и разворачивания операционных систем по сети
- Microsoft Deployment Toolkit (MDT) 2013 Update 1 ( https://www.microsoft.com/en-us/download/details.aspx?id=48595) – набор инструментов для автоматизации развертывания операционных систем на рабочие станции и сервера
- Windows Assessment and Deployment Kit (Windows ADK) для Windows 10 (https://go.microsoft.com/fwlink/p/?LinkId=526740) – набор компонентов для настройки и развертывания Windows на новые компьютеры
- Установочный образ Windows 10 — в виде iso образа или установочного диска
Содержание:
- Установка роли Windows Deployment Services
- Установка Microsoft Deployment Toolkit 2013
- Установка Windows Assessment and Deployment Kit
- Настройка MDT 2013
- Создание задания установки MDT
- Настройка загрузочного образа в Windows Deployment Services
- Тестирование установки Windows 10 по сети
Установка роли Windows Deployment Services
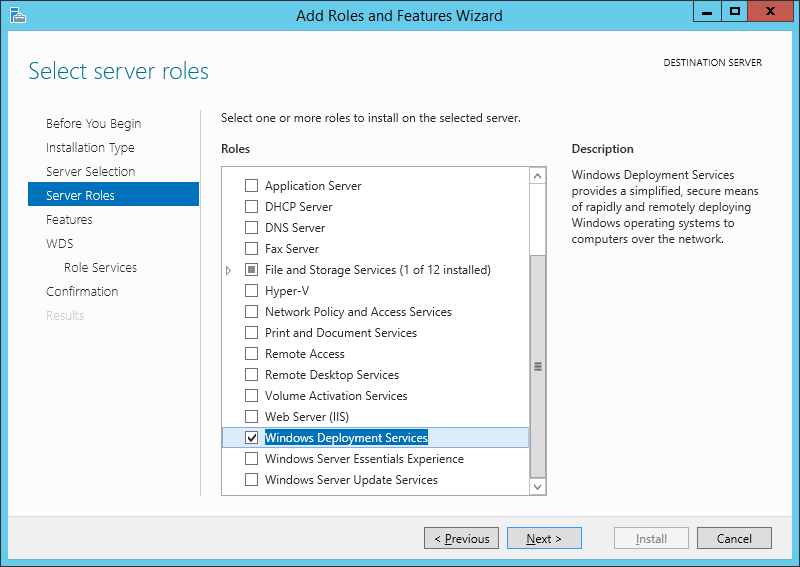
В первую очередь нужно на сервере под управлением Windows Server 2012 R2 установить роль Windows Deployment Services. Установку роли можно выполнить из консоли Server Manager. В списке ролей выберите Windows Deployment Services и нажмите Next.
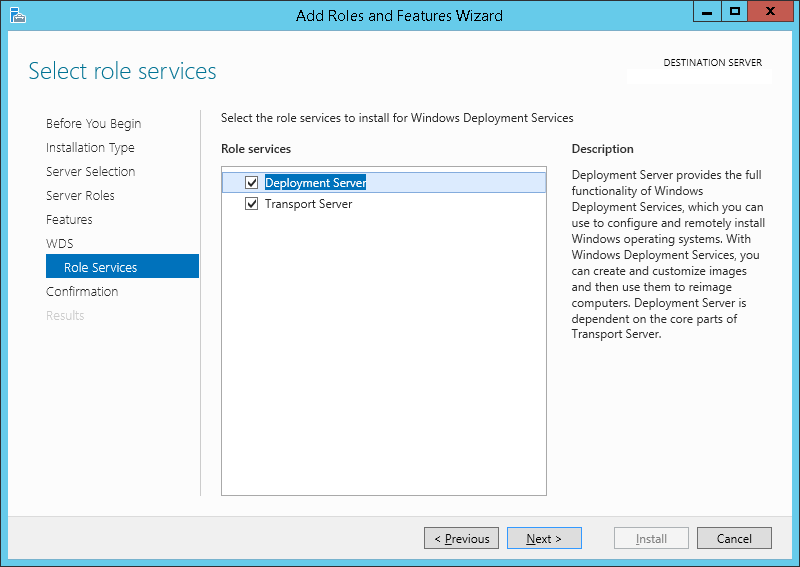
В списке устанавливаемых компонентов роли WDS отметьте службы Deployment Server и Transport Server.
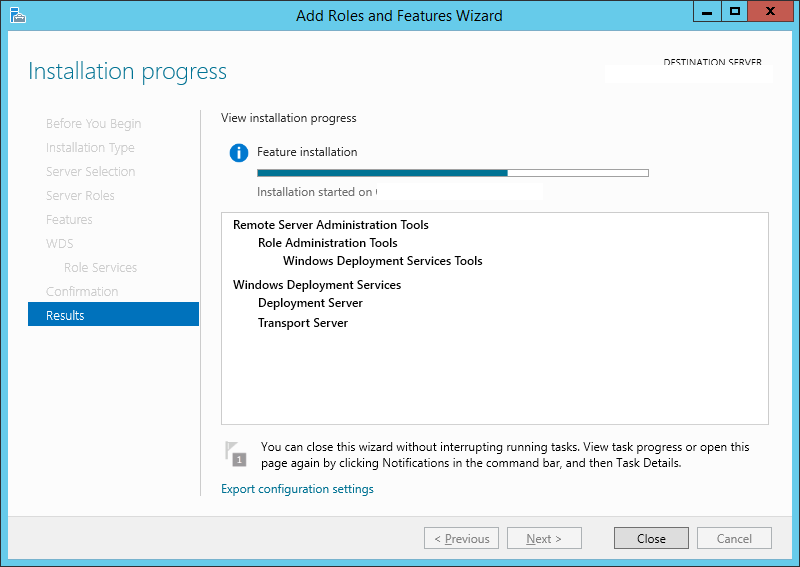
Запустите установку роли WDS (занимает пару минут).
Совет. Роль Windows Deployment Services можно установить с помощью всего одной команды PowerShell:
Install-WindowsFeature -Name WDS -IncludeManagementTools
Установка Microsoft Deployment Toolkit 2013
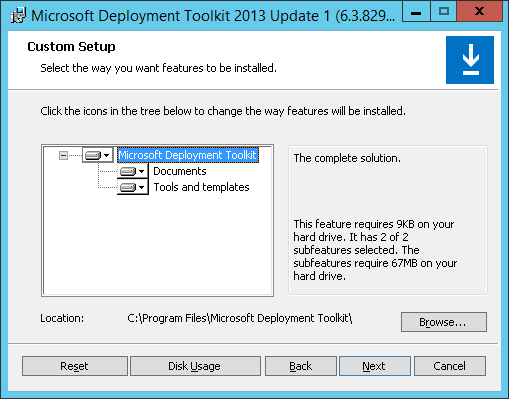
Установите Microsoft Deployment Toolkit (MDT) 2013 Update 1 со стандартными настройками, для чего достаточно скачать и запустить с правами администратора файл MicrosoftDeploymentToolkit2013_x64.
Установка Windows Assessment and Deployment Kit
Далее нужно установить Windows Assessment and Deployment Kit (Windows ADK) для Windows 10. Скачайте и запустите файл adksetup.exe.
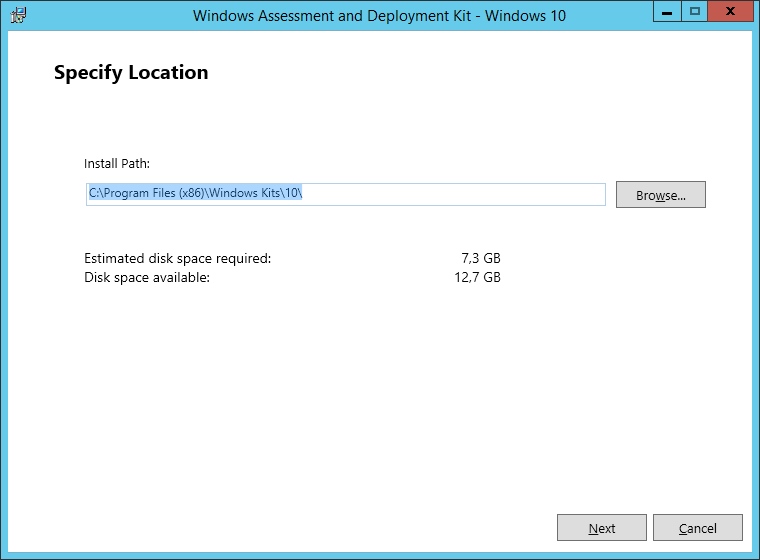
Укажите каталог для установки (по умолчанию C:\Program Files (x86)\Windows Kits\10\).
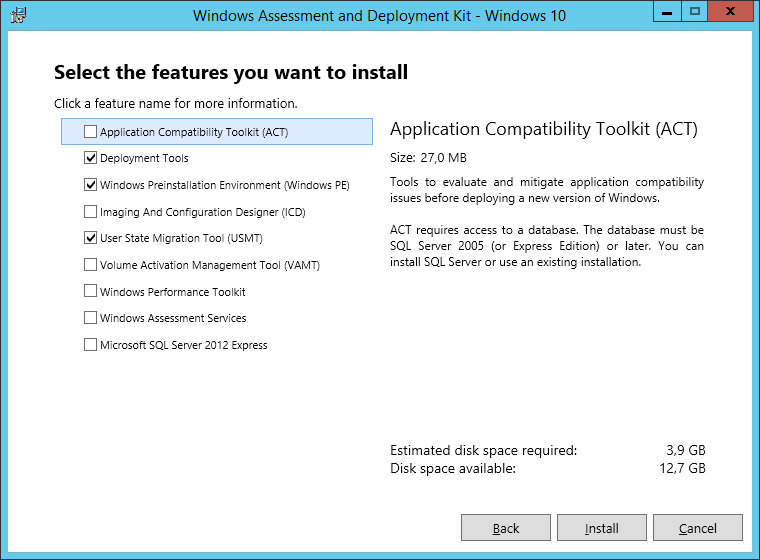
В списке компонентов ADK для установки отметьте:
- Deployment tools –используется для настройки образа Windows и автоматизации развертывания образа
- Windows Preinstallation Environment (Windows PE) – среда WinPE — минимальная ОС, разработанная для подготовки компьютера к установке Windows или обслуживания
- User State Migration tool (USMT) – набор инструментов для миграции данных пользователей между системами
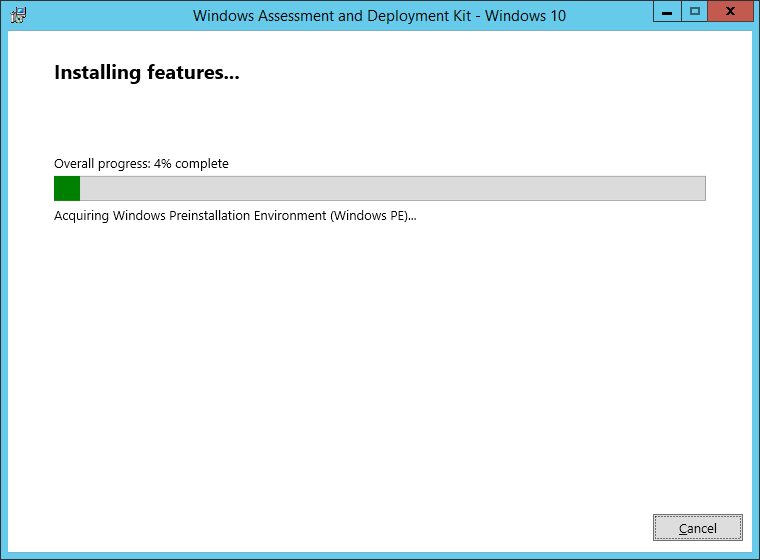
Запустите установке Windows ADK.
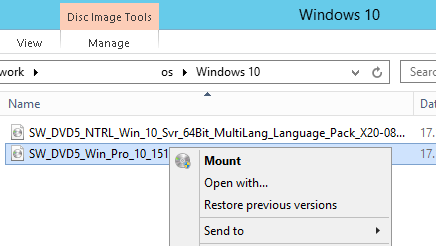
Теперь нам нужен дистрибутив Windows 10. В нашем примере это будет Windows 10 x64 Pro. Т.к. MDT не позволяет напрямую работать с iso файлами образа Windows, необходимо распаковать установочные файлы. Самый простой вариант – смонтировать файл с iso образом Windows 10 через File Explorer (Проводник) в отдельный виртуальный драйв (ПКМ по iso файлу-> Mount).
Настройка MDT 2013
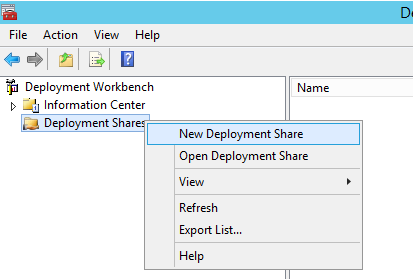
Приступим к настройке MDT 2013. Запустим консоль Deployment Workbench, щелкнем ПКМ по Deployment Share и создадим новый каталог (New Deployment Share).
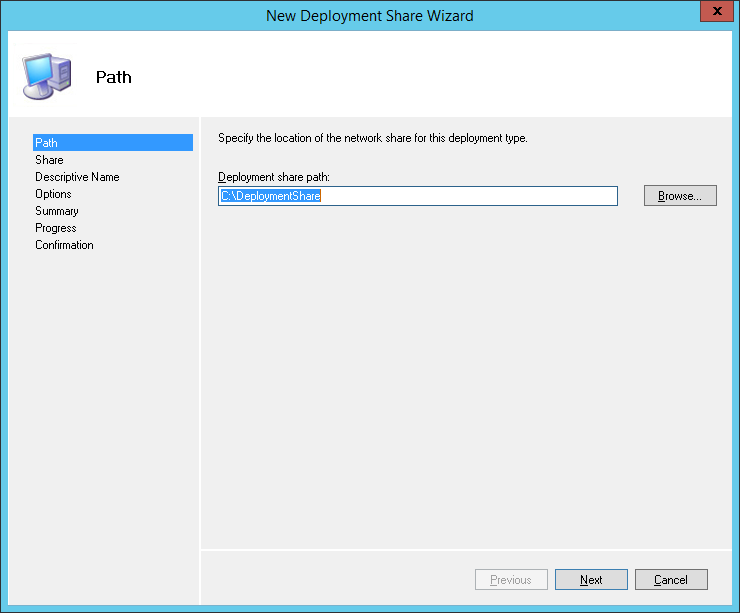
В окне мастера создания нового каталога распространения укажите путь к папке (C:\DeploymentShare в нашем случае).
Укажите сетевое имя каталога (мы оставили имя по умолчанию DeploymentShare$) и нажмите Next.
Совет. Знак “$” в имени сетевой папки означает, что она будет скрыта от пользователей.
После окончания работы мастера перейдите в папку C:\DeploymentShare.
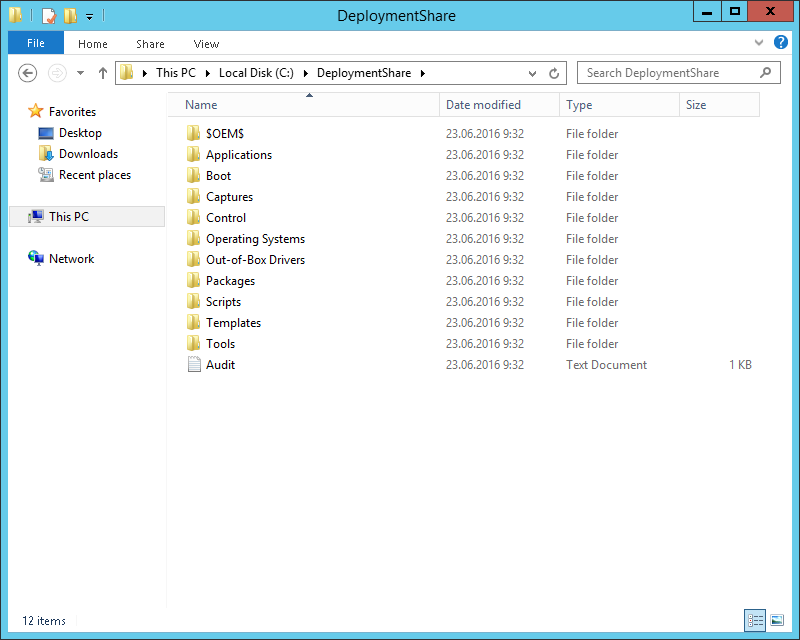
В этой папке хранятся образы ОС, драйвера, настройки, пакеты с приложениями и т.д. Папка является портабельной и может быть легко перенесена на другой MDT сервер.
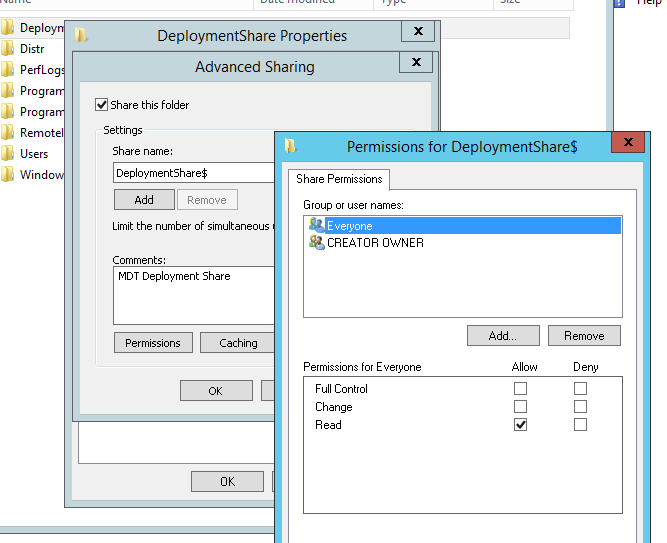
Чтобы все сетевые клиенты (в том числе анонимные) могли обращаться к содержимому этой папке, в свойствах сетевой папки DeploymentShare$, нужно добавить группу Everyone с разрешением на чтение.
На следующем шаге нам нужно импортировать образ Windows 10. MDT поддерживает импорт образа операционной системы непосредственно с диска дистрибутива, wim файла или образа wds.
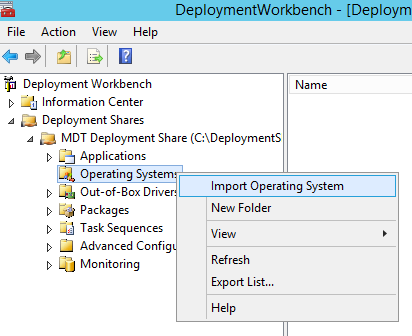
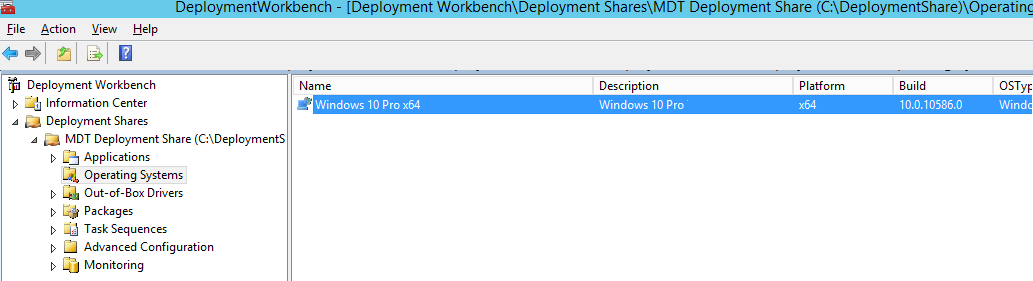
Разверните Deployment Shares -> MDT Deployment share. ПКМ по разделу Operating systems и в меню выберите Import Operating System.
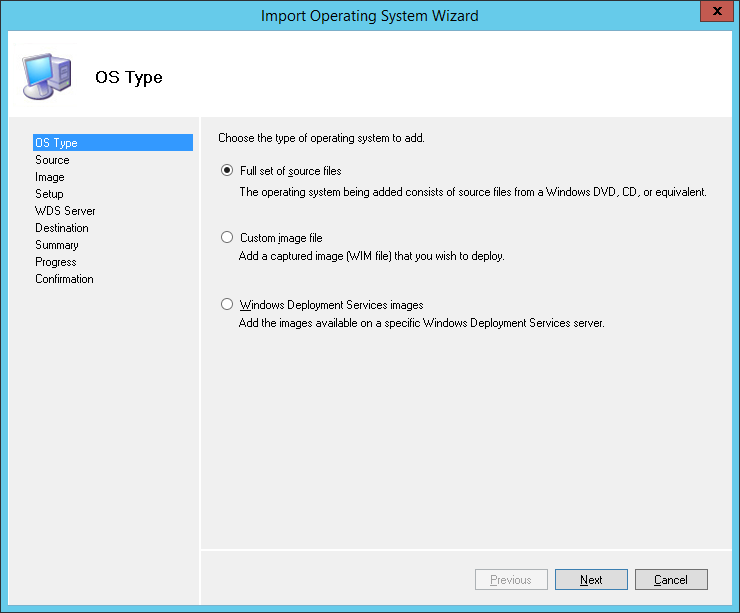
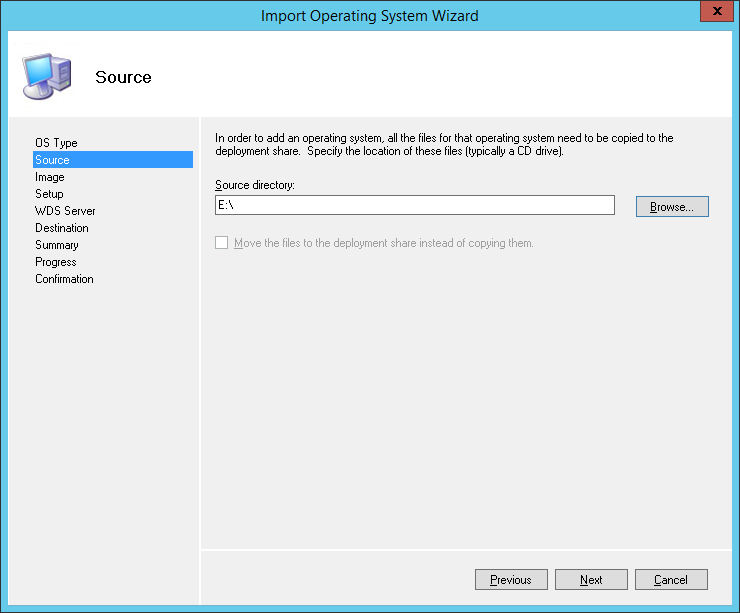
Выберите пункт Full set of source files и укажите имя драйва, на который был смонтирован iso образ Windows 10.
Укажите имя каталога, в котором будет храниться импортируемый образ.
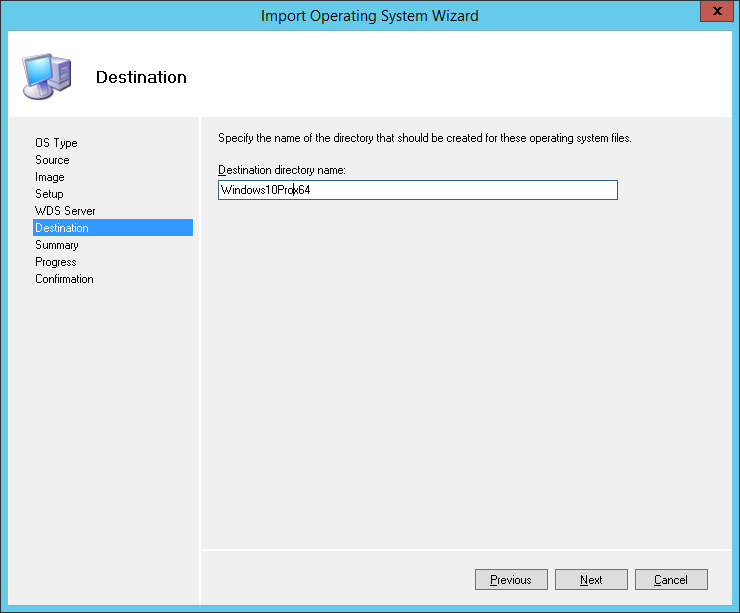
Мастер скопирует файлы дистрибутива Windows 10 в каталог C:\DeploymentShare\Operating Systems\Windows10Prox64, а в разделе Operating Systems появится новый запись, указывающая на образ Windows 10 Pro x64.
Создание задания установки MDT
Теперь нужно создать задание установки (Task Sequence), представляющее собой последовательность действий, необходимых для разворачивания Windows (это установка ОС, драйверов, приложений, конфигурация системы, обновлений, запуск различных скриптов настройки и т.п.).
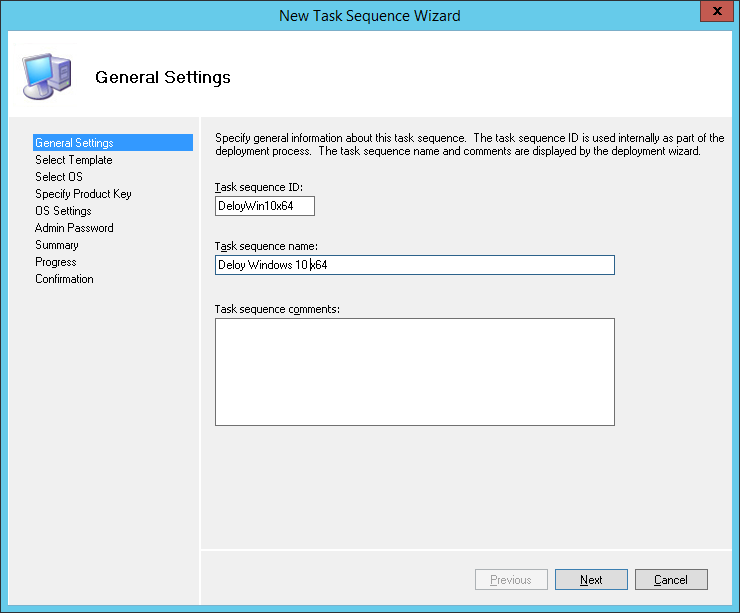
Щелкните ПКМ по разделу Task Sequences и выберите New Task Sequence.
В качестве идентификатора задания (Task sequence ID) укажем DeployWin10x64, а имени (Task sequence name) — “Deploy Windows 10 x64”.
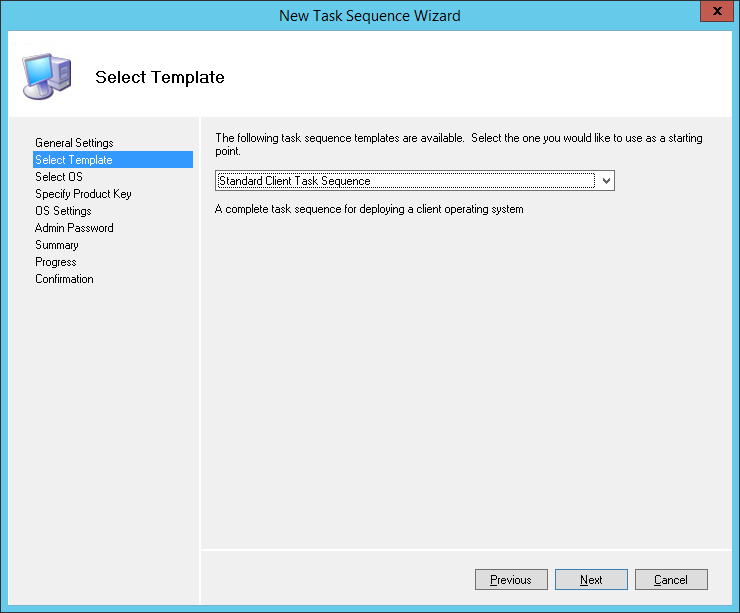
В выпадающем меню нужно выбрать один из существующих шаблонов заданий установки. В нашем случае это будет Standard Client Task Sequence.
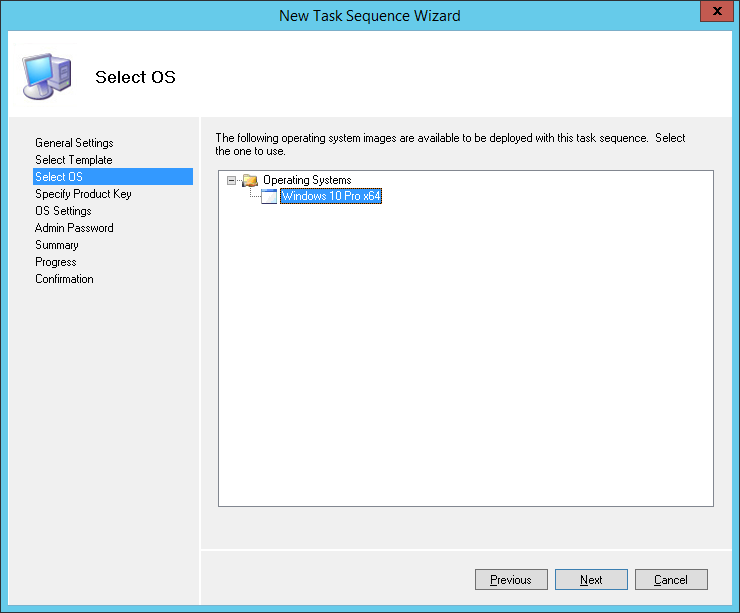
Выберите ОС, которую нужно установить в рамках этого задания (Windows 10 Pro x64).
Затем можно указать ключ продукта, это может быть как retail, MAK или KMS ключ.

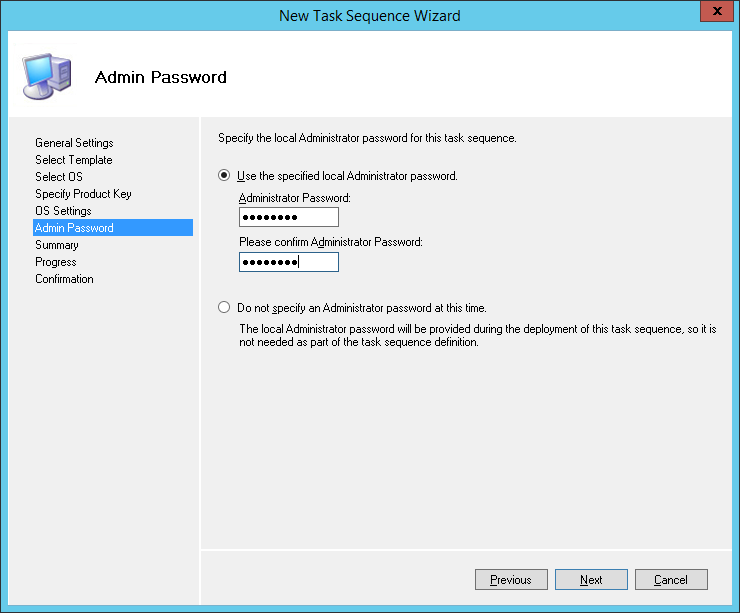
Далее можно задать пароль локального администратора на устанавливаемой системе.
Совет. Имейте в виду, что пароль хранится в открытом виде в файле Unattend.xml, поэтому стоит задать простой пароль локального администратора, который после ввода компьютера в домен будет автоматически измен с помощью MS LAPS.
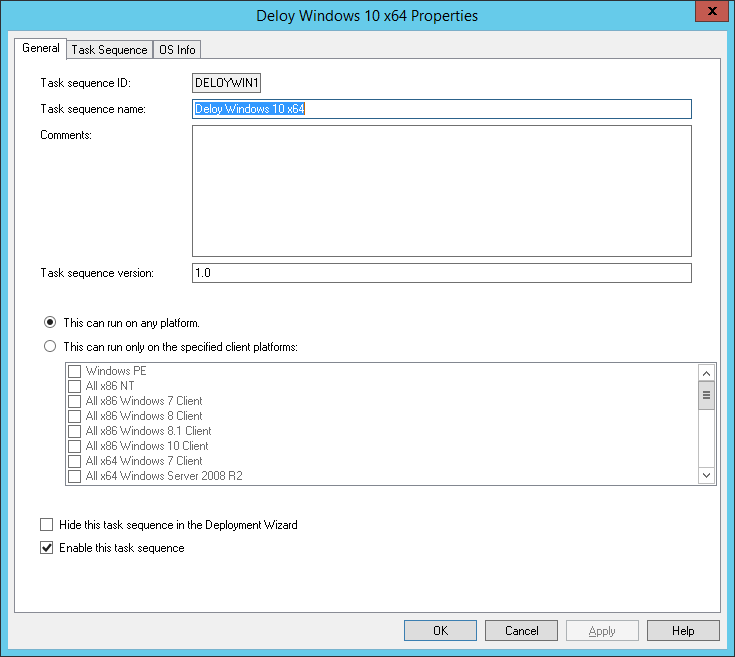
Откройте свойства созданного задания и проверьте, что его запуск разрешён на любых платформах (This can run on any platforms).
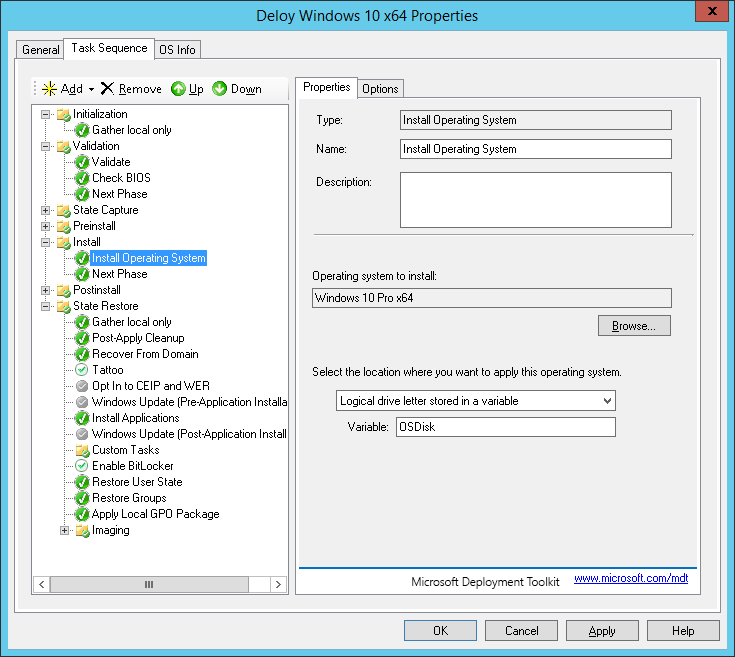
На вкладке Task Sequence отображается последовательность шагов, определенных в шаблоне, которые нужно выполнить при разворачивании ОС на клиенте. Здесь можно добавить собственные шаги, либо оставить все по-умолчанию.
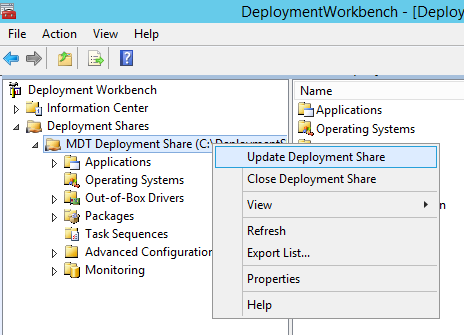
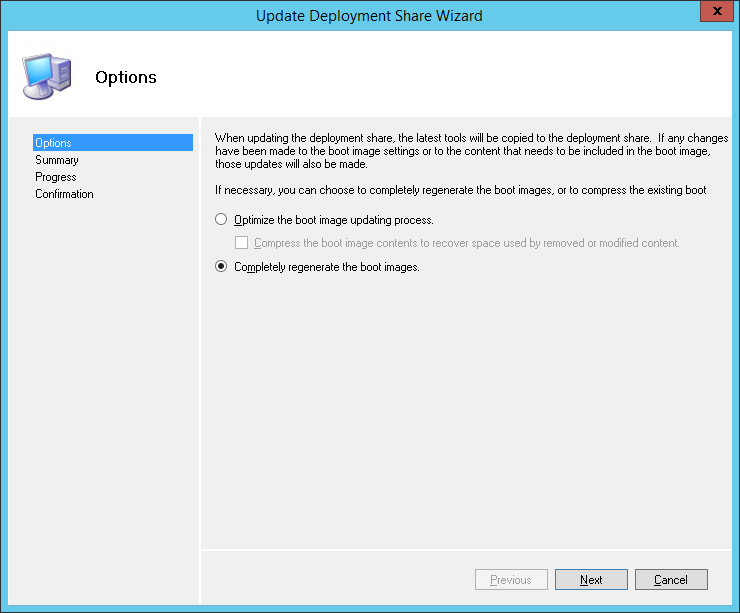
Далее нужно обновить каталок распространения MDT. Щелкните ПКМ по MDT Deployment Share и выберите Update Deployment Share. MDT сгенерирует загрузочные образы и файлы, нужные для установки ОС.
При первом запуске каталог C:\DeploymentShare\Boot пуст, поэтому нужно выбрать пункт Completely regenerate the boot image и дождаться генерации образов ОС.
В каталоге C:\DeploymentShare\Boot должны появится iso и wim образы Windows PE для x86 и x64 платформ. Эти образы могут быть использованы для загрузки физических или виртуальных машин при разворачивании образа. При разворачивании образа Windows по сети (PXE boot) с помощью Windows Deployment Services могут быть использованы wim файлы.
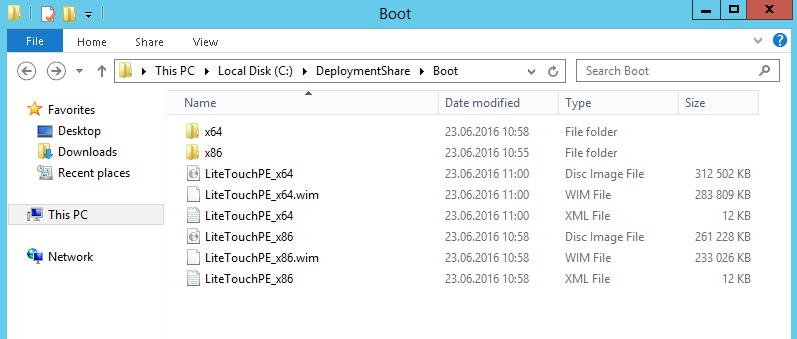
Совет. Т.к. мы планируем использовать загрузку PXE booting, нам понадобятся только wim файлы LiteTouchPE_x64.wim и LiteTouchPE_x86.wim.
Настройка загрузочного образа в Windows Deployment Services
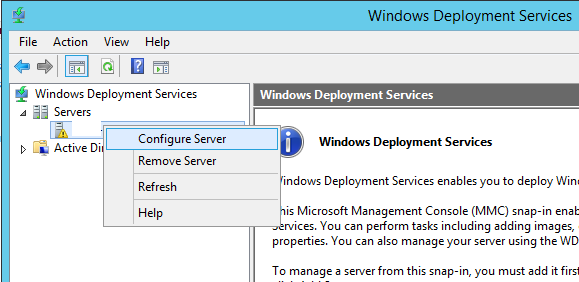
Следующий этап – настройка сервера WDS, который должен обслуживать запросы клиентов PXE. Откройте консоль Windows Deployment Services (Server Manager -> Tools -> Windows Deployment Services), разверните ветку Servers и в контекстном меню сервера выберите Configure Server.
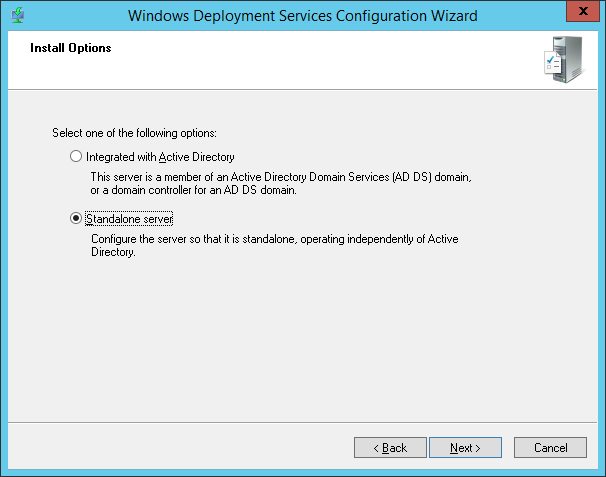
Укажем, что это будет отдельный WDS сервер (Standalone Server), не зависимый от Active Directory.
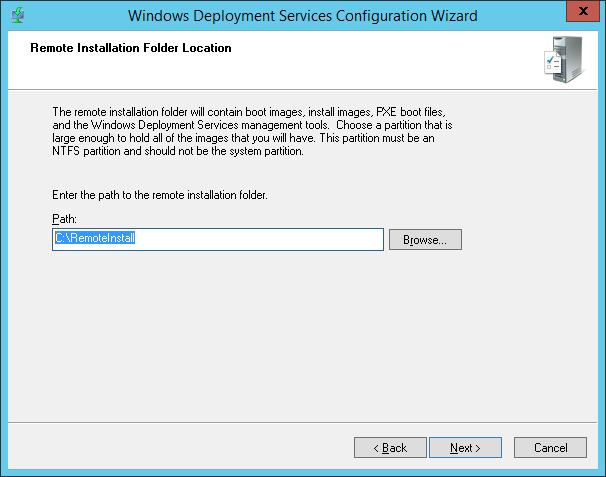
Каталог установки оставим без изменений — C:\RemoteInstall.
В настройках клиента PXE нужно указать, что нужно отвечать на запросы всех клиентов — Respond to all clien computers (known and unknown).
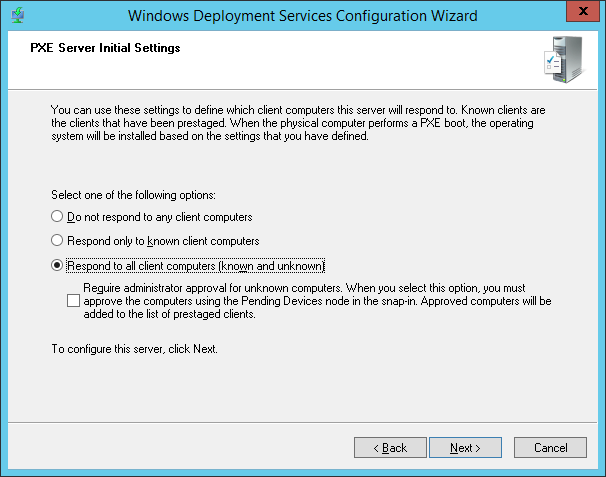
Совет. В среде Active Directory было бы безопаснее использовать опцию Respond only to known client computer.
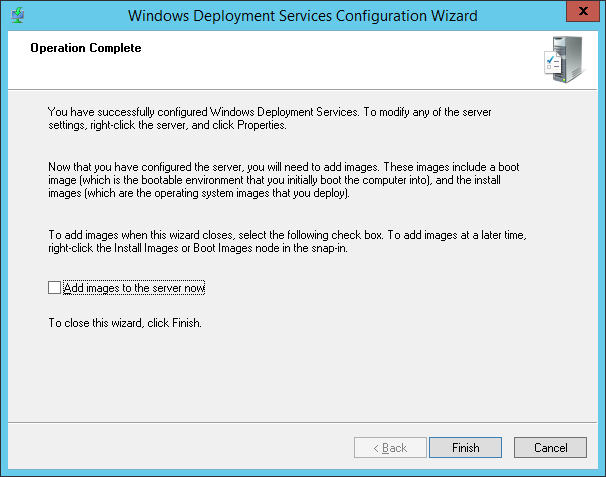
Снимите галку– Add images to the server now.
Зеленый треугольник на имени WDS сервера означает, что он настроен и запущен.
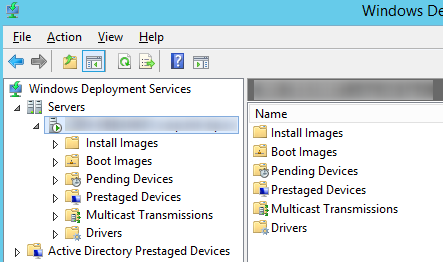
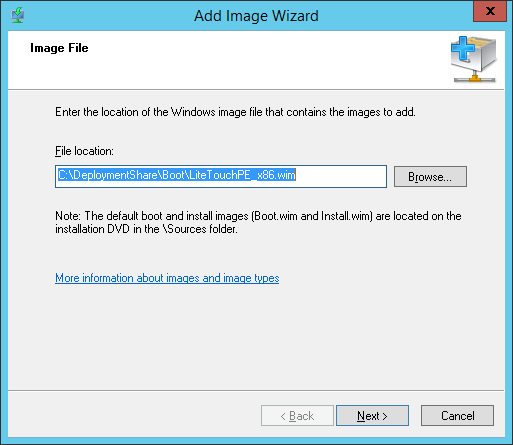
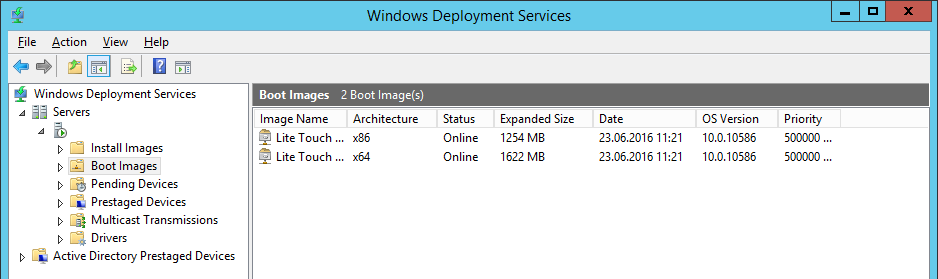
Теперь нам нужно импортировать на WDS сервер загрузочный образ, который мы создали ранее с помощью MDT. Щелкните ПКМ по Boot Image –> Add boot image.
Перейдите в каталог C:\DeploymentShare\Boot и последовательно добавьте файлы LiteTouchPE_x86.wim и LiteTouchPE_x64.wim.
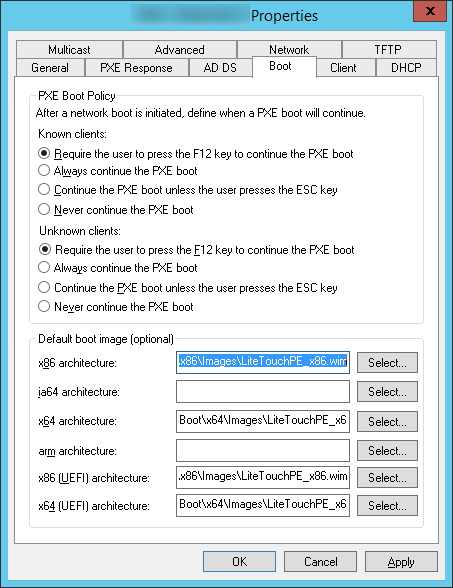
Последнее, что осталось выполнить – открыть свойства WDS сервера и перейти на вкладку Boot. Чтобы предотвратить случайную загрузку клиентов через PXE и автоматическую установку Windows, зададим обязательное использование клавиши F12 для использования PXE-загрузки. Для этого в секции PXE Boot Policy нужно выбрать опцию Require the user to press the F12 key to continue the PXE boot.
Здесь же укажите загрузочные образы для архитектур x86 и x64 (в том числе для архитектуры UEFI).
Все остальные настройки WDS сервера оставим по-умолчанию. Перезапустите службу WDS через консоль (All tasks ->Restart).
Важно. WDS сервер и клиентский компьютер, на который вы хотите установить ОС через PXE, должны находится в одной подсети (VLAN). Если они расположены в разных подсетях, нужно настроить DHCP-relay (IP Helper) с дополнительными DHCP опциями 60 и 67.
Тестирование установки Windows 10 по сети
Теперь мы готовы протестировать сетевую загрузку компьютера клиента с wim образа, расположенного на WDS сервере (PXE boot). В этом тесте это будет виртуальная машина VMWare. Запустите ВМ и в процессе загрузи несколько раз нажмите клавишу F12 для начала загрузки через PXE.
Press F12 for network service boot
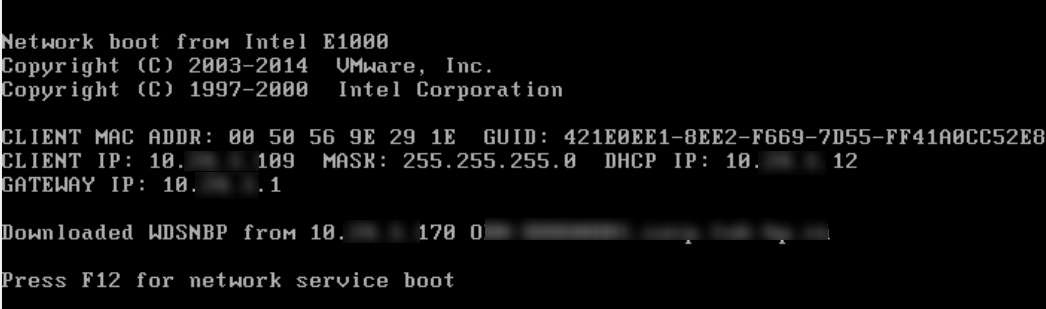
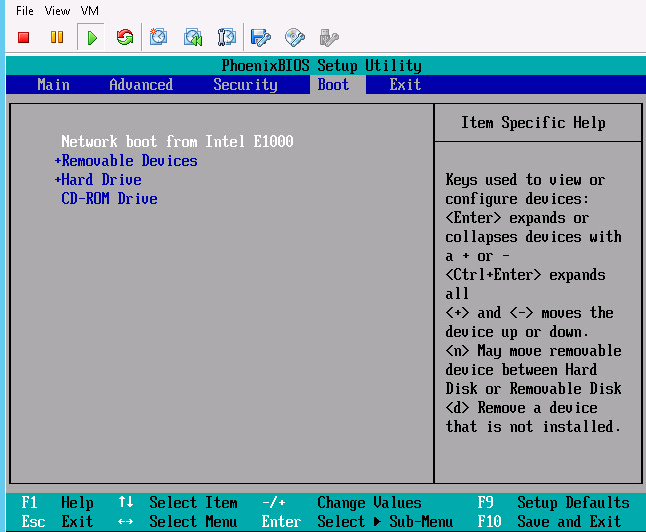
Совет. Т.к. экран загрузки в ВМ проскакивает слишком быстро, практически нереально успеть нажать кнопку F12. Поэтом в настройках ВМ предпочтительно задать наивысший приоритет для загрузочного устройства Network boot from Intel E1000.
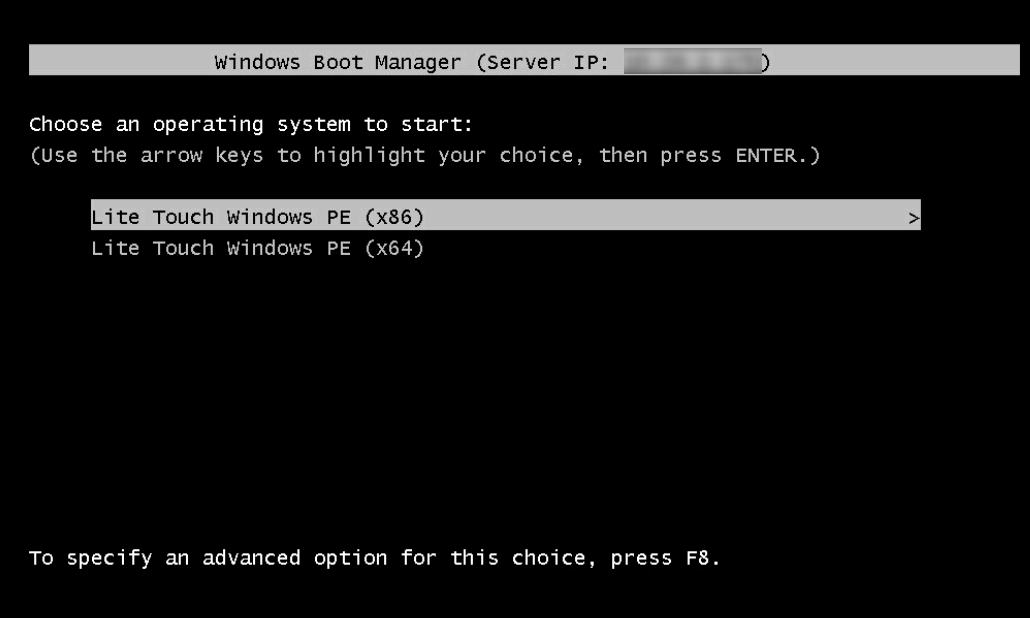
Машина подключится к WDS серверу и получит список доступных загрузочных образов Windows PE. В стандартном диалоге Boot Manager нужно быте выбрать ОС, которую нужно загрузить. В нашем случае это Lite Touch Windows PE (x86).
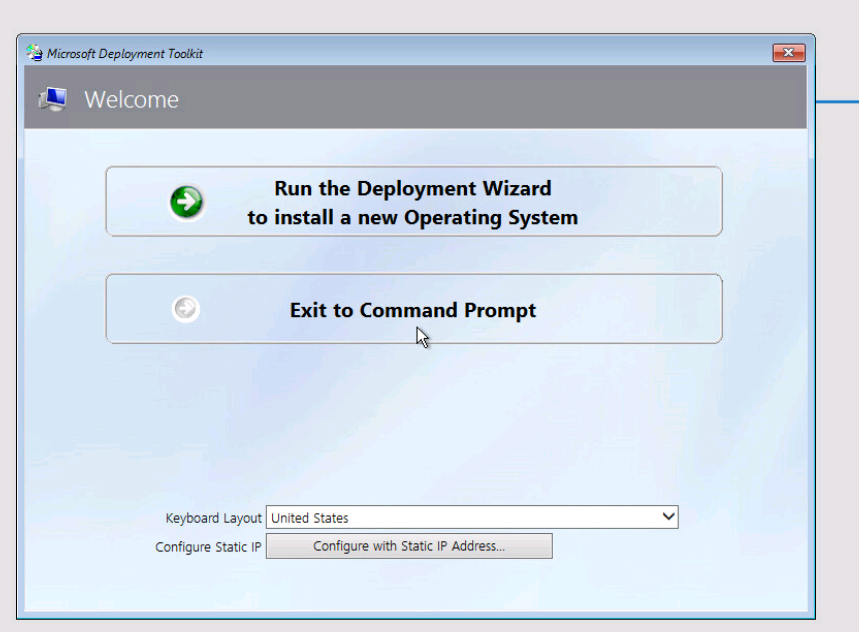
Система начнет загрузку по сети wim образа со средой WinPE и предложит начать установку Windows 10 с помощью мастера Microsoft Deployment Tool Wizard.

Нажмите на кнопку Run the Deployment Wizard to install a new Operating System для запуска пошагового мастера установки образа Windows 10 на компьютер клиента.
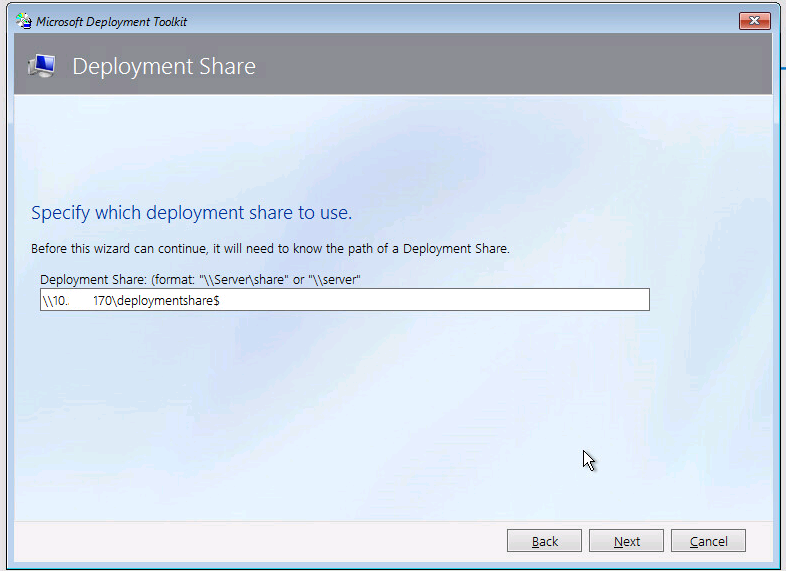
В нашем примере также понадобилось указать UNC путь к сетевой папке DeploymentShare$ на MDT сервере(\\10.1.24.170\DeploymentShare$) и имя+пароль пользователя для доступа к ней.
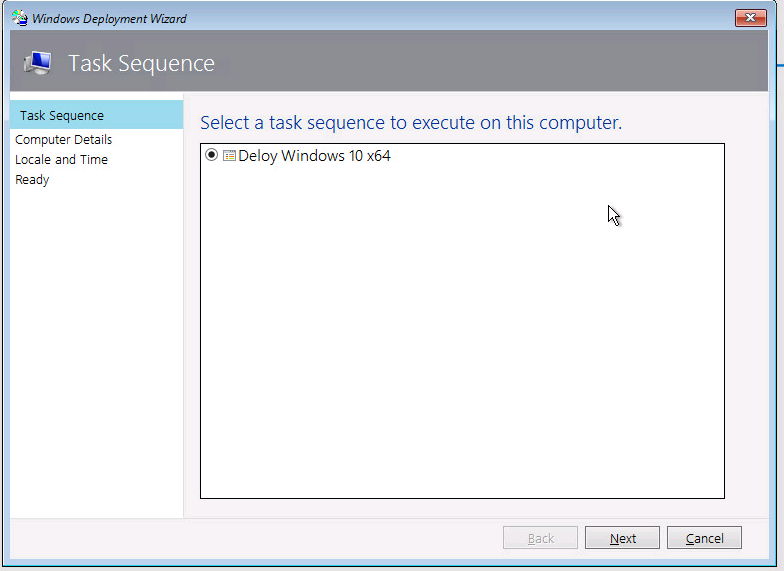
Осталось среди доступных заданий выбрать созданное ранее Deploy Windows 10 x64 и дождаться окончания сетевой установки образа Windows 10 на этот компьютер.
Итак, в этой статье мы показали, как воспользоваться функционалом MDT 2013 и WDS сервера для создания инфраструктуры, позволяющей в автоматическом режиме по сети развернуть образ Windows 10 на клиентах.
In my previous posts we have seen the installation and configuration of windows deployment services and deploying windows 7 using windows deployment services. In this post we will take a look at integrating windows deployment services with Microsoft Deployment Toolkit (MDT). Microsoft deployment toolkit is a solution accelerator for deploying operating system and applications, the latest version of MDT supports deployment of windows 8, Windows 7, Office 2010, Windows Server 2012 and later. The latest version of MDT can be downloaded from here. Please note that MDT is available for x86 and x64 platforms. Select the version that corresponds with your host hardware type. Both versions of MDT 2012 support deployment of x86 and x64 Windows operating systems so select the version that corresponds with your host hardware type. Note that both versions of MDT 2012 support deployment of x86 and x64 Windows operating systems.
Lab Setup:
The lab setup includes 2 virtual machines, one virtual machine will be installed with Windows Server 2008 R2 Enterprise x64 SP1 which will be our Domain Controller and DHCP server(AD.PRAJWAL.LOCAL) . The second virtual machine will be installed with Windows Server 2008 R2 Enterprise x64 SP1 .This will have MDT and WDS running on it (WDS.PRAJWAL.LOCAL) . For deploying operating system using MDT and WDS we will create a blank virtual machine.
On the Domain Controller machine install the DHCP role and configure the scope as per your requirement. On the second virtual machine, Install the Windows Deployment Services role and configure it. Before you start installing MDT 2012 install the .Net Framework 3.5.1 Features and which is a prerequisite for MDT. We will also install windows automated installation kit 3.0 which contains set of tools to customize, configure and deploy windows 7 and server 2008 R2 OS. The WAIK 3.0 can be downloaded from here.

On the machine WDS.PRAJWAL.LOCAL, launch the Server Manager, right click Features and click on Add Features.Install the Net Framework 3.5.1 Features else you might see the below error.
On the windows automated installation kit welcome page, click on Windows AIK Setup.
Click on Next to proceed with the installation.
The Windows Automated Installation Kit has been installed. Click on Close.
Launch the Microsoft Deployment Toolkit 2012 Update 1 and click on Next.
Click on Next.
The MDT 2012 setup is complete. Click on Finish.
Click on Start, click on All Programs, Microsoft Deployment Toolkit and click on Deployment Workbench.
The next step is to create a Deployment Share which is basically a shared folder that contains scripts, operating system source files, applications, drivers, and updates for the administrator to use for deployment. Note that you can create multiple deployment shares too. In this post we will go with a single deployment share. Right click on Deployment Shares and click on New Deployment Share.
The default Deployment share path is C:DeploymentShare. We will change the location to E:DeploymentShare. Click on Next.
Share Name – For this step, specify a valid share name. When you specify a share name make sure that the share name is unique in the network. Click on Next.
Options – You can leave this step to default values or check only options do you require. Click on Next and click on Finish to complete the new deployment share wizard.
Expand Deployment Shares, MDT Deployment Share. You should see list of options under MDT Deployment Share which we are going to configure soon in the coming post.
Still Need Help?
If you need further assistance on the above article or want to discuss other technical issues, check out some of these options.

Prajwal Desai
Prajwal Desai is a technology expert and 10 time Dual Microsoft MVP (Most Valuable Professional) with a strong focus on Microsoft Intune, SCCM, Windows 365, Enterprise Mobility, and Windows. He is a renowned author, speaker, & community leader, known for sharing his expertise & knowledge through his blog, YouTube, conferences, webinars etc.
Published October 01, 2022 by Danny Moran
Table of Contents
PAGE CONTENT
Introduction
Microsoft Deployment Toolkit (MDT) is a collection of tools that can be used to easily automate the deployment process for installing Windows Desktop and Windows Server operating systems.
Downloads
Required Downloads
- Microsoft Deployment Toolkit download
- Windows ADK for Windows 11, version 22H2 download
- Windows PE add-on for the ADK, version 2004 download
Other Downloads
If you need to download Windows 11, you can use these two links.
- Windows 11 22H2 download
- Windows 11 22H2 Evaluation download
Installing Windows Deployment Services
-
Run PowerShell as an Administrator
-
Run the following command:
Install-WindowsFeature WDS -
Open Server Manager, press Tools, then press Windows Deployment Services.
-
In the WDS panel, expand the Servers drop down in the left hand column.
-
Right-click your local server in the servers drop down and press configure server.
-
Before you begin, check your your environment meets the requirements, and if it does, press Next.
-
Select if you are integrating your WDS server with Active Directory, or if you are setting up a standalone server and press Next. (For this guide, we are integrating with Active Directory.)
-
Enter the location where you want to store your WDS files. By default, it stores it in C:\RemoteInstall. For best performance, you should change the path to a secondary drive, however using the default location works fine. Press Next once you have entered the path location. If you leave it on the C drive, then you will get a warning, however, you can just press Yes to continue.
-
For the PXE settings, set it to Respond to all client computer (known and unknown) and then press Next.
-
Untick Add images to the server now, as we will add the boot image at a later stage, and press Finish.
-
Run MicrosoftDeploymentToolkit_x64.msi
-
On the welcome screen of the setup wizard, press Next.
-
Accept the license agreement by ticking the box and then pressing Next.
-
On the custom setup page, leave all these are default. Microsoft Deployment Toolkit, and both subfeatures (Documents, and Tools and Templates) should be selected. Then press Next.
-
Select if you want to join the customer experience improvement program and then press Next.
-
On the last page, press Install to install Microsoft Deployment Toolkit.
-
After the install has finished, press Finish.
Installing the Windows ADK
-
Run adksetup.exe
-
Select where you want to install the ADK to and then press Next. By default, it installs to C:\Program Files x86\Windows Kits\10\ which is fine.
-
Select if you want to allow Microsoft to collect insights for the Windows Kits, and then press Next.
-
Accept the licence agreement by pressing Accept.
-
Select the features you want to install and then press Install. I leave the selected options as default as they can be easily changed at a later date if more are required.
-
After the install has finished, press Close.
Installing the Windows PE add-on
-
Run adkwinpesetup.exe
-
For the install location, it is auto selected based on where you installed the Windows ADK. Just press Next.
-
Select if you want to send anonymous usage data to Microsoft for the Windows Kits, and then press Next.
-
Accept the licence agreement by pressing Accept.
-
The only option, Windows Preinstallation Environment (Windows PE), should be ticked, and then press Install.
-
After the install has finished, press Close.
-
Open Deployment Workbench
-
Right-click Deployment Shares, and then press New Deployment Share.
-
Set a path for where you want to store your deployment share and press Next. The deployment share can end up being 100’s of GB in size. Pick a drive that has a lot of fast storage.
-
Set a Deployment Share name and then press Next. Make sure you leave the $ at the end of the share name.
-
Set a Deployment Share description and then press Next.
-
Leave the options as default as these will be amended later.
-
Check the summary is correct and then press Next to create the deployment share.
-
Once the deployment share has finished being created, press Finish.
-
Copy the installation ISO file for the operating system you want to deploy to your deployment server.
-
Right-click the ISO file and press Mount.
-
In the Deployment Workbench, right-click the Operating Systems folder and press New Folder.
-
Name the folder Windows the same name as the operating system you are importing and press Next, Next, and then Finish.
-
Right-click the new folder you just created and then press Import Operating System.
-
Select Full set of source files, and then press Next.
-
Select Browse…, and then select the mounted drive, and then press OK and then Next.
If you get an error at this stage, it is likely that the ISO file that you are using doesn’t have an install.wim file, but an install.esd file. You will copy the install.esd file from within the sources folder of the mounted drive to the desktop and then use the below guide to extract the install.wim file out of it. Then repeat Step 7 but select the folder that has your extracted install.wim file.
Guide on extracting WIM files from ESD files
-
Enter a destination directory name and then press Next. The name should be automatically picked up.
-
Check the summary is correct and then press Next to import the operating system.
-
Once the operating system has finished importing, press Finish to close the wizard.
-
Right-click the Task Sequences folder with MDT and press New Task Sequence.
-
Give your Task Sequence a unique ID and descriptive name, and then pres Next.
-
Select Standard Client Task Sequence and then press Next.
-
Select the operating system you want to deploy and press Next.
-
Select do not specify a product key at this time, and then press Next.
-
Fill in the Full Name, Organisation, and IE Home Page, and then press Next.
-
Set a local administrator password that can be used once the operating system has been deployed, and then press Next.
-
On the summary page, check the settings and then press Next to create the task sequence.
-
Press Finish to close the task sequence wizard.
-
Right-click your deployment share and press Properties.
-
Under General, untick x86 for the supported platforms.
-
Under Rules, enter the below settings into the Rules box.
[Settings] Priority=Default Properties=MyCustomProperty [Default] OSInstall=Y SkipBDDWelcome=YES SkipCapture=YES SkipAdminPassword=YES SkipProductKey=YES SkipComputerBackup=YES SkipBitLocker=YES SkipUserData=YES SkipTimeZone=YES SkipLocaleSelection=YES JoinDomain=ad.dannymoran.com MachineObjectOU=OU=Workstations,OU=Company,DC=ad,DC=dannymoran,DC=com KeyboardLocale=en-GB TimeZoneName=GMT Standard Time EventService=http://DEPLOYMENT01:9800 -
Press Edit Bootstrap.ini and enter the below settings.
[Settings] Priority=Default [Default] DeployRoot=\\DEPLOYMENT01\DeploymentShare$ UserID=Administrator UserDomain=ad.dannymoran.com UserPassword=Password01 KeyboardLocalePE=0809:00000809 SkipBDDWelcome=YES -
Under Windows PE, change the platform to x64, and then untick Generate a Lite Touch bootable ISO image.
-
Under Monitoring, tick Enable monitoring for this deployment share.
-
Press Apply and then OK.
-
Right-click your deployment share and press Update deployment share.
-
Select Completely regenrate boot images, and then press Next, and then Next to generate the boot images.
-
Open Windows Deployment Services
-
Right-click Boot Images and press Add Boot Image…
-
Select your MDT boot image. It should be located: C:\DeploymentShare\Boot\LiteTouchPE_x64.wim
-
Press Next, Next, Next, and then wait for the image to be imported and then press Finish.
You should now be able to network boot from devices on your local network and boot into MDT.
Once in the MDT PXE boot environment, follow the onscreen wizard to deploy the operating system.
Microsoft Deployment Toolkit (MDT) is a powerful tool for deploying Windows operating systems. When combined with Windows Deployment Services (WDS), MDT can leverage multicast deployments to efficiently deploy OS images to multiple clients simultaneously, reducing network load and deployment time. In this blog post, we’ll guide you through the process of enabling multicast deployments on your MDT server.
What is Multicast Deployment?
Multicast deployment allows a server to send a single instance of an operating system image to multiple clients at once. This method is particularly useful in environments where bandwidth is limited or when deploying to a large number of devices simultaneously.
Step-by-Step Guide to Enabling Multicast Deployments
Step 1: Prepare Your Server
Ensure that your server meets the following prerequisites:
- Running a version of Windows Server that supports WDS (e.g., Windows Server 2016, 2019, or later).
- MDT is installed and a deployment share (MDT1) is configured.
Step 2: Install Windows Deployment Services (WDS)
- Open Server Manager:
- Log in to your server (Server1) and open Server Manager.
- Add Roles and Features:
- Click on Add roles and features.
- In the wizard, click Next until you reach the Server Roles section.
- Select Windows Deployment Services and click Next.
- Complete the wizard and install the role.
- Configure WDS:
- After the installation, go to Tools in Server Manager and select Windows Deployment Services.
- In the WDS console, right-click on the server node and select Configure Server.
- Follow the wizard to complete the initial configuration, ensuring that you integrate WDS with your MDT deployment share (MDT1).
Step 3: Enable Multicast in MDT
- Open Deployment Workbench:
- Open Deployment Workbench from MDT.
- Navigate to your deployment share (MDT1).
- Configure Deployment Share:
- Right-click on your deployment share and select Properties.
- Go to the Windows PE tab.
- Enable multicast by checking the Enable multicast for this deployment share option.
- Adjust any additional multicast settings as needed.
- Update Deployment Share:
- Right-click on your deployment share (MDT1) and select Update Deployment Share.
- This will regenerate the boot images to include multicast support.
Step 4: Create a Multicast Transmission
- Open WDS Console:
- Go back to the WDS console.
- Navigate to Multicast Transmissions.
- Right-click and select Create Multicast Transmission.
- Configure Transmission:
- Follow the wizard to select the image you want to deploy.
- Set the transmission name and configure the multicast settings according to your needs.
Conclusion
By integrating Windows Deployment Services (WDS) with Microsoft Deployment Toolkit (MDT), you can efficiently deploy operating system images using multicast. This setup significantly reduces the network load and deployment time, making it ideal for large-scale deployments. Follow the steps outlined above to enable multicast deployments on your MDT server and streamline your OS deployment process.