
Last Updated :
07 Jun, 2024
Memcached is a powerful tool used to speed up dynamic web applications by caching data in memory. While commonly used on Unix-like systems, such as Linux, installing Memcached on Windows may seem difficult. However, setting it up on your Windows machine is straightforward with the right guidance. This guide will walk you through each step in simple language, making it easy for anyone to follow and install Memcached on Windows.

Table of Content
- Steps to install Memcached on Windows
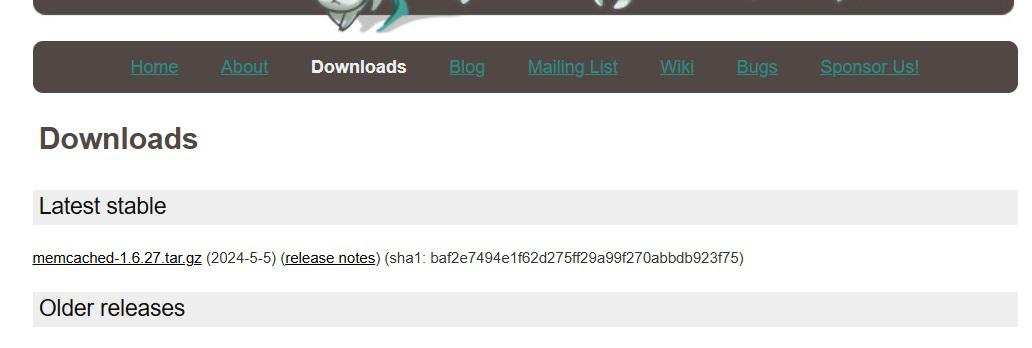
- Step 1: Downloading Memcached
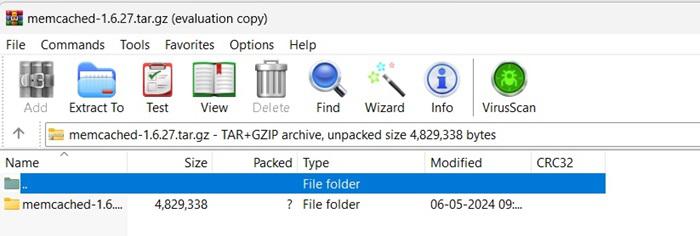
- Step 2: Extract the Contents
- Step 3: Accessing the Command Prompt
- Step 4: Installing Memcached
- Step 5: Starting Memcached
- Step 6: Verifying the Installation
- How to Install Memcached on Windows — FAQs
Steps to install Memcached on Windows
Step 1: Downloading Memcached
Download the Memcached binary for Windows from a trusted source. Ensure you choose the version compatible with your Windows architecture (32-bit or 64-bit).
Step 2: Extract the Contents
Once the download is complete, extract the contents of the zip file to a folder on your computer using built-in Windows tools or a third-party software like 7-Zip.
Step 3: Accessing the Command Prompt
Navigate to the extracted folder using the Command Prompt. To do this, open the Start menu, type «cmd» into the search bar, and press Enter. This will launch the Command Prompt.
Step 4: Installing Memcached
In the Command Prompt, navigate to the directory where you extracted the Memcached files using the cd command.
For example:
cd C:\path\to\extracted\memcached
Once you’re in the Memcached directory, execute the following command to initiate the installation process:
memcached.exe -d install
This command installs Memcached as a Windows service, allowing it to run in the background.
Step 5: Starting Memcached
After installing Memcached as a service, you can start it using the following command:
net start memcached
This command initiates the Memcached service, enabling it to cache data and enhance the performance of your web applications.
Step 6: Verifying the Installation
To ensure that Memcached has been successfully installed and is running correctly, you can check the Windows Services interface. Press Win + R, type «services.msc» into the Run dialog, and press Enter. Look for the «memcached» service in the list, and verify that its status is set to «Running.»
Conclusion
So You’ve successfully installed Memcached on your Windows machine. By caching data in memory, Memcached can significantly improve the performance of your web applications. Experiment with different configurations to optimize caching performance according to your application’s needs.
Memcached is a high performance, in-memory key-value store or caching system. Its main purpose is to speed up web applications by caching database queries, contents, or other computed results.
Memcached is originally a linux application, but since it is open-source, it has been compiled for windows. There are two major sources for the pre-built windows binary: Jellycan and Northscale, and both versions can be used. The following are the download links for the memcached windows binaries:
- http://code.jellycan.com/files/memcached-1.2.5-win32-bin.zip
- http://code.jellycan.com/files/memcached-1.2.6-win32-bin.zip
- http://downloads.northscale.com/memcached-win32-1.4.4-14.zip
- http://downloads.northscale.com/memcached-win64-1.4.4-14.zip
- http://downloads.northscale.com/memcached-1.4.5-x86.zip
- http://downloads.northscale.com/memcached-1.4.5-amd64.zip
In versions earlier than 1.4.5, memcached can install itself as a service. However, the ability to run memcached as a service is removed since version 1.4.5. Therefore, the installation steps are divided into two categories, part A for memcached prior to version 1.4.5. and part B for memcached version 1.4.5 and later.
A) Installation of memcached < 1.4.5:
-
Extract the memcached windows binary to any directory.
-
In versions earlier than 1.4.5, memcached can install itself as a service. Run a command prompt with elevated privileges, and type:
c:\memcached\memcached.exe -d install- Replace
c:\memcached\memcached.exewith the actual path of your installation.
- Replace
-
Then, start or stop the memcached service with the following command:
c:\memcached\memcached.exe -d start c:\memcached\memcached.exe -d stop -
To change the configuration of memcached, run regedit.exe and navigate to the key
HKEY_LOCAL_MACHINE\SYSTEM\CurrentControlSet\Services\memcached. Suppose you wish to increase the memory limit of memcached, edit the value of ImagePath to the following:"c:\memcached\memcached.exe" -d runservice -m 512- Besides
-m 512, you may also append other memcached parameters to the path. Runc:\memcached\memcached.exe -hto view the list of available parameters.
- Besides
-
Meanwhile, to uninstall the memcached serivce, run the following command:
c:\memcached\memcached.exe -d uninstall
B) Installation of memcached >= 1.4.5:
-
Extract the memcached windows binary to any directory.
-
In version 1.4.5 or later, memcached cannot run as a service. It must be started as a normal process using the task scheduler. To configure the memcached process to run automatically every time windows start, run a command prompt with elevated privileges, and type the following:
schtasks /create /sc onstart /tn memcached /tr "'c:\memcached\memcached.exe' -m 512"- Replace
c:\memcached\memcached.exewith the actual path of your installation. - Besides
-m 512, you may also append other memcached parameters to the path. Runc:\memcached\memcached.exe -hto view the list of available parameters.
- Replace
-
Meanwhile, to remove the scheduled memcached task, run the following command:
schtasks /delete /tn memcached
Integrating with PHP
To interface with memcached in PHP, you need to install the memcache extension for PHP:
-
Check that your PHP extension folder has the file php_memcache.dll. If not, download the file from https://pecl.php.net/package/memcache (select the windows dll file), and place it in the PHP extension folder.
-
Add the following line in php.ini to enable the memcache extension:
extension=php_memcache.dll -
Create this simple php script file to test that it works.
<?php

$memcache = new Memcache;
$memcache->connect('localhost', 11211) or die ("Could not connect");

$version = $memcache->getVersion();
echo "Server's version: ".$version."<br/>\n";

$tmp_object = new stdClass;
$tmp_object->str_attr = 'test';
$tmp_object->int_attr = 123;

$memcache->set('key', $tmp_object, false, 10) or die ("Failed to save data at the server");
echo "Store data in the cache (data will expire in 10 seconds)<br/>\n";

$get_result = $memcache->get('key');
echo "Data from the cache:<br/>\n";

var_dump($get_result);

?>
Integrating with Python
To interface with memcached in Python, you need to install the memcached client for Python.
-
Execute one of the following command to install the memcached client. The first is for Python 2.x while the second is for Python 3.x.
pip install python-memcached pip install python3-memcached -
Create this simple python script to test that it works.
import memcache
mc = memcache.Client(['127.0.0.1:11211'], debug=0)
mc.set("some_key", "Some value")
value = mc.get("some_key")
mc.set("another_key", 3)
mc.delete("another_key")
mc.set("key", "1")   # note that the key used for incr/decr must be a string.
mc.incr("key")
mc.decr("key")
Memcached statistics
To view the statistics for memcached, bring up a telnet connection to memcached by the command:
telnet 127.0.0.1 11211
Then, type stats and enter.
Here is an explanation of the different memcached stats.
| Name | Type | Meaning |
|---|---|---|
| pid | 32u | Process id of this server process |
| uptime | 32u | Number of secs since the server started |
| time | 32u | current UNIX time according to the server |
| version | string | Version string of this server |
| pointer_size | 32 | Default size of pointers on the host OS (generally 32 or 64) |
| rusage_user | 32u.32u | Accumulated user time for this process (seconds:microseconds) |
| rusage_system | 32u.32u | Accumulated system time for this process (seconds:microseconds) |
| curr_items | 32u | Current number of items stored |
| total_items | 32u | Total number of items stored since the server started |
| bytes | 64u | Current number of bytes used to store items |
| curr_connections | 32u | Number of open connections |
| total_connections | 32u | Total number of connections opened since the server started running |
| connection_structures | 32u | Number of connection structures allocated by the server |
| reserved_fds | 32u | Number of misc fds used internally |
| cmd_get | 64u | Cumulative number of retrieval reqs |
| cmd_set | 64u | Cumulative number of storage reqs |
| cmd_flush | 64u | Cumulative number of flush reqs |
| cmd_touch | 64u | Cumulative number of touch reqs |
| get_hits | 64u | Number of keys that have been requested and found present |
| get_misses | 64u | Number of items that have been requested and not found |
| delete_misses | 64u | Number of deletions reqs for missing keys |
| delete_hits | 64u | Number of deletion reqs resulting in an item being removed. |
| incr_misses | 64u | Number of incr reqs against missing keys. |
| incr_hits | 64u | Number of successful incr reqs. |
| decr_misses | 64u | Number of decr reqs against missing keys. |
| decr_hits | 64u | Number of successful decr reqs. |
| cas_misses | 64u | Number of CAS reqs against missing keys. |
| cas_hits | 64u | Number of successful CAS reqs. |
| cas_badval | 64u | Number of CAS reqs for which a key was found, but the CAS value did not match. |
| touch_hits | 64u | Numer of keys that have been touched with a new expiration time |
| touch_misses | 64u | Numer of items that have been touched and not found |
| auth_cmds | 64u | Number of authentication commands handled, success or failure. |
| auth_errors | 64u | Number of failed authentications. |
| evictions | 64u | Number of valid items removed from cache to free memory for new items |
| reclaimed | 64u | Number of times an entry was stored using memory from an expired entry |
| bytes_read | 64u | Total number of bytes read by this server from network |
| bytes_written | 64u | Total number of bytes sent by this server to network |
| limit_maxbytes | 32u | Number of bytes this server is allowed to use for storage. |
| threads | 32u | Number of worker threads requested. (see doc/threads.txt) |
| conn_yields | 64u | Number of times any connection yielded to another due to hitting the -R limit. |
| hash_power_level | 32u | Current size multiplier for hash table |
| hash_bytes | 64u | Bytes currently used by hash tables |
| hash_is_expanding | bool | Indicates if the hash table is being grown to a new size |
| expired_unfetched | 64u | Items pulled from LRU that were never touched by get/incr/append/etc before expiring |
| evicted_unfetched | 64u | Items evicted from LRU that were never touched by get/incr/append/etc. |
| slab_reassign_running | bool | If a slab page is being moved |
| slabs_moved | 64u | Total slab pages moved |
| crawler_reclaimed | 64u | Total items freed by LRU Crawler |
| lrutail_reflocked | 64u | Times LRU tail was found with active ref. Items moved to head to avoid OOM errors. |
Source: https://github.com/memcached/memcached/blob/master/doc/protocol.txt
This article will teach you how to install and set up Memcached in both a Windows and Linux environment.
If you’ve already completed the installation process, you can also learn how to access and manage data in Memcached with PHP.
What is Memcached?
Memcached is a free, open-source memory caching system, often used for enhancing the speed of dynamic database-driven websites.
The cached data gets stored in a short-term, dynamic memory location that can be easily accessed within your applications by a key name.
Install Memcached on Windows
Memcached installation in a Windows environment is pretty straightforward. There are just a few steps to follow.
There are two locations that you need to download from. The executable and supporting files GitHub repository, and the PHP extension from PHP’s official website.
First, we’ll start with the executable file and supporting files. You can download them from GitHub. They keep the repository updated regularly with the latest versions.
Make sure to download the correct files that your system will support, x64 vs. x86, etc., and place them in a directory on your local drive. My files are located on the C: drive at:
C:\memcached
Now, we need to head on over to the PHP PECL Downloads Page where you’ll see a long list of extension releases for PHP.
This list only contains a handful of Memcached Windows download links. The latest Windows download, at the time of this article, allows support for PHP versions 7.2 through 7.4. Download the file that fits your PHP environment description, x64 or x86, or thread-safe vs. non-thread-safe.
Move the newly downloaded DLL file to the location of your PHP installation and into the ext folder. Mine is located here:
C:\php\ext
In my case, I’ve downloaded the installation file for PHP 7.4, so my php.ini configuration will look like this:
[Memcache]
extension=php-7.4.x_memcache.dll
memcache.allow_failover = 0
memcache.chunk_size = 32768
memcache.default_port = 11211
memcache.hash_strategy = standard
memcache.hash_function = crc32
memcache.protocol = ascii
memcache.compress_threshold = 20000
memcache.lock_timeout = 1
Make sure you’ve used the correct file name when updating your
php.inifile. Yours could be different than what’s shown in this example and adding an incorrect file name will cause issues with the installation.
After you’ve downloaded and moved the DLL file to the correct location and updated your php.ini file, restart PHP by opening the Services app, or services.msc, and restarting the World Wide Web Publishing Service service.
[Ctrl+R]
services.msc
The final step is starting Memcached in your Windows environment by running the following command:
C:\memcached\memcached.exe -d start
Make sure you’re in the directory where the memcached.exe file is located before starting it, otherwise you’ll get an error. Alternatively, you could set up the path in your system’s environment variables to point to the correct directory so you can start it from anywhere in the command-line tool.
Install Memcached on Linux
There are two options for the first step of an installation in a Linux environment. You can either download the file directly from the downloads page or you can run the wget command below, which will grab and download the latest version automatically to your current active directory:
wget http://memcached.org/latest
Next, you’ll need to unzip the downloaded tar.gz file:
tar -zxvf memcached-1.x.x.tar.gz
You’ll need to replace «1.x.x» with the version number that was downloaded. At the time of this writing, the latest version was 1.6.9, so the command would be
tar -zxvf memcached-1.6.9.tar.gz
Now that the file contents are extracted, move over to the newly created directory, again using the correct version number in place of «1.x.x»:
cd memcached-1.x.x
Finally, complete the installation from the new directory:
./configure && make && make test && sudo make install
That’s pretty much it. With my Linux/Apache environment, I had to restart Apache for the new installation to take effect within my PHP applications, but all you need to do is run this command to restart Apache:
sudo systemctl restart apache2
Conclusion
Memcached is a great solution for memory caching, in either a Windows or Linux environment. Especially when querying heavy loads of data, or data that typically doesn’t change often.
Now that everything is setup in your environment, head on over to the next article to leverage the power of Memcached with PHP.
Written by: J. Rowe, Web Developer
Last Updated: April 19, 2022
Created: December 16, 2020
Answer
Memcached is primarily developed for Unix-like operating systems, but it also has support for Windows. In this guide, we will discuss the steps required to install and run Memcached on a Windows machine.
Prerequisites
- A Windows machine with administrative privileges.
- Visual Studio C++ Build Tools (2015 or later) installed on your system. You can download it from here.
- Memcached binary distribution package for Windows. You can download it from here.
Steps
- Extract the downloaded
memcached-win32-*.zipfile to any directory on your system. - Open the command prompt as an administrator and navigate to the directory where you extracted the files in step 1.
- Run the following command to install Memcached as a Windows service:
«`
memcached.exe -d install
«` - Once installed, start the Memcached service using the following command:
«`
net start memcached
«` - Memcached should now be running on your Windows machine. You can verify this by running the following command:
«`
telnet localhost 11211
«`
If the installation was successful, you should see output similar to the following:
«`
Trying 127.0.0.1…
Connected to localhost.
Escape character is ‘^]’.
«`
That’s it! Memcached is now successfully installed and running on your Windows machine. You can now use it in your applications to improve performance by caching frequently accessed data.
Was this content helpful?
Help us improve by giving us your feedback.
Database · November 8, 2024
Memcached is a high-performance, distributed memory object caching system that is primarily used to speed up dynamic web applications by alleviating database load. It is particularly useful for caching database query results, session data, and other frequently accessed data. In this tutorial, we will guide you through the simple installation of Memcached on a Windows operating system.
Prerequisites
Before you begin the installation process, ensure that you have the following:
- A Windows operating system (Windows 10 or later is recommended).
- Administrator access to your machine.
- Basic knowledge of command line operations.
Step 1: Download Memcached for Windows
Memcached does not officially support Windows, but there are third-party builds available. One of the most popular options is the Memcached installer provided by Jellycan. Follow these steps to download it:
- Visit the Memcached for Windows GitHub page.
- Download the latest release (look for a file named something like
memcached--win32.zip). - Extract the contents of the ZIP file to a directory of your choice (e.g.,
C:memcached).
Step 2: Install Memcached as a Service
To run Memcached as a service on Windows, you will need to use the command line. Follow these steps:
- Open the Command Prompt as an administrator. You can do this by searching for “cmd” in the Start menu, right-clicking on it, and selecting “Run as administrator.”
- Navigate to the directory where you extracted Memcached. For example:
- Run the following command to install Memcached as a service:
- Next, start the Memcached service with the following command:
cd C:memcachedmemcached.exe -d installmemcached.exe -d startStep 3: Configure Memcached
By default, Memcached runs on port 11211. You can customize its settings by modifying the command used to start the service. For example, to set the memory limit to 512 MB and run it on a different port, you can use:
memcached.exe -m 512 -p 11212 -d startIn this command:
-m 512sets the memory limit to 512 MB.-p 11212specifies the port number.
Step 4: Verify Memcached Installation
To ensure that Memcached is running correctly, you can use Telnet to connect to the Memcached server. Follow these steps:
- Open Command Prompt.
- Type the following command to connect to Memcached:
- If the connection is successful, you will see a blank screen. You can then type
statsand press Enter to view the statistics of your Memcached server.
telnet localhost 11211Step 5: Using Memcached in Your Applications
Once Memcached is installed and running, you can start using it in your applications. Most programming languages have libraries that allow you to interact with Memcached easily. For example, in PHP, you can use the following code to connect to Memcached:
$memcached = new Memcached();
$memcached->addServer('localhost', 11211);
$memcached->set('key', 'value');
$value = $memcached->get('key');
echo $value; // Outputs: value
Conclusion
In this tutorial, we covered the simple installation of Memcached on a Windows operating system. By following these steps, you can set up Memcached to improve the performance of your web applications. Caching frequently accessed data can significantly reduce database load and enhance user experience.
For those looking for reliable hosting solutions, consider exploring USA VPS Hosting options that can support your applications effectively.