
When installing or uninstaller an application with Windows Installer (.MSI executable or .EXE that calls msiexec.exe), or when launching Windows Update or Microsoft Update in Windows 7 (occurring at least in Windows 7 Beta), the installer and WU may crashes, halts, stops working, returns error, and causes Windows Installer or Windows Explorer to stop working with a “Windows Explorer has stopped working” or “Windows Installer has stopped working” dialog box. Installation or attempt to go to Windows Update fails.
The dialog continues to say “Windows is checking for a solution to the problem…” or “Windows is collecting more information about the problem. This might take several minutes…”, and then the system asks user whether “Do you want to send more information about the problem?” to Microsoft. Click on “Send Information” button does not return any viable solution, even setting compatibility modes to Windows XP and Windows Vista does not resolve the issue.

In Event Viewer, an Error level log is been recorded, and has the details similar to below:
Faulting application name: Explorer.EXE, version: 6.1.7000.0, time stamp: 0x49431f06
Faulting module name: ntdll.dll, version: 6.1.7000.0, time stamp: 0x49433e67
Exception code: 0xc0000005 or 0xc015000f
Fault offset: 0x0007f6d6
Faulting process id: 0x56c
Faulting application start time: 0x01c97968a23fc032
Faulting application path: C:\Windows\Explorer.EXE
Faulting module path: C:\Windows\SYSTEM32\ntdll.dll
Report Id: f314a30c-e55b-11dd-83d9-001e375c9a5c
The cause of the Windows Explorer crash and MSI failure is possible related to SQM Client, which is part of the Customer Experience Improvement Program (CEIP). Under the default setting, where MachineThrottling is enabled in the registry, any calls to WinSqmStartSession in ntdll.dll file will cause Explorer to crash, or Windows Installer installation to fail.
Thus, while waiting for hotfix or update from Microsoft, in order to fix the issue, just remove and delete the MachineThrottling registry entry from system registry. The MachineThrottling registry entry is located inside the following registry key:
HKEY_LOCAL_MACHINE\SOFTWARE\Microsoft\SQMClient\Windows\DisabledSessions
Alternatively, just download the Win7-Explorer-Fix.zip, unpack and run the Win7-Explorer-Fix.cmd as administrator to automatically delete the registry key away.
If the registry fix above doesn’t resolve the issue, try to disable the Windows Customer Experience Improvement Program for good. To disable CEIP, start Local Group Policy Editor (gpedit.msc), and then go to Computer Configuration -> Administrative Templates -> System -> Internet Communication Management -> Internet Communication settings. In the right details pane, double click on Turn off Windows Customer Experience Improvement Program, and then select Enabled radio button.

Disabling Windows Customer Experience Improvement Program does not cause any feature loss, as it’s used to send anonymous usage data to Microsoft in order to be used to improve Windows only.
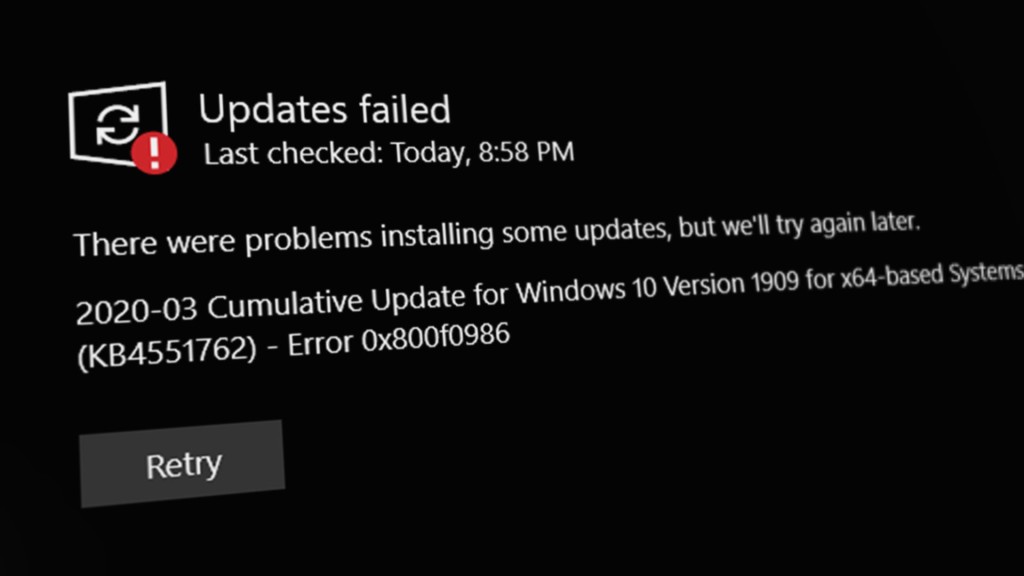
In this post, we will show how you can fix Installer encountered an error 0x800f0905 on Windows 11 or Windows 10. This error can occur when running Windows Update or using its Windows Update Standalone Installer.

When updating Windows, if you receive error 0x800f0905, it’s because of misconfigured or corrupt Windows files. It can be the update file or any of the system files. When files are corrupt, installations can fail, downloads can get stuck, and sometimes the process needs a restart. It takes a while for Windows to achieve this, but it can be done manually by the end user.
Follow these suggestions to fix Installer encountered an error 0x800f0905, while running the Windows Update Standalone Installer on your Windows 11/10 computer:
- Let Windows Update Itself
- Run Windows Update Troubleshooter
- Refresh Windows Update Services
- Repair Corrupt System Files
- Peform an InPlace Upgrade
You will need admin permission to resolve this.
1] Let Windows Update Itself
If you have slow hardware, especially an HDD, then downloading and installing Windows Update may take longer than itself. In fact, at times, it results in timeout, and Windows itself throws an error. The point is that you may have to wait for this and try a couple of times. Windows Updates work better compared to previous, but they still share their own set of problems.
Make sure to disable all sleep mode; in fact, Power Toys offer this feature without changing the core settings. Let it run overnight, and see if it gets resolved.
2] Run Windows Update Troubleshooter
Windows offers a built-in troubleshooter that can help you resolve Windows Update. It’s an automated solution where a lot of services are restarted, the Update cache is cleared, and so on.
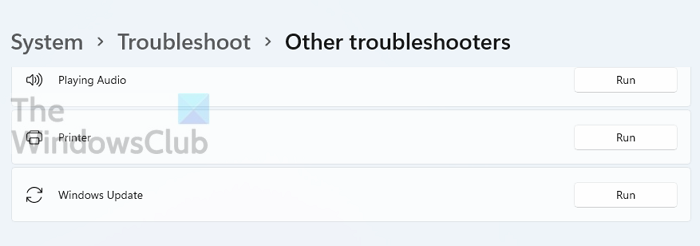
Go to Windows Settings > System > Troubleshoot > Other troubleshooter. If you are using Windows 10, then it is available under Update and Security instead of System.
Read: Fix 0x800f0845 Windows Update Error
3] Refresh Windows Update Services
The best way to reset Windows Update Service is to restart them, delete any downloaded files, and reset WINSOCK for network issues.
Open PowerShell or Windows Terminal or Command Prompt with admin permission, and execute the commands one after another:
net stop bits
net stop wuauserv
net stop appidsvc
net stop cryptsvc
Del "%ALLUSERSPROFILE%\Application Data\Microsoft\Network\Downloader\*.*"
rmdir %systemroot%\SoftwareDistribution /S /Q
rmdir %systemroot%\system32\catroot2 /S /Q
regsvr32.exe /s atl.dll
regsvr32.exe /s urlmon.dll
regsvr32.exe /s mshtml.dll
netsh winsock reset
netsh winsock reset proxy
net start bits
net start wuauserv
net start appidsvc
net start cryptsvc
Once done, you can restart Windows PC and then manually initiate the download once you log in again. This will remove any chance of errors caused by any of these services and files.
4] Repair Corrupt System Files
System File Checker (SFC) and DISM are built-in tools that can fix any corrupt system file by replacing them with a new copy.
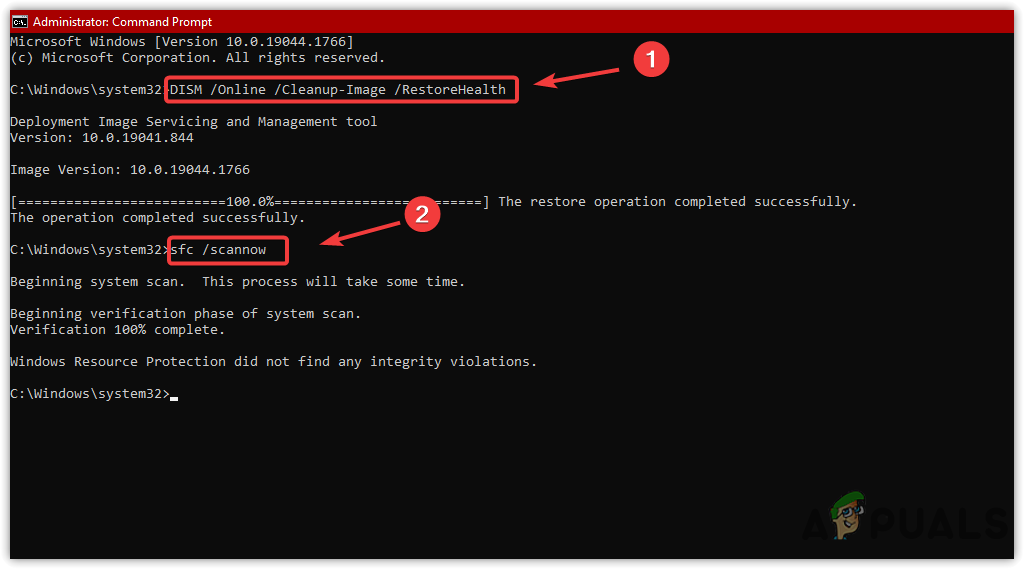
Open an elevated PowerShell or Command Prompt or Windows Terminal, and execute the following commands. First run the SFC command, and second DISM.
sfc /scannow
DISM /Online /Cleanup-Image /RestoreHealth
If any of these find a corrupted file system, they will be replaced. Once done, restart the PC, and then check for updates again or try installing it.
5] Peform an InPlace Upgrade
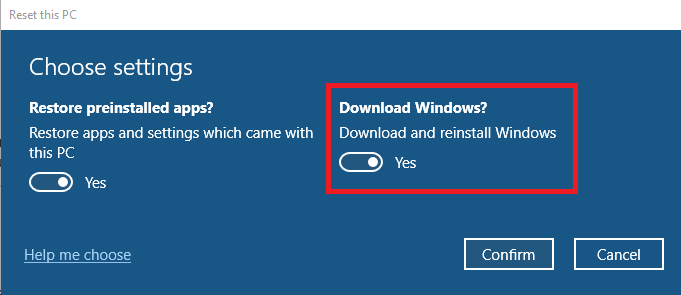
This method is a bit of overkill but if you cannot update, and it’s a major one, then you can choose to perform an in-place upgrade that will not remove anything from the system. The method is also called Refresh your PC. It can fix a lot of software, and system file issues by reinstalling the OS still preserving user data.
During the process, the wizard also offers you to download the latest version of Windows from the cloud, and then upgrade.
- The option is available in Settings > Recovery > Reset this PC in Windows 11.
- If you are on Windows 10, navigate to Settings > Update and Security > Recovery > Reset this PC.
I hope the post was easy to follow, and you were able to resolve the Windows Update Error 0x800f0905.
Related:
- Windows Update Standalone Installer Error 0x8007000d
- Windows Update Standalone Installer Error 0x80096002
How Do I Know if My Windows Update Is Corrupted?
If you are unable to install Windows update, or unable to download it, the update keeps failing in between, then it’s a hint that Windows Update is corrupted. The best way to restart the process is to delete everything in the Software Distribution folder and redownload everything.
Will Resetting PC Fix Corrupted Files?
It helps when you do not have any other option, and should be used when you are unable to next major update. You can use the Reset this PC option, followed by downloading the latest version of Windows using the cloud option.
Is It Better to Reset or Reinstall Windows?
Reset is a better option because it will save a lot of time, and also ensure the data on the PC is wiped clean. While both are eventually the same process, Reset option doesn’t need you to be around.
How Do I Fix a Corrupted Windows Update?
The best fix is using the Troubleshooter tool available in Windows along with DISM and SFC tools. They will replace everything that is corrupted. You can also follow the manual method, but that will involve deleting files from System Folders so make sure you clearly understand before doing it.
Windows Installer Keeps Popping Up: Troubleshooting Guide
The Windows Installer service is a fundamental component of the Windows operating system, responsible for installing, maintaining, and removing software applications. However, users often encounter a frustrating issue where the Windows Installer dialog box keeps popping up frequently, even if no installation is needed. This annoying behavior can disrupt workflow and productivity, making it essential to understand the causes and solutions of the issue. This article will provide a detailed examination of potential reasons behind the recurrent Windows Installer prompts and various methods to resolve the problem effectively.
Understanding the Windows Installer Service
Before diving into troubleshooting, it is crucial to understand what the Windows Installer service is and how it functions. The Windows Installer is a built-in Windows service (msiexec.exe) that manages software installation and maintenance. It uses installation packages with a .msi file extension to perform these tasks. Several third-party applications also utilize this service, which provides reliability through its organized method of handling installations and uninstalls.
Why Does Windows Installer Keep Popping Up?
The Windows Installer dialog can appear unexpectedly for several reasons:
-
Incomplete or Incorrect Installations: If software has been installed incorrectly or is missing necessary components, the Windows Installer may attempt to complete or reconfigure the installation.
-
Corrupted Registry Entries: Software uninstalls can leave behind corrupted or residual registry entries, which the Windows Installer attempts to access, causing it to open.
-
Missing or Damaged Files: If certain files associated with an application are missing or corrupted, the system may trigger the installer to repair the application.
-
Malware or Adware: In some cases, malware or adware can mimic installer prompts as a means to install unwanted software onto your system.
-
Scheduled Tasks: Some applications may create scheduled tasks that call the Windows Installer service at specific times, resulting in the pop-up.
-
Software Updates: Sometimes, an application will attempt to update its components during startup, triggering the installer even when you are not trying to install anything.
Troubleshooting the Windows Installer Pop-Up
No matter the reason behind the pop-up, various methods can help you diagnose and resolve the issue. Here’s a step-by-step troubleshooting guide.
1. Check for Active Installations
Before diving deeper into troubleshooting, check if there are any active installations happening on your computer.
- Open Task Manager: Press
Ctrl + Shift + Escto open the task manager. Look for any setup processes under the ‘Processes’ tab. - Check Installed Programs: Go to Control Panel > Programs > Programs and Features and review recently installed or updated software. It’s possible that an activity is still running in the background.
2. Repair or Uninstall Problematic Software
If you identify any specific software that seems to be causing the issue, repair or uninstall it.
-
Repair: Go to Control Panel > Programs and Features, select the software, and click on the «Repair» option if available. Follow the prompts and see if this resolves the issue.
-
Uninstall: If repairing the software doesn’t work, consider uninstalling it altogether from the same menu.
3. Clean Up the Registry
Incorrect or leftover entries in the Windows Registry can trigger the Windows Installer. It’s recommended to create a backup before making any changes:
-
Backup the Registry:
- Press
Windows + R, typeregedit, and hit Enter. - In the Registry Editor, click on «File» and then «Export» to save a backup file.
- Press
-
Clean Up:
- Navigate to
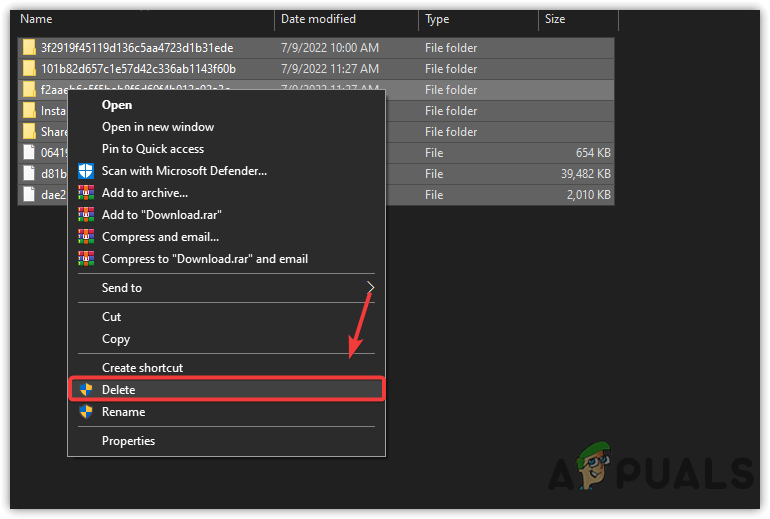
HKEY_LOCAL_MACHINESOFTWAREMicrosoftWindowsCurrentVersionUninstall. - Check for software that you have uninstalled but still appears in this directory. Right-click on any unused entries and select «Delete.»
- Navigate to
Be cautious while modifying the registry, as any incorrect changes could lead to system instability.
4. Disable Windows Installer Service
Disabling the Windows Installer as a workaround can help, but it is usually not recommended since it prevents all software installations or repairs. However, if you are in a bind, here’s how:
- Press
Windows + R, typeservices.msc, and press Enter. - Locate «Windows Installer» in the services list.
- Right-click it, then click on «Stop.»
Remember, this is only a temporary measure and may hinder your ability to install or update software.
5. Use the Microsoft Program Install and Uninstall Troubleshooter
Microsoft provides tools to deal with Windows Installer issues effectively. The Program Install and Uninstall troubleshooter can help address problems.
- Download the troubleshooter from the Microsoft website.
- Run the program and follow the prompts to fix installation issues.
This tool can automatically detect common problems and sometimes offers manual options if needed.
6. Check for Malware and Adware
Given that malware can replicate installer behavior, you should probably run a thorough scan of your system.
-
Run Windows Defender:
- Go to Settings > Update & Security > Windows Security > Virus & Threat Protection.
- Perform a Quick Scan or Full Scan.
-
Use Third-Party Software:
- Tools such as Malwarebytes or AdwCleaner can help detect and remove adware and malware more effectively.
7. Reboot in Safe Mode
In Safe Mode, only essential system services and processes run, which can help determine if the issue is related to a third-party application.
- Access Safe Mode:
- Click on the Start menu, then select «Settings» > «Update & Security» > «Recovery».
- Under «Advanced Startup,» click «Restart now.»
- Following the reboot, choose «Troubleshoot» > «Advanced options» > «Startup Settings,» and click «Restart.»
- After your computer restarts, choose “Safe Mode.”
Once in Safe Mode, observe whether the Windows Installer keeps appearing. If it does not, a third-party app is likely at fault.
8. System File Checker and DISM
Corrupted system files can cause erratic behavior, including issues with the Windows Installer. Utilize the built-in System File Checker (SFC) and Deployment Imaging Service and Management Tool (DISM) to scan and repair files:
-
Run SFC:
- Open the Command Prompt as an administrator by typing
cmdin the Start menu, right-clicking it, and selecting “Run as administrator.” - Type
sfc /scannowand press Enter. This will scan and repair missing or corrupted system files.
- Open the Command Prompt as an administrator by typing
-
Run DISM:
- Similarly, in the Command Prompt, type
DISM /Online /Cleanup-Image /RestoreHealthand press Enter. This command fixes any image issues that might cause problems.
- Similarly, in the Command Prompt, type
9. Manage Startup Programs
Certain software may create tasks that invoke the Windows Installer at startup. Modify your startup programs to see if anything suspicious is running.
- Access Task Manager:
- Press
Ctrl + Shift + Escand navigate to the ‘Startup’ tab. - Disable applications that seem unnecessary or related to the software triggering the issue.
- Press
10. Restore System to A Previous Point
If you’ve recently installed new software or updates and this has caused the Windows Installer pop-up to begin, consider using System Restore:
- Access System Restore:
- Search for «Create a restore point» in the Start menu.
- Click on «System Restore» and follow the prompts to restore to a date before the problem started.
11. Update Windows
Keeping your operating system updated is critical for maintaining optimal performance. Microsoft often releases patches that fix known issues, including those related to the Windows Installer.
- Check for Updates:
- Go to Settings > Update & Security > Windows Update, and click on «Check for updates.»
- Install any available updates and restart your computer.
12. Consider Reinstalling Windows
If all else fails, and the problem persists, you may need to consider a complete reinstallation of the operating system. This step can be extreme, but it ensures that all files are reset to their original state.
-
Backup Data: Prior to reinstalling, make sure to back up all your important files to prevent data loss.
-
Create Installation Media: Use the Windows Media Creation Tool to create a bootable USB drive.
-
Reinstall: Follow the prompts to reinstall Windows. Make sure you have your product key if needed.
Conclusion
Experiencing frequent Windows Installer pop-ups can be incredibly frustrating, interfering with daily tasks and productivity. While the problem could stem from a variety of sources, this guide encompasses a comprehensive range of troubleshooting methods from simple checks and repairs to the more drastic measure of reinstalling Windows.
By systematically following through the steps mentioned above, users can identify the root cause of the Windows Installer prompts and implement an effective resolution. It’s always wise to regularly back up your data and keep your system updated to prevent future occurrences of the problem. With patience and attention to detail, resolving these annoying Windows Installer pop-ups is entirely achievable.
Have you encountered the Windows Installer Error 0xc8000222 while trying to update your computer? This issue has been a concern to many Windows users.
If you see the “installer encountered an Error 0xC8000222” notification, you were likely trying to install specific Windows Updates or the Windows Update System Readiness Tool.
Here’s a classic user example of the Installer Error 0xc8000222:
“When I run Windows6.1-KB982018-v3-x64.msu, it immediately fails with error 0xc8000222.”
This user was trying to update a specific Windows Update – kb/982018 – before being prompted with the error message. In most cases, when this Windows Update error occurs, an error window will pop up and prompt the user with the following messages:
“Go for Windows Update.”
“Send a problem report to Windows using its error reporting service.”
“Windows could not search for new updates.”
“Installer encountered an error 0xc8000222”
Important!
The error 0xc8000222 can be result of Windows misconfiguration, junk files and system file conflicts. You can optimize your Windows performance automatically, using a quality PC Repair software. You can download it here.
Download PC Repair
Why Does the Windows Installer Error 0xc8000222 Happen?
The most common cause of the Windows Installer Error 0xc8000222 is broken or corrupt Windows system files. This causes the needed information for the proper functioning of the important Windows files, programs, and applications to be unavailable, which results in the Windows Update error code.
Other causes of the Windows Installer Error 0xc8000222 include:
- Improper system shutdown
- Hardware malfunction
- Malware or virus attack of the system
- Corrupted shared library files
- Deleted or corruption of file registry entries
- Incomplete installation or uninstallation or a program or application
- Misconfiguration of Windows Update system
- Corrupt or incomplete downloaded files cache
Note: These causes that we’ve listed here are the most common, as reported by many users. There might be other possible causes that are not listed here.
Fix the Windows Installer Error 0xc8000222
The following solutions will help you get rid of the Windows Installer Error 0xc8000222 so that you can continue with your Windows Update process.
Note: Most of these solutions will require you to use the elevated Command Prompt (or Command Prompt admin). This means you will need to open the Command Prompt as an administrator and allow the User Account Control (UAC) if prompted.
Scan Your System with a Quality Antimalware
When you see the ‘installer encountered an Error 0xc8000222’ notification, you shouldn’t rule out a virus or malware infection. This problem is known to cause many unexpected errors in the Windows operating system. Scanning your system with a quality antimalware software can help flush out the malware or viruses and restore your PC to its normal function.
Run the Windows Update Troubleshooter
When you encounter any Windows Update error, the Windows Update Troubleshooter should be your first troubleshooting solution to scan, identify, and repair damaged Windows Update components.
To run the Windows Update Troubleshooter:
- Press Win + S keys.
- On the search bar, type
troubleshooter - Click Troubleshooting.
- From the list of Troubleshoot computer problems, select Windows Update.
- Follow the on-screen instruction to let the Windows Update Troubleshoot run.
- After completion, restart your PC to save changes.
Temporarily Disable Third-Party Antivirus or Firewall
Some antivirus or antimalware software can be sensitive and cause unnecessary PC errors. Depending on your computer’s third-party antivirus program, follow the manufacturer’s instructions to disable it until you’re done with the Windows Update that you’re running.
You can also consider disabling your PC’s firewall using the following steps:
- Open Windows search, then type
control panel. - Open the Control Panel, the select System and Security.
- Click Windows Defender Firewall.
- Click on Turn Windows Defender Firewall On or Off.
- Now, select the Disable option for both the radio button.
Run System File Checker and CHKDSK
- Right-click Windows Start, then select Command Prompt (Admin).
- In the Command Prompt, type
sfc/ scannow(no quotes). Press Enter to run the command. - Again, input this command in the Command Prompt, then press Enter:
sfc /scannow /offbootdir=c:\ /offwindir=c:\windows - Scanning the system will begin automatically. Wait for the process to complete (it can take a few minutes).
If the SFC scan finds any problem, it will repair it automatically. Once done, restart the PC and check if the Windows Update error has been resolved.
Run DISM to Fix The Error 0xc8000222
If the SFC scan fails to yield positive information, try the DISM scan.
- If the SFC scan fails to yield positive information, try the DISM scan.
- Press Win + X keys > Select Command Prompt (Admin)
- Type the following commands in the cmd and press Enter after every command:
Dism /Online /Cleanup-Image /CheckHealth
Dism /Online /Cleanup-Image /ScanHealth
Dism /Online /Cleanup-Image /RestoreHealth - Let the DISM commands run to completion. It might take some time, so be patient.
- If the above commands don’t find anything to fix, type (copy and paste) the following commands in the Command Prompt again and press Enter after each command:
Dism /Image:C:\offline /Cleanup-Image /RestoreHealth /Source:c:\test\mount\windowsDism /Online /Cleanup-Image /RestoreHealth /Source:c:\test\mount\windows /LimitAccess
Once done, reboot your PC to save the changes you’ve made and see if they were able to fix the Windows Update Error 0xc8000222.
The DISM commands can also solve such errors like DISM error 0x800f081f and many Windows update issues like 0xc000012f.
Clear the Windows Update Configuration and Cache
You may need to clear the cache and rename the Windows Update service. To do so:
- Right-click on Start Menu > Command Prompt (Admin).
- If User Account Control (UAC) is enabled, select Yes.
- In the Command Prompt, type
net stop wuauserv. Then, wait for the message that indicates, “The Windows Update service was stopped successfully.” - Again, execute this command:
ren c:\windows\SoftwareDistribution softwaredistribution.oldNote: This command will rename the old Windows Update directly and cause the Windows Update service to recreate this folder. - Again, run this command:
net start wuauserv
Wait for the message that says, “The Windows Update service was started successfully”.
Perform a Clean Boot
Sometimes the third-party software in your computer can conflict with Windows essential services and cause the Windows Update error. If you perform a clean boot, you’ll get the opportunity to diagnose the issue step by step.
To conduct a clean boot in Windows 10:
- Sign in to your PC as an administrator.
- Open the search box, then type
msconfig. - Click System Configuration, then go to the Services tab.
- Check the box of ‘Hide all Microsoft services’ and then click Disable all.
- Move to the Startup tab in the System Configuration > then select Open Task Manager.
- In the Task Manager, go to Startup.
- For each startup item in the list, select the item and then select Disable.
- Once you’ve disabled all the tasks, close the Task Manager.
- Now, still in the System Configuration Window, go to the Startup tab and select OK.
Now, try again to conduct the Windows Update and see if it works without the error.
Microsoft releases a multitude of cumulative updates for Windows 10 and 11 each month. Usually, these updates are automatically downloaded and installed through Windows Update. However, users may sometimes encounter various errors during the update process. For each error, there are tried-and-true solutions suggested by users who have faced similar issues.
Understanding the reasons behind Windows Update errors is essential to resolving them. Your error could come from the following causes:
- Incorrect or Corrupted Registry: Improperly modified or corrupt registry entries, particularly the wuauserv key, can lead to update errors since this key is responsible for downloading, detecting, and installing Windows updates.
- Windows Update Service Not Running: If the Windows Update service is disabled or has been stopped, updates will be unable to install.
- Corrupted Software Distribution Folder: Errors are likely if the contents of the Software Distribution folder become corrupted, as this folder stores the temporary files necessary for installing Windows updates.
- Corrupt System Files: Corrupted system files are another frequent source of issues since they are integral to the update process. Follow the instructions below to repair any corrupted files.
Note that the causes of Windows Update errors can vary and may include other factors such as network issues, hardware and software incompatibility, specific bugs within an update, or additional system conflicts. Identifying the exact cause of a Windows Update error in your case may require a methodical troubleshooting approach.
1. Use the Windows Update Troubleshooter
The Windows Update Troubleshooter is your first line of defense against update-related issues. It scans for conflicts within the update process and automatically fixes common errors, such as configuration issues or network connectivity problems. This built-in utility can save you the trouble of manually diagnosing and resolving the root causes of update failures.
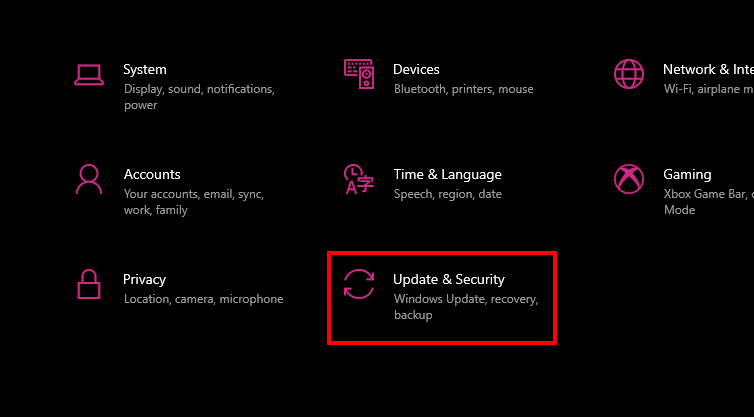
- Press Windows + I to open Settings, select Update & Security, and then click Troubleshoot.

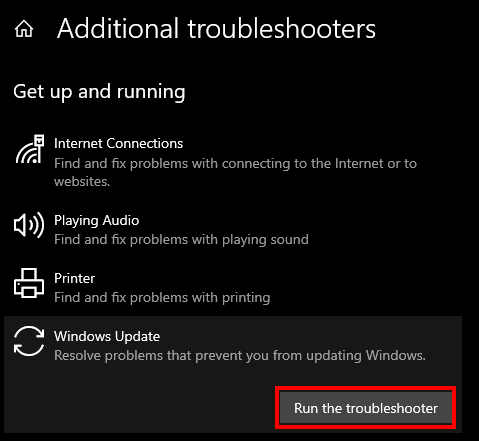
- Click on Additional troubleshooters, find Windows Update, and select Run the troubleshooter.

- The troubleshooter will begin detecting problems. Follow any on-screen instructions to allow the tool to attempt repairs.
- After completion, reboot your PC to apply any changes. Then, check if Windows updates can proceed.
2. Restart Windows Update Service
The Windows Update Service manages the checking, downloading, and installing of updates. Occasionally, this service might glitch or become unresponsive. Restarting it can resolve temporary malfunctions, making sure that updates are initiated and completed successfully.
Making sure that the service is active and set to start automatically maintains your system’s capability to stay up-to-date.
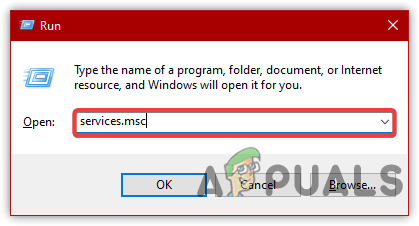
- Press Windows + R to open the Run dialog box.
- Type services.msc and hit OK.

Opening Services Window - Scroll down or press W to quickly navigate to the Windows Update service.
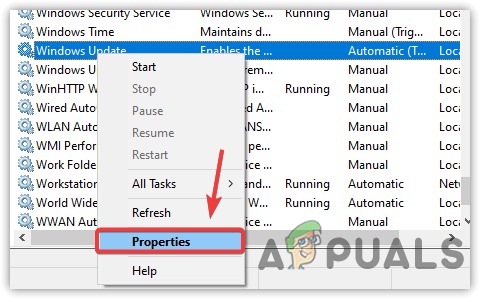
- Right-click Windows Update and select Properties.

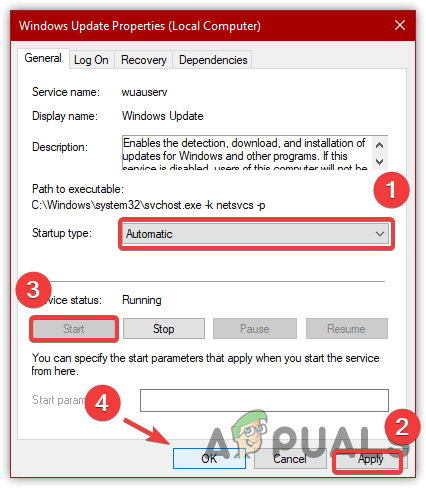
Navigating to Service Properties - In the drop-down menu, set the startup type to Automatic.
- Click Apply, then Start if the service is not running.

Restarting Windows Update Service - Confirm changes by clicking OK and check if the update error has been resolved.
3. Reset Windows Update Registry Keys
Misconfigured or damaged Windows Update registry keys can disrupt the update process. Resetting them to default settings can resolve errors and corruptions within these vital components, facilitating smooth and error-free updates.
This action can be crucial for restoring the Windows Update service’s ability to download and install updates properly.
- Download the registry file from here to reset Windows Update registry settings.
- Right-click the downloaded file and choose Run as administrator.

Running Windows Registry File - Confirm the changes by clicking Yes on the prompt.
- After the process completes, check if the issue is resolved.

4. Turn OFF Metered Connection
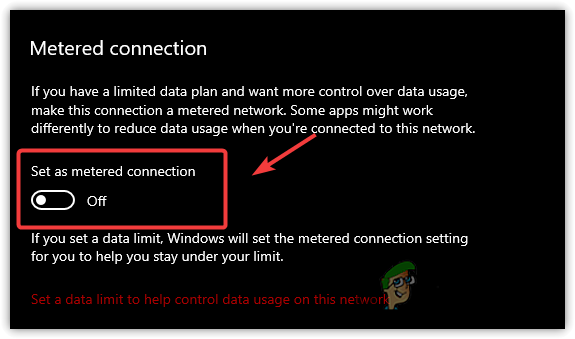
While the Metered Connection feature is useful for managing bandwidth, it can also block Windows from downloading updates to conserve data. Disabling this setting permits your system to download the necessary update files without restrictions, which could resolve update-related connectivity issues.
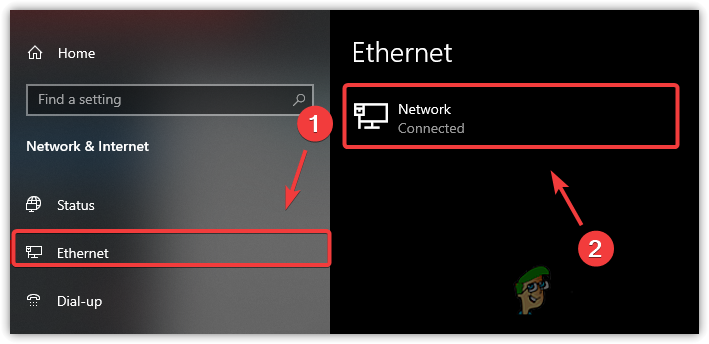
- Right-click the Start Menu and open Settings.
- Navigate to Network & Internet, and select either Ethernet or Wi-Fi from the sidebar.

Navigating to Network Properties - Disable the Metered Connection switch if it is enabled.

Turning Off Metered Connection - Attempt to update Windows once more and verify if the problem persists.
5. Clear and Rename Software Distribution Folder
The Software Distribution folder is crucial for the Windows update process, serving as the temporary storage for update files before installation. If these files become corrupted, update processes may fail.
Deleting existing files and renaming the folder allows Windows to create a new folder during the next update attempt, which can resolve problems related to corrupted update files, allowing for a successful update.
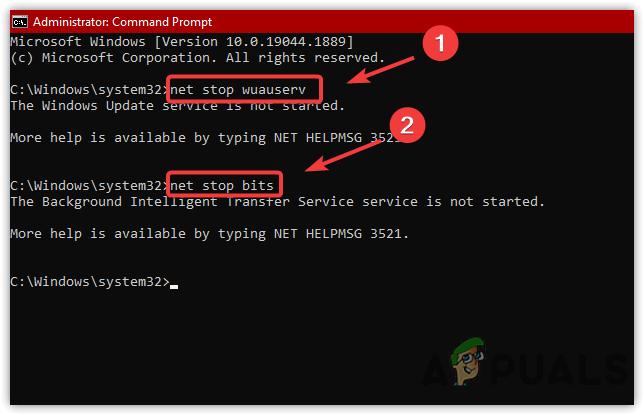
- Open the Start Menu, search for Command Prompt, right-click it, and select Run as Administrator.
- Input the following commands into the command prompt and press Enter:
net stop wuauserv
net stop bits

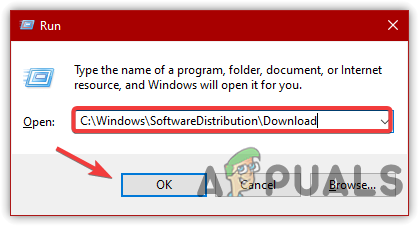
Stopping Windows Update Services - Press Windows + R, type
C:\Windows\SoftwareDistribution
, and hit Enter.
Navigating to the Software Distribution Folder - Delete all files and folders within this directory.

Deleting Software Distribution Files - Return to the command prompt and rename the folder with the following command:
rename C:\Windows\SoftwareDistribution SoftwareDistribution.bak
- Restart the previously stopped services with these commands:
net start wuauserv
net start bits
- Attempt to update Windows and check if the issue has been resolved.
6. Clear Temporary Files
Clearing out temporary files is an important troubleshooting step, as these can accumulate and occupy valuable disk space needed for Windows update processes. Performing a disk cleanup and removing these unnecessary files can potentially fix errors caused by lack of storage.
- Press Win + E to open File Explorer.
- Navigate to This PC, right-click on the Windows drive, and select Properties.
- Choose Disk Cleanup.
Disk Cleanup - Select all categories under Files to delete.
Removing Temporary Files - Press OK and then Delete Files.
- Once complete, recheck for the error.
7. Perform DISM and SFC Commands
DISM (Deployment Image Servicing and Management) and SFC (System File Checker) are powerful tools for addressing Windows update issues. DISM services your Windows image, including Windows Recovery Environment, Windows Setup, and Windows PE, repairing any corruption detected. This can indirectly address update issues related to system integrity.
After DISM, the SFC command scans for and replaces corrupted or missing protected system files, which could be causing your update problems. Running these commands can effectively help to restore proper update functionality.
- Search for Command Prompt from the Start Menu and run it as an administrator. Input the following commands:
DISM /Online /Cleanup-Image /RestoreHealth
sfc /scannow

Repairing System Files - Reboot your PC after the scans complete and check if the error has been resolved.
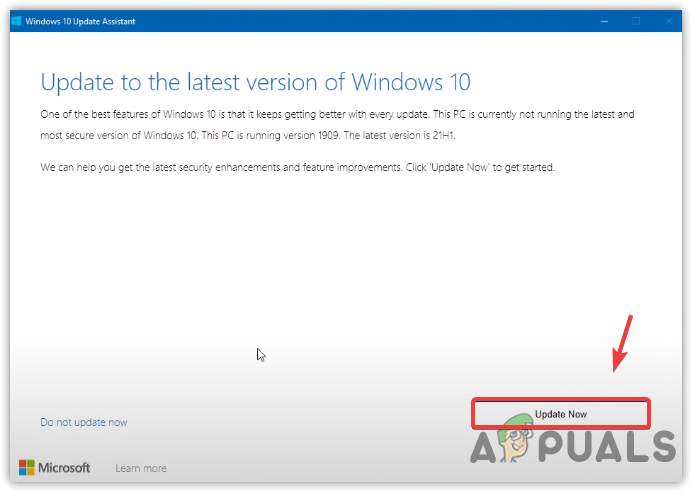
8. Download Windows Updates via Update Assistant
The Windows Update Assistant offers a straightforward method for downloading and installing the latest updates, bypassing potential problems encountered during the standard update process. It simplifies the procedure, often avoiding errors and making sure you receive the latest version of Windows with minimal hassle.
- Download and run the Windows Update Assistant.
- Press Update Now and wait for the assistant to download the updates.

Upgrading Windows - Windows will automatically initiate the upgrade upon completion.
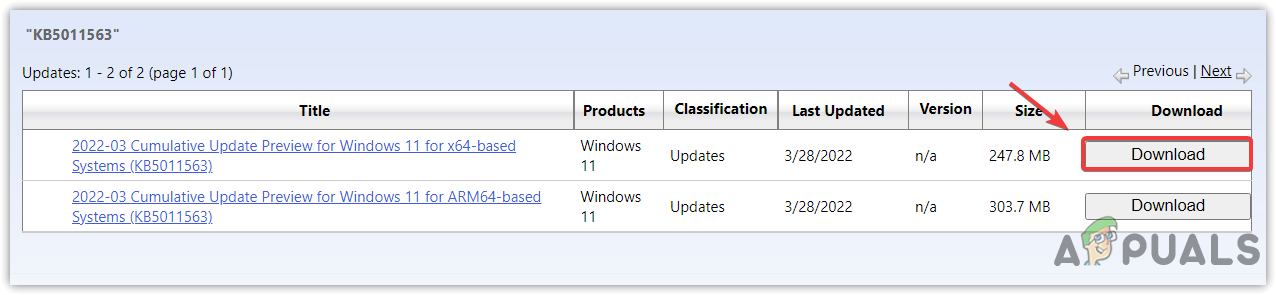
9. Download Windows Updates via Microsoft Catalog
When conventional methods fail, the Microsoft Update Catalog allows you to manually search for and install updates. This method avoids potential glitches in the Windows Update service, making sure you obtain necessary patches without any issues.
- Navigate to the Microsoft Update Catalog and search for the update by its name.
- Select the appropriate Download button for the update.

Downloading the Windows update - Follow the provided link to download the file.
- Once downloaded, execute the update file to begin the installation process.
Kamil Anwar
Kamil is a certified MCITP, CCNA (W), CCNA (S) and a former British Computer Society Member with over 9 years of experience Configuring, Deploying and Managing Switches, Firewalls and Domain Controllers also an old-school still active on FreeNode.