
Можно я не буду отвечать на вопрос «Зачем?!!» а сразу перейду к описанию? 
Заранее опишу ограничения:
1. Squid в обязательном порядке требует указывать DNS-сервер. Можно направить его в сторону DNS-сервера на роутере или скормить публичный DNS того же гугла, но лучше поставить Acylic DNS Proxy с настроенным hosts-файлом. Это само по себе, на уровне запросов, блокирует этак 90% рекламы, которую, к тому же, squid в результате не кэширует.
2. Squid не умеет использовать внешние прокси для запросов по https, поэтому делать это придется вручную и довольно корявым образом — с применением Proxifier, в котором надо будет указывать не имена сайтов, на которые хочешь попасть, а их ip-адреса. Поскольку squid не использует системный DNS-резолвер, это единственный вариант, при котором содержимое сайтов будет кэшироваться. Для сайтов TOR можно использовать промежуточный прокси, это я опишу.
Нам потребуется:
1. Собственно, Squid под Windows — берется здесь
2. OpenSSL для генерирования собственного Certificate Authority — берется здесь. Будет достаточно light-пакета на 3Мб
3. Утилита, скрывающая окна консоли качается отсюда.
4. 3proxy, если нужно проксирование в TOR-сеть берется здесь
Начнем же!
1. Распаковываем скачанный пакет — открываем cmd, переходим в папку с пакетом, набираем msiexec /a squid.msi /qb TARGETDIR=.\unpack
2. Копируем папку Squid из unpack в то место, где squid будет работать в дальнейшем. В приведенных мной примерах это папка E:\squid
3. Каталог unpack и squid.msi можно удалить, они больше не понадобятся. Идем в папку E:\squid
4. Открываем cmd.exe в этой папке и вбиваем туда mkdir .\_cache & mkdir .\etc\bump & mkdir .\dev\shm & mkdir .\log & echo 0 > .\log\access.log & echo 0 > .\log\cache.log
Это создает папки для внутренних нужд squid. В дальнейшем предполагается, что кэш располагается в папке _cache
5. Устанавливаем OpenSSL, идем в каталог bin, открываем cmd.exe, вбиваем туда:
5.1 — openssl req -new -config «openssl.cfg» -newkey rsa:1024 -days 1825 -nodes -x509 -keyout squidCA.pem -out squidCA.pem
5.2 — openssl x509 -in squidCA.pem -outform DER -out browserCA.der
Первая команда создает сертификат SquidCA.pem для генерации вторичных сертификатов. Копируем его в E:\squid\etc\bump
Вторая команда конвертирует этот сертификат в формат для импорта в браузер (если Firefox) или систему (если все остальное)
6. Идем в E:\squid\lib\squid, открываем командную строку,
ssl_crtd.exe -c -s /cygdrive/e/squid/etc/bump/ssldb (ВАЖНО: каталога ssldb существовать не должно, иначе вылезет ошибка!)
7. Редактируем E:\squid\etc\squid.conf
У меня он выглядит так:
[squid.conf]
acl localnet src 10.0.0.0/8 # RFC1918 possible internal network
acl localnet src 172.16.0.0/12 # RFC1918 possible internal network
acl localnet src 192.168.0.0/16 # RFC1918 possible internal network
acl localnet src fc00::/7 # RFC 4193 local private network range
acl localnet src fe80::/10 # RFC 4291 link-local (directly plugged) machines
acl SSL_ports port 443
acl Safe_ports port 80 # http
acl Safe_ports port 21 # ftp
acl Safe_ports port 443 # https
acl Safe_ports port 70 # gopher
acl Safe_ports port 210 # wais
acl Safe_ports port 1025-65535 # unregistered ports
acl Safe_ports port 280 # http-mgmt
acl Safe_ports port 488 # gss-http
acl Safe_ports port 591 # filemaker
acl Safe_ports port 777 # multiling http
acl CONNECT method CONNECT
#
# Recommended minimum Access Permission configuration:
#
# Only allow cachemgr access from localhost
http_access allow localhost manager
http_access deny manager
# Deny requests to certain unsafe ports
# http_access deny !Safe_ports
# Deny CONNECT to other than secure SSL ports
# http_access deny CONNECT !SSL_ports
# We strongly recommend the following be uncommented to protect innocent
# web applications running on the proxy server who think the only
# one who can access services on «localhost» is a local user
# http_access deny to_localhost
#
# INSERT YOUR OWN RULE(S) HERE TO ALLOW ACCESS FROM YOUR CLIENTS
#
# Example rule allowing access from your local networks.
# Adapt localnet in the ACL section to list your (internal) IP networks
# from where browsing should be allowed
http_access allow localnet
http_access allow localhost
# And finally deny all other access to this proxy
http_access deny all
# DNS Options
dns_v4_first on
dns_nameservers 127.0.0.1
# Squid normally listens to port 3128
http_port 3128 ssl-bump generate-host-certificates=on dynamic_cert_mem_cache_size=8MB cert=/cygdrive/e/squid/etc/bump/squidCA.p
sslcrtd_program /cygdrive/e/squid/lib/squid/ssl_crtd -s /cygdrive/e/squid/etc/bump/ssldb -M 8MB
sslcrtd_children 32 startup=2 idle=1
always_direct allow all
ssl_bump client-first all
sslproxy_cert_error allow all
sslproxy_flags DONT_VERIFY_PEER
# LOG
cache_access_log stdio:/cygdrive/e/squid/log/access.log buffer-size=128KB
# cache_store_log stdio:/cygdrive/e/squid/log/store.log buffer-size=128KB
cache_store_log none
cache_log stdio:/cygdrive/e/squid/log/cache.log buffer-size=128KB
# Uncomment the line below to enable disk caching — path format is /cygdrive/
, i.e.
cache_dir rock /cygdrive/e/squid/_cache/rock 2048 max-size=32767 max-swap-rate=3000 swap-timeout=300
cache_dir aufs /cygdrive/e/squid/_cache/aufs 4096 16 256 min-size=32768
cache_replacement_policy heap LFUDA
memory_replacement_policy lru
ipcache_size 10240
cache_swap_low 90
cache_swap_high 95
maximum_object_size_in_memory 50 KB
cache_mem 128 MB
memory_pools off
maximum_object_size 4 MB
quick_abort_min -1 KB
log_icp_queries off
client_db off
buffered_logs on
half_closed_clients off
via off
reload_into_ims on
max_filedescriptors 3200
pid_filename /cygdrive/e/squid/_cache/squid.pid
hosts_file none
# Leave coredumps in the first cache dir
coredump_dir /cygdrive/e/squid/_cache
# Add any of your own refresh_pattern entries above these.
# refresh_pattern -i ^ftp: 100000 90% 200000
# refresh_pattern -i ^gopher: 1440 0% 1440
# cache images
refresh_pattern -i \.(gif|png|ico|jpg|jpeg|jp2|webp)$ 259200 90% 518400 override-expire reload-into-ims ignore-no-store ignore-private refresh-ims
refresh_pattern -i \.(jpx|j2k|j2c|fpx|bmp|tif|tiff|bif)$ 259200 90% 20000 override-expire reload-into-ims ignore-no-store ignore-private refresh-ims
refresh_pattern -i \.(pcd|pict|rif|exif|hdr|bpg|img|jif|jfi
refresh_pattern -i \.(woff|woff2|eps|ttf|otf|svg|svgi|svgz|p
# cache content
refresh_pattern -i \.(swf|js|ejs)$ 259200 90% 518400 override-expire reload-into-ims ignore-no-store ignore-private refresh-ims
refresh_pattern -i \.(wav|css|class|dat|zsci|ver|advcs)$ 259200 90% 518400 override-expire reload-into-ims ignore-no-store ignore-private refresh-ims
# cache videos
refresh_pattern -i \.(mpa|m2a|mpe|avi|mov|mpg|mpeg|mpg3|mpg
refresh_pattern -i \.(m1s|mp2v|m2v|m2s|m2ts|wmx|rm|rmvb|3pg|3
refresh_pattern -i \.(asx|mp2|mp3|mp4|mp5|wmv|flv|mts|f4v|f
refresh_pattern -i \.(htm|html)$ 9440 90% 518400 reload-into-ims ignore-no-store ignore-private refresh-ims
refresh_pattern -i \.(xml|flow|asp|aspx)$ 0 90% 518400 refresh-ims
refresh_pattern -i \.(json)$ 0 90% 518400 refresh-ims
refresh_pattern -i (/cgi-bin/|\?) 0 90% 518400
# live video cache rules
refresh_pattern -i \.(m3u8|ts)$ 0 90% 518400 refresh-ims
# cache microsoft and adobe and other documents
refresh_pattern -i \.(ppt|pptx|doc|docx|docm|docb|dot|pdf|p
refresh_pattern -i \.(xls|xlsx|xlt|xlm|xlsm|xltm|xlw|csv|tx
refresh_pattern -i . 0 90% 518400 refresh-ims
Я таки нежно напоминаю, что это локальный вариант, для запуска на отдельной машине, с максимальным кэшированием статики. Пути, при необходимости утащить их куда-то в другое место, надо поменять по всему конфигурационному файлу.
8. Создаем ярлык, параметры — C:\Windows\System32\cmd.exe /K «color 02 & cd /dE:\squid\ & set PATH=E:\squid\bin;%PATH%» где нужно указать путь к папке со squid
9. Запускаем этот ярлык (текст в командной строке должен быть зеленым), набираем squid -z
Если все сделано и настроено правильно, то в папке _cache появятся директории aufs и rock. Если где-то накосячено — то читаем E:\squid\log\cache.log и исправляем накосяченное.
10. Открываем cmd.exe, рабочая папка должна быть E:\squid, выполняем icacls .\_cache /T /Q /C /RESET && icacls .\etc\bump /T /Q /C /RESET && icacls .\log /T /Q /C /RESET && pause
Эти команды сбрасывают сбойные права доступа, которые назначает созданным файлам и папкам cygwin. Без выполнения команды rock-кэш работать не будет.
11. Запускаем (из зеленой консоли) squid -N (без этой опции не работает rock-database, увы), выбираем в браузере прокси-сервером 127.0.0.1:3128. Должно работать.
12. Создаем в E:\squid батник для запуска сквида. Имя на ваше усмотрение, содержимое:
cd /d %~dp0
set PATH=%~dp0bin;%PATH%
cd bin
squid -N
Запускаем его.
13. Если все работает как надо, то копируем в папку E:\squid утилиту RunHiddenConsole.exe чтобы в дальнейшем запускать прокси через нее.
Настройка для работы с TOR:
1. Качаем и распаковываем TOR Expert Bundle. Для запуска требуется распаковать его, создать файл torrc.cfg с начинкой
SOCKSPort 127.0.0.1:9050
SOCKSPolicy accept 127.0.0.1
SOCKSPolicy reject *
GeoIPFile .\Data\geoip
GeoIPv6File .\Data\geoip6
DataDirectory .\Data
Ну а далее запускается ярлыком RunHiddenConsole.exe «tor.exe -f torrc.cfg» из папки с TOR’ом.
2. В папке E:\squid создаем файл onion.txt с содержимым
^http.*onion
Аналогичным образом можно добавлять другие сайты (только HTTP), которые должны быть доступны через TOR
3. В файл конфига squid добавляем:
К листам acl
acl onion url_regex «/cygdrive/e/squid/onion.txt»
Перед командой «always_direct» вставляем
cache_peer 127.0.0.1 parent 3127 0 no-query default
never_direct allow onion
always_direct deny onion
4. Скачиваем 3proxy (в архиве), создаем в squid папку _3proxy, копируем туда файл 3proxy.exe из архива
Создаем там же файл 3proxy.cfg с содержимым:
internal 127.0.0.1
fakeresolve
auth iponly
allow * 127.0.0.1
parent 1000 socks5+ 192.168.16.250 9050
proxy -p3127
где 127.0.0.1 9050 — это адрес и порт, на котором слушает TOR (если вы выбрали другой)
5. Переделываем батник запуска squid к виду:
RunHiddenConsole.exe %~dp0_3proxy\3proxy.exe %~dp0_3proxy\3proxy.cfg
cd /d %~dp0
set PATH=%~dp0bin;%PATH%
cd bin
squid -N
Все готово, можно пользоваться. По умолчанию такой режим предназначен только для того, чтобы заходить на сайты находящиеся в доменной зоне .onion
Дополнения:
При включенном squid иметь дисковый кэш браузера включенным как-то излишне.
В Firefox выключаем через about:config, ищем строку browser.cache.disk.enable и ставим ее в false. Кэш в памяти это оставит нетронутым.
В Chromium это делается «извне», путем добавления к ярлыку запуска браузера параметров —disk-cache-size=1 —media-cache-size=1
Поэтому я рекомендую использовать Chromium (и основанные на нем браузеры) не сами по себе, а в портативном виде, с помощью программки chrlauncher, где эти параметры можно задавать в конфигурационном файле.
Если у вас есть ipv6, то опцию dns_v4_first надо переключить в off
И напоследок — ответ на вопрос «а почему бы не использовать HandyCache?»
1. Он не кэширует HTTPS, если его не купить. Лицензия дешевая, и это не проблема, но…
2. Он ломает поведение страниц, которые используют технологию CORS. Это facebook, github, addons.mozilla.org и многих других, о которых я сейчас не вспомню.
3. Поддержка родительских SOCKS в ныне доступной версии RC4 1.0.0.700 сломана.
ИМХО, squid работает быстрее + его способ хранения кэша лично мне нравится больше. Мелкие файлы сохраняются в ROCK-кэш, крупные в AUFS-кэш, пространство на жестком диске (размер кластеров на разделе 32КБ) используется оптимально, по сравнению с HandyCache, где фактический кэш 2,32 Гб у меня занимает 3,86 Гб на диске.
You can set up a personal proxy server and can use it for many purposes. This article will set up the proxy setup with the squid proxy on the windows server. In this guide, we will go over how to set up and configure a Squid Proxy on Windows Server.
Download & Install Squid Proxy
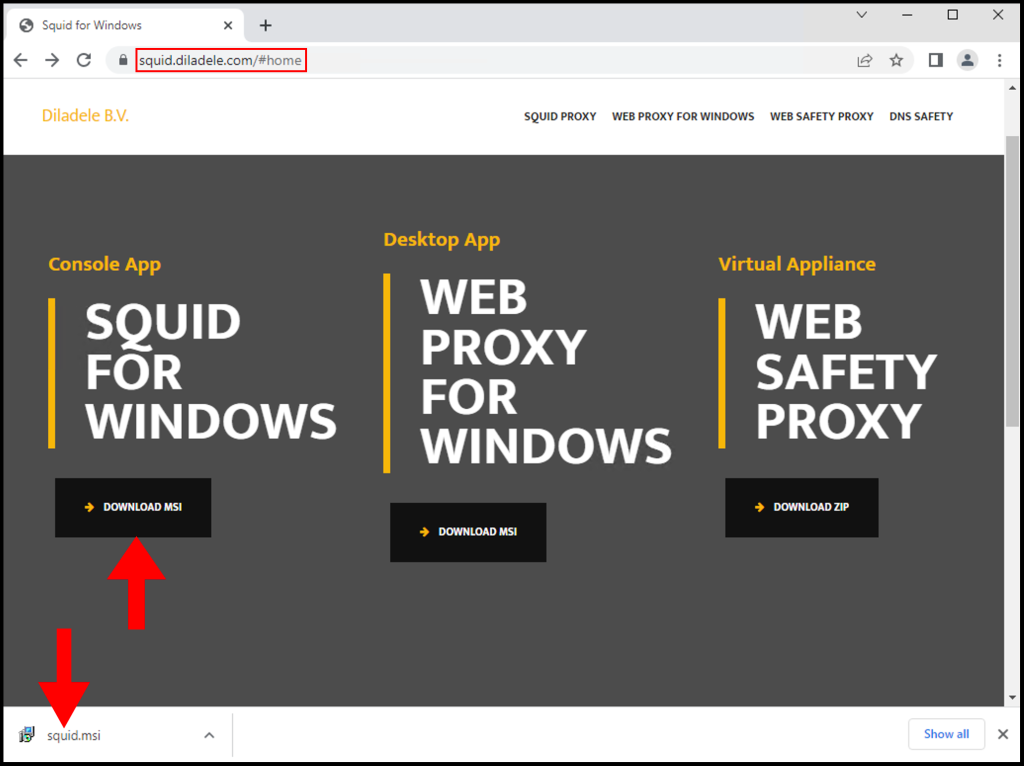
Download the Squid Proxy Installer from the following URL:
https://squid.diladele.com/#home
1. First, download the Squid Proxy application on your Windows server and open the .msi file to install Squid Proxy.
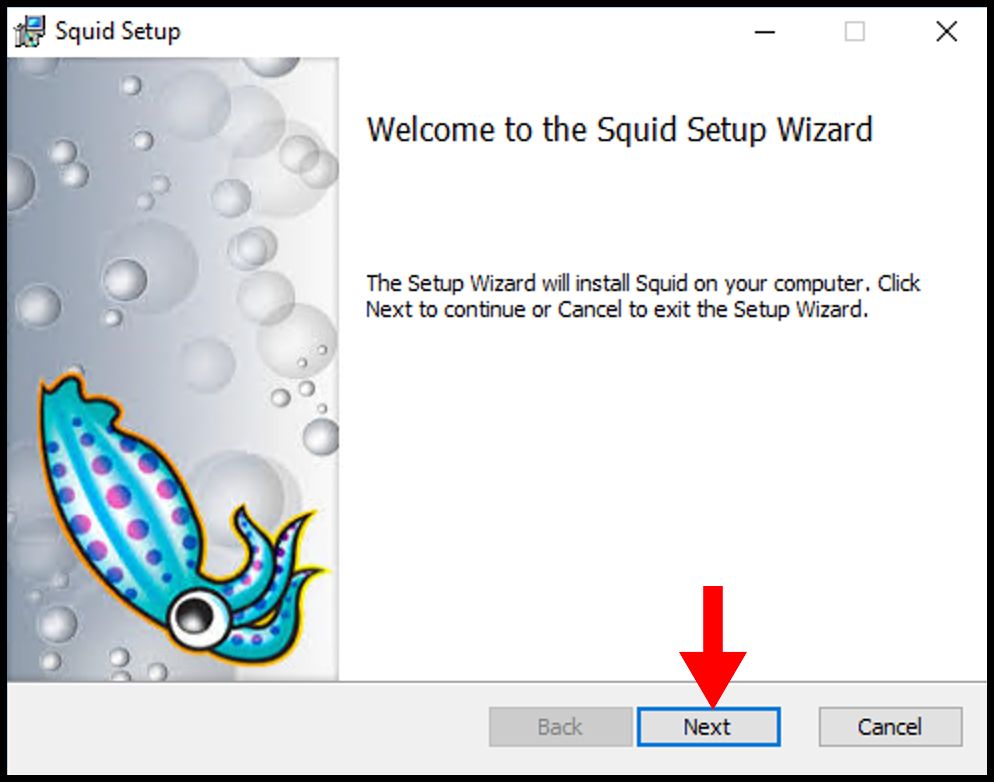
2. Once the Squid Setup window opens, click Next to begin the installation.
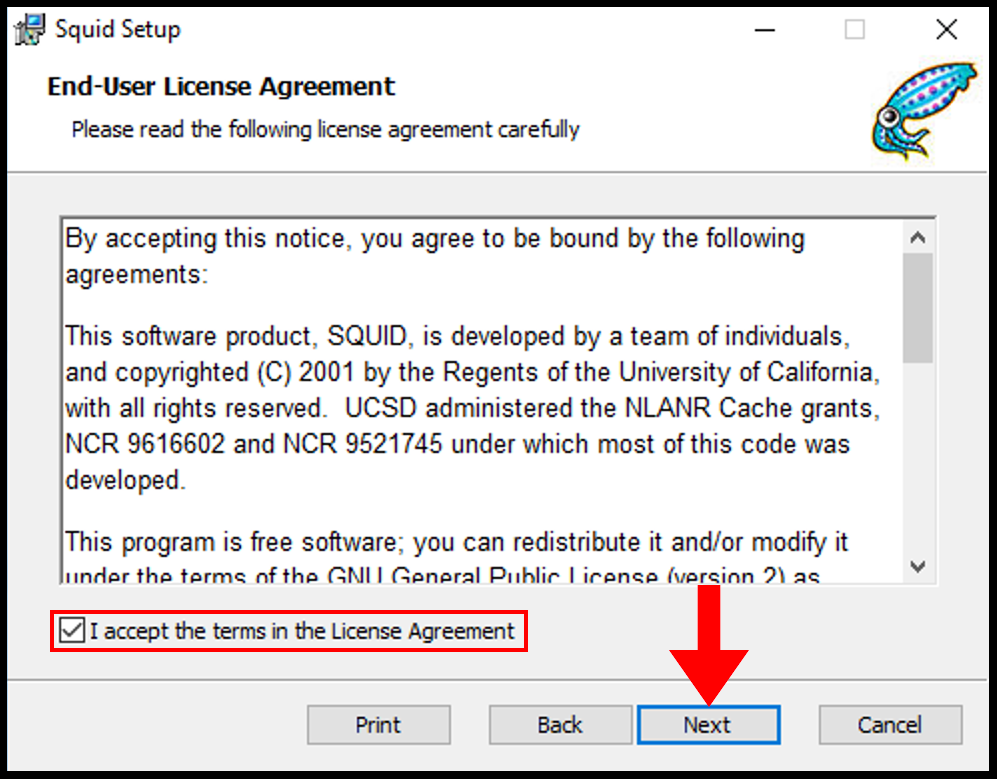
3. Next on the End-User License Agreement page, accept the terms and then click Next.
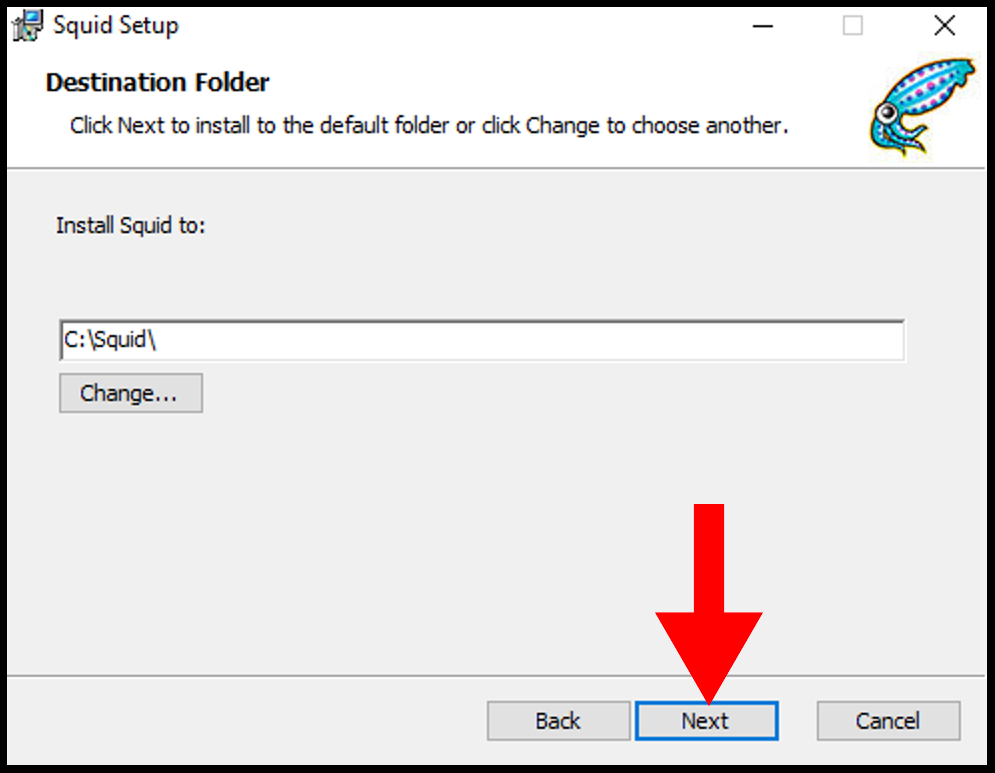
4. Then on the Destination Folder page, you can select the directory you want to install and once you are done click Next.
5. Then on the next page, click Install to begin the installation of Squid.

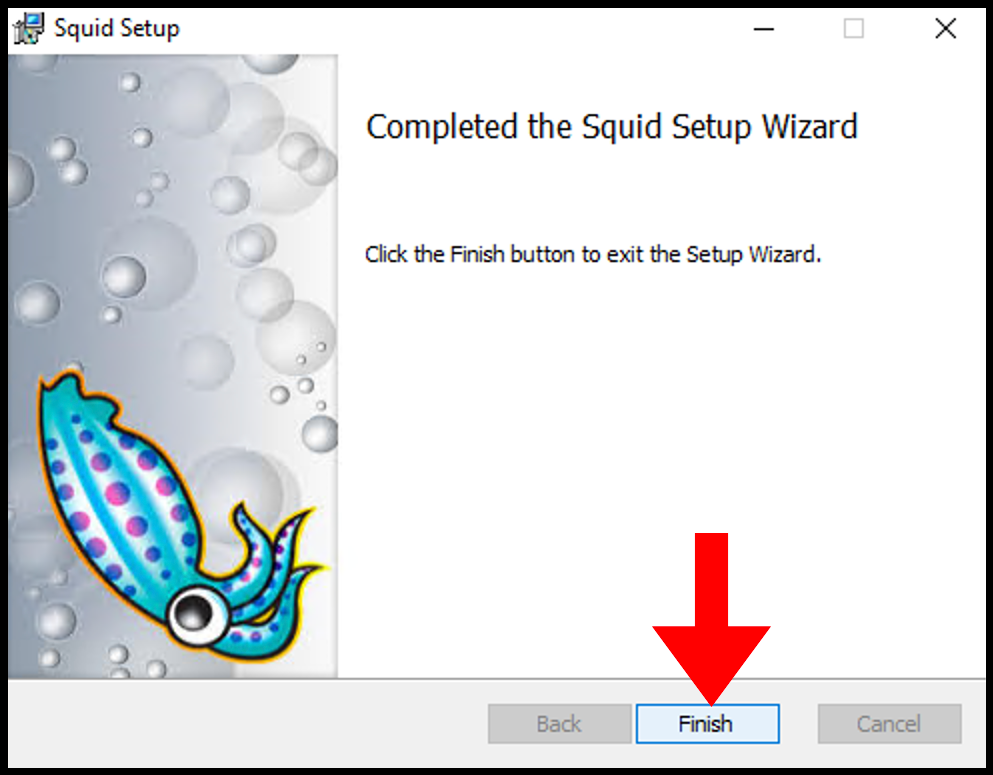
6. Once it’s done, you can close out of the setup window.
Allow Squid Port Through Firewall
Local network usage 3128 TCP port to connect through Squid Proxy. Let us first allow the 3128 TCP port in the firewall inbound rules.
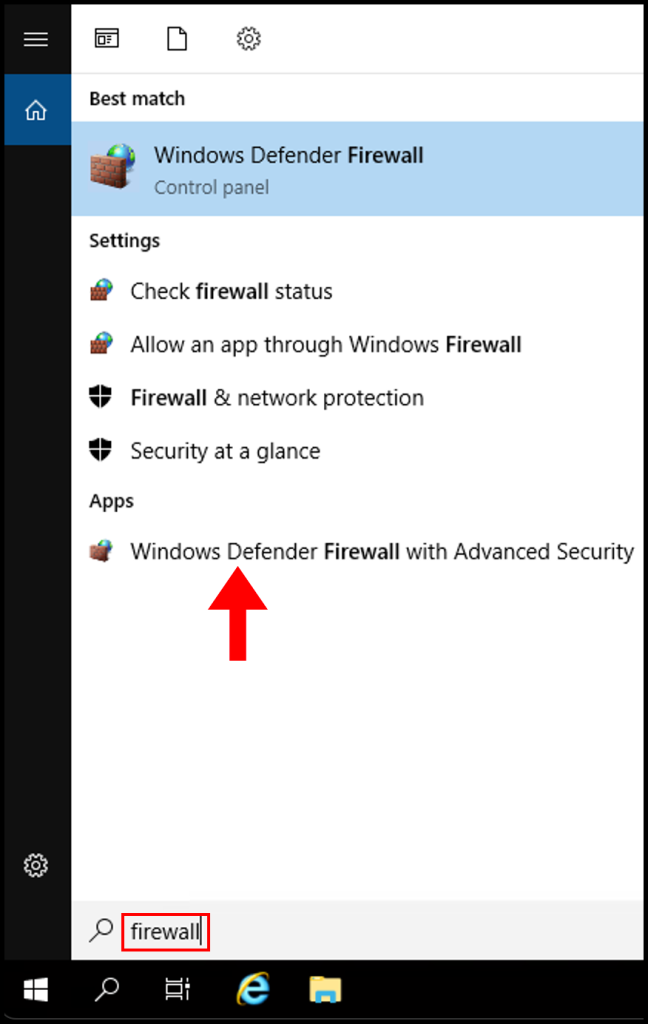
1. Log in to your Windows server, then search and open Windows Firewall with Advanced Security.
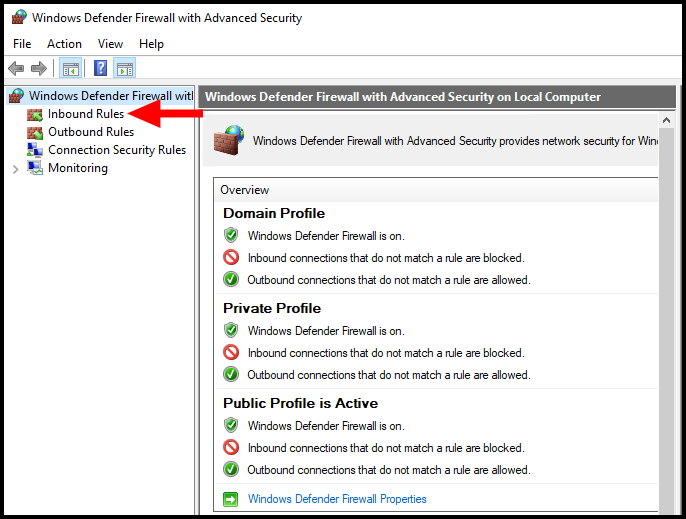
2. Then navigate to Inbound Rules on the left-side menu.
3. Next click New Rule from the right-hand menu.

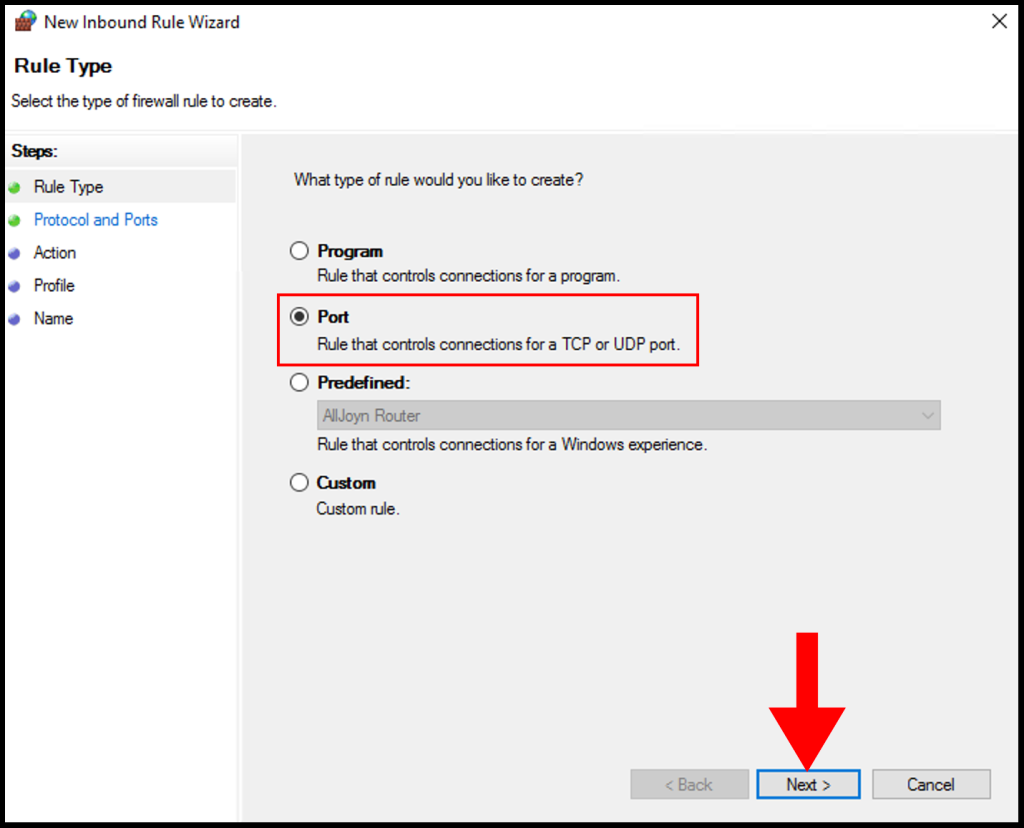
4. On the Rule Type page, select the button next to Port and click Next.
5. On Protocol and Ports, select TCP and select Specific local ports and enter 3128 then click Next.

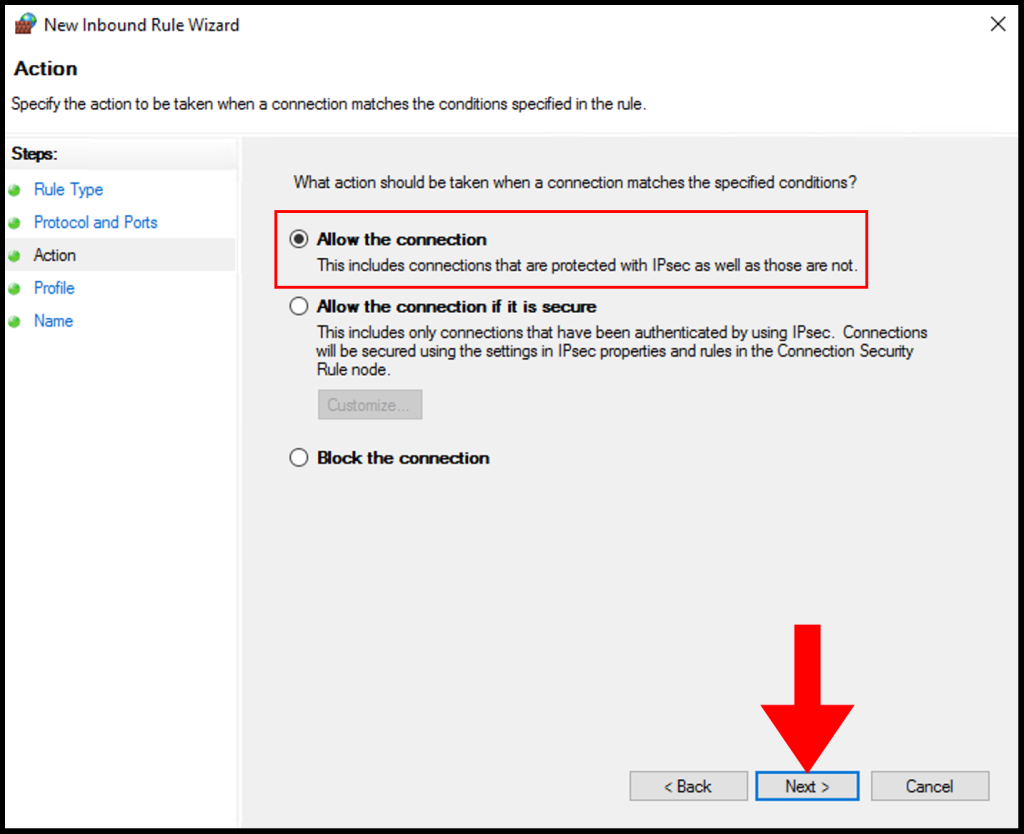
6. Next, click Allow the connection and click Next to move on.
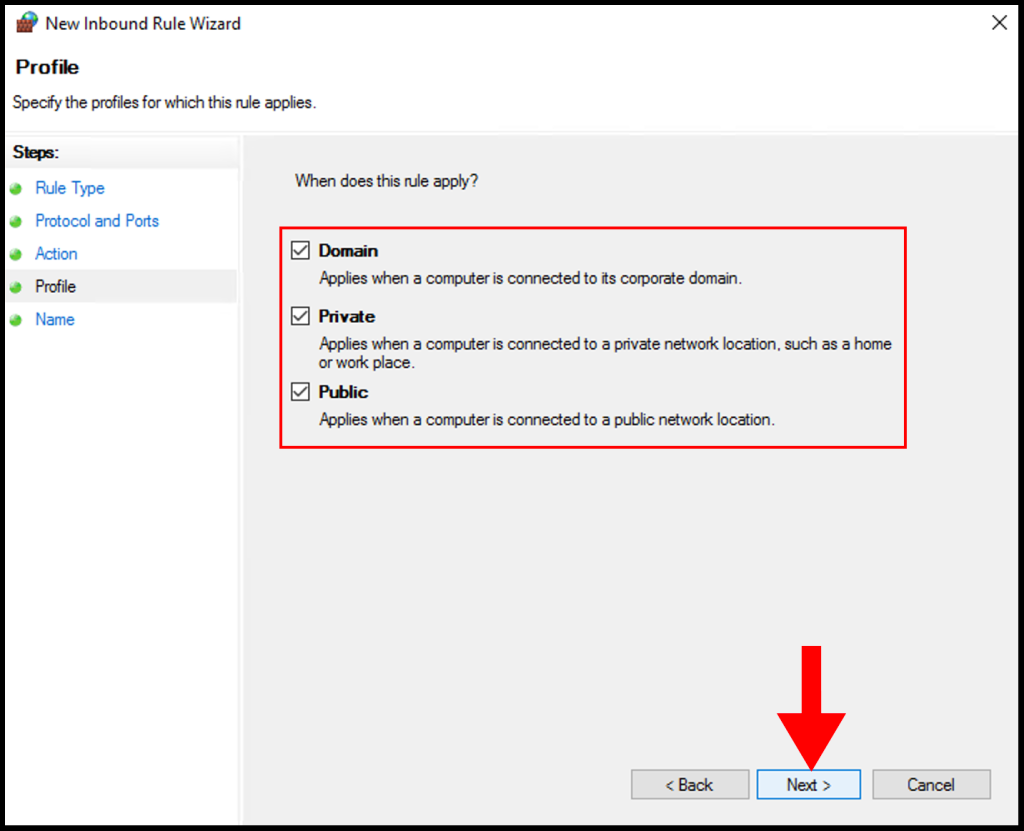
7. In the Profile tab, you need to select the below options and check the boxes for Domain, Private, and Public then click Next to move on.
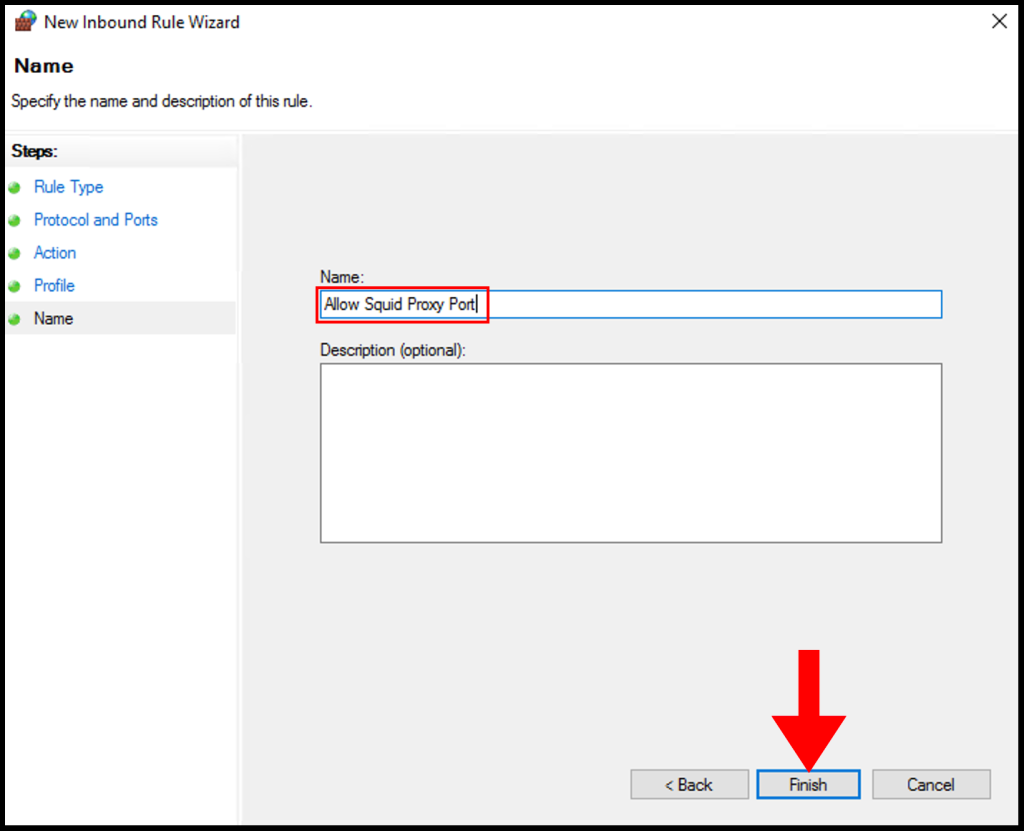
8. In the Name section, you can specify a name that is easily identifiable for the rule, then click Finish. We have successfully setup and configure a Squid Proxy on Windows Server.
Configure Squid Proxy
1. Configure Squid by following the steps below:
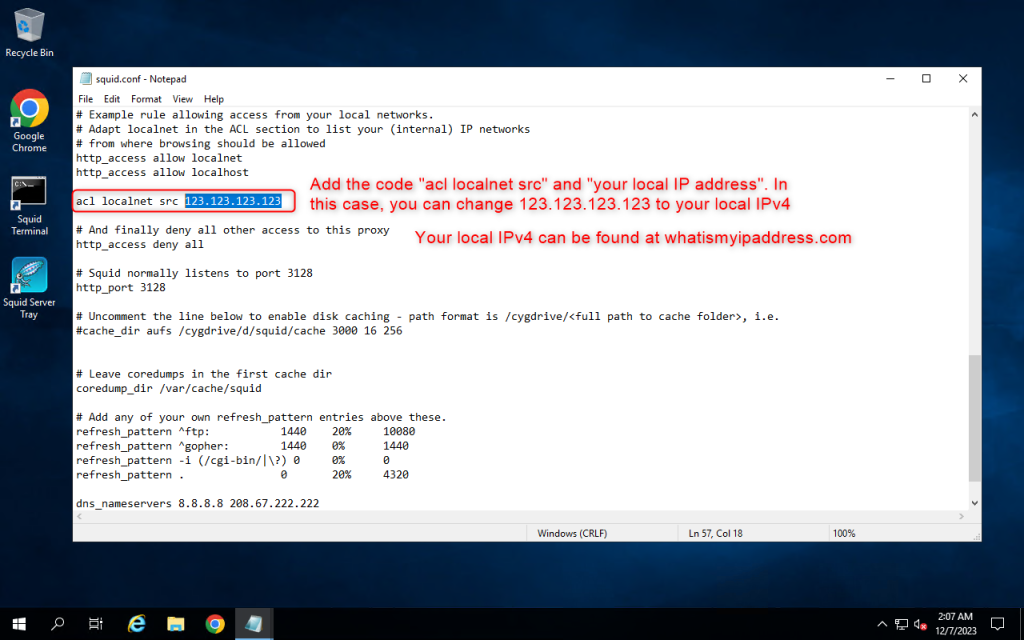
2. Add the code “acl localnet src” and “your local IPv4”. In this case, you can change 123.123.123.123 to your local IPv4. You can find your local IPv4 at https://whatismyipaddress.com/
Then save by pressing Ctrl + S
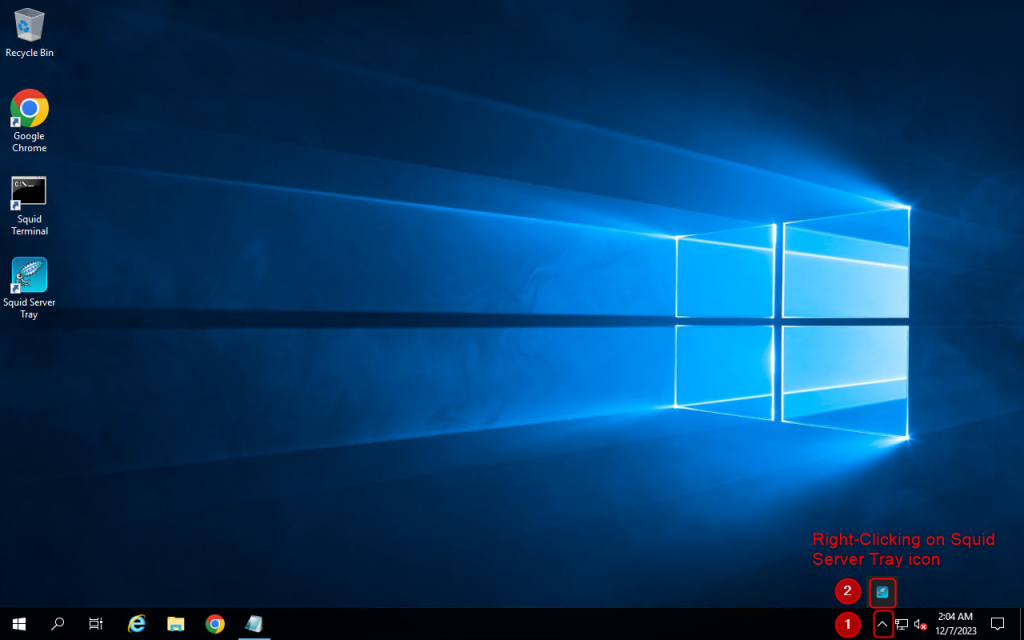
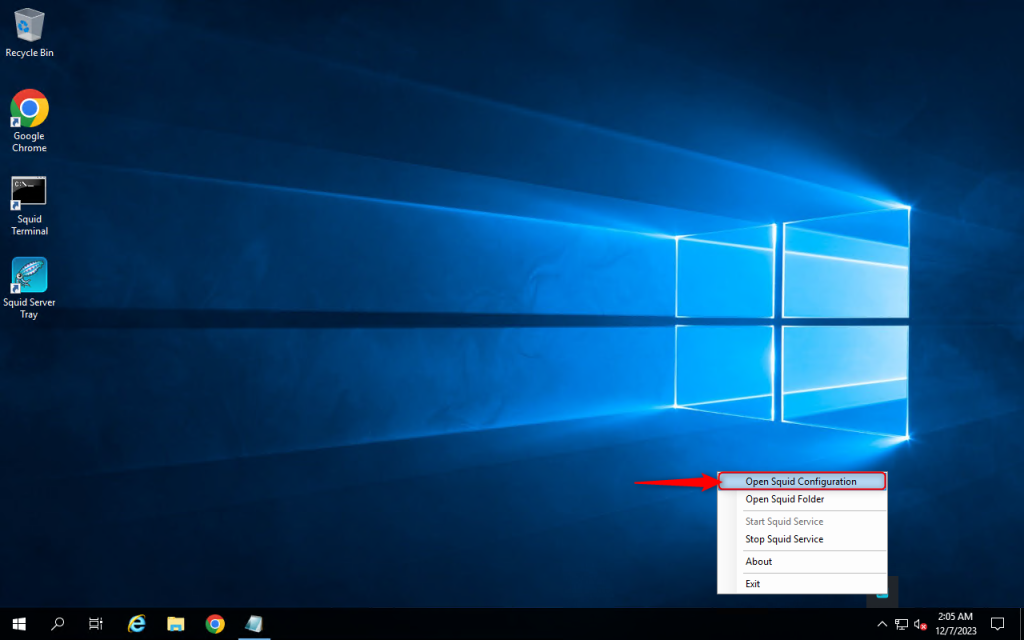
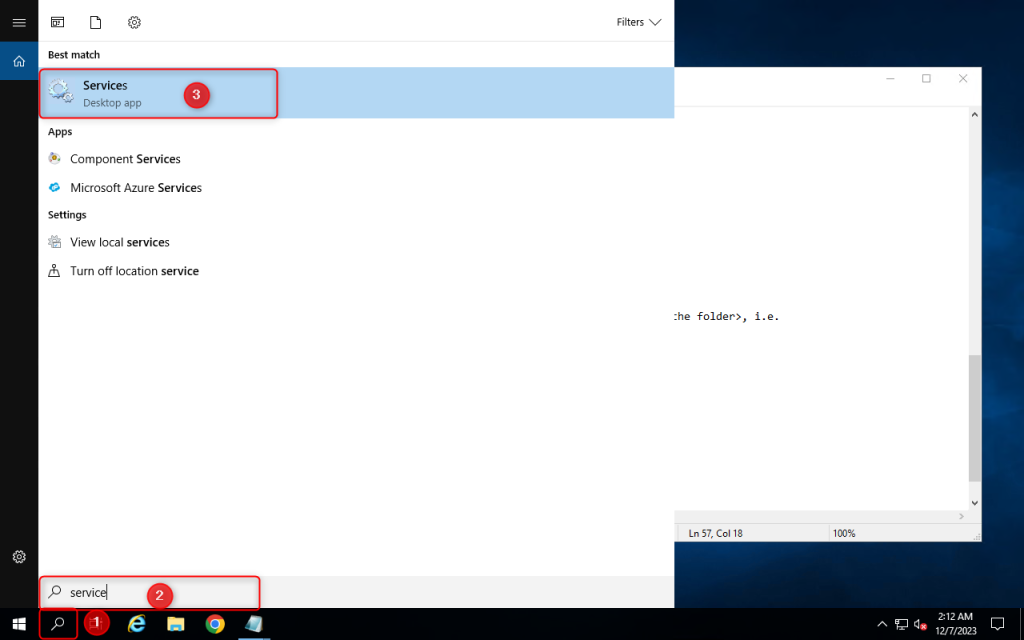
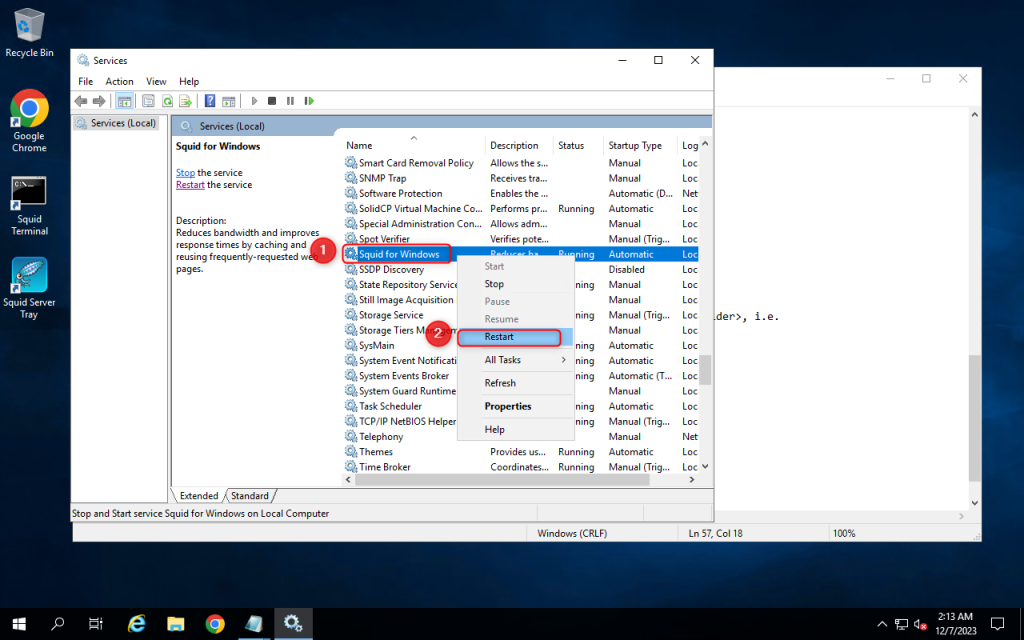
3. Open Services setting and restart the Squid for windows service
Use proxy on a client
1. Go to your client computer and enter the proxy that has been setted up.

2. Enter Proxy IP address and Port. Now you will be able to use your proxy on a client
Инструкция для установки на ОС Windows Server
Скачать дистрибутив можно с сайта https://3proxy.ru. Дистрибутив распространяется в виде архива zip, поэтому нужно просто распаковать содержимое архива в каталог, например C:\Program Files\3proxy.
Далее необходимо создать конфигурационный файл C:\Program Files\3proxy\bin64\3proxy.cfg, если нет готового шаблона можно просто скопировать файл C:\Program Files\3proxy\cfg\3proxy.cfg.example. Пример шаблона конфигурационного файла см. ниже.
Осталось зарегистрировать 3proxy.exe в качестве системной службы windows, для этого нужно запустить cmd.exe и выполнить следующие команды:
cd  C:\Program Files\3proxy

    3proxy.exe  --install
после чего системная служба будет установлена и запущена. Остановка и перезапуск службы 3proxy.exe выполняется штатным средствами windows.
Далее остаётся только проверить работоспособность прокси и пользоваться.
Пример конфигурационного файла 3proxy.cfg для VPS с одним внешним IP 46.17.40.98 и DNS-сервером 77.88.8.1 с установленной авторизацией по имени/паролю:
nserver 77.88.8.1

    nscache 65536
timeouts 1 5 30 60 180 1800 15 60
users USERNAME:CL:PASSWORD
service
log «C:\Program Files\3proxy\3proxy.log» D
logformat «- +_L%t.%. %N.%p %E %U %C:%c %R:%r %O %I %h %T»
rotate 7
auth strong
allow USERNAME
external 46.17.40.98
internal 46.17.40.98
deny * * 127.0.0.1
deny * * 46.17.40.98
#необходимо добавить строки «deny * * IP-адрес»
#для всех IP-адресов сервера,
#на котором работает 3proxy, иначе клиенты прокси смогут
#подключиться к указанным IP изнутри ОС, и таким образом
#необоснованно преодолеть сетевой фильтр внешней сети сервера
proxy -n
maxconn 32
Похожее
- Качаем свежий и стабильный squid http://squid.acmeconsulting.it/
- Распаковываем его в корень c:
- Устанавливаем как системный сервис и добавляем запись в реестр windows c:\squid\sbin\squid -i -f C:\squid\etc\squid.conf -n Squid
- Конфигурируем базовую настройку
- Переходим в директорию C:\squid\etc\ и переименовываем все находящиеся в ней файлы:
- cachemgr.conf.default => cachemgr.conf
- mime.conf.default => mime.conf
- squid.conf.default => squid.conf
- squid_radius_auth.conf.default — можно не переименовывать, если вы не предполагаете использовать аутентификацию по протоколу radius для пользователей прокси-сервера squid.
- Далее открываем в любом текстовом редакторе файл squid.conf. Настроим минимально необходимую рабочую конфигурацию (в дальнейшем вы сможете донастроить и оптимизировать конфигурацию под свои нужды). Итак, в файле squid.conf раскомментируем (убираем символ #) или дописываем следующие строчки:
- Переходим в директорию C:\squid\etc\ и переименовываем все находящиеся в ней файлы:
acl all src all
acl manager proto cache_object
acl localhost src 127.0.0.1/32
acl to_localhost dst 127.0.0.0/8 0.0.0.0/32
# Оставляем ниже одну из записей для своей локальной сети, если прокси-сервер используется
# только на одной машине, на которой он и установлен, то эти записи нужно закомментировать
acl localnet src 10.0.0.0/8 # RFC1918 possible internal network
acl localnet src 172.16.0.0/12 # RFC1918 possible internal network
acl localnet src 192.168.0.0/16 # RFC1918 possible internal network
#
acl SSL_ports port 443
acl Safe_ports port 80 # http
acl Safe_ports port 21 # ftp
acl Safe_ports port 443 # https
acl Safe_ports port 70 # gopher
acl Safe_ports port 210 # wais
acl Safe_ports port 1025-65535 # unregistered ports
acl Safe_ports port 280 # http-mgmt
acl Safe_ports port 488 # gss-http
acl Safe_ports port 591 # filemaker
acl Safe_ports port 777 # multiling http
acl CONNECT method CONNECT
# Only allow cachemgr access from localhost
http_access allow manager localhost
http_access deny manager
# Deny requests to unknown ports
http_access deny !Safe_ports
# Deny CONNECT to other than SSL ports
http_access deny CONNECT !SSL_ports
http_access allow localnet
# And finally deny all other access to this proxy
http_access deny all
#Allow ICP queries from local networks only
icp_access allow localnet
icp_access deny all
# Прописываем порт, на который сквид будет ожидать соединения от клиентов.
http_port 3128
#We recommend you to use at least the following line.
hierarchy_stoplist cgi-bin ?
#Default:
cache_replacement_policy lru
# Прописываем расположение директории, в которой будет хранится наш кэш:
cache_dir ufs c:/squid/var/cache 100 16 256
store_dir_select_algorithm least-load
max_open_disk_fds 0
minimum_object_size 0 KB
maximum_object_size 4096 KB
cache_swap_low 90
cache_swap_high 95
update_headers on
access_log c:/squid/var/logs/access.log
logfile_daemon c:/squid/libexec/logfile-daemon.exe
cache_log c:/squid/var/logs/cache.log
cache_store_log c:/squid/var/logs/store.log
logfile_rotate 10
emulate_httpd_log off
log_ip_on_direct on
mime_table c:/squid/etc/mime.conf
log_mime_hdrs off
pid_filename c:/squid/var/logs/squid.pid
log_fqdn off
strip_query_terms on
buffered_logs off
- Таким образом, мы определили в конфигурационном файле три базовых блока — управление доступом (подсети, порты, acl-листы), настройка КЭШа, настройка логов, а также некоторые системные настройки (кстати, не все обязательные). Также обратите внимание на то, что знак в именах директорий нужно писать именно на юниксовый манер «/», а не Windows — «\».
- Теперь сформируем структуры КЭШа прокси-сервера squid, выполнив команду:
c:\squid\sbin\squid —z —f C:\squid\etc\squid.conf После выполнения этой команды мы должны увидеть следующее сообщение: Creating Swap Directories Т.е., все усешно кэш-директория создана.
- Также обратите внимание на то, что при выполнении этой команды сквид проверяет конфигурационный файл squid.conf на корректность, и если в нем что-то написано не так, т выдалось бы соответствующее сообщение.
- Для создания кэш-файла мы использовали тип файловой системы ufs (опция в конф. Файле — cache_dir ufs c:/squid/var/cache 100 16 256). Также можно использовать тип awin32, посмотрите документацию и выберете наиболее подходящий для Вас. Также полезно заглянуть в лог-файл C:\squid\var\logs\cache.log и посмотреть нет ли там каких-либо ошибок.
- Теперь делаем первый пробный старт прокси-сервера Сквид. Запустим его для начала в виде консольного приложения — в случае каких-либо ошибок они будут выведены на экран и нужно будет исправить соотвествующие опции в конфигурационном файле. start c:\squid\sbin\squid —f C:\squid\etc\squid.conf
- Попробуем к нему обратиться, выполнив команду: telnet localhost 3128
- Пробуем зайти на какую либо страничку, например http://vasenin.org. При данной настройке если прокси-сервер находится на той же машине с которой вы пытаетесь выйти в интернет, вы получите ошибку доступа. Чтобы это исправить внесите в конфигурационный файл строчку: acl localnet src 127.0.0.1/32 Теперь и с самой машины, на которой установлен прокси-сервер, можно «ходить» в интернет.
- Если планируете, что proxy-сервер будет работать постоянно, то можно просто установить в службе Squid под windows параметр «Автозапуск».
Proxies soak up the harshness of the internet and add additional functionality. You can use proxies to access geo-restricted content, conceal your IP address, and shield your device from malicious requests.
This guide demonstrates how to use Oxylabs Residential and Datacenter Proxies on Windows 10 & 11 as well as on previous generations of Microsoft’s operating system.

Setting up proxies on Windows 10 & 11
The setup for proxy server for Windows 10 and 11 is identical. The newer Windows versions allow you to configure the most important options through the Settings application. To configure proxy server settings, follow the instructions below.
-
Navigate to Start > Settings > Network & Internet > Proxy.

Windows Settings app

Network & Internet settings
2. Configure Proxy settings. Windows has three ways to set up a proxy: automatically, by setting up a script, or manually.
Automatic proxy setup
While in Proxy settings, turn on Automatically detect settings.

Enabling the automatic settings detection
When you enable this option, Windows will automatically detect authorized proxy server settings using the Web Proxy Auto-Discovery Protocol (WPAD). Organizations authorize (impose) such settings on computers connected to their internal networks to restrict access and protect digital assets.
If you use a personal computer or want to add a proxy manually, turn this setting off.
Setting up a script
While in Proxy settings, enable Use setup script and enter an address.

Enabling the script setup
After clicking Save, the proxy configuration will be imported from a specified list.
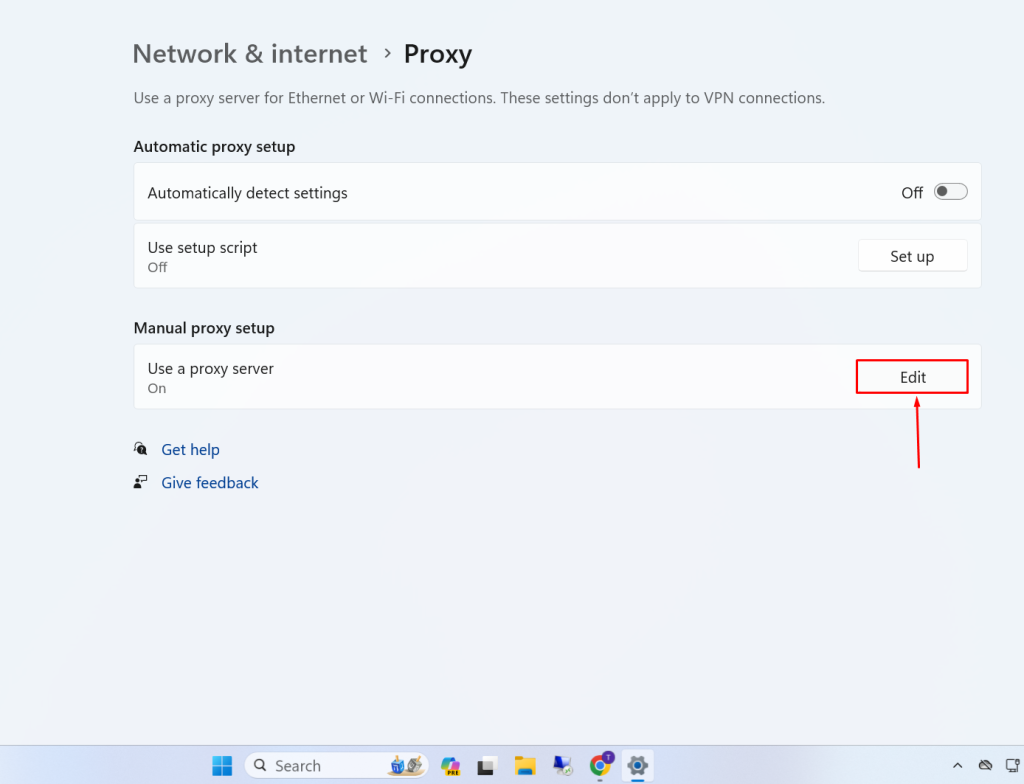
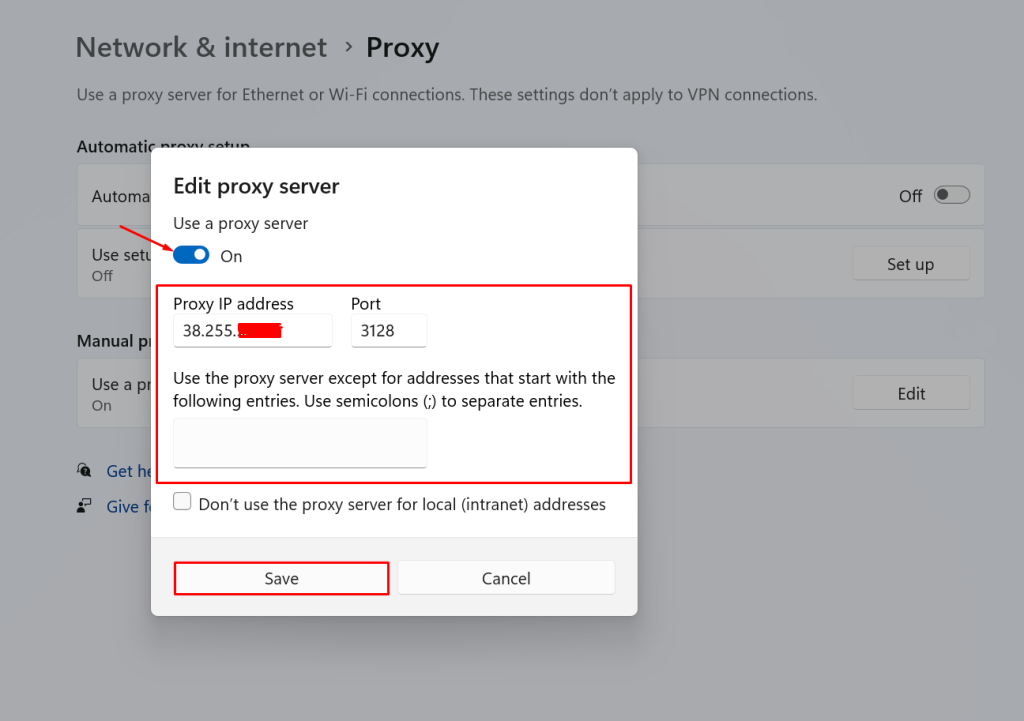
Manual proxy setup
To configure a proxy manually, enable Use a proxy server and specify the following details:
Residential Proxies
Proxy type: HTTP, HTTPS, or SOCKS5
Proxy host: pr.oxylabs.io
Proxy port: 7777
You can also use country-specific entries. For example, if you enter fr-pr.oxylabs.io under IP address and 40000 under Port, you’ll acquire a French exit node. For a complete list of country-specific entry nodes or if you need a sticky session, please refer to our documentation.

Configuring Residential Proxies
Enterprise Dedicated Datacenter Proxies
Specify the following if you purchased Dedicated Datacenter Proxies via sales.
Proxy type: HTTP or SOCKS5
Proxy host: a specific IP address (e.g., 1.2.3.4)
Proxy port: 60000
For Enterprise Dedicated Datacenter Proxies, you’ll have to choose an IP address from the acquired list. Visit our documentation for more details.
NOTE: To specify the SOCKS5 proxy type, you’ll have to use legacy Windows features (refer to the next section).
Self-Service Dedicated Datacenter Proxies
Specify the following if you purchased Dedicated Datacenter Proxies via the dashboard.
Proxy type: HTTP, HTTPS, or SOCKS5
Proxy host: ddc.oxylabs.io
Proxy port: 8001
For Self-Service Dedicated Datacenter Proxies, the port indicates the sequential number of an IP address from the acquired list. Check our documentation for more details.
Shared Datacenter Proxies
Proxy type: HTTP, HTTPS, SOCKS5
Proxy host: dc.oxylabs.io
Proxy port: 8001
For the pay-per-IP subscription, the port is the sequential number assigned to an IP address on your list, meaning port 8001 will use the first IP address. Please check our documentation for further details.
With the pay-per-traffic subscription, port 8001 picks a random IP address, remaining constant throughout the session. The proxy’s geo-location can be set in the user authentication string, like user-USERNAME-country-US:PASSWORD, connecting you to a US proxy. More details are in our documentation.
ISP Proxies
Proxy type: HTTP, HTTPS, or SOCKS5
Proxy host: isp.oxylabs.io
Proxy port: 8001
NOTE: You can also list specific websites that will ignore your proxy server settings. Separate addresses with semicolons to create multiple exceptions. Add an asterisk with a dot (*.) if you want to exclude multiple addresses from the same domain (*.oxylabs.io).
3. Lastly, open a browser, enter your Oxylabs proxy user’s credentials, and Sign in. Use the same credentials you typed in while creating a new proxy user in the Oxylabs dashboard.

Entering Oxylabs sub-user’s credentials
All set up! You’re now passing your web requests through a proxy.
Configuring proxies using legacy Windows settings
These steps apply to all Windows versions (7, 8, and older) and offer some more in-depth features excluded from the Settings app found on Windows 10 & 11. To configure proxy settings, follow the steps below:
-
Navigate to Control Panel > Network and Internet > Internet Options.

Locating Control Panel

Navigating to Network and Internet

Accessing Internet Options
2. Under Internet Properties, select the Connections tab and open LAN settings.

Accessing LAN settings
3. Check the Use a proxy server for your LAN option and press Advanced.

Enabling a proxy server
4. Specify your proxy details. For a detailed Oxylabs proxy configuration (Residential and Datacenter), refer to the previous section.

Configuring proxy settings
You can also specify the proxy Type (HTTP or SOCKS). These proxy settings correspond to the proxy settings described in the previous section, as they are universal system-wide. If you fill a field here, it also applies in the Settings app if you’re using Windows 10 & 11.
You can also list specific websites that will ignore your proxy settings. Separate addresses with semicolons to create multiple exceptions. Add an asterisk with a dot (*.) if you want to exclude multiple addresses from the same domain (*.oxylabs.io). You can find detailed tutorial in our blog on how to find your proxy server address.
5. Launch a browser to authenticate your proxy settings. Enter your Oxylabs sub-user’s credentials, and Sign in. Use the same credentials you typed in while creating a new sub-user in the Oxylabs dashboard.
Entering Oxylabs sub-user’s credentials
All set up! You can now connect to the internet via proxy.
Common Windows proxy server errors
Here are some of the most common proxy-related errors encountered on Windows:
-
Windows could not automatically detect this network’s proxy settings.
-
Unable to connect to the proxy server.
-
Cannot turn off proxy settings in Windows.
Go over these options for potential solutions:
-
Review proxy settings.
-
Reboot the device.
-
Update or downgrade network drivers.
-
Check potentially conflicting applications such as VPNs.
-
Use a restore point.
-
Reset network settings.
-
Clear browser cache.
-
Scan the computer for malware.
Wrapping up
There are several ways to install proxy server on Windows, each bringing the same result, although legacy settings allow you to toggle more settings.
Whether you’re using a Windows PC, Android device, or macOS laptop, Oxylabs got you covered – find out how to use proxies for a variety of applications and operating systems in our integrations.
Don’t hesitate to contact us for more details if you have questions about configuring our proxies for Windows or if you have any inquiries about our solutions.
Please be aware that this is a third-party tool not owned or controlled by Oxylabs. Each third-party provider is responsible for its own software and services. Consequently, Oxylabs will have no liability or responsibility to you regarding those services. Please carefully review the third party’s policies and practices and/or conduct due diligence before accessing or using third-party services.
Frequently asked questions
How to disable proxy settings on Windows?
On Windows 10 & 11, open the Settings app, navigate to Network & Internet > Proxy, and disable all three proxy setup options.
Alternatively, if you’re using an older Windows version, navigate to Network and Internet > Internet Options > Internet Properties > Connections > LAN settings. Untick all three proxy setup options and save your preferences.
If the options above don’t work, you can edit an entry in Windows Registry to set the universal proxy setting. Search for the Registry Editor or press Win+R and type in regedit. Then navigate to HKEY_LOCAL_MACHINE\Software\Policies\Microsoft\Windows\CurrentVersion\Internet Settings, select ProxySettingsPerUser, and change the value to 1. Lastly, restart your computer.
Where to find proxy settings on Windows?
For setting up a proxy, Windows 10 & 11 have two options – the Settings app and Control Panel’s options. Older Windows versions host proxy settings only under the Control Panel’s internet settings.
How to change proxy settings on Windows 7 and older versions?
Access the proxy settings through Control Panel > Network and Internet > Internet Options > Internet Properties > Connections > LAN settings.
Useful resources
ISO/IEC 27001:2017 certified products:
Get Windows proxies for $8/GB