
Last Updated :
26 Feb, 2024
John the Ripper is password cracking software used by penetration testers and cyber security experts. It is completely free. In starting it was only made for Unix operating system but now it can be used on several other platforms also like windows, mac, etc. It was first released in 1996 by OpenWall. Its latest version is 1.9.0 which was released in 2019. It has the ability to crack passwords and also it automatically detects the hash type if passwords are saved in a hash rather than plain text, it combines a number of strategies to crack passwords. It is mainly used to perform dictionary attacks and brute force attacks on any system or application.
Installing John the Ripper on Windows:
Follow the below steps to install John the Ripper on Windows:
Step 1: Visit the official website of John the ripper using any web browser.
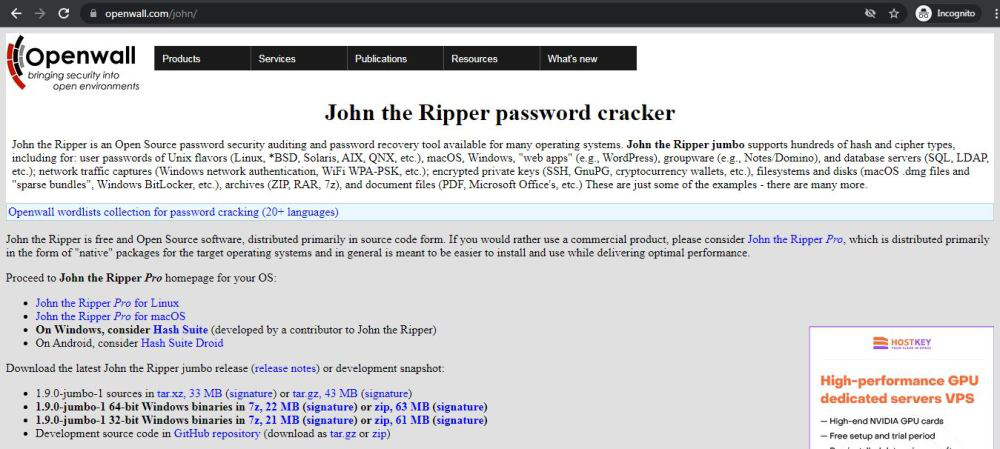
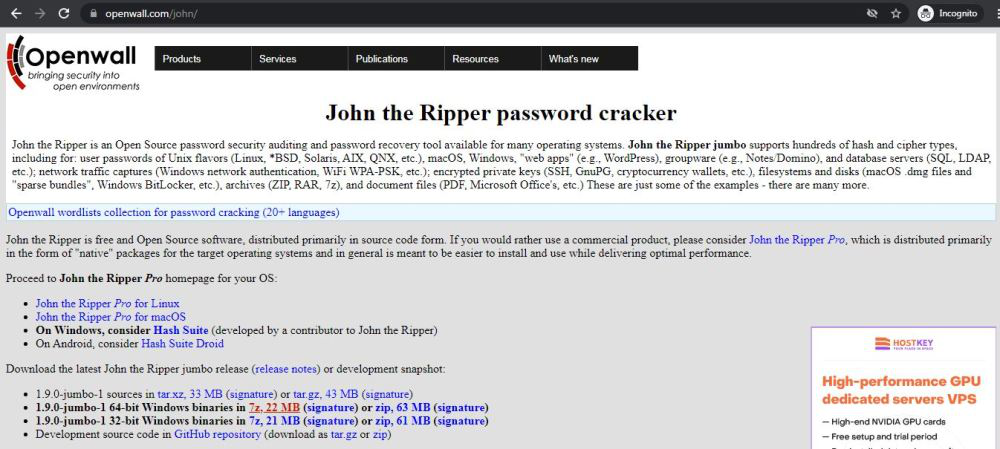
Step 2: There are two options available for windows one is 1.9.0-jumbo-1 64-bit Windows and the other is 1.9.0-jumbo-1 32-bit Windows. Click on the one as per your system configuration. Let’s take the one for the 64-bit operating system. Downloading of the executable file will start shortly. It is a small 21.1 MB file that will hardly take a minute.
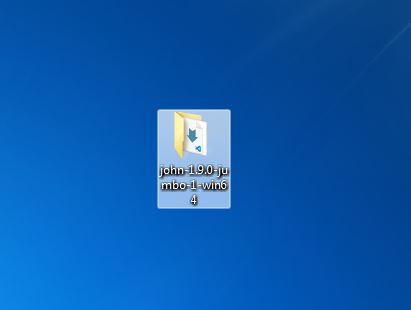
Step 3: Now check for the zip file in downloads in your system and extract it.
Step 4: After extraction, a new folder will be seen on the desktop, open it.
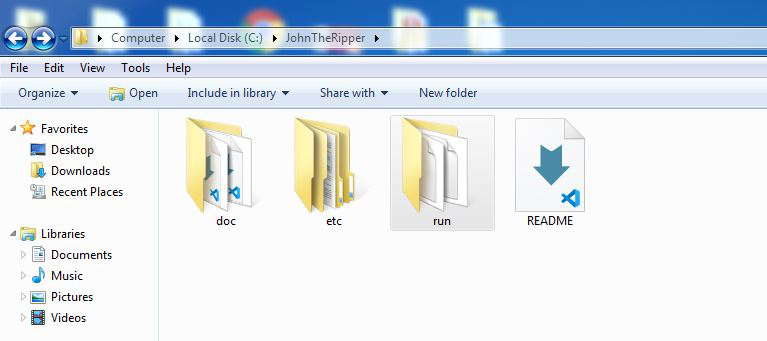
Step 5: Below folders are inside the extracted folder.
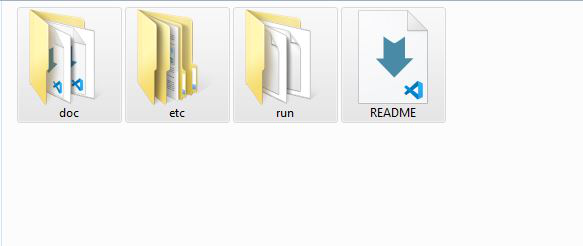
Step 6: Cut/Copy these folders and go to C drive, make a new folder named JohnTheRipper and paste these folders into this new folder named John the Ripper.
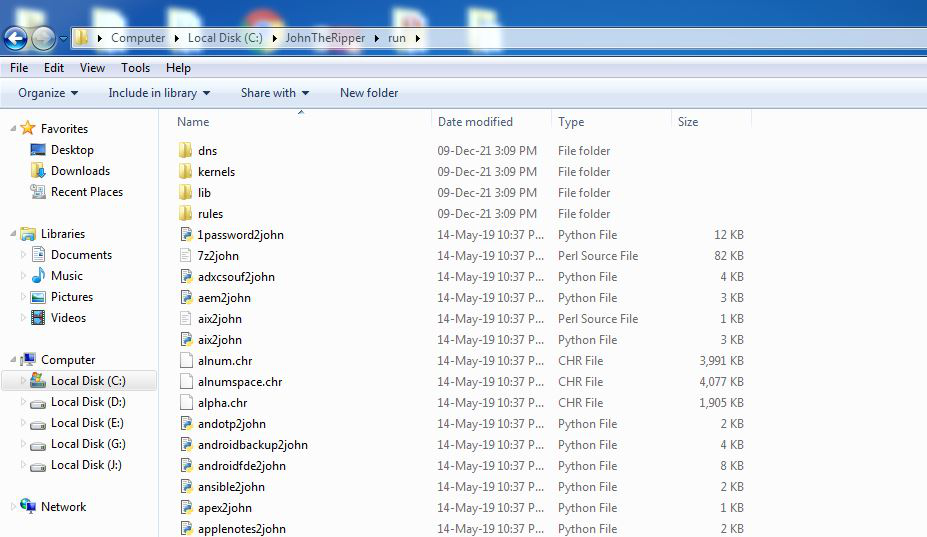
Step 7: Now go inside the run folder.
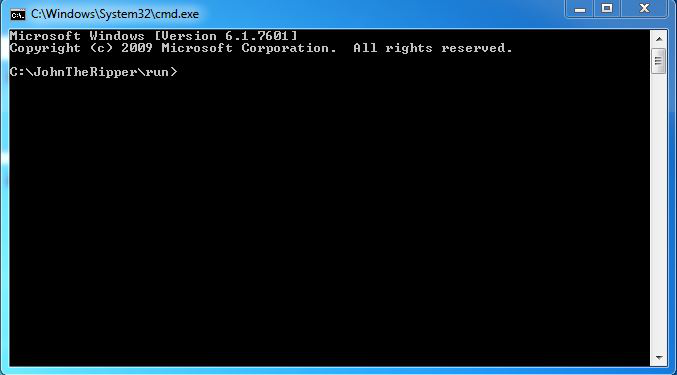
Step 8: Type cmd on as shown in the below image and press enter.

Step 9: The command prompt will open with the current folder.
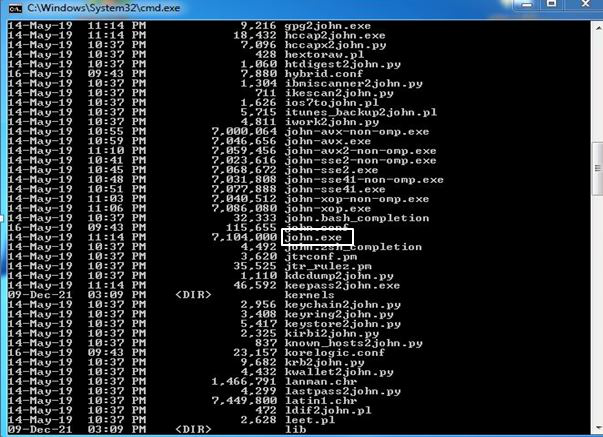
Step 10: Type dir for listing all files and folders.
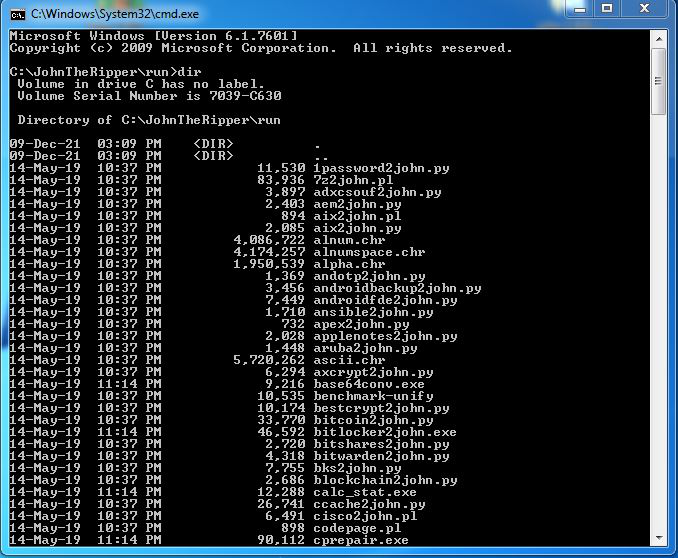
Step 11: Now look for john.exe.
Step 12: Type john and press enter, it will show the version of john the ripper so it is working correctly.
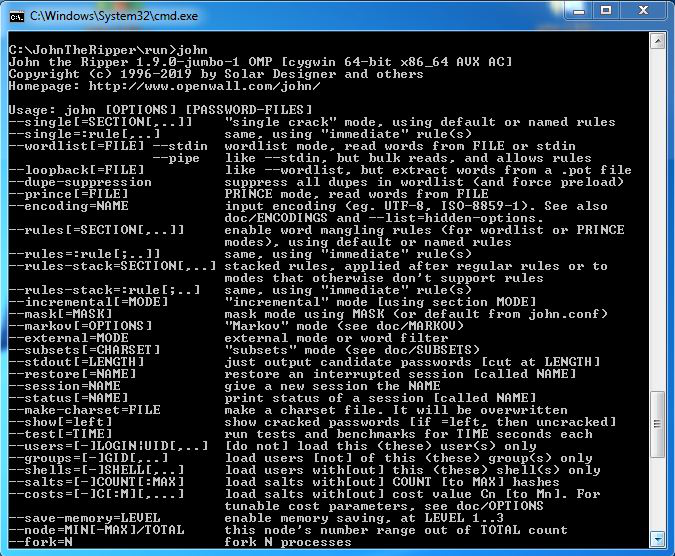
Congratulations!! At this point, you have successfully installed John the Ripper on your windows system.
Reading Time: 5 minutes
John the Ripper, commonly known as John, is one of the most widely used and powerful password cracking tools in the cybersecurity community. It is an open-source software designed to detect weak passwords by performing brute-force, dictionary, and hybrid attacks on encrypted password hashes. In this article, we’ll guide you through everything you need to know about downloading, installing, and using John the Ripper to improve password security.
What is John the Ripper?
John the Ripper is a popular password cracking tool that supports multiple cryptographic hash algorithms. Originally developed for Unix-based systems, it has since evolved to support a wide variety of platforms and password hash formats, including those used in Windows, macOS, and various application frameworks. Security professionals and ethical hackers use John the Ripper to audit password strength by identifying weak or easily guessable passwords.
While John the Ripper can be used for ethical hacking and security testing, it should always be used responsibly and legally, with permission from the system owner.
Key Features of John the Ripper
John the Ripper stands out for its versatility and ability to crack a broad range of password formats. Here are some of its most notable features:
1. Multi-Platform Support
John the Ripper is available for Linux, Windows, and macOS, making it accessible to a wide range of users across different environments.
2. Support for Multiple Hash Formats
It supports numerous cryptographic hash algorithms, including:
- DES
- MD5
- SHA-1
- WPA/WPA2 (Wi-Fi Protected Access)
- LM/NTLM (Windows hashes)
- And many more
3. Password Cracking Techniques
John the Ripper can employ various cracking techniques:
- Brute Force Attacks: Try all possible combinations of characters.
- Dictionary Attacks: Use pre-built wordlists to guess common passwords.
- Hybrid Attacks: Combine dictionary and brute-force attacks to crack more complex passwords.
- Rule-Based Cracking: Alter dictionary words using predefined rules to generate possible password variations.
4. Optimised Performance
John the Ripper is highly efficient and can take advantage of multi-core processors and GPUs (with the correct configuration) to speed up password cracking tasks.
5. Cracking Speed
John is incredibly fast compared to other password cracking tools, especially when optimised for your hardware.
Why Use John the Ripper?
1. Security Auditing
John the Ripper is a valuable tool for penetration testers and ethical hackers. It helps identify weak passwords within a system or network, allowing administrators to address vulnerabilities before malicious actors can exploit them.
2. Password Strength Evaluation
John the Ripper allows organisations to evaluate the strength of their passwords, providing a real-world test of their security measures. It can help you understand whether your users are choosing passwords that are resistant to brute-force attacks.
3. Educational Tool
For students and cybersecurity enthusiasts, John the Ripper is an excellent educational tool. It helps users learn about password hashing techniques and understand how attackers can break weak passwords.
4. Free and Open Source
Being open-source, John the Ripper allows users to study and modify the code according to their needs. It also provides free access to a robust tool that would otherwise be expensive.
System Requirements for John the Ripper
Before downloading John the Ripper, ensure that your system meets the following requirements:
- Operating System: Linux, Windows, or macOS
- Processor: A multi-core CPU is recommended for faster cracking speeds, especially if you’re working with large password hashes.
- Memory: At least 2GB of RAM, though more may be required for more complex cracking tasks.
- Storage: Sufficient disk space for storing password hash files and cracking progress data.
- Graphics Card (optional): John the Ripper can utilise GPUs to speed up cracking on supported systems, especially for hash algorithms like MD5 and SHA-1.
Downloading John the Ripper is simple and straightforward. Follow the steps below to get started:
Step 1: Visit the Official Website
Go to the official John the Ripper website at https://www.openwall.com/john/. This ensures that you are downloading the latest version of the software, avoiding potentially malicious or outdated sources.
Step 2: Choose Your Platform
John the Ripper is available for multiple platforms, so choose the correct version for your system:
- Linux: The preferred version is often the open-source community build available for Linux distributions.
- Windows: Download the precompiled Windows binaries or build from source.
- macOS: Download the macOS build or use a package manager like Homebrew for installation.
Step 3: Download the File
Click on the download link for your platform and save the file to your system.
Installing John the Ripper
Once you have downloaded the appropriate file, you can proceed with the installation process for your operating system.
Installation on Linux
- Download the source code (or use your package manager to install it if available in your distro’s repository).
- Extract the tar file:
tar -xvzf john-*.tar.gz - Navigate to the extracted directory:
cd john-* - Compile the source code:
make - Run John the Ripper:
After compiling, you can start using John the Ripper directly from the terminal.
Installation on Windows
- Download the Windows binary from the official website.
- Extract the archive to a directory of your choice.
- Run John the Ripper from the command line by navigating to the directory where you extracted the binary.
Installation on macOS
- Use Homebrew (recommended for ease of installation):
brew install john - Alternatively, you can download and compile from source in the same way as for Linux.
How to Use John the Ripper
Once you have installed John the Ripper, you can start cracking password hashes. Below is a basic guide to using John the Ripper:
1. Prepare Your Hashes
First, you need a file containing the password hashes you want to crack. These hashes may be extracted from system files or provided from a penetration testing engagement.
2. Run John the Ripper
To crack a password hash, use the following basic command:
John will automatically detect the hash type and begin attempting to crack it.
3. Using Wordlist and Rules
You can improve the chances of success by specifying a wordlist (a file containing common password candidates) for John to use in a dictionary attack:
|
john —wordlist=[path_to_wordlist] [path_to_hash_file] |
You can also combine dictionary attacks with brute-force and rule-based cracking by specifying additional options.
4. Monitor Progress
To view the cracking progress, use:
5. Cracking Specific Hash Types
You can specify the hash type manually if John does not auto-detect it. For example:
|
john —format=raw—md5 [path_to_hash_file] |
6. Crack Multiple Hashes
John the Ripper can also crack multiple password hashes in parallel. Simply include multiple hash files, and John will attempt to crack all of them:
|
john [hash_file1] [hash_file2] |
Best Practices for Ethical Hacking
John the Ripper should only be used for legal and ethical purposes. Follow these guidelines to ensure responsible use:
- Permission: Always ensure you have explicit permission to perform penetration testing and password cracking on any system or network.
- Confidentiality: Ensure any passwords or sensitive data you crack are securely handled and not exposed to unauthorised parties.
- Legal Compliance: Understand and comply with relevant laws, regulations, and guidelines governing ethical hacking and penetration testing in your country or region.
Troubleshooting Common Issues
Problem: John the Ripper Fails to Crack Passwords
- Ensure that you are using the correct hash format and method. Sometimes, hashes might be salted, which requires different handling.
- Use larger or more specialised wordlists for more complex passwords.
Problem: Installation Errors
- Make sure you have installed all required dependencies (such as a working version of GCC on Linux).
- If using Windows, ensure that your system supports the necessary libraries for John to run.
Frequently Asked Questions (FAQs)
1. Is John the Ripper Free?
Yes, John the Ripper is open-source and free to use for personal and educational purposes.
2. Can John the Ripper Crack Any Password?
While John the Ripper is highly effective, it may not crack all passwords, especially those using strong encryption algorithms or long, complex passphrases.
3. Can John the Ripper Be Used for Ethical Hacking?
Yes, John the Ripper is commonly used for ethical hacking, penetration testing, and password auditing, provided you have permission from the system owner.
Conclusion
John the Ripper is a highly effective and versatile tool for password cracking, security auditing, and vulnerability assessment. Whether you’re a penetration tester, a system administrator, or a cybersecurity enthusiast, John the Ripper can help you identify weak passwords and improve overall security.
Start by downloading John the Ripper today from the official Openwall website and begin securing your systems from weak passwords. Always use it responsibly and legally to ensure ethical practices in cybersecurity.
Disclaimer: This post may contain affiliate links. If you make a purchase through one of these links, Cyberly may earn a small commission at no extra cost to you. Your support helps us continue providing free tutorials and content. Thank you!

What is John the Ripper
John the Ripper is a popular password cracker that can brute-force using both the CPU and the video card and supports many algorithms. To be more precise, this is an offline hacker (online hackers brute force services by connecting to them, and offline hackers work with captured hashes (files) to which they choose a password).
Even if you are already familiar with Hashcat (and even more so if you are NOT familiar with Hashcat), you need to learn how John the Ripper works, since they are different.
hashcat differences john the ripper
- one
- Hashcat for brute-force can use a video card, central processing unit (CPU), or both.
- John the Ripper can use one thing: either the video card, or the video core of the CPU, or only the CPU.
- Two
- Hashcat can use the graphics card to crack any supported algorithms.
- John the Ripper for GPU Cracking only supports certain kinds of algorithms.
- Three
- If you have several video cards, Hashcat out of the box supports working with several devices at once and by default splits the task into the required number of threads and the size of each task is tied to the power of the video card.
- John the Ripper can work with multiple graphics cards, but by default splitting a task across multiple graphics cards is supported for only one algorithm.
- Four
- For Hashcat, it doesn’t matter how you installed it: built from source or downloaded a binary file.
- It is very important for John the Ripper to compile the binary himself, as this takes into account the specifics of your system. As a result, when compiling, the instruction sets supported by the processor will be indicated, for example, AVX2 instead of the default AVX, which ultimately will have a very significant impact on performance – for some algorithms, this will speed up cracking by 2 times! Alternatively, John’s binaries compiled on newer hardware may not work on some computers.
- Five
- For Hashcat, you must specify the hash type.
- John the Ripper determines the hash itself, or you can explicitly specify the format of the hash.
- Six
- The syntax for commands and options varies greatly.
- Seven
- About cracking a password in John the Ripper on a video card, you need to know that brute-force on a graphics card takes a long time to run – this is noticeable even in the benchmark. Therefore, if you need to execute many short sessions, then sometimes it is more rational to use the central processor, on which the hack starts immediately.
Installing video card drivers for John the Ripper
If you want to use the GPU to crack passwords (and this is ten times faster than on the central processor), then you need to install a video driver.
For hacking, the following can be used:
- CPU
- video core cpu
- video card
You need to choose one of these – the fastest option is a video card.
Of course, specific computer configurations may vary: some do not have a discrete graphics card, some do not have a video core on a CPU – I hope you can check this yourself.
Installing video drivers in Windows
Everything is simple in this OS – most likely, the video drivers for your graphics card are already installed. If not, go to the manufacturer’s website, download and install the driver.
If you suddenly want to use the video core of the central processor (this is pointless if you have at least some kind of discrete video card, nevertheless – perhaps you simply do not have a dedicated graphics card), then you need to install “OpenCL Runtime for Intel Core and Intel Xeon Processors “. If you really need it, you can find the links you need in this article on Hashcat, which also uses this driver.
Installing video drivers in Linux
On Kali Linux
Pre-full system update and reboot:
sudo apt update && sudo apt full-upgrade -y
reboot
Installing video drivers for NVIDIA on Linux
sudo apt install -y ocl-icd-libopencl1 nvidia-driver nvidia-cuda-toolkit
Enabling OpenCL for Intel
If your CPU supports OpenCL, then install the following packages:
sudo apt install firmware-misc-nonfree intel-opencl-icd
On Arch Linux, BlackArch
Enabling OpenCL for NVIDIA
Remove xf86-video-nouveau there it is:
sudo pacman -R xf86-video-nouveau
Install proprietary NVIDIA driver, CUDA and other required packages:
sudo pacman -S nvidia nvidia-utils opencl-nvidia opencl-headers cuda
Enabling OpenCL for Intel
sudo pacman -S linux-firmware intel-compute-runtime pocl
Install john the ripper Linux
As already mentioned, it is important to build John the Ripper yourself so that he uses all the features of your processor. Another plus of this approach is that we get the latest version of John the Ripper.
Installing the required dependencies in Kali Linux :
sudo apt install build-essential libssl-dev yasm libgmp-dev libpcap-dev libnss3-dev libkrb5-dev pkg-config
Installing required dependencies on Arch Linux, BlackArch:
sudo pacman -S openssl yasm gmp libpcap nss krb5 pkg-config
The following is the same in any distribution:
wget https://github.com/openwall/john/archive/bleeding-jumbo.zip
unzip bleeding-jumbo.zip
rm bleeding-jumbo.zip
cd john-bleeding-jumbo/src/
./configure && make
Please note that in the last command you can use the -j option after which specify the number of (logical) cores of your processor, for example, I have 12 logical cores, then I use:
Now go to the run folder :
And run the test:
You don’t need to install John the Ripper at the system level – move the run folder to a location convenient to you and run John from there. In addition to the John the Ripper executable, the run folder contains many scripts for extracting hashes – we’ll talk about them later.
Remember that if you type in the terminal
then the version preinstalled on the system will run, not the one you compiled.
Installing John the Ripper on Debian, Linux Mint, Ubuntu
The installation should be done exactly the same as in Kali Linux. Therefore, refer to the Installing John the Ripper on Kali Linux section. If something did not work out for you, then write here in the comments indicating your distribution and the error.
How to install john the ripper on windows
We’ll look at compiling John the Ripper from source on Windows sometime later. Let’s use the official binary file.
Install Cygwin first – just go to the official website https://www.cygwin.com/, download the setup-x86_64.exe file and install.
On page https://github.com/openwall/john-packages/releases/tag/jumbo-dev download the file winX64_1_JtR.7z .
Unpack the contents of this archive into the C:\cygwin64\home\USERNAME folder , for example, The user I have is kalitut , so I unpack it into the C:\cygwin64\home\kalitut\folder .
In fact, on Windows it is possible to run John the Ripper even without Cygwin, but in this case it will not be able to use OpenCL (video cores) for brute-force.
Now in the C:\cygwin64\home\USERNAME\JtR\run\ find cygOpenCL-1.dll and rename it to cygOpenCL-1.dll.bac .
Then, in the c:\Windows\System32 folder, find the OpenCL.dll file and copy it to the C:\cygwin64\home\USERNAME\JtR\run\ folder .
Then, in the C:\cygwin64\home\USERNAME\JtR\run\ folder, rename the OpenCL.dll file to cygOpenCL-1.dll .
The file swap trick may not work for all systems – but either way, you can use the CPU or integrated graphics to hack.
Open Cygwin console to execute commands.
Run install test ::
Run your system benchmark:
Still, JtR is one of those programs that primarily targets Linux. Further, you will see that we will run scripts to generate (extract) hashes from files and, for example, some of the auxiliary programs/scripts need, for example, an installed Python environment, which is present in Linux by default.
Checking John the Ripper
In this section, we will check what devices John the Ripper sees for use during brute force.
The options are the same on any system, but remember that on Windows, to run John the Ripper, you need to open Cygwin and specify ~/JtR /run/ john as the executable file.
If you run a file installed from the standard repositories in Linux, then it is enough to write simply
If you run a file compiled from the source code, then go to the directory with the executable file (in the program folder it is the run directory ) and specify as the executable file
To view OpenCL devices, use the –list=opencl-devices option:
./john --list=opencl-devices
As already mentioned, John the Ripper cannot simply work with any supported OpenCL algorithms – a module must be created for them. Therefore, some algorithms can only be cracked on the central processor, while some algorithms can be cracked on a video card or on a central processor.
The list of algorithms may differ by OS and by installed dependencies.
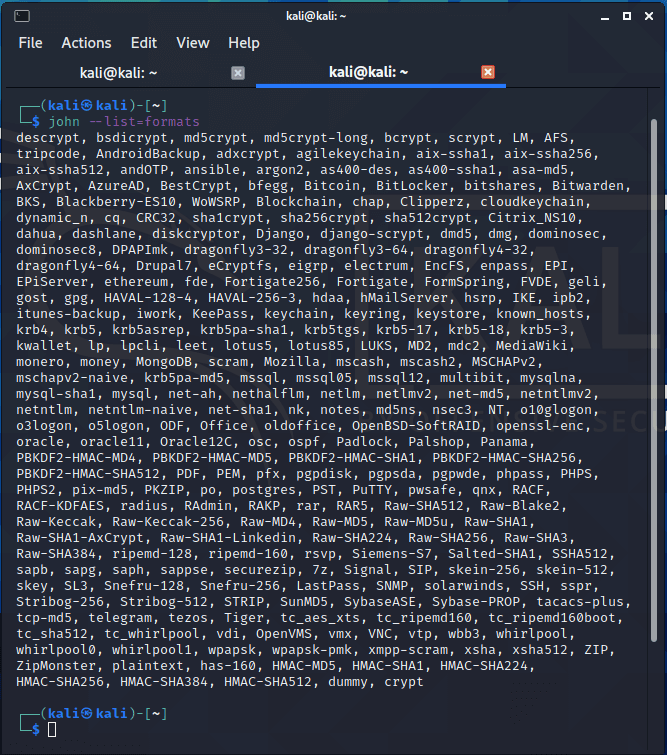
To see the list of supported algorithms:
The list did not fit all:
To see a list of algorithms for cracking on OpenCL:
john --list=formats --format=opencl
How to use a graphics card to jailbreak John the Ripper
By default, JtR uses the CPU even if all the required OpenCL drivers are installed.
To enable the video card, you need to use the –format option and explicitly specify the algorithm that OpenCL supports.
For example, to benchmark the wpapsk algorithm on a video card:
john --test --format=wpapsk-opencl
To hack wpapsk on the central processor, you need to run something like this:
john --test --format=wpapsk
How to use video CPU core in JtR
As you already know, OpenCL devices are discrete graphics and integrated graphics (video core of the CPU). By default, jailbreak starts on a discrete video card.
With the -dev option , you can explicitly specify the device to do the computation:gpu (discrete graphics) or cpu (integrated graphics).
Running a speed test on the video core of the processor:
john --test --format=wpapsk-opencl -dev=cpu
Running a speed test on the video core of a dedicated video card (by default):
john --test --format=wpapsk-opencl -dev=gpu
How to run John the Ripper benchmark
To check the speed of brute-force passwords in JtR, use the –test option .
This option can be used with a number – the number of seconds that the test will run.
If you want to check the speed of only a certain algorithm, then use the –format option .
An example of a test of the speed of cracking a Wi-Fi password by a central processor:
john --test=10 --format=wpapsk
An example of a test of the speed of cracking a WiFi password with a discrete video card:
john --test=10 --format=wpapsk-opencl
If you only need to check the operation of decryption of various algorithms without running a benchmark, then specify 0 as the value of the –test option :
How to set up John the Ripper
John the Ripper has a settings file with a lot of options. This file is called john.conf and is located in the same folder as the john executable.
Provide good cooling; watch the temperature. If the OpenCL runtime supports this, the GPU temperature will be monitored and displayed in the status bars, and there is a user editable limit in john.conf that will shutdown at 95 °C.
This setting is set by the directive:
The temperature is indicated in degrees Celsius -°C.
Instead of interrupting, you can stop the program for this number of seconds to cool down the GPU when the temperature reaches the AbortTemperature value, then the program will re-check the temperature and either continue or pause. Set to 0 to just quit.
If SleepOnTemperature =1 (one second) is specified, then no pause/resume messages will be displayed, since such a short value is interpreted as a desire to keep the temperature of the video card near the extreme value. Default directive value:
How to Crack Password in John the Ripper
John the Ripper can only crack hashes – he cannot directly work with encrypted files. The program cannot open, for example, an office document, enter a password there, etc.
This is a solvable problem – we need to compute (extract) the hash for the file of interest. John himself does not know how to do this. We need auxiliary utilities. You can get acquainted with their list, for example, by typing the command:
This is how the list looks like on the machine
The list is long to go !
On Kali Linux, these files are located in two directories:
- script files in /usr/share/john/
- and binaries in /usr/sbin/
These files are located in BlackArch:
- script files in the /usr/lib/john/ directory
- binaries in /usr/bin/
If you compiled John the Ripper from source, then all of these files are collected in the run directory .
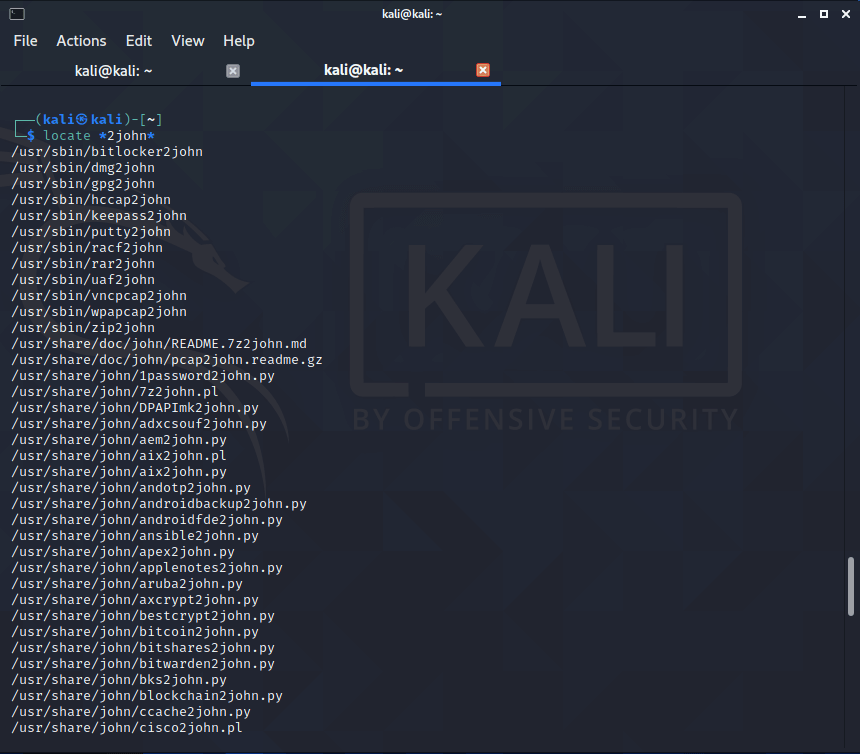
To find the file you need, use a command like this:
To find all files at once by extracting hashes, run:
If you cannot find some file on your system (this can be done with the locate command ), then download them from the source codes: https://github.com/magnumripper/JohnTheRipper .
How to convert a file to hash John the Ripper
The scripts have been collected from a wide variety of places and written by many researchers, often based on research by other researchers. Therefore, they are written in different programming languages.
In general, the use is pretty standard – you need to specify the program to run and, separated by a space, the file for which you want to calculate the hash.
The good news is that these hashes are shared by both Hashcat and John the Ripper. That is, you can use this table and these files to crack passwords in John the Ripper or Hashcat.
You can specify several files at once to extract their hashes – for example, several ZIP archives or several office documents.
An example of extracting a hash from a passwords.zip file, that is, from a ZIP archive:
zip2john '/home/kalitut/test/passwords.zip'
Output example:
The first line will contains the properties of the archive:
ver 2.0 passwords.zip/passwords.txt PKZIP Encr: cmplen=339, decmplen=490, crc=F872015C type=8
The hash itself goes further:
passwords.zip/passwords.txt:$pkzip2$1*1*2*0*153*1ea*f872015c*0*2b*8*153*f872*3dc8*8cfe495658baa3b5650d212831700dbefbf0c95bbc2831d287121ca64f0a0b7f468c9d3ab88fdce90c7c7e0f9f8978a2d3496661af8dc24e2702398612c927d5f33c243c892bdd11a39f7ecd6c375c7da5df205f6ced61c9d7629d4253f98c01257d45be64f936eeb4bf06060b5e3b2bd286f9322c130d07f88d15af4e6b9a107f0dd2f6c48dc05b4aa81f7f1a9306b5070b7e3414d687a011a73d4a903568e3559c590f2d720542e686d2d6cf70d11d0b60728415ff147263d26f994a73328aad1f204ff2d38c89acbba101e3aff5a0850ef016c64cee400fb5f01834ee37ddedf8051618802547120f52e2c8b2aa4f6d161807aa8d76fd11992e30abd712710da1e238ed17f57ee5af00117016dbd4ae673d6aa9ae694da53c578a0ff6d2af00ebb0dded84cf1f2a966d441b03e22338b4a287d364faa41bea9bc72d0454c0aa654a2e9bb13567aafd5e7043fb6c2289c244*$/pkzip2$:passwords.txt:passwords.zip::/home/kalitut/test/passwords.zipAn example of a command that saves the hash to the passwords.zip.hash file:
zip2john '/home/kalitut/test/passwords.zip' > passwords.zip.hash
An example of extracting a hash from a .7z archive:
7z2john.pl '/mnt/disk_d/Arch/from_kali.7z'
Output example:
The first line warns that hashes can contain encrypted sensitive data and you need to be careful if you share the hash with someone or publish it online:
ATTENTION: the hashes might contain sensitive encrypted data. Be careful when sharing or posting these hashesThe second line is the hash itself:
from_kali.7z:$7z$2$19$0$$8$a09335e006fc03b20000000000000000$2687817801$144$144$47a0c3138667a3727b8db3f9aa10362c8a9739192d9e55d8c052f16965cd1360100f1b17764c07101a9088eb5e965129c245647e3597e2182dee769db99ab2a5d07716f78867a9f5e5b4198f8e3bc9a4bc019006f95c613006cbecf9bda18a865cde0279cce92e060bdeb31ca50983f1d6363fb626651b706dc44838294b250ad53a6ce02a2a49eeb8523be9fee28dbc$374$00
So, John the Ripper – a popular offline brute force. In here, we learned the tricks for installing JtR, and also learned how to test the speed of brute-forcing passwords, turn on the video card for use and control actions when overheating.
When running such programs (John the Ripper and Hashcat), you need to take care of proper cooling. If your computer/laptop overheats, then the hacking speed will drop very significantly.
John the Ripper
This is the community-enhanced, «jumbo» version of John the Ripper.
It has a lot of code, documentation, and data contributed by jumbo
developers and the user community. It is easy for new code to be added
to jumbo, and the quality requirements are low, although lately we’ve
started subjecting all contributions to quite some automated testing.
This means that you get a lot of functionality that is not necessarily
«mature», which in turn means that bugs in this code are to be expected.
John the Ripper homepage is:
https://www.openwall.com/john/
If you have any comments on this release or on JtR in general, please
join the john-users mailing list and post in there:
https://www.openwall.com/lists/john-users/
For contributions to John the Ripper jumbo, please use pull requests on
GitHub:
https://github.com/openwall/john/blob/bleeding-jumbo/CONTRIBUTING.md
Included below is basic John the Ripper core documentation.
John the Ripper password cracker.
John the Ripper is a fast password cracker, currently available for
many flavors of Unix, macOS, Windows, DOS, BeOS, and OpenVMS (the latter
requires a contributed patch). Its primary purpose is to detect weak
Unix passwords. Besides several crypt(3) password hash types most
commonly found on various Unix flavors, supported out of the box are
Kerberos/AFS and Windows LM hashes, as well as DES-based tripcodes, plus
hundreds of additional hashes and ciphers in «-jumbo» versions.
How to install.
See INSTALL for information on installing John on your system.
How to use.
To run John, you need to supply it with some password files and
optionally specify a cracking mode, like this, using the default order
of modes and assuming that «passwd» is a copy of your password file:
or, to restrict it to the wordlist mode only, but permitting the use
of word mangling rules:
john --wordlist=password.lst --rules passwd
Cracked passwords will be printed to the terminal and saved in the
file called $JOHN/john.pot (in the documentation and in the
configuration file for John, «$JOHN» refers to John’s «home
directory»; which directory it really is depends on how you installed
John). The $JOHN/john.pot file is also used to not load password
hashes that you already cracked when you run John the next time.
To retrieve the cracked passwords, run:
While cracking, you can press any key for status, or ‘q’ or Ctrl-C to
abort the session saving its state to a file ($JOHN/john.rec by
default). If you press Ctrl-C for a second time before John had a
chance to complete handling of your first Ctrl-C, John will abort
immediately without saving. By default, the state is also saved every
10 minutes to permit for recovery in case of a crash.
To continue an interrupted session, run:
These are just the most essential things you can do with John. For
a complete list of command line options and for more complicated usage
examples you should refer to OPTIONS and EXAMPLES, respectively.
Please note that «binary» (pre-compiled) distributions of John may
include alternate executables instead of just «john». You may need to
choose the executable that fits your system best, e.g. «john-omp» to
take advantage of multiple CPUs and/or CPU cores.
Features.
John the Ripper is designed to be both feature-rich and fast. It
combines several cracking modes in one program and is fully
configurable for your particular needs (you can even define a custom
cracking mode using the built-in compiler supporting a subset of C).
Also, John is available for several different platforms which enables
you to use the same cracker everywhere (you can even continue a
cracking session which you started on another platform).
Out of the box, John supports (and autodetects) the following Unix
crypt(3) hash types: traditional DES-based, «bigcrypt», BSDI extended
DES-based, FreeBSD MD5-based (also used on Linux and in Cisco IOS), and
OpenBSD Blowfish-based (now also used on some Linux distributions and
supported by recent versions of Solaris). Also supported out of the box
are Kerberos/AFS and Windows LM (DES-based) hashes, as well as DES-based
tripcodes.
When running on Linux distributions with glibc 2.7+, John 1.7.6+
additionally supports (and autodetects) SHA-crypt hashes (which are
actually used by recent versions of Fedora and Ubuntu), with optional
OpenMP parallelization (requires GCC 4.2+, needs to be explicitly
enabled at compile-time by uncommenting the proper OMPFLAGS line near
the beginning of the Makefile).
Similarly, when running on recent versions of Solaris, John 1.7.6+
supports and autodetects SHA-crypt and SunMD5 hashes, also with
optional OpenMP parallelization (requires GCC 4.2+ or recent Sun Studio,
needs to be explicitly enabled at compile-time by uncommenting the
proper OMPFLAGS line near the beginning of the Makefile and at runtime
by setting the OMP_NUM_THREADS environment variable to the desired
number of threads).
«-jumbo» versions add support for hundreds of additional hash and cipher
types, including fast built-in implementations of SHA-crypt and SunMD5,
Windows NTLM (MD4-based) password hashes, various macOS and Mac OS X
user password hashes, fast hashes such as raw MD5, SHA-1, SHA-256, and
SHA-512 (which many «web applications» historically misuse for
passwords), various other «web application» password hashes, various SQL
and LDAP server password hashes, and lots of other hash types, as well
as many non-hashes such as SSH private keys, S/Key skeykeys files,
Kerberos TGTs, encrypted filesystems such as macOS .dmg files and
«sparse bundles», encrypted archives such as ZIP (classic PKZIP and
WinZip/AES), RAR, and 7z, encrypted document files such as PDF and
Microsoft Office’s — and these are just some examples. To load some of
these larger files for cracking, a corresponding bundled *2john program
should be used first, and then its output fed into JtR -jumbo.
Graphical User Interface (GUI).
There is an official GUI for John the Ripper: Johnny.
Despite the fact that Johnny is oriented onto JtR core, all basic
functionality is supposed to work in all versions, including jumbo.
Johnny is a separate program, therefore you need to have John the Ripper
installed in order to use it.
More information about Johnny and its releases is on the wiki:
https://openwall.info/wiki/john/johnny
Documentation.
The rest of documentation is located in separate files, listed here in
the recommended order of reading:
- INSTALL — installation instructions
- OPTIONS — command line options and additional utilities
- MODES — cracking modes: what they are
- CONFIG (*) — how to customize
- RULES (*) — wordlist rules syntax
- EXTERNAL (*) — defining an external mode
- EXAMPLES — usage examples — strongly recommended
- FAQ — guess
- CHANGES (*) — history of changes
- CONTACT (*) — how to contact the author or otherwise obtain support
- CREDITS (*) — credits
- LICENSE — copyrights and licensing terms
- COPYING — GNU GPL version 2, as referenced by LICENSE above
(*) most users can safely skip these.
There are a lot of additional documentation files in jumbo’s «doc»
directory, which you’ll also want to explore.
Happy reading!
John the Ripper — это программа для взлома паролей, которая умеет подбирать пароли к множеству типу файлов: архивы, офисные документы, умеет взламывать хеши сетевых протоколов и многое другое.
John the Ripper — это утилита командной строки, поэтому её использование требует навыков работы в командной строке, а также знание опций John the Ripper.
Johnny — это графический интерфейс для John the Ripper, который облегчает использование популярного взломщика паролей.
Программа John the Ripper является портативной, для её установки достаточно распаковать скаченный архив с этой программой. Johnny также является портативной программой, распространяемой в файле установщике. Для работы Johnny требуется John the Ripper, то есть нужно установить обе программы.
Установка этих программ простая, но при этом для брут-форса пароля John сможет использовать только центральный процессор, но не сможет использовать видеокарту. Взлом пароля на видеокарте в разы быстрее, чем на центральном процессоре, поэтому хотелось бы добавить поддержку графической карты, тем более, что это в принципе возможно.
Данная инструкция покажет, как установить John the Ripper и Johnny в Windows чтобы можно было взламывать пароли на видео карте.
Сначала установите Cygwin — простой зайдите на официальный сайт https://www.cygwin.com/, скачайте файл setup-x86_64.exe и установите. Если что-то непонятно про Cygwin, то все подробности смотрите в статье «Как начать знакомство с командами Linux: Cygwin».
Со страницы https://github.com/openwall/john-packages/releases/tag/jumbo-dev скачайте файл winX64_1_JtR.7z.
Распакуйте содержимое этого архива в папку C:\cygwin64\home\ИМЯ-ПОЛЬЗОВАТЕЛЯ, например, у меня пользователь MiAl, поэтому я распаковываю в папку C:\cygwin64\home\MiAl\. Обратите внимание, что создавать папку и копировать в неё файлы нужно от имени обычного пользователя, поскольку во время своей работы John the Ripper будет пытаться записать данные в .pot файл в той же папке, где запущена программа. Если вы скопировали папку JtR в файловом менеджере с повышенными правами, то эта папка будет принадлежать Администратору и записать в неё что-либо или поменять права на неё невозможно.
Теперь в папке C:\cygwin64\home\ИМЯ-ПОЛЬЗОВАТЕЛЯ\JtR\run\ найдите cygOpenCL-1.dll и переименуйте его в cygOpenCL-1.dll.bac.
Затем в папке c:\Windows\System32 найдите файл OpenCL.dll и скопируйте его в папку C:\cygwin64\home\ИМЯ-ПОЛЬЗОВАТЕЛЯ\JtR\run\.
Затем в папке C:\cygwin64\home\ИМЯ-ПОЛЬЗОВАТЕЛЯ\JtR\run\ переименуйте файл OpenCL.dll в cygOpenCL-1.dll.
Далее эту же самую процедуру нужно повторить для файла в папке C:\cygwin64\bin\. То есть в папке C:\cygwin64\bin\ найдите cygOpenCL-1.dll и переименуйте его в cygOpenCL-1.dll.bac. Затем в папке c:\Windows\System32 вновь найдите файл OpenCL.dll и скопируйте его в папку C:\cygwin64\bin\. Наконец в папке C:\cygwin64\bin\ переименуйте файл OpenCL.dll в cygOpenCL-1.dll.
Чтобы вы понимали, для чего мы всё это делаем, посмотрите на скорость взлома на центральном процессоре:

И на скорость взлома на видеокарте, которая стала доступна благодаря показанным выше действиям с подменой файлов:

Откройте консоль Cygwin для выполнения команд.
Запустите тест установки::
~/JtR/run/john --test=0
Запустите бенчмарк вашей системы:
~/JtR/run/john --test
Установка Johnny в Windows с поддержкой видеокарты (OpenCL)
Откройте Cygwin – мы будем компилировать Johnny из исходного кода.
Установите apt-cyg:
curl https://raw.githubusercontent.com/transcode-open/apt-cyg/master/apt-cyg > apt-cyg
install apt-cyg /bin
Смотрите также: apt-cyg — apt для Cygwin
Установите зависимости:
apt-cyg install gcc-g++ git libQt5Core-devel make libQt5Gui-devel libGL-devel xorg-server xinit
Скачайте исходный код и скомпилируйте программу:
git clone https://github.com/shinnok/johnny && cd johnny
export QT_SELECT=qt5
qmake-qt5 && make -j$(nproc)
По умолчанию X сервер не запущен в Cygwin, запустите Cygwin/X:
startxwin &
Нажмите Enter, чтобы увидеть приглашение командной строки.
Установим значение переменной DISPLAY:
export DISPLAY=:0.0
Теперь вы можете запустить Johnny:
./johnny
Запустите Johnny, перейдите во вкладку Settings и укажите файл до исполнимого файла john.exe, например /home/MiAl/john/run/john.exe.
Скриншот сделан в Windows после успешного взлома пароля на видеокарте с помощью Johnny.

Инструкции по использованию ищите на страницах-карточках данных программ:
- John the Ripper
- Johnny
Связанные статьи:
- Как сбросить забытый пароль Linux в WSL (58.3%)
- KeePass (57%)
- KeePassXC (57%)
- Как перенести пароли LastPass в Bitwarden (57%)
- Как защитить архив паролем (55.8%)
- Изменение профиля съёмки в ActivePresenter (RANDOM — 50%)