
Installing and Using FFmpeg in Python
Introduction
FFmpeg is a powerful multimedia framework that can decode, encode, transcode, mux, demux, stream, filter, and play just about anything that humans and machines have created. It supports the most obscure ancient formats up to the cutting edge. This versatility makes it an invaluable tool for developers dealing with multimedia data.
In this blog, we will cover how to install FFmpeg and use it in Python. We will use the ffmpeg-python library, which is a Python binding for FFmpeg, making it easier to work with FFmpeg commands in Python.
Installing FFmpeg
Before we can use FFmpeg in Python, we need to install the FFmpeg binary on our system.
Installing FFmpeg on Windows
- Download the FFmpeg executable from the official FFmpeg website.
- Extract the downloaded zip file.
- Add the
bindirectory of the extracted files to your system’s PATH environment variable.
Installing FFmpeg on macOS
You can use Homebrew to install FFmpeg:

Installing FFmpeg on Linux
On Ubuntu or Debian-based systems, you can install FFmpeg using:
sudo apt update
sudo apt install ffmpeg
On Fedora, you can use:
Installing ffmpeg-python
With FFmpeg installed, we can now install the ffmpeg-python library. This library provides a more Pythonic interface to FFmpeg.
Install it using pip:
pip install ffmpeg-python
Using FFmpeg in Python
Here’s a basic example of how to use FFmpeg in Python to convert a video file from one format to another.
Converting a Video File
output_file = 'output.avi'
ffmpeg.input(input_file).output(output_file).run()
Extracting Audio from a Video File
You might want to extract the audio from a video file. Here’s how you can do it:
output_file = 'output.mp3'
ffmpeg.input(input_file).output(output_file).run()
Resizing a Video
You can also resize a video using FFmpeg:
output_file = 'output_resized.mp4'
ffmpeg.input(input_file).output(output_file, vf='scale=1280:720').run()
Adding a Watermark to a Video
To add a watermark to a video, you can use the following code:
watermark = 'watermark.png'
output_file = 'output_with_watermark.mp4'
ffmpeg.input(input_file).output(output_file, vf='movie=watermark.png [watermark]; [in][watermark] overlay=W-w-10:H-h-10 [out]').run()
Combining Multiple Commands
FFmpeg is very powerful and allows you to chain multiple commands together. Here’s an example where we convert a video, resize it, and extract the audio all in one go:
video_output_file = 'output_resized.avi'
audio_output_file = 'output_audio.mp3'
ffmpeg.input(input_file).output(video_output_file, vf='scale=1280:720').run()
ffmpeg.input(input_file).output(audio_output_file).run()
Error Handling
FFmpeg commands might fail for various reasons (e.g., invalid input files, missing codecs). The ffmpeg-python library provides a way to catch and handle these errors.
output_file = 'output.avi'
try:
ffmpeg.input(input_file).output(output_file).run()
except ffmpeg.Error as e:
print(f"An error occurred: {e.stderr.decode()}")
Conclusion
FFmpeg is a versatile tool that can handle a wide range of multimedia tasks. By using the ffmpeg-python library, we can leverage the power of FFmpeg in a more Pythonic way. This blog covered basic usage examples, but FFmpeg’s capabilities are vast. I encourage you to explore the FFmpeg documentation and the ffmpeg-python GitHub page for more advanced usage and examples.
Happy coding!
FFmpeg is a very popular and useful open-source tool that lets you work with videos and audios in many different ways. It can do things like converting, recording, streaming, or even splitting and combining audio and video files. It’s the secret sauce behind many Python tools and scripts for video and audio tasks.
Ever tried using a command-line tool but it just didn’t work because FFmpeg wasn’t there? Well, this guide will show you how to get FFmpeg set up on your Windows 11 computer so you can run those Python scripts that require it. Believe me, it’s surprisingly easy to install, even if you’re new to installing software.
Why do you need FFmpeg?
FFmpeg is an important tool for many users who often need to work with video and audio. Whether you’re into coding with Python and need to make scripts that deal with multimedia formats, or you just want to merge, split, convert, or stream media files, FFmpeg can do all that. Most importantly, it supports tons of formats.
Related resource: Convert SRT to 3D Subtitles and Add them to 3D Movies
Downloading FFmpeg
Before we can use the FFmpeg’s features, we need to first download the software. There are plenty of places online where you can download FFmpeg for Windows 11 or 10. Choose the version that fits what you need it for, as they come with different features and capabilities.
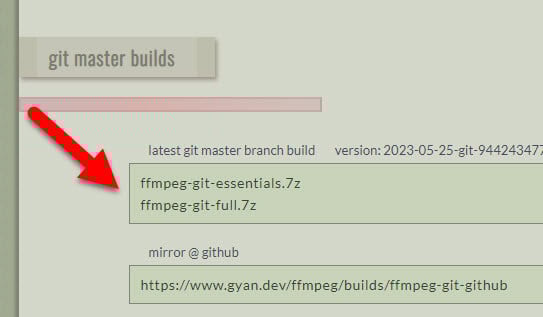
- Visit a reliable FFmpeg builds page. Here’s a site where you can find various FFmpeg builds, like Gyan.dev FFmpeg Builds. Just go there with your browser.
https://www.gyan.dev/ffmpeg/builds/
- Look for
ffmpeg,ffprobe, andffplayon the page. For Python stuff, eitherffmpeg-git-essentials.7zorffmpeg-git-full.7zwill do the job. Pick the one that matches your needs. - Click the link for the build you want to start downloading it.

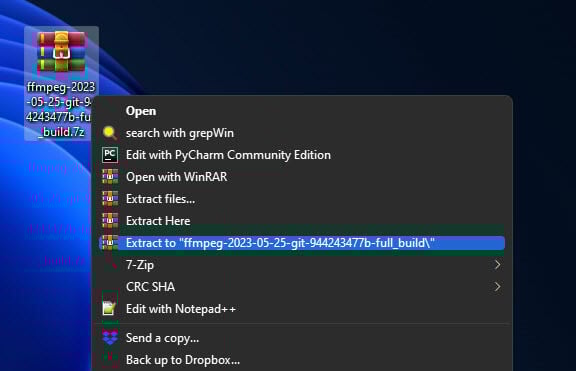
- After downloading, you’ll get a .7z file. You’ll need a tool like 7-Zip to open it. Right-click the file, pick “Extract Here” or “Extract files”. If you don’t have 7-Zip, it’s free to download and use.

Installing FFmpeg in Windows 11
Now that you have the FFmpeg files, the next step would be to install it on your PC. The most crucial step is to add FFmpeg to your system path, so your computer knows where to find it. This makes sure you won’t get errors when trying to use FFmpeg from the command line or with Python scripts.
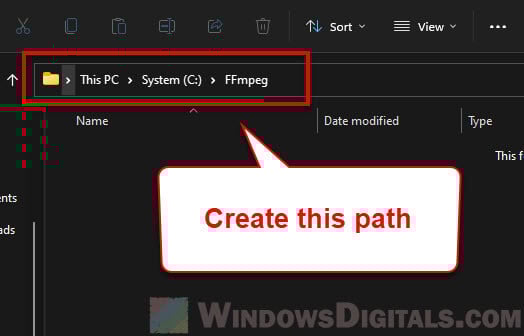
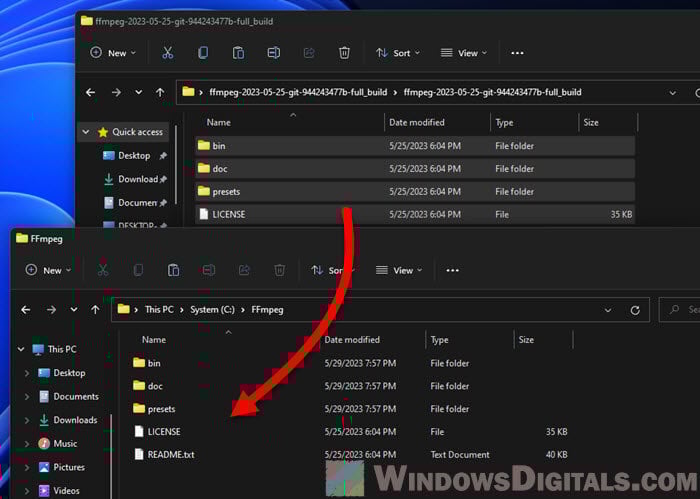
- Make a new folder in your
C:drive calledFFmpegto keep things tidy.
- Move all the extracted files into the
FFmpegfolder you just made.
- We need to tell your computer where FFmpeg locates so you can use it from anywhere. Here’s how:
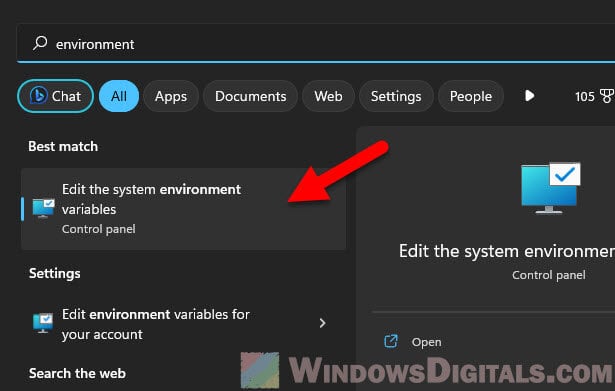
- Hit the Start Menu, look up “Environment Variables”, and choose “Edit the system environment variables”.

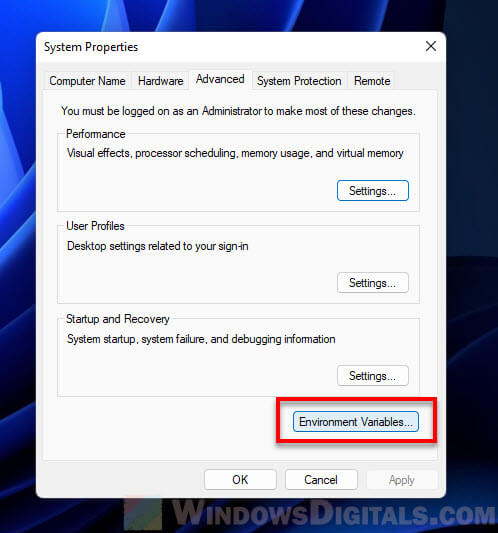
- In the window that comes up, click “Environment Variables”.

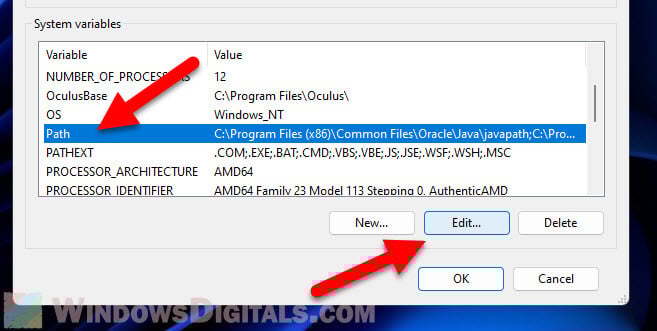
- Find the “System variables” section, scroll to “Path”, select it, and click “Edit”.

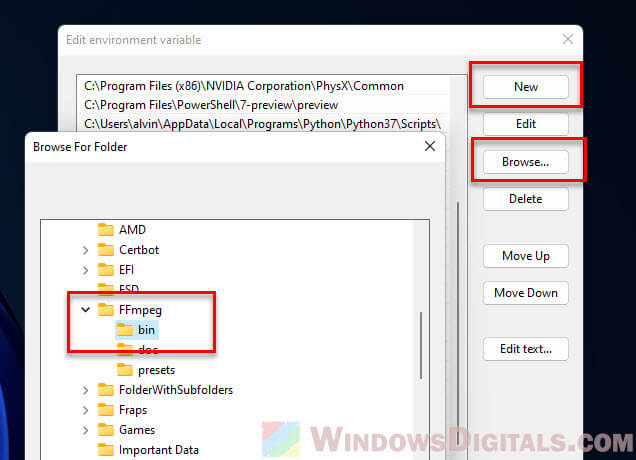
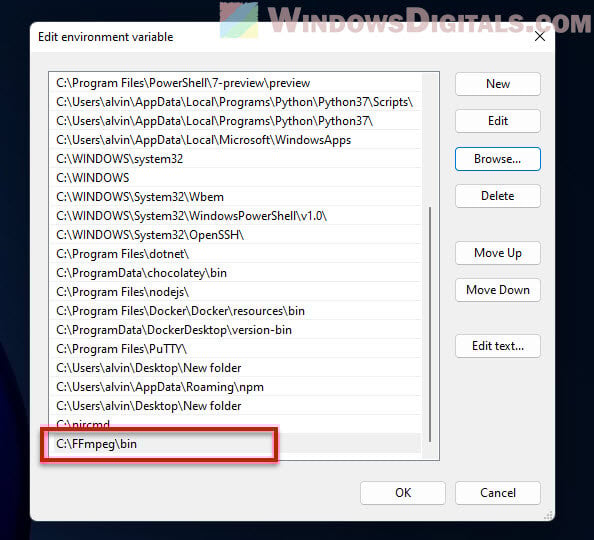
- Click “New” then “Browse”.
- Browse to the
C:drive, open theFFmpegfolder, and inside it, thebinfolder.
- Click “OK” to save the changes and close all windows.

- Hit the Start Menu, look up “Environment Variables”, and choose “Edit the system environment variables”.
Checking the installation
To make sure FFmpeg is already installed and ready to be used, open a new command prompt window (just type cmd in the search bar and hit Enter). Type ffmpeg -version and hit Enter. If everything went right, you’ll see info about the FFmpeg version installed on your system.

Some final words
Congrats! You’ve got FFmpeg installed on your Windows 11 PC. Now, all those Python scripts and command-line tools that need FFmpeg to deal with video and audio stuff should work just fine. If you need to manually use it for tasks like converting or streaming, you can check what you can do with it by running the ffmpeg -help command to see a list of commands that you can use with it.
Provide feedback
Saved searches
Use saved searches to filter your results more quickly
Sign up
Appearance settings
Project description
ffmpeg for Python
Static builds of ffmpeg for Python
Installation
From pip:
pip install ffmpeg-binaries
Basic usage
import ffmpeg

# Initialize module (only if no binaries found)
ffmpeg.init()

# Call ffmpeg directly
ffmpeg.run_as_ffmpeg("-h")

# Use the binaries path in other modules
other_module.add_ffmpeg(ffmpeg.FFMPEG_PATH)

# Add directly to path
ffmpeg.add_to_path()
Import name conflict
If another dependency aleady uses the ffmpeg import name, like typed-ffmpeg or
ffmpeg-python, you can install the mirror package instead:
pip install ffmpeg-binaries-compat
and use it with the import name ffmpeg_binaries:
import ffmpeg_binaries as ffmpeg

# Initialize module (only if no binaries found)
ffmpeg.init()

# Call ffmpeg directly
ffmpeg.run_as_ffmpeg("-h")

# Use the binaries path in other modules
other_module.add_ffmpeg(ffmpeg.FFMPEG_PATH)

# Add directly to path
ffmpeg.add_to_path()
Download files
Download the file for your platform. If you’re not sure which to choose, learn more about installing packages.
Source Distribution
Built Distributions
File details
Details for the file ffmpeg_binaries-1.0.1.tar.gz.
File metadata
-
Download URL:
ffmpeg_binaries-1.0.1.tar.gz - Upload date:
- Size: 7.3 kB
- Tags: Source
- Uploaded using Trusted Publishing? Yes
- Uploaded via: twine/6.1.0 CPython/3.12.9
File hashes
Hashes for ffmpeg_binaries-1.0.1.tar.gz
| Algorithm | Hash digest | |
|---|---|---|
| SHA256 | 2c5b123956860521460078b2b5b0ae34f83fc0cd68b792a4df89e97f4d6a9d78 |
|
| MD5 | 46e1fcc686a011558e00a46e67a8b6ef |
|
| BLAKE2b-256 | 0a7398bef219b81da1de44ece0cff03d28f11b5df7d1ab8af00b24608c32ab7d |
See more details on using hashes here.
Provenance
The following attestation bundles were made for ffmpeg_binaries-1.0.1.tar.gz:
Publisher:
ci.yml on MatteoH2O1999/ffmpeg-binaries
Attestations:
Values shown here reflect the state when the release was signed and may no longer be current.
-
Statement:
- Statement type:
https://in-toto.io/Statement/v1 - Predicate type:
https://docs.pypi.org/attestations/publish/v1 - Subject name:
ffmpeg_binaries-1.0.1.tar.gz - Subject digest:
2c5b123956860521460078b2b5b0ae34f83fc0cd68b792a4df89e97f4d6a9d78 - Sigstore transparency entry: 189951130
- Sigstore integration time:
Source repository:
- Permalink:
MatteoH2O1999/ffmpeg-binaries@d938efb032a5a168c40c1b7e78723c6abab203ba - Branch / Tag:
refs/tags/v1.0.1 - Owner: https://github.com/MatteoH2O1999
- Access:
public
Publication detail:
- Token Issuer:
https://token.actions.githubusercontent.com - Runner Environment:
github-hosted - Publication workflow:
ci.yml@d938efb032a5a168c40c1b7e78723c6abab203ba - Trigger Event:
release
- Statement type:
File details
Details for the file ffmpeg_binaries-1.0.1-py3-none-win_amd64.whl.
File metadata
-
Download URL:
ffmpeg_binaries-1.0.1-py3-none-win_amd64.whl - Upload date:
- Size: 88.8 MB
- Tags: Python 3, Windows x86-64
- Uploaded using Trusted Publishing? Yes
- Uploaded via: twine/6.1.0 CPython/3.12.9
File hashes
Hashes for ffmpeg_binaries-1.0.1-py3-none-win_amd64.whl
| Algorithm | Hash digest | |
|---|---|---|
| SHA256 | da3d6a528fe2e4fe3e4831486a37d59cb5a1e586d513ef7556622db1f9b4711f |
|
| MD5 | 3fd380aae431c2ec4866ef4068be8d17 |
|
| BLAKE2b-256 | 57cc0d76971e84db565e2edba568bc785cb7321c31932ce640d1ac499b985231 |
See more details on using hashes here.
Provenance
The following attestation bundles were made for ffmpeg_binaries-1.0.1-py3-none-win_amd64.whl:
Publisher:
ci.yml on MatteoH2O1999/ffmpeg-binaries
Attestations:
Values shown here reflect the state when the release was signed and may no longer be current.
-
Statement:
- Statement type:
https://in-toto.io/Statement/v1 - Predicate type:
https://docs.pypi.org/attestations/publish/v1 - Subject name:
ffmpeg_binaries-1.0.1-py3-none-win_amd64.whl - Subject digest:
da3d6a528fe2e4fe3e4831486a37d59cb5a1e586d513ef7556622db1f9b4711f - Sigstore transparency entry: 189951137
- Sigstore integration time:
Source repository:
- Permalink:
MatteoH2O1999/ffmpeg-binaries@d938efb032a5a168c40c1b7e78723c6abab203ba - Branch / Tag:
refs/tags/v1.0.1 - Owner: https://github.com/MatteoH2O1999
- Access:
public
Publication detail:
- Token Issuer:
https://token.actions.githubusercontent.com - Runner Environment:
github-hosted - Publication workflow:
ci.yml@d938efb032a5a168c40c1b7e78723c6abab203ba - Trigger Event:
release
- Statement type:
File details
Details for the file ffmpeg_binaries-1.0.1-py3-none-manylinux1_x86_64.whl.
File metadata
-
Download URL:
ffmpeg_binaries-1.0.1-py3-none-manylinux1_x86_64.whl - Upload date:
- Size: 60.3 MB
- Tags: Python 3
- Uploaded using Trusted Publishing? Yes
- Uploaded via: twine/6.1.0 CPython/3.12.9
File hashes
Hashes for ffmpeg_binaries-1.0.1-py3-none-manylinux1_x86_64.whl
| Algorithm | Hash digest | |
|---|---|---|
| SHA256 | e27f2fed8e798ae33e8e749650d9c396f51f1caac57589568664208329933d4e |
|
| MD5 | 00a7ef875c1dd2689c5457751a0a5669 |
|
| BLAKE2b-256 | e8e94aa42c957ee81e54eb2385e1199303e25f275dc42963e0e98c0f5f031416 |
See more details on using hashes here.
Provenance
The following attestation bundles were made for ffmpeg_binaries-1.0.1-py3-none-manylinux1_x86_64.whl:
Publisher:
ci.yml on MatteoH2O1999/ffmpeg-binaries
Attestations:
Values shown here reflect the state when the release was signed and may no longer be current.
-
Statement:
- Statement type:
https://in-toto.io/Statement/v1 - Predicate type:
https://docs.pypi.org/attestations/publish/v1 - Subject name:
ffmpeg_binaries-1.0.1-py3-none-manylinux1_x86_64.whl - Subject digest:
e27f2fed8e798ae33e8e749650d9c396f51f1caac57589568664208329933d4e - Sigstore transparency entry: 189951132
- Sigstore integration time:
Source repository:
- Permalink:
MatteoH2O1999/ffmpeg-binaries@d938efb032a5a168c40c1b7e78723c6abab203ba - Branch / Tag:
refs/tags/v1.0.1 - Owner: https://github.com/MatteoH2O1999
- Access:
public
Publication detail:
- Token Issuer:
https://token.actions.githubusercontent.com - Runner Environment:
github-hosted - Publication workflow:
ci.yml@d938efb032a5a168c40c1b7e78723c6abab203ba - Trigger Event:
release
- Statement type:
File details
Details for the file ffmpeg_binaries-1.0.1-py3-none-macosx_10_13_universal2.whl.
File metadata
-
Download URL:
ffmpeg_binaries-1.0.1-py3-none-macosx_10_13_universal2.whl - Upload date:
- Size: 50.3 MB
- Tags: Python 3, macOS 10.13+ universal2 (ARM64, x86-64)
- Uploaded using Trusted Publishing? Yes
- Uploaded via: twine/6.1.0 CPython/3.12.9
File hashes
Hashes for ffmpeg_binaries-1.0.1-py3-none-macosx_10_13_universal2.whl
| Algorithm | Hash digest | |
|---|---|---|
| SHA256 | 2e0fccfecc35f88bd626eca19c866574d9118f50399a07f9c8df23b249001bfc |
|
| MD5 | 75ef8c2460300fcb8ceea5e228211f45 |
|
| BLAKE2b-256 | 483e4a40ac2c8ca6007b29e3dc412791b2915a36aa0e1e6a80ea4ec10958b463 |
See more details on using hashes here.
Provenance
The following attestation bundles were made for ffmpeg_binaries-1.0.1-py3-none-macosx_10_13_universal2.whl:
Publisher:
ci.yml on MatteoH2O1999/ffmpeg-binaries
Attestations:
Values shown here reflect the state when the release was signed and may no longer be current.
-
Statement:
- Statement type:
https://in-toto.io/Statement/v1 - Predicate type:
https://docs.pypi.org/attestations/publish/v1 - Subject name:
ffmpeg_binaries-1.0.1-py3-none-macosx_10_13_universal2.whl - Subject digest:
2e0fccfecc35f88bd626eca19c866574d9118f50399a07f9c8df23b249001bfc - Sigstore transparency entry: 189951135
- Sigstore integration time:
Source repository:
- Permalink:
MatteoH2O1999/ffmpeg-binaries@d938efb032a5a168c40c1b7e78723c6abab203ba - Branch / Tag:
refs/tags/v1.0.1 - Owner: https://github.com/MatteoH2O1999
- Access:
public
Publication detail:
- Token Issuer:
https://token.actions.githubusercontent.com - Runner Environment:
github-hosted - Publication workflow:
ci.yml@d938efb032a5a168c40c1b7e78723c6abab203ba - Trigger Event:
release
- Statement type:
File details
Details for the file ffmpeg_binaries-1.0.1-py3-none-any.whl.
File metadata
-
Download URL:
ffmpeg_binaries-1.0.1-py3-none-any.whl - Upload date:
- Size: 9.1 kB
- Tags: Python 3
- Uploaded using Trusted Publishing? Yes
- Uploaded via: twine/6.1.0 CPython/3.12.9
File hashes
Hashes for ffmpeg_binaries-1.0.1-py3-none-any.whl
| Algorithm | Hash digest | |
|---|---|---|
| SHA256 | 820255d74d7597d390ac5760cc0c552d283500c9d1e982838a9a0ac27361f1ce |
|
| MD5 | b6ae30391b133a2b0f6b85eec0f9c7f4 |
|
| BLAKE2b-256 | 2d269949a715134ef1bc6972adf406ce7e14cc5f6288eccfd7125a5846d59c71 |
See more details on using hashes here.
Provenance
The following attestation bundles were made for ffmpeg_binaries-1.0.1-py3-none-any.whl:
Publisher:
ci.yml on MatteoH2O1999/ffmpeg-binaries
Attestations:
Values shown here reflect the state when the release was signed and may no longer be current.
-
Statement:
- Statement type:
https://in-toto.io/Statement/v1 - Predicate type:
https://docs.pypi.org/attestations/publish/v1 - Subject name:
ffmpeg_binaries-1.0.1-py3-none-any.whl - Subject digest:
820255d74d7597d390ac5760cc0c552d283500c9d1e982838a9a0ac27361f1ce - Sigstore transparency entry: 189951140
- Sigstore integration time:
Source repository:
- Permalink:
MatteoH2O1999/ffmpeg-binaries@d938efb032a5a168c40c1b7e78723c6abab203ba - Branch / Tag:
refs/tags/v1.0.1 - Owner: https://github.com/MatteoH2O1999
- Access:
public
Publication detail:
- Token Issuer:
https://token.actions.githubusercontent.com - Runner Environment:
github-hosted - Publication workflow:
ci.yml@d938efb032a5a168c40c1b7e78723c6abab203ba - Trigger Event:
release
- Statement type:
Python is one of the most popular programming languages due to its simplicity and versatility. You can use it for various types of projects including web development, data analysis, web scraping, automation, and more. When it comes to editing or manipulating media files like videos, images, and audio files, you will need to use libraries that provide these functionalities as they don’t come with Python.
In this article, we are going to learn how to use FFmpeg, a popular media manipulation tool in Python to work with media files, showing some practical examples.
What is FFmpeg
FFmpeg is a complete, cross-platform solution to record, convert, and stream audio and video. It can decode, encode, transcode, mux, demux, stream, filter, and play media files in any format. It is also highly portable—it compiles and runs in a wide variety of build environments, machine architectures, and configurations like Linux, Mac OS X, Microsoft Windows, etc.
FFmpeg contains multiple tools for end-users to convert, play, and analyze media files and libraries for developers to use in different applications. Libraries like libavcodec, libavutil, libavformat, libavfilter, libavdevice, libswscale, and libswresample will be downloaded automatically when you download FFmpeg to your machine.
Although FFmpeg is a command-line tool, you can use it in your Python project with the Python library ffmpeg-python.
Pre-requisite
You need to have the tools below installed and the versions used in this tutorial are included as a reference:
- Python — 3.11.4
- pip — 23.0.1
- FFmpeg — 6.0
The ffmpeg-python library is only a Python wrapper for the FFmpeg installed on your machine and does not work independently. Therefore, you must have FFmpeg installed before using ffmpeg-python in your Python project.
Installing/Adding the FFmpeg Libary in Python
Once you have the tools above installed, open up the terminal/command prompt and run the command below in your working directory to install ffmpeg-python in your Python project using pip:
pip install ffmpeg-python
Then, create a Python file (eg. index.py), import ffmpeg in the code, and use it to perform various operations on media files.
import ffmpeg

// use ffmpeg here to perform various operations here
Let’s look at some examples…
Using ffmpeg-python
Basic Usage (Convert Video Format)
Using the ffmpeg-python library typically includes specifying the input video file using the ffmpeg.input() function, output file using the output() function, and executing the command using run() function:
import ffmpeg

(
	ffmpeg.input("input.mp4")
	.output("output.wmv")
	.run()
)
The basic command above will convert the input MP4 video into a WMV video. To do more with FFmpeg, we can apply various filters to the input file after the input() function and also pass different parameters like ss, to, acodec, etc. to the input() and output() functions.
Converting an MP4 video to an MP3 audio or extracting audio from a video is simple. It works similarly to converting the format of a video as shown in the previous example. Instead of naming the output file in a video file extension, name it in an audio file extension like “.mp3”. It will convert the video to MP3 automatically using the default audio codec (libmp3lame):
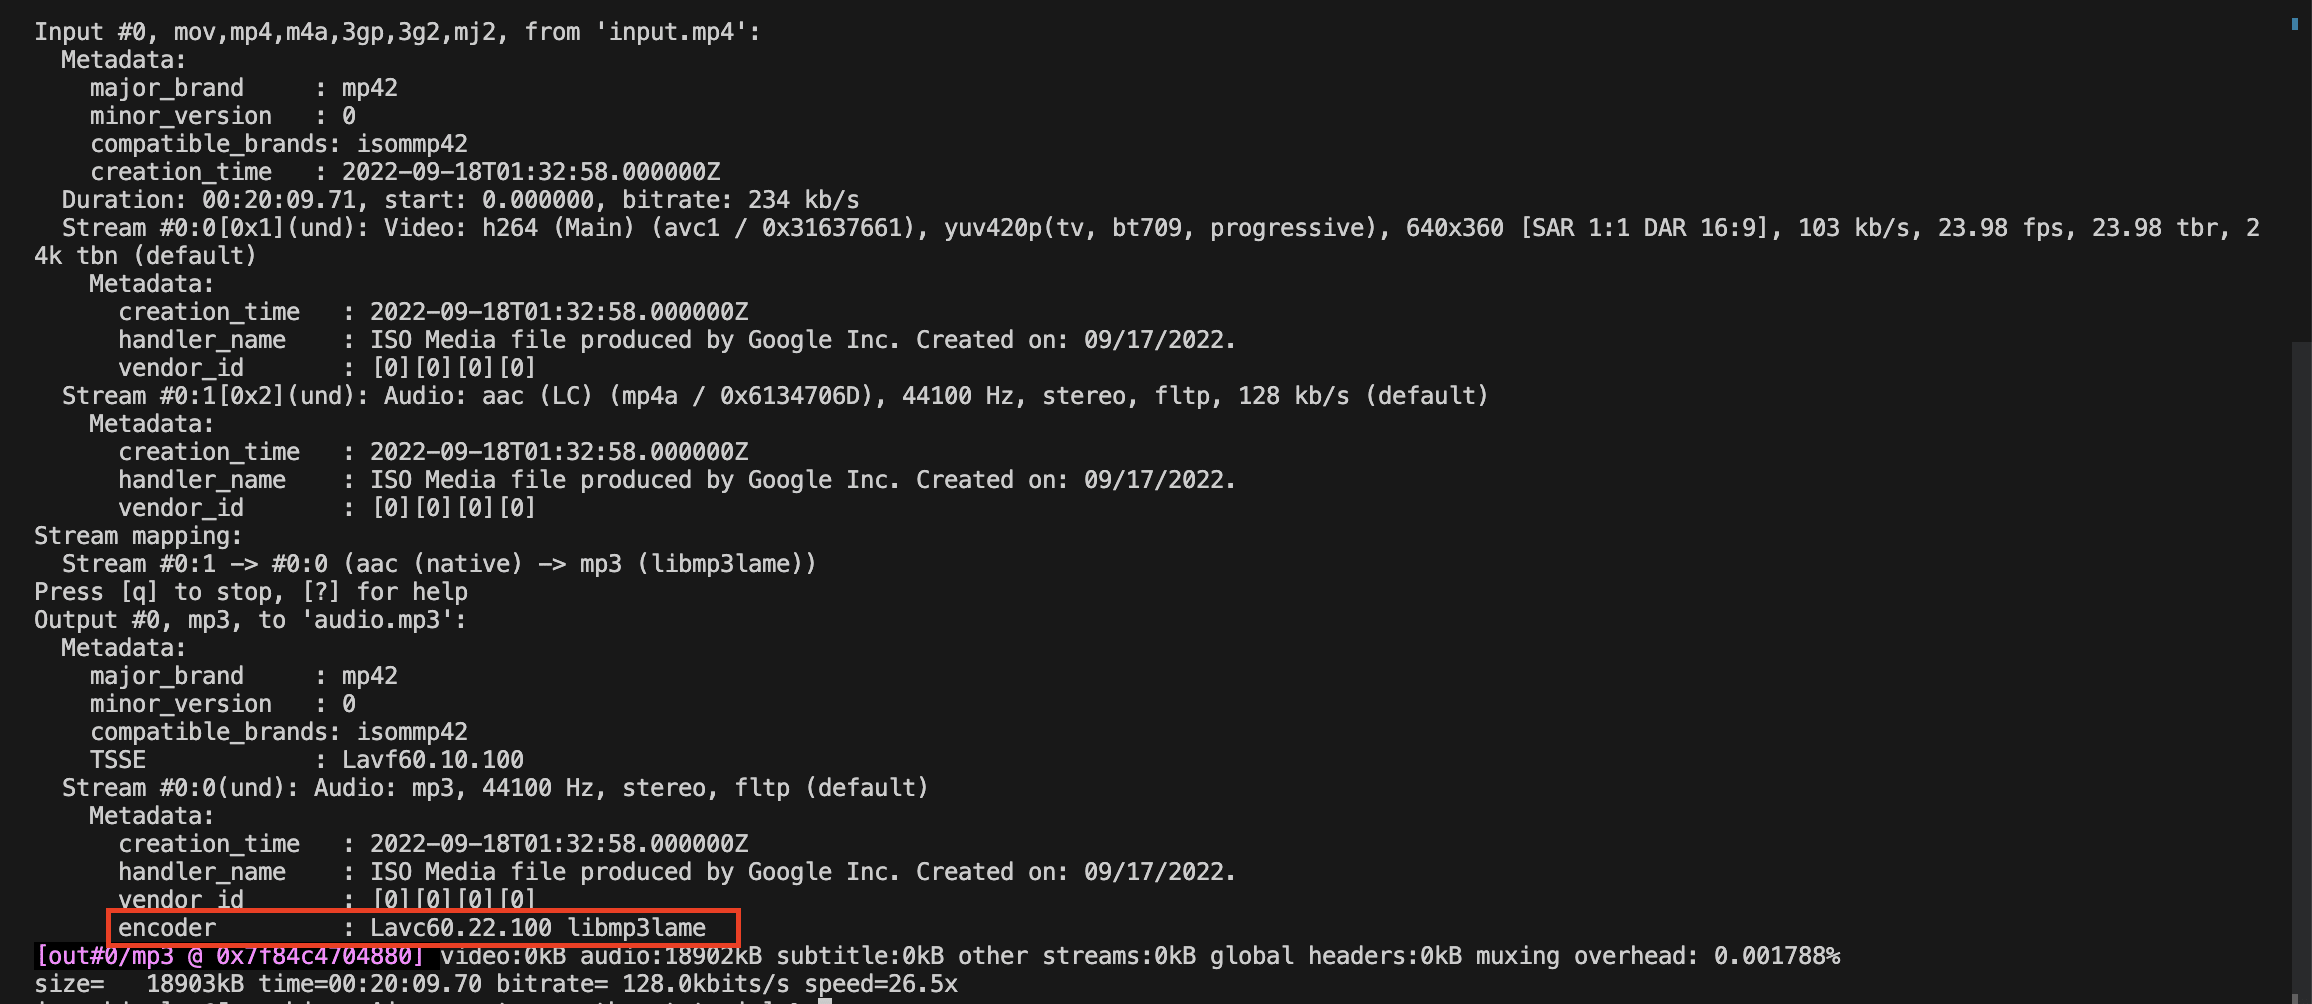
Here’s the code:
import ffmpeg

(
	ffmpeg.input("input.mp4")
	.output('audio.mp3')
	.run()
)
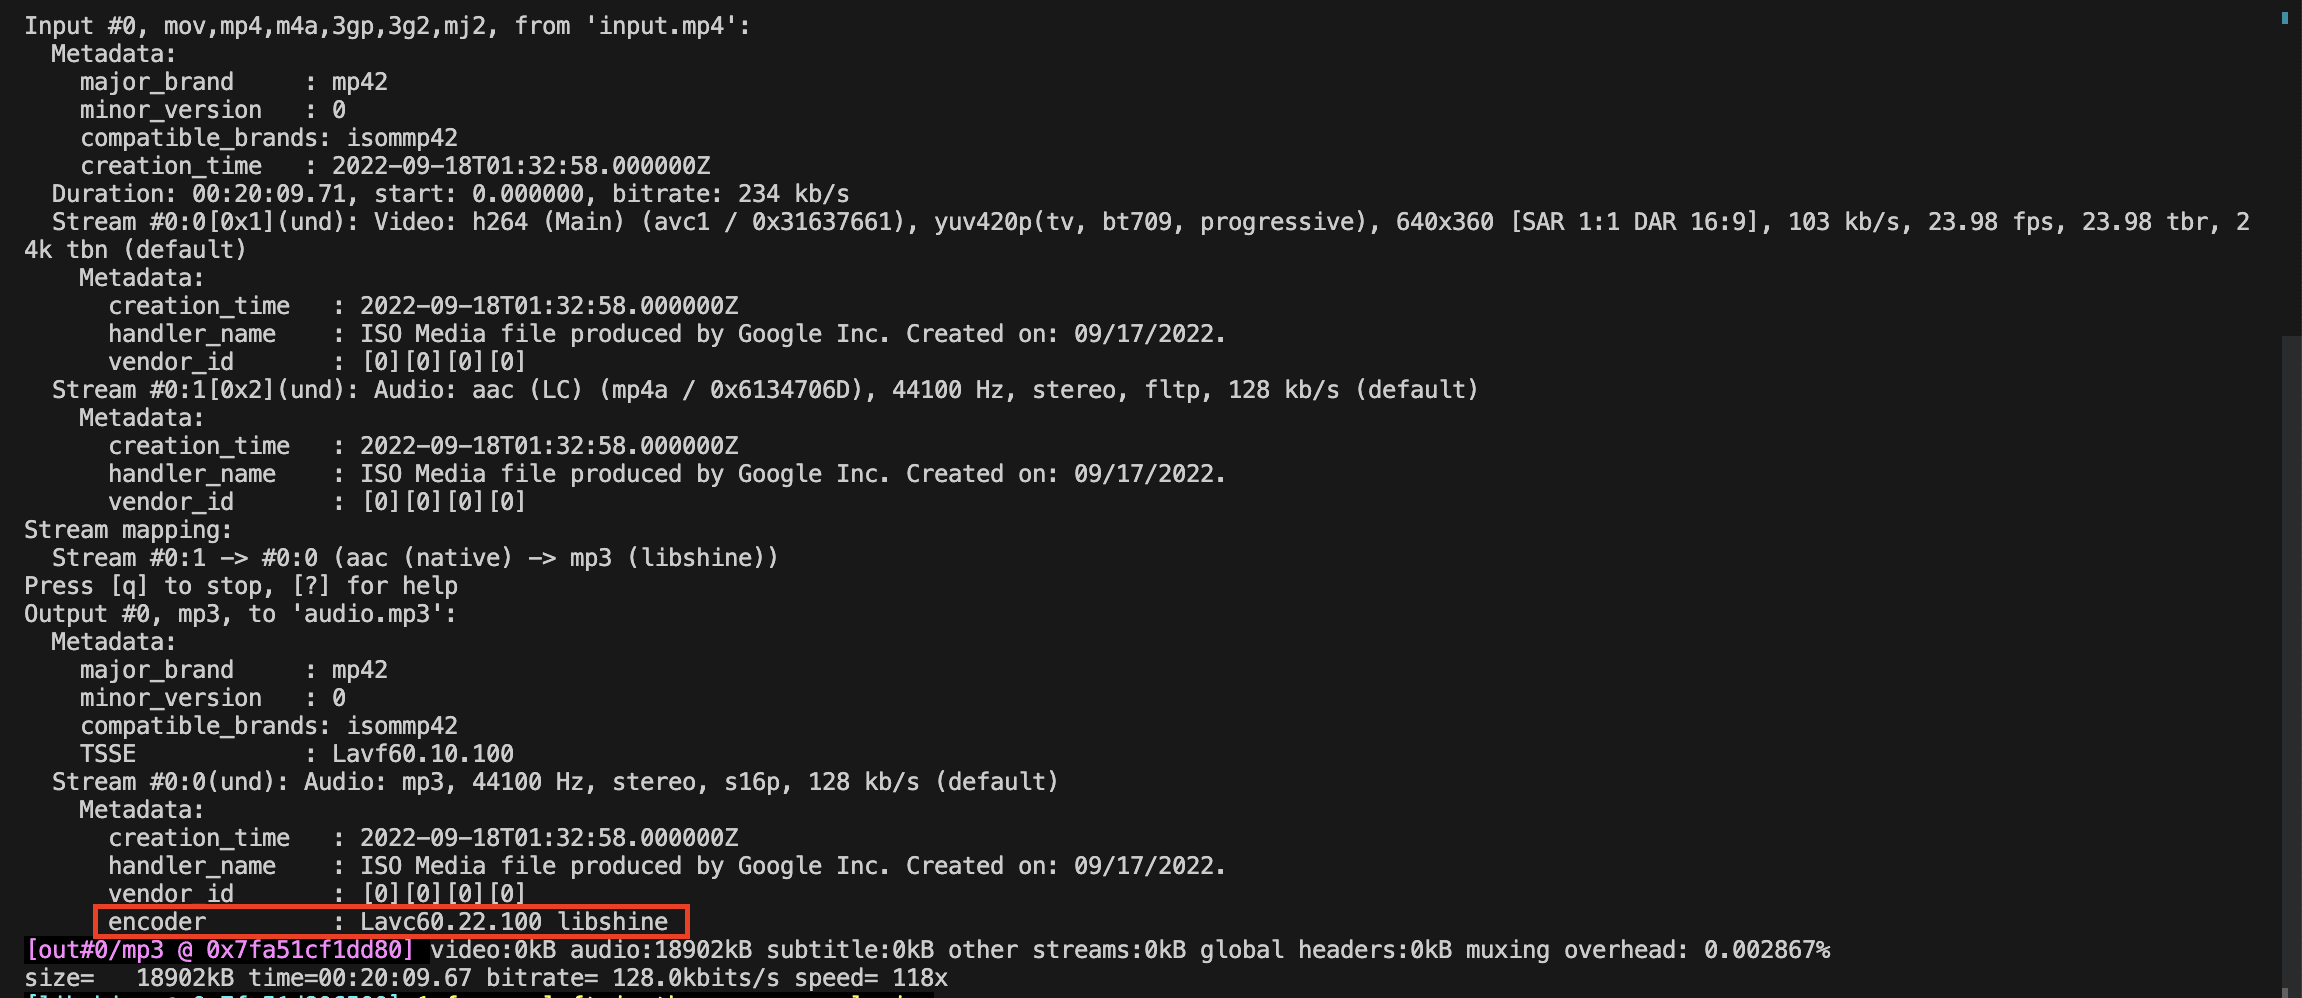
You can also use a custom audio codec by specifying it in the acodec parameter of the output() function:
import ffmpeg

(
	ffmpeg.input("input.mp4")
	.output('audio.mp3', acodec='libshine')
	.run()
)
This will use the libshine encoder to encode the output file:
🐻 Bear Tips: Check the FFMpeg doc for the complete list of supported codecs.
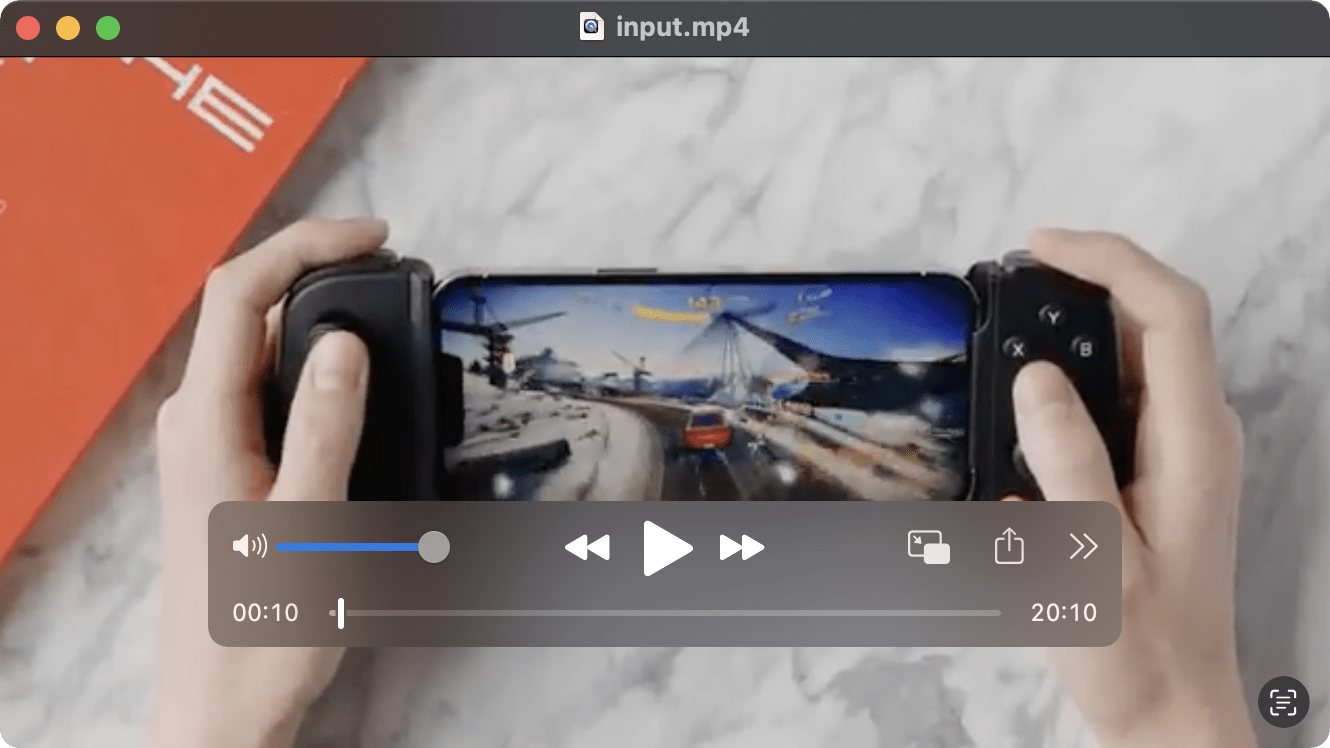
Trim Video
Trimming a video using ffmpeg-python only requires adding some parameters in the input() function. In the input() function, specify the start time in the ss parameter and the end time in the to parameter.
This will trim the input video from 00:00:10 to 00:00:20 and save it as a new “output.mp4” video:
import ffmpeg

start_time = '00:00:10' # Start time for trimming (HH:MM:SS)
end_time = '00:00:20' # End time for trimming (HH:MM:SS)

(
	ffmpeg.input("input.mp4", ss=start_time, to=end_time)
	.output("trimmed_output.mp4")
	.run()
)
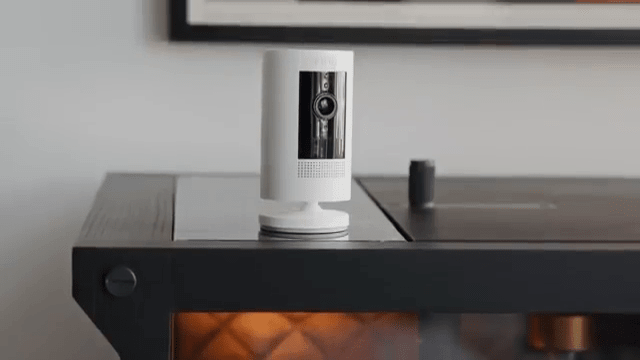
Here’s a screenshot of the input video at the 00:00:10 timestamp:
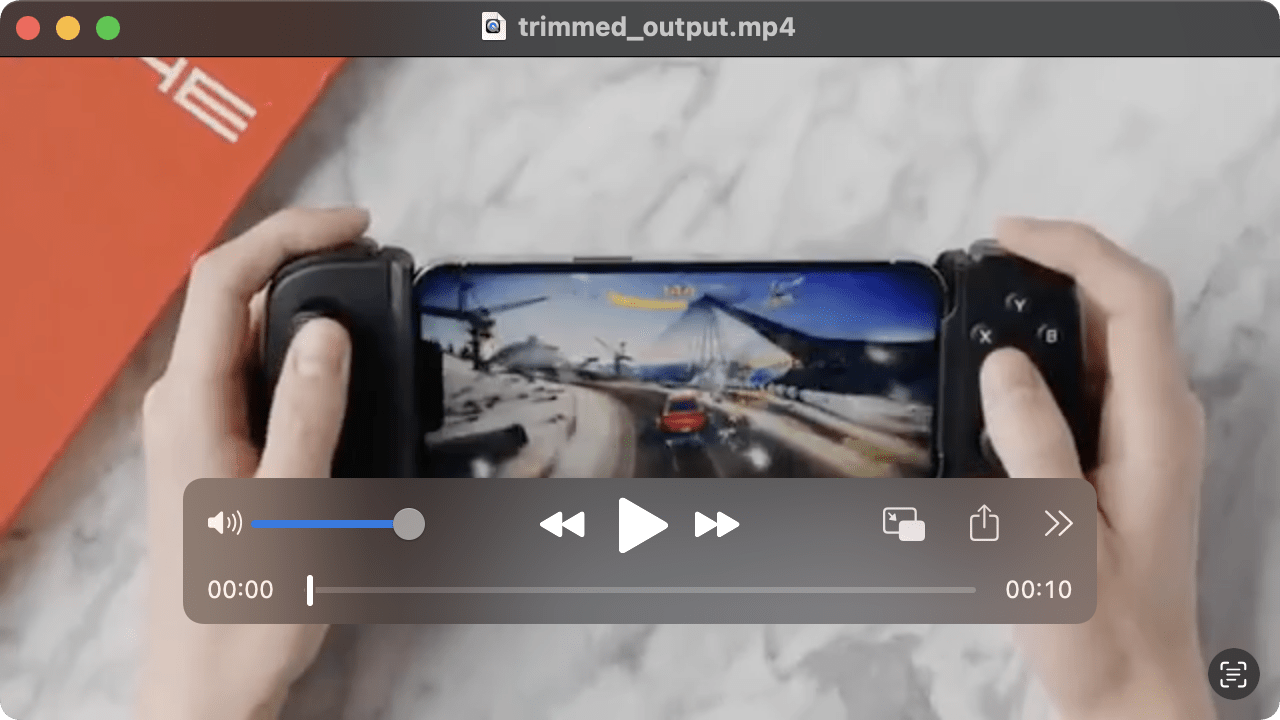
And this is the result of the output video:
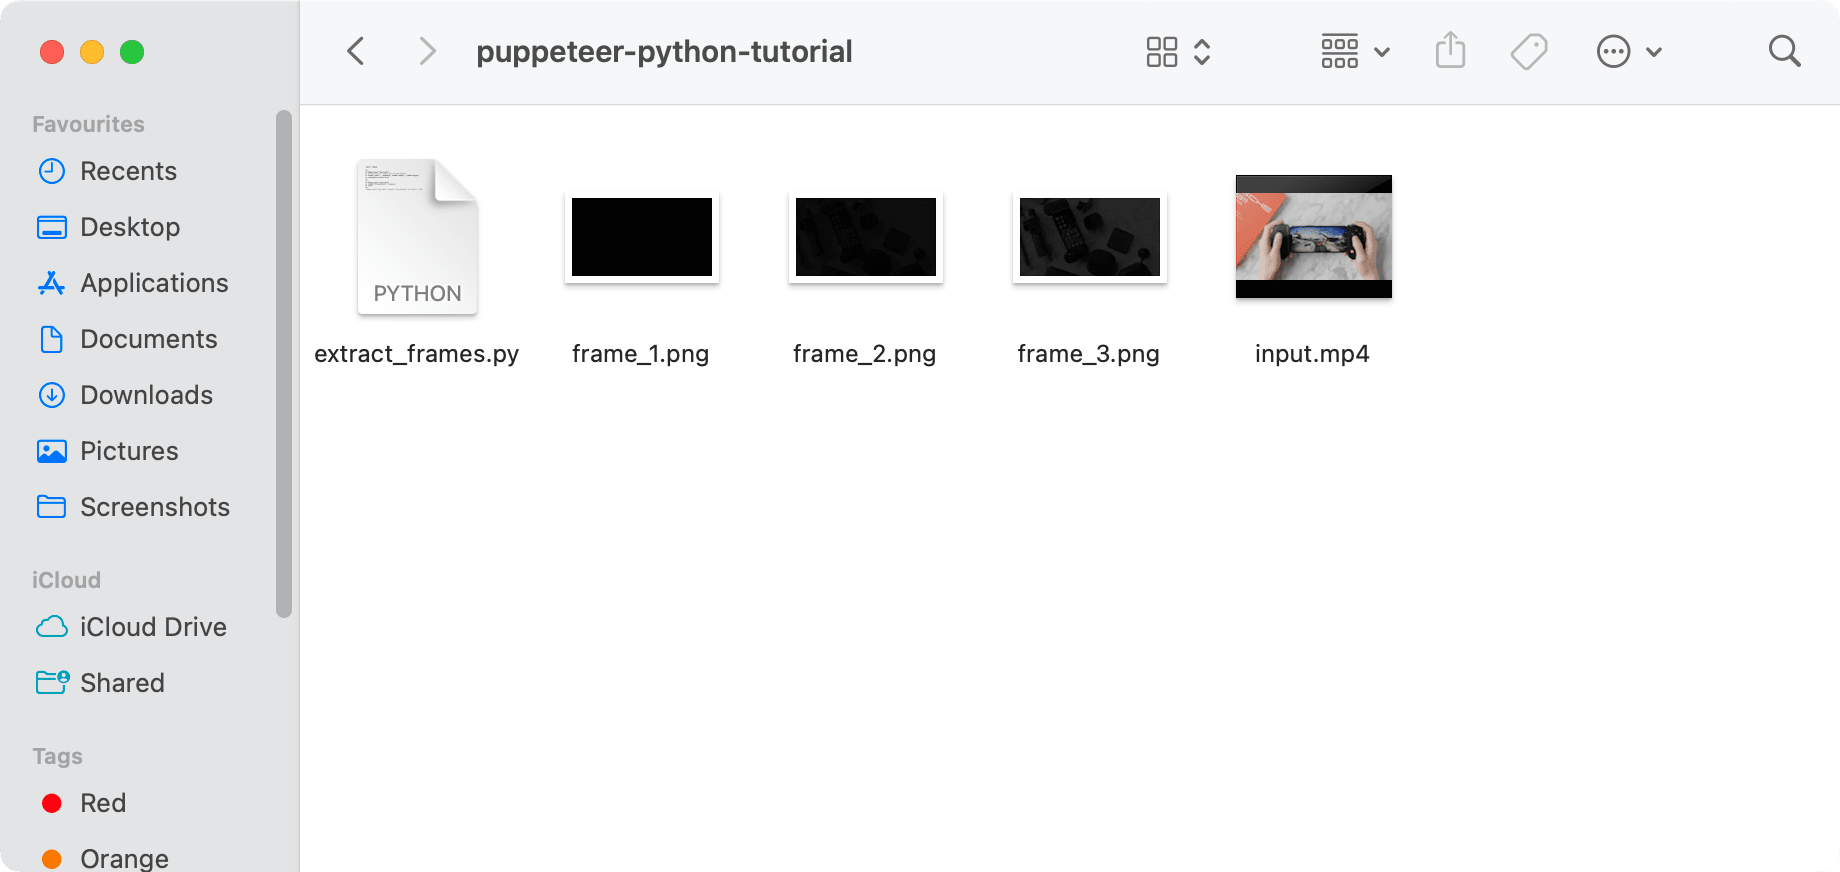
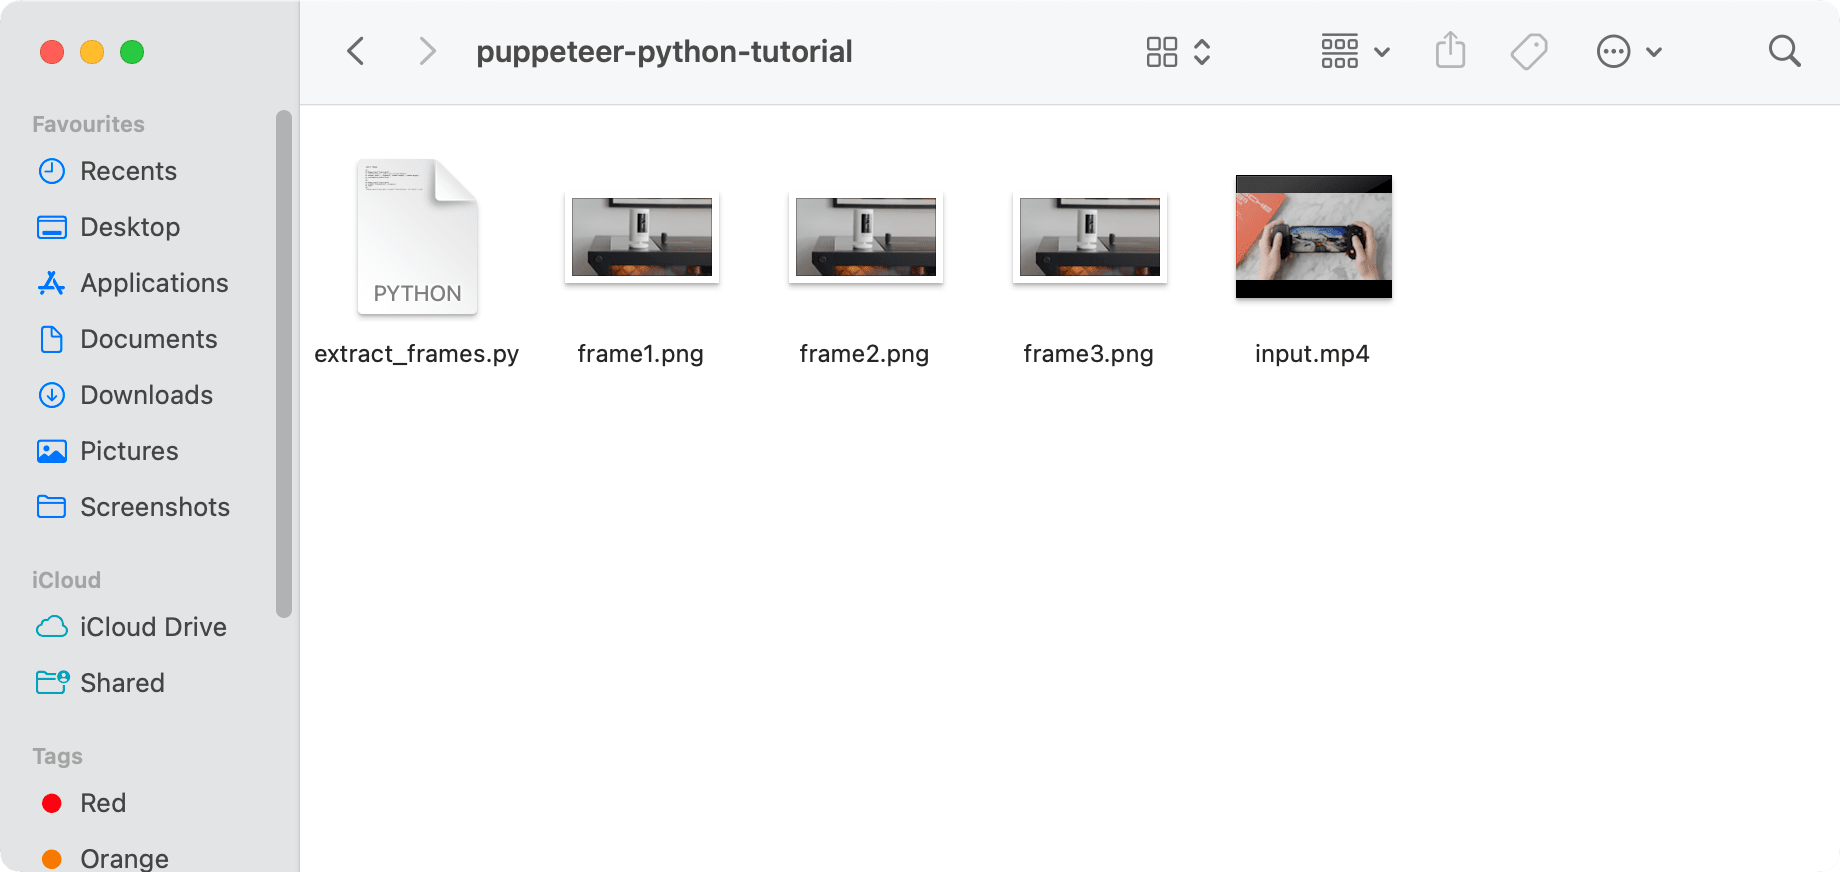
Another thing you can do with FFmpeg by adding parameters to the functions is to extract frames from the input video. You can specify the number of frames that you want to extract using the parameter vframes:
import ffmpeg

(
	ffmpeg.input("input.mp4")
	.output('frame_%d.png', vframes=3)
	.run()
)
It will extract the first three frames from the input video at 25fps, which is the default frame rate:
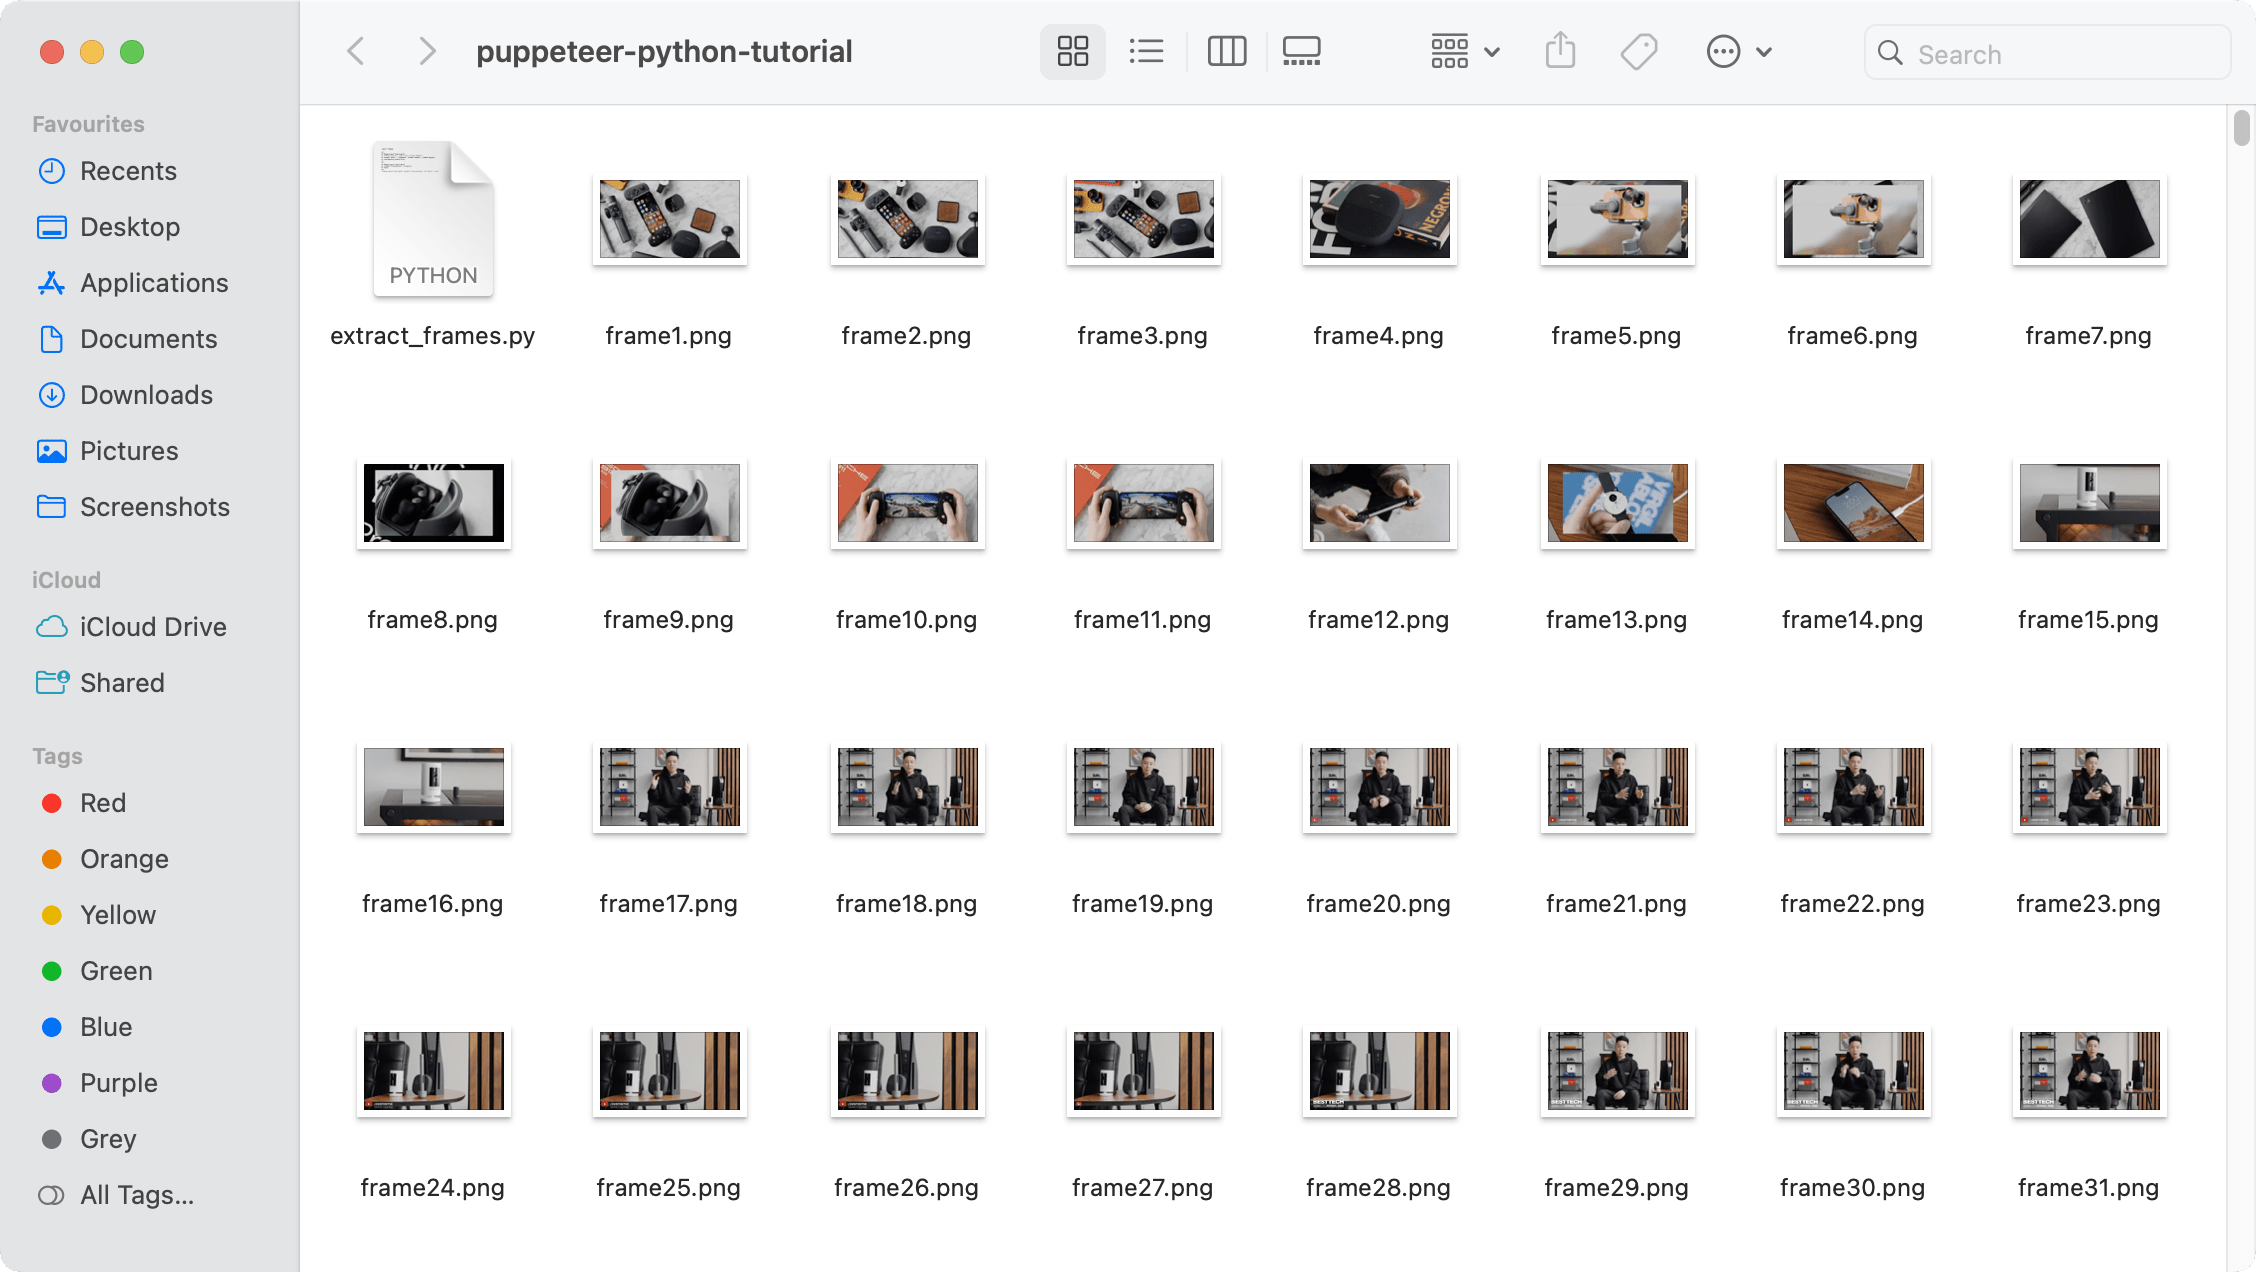
You can also use the fps filter to change the frame rate of the video. The code below will extract frames from the whole video (since vframes is not specified) at 1fps instead of 25fps:
import ffmpeg

(
	ffmpeg.input("input.mp4")
	.output('frame%d.png', vf='fps=1')
	.run()
)
Here’s a screenshot of the output frames:
For both methods, you use the ss parameter to specify the start time:
import ffmpeg

(
	ffmpeg.input("input.mp4", ss="00:00:15")
	.output('frame%d.png', vframes=3)
	.run()
)
The code above will extract the first three frames starting from 00:00:15:
Create Video Thumbnails
Creating a thumbnail image from the input video is technically the same as extracting frames from the video, but only a single frame:
import ffmpeg

(
	ffmpeg.input("input.mp4", ss="00:00:15")
	.output("thumbnail.png", vframes=1)
	.run()
)
Here’s the thumbnail created from the executing the code above:
Besides using the ss parameter to select a particular frame from the video, you can also use a filter. The “Thumbnail” filter selects the most representative frame in a given sequence of consecutive frames automatically from the video and saves it as the thumbnail image.
You can use the “Thumbnail” filter by specifying the filter name in the filter() function following input():
import ffmpeg

(
	ffmpeg.input("input.mp4")
	.filter('thumbnail')
	.output("thumbnail_filter.png")
	.run()
)
By default, FFmpeg analyzes the frames in a batch of 100 and picks the most representative frame out of them. The process continues until the end of the video and we will get the best frame among all the batches.
Here’s the thumbnail selected automatically using the “Thumbnail” filter in the default batch size:

You can also change the batch size by using the parameter n:
import ffmpeg

(
	ffmpeg.input("input.mp4")
	.filter('thumbnail', n=300)
	.output("thumbnail_filter_2.png")
	.run()
)
If you’re using FFmpeg in Python to automate the video editing process like adding subtitles, logos, or other elements to them, you should try an alternative tool, which is Bannerbear. It provides a simple REST API that offers easy integration into any existing platform or app to generate designed visual content including images and videos automatically.
It’s easy to add it to your Python project to automate the video editing process. Firstly, you need a design template in your Bannerbear account like the one in the screenshot below:
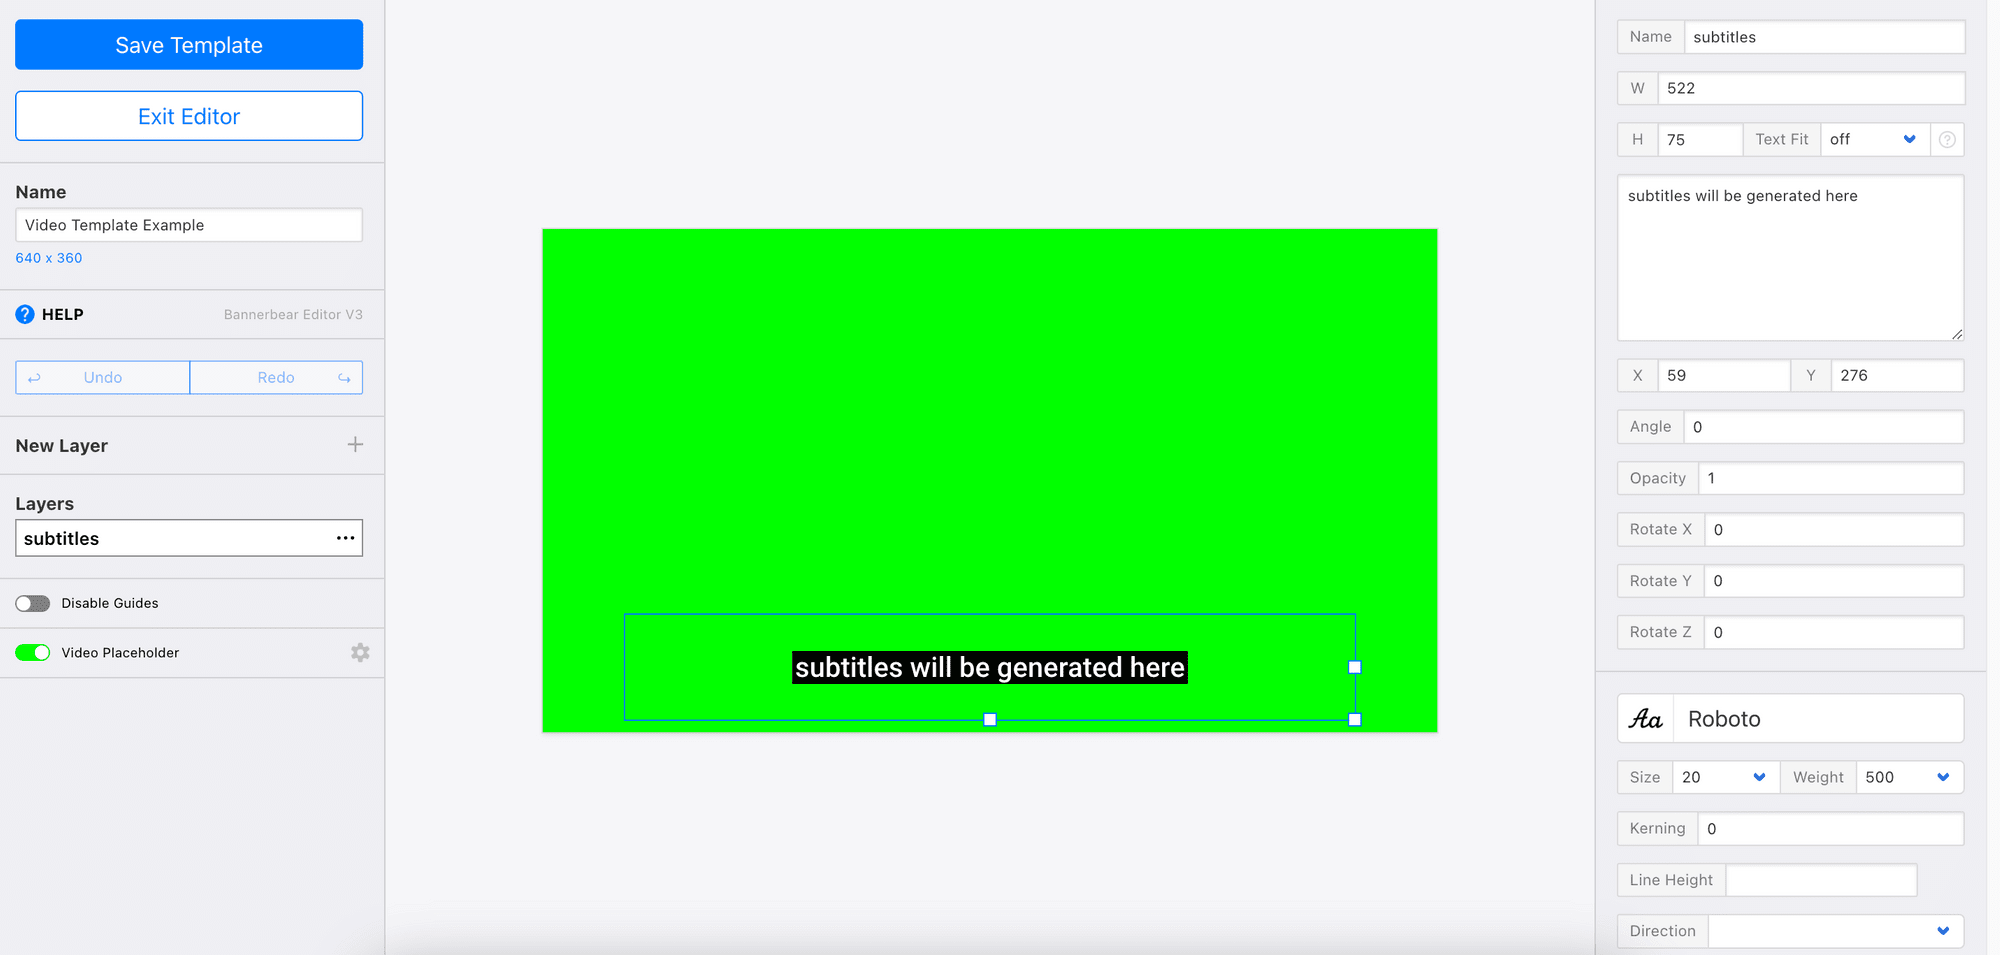
🐻 Bear Tips: Duplicate one from the Template Library in seconds!
Then, make an HTTP request in your Python code to call the Bannerbear API and trigger the video generation process. You will get the URL of the resulting video in the response and here’s a screenshot of the video:
</source>
You can refer to this tutorial and the API Reference to learn how to do it in detail.
Conclusion
The ffmpeg-library enables you to use FFmpeg in Python to manipulate various media files for different purposes like building comprehensive multimedia applications, preprocessing media files for machine learning projects, etc. However, learning the FFmpeg commands has a learning curve. If you prefer a tool that is more visual and with a user-friendly UI, use Bannerbear. Signing up for an account is free and you can choose a design from the Template Library to start immediately!