
I have been using WSL for some time now, and with it Ubuntu on my Windows machine, but since I switched to WSL2, the startup time has increased from «instant» to 10 seconds.
It wouldn’t let me reset it to WSL1, so if I’m going to reinstall WSL for this anyway, I’ll see what other distributions are available besides Ubuntu. Because there are.
If you’ve been reading my blog for a long time, you’ve probably seen me mention that I’m using Windows 10 LTSC. This has many advantages (and disadvantages), I don’t intend to go into them in this article.
One of those disadvantages (for some, for me it’s an advantage) is that it doesn’t have a Microsoft Store. And if you want to use a distribution other than the default Ubuntu, you will need it. Right? No.
So why did I choose Debian?
- For one thing, all my servers are running Debian (including Raspberry Pi), so it’s handy.
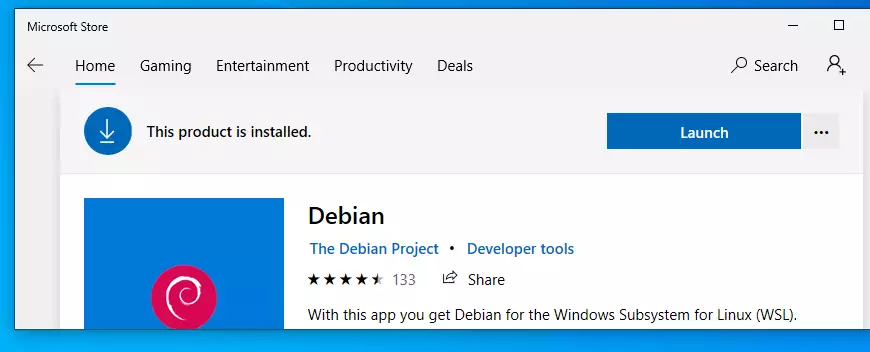
- Secondly, because of its size. If you look at the size in the MS Store linked above, you can currently see that Ubuntu will download 608MB, while Debian requires only 93.5MB. That is a significant difference.Used storage after the installation with Ubuntu:

Meanwhile the Debian uses:

Both configured the same way.


The installation of Debian is relatively simple, but it’s hard to find how to do it without the MS Store. That is one of the reasons for this article 
Let’s get started!
- Open a CMD, but with a normal user, no admin rights required.
- Set WSL1 as a default:
wsl.exe --set-default-version 1 - List all available distributions:
wsl.exe --list --online - If you want to install Debian, do so:
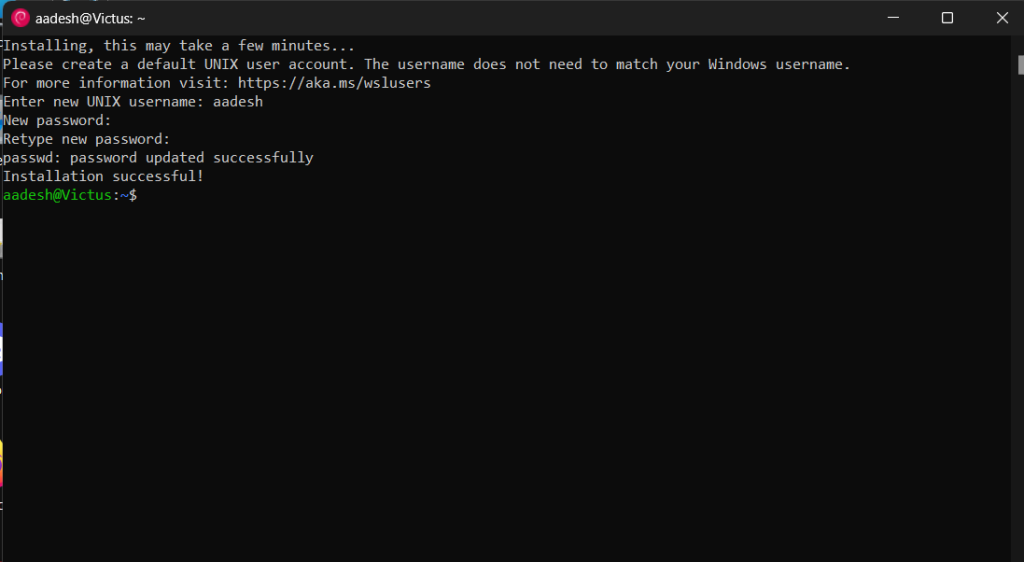
wsl.exe --install -d Debian - Set up your new user by entering your username (in lower case only!) and password twice.
- You’re in the Debian. Great! You’re almost done.
- Update your system by running:
sudo apt update && sudo apt upgrade -y - Remember to pin the icon to the taskbar:
- If you’d like to check the list of installed distributions, run this command in CMD:
wsl.exe -l -v
Extra settings
From now on I will only write down what was important for me to get a usable system. You can use the system without these, but if you want to SSH to another machine from here, they will speed things up considerably.
- I don’t want to write an article on SSH config, there are good sites for that, e.g. this one. However, to get the TAB autocomplete to work, you need to put these up:
sudo apt install openssh-client bash-completion - To use sudo without password, the /etc/sudoers file must be edited:
sudo nano /etc/sudoersAnd replace the line starting with «%sudo» with this:%sudo ALL=(ALL) NOPASSWD:ALL - Use «magic» command as an ultimate updater, and add date to the history by editing
nano /etc/bash.bashrcadd to the bottom:alias magic='sudo apt update && sudo apt dist-upgrade --autoremove -y'HISTTIMEFORMAT="%Y-%m-%d %T " - I like to scripting in ksh, so install it:
sudo apt install ksh - And I also use these tools:
sudo apt install curl wget - The systemd enabled by default. However, since I don’t use it, I disabled it to save resources:
sudo nano /etc/wsl.confAnd add these lines:
[boot]systemd=false
This brief tutorial shows students and new users how to install and run Debian Linux on Windows Subsystem for Linux 2 (WSL2).
In 2017, Windows released Windows Subsystem for Linux that lets developers run a GNU/Linux environment, including most command-line tools, utilities, and applications directly in Windows without setting up a virtual machine or dual-boot.
WSL2 has since been released, an improvement over version 1. The new and improved version has a performance boost and complete system call compatibility. It is built with a new architecture that delivers features that make WSL a fantastic way to run a Linux environment in Windows.
To install WSL 2 on Windows 10, these two requirements must be met:
- Windows 10 May 2020 (2004), Windows 10 May 2019 (1903), or Windows 10 November 2019 (1909) or later
- A computer with Hyper-V Virtualization support
Installing Debian with WSL on Windows 11 is a great way to access a Linux environment without needing a separate virtual machine or dual-boot setup. With WSL, you can run Debian command-line utilities, including bash, ssh, git, apt, and many more, directly on your Windows 11 computer.
This can be useful for developers who need to work with Linux-based tools or anyone who wants to experiment with Linux without leaving the Windows environment. Additionally, WSL2, the latest version of WSL, provides enhanced performance and complete system call compatibility, making it an even better choice for running Linux on Windows.
Since you can now install Linux systems, including Debian, directly in Windows, let’s go ahead and install Debian. Before you can do that, you must enable WSL or WSL2 in Windows.
When you’re ready to enable WSL 2 on Windows 10, follow the steps below:
Enable WSL in Windows
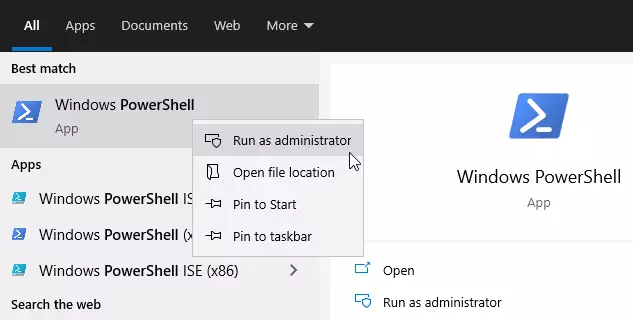
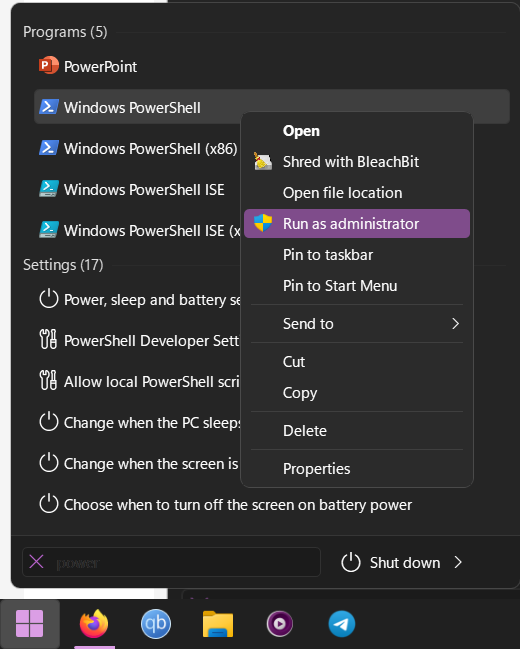
To enable WSL in Windows, you will want to open the PowerShell terminal as administrator. Click on Start, then begin typing PowerShell.
Next, right-click the Windows PowerShell app and choose to run as administrator.
When the console opens, run the commands below:
dism.exe /online /enable-feature /featurename:Microsoft-Windows-Subsystem-Linux /all /norestart
After installing, you should get a success message similar to the lines below:
Deployment Image Servicing and Management tool
Version: 10.0.19041.844

Image Version: 10.0.19042.844

Enabling feature(s)
[==========================100.0%==========================]
The operation completed successfully.
Enable Virtual Machine Platform
WSL 2 requires Windows 10 Virtual Machine Platform to be enabled. This is not Hyper-V. To enable the VM platform feature in Windows, run the commands below from the same PowerShell administrator’s console.
dism.exe /online /enable-feature /featurename:VirtualMachinePlatform /all /norestart
If you’re using Windows 10 version lower than 2004, then use the commands below:
Enable-WindowsOptionalFeature -Online -FeatureName VirtualMachinePlatform -NoRestart
When you’re done running the commands above, restart your computer for all the configuration changes to apply. If you don’t restart, the below command might not be recognized.
After restarting your computer, log back in and launch PowerShell as administrator. Then, run the commands below to configure WSL 2 as the default version of WSL.
wsl --set-default-version 2
If you get an error about not having Linux kernel installed, get it from the link below and run it in Windows, then try the command above again.
https://wslstorestorage.blob.core.windows.net/wslblob/wsl_update_x64.msi
Install Debian in Windows 10
Now that WSL 2 is installed and ready to be used, open the link below to download and install a copy of Debian from the Windows store.
Get Debian – Microsoft Store
Debian on Windows allows you to use Debian Terminal and run Debian command line utilities, including bash, ssh, git, apt, and many more.
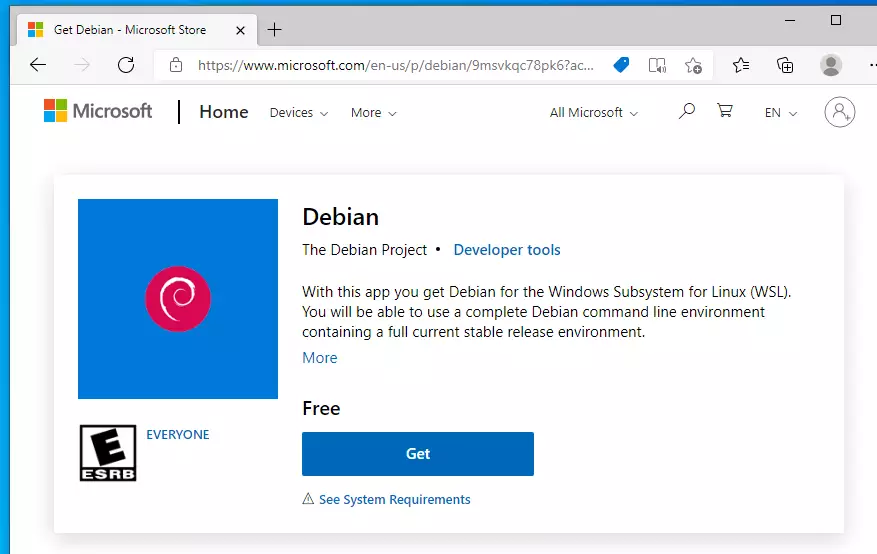
Click the Get button and install. After installing Debian, you’ll want the option to launch Debian from the Windows WSL environment.
After downloading and installing, you will get a Launch button.
After launching Debian, it should install and prompt you to create your account.
Installing, this may take a few minutes…
Please create a default UNIX user account. The username does not need to match your Windows username.
For more information visit: https://aka.ms/wslusers
Enter new UNIX username: richard
New password:
Retype new password:
passwd: password updated successfully
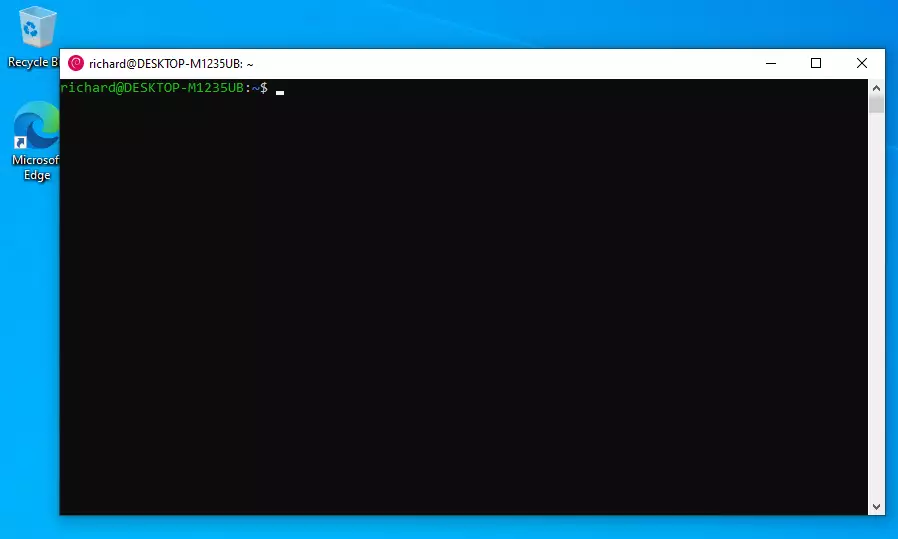
Installation successful!
richard@DESKTOP-M1235UB:~$
That should do it!
Some troubleshooting commands to run when you run into issues.
wsl --set-default-version 1
bcdedit /set hypervisorlaunchtype auto start
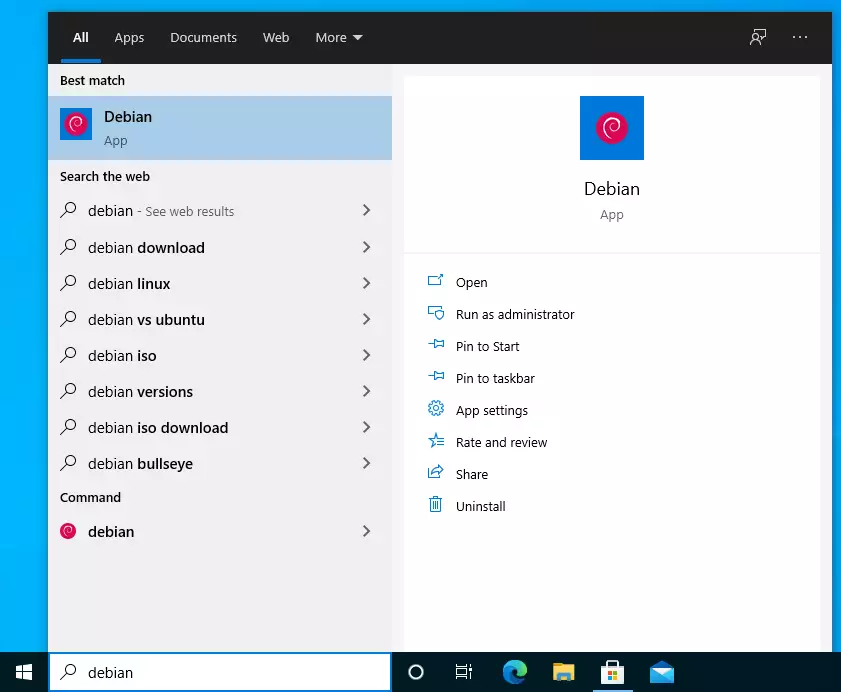
Now, simply launch Debian from Windows and start by searching for it. You can also pin it to the taskbar and always have it launch from there.
That should do it!
Conclusion:
This post showed you how to install WSL 2 on Windows 10 and install Debian. If you find any error, please report it in the comment form below.
Debian is one of the oldest Linux distributions available that is currently being maintained actively. Ubuntu, which is the most popular Linux distribution, is based upon the experimental version ‘Sid’. And Ubuntu in turn acts as a base for numerous operating systems such as Linux Mint, Pop_OS!, Linux Lite, etc. Debian is mostly used by servers around the world because Debian is very stable.
Microsoft has recently updated their WSL or Windows Subsystem for Linux to version 2 (termed WSL2) and the Linux instance installed is more usable for all users now. In this tutorial, we will try to install this Debian Linux on our Windows machine using WSL2.
Enable/Install WSL2
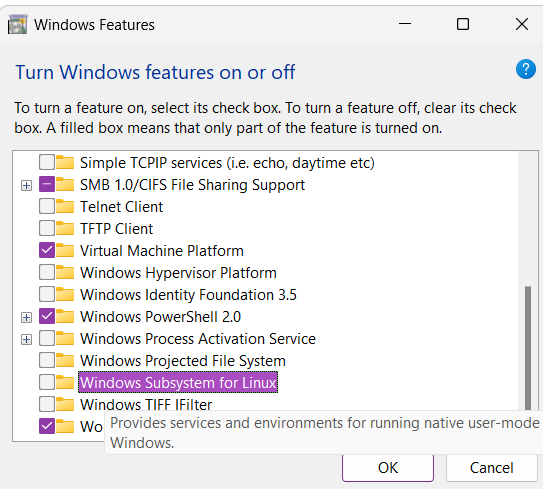
If you are using Windows 11, WSL2 is already installed on your system, and you just have to enable it. We will discuss this after learning to install this on Windows 10. Windows 10 users have to first enable WSL on their system. From the Start Menu, search and run Turn Windows features on or off, and launch it. From Here, enable ‘Virtual Machine Platform‘ and ‘Windows Subsystem for Linux‘ and click OK and restart your PC.
Now, search and open ‘PowerShell’ application and right-click upon it to run it as administrator. Now, just type the following command and press the Enter key on your keyboard :
wsl --set-default-version 2
wsl --list --online
If you are using Windows 11, open the ‘PowerShell’ application as Administrator and then run the following command :
wsl --set-default-version 2
wsl --list --online
Installing Debian on WSL2
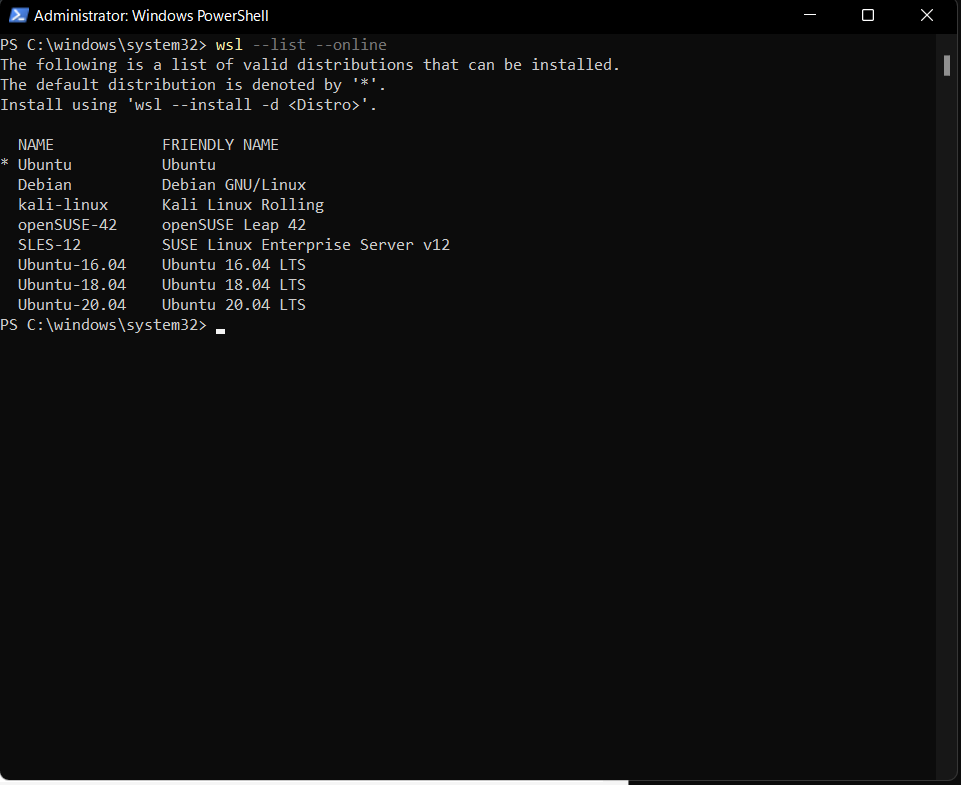
Now, the default version that is installed on your PC is Ubuntu (marked by an asterisk here), to install Debian, you can run the following command :
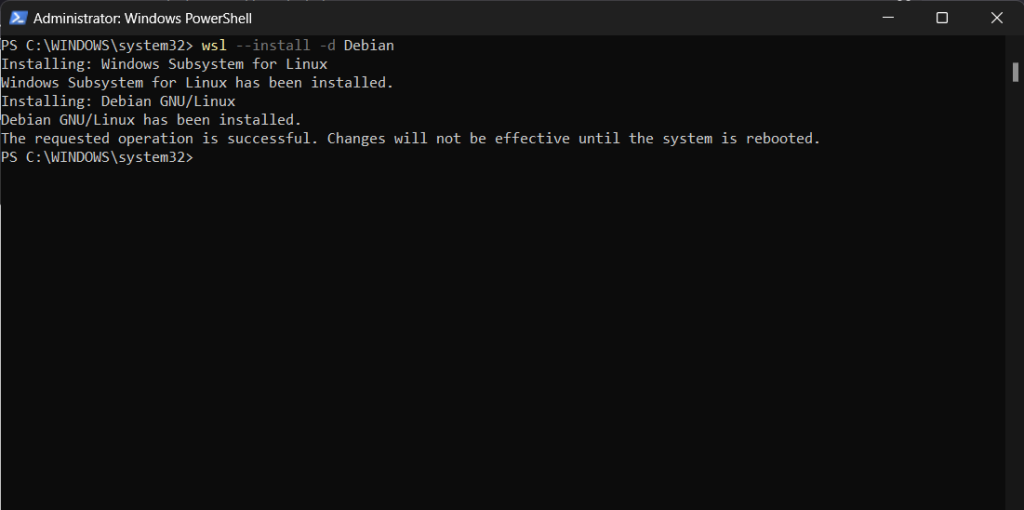
If prompted, you should also reboot your system.
Post installation tweaks
Once you restart your PC, you will see a Terminal window waiting for you asking you to create a Username and Password.
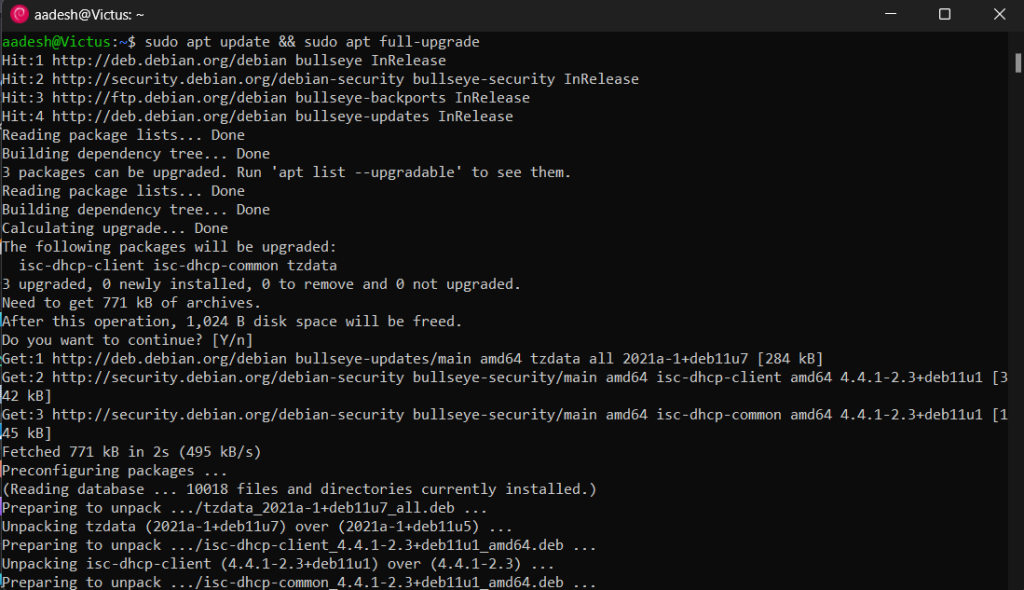
Now, you should also update your system to the latest version using the apt command, type the following in your Debian Machine :
sudo apt update && sudo apt full-upgrade
Summary
While WSL2 provides the complete command line experience to any developer/user, it is still not a complete replacement for actual Installation on a Virtual machine or on bare metal. Applications do not have hardware acceleration and hence drain the battery more and so on. It is still a good decision from Microsoft as many people will have the exposure to Linux command line and maybe even encourage people to fully switch to the Linux Desktop
References
Microsoft’s Official WSL2 Documentation
Back in 2017, Windows released Windows Subsystem for Linux that lets developers run a GNU/Linux environment, including most command-line tools, utilities, and applications directly in Windows without setting up a virtual machine or dual-boot.
WSL2 has since been released, and it’s an improvement over version 1. The new and improved version comes with performance boost, full system call compatibility, and built with a new architecture and that delivers features that make WSL an amazing way to run a Linux environment in Windows.
To install WSL 2 on Windows 10, these two requirements must be met:
- Windows 10 May 2020 (2004), Windows 10 May 2019 (1903), or Windows 10 November 2019 (1909) or later
- A computer with Hyper-V Virtualization support
Since you can now install Linux systems, including Debian directly in Windows, let’s go ahead and install Debian. Before you can do that, you must first enable WSL or WSL2 in Windows.
Enable WSL in Windows
To enable WSL in Windows, you will want to open PowerShell terminal as administrator. Click on Start then begin typing PowerShell.
Next, right-click Windows PowerShell app and choose to run as administrator.

When the console opens, run the commands below:
dism.exe /online /enable-feature /featurename:Microsoft-Windows-Subsystem-Linux /all /norestart
After installing, you should get a success message similar to the lines below:
Deployment Image Servicing and Management tool
Version: 10.0.19041.844

Image Version: 10.0.19042.844

Enabling feature(s)
[==========================100.0%==========================]
The operation completed successfully.
Enable Virtual Machine Platform
WSL 2 requires Windows 10 Virtual Machine Platform to be enabled. This is not Hyper-V. To enable the VM platform feature in Windows, run the commands below from the same PowerShell administrator’s console.
dism.exe /online /enable-feature /featurename:VirtualMachinePlatform /all /norestart
If you’re using Windows 10 version lower than 2004, then use the commands below:
Enable-WindowsOptionalFeature -Online -FeatureName VirtualMachinePlatform -NoRestart
When you’re done running the commands above, restart your computer for all the configuration changes to apply. If you don’t restart, the below command might not be recognized.
After restarting your computer, login back in and launch PowerShell as administrator. Then run the commands below to configure WSL 2 as the default version of WSL.
wsl --set-default-version 2PS: If you get an error about not having Linux kernel installed, get it from the link below and run it in Windows, then try the command above again.
https://wslstorestorage.blob.core.windows.net/wslblob/wsl_update_x64.msi
Install Debian in Windows 10
Now that WSL 2 is installed and ready to be used, open the link below to download and install a copy of Debian from Windows store.
- Get Debian – Microsoft Store
Debian on Windows allows you to use Debian Terminal and run Debian command line utilities including bash, ssh, git, apt and many more.

Click the Get button and install. After installing Debian, you’ll want the option to launch Debian from Windows WSL environment.
After downloading and installing, you will get a Launch button.

After launching Debian, it should install and prompt to create your account.
Installing, this may take a few minutes…
Please create a default UNIX user account. The username does not need to match your Windows username.
For more information visit: https://aka.ms/wslusers
Enter new UNIX username: ngubri
New password:
Retype new password:
passwd: password updated successfully
Installation successful!
ngubri@DESKTOP-M1235UB:~$
That should do it!
Some troubleshooting commands to run when you run into issues.
wsl --set-default-version 1
bcdedit /set hypervisorlaunchtype auto start
Now simply launch Debian from Windows start by searching for it. You can also pin it to the taskbar and always have it launch from there.

That should do it!

To ensure that WSL 2 is enabled in your system, open the Windows command prompt and run the below-mentioned command:
 wsl -l -v
 //OR
 wsl --list --verbose
Note that the above command only works on Windows build version “18362” and higher. If the output indicates the WSL version properly, that means WSL 2 is enabled in your system:
If you are still running the WSL version 1, then use the following command to enable WSL 2:
wsl --set-default-version 2Though WSL 2 is the latest version, there are still some features that are only supported by WSL 1, such as quick access to files stored on Windows, serial port support, etc. So to set a specific version of WSL to a specific distribution, use the command:
wsl --set-version [distro_name] [wsl_version_number]Replace the “[distro_name]” with the Linux distribution name and mentioned the WSL version in the place of “[wsl_version_number].” (example: wsl –set-version Debian 2)
Conclusion:
WSL is a Windows feature that allows Windows 10 users to run Linux on Windows 10 natively. There are two main versions of WSL; WSL 2 is the updated version of WSL 1 and supports all system calls, and 20% faster than its predecessor.WSL converts the Linux calls into windows calls and executes them, though WSL 2 has its own specifically designed kernel that no longer needed call system translation. After enabling WSL in Windows and installing Linux distribution, you can use bash shell for all compatible utilities. It is quite helpful for developers who are interested to learn Linux on Windows.
WSL 2 uses an actual Linux kernel that allows Linux containers. WSL 1 was genius with running Linux on the Windows kernel, but of course lacked some of the features, such as containers.
Although the WSL 2 is the current and overhauled version, some exceptions might make you use WSL 1. Which version you should use is a personal choice, but I would recommend going with WSL 2 because it is efficient and allows you to install Linux updates easily.
Reference:
https://websiteforstudents.com/
Debian is a free and open-source GNU/Linux distribution. It is one of the oldest Linux distributions based on the Linux kernel. Today, Debian is known for its stability and serves as the base for many derived distributions, such as Ubuntu.
For beginners, installing Debian 12 “Bookworm” can be overwhelming due to the legacy installer and choosing the ISO files. This guide provides step-by-step instructions with screenshots to simplify the process.
Minimum System Requirement for Debian
The following are the minimum system requirements for Debian. But it can vary based on what type of box you want to set up.
Minimum RAM: 512MB
Recommended RAM: 2 GB
Processor: 1 GHz
Minimum Disk Space: 10 GB
However, a more realistic requirement for modern systems and desktops is a minimum of 4 GB of RAM, 25 GB of disk space and a CPU not older than ten years.
Install Debian 12 “Bookworm”: Steps
- Installing Debian 12 is split into the below sections; follow them accordingly.
- Downloading ISO files for Debian
- Creating bootable USB
- Prepare partition for dual-boot (optional)
- Install Debian
Download Debian 12 iso image
Visit the following page to download the Debian .iso images.
Debian provides many types of images for installation for all architecture. If you are downloading for the first time, you might get overwhelmed with which file to download. To keep things simple, I have added the following table for you to help you to choose which .iso to download.
| Type | Type of image | Description | Size | Download |
| Free+non Free | netinst CD image | Minimal Size Requires internet connection during installation |
~ 500 MB | iso-cd torrent |
| Free+non Free | full CD | You need the CD 1 only for basic installation | ~ 700 MB | iso-cd torrent |
| Free+non Free | full DVD | You need the DVD 1 only for basic installation | ~ 4 GB | iso-dvd torrent |
If you want other ISO files based on architectures, visit this page and navigate as needed.
Prepare bootable USB
Write the .iso image on a USB stick. There are many ways you can do it. I would recommend using Etcher to write the image. It is available for Windows as well.
After downloading, install Etcher. And write the downloaded ISO file
Prepare a partition to install Debian 12 (for Dual boot systems with Windows)
If you are installing it in the entire disk, Or, want to partition it during installation, you can skip this step.
For those who are installing a fresh Debian 12 with Windows as a dual-boot, follow the below steps to create a partition for Linux installation.
- To create a Windows 10 or 11 recovery disk, use a separate USB stick.
- Insert the empty 16GB+ USB stick into the Windows 10 machine.
- Open Control Panel
- Search with ‘recovery’
- Click on Create a recovery drive.

- Wait till the recovery is complete. Once completed, safely remove the USB stick from the machine.
- You can check whether the recovery stick works by booting from it to be safe.
If you already have a partition that you can use to install Debian, you may want to skip this step.
OEM-installed machines with Windows 10 typically come with two basic partitions (excluding the recovery partitions). C:\ and D:\. C Drive contains Windows 10 or Windows 11 system files, and D Drive is reserved for user data. Debian 12 needs a minimum of 30GB storage space partition, which we need to create by shrinking C:\ drive, which typically contains most of the space. Follow the below steps to create a partition for Debian.
- Open the partition editor from the START menu by searching ‘partition’.
- Right-click on C Drive and click ‘Shrink Volume’.

- In the next window, you can see the available size available in MB. Enter the value as per your need in MB in the ‘amount of space to shrink in MB’.
Tip: If you need 50 GB for partition – enter 50*1024= 51200 MB

- Click ‘Shrink’ and wait until it finishes.
- You will see an unallocated space created in a graphical display of your storage. This space would be used to install Debian. Do not format now, as the Debian 12 installer would allow you to format during installation.
The above screenshots are an example which might be different for your system.
- Once the partition is created, plugin the USB stick into your target system and restart.
- Press F2 or any other OEM-specific function key to enter into BIOS.
- In the BIOS, make sure the boot priority is set to the USB stick which you created for Debian 12.
- Press F10 in the BIOS to save and exit.
Install the system
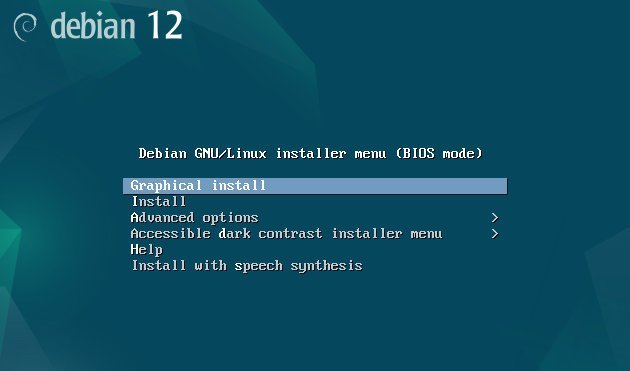
After booting from the LIVE USB, select the Graphical Install option.
Following the on-screen instructions to choose Language, Country and Keyboard layouts.
Once the Network selection page comes, select the Wireless or Wired network. If you are using the DVD ISO file, then I recommend not to connect to any network. Because Debian mirrors are sometimes slow and delay your installation process.
Enter the password for the “root” account.
You must create one user account for Debian Linux. Enter the username and password.

On the partition disk page, select “Manual”.

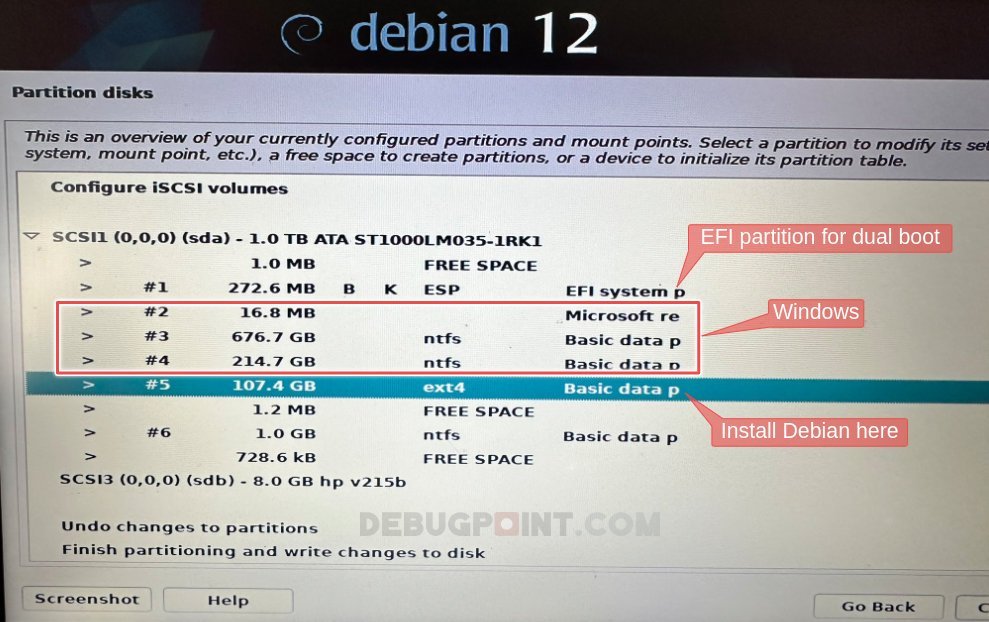
When you choose manual partitioning, the installer will scan your disk and show you the entire partition table. Ensure you have EFI partition and Windows partition untouched. Select the free space which you have created earlier OR choose the existing target partition to install Debian 12.
Here’s an example:
Select and hit enter to bring up the detailed screen for that partition. Choose format the partition and mount point to root i.e. “/”. Keep all other values unchanged. Once done, select “Done setting up the partition” and hit enter.
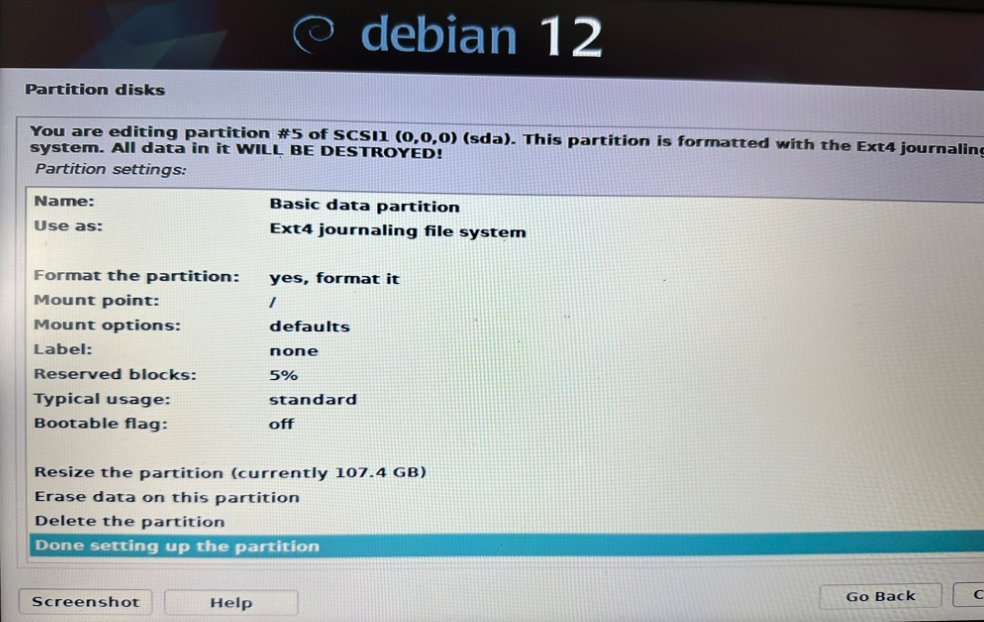
You should clearly see the “F” and the mount point “/” beside your target partition.

Once you are ready, select “Finish partitioning and write changes to disk”. Be careful before you hit enter because it will physically make changes to your disk.
The installation will start and wait until the next prompt.

In the next series of prompts, choose:
- Scan extra installation media=NO
- Use a network mirror=NO
- Participate in package usage survey=NO
Debian 12 features all the leading desktop environments. Choose the one you want in the below screen and click continue. On the next display manager screen, choose “lightdm” for all except KDE. If yo choose KDE Plasma, use “sddm”.

At the final screen, choose to install the GRUB boot loader to the primary drive.
Wait for the installation to finish. At the final screen, select continue, and the installer will reboot your system. Unplug the USB device.

If all goes well, you should see the Debian 12 GRUB menu. You can now login to the new Debian 12 system using the user name and password.

Closing Notes
I hope this guide helped you to install and configure a Basic Debian 12 “Bookworm” system. Debian is a massive operating system with many options. Try the one best for you.
If you are stuck with some errors, drop a comment below.
After completion, do try to check out our guide: 10 Things to do after installing Debian 12.