
Windows 7 is one of the most popular operating systems for personal computers in the world. However, some users may face issues when trying to install their camera on Windows 7, and this can be a frustrating problem. Fortunately, there are several methods to solve this problem and get your camera up and running on your Windows 7 computer. In this blog post, we’ll take a look at some of the most effective methods for installing a camera on Windows 7.
Video Tutorial:
The Challenge of Installing a Camera on Windows 7
Installing a camera on Windows 7 can be a challenge for several reasons. Firstly, the drivers required to run the camera may not be pre-installed on older versions of Windows, meaning that you’ll need to manually download and install them. Additionally, some cameras may not be compatible with Windows 7, or may require additional software to be installed.
Things You Should Prepare for
Before we get started with the methods, there are a few things you should prepare for:
– Ensure that your camera is compatible with Windows 7. Check the manufacturer’s website to see if drivers are available.
– Download the latest drivers for your camera from the manufacturer’s website, and save them to your desktop or another easily accessible location.
– Connect your camera to your computer via a USB cable.
Method 1: Via Device Manager
One of the most effective ways to install a camera on Windows 7 is via Device Manager. Here’s how to do it:
1. Connect your camera to your computer via a USB cable.
2. Click the Start button and type «Device Manager» into the search bar.
3. Click on Device Manager to open it.
4. Select «Imaging Devices» from the list of device types.
5. Right-click on your camera and select «Update Driver Software«.
6. Choose «Browse my computer for driver software«.
7. Navigate to the location where you saved the driver software and click «Next«.
8. Follow the on-screen instructions to complete the installation.
Pros:
– Easy to use for basic installations.
– No extra software necessary.
Cons:
– Not effective with older cameras or ones with more advanced features.
– May not always detect the correct drivers.
Method 2: Using Compatibility Mode
If your camera is not compatible with Windows 7, you can try installing the drivers in compatibility mode. Here’s how to do it:
1. Download the latest drivers for your camera from the manufacturer’s website.
2. Right-click on the downloaded file and select «Properties«.
3. Click on the «Compatibility» tab.
4. Check the box next to «Run this program in compatibility mode for:«.
5. Select «Windows Vista» or an earlier version of Windows from the drop-down menu.
6. Click «Apply» and then «OK«.
7. Double-click on the downloaded file to start the installation.
8. Follow the on-screen instructions to complete the installation.
Pros:
– Can be effective for older cameras or ones with more advanced features.
– Compatibility mode can be set to several different versions of Windows.
Cons:
– May require additional software to run properly.
– Not always effective for all cameras.
Method 3: Using Driver Update Tools
If the above methods don’t work, you can try using driver update tools to automatically install the required drivers. Here’s how to do it:
1. Download a driver update tool like DriverDoc or DriverFinder and install it on your computer.
2. Follow the on-screen instructions to scan your computer for missing or outdated drivers.
3. Select your camera from the list of devices and click «Update Driver» or a similar option.
4. The tool will automatically download and install the latest drivers for your camera.
Pros:
– Can save time and effort for users who are not tech-savvy.
– Can detect and update drivers for multiple devices simultaneously.
Cons:
– Not all driver update programs are reliable or trustworthy.
– May require a subscription or payment to use.
Why Can’t I Install My Camera on Windows 7?
There are several reasons why you might be having difficulty installing your camera on Windows 7. Here are a few common issues and how to fix them:
Q1: My camera is not compatible with Windows 7. What can I do?
A: You can try installing the drivers in compatibility mode, as described in Method 2. If this doesn’t work, you may need to purchase a new camera that is compatible with Windows 7.
Q2: I can’t find the drivers for my camera. What can I do?
A: Check the manufacturer’s website for the latest drivers. If they are not available, contact the manufacturer’s support team for assistance.
Q3: My camera is not being detected by Windows 7. What can I do?
A: Try connecting the camera to a different USB port, or restarting your computer. If this doesn’t work, try using a different USB cable or contacting the manufacturer’s support team.
Additional Tips
– Make sure your camera is fully charged or has fresh batteries before connecting it to your computer.
– Keep your drivers up-to-date by regularly downloading the latest versions from the manufacturer’s website.
– Avoid using third-party driver update programs unless you have researched them thoroughly and are confident in their reliability.
5 FAQs about Installing a Camera on Windows 7
Q1: What do I do if my camera doesn’t have drivers available for Windows 7?
A: You can try installing the drivers in compatibility mode for an earlier version of Windows, as described in Method 2. If this doesn’t work, you may need to purchase a new camera that is compatible with Windows 7.
Q2: How do I know if my camera is compatible with Windows 7?
A: Check the manufacturer’s website for information on system requirements and compatibility. If you are unsure, contact the manufacturer’s support team for assistance.
Q3: Why won’t my camera turn on when connected to my Windows 7 computer?
A: This could be due to a low battery or a malfunction with the camera. Try replacing the batteries or contacting the manufacturer’s support team for assistance.
Q4: How do I update my camera drivers?
A: Download the latest drivers from the manufacturer’s website and follow the on-screen instructions to install them. Alternatively, use a driver update program like DriverDoc or DriverFinder.
Q5: Can I use a USB hub to connect my camera to my Windows 7 computer?
A: It is possible, but not recommended. USB hubs can cause connection issues and may not provide enough power to the camera.
In Conclusion
Installing a camera on Windows 7 can be a challenge, but with the right tools and methods, you can get it up and running in no time. Try out the above methods, and if all else fails, contact the manufacturer’s support team for additional assistance. Remember to keep your drivers up-to-date and to follow best practices for connecting and using your camera.
Camera drivers can ensure smooth webcam performance. Hence, this article shares how to download, install, and update them for Windows 11, 10, and 7.
A webcam is perhaps the most crucial device in today’s world, where video calls and meetings have become an everyday norm for many users. However, it may be frustrating if this device exhibits erratic behavior and does not work. If you are experiencing problems with the webcam on your computer, you should pay heed to the camera drivers.
An outdated or missing Windows 10/Windows 11 camera driver is the reason you experience issues with your computer’s webcam. The driver is an interface your system uses to interact with the camera. Without an appropriate, up-to-date, and compatible driver, the camera on your computer does not function correctly.
Universal Method to Update Camera Driver Automatically
If you are having trouble searching for the correct Camera driver online, then you can use the best driver updating tool, Win Riser Driver Updater. It automatically detects your system and provides you with the latest driver updates. The driver updater only provides WHQL-tested and certified drivers. By clicking on the download button given below, you can get Win Riser Driver Updater for Free.
Hence, this article acquaints you with the top methods to download a camera driver for Windows 10 or 11 PC, install, and update it.
Methods to Download and Install Camera Driver for Windows 11/10/8/7
You can apply these methods to get the updated PC camera driver downloaded and installed for Windows.
Method 1: Download Camera Drivers through the Manufacturer’s Website
Like drivers for all other peripherals, camera drivers for Windows 10 and 11 are also available on the manufacturer’s official website. However, you should be aware of your computer’s make and model. You can follow the directions Settings>System>About to find the required details about your PC and then implement these steps to download and install the driver.
- Firstly, navigate to your camera manufacturer’s official website.
- Now, find your camera using the search box.
- You can now go to the Driver Support section and your camera model’s driver download page.
- Now, download the camera driver for Windows 11/10.
- Lastly, double-click the file you downloaded in the previous step and follow the directions to install the driver.
Also Read: HP Webcam Drivers Download, Install & Update For Windows 10, 8, 7
Method 2: Download and install the camera driver for Windows 10/11 using Device Manager
The Device Manager is a tool in Windows to download the latest drivers on your computer. Below is the process to download and install the updated camera driver for Windows 7, 10, or 11 using the Device Manager.
Also Read: Download and Update Microphone Driver for Windows 10
Method 3: Download and Install the Latest Camera Drivers (Recommended)
As you may also agree, manual methods to download, install, and update the camera drivers for Windows 7/10/11 are complicated and time-consuming. Moreover, if you take even a single wrong step during a manual installation of drivers, you may experience problems with the peripheral and system crashes.
Hence, we recommend downloading and installing updated drivers through a dedicated program like Bit Driver Updater. The Bit Driver Updater updates all drivers automatically with a single click and offers benefits like driver backup and restoration, driver download speed acceleration, scheduled scans for outdated drivers, and more.
Read the Complete Review of Bit Driver Updater
You can navigate to the following link to download the Bit Driver Updater and get it installed on your computer.
Within a few seconds of installing the software, you get a list of outdated drivers on your screen. After going through the list, you can Update All with one click. You can use the Update Now feature to download and install only the camera driver for Windows 10, 7, or 11 if you wish to do so. However, in our opinion, updating all drivers is a better choice to ensure smooth device performance.

Also Read: Best Free Driver Updater for Windows 10, 11 in 2023 [Updated]
Method 4: Update your computer’s OS
Updating the computer’s operating system downloads and installs the latest drivers on your computer and updates the currently installed drivers. However, this method is not very successful if the driver update is extremely new. Still, you can follow the below directions to try downloading the camera drivers for Windows 7/10/11.
Also Read: Download, Install, and Update Logitech HD Webcam C270 Drivers for Windows
Camera Drivers Downloaded and Installed
This article highlighted the best ways to download camera drivers for Windows 10/11/7, install, and update them. You can follow the method that seems the most convenient to you.
However, we recommend downloading and installing driver updates automatically through Bit Driver Updater, as it keeps annoying driver-related issues away.
If you know other better methods to download and install the camera drivers or have any questions/suggestions about this post, please leave us a comment.
Все способы:
- Настраиваем веб-камеру на ноутбуке с Windows 7
- Шаг 1: Скачивание и установка драйверов
- Шаг 2: Включение веб-камеры
- Шаг 3: Настройка программного обеспечения
- Шаг 4: Настройка камеры в Skype
- Вопросы и ответы: 1
Практически каждый современный ноутбук оснащен веб-камерой. В большинстве случаев она вмонтирована в крышку над экраном, а управление ею осуществляется с помощью функциональных клавиш. Сегодня мы хотим уделить внимание настройке этого оборудования на лэптопах под управлением операционной системы Windows 7.
Настраиваем веб-камеру на ноутбуке с Windows 7
Перед тем как приступать к редактированию параметров, необходимо позаботиться об установке драйверов и включении самой камеры. Мы разделили всю процедуру на этапы, чтобы вы не запутались в последовательности действий. Давайте начнем с первого этапа.
Читайте также:
Как проверить камеру на ноутбуке с Windows 7
Шаг 1: Скачивание и установка драйверов
Начать следует с загрузки и инсталляции подходящих драйверов, поскольку без такого программного обеспечения камера работать корректно не будет. Лучшим вариантом для поиска станет страница поддержки на официальном сайте производителя, поскольку там всегда находятся самые свежие и подходящие файлы, однако существуют и другие методы поиска и установки. Ознакомиться с ними на примере ноутбука от ASUS вы можете в другом нашем материале по следующей ссылке.

Подробнее: Устанавливаем драйвер веб-камеры для ноутбуков ASUS
Шаг 2: Включение веб-камеры
По умолчанию веб-камера может быть отключена. Активировать ее необходимо функциональными клавишами, которые расположены на клавиатуре, или через «Диспетчер устройств» в операционной системе. Оба этих варианта расписаны другим нашим автором в статье ниже. Следуйте руководству, приведенному там, а затем переходите к следующему шагу.
Подробнее: Включение камеры на компьютере в Windows 7
Шаг 3: Настройка программного обеспечения
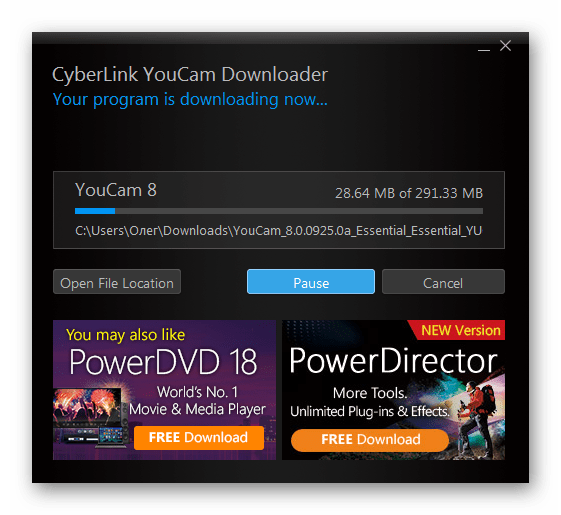
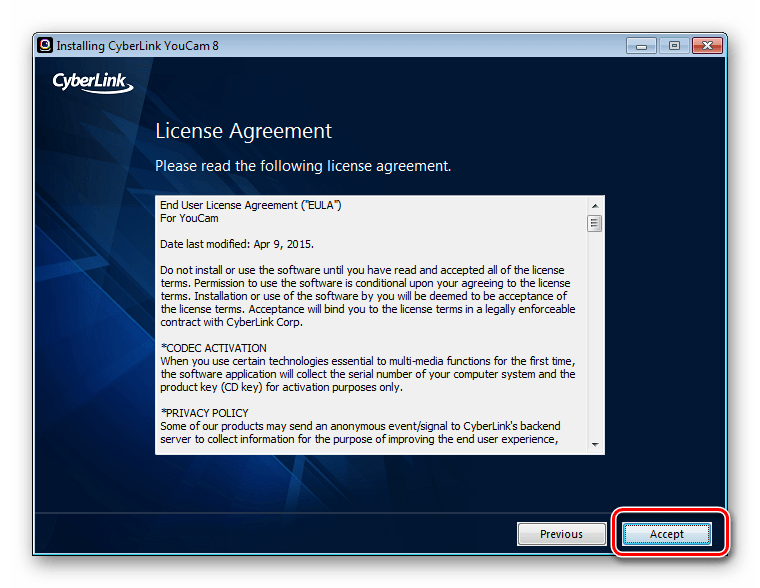
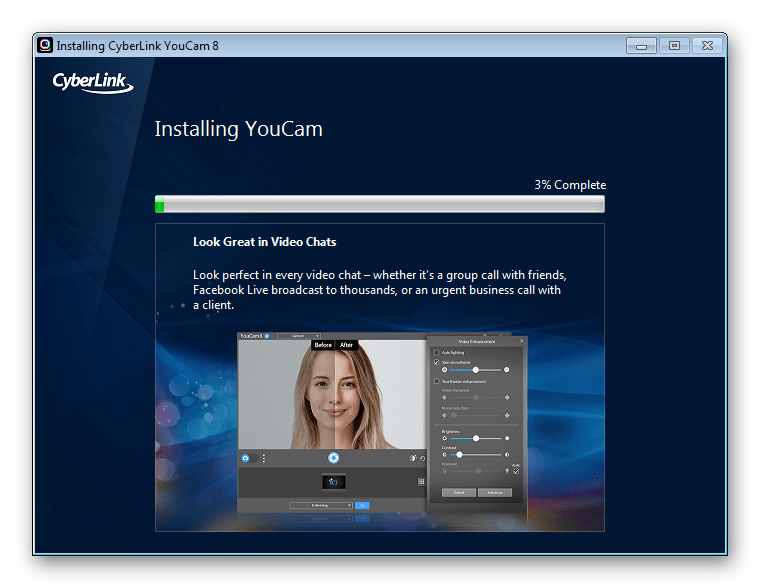
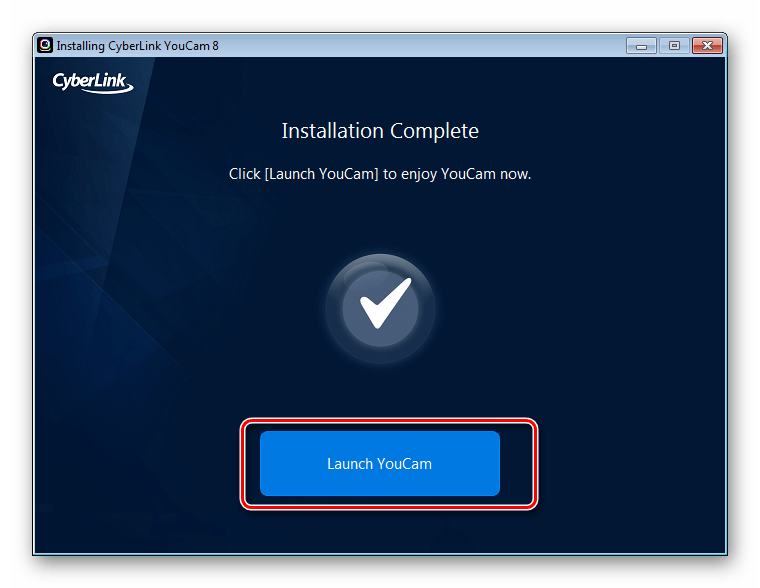
Во многих моделях лэптопов в комплекте с драйвером камеры идет специальная программа для работы с ней. Чаще всего это YouCam от компании CyberLink. Давайте разберем процесс ее инсталляции и настройки:
- Ожидайте запуска инсталлятора после инсталляции драйверов или откройте его самостоятельно.
- Выберите место на компьютере, куда будут загружены файлы установки программы, если это требуется.
- Дождитесь завершения загрузки всех файлов.
- Выберите подходящий язык YouCam, место сохранения файлов и кликните на «Next».
- Примите условия лицензионного соглашения.
- Во время инсталляции не выключайте окно Мастера установки и не перезагружайте компьютер.
- Запустите ПО нажатием на соответствующую кнопку.
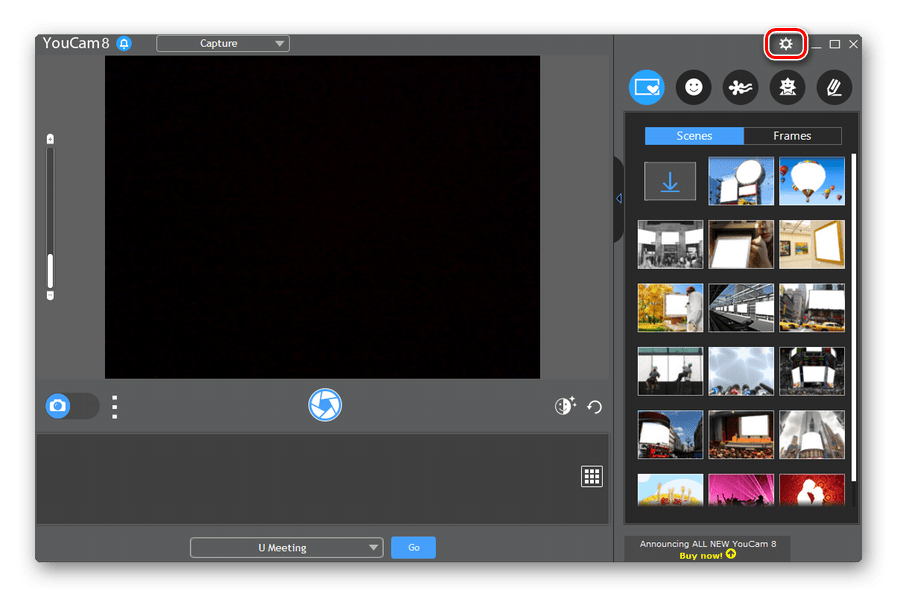
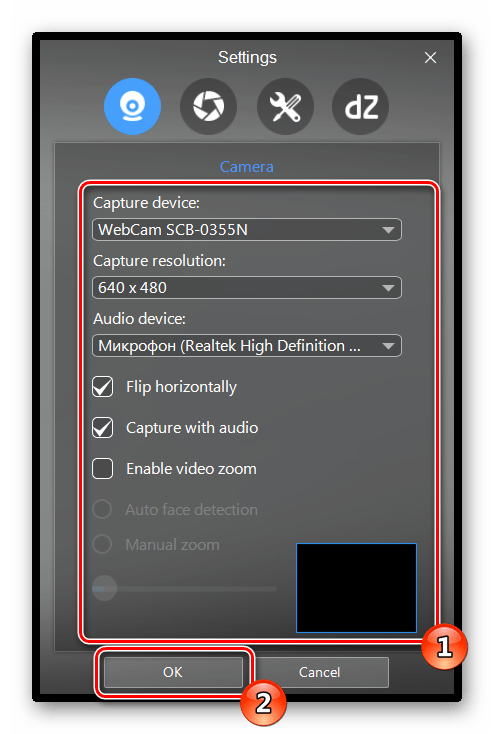
- Во время первого открытия сразу же перейдите в режим настройки, кликнув на значок шестеренки.
- Убедитесь в том, что выбрано правильное устройство передачи изображения, установлено оптимальное разрешение экрана, а звук записывается из активного микрофона. По необходимости выполните корректировку масштабирования и включите функцию автоматического определения лица.
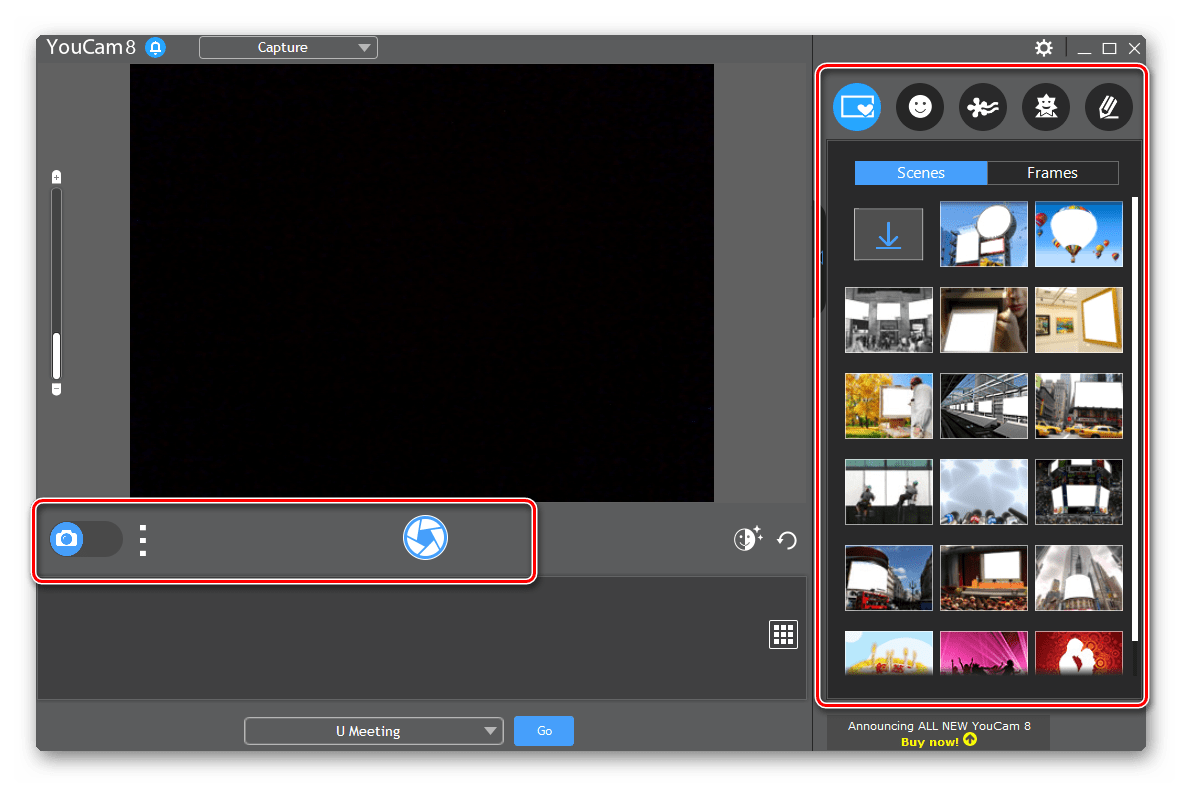
- Теперь вы можете приступать к работе с YouCam, делать снимки, записывать ролики или применять эффекты.


Если данный софт не шел вместе с драйвером, загрузите его с официального сайта, когда это нужно, либо же задействуйте любую другую похожую программу.
Кроме этого для записи видео и дальнейшей работы с веб-камерой может потребоваться микрофон. Инструкции по его включению и настройке ищите в других наших материалах далее.
Подробнее: Включение и настройка микрофона в Windows 7
Шаг 4: Настройка камеры в Skype
Многие пользователи ноутбуков активно задействуют программу Skype для разговоров по видеосвязи, а для нее требуется отдельная настройка веб-камеры. Данный процесс не займет много времени и не требует от юзера дополнительных знаний или навыков. За детальными инструкциями по выполнению этой задачи мы рекомендуем обратиться к отдельному материалу.
Подробнее: Настройка камеры в программе Skype
На этом наша статья подходит к логическому завершению. Сегодня мы постарались максимально подробно рассказать о процедуре конфигурации веб-камеры на ноутбуке в Windows 7. Надеемся, предоставленное пошаговое руководство помогло вам легко справиться с поставленной задачей и у вас больше не осталось вопросов по этой теме.
Наша группа в TelegramПолезные советы и помощь
Google Camera, also known as GCam, is a popular camera app developed by Google for Android devices. However, many users wish to have this app on their Windows 7 computers as well. Fortunately, it is now possible to use Google Camera on Windows 7. In this article, we will explore its features and provide a step-by-step guide on how to install it.
Windows 7 Camera Features
Google Camera is known for its advanced camera features. Which makes it a favorite among smartphone users. Some of the most popular features include:
Night Sight: This feature allows you to capture clear and detailed photos in low-light conditions, without using a flash. It works by taking multiple shots and combining them to create a brighter and more detailed image.
Portrait Mode: This feature uses advanced algorithms to blur the background and highlight the subject, creating a professional-looking photo.
Lens Blur: This feature allows you to adjust the focus of the photo after you have taken it, giving you more control over the final result.
HDR+: This feature uses multiple exposures to capture more detail in both the brightest and darkest areas of a photo, resulting in a more natural-looking image.
Photo Sphere: This feature allows you to take 360-degree panoramic photos, which can be viewed and explored in Google Maps.
Google Camera For Windows 7
To use Google Camera on Windows 7. You will need to use an Android emulator such as BlueStacks. Here are the steps to follow:
- Get and install BlueStacks on your Windows 7 computer.
- Open BlueStacks and log in to your Google account.
- Download the Google Camera APK file from a trusted source and save it to your computer.
- Click on the “Install APK” button on the right-hand side of the BlueStacks home screen.
- Navigate to the location where you saved the Google Camera APK file and select it.
- BlueStacks will automatically install Google Camera on your Windows 7 computer.
- Open Google Camera from within BlueStacks and start taking photos!
Windows 7 Camera Apk
Download Camera For PC
How to Install Camera on Windows 7
In addition to using Google Camera, Windows 7 also has its own built-in camera app. Here’s how to install and use it:
- Touch on the “Start” button and type “camera” in the search bar.
- Now, touch on “Camera” from the search results.
- If you don’t have a built-in camera on your computer, you will need to connect an external camera to use the app.
- Once your camera is connected, you can use the camera app to take photos and videos.
Is there a camera app on Windows 7?
Yes, Windows 7 has a built-in camera app that allows you to take photos and videos using your computer’s webcam or an external camera. To access the camera app, simply click on the “Start” button and type “camera” in the search bar. Then click on “Camera” from the search results.
Which camera software is best for Windows 7?
There are many camera software options available for Windows 7, both free and paid. Some of the most popular ones include:
- Adobe Photoshop Camera Raw
- CyberLink YouCam
- Debut Video Capture Software
- ManyCam
- Windows Movie Maker
Ultimately, the best camera software for Windows 7 will depend on your specific needs and preferences.
How do I allow Chrome to access my camera Windows 7?
To allow Google Chrome to access your camera on Windows 7. You will need to follow these steps:
- Open Google Chrome and click on the three dots in the upper-right corner of the window.
- Select “Settings” from the drop-down menu.
- Scroll down to the “Privacy and security” section and click on “Site settings.”
- Scroll down to the “Permissions” section and click on “Camera.”
- Ensure that the toggle switches next to “Ask before accessing” is turned on.
- Under “Blocked,” click on the “Add” button.
- Enter the URL of the website you want to grant camera access to and click “Add.”
- Refresh the webpage and you should now be prompted to allow camera access.
If you have already blocked camera access to a website. You will need to remove it from the “Blocked” list before you can grant camera access again.
Conclusion
Google Camera is a feature-rich camera app that is highly popular among Android users. With the help of an Android emulator such as BlueStacks. It is now possible to use Google Camera on Windows 7 as well. Whether you choose to use Google Camera or the built-in Windows camera app. You can enjoy capturing high-quality photos and videos on your computer.
A webcam driver is a program that enables your computer to communicate with the webcam. If your webcam is no longer working out of nowhere, in most cases, it indicates a driver issue.
This article will show you 2 easy and safe ways to get the correct driver for your webcam.
Table of contents
- How to Download the Correct Webcam Driver
- Option 1 – Update your driver with Driver Easy
- Option 2 – Update the driver via Device Manager
- Should I Update My Webcam Driver
How to Download the Correct Webcam Driver
Option 1 – Update your driver with Driver Easy
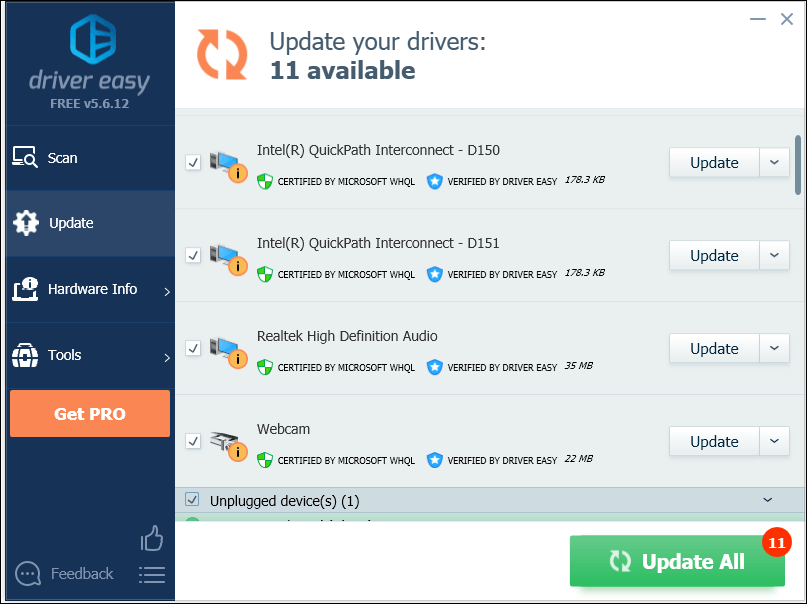
If you’re having issues with your webcam, make sure you’re using the right webcam driver, not just the latest ones. You can use Driver Easy to see if you’re using the right driver.
Driver Easy will automatically recognize your system and find the correct drivers for it. You don’t need to know exactly what system your computer is running, you don’t need to risk downloading and installing the wrong driver, and you don’t need to worry about making a mistake when installing.
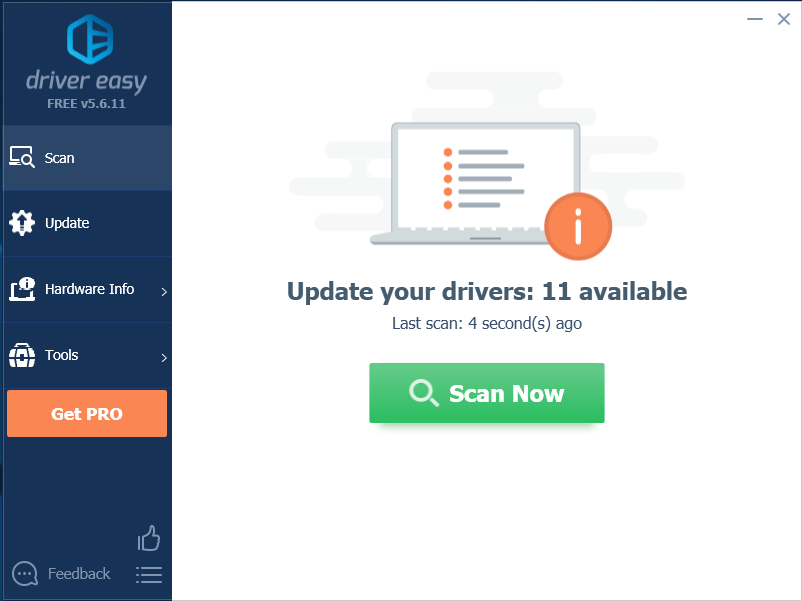
1) Download and install Driver Easy.
2) Run Driver Easy and click the Scan Now button. Driver Easy will then scan your computer and detect any problem drivers.
3) Click Update next to the webcam driver you want to update, then you can install the downloaded driver manually.
Or click Update All to automatically download and install the correct version of all the drivers that are missing or out of date on your system (this requires the Pro version – you’ll be prompted to upgrade when you click Update All).
If you need assistance, please contact Driver Easy’s support team at support@drivereasy.com.
Option 2 – Update the driver via Device Manager
Device Manager is a tool that displays all the hardware attached to your computer. It provides you with options to install, uninstall and update your device driver.
You can update your webcam driver through Device Manager. Here’s how to do it:
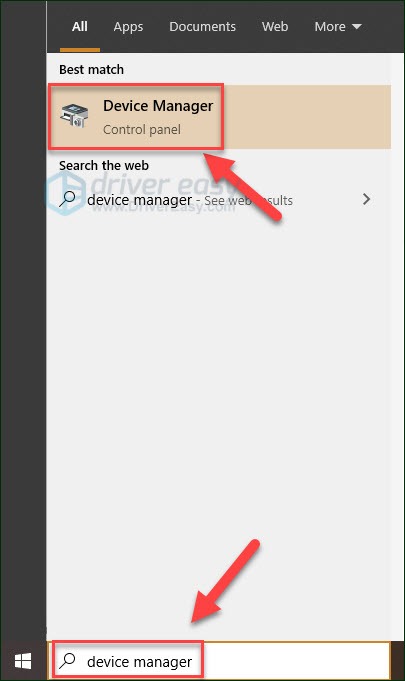
1) On your keyboard, press the Windows logo key.
2) Type device manager, then select Device Manager.
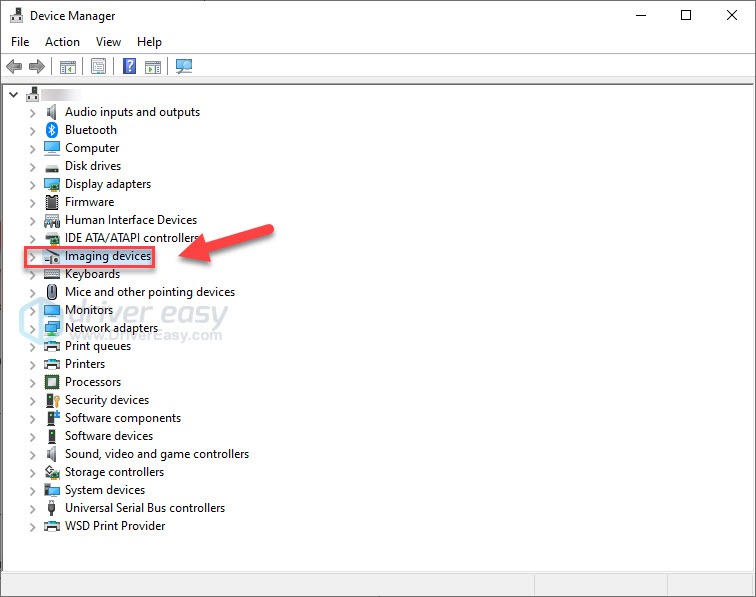
3) Double-click Imaging devices.
4) Right-click your webcam, then click Update driver.
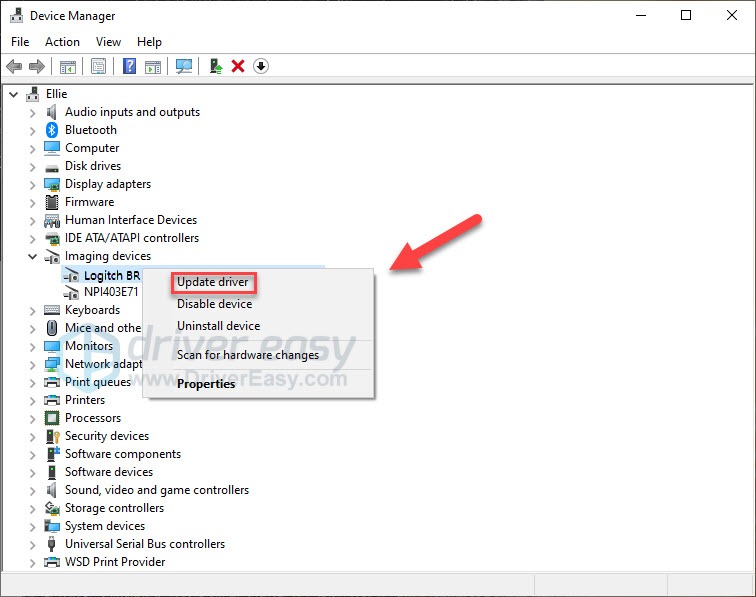
5) Select Search automatically for updated driver software.
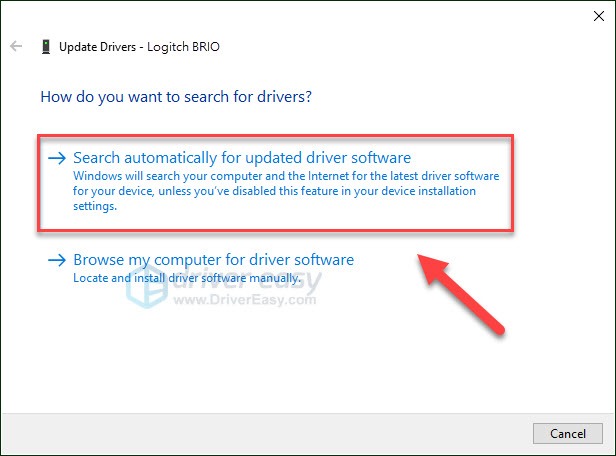
Wait for this process to be complete.
If Device Manager says “The best drivers for your device are already installed” and you still face the issue, chances are that the driver you’re using is not compatible with your webcam or the system. You can use Driver Easy to find the driver that works with your device.
Should I Update My Webcam Driver
A webcam driver is a computer program that lets your system and your other applications interact with the webcam you use. If the driver is missing, corrupted, or incompatible with your system, your webcam won’t be able to function correctly, or it just won’t work with a specific app. (Likewise, if you’re running into issues with any device, say, your mouse, printer, keyboard, etc., chances are good that something is going wrong with the device driver.) So updating your driver should always be your go-to option when your run into issues on your device.
But if you’re looking for a speed enhancement of your webcam, updating your drivers probably won’t do the trick for you. What you can expect from an update is very minor performance increases, fix for certain bugs, or maybe a chance to access new features added.
Hopefully, this article helped! Please feel free to leave a comment below if you have any questions or suggestions.
55
55 people found this helpful