
Step 1: Download
Use the links below to download the latest version of Burp Suite Professional or Community Edition.
Choose your software
Professional
Community Edition
Step 2: Install
Run the installer and launch Burp Suite.
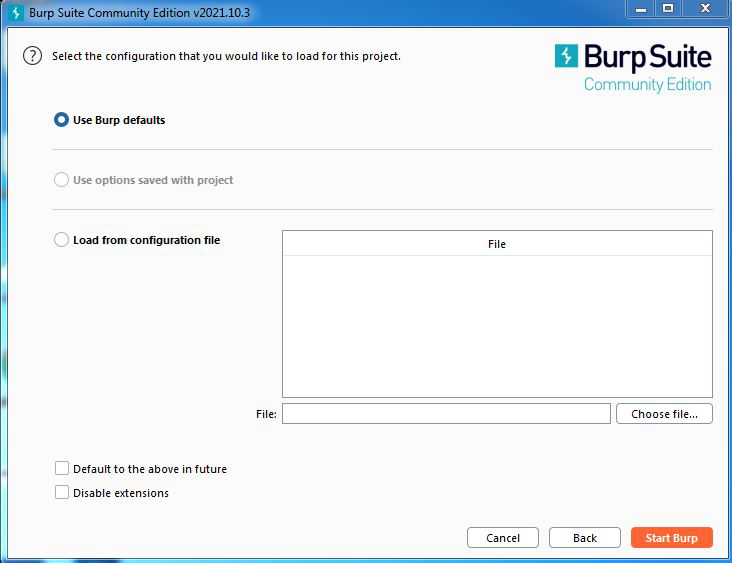
When asked to select a project file and configuration, just click Next and then Start Burp to skip this for now.
Note
If you’re using Burp Suite Professional, enter your license key when prompted. If you don’t have one already, you can subscribe or
request a free trial.
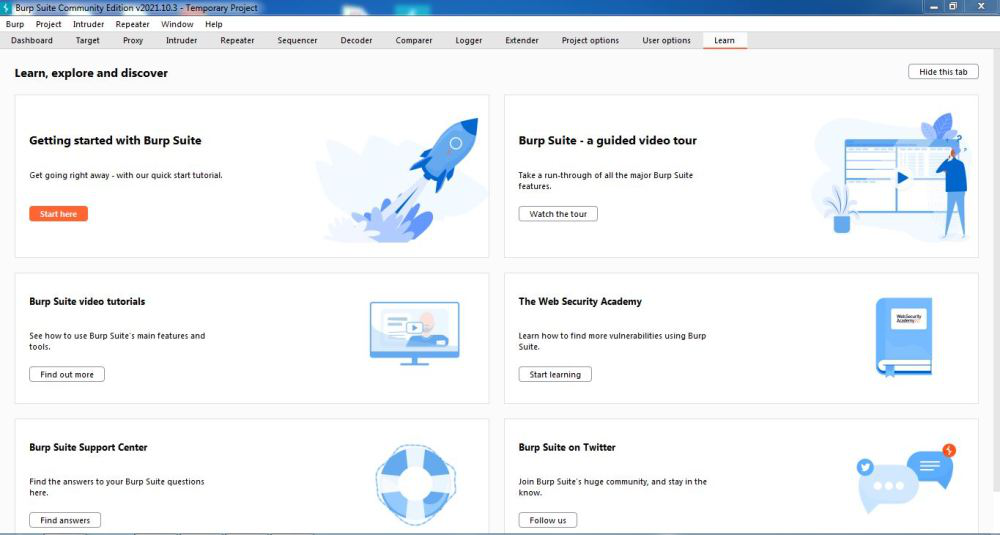
Step 3: Start exploring Burp Suite
If you’re completely new to Burp Suite, follow the rest of this tutorial for an interactive, guided tour of the core features.
Next step — Intercepting HTTP traffic with Burp Proxy
CONTINUE
In this tutorial
- Downloading and installing Burp Suite.
- Intercepting HTTP traffic with Burp Proxy.
- Modifying requests in Burp Proxy.
- Setting the target scope.
- Manually reissuing requests with Burp Repeater.
- Running your first scan.
- Generating a report.
- What next?
Last Updated :
22 May, 2024
Burp Suite can be understood as a web vulnerability scanner. It is a collection of different tools that are brought together in a single application for performing security testing of Web applications. Burp Suite is widely used by penetration testers to test and identify different vulnerabilities that are present in web applications and exploit them to fix those security issues. Burp Suite has a large number of features which include proxy, intruder, repeater, sequencer, decoder, compare, and many more. Burp Suite has a large number of users.
Installing Burp Suite on Windows:
Follow the below steps to install Burp Suite on Windows:
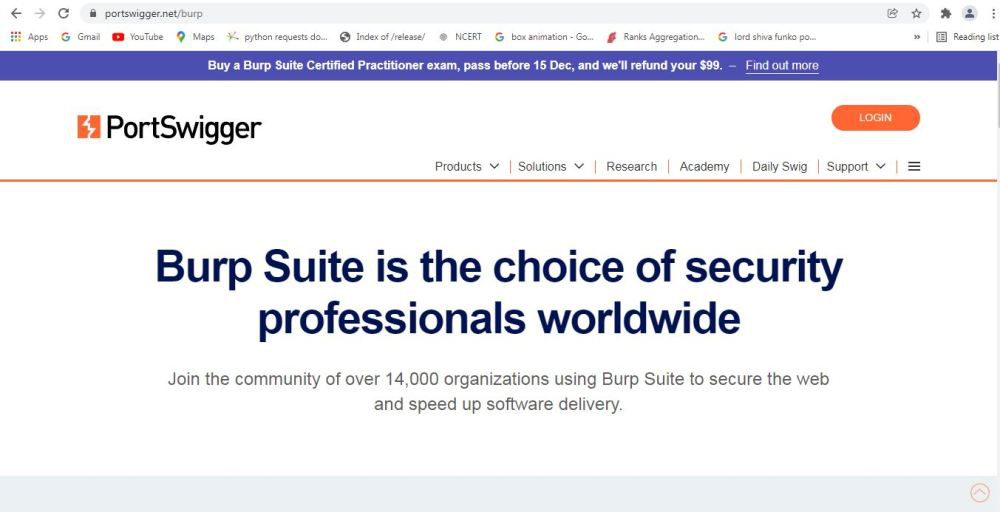
Step 1: Visit the official Burp Suite website using any web browser.
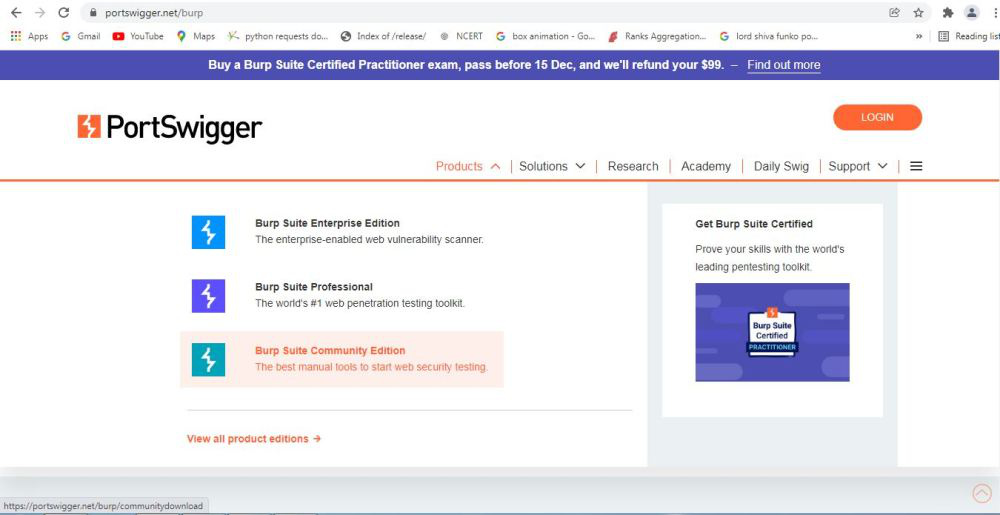
Step 2: Click on Products, a list of different Burp Suites will open, choose Burp suite Community Edition as it is free, click on it.
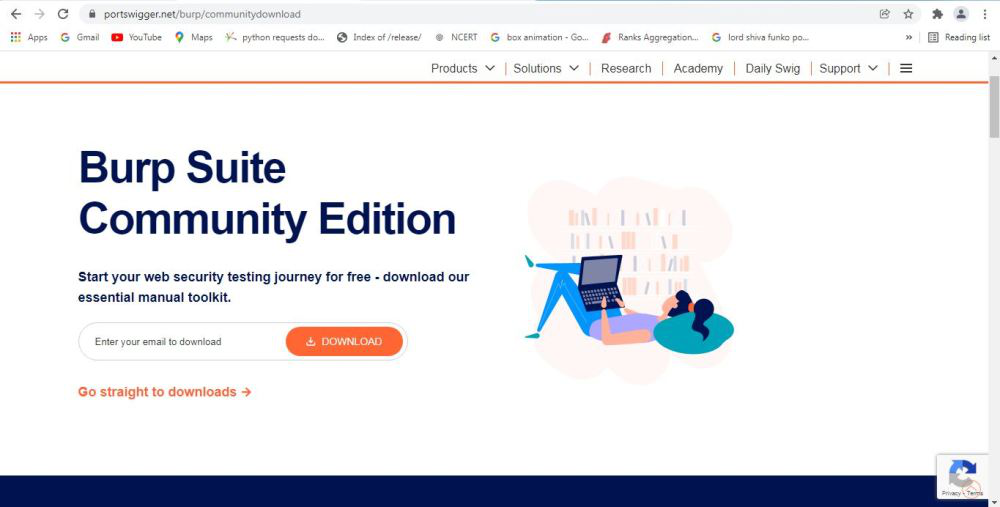
Step 3: New webpage will open, which will ask for email id, and other option is Go Straight to downloads. Click on Go straight to downloads.
Step 4: After clicking on Go straight to downloads new webpage will open which will contain two versions of burp suite one is Burp suite community edition and the other is burp suite professional along with compatibility for different operating systems.
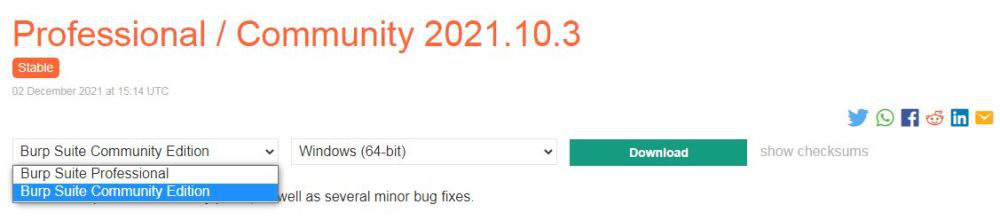
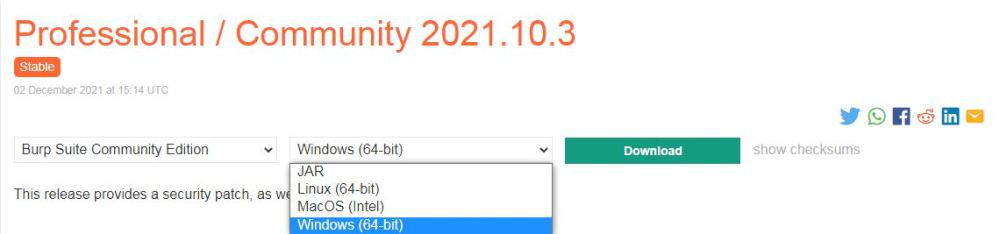
Step 5: Choose Burp suite Community Edition along with Windows (64-bit). Click on the download button, downloading of the executable file will start shortly. It is a big 210 MB file that will take some time depending on download speed.

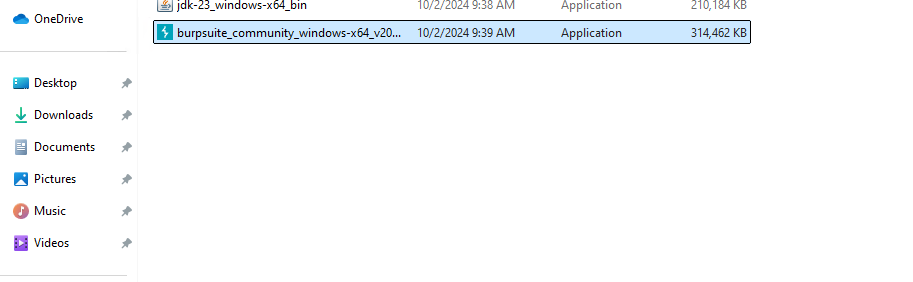
Step 6: Now check for the executable file in downloads in your system and run it.
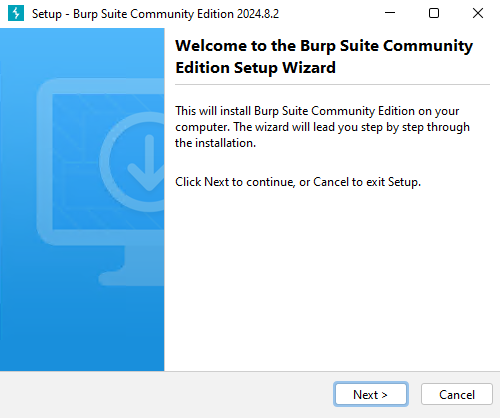
Step 7: Loading of Installation Wizard will appear which will take a few seconds.
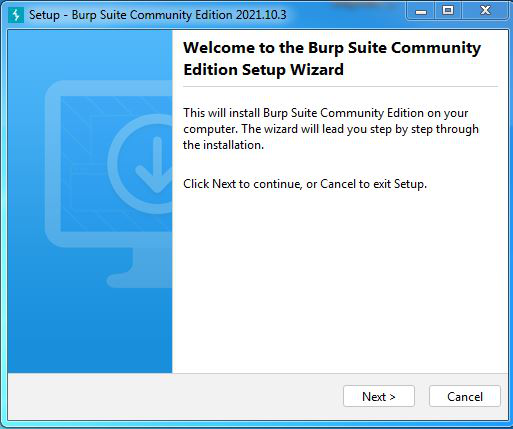
Step 8: After this Setup screen will appear, click on Next.
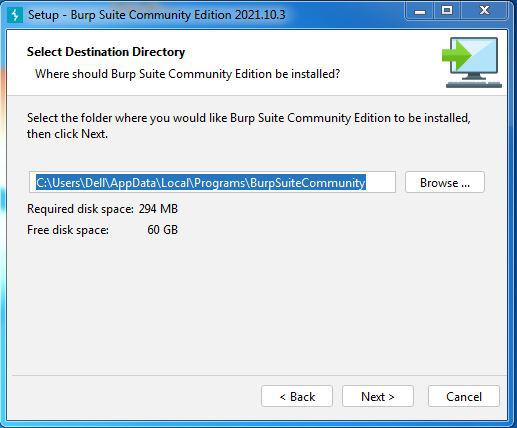
Step 9: The next screen will be of installing location so choose the drive which will have sufficient memory space for installation. It needed a memory space of 294 MB.
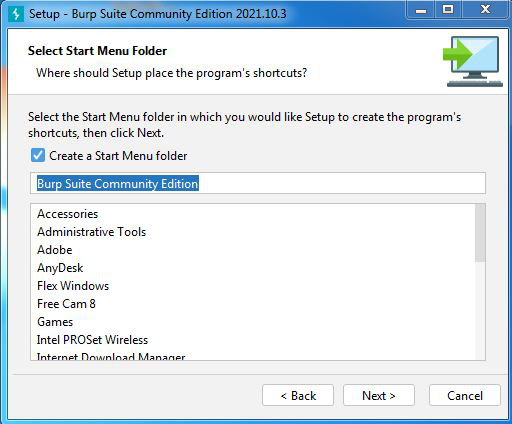
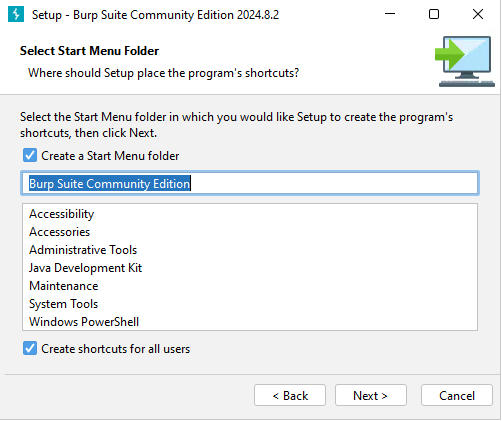
Step 10: Next screen will be of choosing Start menu folder so don’t do anything just click on Next Button.
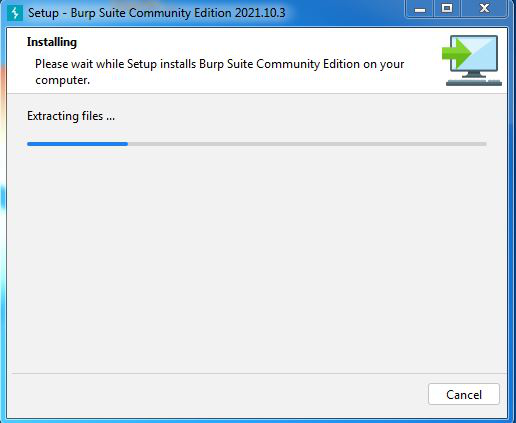
Step 11: After this installation process will start and will hardly take a minute to complete the installation.
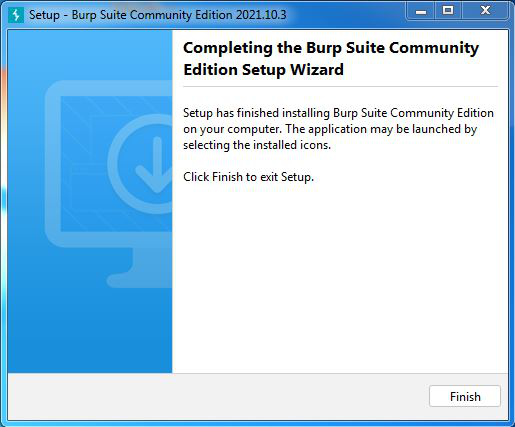
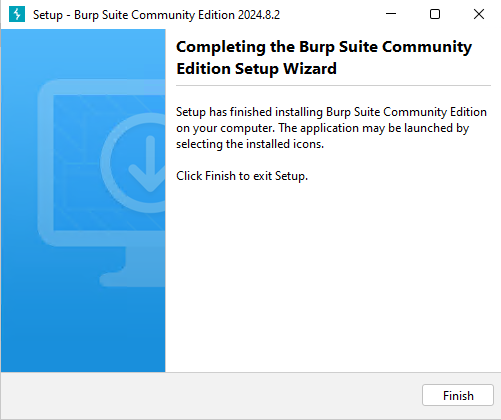
Step 12: Click on Finish after the installation process is complete.
Step 13: Burp suite is successfully installed on the system and an icon is created on the desktop.
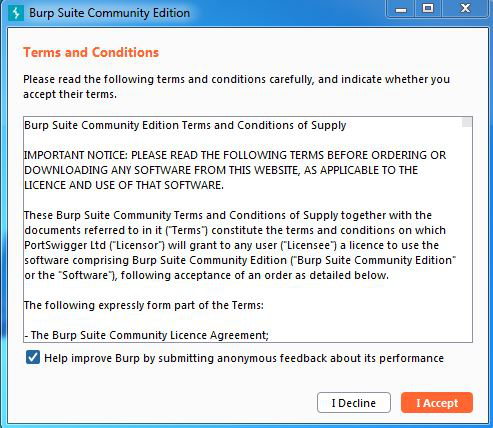
Step 14: Run the software, screen containing terms and conditions will appear Click on I Accept.
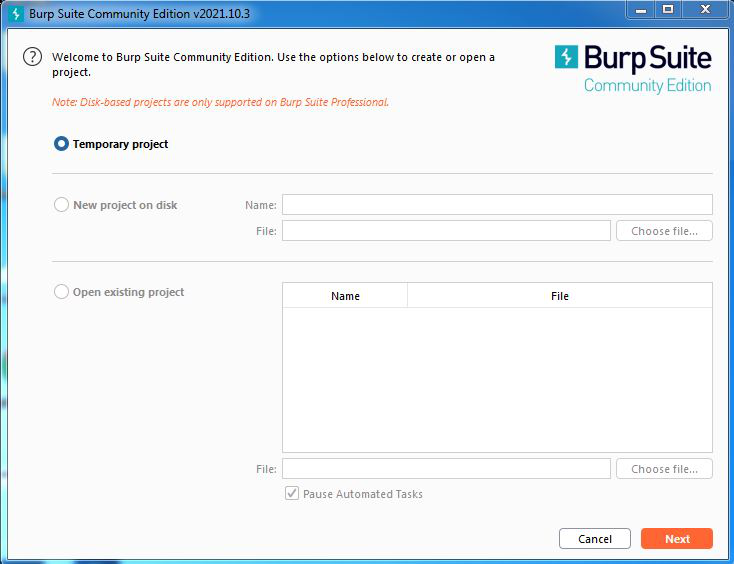
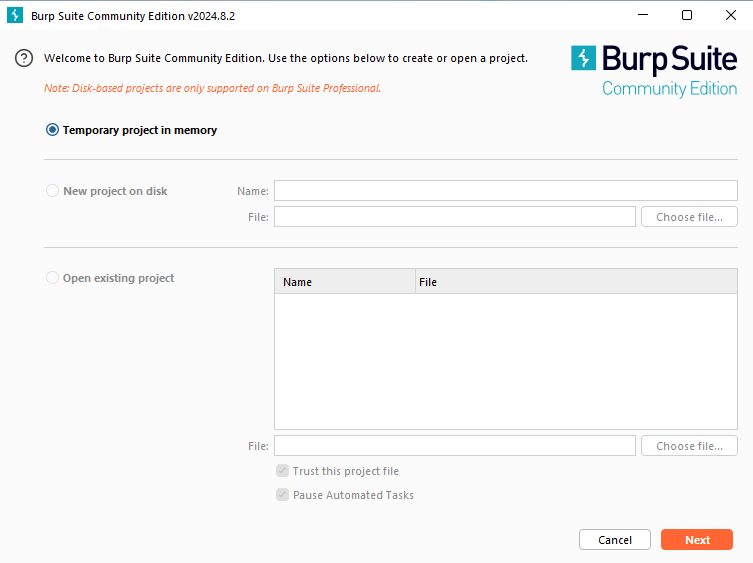
Step 15: New screen containing information regarding the project will appear, Choose temporary project and click Next.
Step 16: Next screen is about using default settings or loading from configuration file, click on Use Burp Defaults.
Step 17: Project will start loading.

Step 18: Finally new project window will appear.
Congratulations!! At this point, you have successfully installed Burp Suite on your windows system.
Burp Suite Professional
Enhance Your Testing Skills with Burp Suite Professional
~Test like a Pro, with Ignorance is a Bliss as a Motto

Disclaimer
This repository is intended solely for educational purposes, or maybe not who knows?
Overview
This repository provides a streamlined method for installing Burp Suite Professional with a single command. While a manual installation guide is also available, we recommend the automated process for convenience.
Linux Installation
Prerequisites
Before proceeding with the installation, ensure that the following dependencies are installed on your system:
General Dependencies
git— for version controlcurlorwget— for downloading files
Ubuntu/Debian-based Systems
sudo apt-get install -y openjdk-22-jre openjdk-22-jdk git curl wget
Fedora-based Systems
sudo dnf install -y java-22-openjdk java-22-openjdk-devel git curl wget
CentOS/RHEL-based Systems
sudo yum install -y java-22-openjdk java-22-openjdk-devel git curl wget
Arch-based Systems
sudo pacman -S jdk-openjdk git curl wget
Installation
Automated Installation
To install Burp Suite Professional, run the following command (root user):
curl https://raw.githubusercontent.com/sdmrf/BurpSuite-Pro/main/Linux/install.sh | sudo bash
Note: Make sure to enter your password after running this command as it is executed with root privileges.
Manual Installation
If you prefer a manual installation, follow the steps below:
- Clone the repository:
git clone https://github.com/sdmrf/BurpSuite-Pro.git
- Change the directory:
- Run the installation script:
Usage
To run Burp Suite Professional, execute the following command:
Uninstallation
Automated Uninstallation
To uninstall Burp Suite Professional, run the following command (root user):
curl https://raw.githubusercontent.com/sdmrf/BurpSuite-Pro/main/Linux/uninstall.sh | sudo bash

Manual Uninstallation
- Change the directory:
- Run the uninstallation script:
Update (Optional)
Automated Update
To update Burp Suite Professional, run the following command (root user):
curl https://raw.githubusercontent.com/sdmrf/BurpSuite-Pro/main/Linux/update.sh | sudo bash
Manual Update
- Change the directory:
- Run the update script:

Windows Installation
Prerequisites
Before proceeding with the installation, ensure that the following dependencies are installed on your system:
-
git— for cloning this repository || Download Git -
Java— for running Burp Suite Professional || Download Java
(Optional — installation of latest Java is now included in the script) -
PowerShell— for executing scripts
Installation
Automated Installation
To install Burp Suite Professional, run the following command:
iex ((New-Object System.Net.WebClient).DownloadString('https://raw.githubusercontent.com/sdmrf/BurpSuite-Pro/main/Windows/install.ps1'))
Manual Installation
- Download the repository:
git clone https://github.com/sdmrf/BurpSuite-Pro.git
- Change the directory:
- Open PowerShell as an administrator and run the following commands:
Set-ExecutionPolicy Unrestricted -Scope Process
- Run the installation script:
Usage
To run Burp Suite Professional, click on the desktop shortcut.

Alternatively, you can run the script manually:
- Change the directory:
cd C:\sdmrf\BurpSuitePro\
- Run the script:
Creating a Shortcut for .vbs File.
(Obsolete — creation of shortcut is now included in the script)
If any problems occur during installation, you can use this method and create a desktop shortcut for it.
- Right-click on the Burp-Suite-Pro.vbs file.
- Select Send to > Desktop (create shortcut).
- Change the shortcut icon:
- Right-click the shortcut and select Properties.
- Click Change Icon, browse for the BurpSuitePro.ico file in the repository, and apply the changes.
Uninstallation
Automated Uninstallation
To uninstall Burp Suite Professional, run the following command:
iex ((New-Object System.Net.WebClient).DownloadString('https://raw.githubusercontent.com/sdmrf/BurpSuite-Pro/main/Windows/uninstall.ps1'))
Manual Uninstallation
- Change the directory:
- Open PowerShell as an administrator and run the following commands:
Set-ExecutionPolicy Unrestricted -Scope Process
- Run the uninstallation script:
Update (Optional)
Automated Update
To update Burp Suite Professional, run the following command:
iex ((New-Object System.Net.WebClient).DownloadString('https://raw.githubusercontent.com/sdmrf/BurpSuite-Pro/main/Windows/update.ps1'))
Manual Update
- Change the directory:
- Open PowerShell as an administrator and run the following commands:
Set-ExecutionPolicy Unrestricted -Scope Process
- Run the update script:
Credits
A special thanks to sdmrf for developing this script and to h3110w0r1d-y for providing the Burp Suite key generation loader.
Burp Suite is a powerful tool security professionals use to test web application security. It offers a range of features, including a proxy server, scanner, intruder, and repeater. It also provides a store where you can install additional plugins.
In this post, we will cover the steps to install Burp Suite on a Windows system including the configuration with Firefox and troubleshooting steps.
System Requirements
Before install BurpSuite Windows ensure your system meets the following requirements:
- Operating System: Windows 7 or later (64-bit)
- RAM: Minimum 4 GB (8 GB recommended)
- Disk Space: At least 1 GB of free space
- Java: Burp Suite requires Java Runtime Environment (JRE) 11 or later. Refer to our guide on how to install Java on Windows system.
Downloading Burp Suite
Burp Suite is available in two editions Community (free) and Professional (paid). For this guide, we will focus on the Community Edition.
To download Burpsuite Windows open your web browser and go to the official PortSwigger website. Navigate to the Downloads Page, Click on the “Products” tab, and select “Burp Suite Community Edition”.
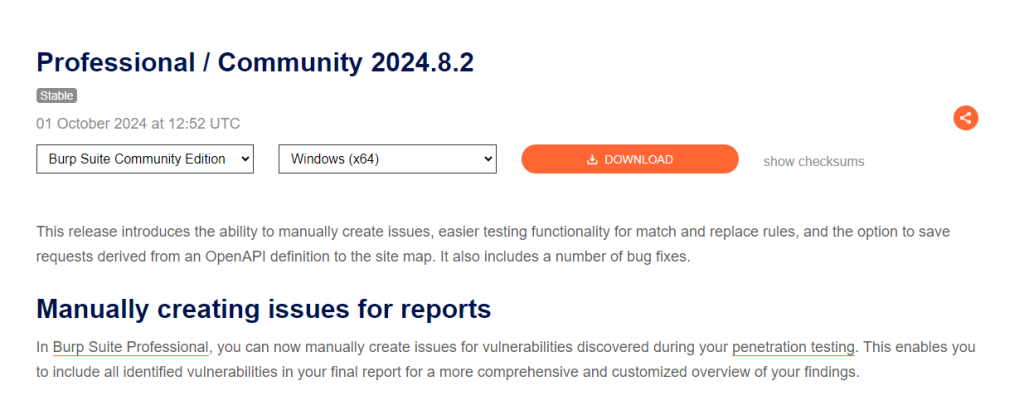
Choose the Windows (64-bit) version and click the download button. The installer file will be downloaded to your system.
Installing Burp Suite
Once the download is complete follow these steps to install Burp Suite:
1. Locate the downloaded installer file usually in your Downloads folder and double-click it to run.
2. The Burp Suite installation wizard will open. Click “Next” to proceed.
3. Read the license agreement and click “I Agree” to accept the terms.
4. Select the destination folder where you want to install Burp Suite. The default location is fine. Click “Next”.

5. Choose the Start Menu folder for the Burp Suite shortcuts. Click “Next”.
6. Click “Next” to begin the installation process. This may take a few minutes.
7. Once the installation is complete, click “Finish” to exit the wizard.
Launch Burp Suite
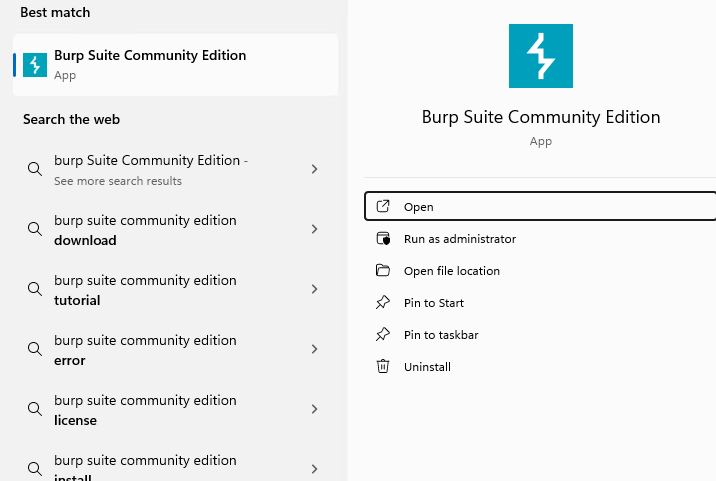
After installation, you can launch Burp Suite by navigating to the Start Menu and search for “Burp Suite”. Click on the Burp Suite icon to launch the application.
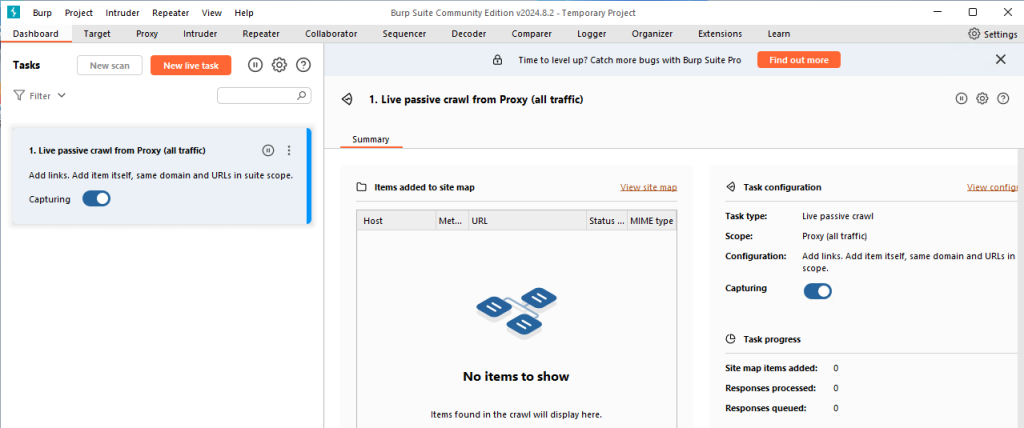
The first time you run Burp Suite, you’ll be prompted to create a new project. Choose “Temporary Project” and click “Next”. Select “Use Burp Defaults” and click “Start Burp”.
Configure Burp Suite
To use Burp Suite effectively you need to configure your browser to work with Burp’s proxy. Here’s how to do it with Mozilla Firefox:
Launch Mozilla Firefox and navigate to Settings search “Proxy” in the search bar. A Network Settings option appears click Settings.
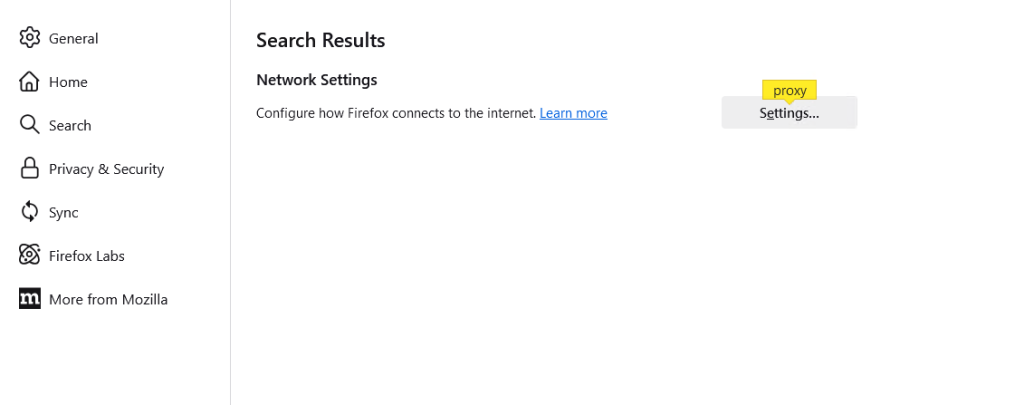
Select “Manual proxy configuration” and enter the following details:
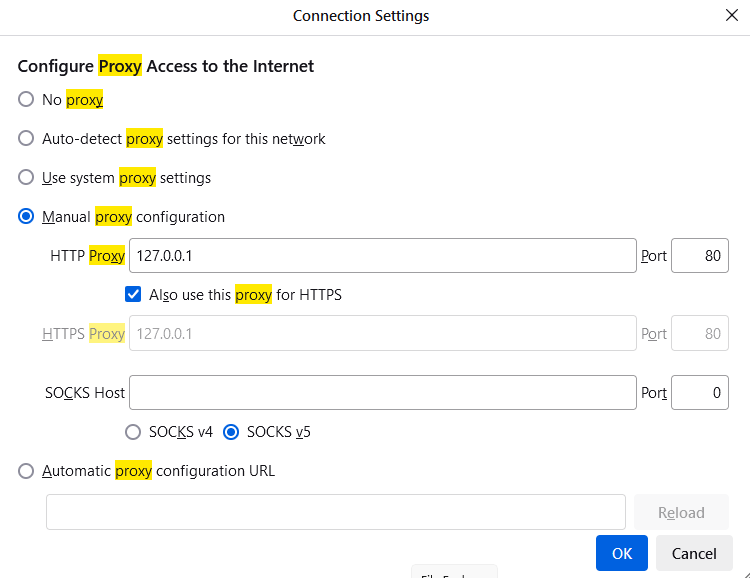
- HTTP Proxy: 127.0.0.1
- Port: 8080
Click “OK” to save the settings.
Install Burp Suite on Our Windows VPS!
With Ultahost, Hosting Windows VPS has never been easier or faster. Enjoy ultra-fast SSD NVME speeds with no dropouts and slowdowns.
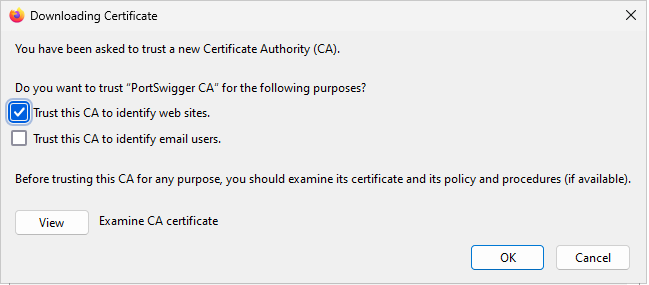
Installing Burp’s CA Certificate
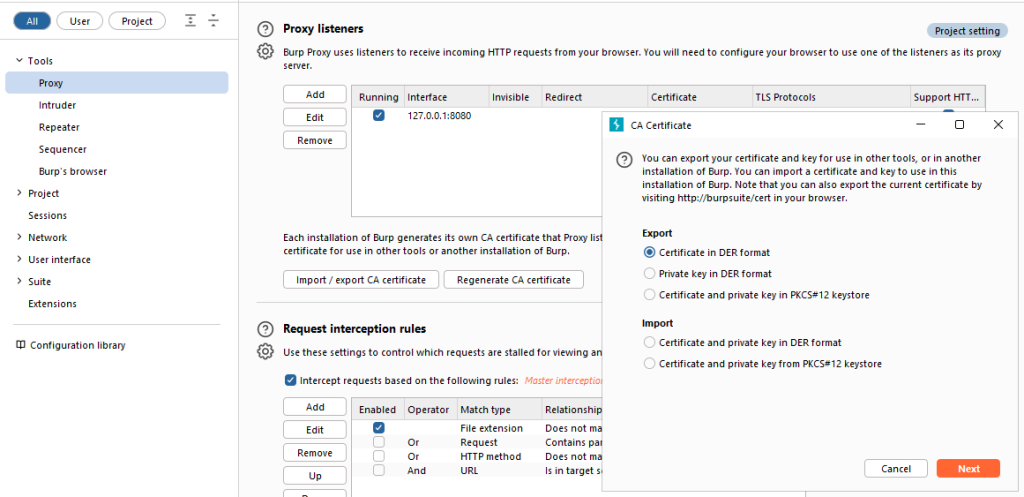
To intercept HTTPS traffic you need to install Burp’s CA certificate in your browser:
Go to the “Proxy” tab and then the “Proxy Setting” sub-tab. Click on “Import/export CA certificate” and select “Export” in DER format. Save the certificate file to your system.
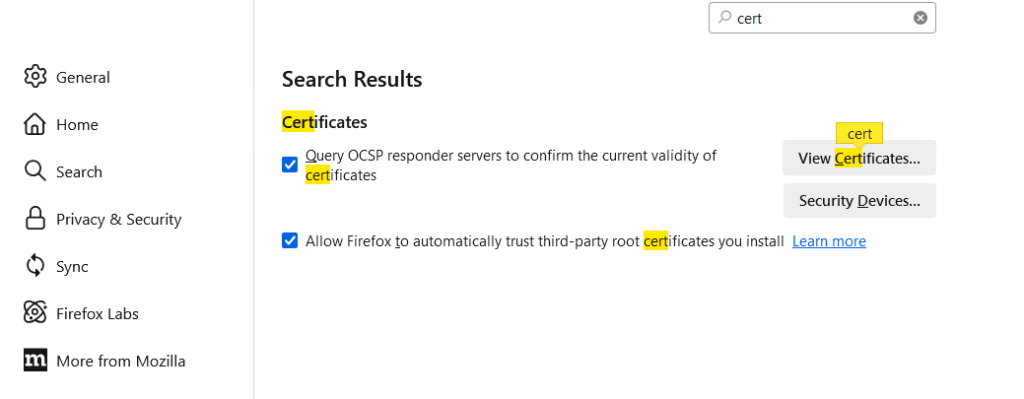
To install the certificate in the Firefox browser. Go to Settings then search Certificates in the search bar then click View Certificates.
Click “Import” and select the saved certificate file.
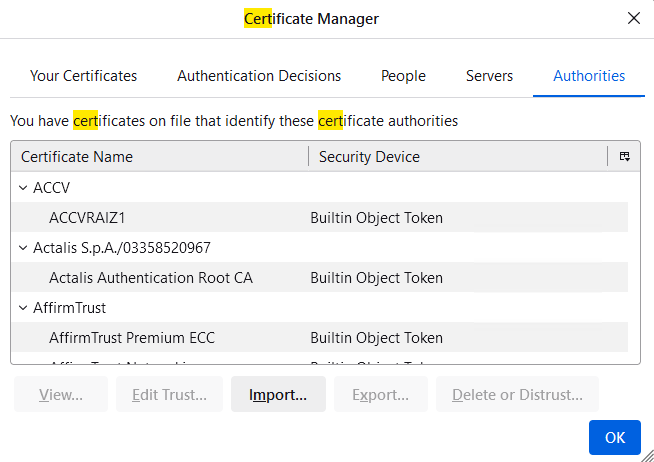
Check the box for “Trust this CA to identify websites” and click “OK”.
Using Burp Suite
Now that Burp Suite is installed and configured you can start using it for web application security testing. Here are some basic features:
- Proxy: Intercept and modify HTTP/HTTPS traffic between your browser and the target application.
- Scanner: Automatically scan for vulnerabilities in web applications.
- Intruder: Perform automated attacks to find and exploit vulnerabilities.
- Repeater: Manually modify and resend individual HTTP requests.
- Sequencer: Analyze the randomness of session tokens.
- Decoder: Encode and decode data in various formats.
- Comparer: Compare different pieces of data to find differences.
Troubleshooting
If you encounter any issues during installation or use here are some common troubleshooting steps after Windows install Burpsuite:
- Ensure you have the correct version of Java installed. You can download the latest JRE from the Oracle website.
- Double-check your browser’s proxy settings to ensure they are correctly configured.
- Some firewall or antivirus programs may block Burp Suite. Temporarily disable them to see if it resolves the issue.
Conclusion
Burp Suite is an essential tool for web application security testing. By following this guide, you should be able to install and configure Burp Suite on your Windows system successfully. With its powerful features, you can perform comprehensive security assessments and identify vulnerabilities in web applications.
If you are installing applications for testing purposes that require high resources consider Ultahost’s fully managed dedicated server plans. Our hosting offers the flexibility and control of a dedicated server which means you can easily fulfill your requirements and configure your server settings to optimize performance for your workloads.
FAQ
What is BurpSuite?
BurpSuite is a tool for web security testing and penetration testing.
Can I install BurpSuite on Windows?
Yes, BurpSuite can be installed on Windows using the official installer.
Where do I download BurpSuite for Windows?
You can download BurpSuite from the official PortSwigger website.
Is BurpSuite free?
BurpSuite has a free version (Community Edition) and a paid version (Professional Edition).
Do I need Java to run BurpSuite on Windows?
Yes, BurpSuite requires Java to run. You may need to install it if you don’t have it.
How long does it take to install BurpSuite on Windows?
The installation process takes only a few minutes once Java is installed.
Can beginners use BurpSuite?
Yes, beginners can use BurpSuite but it is mainly designed for security professionals.
To install Burp Suite in Windows, follow the steps below:
- ✅ Download Burp Suite
- Visit the official Burp Suite website and choose the Community Edition for a free version.
- Select the appropriate version for Windows (64-bit) and click on the download button to start the download process.
- ✅ Install Burp Suite
- Once the download is complete, run the installer.
- Follow the installation wizard, and when prompted, click “Next” and then “Start Burp” to skip the project file and configuration selection.
- If you are using Burp Suite Professional, enter your license key when prompted.
- ✅ Access Burp Suite
- After the installation is complete, an icon for Burp Suite will be created on the desktop.
- Run the software and agree to the terms and conditions.
Table: Burp Suite Installation Steps
| Step | Description |
|---|---|
| 1 | Download the Burp Suite Community Edition for Windows (64-bit) from the official website. |
| 2 | Run the installer and follow the installation wizard. |
| 3 | Skip the project file and configuration selection if prompted. |
| 4 | Enter the license key if using Burp Suite Professional. |
| 5 | Access Burp Suite using the desktop icon and agree to the terms and conditions. |
By following these steps, you can successfully install Burp Suite on your Windows system.
Tables of Contents
Basic Installation Steps
In this section, we’ll go through the basic installation steps of Burp Suite, a comprehensive tool for web application security testing. Whether you’re a beginner in cyber security or an aspiring ethical hacker, these instructions will guide you in setting up Burp Suite on your system.
Step 1: To get started with Burp Suite, first you need to download the software. Visit the official Burp Suite download page. Here, you’ll find two main editions: Burp Suite Professional and Burp Suite Community Edition. Choose the one that suits your needs.
- Burp Suite Professional: Ideal for professional penetration testers, offering advanced features for web security testing.
- Burp Suite Community Edition: A free version, suitable for beginners or those who wish to explore the basic functionalities of Burp Suite.
Step 2: Select the version compatible with your operating system. Burp Suite is available for Windows, Linux, and macOS. For instance, if you’re installing Burp Suite on Windows 10, choose the Windows version.
Step 3: Click the download link. An executable file (.exe for Windows, .dmg for macOS, or a .sh file for Linux) will be downloaded to your computer.
Running the installer and launching Burp Suite
Step 4: Once the download is complete, locate the executable file and double-click it to start the installation process. Follow the on-screen instructions. For Windows users, this might include selecting a destination folder and agreeing to the terms and conditions.
Step 5: After installation, click ‘Finish’ to complete the installation. You can now launch Burp Suite from your desktop or start menu.

Entering the license key for Burp Suite Professional, if applicable
Step 6: If you downloaded Burp Suite Professional, you will need to enter a valid license key. Upon first launch, Burp Suite will prompt you to enter the key. If you don’t have a license key, you can purchase one from the official website.
Step 7: Enter the license key in the provided field and click ‘Next’ to activate your copy of Burp Suite Professional.
Note: The Community Edition does not require a license key and can be used immediately after installation.
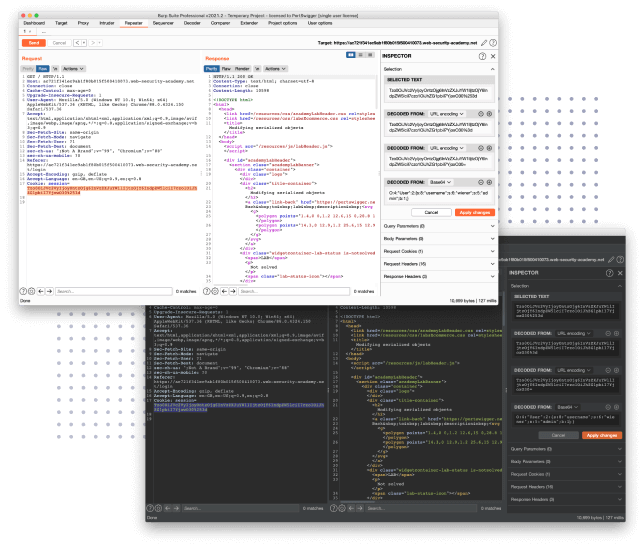
Congratulations! You have successfully downloaded and installed Burp Suite. Whether you chose the Professional or Community Edition, you’re now ready to begin your journey in web application penetration testing. Remember, the suite is an integrated platform designed to provide a comprehensive range of tools for security testing. As you use Burp Suite, you’ll discover its powerful features like Burp Proxy, which allows you to intercept, inspect, and modify HTTP requests and responses between your browser and the web servers you are testing. Enjoy exploring and happy testing!
Custom Installation Options for Burp Suite Enterprise Edition
Choosing the Components to Install for Burp Suite Enterprise Edition
When you’re ready to install Burp Suite Professional on your Windows machine, it’s essential to know that Burp Suite is an integrated platform for performing security testing of web applications. It’s not just a tool; it’s a suite of tools that work together to help you identify vulnerabilities and secure your applications.
Step-by-Step Guide for Component Selection:
- Initial Setup: As you start the setup for Burp Suite, you’ll be presented with various components to choose from. This step is crucial because it determines the functionality you’ll have once you have Burp Suite installed.
- Selecting Components:
- Proxy Settings: One of the critical components is the proxy settings. If you’re planning to intercept and inspect HTTP/HTTPS traffic, configuring the proxy is a must. You’ll need to decide if you want to use the default proxy settings or set up a custom one.
- Burp Suite CA Certificate: This is vital for decrypting HTTPS traffic. Without it, you’ll miss out on inspecting secure traffic.
- Unique Burp Features: Consider adding unique Burp features like the ‘Decoder’ or ‘Grep’ tools, depending on your testing needs.
- Vulnerability Identification Tools: Don’t forget to include tools that automate and assist in identifying vulnerabilities. These are the heart of Burp Suite.
- Optional Components:
- Temporary Project: If you’re just testing out the software, you might opt for a temporary project setup.
- Manual and Automated Tools: Depending on your testing process, you might want to include both manual and automated tools.
- Finalizing Selection: Once you’ve selected the components, click ‘Next’ to proceed. Remember, your choice here shapes your testing capabilities.
Selecting the Installation Location and Start Menu Folder for Burp Suite Enterprise Edition
Now that you’ve chosen your components, the next step is to decide where on your computer you’d like to install Burp Suite Professional. This part of the installation is straightforward but significant.
Guide to Selecting Installation Location:
- Choosing the Right Location:
- 64-bit Windows Machine: Ensure the location you choose is accessible and has sufficient space. For a 64-bit machine, it’s best to install it in a directory that supports 64-bit applications.
- User-Friendly Interface: Burp Suite’s user-friendly interface means you don’t need to worry about command-line operations, so choose a location that’s easy for you to remember.
- Start Menu Folder:
- Select the Start Menu Folder: You’ll be prompted to choose a folder in your Start Menu. This is where your Burp Suite shortcuts will be placed for easy access.
- Customizing the Folder: Feel free to rename or organize this folder in a way that makes sense for your workflow.
- Finalizing Installation Location:
- Option and Click ‘Next’: Once you’ve chosen the installation location and the Start Menu folder, select the appropriate option and click ‘Next’ to proceed.
Completing the Final Part of the Configuration in the App Itself for Burp Suite Enterprise Edition
With Burp Suite Professional for free on your Windows machine, the final step is configuring it within the application. This is where you fine-tune the settings to suit your specific needs.
Final Configuration Steps:
- Run Burp Suite: Once installed, run Burp Suite and start configuring the application’s settings.
- Proxy Tab Configuration:
- Manual Proxy Configuration: Navigate to the ‘Proxy’ tab to set up your proxy. This could be the default setting (like port 8080) or a custom port number.
- Using Firefox or FoxyProxy: If you’re using Firefox or an extension like FoxyProxy, ensure the settings align with the Burp Suite configuration.
- Certificate Authority Setup:
- Install the Burp Suite CA Certificate: This step is crucial for intercepting HTTPS traffic. Follow the prompts to install the certificate authority correctly.
- Advanced Configuration:
- Using an External Application: If you’re integrating with external tools or applications, configure these settings now.
- Remote Code Execution (RCE) Settings: For advanced users, settings related to RCE can be configured for in-depth testing.
- Completing the Setup:
- Go to Settings and Finalize: After configuring everything, go to the application’s settings, review your choices, and make any final adjustments.
- Start Burp and Begin Testing: You’re now ready to start Burp and begin your web application testing, whether it’s for a bug bounty or routine security checks.
By following these detailed instructions, you’ll have a fully customized and ready-to-use Burp Suite Professional installed on your Windows machine, tailored specifically for your web application security testing needs. Remember, each step in this guide is designed to optimize your experience with Burp Suite and enhance your ability to scan vulnerabilities effectively.

Trial Deployment and Configuration
Embarking on a journey with Burp Suite Enterprise Edition involves a few critical steps. This part of our burp suite tutorial will guide you through the initial deployment and configuration process. Whether you’re an aspiring cybersecurity enthusiast or an IT professional, this guide aims to make your experience smooth and straightforward.
Downloading the License Key from the PortSwigger Site
- Initiating the Download: The first step in setting up Burp Suite is to acquire the license key. This is a crucial step to unlock the professional edition of Burp Suite, especially if you’re looking to get professional for free on Windows. Head over to the PortSwigger website, where you’ll find the option to download the license key. Ensure you have an account or create one if necessary.
- Retrieving Your Key: After logging in, navigate to the section where license keys are available. Select the Burp Suite Enterprise Edition and initiate the download for your license key. Remember, this key is your gateway to a plethora of features that Burp Suite offers, including advanced tools like decoder and grep capabilities to identify websites and analyze data.
Setting Up a Proxy Server (Optional)
- ✅ Decision to Use a Proxy: This step is optional but can be beneficial for more advanced use cases. A proxy server acts as an intermediary between your computer and the internet. It’s particularly useful if you want to monitor and manipulate the web traffic for testing purposes.
- ✅ Configuration Process: If you decide to set up a proxy server, the process involves adjusting your network settings to route traffic through the proxy. You might need to open a command prompt window to configure network settings or use specific software that enables proxy functionalities.
Uploading the License Key to Burp Suite Enterprise Edition and Accessing the Configuration Page
- Launching Burp Suite: With the license key downloaded, it’s time to setup Burp Suite on your system. Open the Burp Suite application, and you’ll be prompted to upload your license key.
- License Key Upload: Navigate to the section where you can upload your key. Here, you will typically see a ‘click next’ button after selecting your key file. This action will validate your license and unlock the professional features of Burp Suite.
- Accessing Configuration Page:
- Step 8: Once the license key is validated, Burp Suite will direct you to its configuration page.
- Step 9: Here, you’ll find various options to configure Burp Suite according to your requirements.
- Step 10: Explore the settings and adjust them as needed. This might include setting up target scopes, defining rules for scanning, and customizing the tool to suit your specific needs.
- Step 11: Finally, confirm your settings and commence with using Burp Suite Enterprise Edition to its full potential.
By following these steps, you should have a successful installation and initial configuration of Burp Suite Enterprise Edition. Remember, practice makes perfect. So, dive into the tool, experiment with its features, and enhance your cybersecurity skills!
Standard Deployment and Configuration
Deploying and configuring a software application can be an exciting journey, especially when you’re keen to see how it enhances your work or personal projects. Think of it like setting up a new gadget – there’s a process to follow, but the result is rewarding. Let’s walk through this process together, step by step.
Reviewing the Prerequisites for Installation
Before jumping into the actual installation of our application, it’s essential to ensure that we have everything needed for a smooth setup. It’s like making sure you have all the ingredients before you start cooking a new recipe.
- System Requirements: First, check if your computer meets the system requirements of the application. This includes the operating system, processor speed, RAM, and available disk space. If your system doesn’t meet these requirements, the application might not run efficiently, or worse, it might not run at all.
- Compatibility Check: Ensure that the application is compatible with any other software you might have installed. Sometimes, applications can clash with each other, leading to performance issues.
- User Permissions: You’ll need the right level of user permissions to install the software. If you’re not the admin of the computer, you might need to get their permission or assistance.
- Backup Existing Data: Always a good idea! Before installing new software, back up your existing data. This way, if something goes awry during the installation, your precious data remains safe.
- Internet Connectivity: A stable internet connection is often required for downloading the software and any updates it might need during installation.
- Documentation: Have the installation guide or user manual handy. It’s your roadmap through the entire process.

Configuring the Environment Network and Firewall Settings
Now, let’s set the stage for our application by configuring the network and firewall settings. This step is crucial for the application to communicate effectively with other systems and the internet, if needed.
- Network Configuration: Adjust your network settings to align with the application’s requirements. This might involve configuring ports, setting up IP addresses, or adjusting VPN settings.
- Firewall Adjustments: Firewalls are like gatekeepers, ensuring your system’s safety. You might need to tweak these settings to allow the application to send and receive data through the network. This is a delicate balance between security and functionality.
- Proxy Settings: If your network uses a proxy, configure these settings to ensure the application can access the internet without a hitch.
- Testing Connectivity: Once you’ve made these changes, test the connectivity. Make sure that the application can reach its required destinations, be it a server, a cloud service, or just the internet.
Installing the Application, Configuring It, and Activating the License
The moment we’ve been preparing for! Let’s get the application up and running.
- Installation Wizard: Run the installation wizard. This is typically a straightforward process where you might have to ‘click next’ a few times and choose installation directories.
- Custom Configuration: During installation, you might be prompted to configure certain settings. This can include things like selecting features to install, setting up user accounts, or specifying data storage locations.
- License Activation: After installation, you’ll likely need to activate the software using a license key. This is the step where the application becomes officially yours to use.
- Initial Setup: Some applications require an initial setup process. This might involve creating user profiles, setting preferences, or configuring additional features.
- Update and Patch: Check for any updates or patches that might be available. Installing these ensures that you have the latest features and security enhancements.
- Final Testing: Finally, test the application to make sure everything is working as expected. If something isn’t quite right, revisit the settings or consult the documentation.
And there you have it! You’ve successfully deployed and configured your application. Now, it’s time to explore its features and enjoy the benefits it brings to your work or personal projects. Remember, every application is different, so always refer to its specific documentation for the best guidance. Happy exploring!
Unattended Installation
Performing an Unattended/Silent Installation via the Command Line
Unattended installations are a convenient method to set up software on a computer without manual input during the process. This method is particularly useful for deploying software on multiple machines or for users who prefer automation over interactive setups. Let’s delve into how to perform an unattended or silent installation via the command line.
Step-by-Step Guide
- Preparation: Before starting, ensure you have the installation file (usually an .exe or .msi file) and administrative privileges on your computer.
- Command Line Access: Open the command line interface. On Windows, this can be done by searching for ‘cmd’ and running it as an administrator.
- Navigate to File Location: Use the
cdcommand to navigate to the directory where your installation file is located. For example,cd C:\Downloads. - Execute Installation Command: Enter the command for installation. This usually includes the file name followed by specific parameters or switches that instruct the system to run an unattended installation. For instance,
setup.exe /silentorinstaller.msi /quiet. These parameters tell the installer to run without displaying any user interface (UI). - Monitor Process (Optional): While the installation runs silently, you can check its progress through the task manager or by observing changes in the installation directory or system processes.
- Completion: Once the installation process is complete, the command line will return to its usual prompt, indicating that the process has finished.
Tips and Tricks
- ✅ Test Before Deployment: It’s always a good idea to test the silent installation command on a single machine before rolling it out to multiple computers.
- ✅ Customization: Depending on the software, additional parameters can be added to the command line to customize the installation, like specifying installation directories or feature sets.
This approach saves time and reduces the chance of errors compared to manual installation methods. It’s a favorite for IT professionals and system administrators for its efficiency and scalability.