
Newb’s Guide to installing Arch Next to Pre-installed Windows 10
The steps I took to dual boot Arch Linux alongside the preinstalled Windows 10 that came with my new Lenovo Ideapad. I used Ubuntu exclusively for the last 6 years so I’m Window’s illiterate. I don’t know a whole lot about the inner workings of Linux either.
Pre-Instllation Steps
Prepare the preinstalled Windows to share the system.
Verify the boot mode…
- Boot into Windows
- Press Win key and ‘R’ to start the Run dialog
- In the Run dialog type «msinfo32» and press Enter
- In the System Information windows, select System Summary on the left and check the value of BIOS mode item on the right.
- Make sure the value is UEFI, which means Windows boots in UEFI/GPT mode
Disable secure boot
- Open Settings (The gear icon in the start menu)
- Click «Updates & Security»
- In the «Recovery» menu, click «Restart now» under the «Advanced startup» header
- After restart, choose the «Troubleshoot» option.
- Choose «Advanced Options»
- Choose «UEFI Firmware Settings»
- Press the restart button to load the UEFI firmware
- In the Security settings find and disable Secure Boot
- In the Boot settings also find and disable Fast Boot
Disable Fast Startup
- Open Control Panel (Press Windows key, Type «Control Panel» and press enter)
- In the «View by» menu, choose «Small Icons» and click on «Power Options».
- Open «Choose what power buttons do» on the left side menu.
- Click «Change settings that are currently unavailable»
- Uncheck «Turn on Fast Startup» and save changes.
Shrink the Windows partition
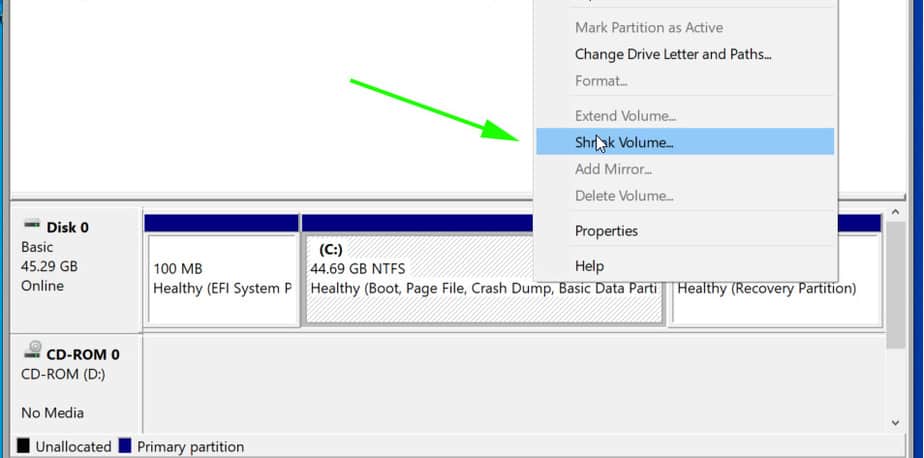
- Press Windows Key + R and type diskmgmt.msc — hit enter
- Right click the C drive and choose «Shrink Volume»
- Enter the amount of space to shrink the partition (I shrunk mine by 200000mb — 200 gigs)
- Click «Shrink»
Make a bootable USB
- Choose a mirror from www.archlinux.org/download — I used the American pair.com mirror because it’s the first reputable domain I recognised.
- Download the .iso file.
- Download Rufus from https://rufus.akeo.ie/
- Plug in a new USB stick and open Rufus
- Select the USB drive and the downloaded Linux iso.
- Choose the GPT partition scheme, FAT32 file system
- Press start
Install Arch
We’re ready to boot and install Arch.
Boot the USB
- Plug in the USB
- Hold down the shift key while clicking Restart
- Choose «Troubleshoot» then «Advanced Options» then «UEFI Firmware Settings» then restart.
- In the Boot menu, find your bootable USB and move it up above the Windows boot manager so it will boot the USB first.
- Save and exit
Load keyboard layout & locale
- Type
loadkeys usat the command line and press enter - Type
locale-genat the command line and press enter
Hookup them internets
- At the command line type
rfkill unblock wifiand press enter - Type
iw devand press enter. It will tell you the name of the Wifi interface. - Type
wifi-menu <wifi_interface_name>(using your actual interface name) and press enter. - A UI will show allowing you to choose a network and log into it.
- After logging in,
ping google.comto verify the internets work. After a few packets are sent, CTRL+C to stop pinging — if it says no packets were lost then we’re good.
Partitioning
- First type
free -m, hit enter. Take note of the amount of total memory available. - Type
gdisk /dev/sdaand hit enter to start the GPT partitioning program - Create SWAP partition
- At the prompt, type
n, press enter to create a new partition - It will prompt for a partition number. Just hit enter to use the default.
- It asks where to start the first sector. Press enter to accept the default which is automatically the start of unallocated space.
- It asks for the last sector. Type
+12GB(I have 12 gigs of memory — if you have more or less you should adjust accordingly) and press enter. - If it says anything other than «Linux Filesystem» type
8200at the next prompt. Hit enter.
- At the prompt, type
- Create Root partition
- At the prompt, type
n, press enter to create a new partition - It will prompt for a partition number. Just hit enter to use the default.
- It asks where to start the first sector. Press enter to accept the default which is automatically the start of unallocated space.
- It asks for the last sector. Press Enter to accept the default and use all of remaining unallocated space.
- If it says anything other than «Linux Filesystem» type
8300at the next prompt. Hit enter.
- At the prompt, type
- At the prompt, type
W, press enter to write changes to the drive. When prompted, typeYand press enter to confirm.
Create SWAP space
- Type
gdisk -l /dev/sda, press enter and take note of the partition number of the Swap part. - Type
mkswap -L "Linux Swap" /dev/sda7(My swap partition was number 7 — if yours is 5 use /dev/sda5 instead). Hit enter. - Type
swapon /dev/sda7(again, using the apprpriate swap partition number). Hit enter. - Verify status of swap space by typing
free -mand press enter. If the last line starts with «Swap:» we’re good.
Format and mount the root partition
- Type
gdisk -l /dev/sda, press enter and take note of the partition number of the Root part. - Type
mkfs.ext4 -L /dev/sda8(My root partition was number 7 — if yours is 6 use /dev/sda6 instead). Hit enter. - Type
mount /dev/sda8 /mnt(again, using the apprpriate swap partition number). Hit enter.
Start the installation
- Type
pacstrap /mnt base, hit enter.
Mount the EFI partition
- Type
gdisk -l /dev/sda, press enter and take note of the partition number of the EFI part. - Type
mount /dev/sda1 /mnt/boot/efi(My efi partition was number 1 — if yours is 2 use /dev/sda2 instead). Hit enter.
Configure the system
- Type
genfstab -U /mnt >> /mnt/etc/fstab. Hit enter. - Type
cat /mnt/etc/fstab, press enter, to verify the file was created correctly. - Change root into the new installation: type
arch-chroot /mntand press enter.
Set the timezone
- Type
cd /usr/share/zoneinfo && lspress enter. Take note of the appropriate region and use it as follows… - Type
cd <region> && ls(replacing<region>with the most appropriate region.) press enter. Take note of the most appropraite city. - Type
ln -sf /usr/share/zoneinfo/<region>/<city> /etc/localtime(replacing<region>and<city>with the most appropriate region and city.) - Type
hwclock --systohc. Hit enter.
Set the host
- Create the file
/etc/hostnameand write your hostnme in it with nano or vim - Create the file
etc/hostsand populate it like this (replacingmyhostnamewith whatever you put in your hostname file.)
127.0.0.1	localhost
::1		localhost
127.0.1.1	myhostname.localdomain	myhostname
Create the root user’s password
- Type
passwdand press enter - Enter a new root password and press enter. verify it and press enter.
Create new initramfs image
- Type
mkinitcpio -p linux. Hit enter.
Install Grub bootloader
- Type
pacman -Syu grub efibootmgrand hit enter. - Type
pacman -Syu efibootmgrand hit enter. - Type
grub-mkconfig -o /boot/grub/grub.cfg. Hit enter. - Type
grub-install /dev/sda. Hit enter. - Verify the install… Type
ls -l /boot/efi/EFI/arch/. Hit Enter. If you see a file called grubx64.efi then all is well.
Create new user
- Type
useradd -s /bin/bash -m username(replace «username» with the new user’s name). Hit enter. - Type
passwd username(replace «username» with the new user’s name). Hit enter. - Enter and verify the password.
Install a desktop environment and some important packages
- Type
pacman -Syu gnome-desktop. Hit enter. - Type
pacman -Syu gdm. Hit enter. - Type
systemctl enable gdm. Hit enter. - Type
pacman -Syu xterm. Hit enter. - Type
pacman -Syu iw. Hit enter. - Type
pacman -Syu dialog. Hit enter. - Type
pacman -Syu vim. Hit enter. - Type
pacman -Syu wpa_supplicant. Hit enter. - Type
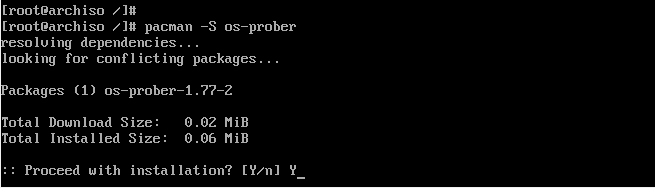
pacman -Syu os-prober. Hit enter. - Type
grub-mkconfig -o /boot/grub/grub.cfg. Hit enter.
Unmount and reboot
- Remove USB
- Type
exit. Hit enter. - Type
umount -R /mnt. Hit enter. - Type
reboot. Hit enter. - After a moment it will load back into Arch, this time with a desktop GUI.

Как установить Arch Linux: пошаговое руководство для начинающих
Arch Linux проста в установке. В этом руководстве показано, как установить Arch Linux шаг за шагом, что проложит путь к успешной настройке.
Многие пользователи Linux хотят попробовать Arch Linux, но общее представление о том, что Arch сложен в установке и освоении, останавливает их. Когда люди говорят, что это “трудно”, они имеют в виду, что это требует усилий. И они правы – вам нужно приложить немного больше усилий для установки вашей системы, настройки всего и чтения о том, как делать то, что вы хотите.
Однако в награду за ваши усилия вы получите систему, которую хорошо понимаете и настраиваете именно так, как вам хочется. После установки Arch Linux запускается так же просто, как и любой другой дистрибутив, если не проще.
Вы можете установить Arch Linux непосредственно на свой компьютер, следуя этому руководству, но вы также можете установить его на виртуальную машину с помощью VirtualBox или другого программного обеспечения для виртуализации.
Содержание
-
1. Загрузка установочного образа Arch Linux
-
2. Подготовка загрузочного USB-накопителя
-
3. Загрузка Arch Linux с USB-накопителя
-
4. Проверка подключения к Интернету
- 4.1 Подключение по SSH(Необязательно)
-
5. Разделение диска на разделы
- 5.1 Создание системного раздела EFI
- 5.2 Создание раздела подкачки
- 5.3 Создание корневого раздела
- 5.4 Создание раздела Home(Необязательно)
- 5.5 Запись изменений на диск
-
6. Создание файловой системы
-
7. Установка Arch Linux
- 7.1 Настройка конфигурации Pacman
- 7.2 Установка системы
-
8. Настройка установленной системы Arch
-
9. Установка загрузчика GRUB на Arch Linux
-
10. Установка среды рабочего стола в Arch Linux
-
11. Создание учетной записи обычного пользователя
-
12. Установка Arch Linux завершена
Примечания по предварительной установке для пользователей VirtualBox и KVM
ВАЖНО! Перед началом установки пользователи VirtualBox и KVM должны включить EFI в настройках виртуальной машины. В противном случае при попытке установить загрузчик GRUB возникнет ошибка.

Установка Arch Linux VirtualBox:
Однако, если вы решили установить Arch на KVM с помощью диспетчера виртуальных машин, чтобы включить поддержку UEFI, выполните следующие действия.
Для удобной установки Arch Linux через SSH так же необходимо в настройках сети изменить тип подключения на “Сетевой мост”

На последнем шаге не спешите нажимать кнопку “Готово” при создании виртуальной машины. Убедитесь, что вы установили флажок “Настроить конфигурацию перед установкой”, затем нажмите “Готово”.
Откроется новое окно. В нем выберите “UEFI” из выпадающего меню “Прошивка”, затем подтвердите нажатием “Применить” и, наконец, нажмите “Начать установку”.

В этом руководстве по установке Arch Linux показан весь процесс в виде простых шагов. Итак, без лишних слов, давайте начнем.
1. Загрузка установочного образа Arch Linux
Первое, что нам нужно сделать, это получить образ Arch Linux. Для этого посетите страницу загрузки Arch Linux, чтобы загрузить файл ISO-образа. Затем загрузите последний образ компакт-диска. Доступны как прямые ссылки на скачивание, так и торрент-ссылки.

К содержанию
2. Подготовка загрузочного USB-накопителя
Как только загрузка вашего ISO-файла Arch Linux завершится, вы должны создать из него live USB. Существует много способов подготовить USB-накопитель в режиме реального времени; один из них — с помощью команды dd.
В качестве альтернативы вы можете использовать такие приложения, как Ether или Ventoy, которые являются хорошими вариантами для создания загрузочного USB-накопителя.
К содержанию
3. Загрузка Arch Linux с USB-накопителя
Как только вы создадите live USB для Arch Linux, выключите компьютер, подключите к нему USB-порт и загрузите систему.
Пожалуйста, помните, что иногда вы не можете загрузиться с подключенного USB-накопителя с включенной безопасной загрузкой. Если у вас именно так, зайдите в BIOS и сначала отключите безопасную загрузку.
Arch предоставляет вам два варианта установки – устаревший и режим UEFI. Режим UEFI (Unified Extensible Firmware Interface) является более современным, и большинство современных аппаратных средств поддерживает только установку UEFI. Таким образом, в этом руководстве по установке Arch Linux будет использоваться режим UEFI.
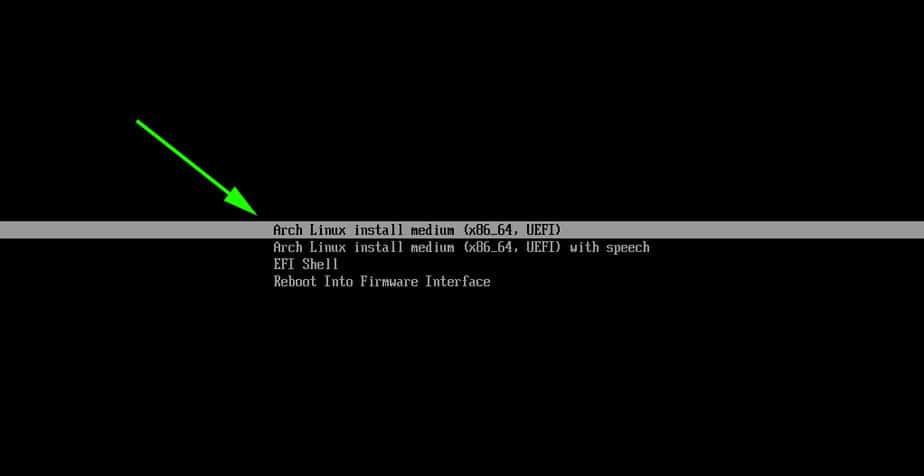
После правильной загрузки в ISO-файл Arch вы должны увидеть что-то похожее на изображение ниже.

Выберите опцию “Arch Linux install medium (x86_64, UEFI)” и нажмите “Ввод”.
После того, как установщик распакует и загрузит ядро Linux, вы будете автоматически перенаправлены на терминал с правами суперпользователя.

К содержанию
4. Проверка подключения к Интернету
Прежде всего, проверьте подключение к Интернету. Чтобы проверить это, пропингуйте веб-сайт, как показано в примере ниже.
Output

PING archlinux.org (95.217.163.246) 56(84) bytes of data.
64 bytes from archlinux.org (95.217.163.246): icmp_seq=1 ttl=52 time=57.4 ms
64 bytes from archlinux.org (95.217.163.246): icmp_seq=2 ttl=52 time=57.4 ms
64 bytes from archlinux.org (95.217.163.246): icmp_seq=3 ttl=52 time=58.4 ms

--- archlinux.org ping statistics ---
3 packets transmitted, 3 received, 0% packet loss, time 2003ms
rtt min/avg/max/mdev = 57.394/57.739/58.376/0.450 ms
Если вы используете проводное соединение, оно обычно подключается автоматически. Однако, если вы получите сообщение об ошибке, пожалуйста, проверьте свое подключение к Интернету или маршрутизатор.
К содержанию
4.1 Подключение по SSH(Необязательно)
После завершения проверки подключения мы можем задать пароль для Root пользователя для дальнейшего подключения через SSH. Для этого введите команду ниже и введите пароль.
Далее нам необходимо узнать адрес компьютера в сети для подключения по SSH с помощью команды:

Теперь мы готовы подключиться к установке Arch через SSH. Для этого воспользуйтесь командой и введите пароль от Root:
ssh root@ip_addr(ваш адрес)
К содержанию
5. Разделение диска на разделы
Следующим шагом в нашем руководстве по установке Arch Linux является разбиение жесткого диска на разделы. Вот где вы, вероятно, столкнетесь с наибольшими трудностями, если не знакомы с инструментами разбиения на разделы, такими как fdisk или cfdisk. Но не волнуйтесь, это легко, как вы увидите.
Во-первых, перечислите свои диски:
Output

Disk /dev/sda: 20GiB, 21474836480 bytes, 41943040 sectors
Disk model: QEMU HARDDISK
Units: sectors of 1 * 512 = 512 bytes
Sector size (logical/physical): 512 bytes / 512 bytes
I/O size (minimum/optimal): 512 bytes / 512 bytes

Disk /dev/loop0: 662.69 MiB, 694882304 bytes, 1357192 sectors
Units: sectors of 1 * 512 = 512 bytes
Sector size (logical/physical): 512 bytes / 512 bytes
I/O size (minimum/optimal): 512 bytes / 512 bytes
Для этого руководства была создана виртуальная машина с пустым жестким диском объемом 20 ГБ, обозначенным “/dev/sda”. Измените “/dev/sda” на название вашего устройства.
Для базового раздела нам нужно создать следующий макет раздела:
/dev/sda1: Системный раздел EFI размером 512 МБ, отформатированный в формате FAT32. Это обеспечивает пространство для хранения загрузчиков и других файлов, необходимых для загрузки.
/dev/sda2: Раздел подкачки размером 4 ГБ. Пространство подкачки используется для расширения виртуальной памяти за пределы установленной физической памяти (ОЗУ) или для поддержки записи на диск.
/dev/sda3: раздел Linux с оставшимся свободным местом на диске в формате EXT4. Это корневой раздел (/), на котором будет храниться наша операционная система Arch Linux, файлы и другая информация.
(Необязательно)/dev/sda4: раздел Home, на котором будут храниться файлы и другая личная информация.
К содержанию
5.1 Создание системного раздела EFI
Теперь давайте приступим к созданию таблицы разделов разметки диска, выполнив команду cfdisk на жестком диске компьютера

Выберите тип метки “GPT” и нажмите “Enter”.
Затем выберите Free Space и нажмите New в нижнем меню. Вы можете перемещаться по пунктам меню с помощью клавиш “Tab” или стрелок.

Введите размер раздела в МБ (“512M“) и нажмите клавишу “Enter”.

По-прежнему выбирая раздел “/dev/sda1”, выберите “Type” в нижнем меню и выберите тип раздела “EFI System”.


Вы закончили настройку системного раздела EFI.

К содержанию
5.2 Создание раздела подкачки
Теперь давайте создадим раздел подкачки, используя ту же процедуру. Снова выберите “Free space” и нажмите “New”.

Введите размер раздела в ГБ (“4G“) и нажмите клавишу “Enter”.

По-прежнему выбирая раздел “/dev/sda2”, выберите “Type” в нижнем меню и выберите тип раздела “Linux swap”.


Вы закончили настройку раздела подкачки.

К содержанию
5.3 Создание корневого раздела
Наконец, вы должны создать корневой раздел (/). Еще раз выберите оставшееся “Free space” и нажмите “New”.

Что касается размера, оставьте значение размера по умолчанию. Это означает все оставшееся свободное пространство. Далее нажмите клавишу “Enter”.

По-прежнему выбирая раздел “/dev/sda3”, выберите “Type” в нижнем меню и выберите тип раздела “Linux filesystem”.


Вы закончили настройку корневого раздела.

К содержанию
5.4 Создание раздела Home(Необязательно)
Еще раз выберите оставшееся “Free space” и нажмите “New”.
Что касается размера, оставьте значение размера по умолчанию. Это означает все оставшееся свободное пространство. Далее нажмите клавишу “Enter”.
По-прежнему выбирая раздел “/dev/sda4”, выберите “Type” в нижнем меню и выберите тип раздела “Linux filesystem”.
Вы закончили настройку домашнего раздела.
К содержанию
5.5 Запись изменений на диск
Далее вам нужно сохранить внесенные изменения. Выберите “Write” в нижнем меню и нажмите “Enter”.

Введите “yes” и нажмите клавишу “Enter”.

Мы здесь закончили. Выберите “Quit” и нажмите “Enter”, чтобы сделать это.

К содержанию
6. Создание файловой системы
Теперь, когда разделы вашего диска готовы, пришло время создать файловую систему. Но давайте сначала просмотрим сводку таблицы разделов, выполнив следующее:
Output

Disk /dev/sda: 20GiB, 21474836480 bytes, 41943040 sectors
Disk model: QEMU HARDDISK
Units: sectors of 1 * 512 = 512 bytes
Sector size (logical/physical): 512 bytes / 512 bytes
I/O size (minimum/optimal): 512 bytes / 512 bytes
Disklabel type: gpt
Disk identifier: 8F633EFF-376D-3C46-8540-4C1BB8EBD4B1

Device       Start      End  Sectors  Size  Type
/dev/sda1     2048  1050623  1048576  512M  EFI System
/dev/sda2  1050624  9439231  8388608    4G  Linux swap
/dev/sda3  9439232 41943006 32503775 15.5G  Linux filesystem

Disk /dev/loop0: 662.69 MiB, 694882304 bytes, 1357192 sectors
Units: sectors of 1 * 512 = 512 bytes
Sector size (logical/physical): 512 bytes / 512 bytes
I/O size (minimum/optimal): 512 bytes / 512 bytes
Так же есть упрощенный вывод разделов.
Диск “/dev/sda” должен иметь три(четыре с Home) раздела (“/dev/sda1”, “dev/sda2” и “/dev/sda3“), аналогичные показанным выше.
При создании разделов на предыдущих этапах были определены границы пространства для хранения, предоставляемого жестким диском, и указан тип пространства между каждой линией границы.
Пришло время отформатировать разделы в соответствии с требуемыми файловыми системами. Здесь мы должны создать три файловые системы, так что давайте начнем.
Для типа раздела EFI создайте файловую систему FAT32.
Подготовьте раздел подкачки:
mkswap /dev/sda2
swapon /dev/sda2
Для корневого раздела создайте файловую систему EXT4(Таким же образом и для Home, главное сменить номер раздела):
К содержанию
7. Установка Arch Linux
7.1 Настройка конфигурации Pacman
Перед установкой необязательным, но крайне полезным шагом является редактирование конфигурации Pacman. Для изменения конфигурации выполните следующую команду:
Далее нажмите Ctrl-W для поиска и введите Misc options. Замените блок кода на этот:
#UseSyslog
Color
ILoveCandy
#NoProgressBar
CheckSpace
#VerbosePkgLists
ParallelDownloads = 10
Теперь синхронизируйте репозиторий Pacman, чтобы вы могли загружать и устанавливать любое программное обеспечение:
К содержанию
7.2 Установка системы
Мы должны смонтировать корневой раздел (“/dev/sda3“) в каталог “/mnt”, прежде чем мы сможем выполнить какую-либо установку.
Для домашнего раздела (“/dev/sda4“) в каталог “/mnt/home”, но прежде необходимо создать эту директорию.
mkdir /mnt/home/ && mount /dev/sda4 /mnt/home
После установки root пришло время установить все необходимые пакеты. Используйте команду pacstrap для установки необходимых пакетов Arch Linux.
pacstrap -K /mnt base linux linux-firmware sudo nano
Загрузка и установка этих пакетов займет некоторое время. Но теперь мы можем приступить к настройке нашей системы.
К содержанию
8. Настройка установленной системы Arch
После завершения установки сгенерируйте файл “/etc/fstab” для вашей новой системы Arch Linux, выполнив следующую команду:
genfstab -U /mnt >> /mnt/etc/fstab
Теперь, когда мы установили Arch Linux, нам нужно переключиться на физически установленный корневой раздел, используя команду arch-chroot.
После перехода в нашу установленную систему проверните настройку конфигурации Pacman из предыдущего пункта.
Далее давайте настроим часовой пояс. Чтобы найти свой часовой пояс, вы можете перечислить (ls -l) содержимое каталога “/usr/share/zoneinfo/”.
Найдите предпочитаемый вами часовой пояс (“/usr/share/zoneinfo/Zone/SubZone“), где “Zone/SubZone” — это ваш выбор, например “Америка/Нью-Йорк”, “Европа/Париж”, “Азия/Бангкок” и так далее. Ты уловил идею.
Создайте символическую ссылку для установки часового пояса (замените “America/New_York” на ваш часовой пояс).
ln -sf /usr/share/zoneinfo/America/New_York /etc/localtime
Теперь нам нужно настроить локаль. Файл “/etc/locale.gen” содержит настройки локали и системных языков и по умолчанию закомментирован. Мы должны открыть этот файл с помощью текстового редактора и раскомментировать строку, содержащую желаемый языковой стандарт.
Раскомментируйте “en_US.UTF-8 UTF-8” и “ru_RU.UTF-8 UTF-8” (удалив знак “#”) и любые другие необходимые локали в “/etc/locale.gen”. Затем нажмите “Ctrl+O”, затем “Enter”, чтобы сохранить, и, наконец, “Ctrl+X”, чтобы выйти из редактора.

Теперь сгенерируйте файл конфигурации локали, используя приведенные ниже команды одну за другой:
Запустите приведенную ниже команду для синхронизации аппаратных часов, автоматически создав файл “/etc/adjtime”, содержащий описательную информацию о настройке часов аппаратного режима и коэффициенте смещения часов.
Создайте и установите переменную “LANG”.
echo LANG=ru_RU.UTF-8 > /etc/locale.conf && export LANG=ru_RU.UTF-8
Теперь мы продвинемся вперед и зададим имя хоста. Имя хоста — это имя компьютера. Итак, давайте назовем его, например, “arch-pc”. Используйте следующую команду:
echo arch-pc > /etc/hostname
Добавьте это имя также в файл “/etc/hosts”. Отредактируйте файл с помощью Nano editor и добавьте следующие строки (замените “arch-pc” на имя хоста, которое вы выбрали ранее).
127.0.0.1      localhost
::1            localhost
127.0.1.1      arch-pc
Не забудьте установить пароль для учетной записи root с помощью команды passwd:
Введите свой пароль дважды. Будьте внимательны, так как вы ничего не увидите во время набора текста.
К содержанию
9. Установка загрузчика GRUB на Arch Linux
Теперь мы устанавливаем загрузчик для Arch, чтобы он загрузился после перезагрузки. Загрузчик по умолчанию для дистрибутивов Linux и Arch Linux также представлен пакетом GRUB.
Установите пакеты GRUB bootloader и EFI boot manager:
pacman -S grub efibootmgr os-prober mtools
Затем создайте точку монтирования для “/dev/sda1” и смонтируйте ее.
mkdir /boot/efi && mount /dev/sda1 /boot/efi
Теперь давайте установим наш загрузчик.
grub-install --target=x86_64-efi --bootloader-id=grub_uefi
Output

Installing for x86_64-efi platform.
Installation finished. No error reported.
Наконец, сгенерируйте файл “/boot/grub/grub.cfg”.
grub-mkconfig -o /boot/grub/grub.cfg
К содержанию
10. Установка среды рабочего стола в Arch Linux
Наш Arch Linux в настоящее время содержит только основные программные пакеты, необходимые для управления системой из командной строки, без GUI (графического интерфейса пользователя).
Arch Linux поддерживает широкий спектр сред рабочего стола. Я установлю GNOME в качестве примера среды рабочего стола.
Первым шагом является установка среды X. Введите приведенную ниже команду, чтобы установить Xorg в качестве сервера отображения.
pacman -S xorg-server xorg-apps
Затем установите соответствующий видеодрайвер.
Пользователи Nvidia:
pacman -S nvidia nvidia-utils
Пользователи AMD / ATI:
Пользователи Intel:
pacman -S xf86-video-intel
Теперь вы можете установить среду рабочего стола GNOME в Arch Linux с помощью:
pacman -S gnome gnome-extra networkmanager
GNOME предлагает широкий выбор поставщиков для загрузки. Выберите подходящего поставщика для каждого запроса и нажмите “Enter”, чтобы продолжить. Если вы не уверены, нажмите “Enter”, чтобы принять значения по умолчанию.
Наконец, включите диспетчер отображения GDM и сетевой менеджер.
systemctl enable gdm && systemctl enable NetworkManager
К содержанию
11. Создание учетной записи обычного пользователя
Метод создания учетной записи пользователя также автоматически создаст домашний каталог для пользователя. Кроме того, мы можем предоставить этой учетной записи привилегии sudo. Напишите свое имя вместо “linuxuser”.
useradd -m -G wheel linuxuser
Обязательно установите пароль для нового пользователя:
Затем включите привилегии sudo для вновь созданного пользователя:
Прокрутите экран вниз и найдите строку:
Раскомментируйте его, удалив знак #
К содержанию
12. Установка Arch Linux завершена
Поздравляю! Мы закончили с нашей установкой Arch Linux, поэтому мы выйдем из терминала, размонтируем корневой раздел, установленный под “/mnt”, и перезагрузимся в нашу недавно установленную систему Arch Linux.
Вас поприветствует менеджер загрузки GRUB. Подождите несколько секунд или нажмите “Enter”, чтобы начать загрузку операционной системы.

Затем вас поприветствует менеджер входа в систему GDM GNOME. Нажмите на пользователя, которого вы создали ранее, и введите его пароль, чтобы войти в систему и наслаждаться вашей недавно установленной системой Arch Linux.

К содержанию
In this guide, you will learn how to Dual boot Arch Linux with Windows 10 on UEFI system. This guide assumes that you already have Windows 10 installed on your system.
Prerequisites
Before you begin configuring the dual-boot setup, ensure that the following requirements are met:
- A bootable installation medium of Arch Linux (Either USB or DVD). To download the latest Arch Linux ISO, proceed to the official Arch Linux download page. Once you have downloaded the ISO image, grab an 8GB USB drive and make it bootable using Rufus tool or any other application that can create a bootable USB drive.
- A fast and stable internet connection for downloading and installing software packages.
Step 1) Create a separate partition for installation of Arch Linux
For the dual boot setup to work, we need to create a separate partition on the hard drive on which Arch Linux will be installed. To do so, head over to the disk management utility by pressing Windows Key + R. In the dialogue box, type diskmgmt.msc and hit ENTER.
This launches the disk management utility displaying the various disk partitions on your hard drive. We are going to create an unallocated partition by shrinking the C drive. If you have a bigger partition than the C drive, feel free to use it for creating the separate partition,
So, we are going to right-click on drive C and select the ‘Shrink Volume’ option as shown
On the pop-up dialogue box that appears, we are going to specify the amount to shrink as shown. This is the amount that will be designated for the installation of Arch Linux. In our example, we have shrunk 20 GB of hard disk space will serve as the unallocated space.
Once you are satisfied, click on the ‘Shrink’ button.

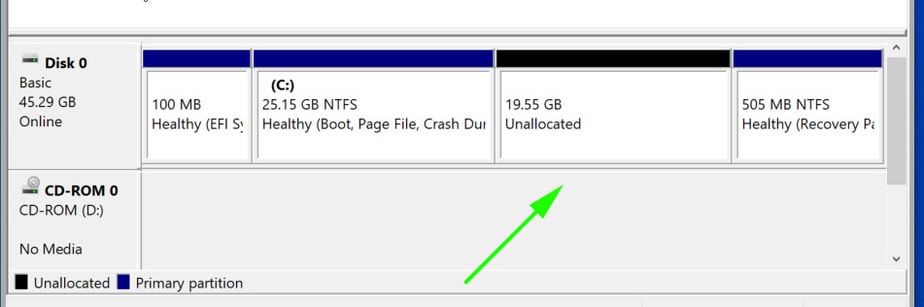
Your unallocated space will be indicated as shown below. In our case, we have set aside approximately 20G for the installation of Arch Linux.
With the unallocated partition in place, plug in your bootable USB and reboot your PC.
Step 2) Configure BIOS to boot from bootable medium
Before you begin with the installation process, it’s prudent to set the boot priority in the BIOS to select your bootable medium as the most preferred option. Depending on your vendor, you can press the Esc, or F10 key to enter the BIOS and navigate to the boot priority Menu.
Also note that we are using the UEFI mode for installation.

Once you have selected your boot medium, press the ESC button to continue with the booting process.
Step 3) Begin the installation of Arch Linux
On the bootup screen, you will be presented with options as shown below. Select the first option – Arch Linux install medium (x86_64, UEFI) and hit ENTER.
This initialize Arch Linux as evidenced by the boot messages on the screen.
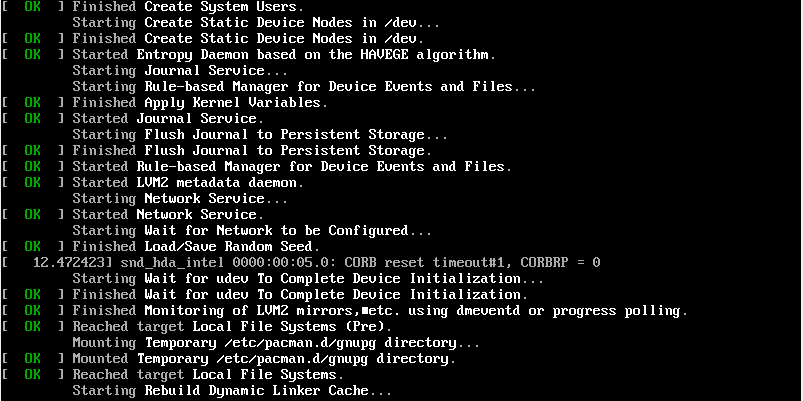
After a few seconds, this ushers you to the prompt as shown below.

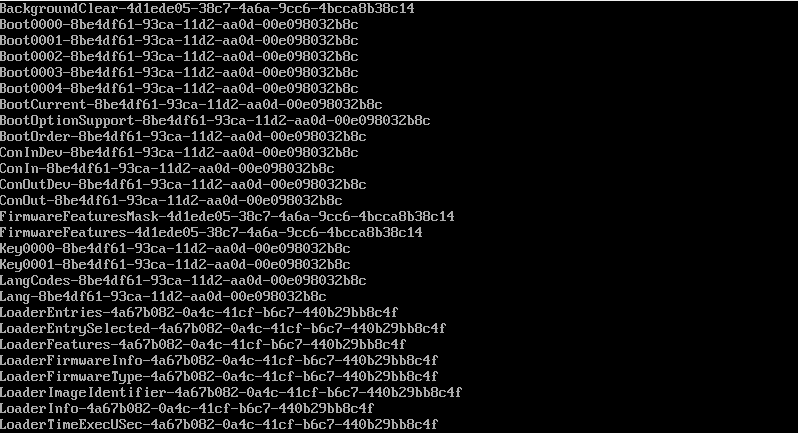
To confirm that you have EFI support, run the command:
# ls /sys/firmware/efi/efivars
You should get some entries on the screen as shown. If nothing is listed on your screen, then it means you are using MBR and this guide won’t work for you in configuring up a dual boot setup.
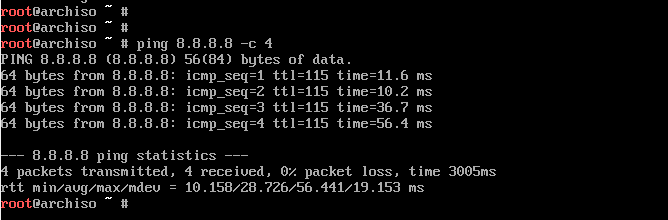
As you begin the installation, you might want to ensure that you have internet connectivity. Internet connectivity is crucial in setting time and date.
You can ping Google’s DNS as shown:
# ping 8.8.8.8 -c 4
You should get a positive reply as shown.
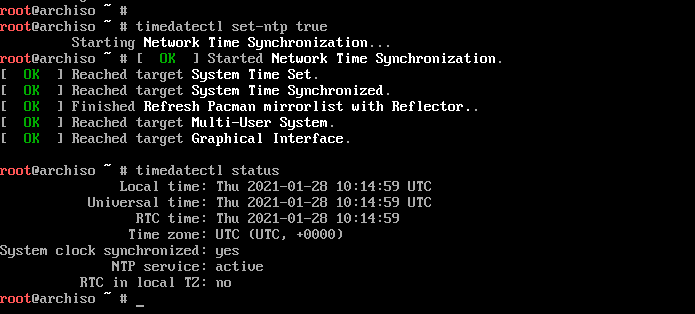
Step 4) Update time and date
Next, we are going to update the system time and date using the timedatectl command as shown.
# timedatectl set-ntp true
You can thereafter confirm the time and date using the command
# timedatectl status
Step 5) Create & format Linux partitions
Next, we are going to partition our hard drive and create some Linux partitions. An easy way of doing this is using the cfdisk utility. Run the command:
# cfdisk
This displays all the partitions available including Windows partitions.
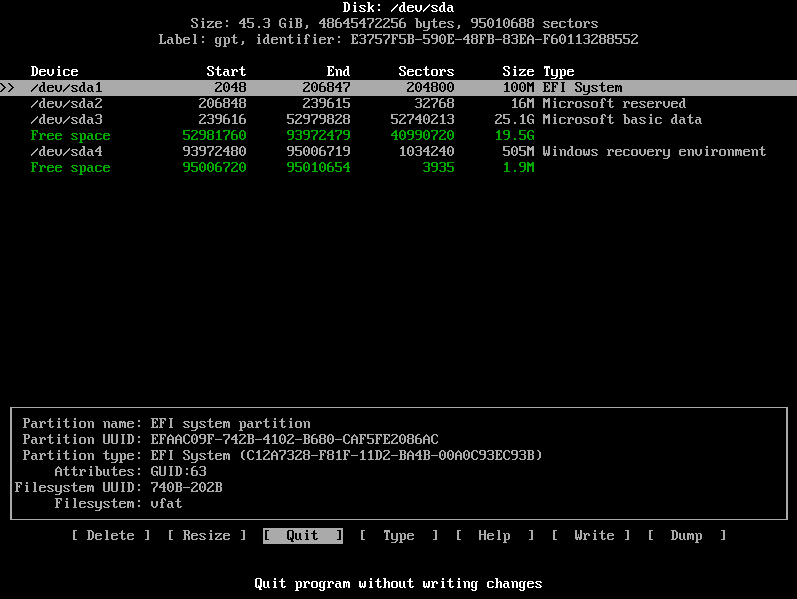
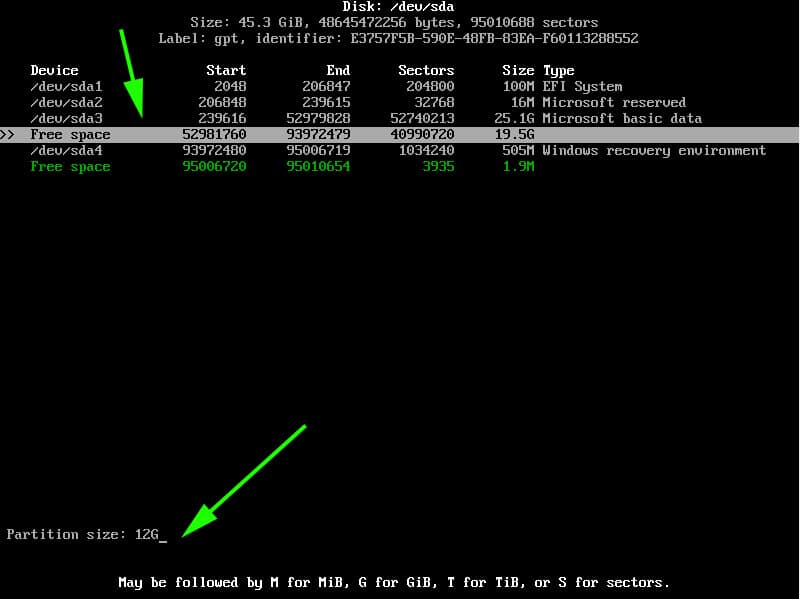
As you can see, we have some free space of 19.5G that we created earlier in step 1 from shrinking drive C on the Windows side. Using this partition, we shall create the following Linux partitions :
- Root partition / 12G
- swap partition 4G
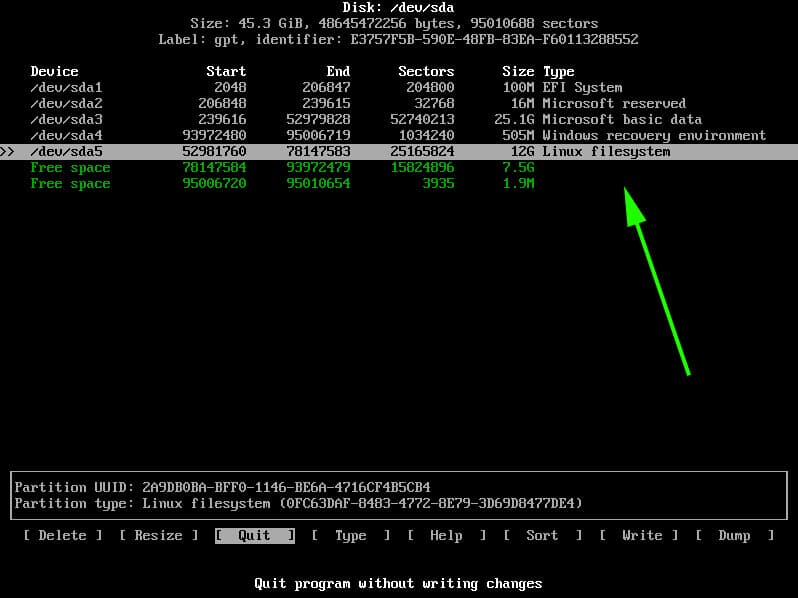
To achieve this, we will navigate to the free space with 19.5G just after /dev/sda3 volume and hit ENTER. We will then specify the volume as 12G for the root partition as shown below. Then hit ENTER.
The root partition will be created with the Linux filesystem type as shown.
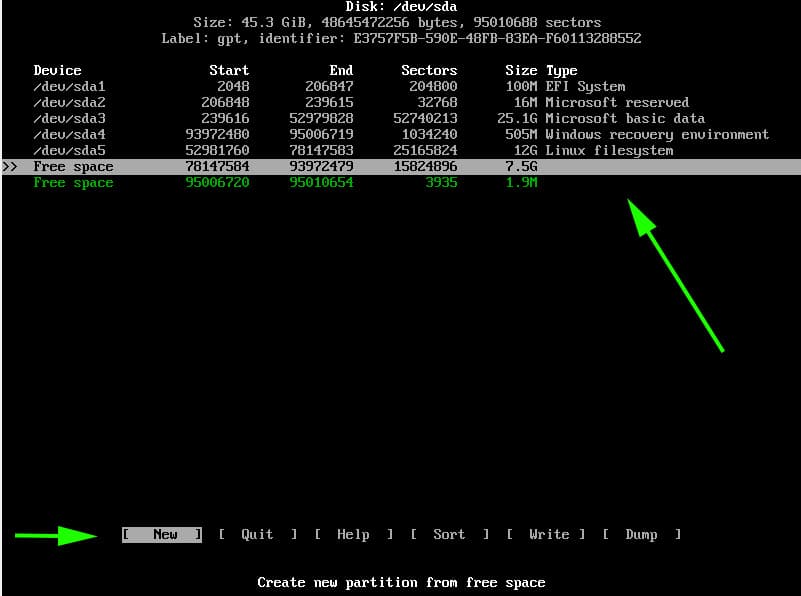
Next, we will create another partition for swap. Using the same method, we will proceed to the remaining free partition of 7G and select the ‘New’ option.
Specify the partition size as 4G
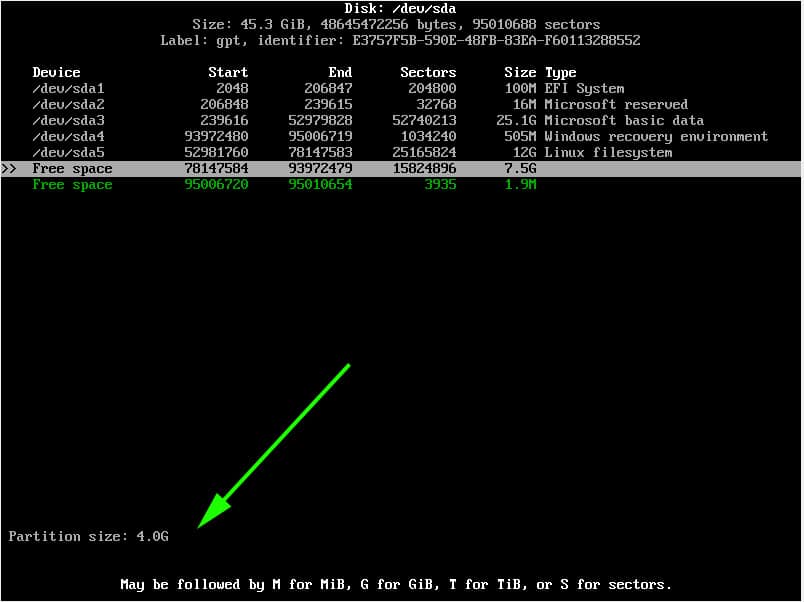
Since this will be our swap partition, we need to go the extra step and modify the partition type. Therefore, we will select the ‘type’ option and hit ENTER.
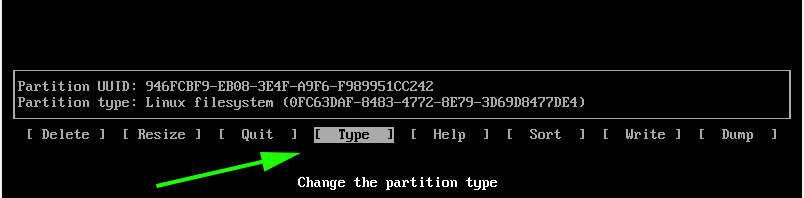
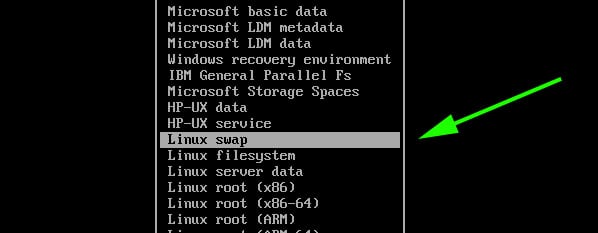
In the list that appears, select ‘Linux Swap’ and hit ENTER.
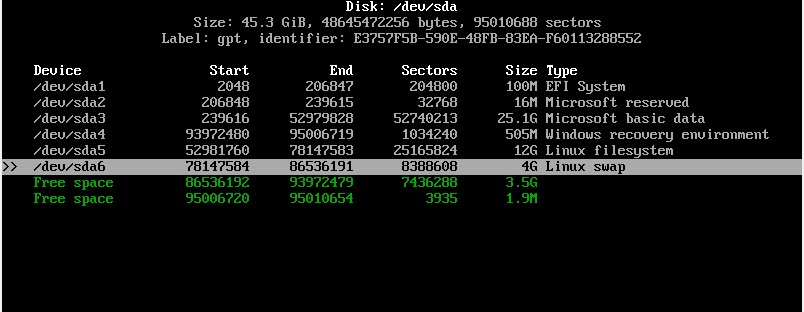
At this point, both the root and Linux swap partitions are created as seen from the partition table below.
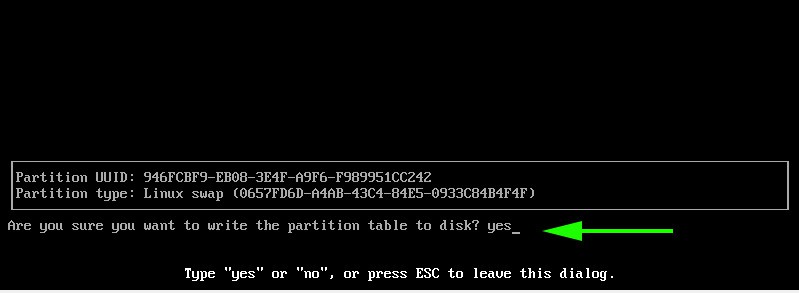
To save the partitions, select the ‘Write’ option and hit ENTER.
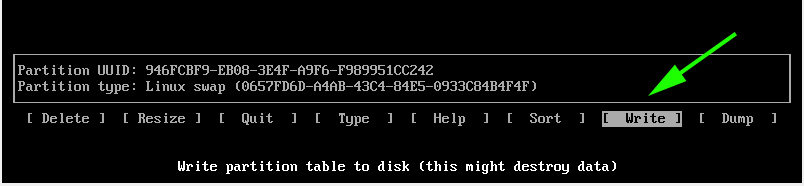
When prompted if you want to write the partition to disk, simply type ‘yes’ and hit ENTER.
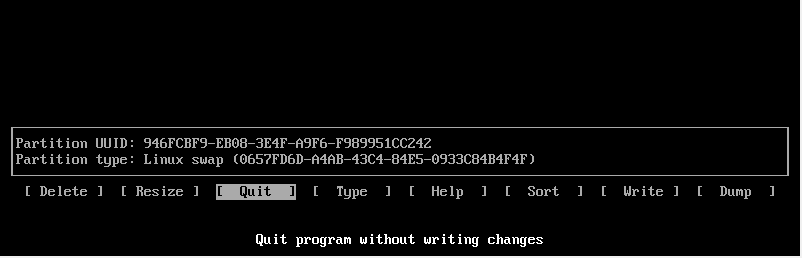
To exit cfdisk utility, select the ‘Quit’ option and hit ENTER.
Step 6) Format and mount the partitions
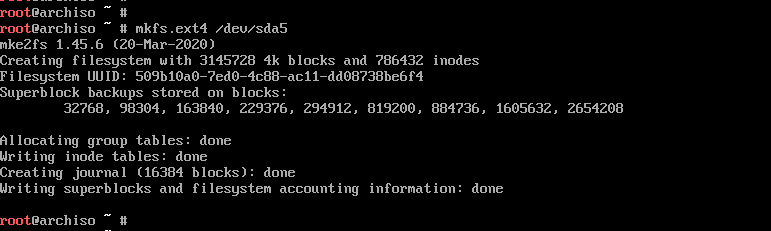
For the partitions to become usable and available for use, we need to format them and later mount them.
To format the root partition, run the command:
# mkfs.ext4 /dev/sda5
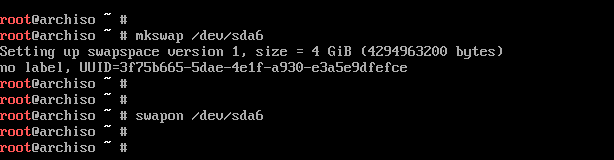
For swap partition, use the command:
# mkswap /dev/sda6
Then enable swap using the swapon command shown:
# swapon /dev/sda6
Next, mount the root partition to the /mnt directory
# mount /dev/sda5 /mnt
Additionally, we are going to create a directory for the EFI partition on which we will mount the Windows EFI system which , in our case is located on the /dev/sda1 partition.
# mkdir /mnt/efi
Then mount the EFI partition on the EFI mount point.
# mount /dev/sda1 /mnt/efi

Step 7) Install base system and other required Linux firmware packages
Next, we are going to install the central packages for our Linux system including the base and Linux-firmware packages.
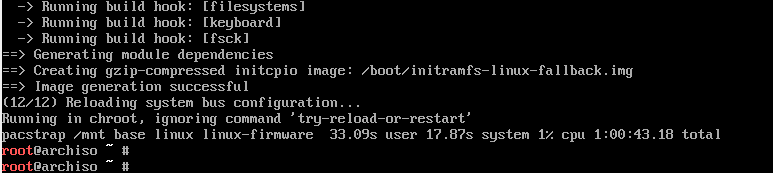
# pacstrap /mnt base linux linux-firmware

This is going to take quite some time. At this point, you can take a much-deserved break and head out for a stroll and grab some coffee. When the installation is successful, you should get the following output.
Step  Generate fstab file
 Generate fstab file
The next step will be to generate the fstab file on the /mnt directory as follows.
# genfstab -U /mnt >> /mnt/etc/fstab
Step 9) Setup timezone
After generating the ftab file, navigate to the newly created root filesystem
# arch-chroot /mnt
You can verify that you are in the root filesystem using the command as shown.
# ls
Time zone information is found in the /usr/share/zoneinfo/ directory. To set your timezone, create a symbolic link to the /etc/localtime
Path.
# ln -sf /usr/share/zoneinfo/US/Pacific /etc/localtime
Next, sync the hardware clock using the command:
# hwclock --systohc
Step 10) Set up locale
The locale determines the system language, currency format, numbering and date on your system. This information is contained in the /etc/locale.gen file. So, open the file using the vim editor.
# vim /etc/locale.gen
NOTE: To install the vim editor, use the pacman command as follows:
# pacman -Sy vim
Once you have accessed the file, scroll and uncomment your preferred locale. In this case, we have decided to go with en_US.UTF-8 UTF-8
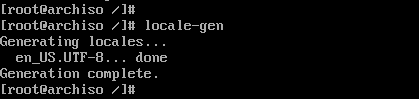
Save and exit the file. Next generate the locale configuration using the command.
# locale-gen
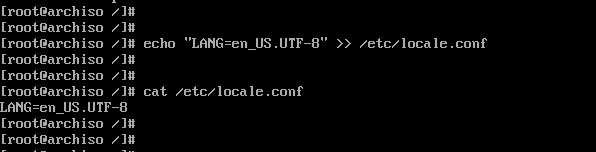
Next, create a new locale configuration file and save the locale as shown.
# echo "LANG=EN_US.UTF-8" > /etc/locale.conf
Step 11) Set up hostname
Next, we are going to configure the hostname of our Arch System. First, create a new file and specify the hostname as shown.
# echo linuxtechi > /etc/hostname

Afterwards, modify the /etc/hosts file as follows.
# echo "127.0.1.1 linuxtechi" >> /etc/hosts
Step 12) Install netctl Network Manager
To use the internet once the installation is complete and upon a reboot, we need to install a network manager. In this example we wil install the netctl network manager as follows
# pacman -Sy netctl
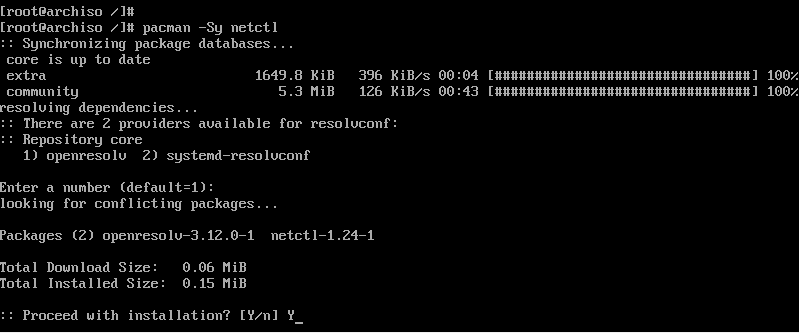
During the installation some optional dependencies for netctl are listed. We are going to install the following dependencies. These are:
- dhcpcd – For DHCP support
- wpa-supplicant – For wireless networking
- ifplugd – For wired connections networking
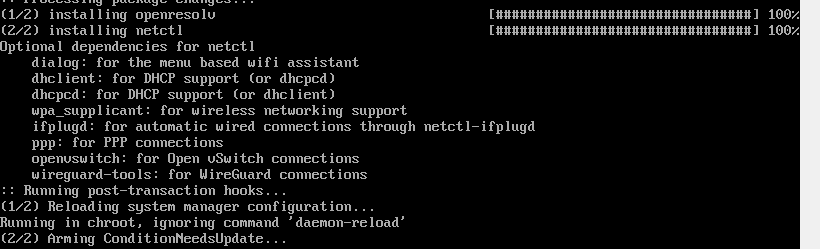
These dependencies will help you set up networking without a problem when you next boot in to Arch Linux.
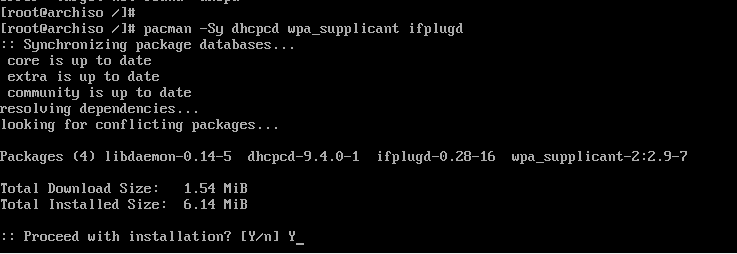
To install the optional dependencies, run the command below:
# pacman -Sy dhcpcd wpa-supplicant ifplugd
Step 13) Create a regular user
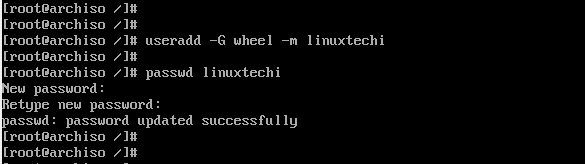
Next, we will create a regular user called linuxtechi and place him in the wheel group as follows.
# useradd -G wheel -m linuxtechi
The next step will be to assign a password to the user.
# passwd linuxtechi
Step 14) Install GRUB bootloader
We are getting close to the finish line. In this step, we will install the grub bootloader to enable us boot into our Arch Linux system upon a reboot.
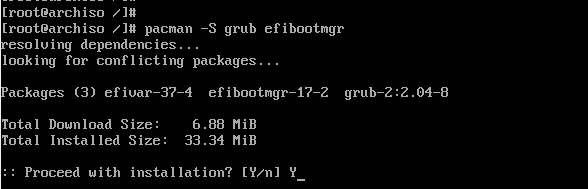
We will install the grub bootloader package alongside the efi boot manager package since we are using the UEFI mode.
# pacman -S grub efibootmgr
Next, install the os-prober package which will enable Arch Linux to detect the Windows operating system.
# pacman -S os-prober
Then install grub on the EFI directory as shown.
# grub-install --target=x86_64-efi --efi-directory=/efi --bootloader-id=GRUB

And install a grub configuration file as shown.
# grub-mkconfig -o /boot/grub/grub.cfg
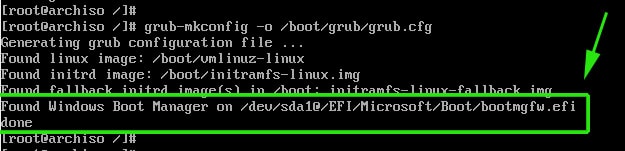
The last line is an indication that Arch has detected the presence of Windows Boot manager on /dev/sda1 partition. Perfect!
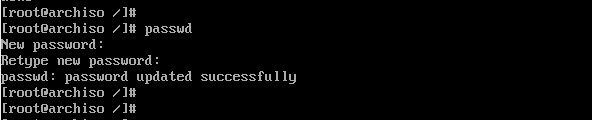
The finally, set a password for the root user as shown.
# passwd
Then exit and reboot your system.
# exit
# reboot
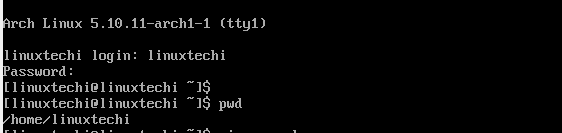
Step 15) Boot into Arch Linux
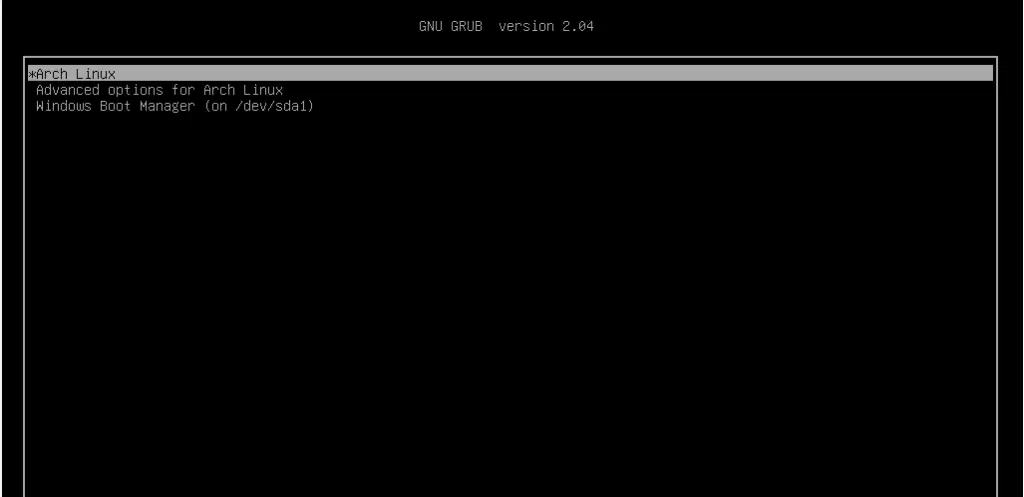
When booting, the GRUB bootloader will display various options including booting into Arch Linux, which is the first option, and also booting into Windows which is the last option in my case.
Log in as your regular user as shown
Step 16) Post Installation tasks
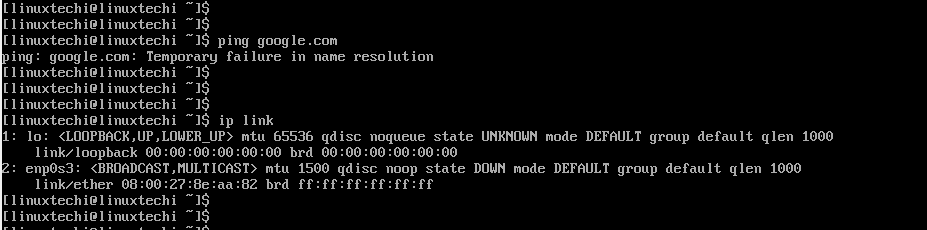
One of the things I noted when I logged in is that I do not have any internet connection. This is an issue caused by the default dhcp profile settings which need to be modified to accommodate the network interface attached to the Arch Linux system.
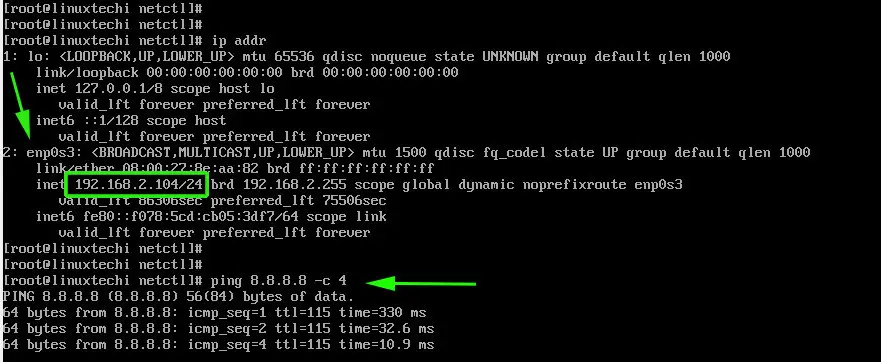
To find the interfaces attached run the command:
$ ip link
The output confirms that our network interface is enp0s3
We need to modify the ethernet-dhcp file in the /etc/netctl/examples/ path and edit out network interface.
But first, lets copy the file to the /etc/netctl directory.
Switch to the root user
# su
Copy the ethernet-dhcp file to the /etc/netctl directory.
# cp /etc/netctl/examples/ethernet-dhcp /etc/netctl/custom-dhcp-profile
Next, navigate to the /etc/netctl directory.
# cd /etc/netctl
Use the vim editor to edit the file.
# vim custom-dhcp-profile
The interface attribute is set to eth0.
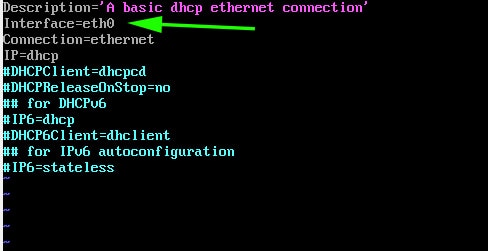
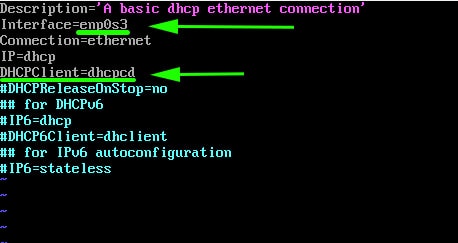
However, as we saw earlier, our network interface is enp0s3. Therefore, modify it to enp0s3. Additionally, uncomment the line starting with the DHCPClient parameter.
DHCPClient=dhcpcd
This enables the system to accept IP addresses using the dhcp service.
Save and exit the configuration file. Next, enable the custom dhcp profile.
# netctl enable custom-dhcp-profile

And finally enable the dhcp service.
# systemctl enable dhcpcd.service

Your interface should now pick an IP address from the router and you should have an internet connection.
You can install an X windows system as shown,
$ sudo pacman -S xorg xorg-server
Then install a display manager. For example, to install GNOME, run:
$ sudo pacman -S gnome
Then start and enable gdm service
$ sudo systemctl start gdm
$ sudo systemctl enable gdm
This brings us to the end of this lengthy topic. Hopefully, you are now in a position to Dual boot Arch Linux with Windows on UEFI system.
Read Also : How to Create and Configure Sudo User on Arch Linux
Dual Boot Arch Linux and windows 11/10 . Install Arch Linux With GUI alongside windows 11. This is a complete step by step tutorial of Arch linux installation 2024.
This Article walks you through the installation guide of Arch Linux With Plasma Desktop and dual Boot with windows 11. Using dual boot you can setup windows 11 and arch Linux on the same drive.
The Pre-requisites of this video
* You need Windows 11 or Windows 10 installed on your PC or laptop.
* An 8 GB or higher USB drive to create a bootable disk with ArchLinux
* At least 40GB of free space reserved from your existing drive.
Creating Free Space For ARCH LINUX
- Open command prompt and type DISKMGMT to access disk manager.
- View connected drives and their partitions.
- Identify the target drive (e.g., Drive 0) with its partitions.
- Choose the C Or D or Any Drive for ArchLinux and right-click on it.
- Select “shrink volume” to allocate free space for ArchLinux.Allocate a minimum of 40GB or more (type in MegaBytes, e.g., 200,000 MB).Click “shrink” to create unallocated free space

Download ArchLinux & Make Bootable USB
- Download the Arch ISO from HERE
- Connect a USB stick to your computer.Use Rufus to burn the downloaded ISO image to the USB drive.
Create System Restore Point
It is recommended to create a System Restore point before installing Archlinux. This option allows you to take a snapshot of the current state of the system. If something goes wrong with the Arch installation, you can use this backup to restore your system to normal.
BIOS Settings
- Reboot your computer.
- During the reboot, enter the BIOS settings using the keyboard shortcut (commonly F2, F9, or ESC).
- In UEFI BIOS, enable USB boot and set the USB drive as the primary boot order.
- Disable secure boot in the BIOS settings.
- If available, enable options like Microsoft’s third-party UEFI.
- Consider clearing any keys or certificates after disabling secure boot.
- Save the changes in the BIOS settings.
- Your system should now boot into ArchLinux from the USB drive.
- If the boot fails, use the boot menu to load Arch install media.
Increase Console FONT
Now, on your monitor, you will see a terminal expecting input. Note that the mouse functionality is disabled so you need to rely on the keyboard
Type setfont ter-132n and press enter to increase the size of the console.
Using iWCTL for WIFI Connection
If using built-in WiFi support, use the iwctl tool to connect to the internet.
- To find list of network interfaces type:
iwctl device list - To search for WIFI Networks type:
iwctl station wlan0 get-networks - To connect to WIFI network type:
iwctl station wlan0 connect WIFI_NAME - Once connected run :
ping google.comto check internet connection (Interrupt Ping with CTRL + C) - Then type the command to syncnorize the package database:
pacman -Sy - Then Type this command :
pacman -S archlinux-keyring
Create Partitions For Arch Linux
- Type
lsblkto list all connected drives on the PC. - Identify the main drives, focusing on SDA or NVME (ignore loops).
- NVME0n1 is MY drive with Windows 11, and SDA is the BootableUSB.

- Create partitions for Arch Linux using earlier free space.
- Type cfdisk /dev/nvme0n1 and press enter.
- Use arrow keys for selection and enter key for confirmation.

- Scroll to free space and create 3 partitions: EFI, ROOT, and swap.
- Create EFI partition (e.g., 800MB) with type EFI System.
- Create ROOT partition (e.g., 20GB or higher) with type Linux file system.
- Use remaining free space for swap partition with type Linux SWAP.
- Write changes to alter the disk and exit from CFDisk.

Formatting Partitions
- Type lsblk to view all newly created partitions
- NVME0N1P5 for EFI, NVME0N1P6 for Root, and NVME0N1P7 for Swap.
- Format the Arch EFI Partition (e.g., NVME0N1p5)
mkfs.fat -F32 /dev/nvme0n1p5 - Format the root partition (e.g., NVME0N1p6)
mkfs.ext4 /dev/NVME0N1p6 - Format the swap partition (e.g., nvme0n1p7)
mkswap /dev/nvme0n1p7
Mount Partitions
- Mount the root partition (e.g., NVME0n1p6) to the “mnt” directory.
mount /dev/nvme0n1p6 /mnt - Create a directory inside “
mnt” and name it “boot,” then mount the EFI partition to this directory.
mkdir /mnt/boot
mount /dev/nvme0n1p5 /mnt/boot
- Enable the swap partition by typing
swapon /dev/nvme0n1p7 - Verify proper mounting of all partitions by typing
lsblk

Installing ArchLinux
Now, it’s time to install the Arch Linux to the root partition which Is mounted to /mnt.
pacstrap -i /mnt base base-devel linux linux-headers linux-firmware amd-ucode sudo git nano vim neofetch htop cmake make bluez bluez-utils networkmanager cargo gcc mpvRun the above command to start installing the base system of Arch Linux. Accept the defaults. This will take some time, sit back, relax, and don’t interrupt the computer.
Generate File System Table (FSTAB)
It’s time to generate a file system table. If you notice, the NVME partitions are mounted to the live session of USB, but when we boot arch from the main drive we need to tell the system to mount all these partitions to the same location.
genfstab -U /mnt >> /mnt/etc/fstabCHROOT To Newley Installed system
So far we are running everything from the Live Session. It’s Time to enter, into the drive where we have installed Arch Linux. For that type:
arch-chroot /mnt
Now you can see the prompt has changed to something else, which means we have entered into the actual drive as a root user.
Change Root Password
Then type passwd and set the root password. This is a superuser account and is known as a top-tier user in Linux.
Adding a Standard User
Also, we are going to create a standard user by tying the below command and replace the username placeholder with your name
useradd -m -g users -G wheel,storage,video,audio -s /bin/bash USER_NAMEThen set the password by typing
passwd USER_NAMENow, we have added this new user to the wheel group and other groups. The Wheel group allows the user to access root privileges with a sudo command. For that, we need to edit the sudoers file. Type the below command
EDITOR=nano visudo
Uncomment the line in the image and save the changes with CTRL + O and CTRL + X to Exit.
SetupTimezone/Region
- Use
ln -sf /usr/share/zoneinfo/and press tab to see the list of available options. - Choose the appropriate timezone, for example
ln -sf /usr/share/zoneinfo/Asia/Kolkata /etc/localtime - Synchronize the current time with the hardware clock using
hwclock --systohc

Setup System Language
It’s time to set a system language by generating a locale. Type the below command
nano /etc/locale.genScroll all the way and uncomment the below line in the image and save the changes. This is going to tell the system to use American English as the system locale.

Now type the below commands to generate a locale & Config file
locale-genecho "LANG=en_US.UTF-8" >> /etc/locale.confSetup Host Name
Now, type the below command to set up the hostname of this computer. In this case, I am going to say “archlinux” and save the changes
echo "archlinux" >> /etc/hostnameThen type nano /etc/hosts and add the below lines.

Make sure you replace the GREEN part with your hostname and save the changes
Grub-Installation
It’s time to install the grub boot loader which is going to help boot arch Linux. Type the below commands
pacman -S grub efibootmgr dosfstools mtoolsgrub-install --target=x86_64-efi --efi-directory=/boot --bootloader-id=GRUBgrub-mkconfig -o /boot/grub/grub.cfgEnable Services
systemctl enable bluetoothsystemctl enable NetworkManagerThen exit from Chroot by typing exit & Unmount the partitions by typing
umount -lR /mntShutdown the computer and eject the USB Stick
Connecting TO WIFI Using NMCLI
Once the system is restarted you can see the grub menu. From here you can boot into only Arch for now and Windows 11 boot entry will be missing.
We are going to fix that issue in a moment. For now, let’s just boot into Arch Linux. Now log in with your user account & increase the console font by typing below command
setfont -d- Check the status of all network interfaces:
nmcli dev status - Turn on the WIFI Radio:
nmcli radio wifi on. - View available wifi networks with the command specified
nmcli dev wifi list - Connect to wifi using the relevant command, replace placeholders with your network information and enclosing the password in double-quotes
sudo nmcli dev wifi connect WIFI_NAME password "WIFI_PASSWORD" - Update the PACMAN database with:
sudo pacman -Sy
Installing GUI
It’s time to install the desktop environment. For Plasma Desktop Run the below commands
sudo pacman -S xorg sddm plasma-meta plasma-wayland-session kde-applications noto-fonts noto-font-emoji ttf-dejavu ttf-font-awesomesudo systemctl enable sddmFor GNOME Desktop
sudo pacman -S xorg gdm gnome gnome-extra sudo systemctl enable gdmThen Reboot the system
sudo reboot nowand this time Arch Linux will boot With a GUI Environment
Fix Discover App Backend
The first thing to do after installing ArchLinux is to fix the Discover app backend. To do so open KONSOLE and type the below command to install flatpak and use it as a backend for discover.
sudo pacman -Sy flatpakInstall NVIDIA Drivers (Optional)
If you have a modern NVIDIA graphic card, it’s recommended to install NVIDIA proprietary drivers.
"This is completely optional, installing this package on older systems may or may not work, so please refer to this article"
Anyway, inside the konsole you can type the below command to set up NVIDIA drivers.
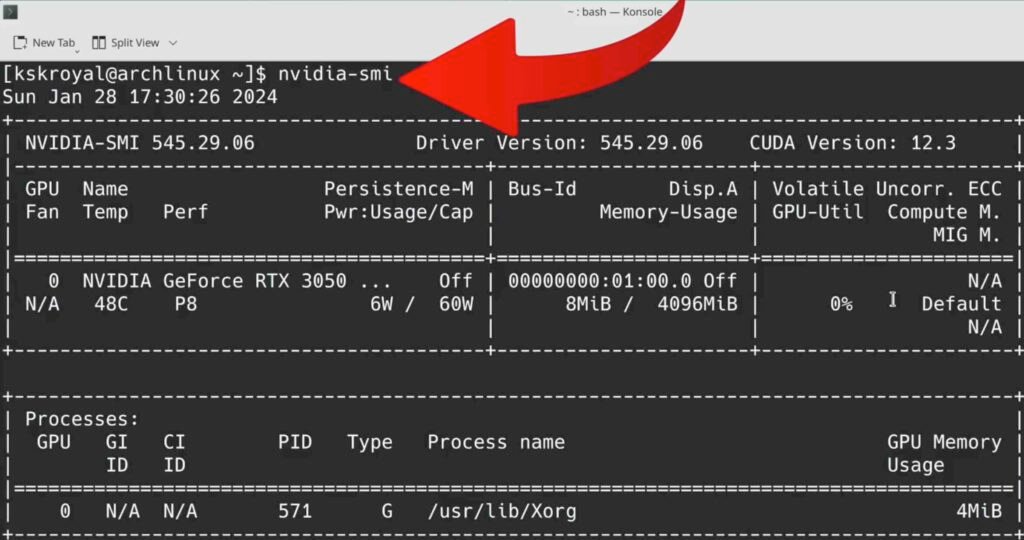
sudo pacman -Sy nvidia Once it’s done, reboot your computer. Now if I type nvidia-smi command inside the terminal you can see it shows the NVIDIA driver information.
Adding Windows Entry To GRUB
- Install OS-Prober with the command provided
sudo pacman -Sy os-prober - Edit the grub file,
sudo nano /etc/default/grub - Set the
GRUB_TIMEOUT=20 - Scroll to the bottom and uncomment the line related to os-prober.

Save changes with ctrl + o and exit with ctrl + x.
Run grub-mkconfig -o /boot/grub/grub.cfg to update the grub configuration.Verify that Windows boot manager is detected.

Reboot the system. Using the grub menu you can boot into either Arch or Windows 11
Removing ArchLinux From Dual Boot
- Reboot your computer and boot into Windows 11.
- Open Disk Management utility by typing diskmgmt in the search bar.
- Delete each new partition by right Clicking created during ArchLinux installation, starting with swap and root partitions.

- “Note that the LINUX EFI partition cannot be deleted using Disk Management“
- Open Command Prompt as an administrator and type
DISKPART - Type
list diskto view all connected drives, select the appropriate drive with
select disk 0 - Type
list partitionto view all partitions on the selected drive. - Identify the Arch EFI partition (e.g., partition 5).

- Select the Arch EFI partition with
select partition [number] - Type
DELETE PARTITION OVERRIDEto remove the partition. - Verify the deletion in Disk Management; the free space is now available.
- Utilize the gained free space to merge it back into Windows 11 partitions
Watch the YouTube Video:
In this article you can read how to setup a PC that both runs
Windows 10 Pro and the latest Arch Linux (Januari 2020). After
following this guide you’ll have a PC that allows you to select
to boot either into Windows 10 or Arch Linux. All you need is a
free harddisk a Windows License and preferrably two USB sticks
that we use to install the Windows and Arch Linux ISO files
onto. We use Windows to create the bootable USB sticks but if
you’re running Mac, see the links below.
Prerequisites
- PC with ethernet connection.
- A harddisk onto which we install Windows and Arch Linux
- 1x USB stick for Arch Linux
- 1x USB stick for Windows 10.
- A PC that runs Windows.
- We assume you have a UEFI bios.
Create a bootable USB Installer for Arch Linux
You’re going to prepare two USB sticks, one will be used for the
Arch Linux installer and the other for the Windows 10
Installer. When you don’t have two USB sticks you’ll have to
reuse one; in this case first create this bootable Arch Linux USB
stick.
- Download the Arch Linux ISO.
- Select a server nearby your location
- Download the file with a name like
archlinux-2020.01.01-x86_64.iso. - Do not download the the bootstrap version
- Download the Rufus Windows application.
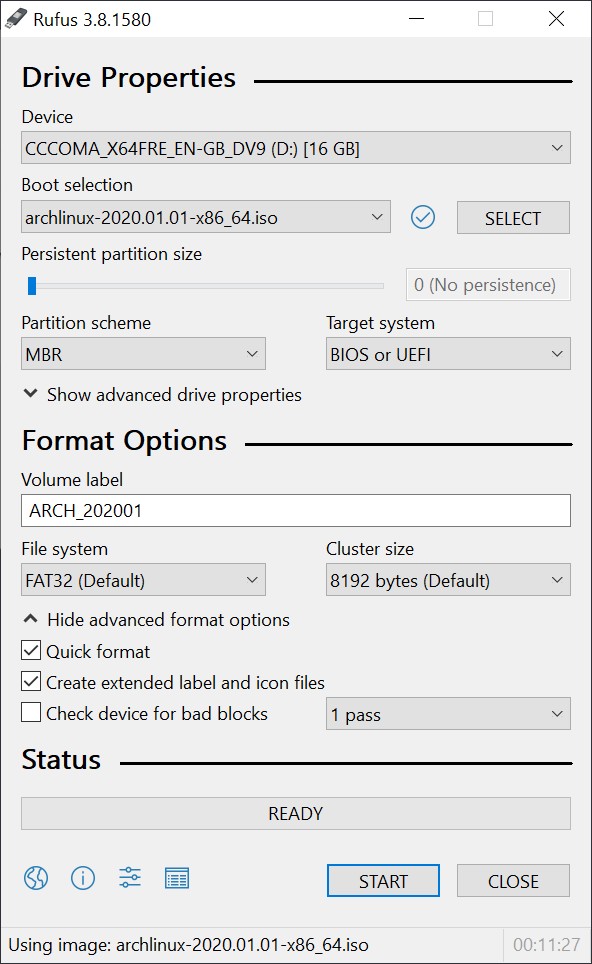
- Run Rufus:
- Device: select your USB stick
- Boot selection: press the SELECT button and brofwse to your arch iso file.
- Partition Scheme: GPT
- Target System: UEFI
- File system: FAT32
- Press START: Select
DD
Create a bootable USB Installer for Windows
To download the Windows 10 Pro ISO we can either use the
Windows Media Creation Tool
which also creates a bootable USB or trick the Windows website to
download the ISO file and use Rufus instead. The Windows Media
Creation Tool is known to be buggy and therefore we’re going to
use Rufus to create a bootable USB stick, just like we did for
the Arch Linux bootable USB stick.
By default when you try open the download page for the Windows 10
ISO, the Microsoft website forces you to use the Windows Media
Creation Tool; at least when you’re using Windows to download the
ISO. Luckily we can trick the website to pretend we’re visiting
the website from a Mac. When the Microsoft website thinks we’re
using a Mac it magically allows us to download the ISO.
- Use the Chrome browser and search for «Windows 10 Pro ISO»
- Open the link to something like: https://www.microsoft.com/software-download/windows10ISO
- Press
CTRL+SHIFT+Ito open the Developers Tools - Click the menu icon (3 dots) on the right of the Developer Tools
- Select More tools > Network Conditions
- Unselect the User agent [x] Select automatically setting.
- Select Safari — Mac
- Reload the page.
- Select Windows 10, press Confirm
- Select your language
- Select the 64-bit download
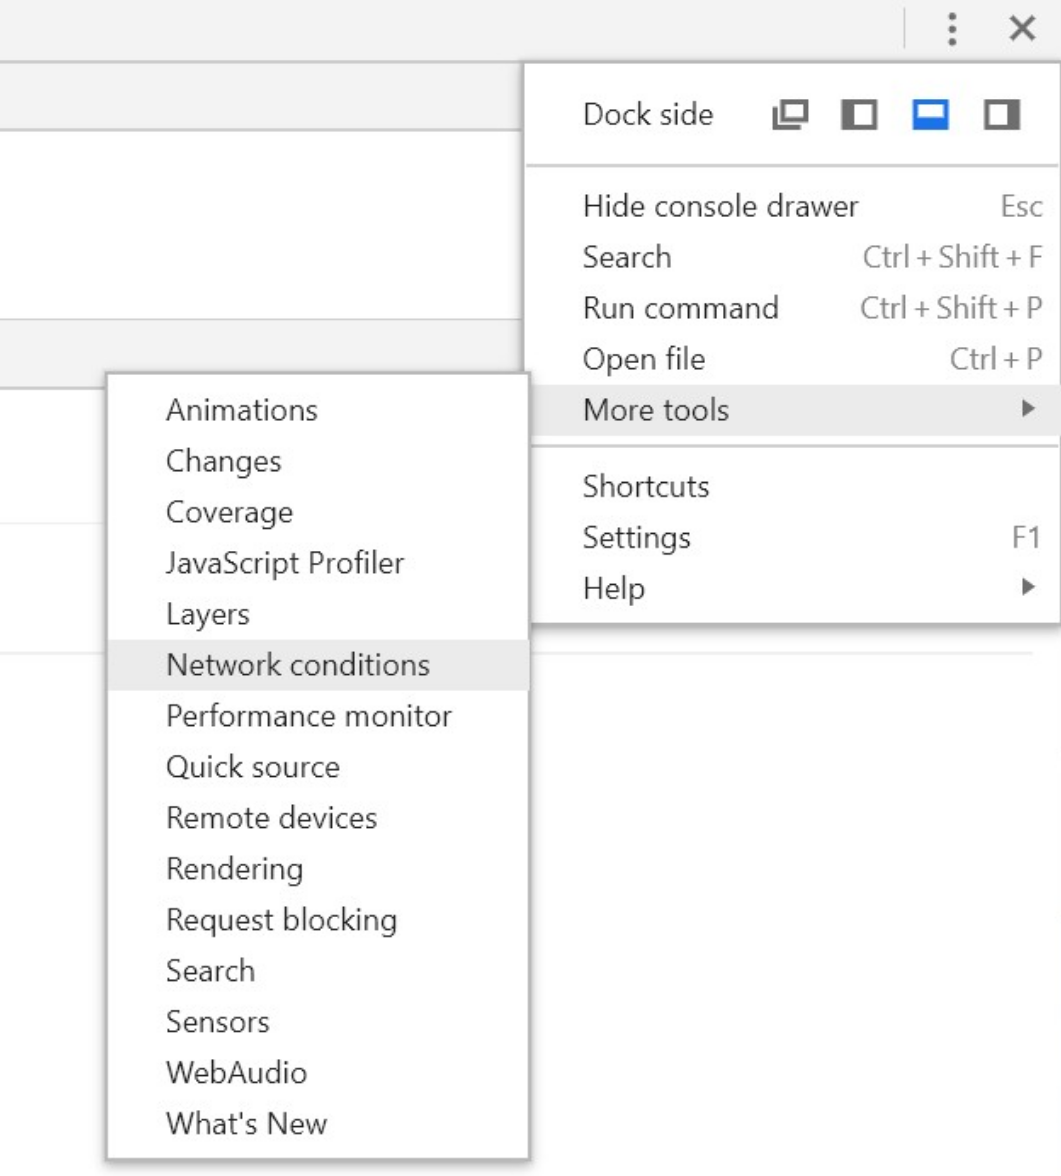
Open the network conditions via the Chrome Developer Tools
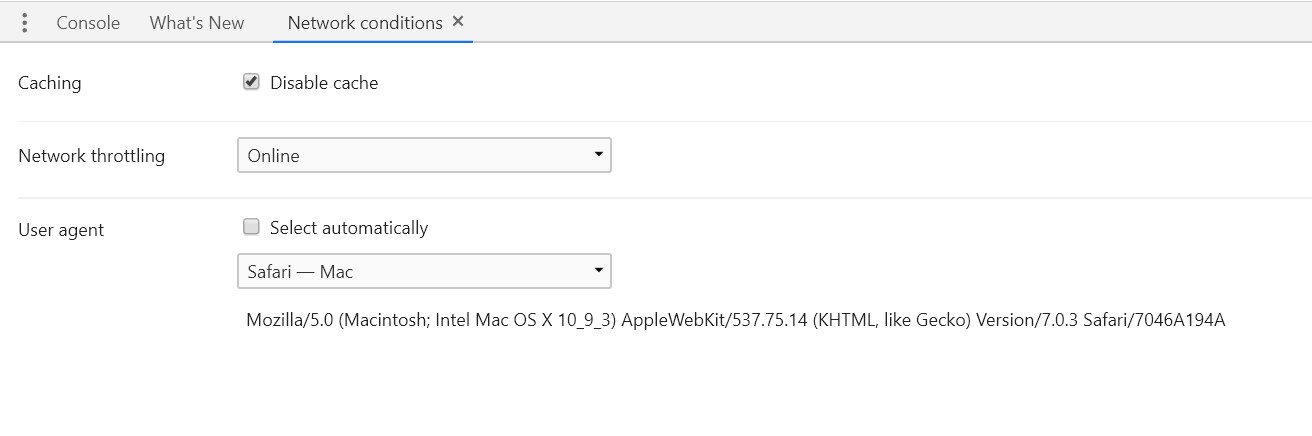
Select Safari on Mac as your user agent
Once you’ve downloaded the Windows 10 Pro ISO, open Rufus again
and place the USB stick in your PC. Note that all data on this
stick will be removed when we copy the Windows 10 Pro Installer
onto this bootable USB stick.
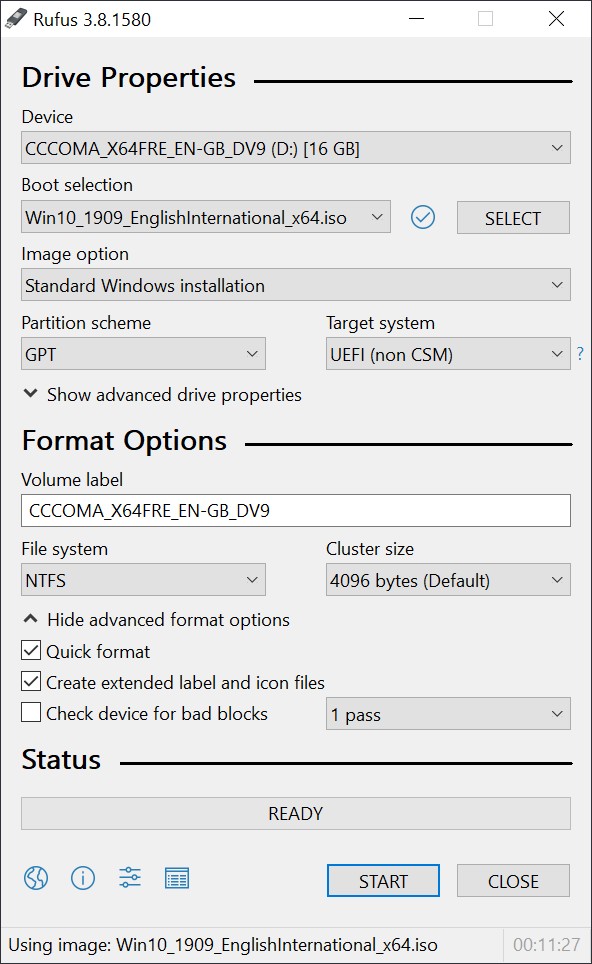
- Run Rufus
- Device: select your USB stick
- Bool selection: press SELECT and browse to your Windows ISO file.
- Partition Scheme: GPT
- Target System: UEFI
- File System: NTFS
- Press START
Install Arch Linux
Now that you have a bootable Arch Linux USB installer and a
bootable Windows 10 Pro USB installer you’ll have to install Arch
Linux first. This means that you have to start with the most
important step first: partitioning.
Partitioning is known to be difficult when you’re new to
Linux. Though let me tell you that it’s a lot easier than you
think. What might be a bit difficult is to choose the sizes
of your partitions. I’ll describe what I normally use and you can
follow along or choose your own partitions sizes.
I do assume that you’ve got one harddisk onto which you want to
install both Arch Linux and Windows 10 Pro. I use a 2TB SSD disk
where I choose 1TB for Arch Linux and 1TB for Windows.
When you’ve got more than one harddisk and you want to use
another harddisk to install Arch Linux and Windows 10 you have to
make sure that your UEFI bios boots from the harddisk onto which
we’re going to install Arch Linux and Windows.
Boot from the Arch Linux USB
- Put your USB stick with the Arch Linux installer into your PC
- Boot from USB
- Select
Arch Linux archiso x86_64 UEFI CD, press Enter
When your screen turns crazy after you have pressed Enter,
reboot and follow these steps instead:
- Boot from from USB
- Select «Arch Linux archiso x86_64 UEFI CD», press e
- Scroll to the end of the command and add
nomodeset - Press enter.

Partitioning your harddisk
To find your harddisk we use fdisk. You might have multiple
harddisks and at this point it doesn’t really matter which one
you use; this is up to you.
# fdisk -l
You’ll see a similar output as below. The Disk /dev/sdb is what
we’re after. We’ll use the /dev/sdb disk to install Arch Linux
and Windows. Note that my PC came pre-installed with Windows 10
Pro which uses a digital license. This means my motherboard has
the license baked into it and it’s safe to remove the existing
partitions. When you don’t have a digital license make sure you
have a copy of your Windows 10 License Key.
You’ll create three partitions. The boot partition, the root Arch
Linux partition and one that the Windows installer will use to
install Windows 10. I recommend writing the partitions numbers,
sizes and types down as you might want to refer to these when
installing Windows 10.
# fdisk -l

Disk /dev/sdb: 3.65 TiB, 4000787030016 bytes, 7814037168 sectors
Disk model: Samsung SSD 860
Units: sectors of 1 * 512 = 512 bytes
Sector size (logical/physical): 512 bytes / 512 bytes
I/O size (minimum/optimal): 512 bytes / 512 bytes
Disklabel type: gpt
Disk identifier: E413F59B-D9CB-4E10-A358-C5E7309DF4D9

Device          Start        End    Sectors  Size Type
/dev/sdb1        2048     526335     524288  256M EFI System
/dev/sdb2      526336 4295493631 4294967296    2T Linux filesystem
/dev/sdb3  4295493632 7814037134 3518543503  1.7T Microsoft basic data
Now that you know the disk name, you can run gdisk to partition your
disk. First we’ll remove all the existing partitions.
# gdisk /dev/sdb
Remove exiting partitions:
- Press `d`
- Partition number (1-2): 1 [PRESS ENTER]
- Press `d`
- Repeat for all your paritions.
Create the boot and main partion for Arch Linux:
- Press `n`
- Partition number: 1
- First sector: [PRESS ENTER]
- Last sector: +256M
- Hex code or GUID: ef00

- Press `n`
- Partition number: 2
- First sector: [PRESS ENTER]
- Last sector: 1T
- Hex code or GUID: 8300
Create the Windows Partition:
- Press `n`
- Partition number: 3
- First sector: [PRESS ENTER]
- Last sector: [PRESS ENTER}
- Hex code or GUID: 0700
Save and exit.
- Press `w`
- Do you want to proced: `y`
Lets see the created partitions:
# fdisk -l /dev/sdb

Disk /dev/sdb: 3.65 TiB, 4000787030016 bytes, 7814037168 sectors
Disk model: Samsung SSD 860
Units: sectors of 1 * 512 = 512 bytes
Sector size (logical/physical): 512 bytes / 512 bytes
I/O size (minimum/optimal): 512 bytes / 512 bytes
Disklabel type: gpt
Disk identifier: E413F59B-D9CB-4E10-A358-C5E7309DF4D9

Device          Start        End    Sectors  Size Type
/dev/sdb1        2048     526335     524288  256M EFI System
/dev/sdb2      526336 4295493631 4294967296    2T Linux filesystem
/dev/sdb3  4295493632 7814037134 3518543503  1.7T Microsoft basic data
Format the partitions:
# mkfs -t vfat /dev/sdb1
# mkfs -t ext4 /dev/sdb2
Setup and install Arch Linux base system
Mount system: you first mount the main system (/dev/sdb2) after which you
mount the boot partition (/dev/sdb1).
# mkdir /mnt
# mount /dev/sdb2 /mnt

# mkdir /mnt/boot
# mount /dev/sdb1 /mnt/boot
Setup base system:
# pacstrap /mnt base base-devel linux linux-firmware
# genfstab -U -p /mnt >> /mnt/etc/fstab
# arch-chroot /mnt
Install some core utilities:
# pacman -S emacs
# pacman -S git
# pacman -S kitty
# pacman -S dhcpcd
# pacman -S openssh
Configure timezone
# ln -sf /usr/share/zoneinfo/Europe/Amsterdam /etc/localtime
# hwclock --systohc

# emacs -nw /etc/locale.gen
-- uncomment: en_US.UTF-8 UTF-8

# locale-gen
# localectl set-locale LANG=en_US.UTF-8

# emacs -nw /etc/locale.conf
-- add the following lines:
LANG=en_US.UTF-8
LC_CTYPE=en_US.UTF-8
Hostname
# emacs -nw /etc/hostname
-- set your hostname, e.g. roxlu, arch, etc.)
Host file
# emacs -nw /etc/hosts

-- make sure it reads something like:
127.0.0.1 localhost
::1 localhost
127.0.1.1 yourhostname.localdomain yourhostname
Add your main account:
# useradd -m -g users -s /bin/bash roxlu
# gpasswd -a roxlu wheel
# passwd roxlu
Set root password:
# passwd
Install the rEFInd boot loader
I’ve been using the rEFInd boot loader for quite a while and have
been very happy with it; I like that it’s a graphical menu that
you can customise. So let’s install the rEFInd boot loader.
# pacman -S refind-efi
# refind-install
The refind-install util will copy some required files to the
boot partition for you but we still have to configure rEFInd to
make sure that it loads the correct files when booting. You have
to set the correct UUID in the /boot/refind_linux.conf.
We have to get the UUID of our root partition (not boot). You can
use the following command to get the UUID for the root partition:
# findmnt -no UUID /
3d72956e-db77-43b4-b299-14a0de20ea4c
To copy the UUID easily I’m using emacs that I use to create a
split window. In the right window I run M-x eshell in which I
execute findmnt -no UUID / and copy the UUID. In the left pane
I opened the /boot/refind_linux.conf. Now make sure that it reads
something similar as this:
# emacs -nw /boot/refind_linux.conf

-- create a split window
-- M-x eshell, and run `blkid /dev/sdb2` in
-- copy the UUID into `refind_linux.conf` so that it looks like:

"Boot with standard options"  "rw root=UUID=3d72956e-db77-43b4-b299-14a0de20ea4c"
"Boot to single-user mode"    "rw root=UUID=3d72956e-db77-43b4-b299-14a0de20ea4c single"
"Boot with minimal options"   "rw root=UUID=3d72956e-db77-43b4-b299-14a0de20ea4c"
Now verify that your boot partition is setup correctly. It should
look similar to this listing:
# cd /boot
# ls -1

EFI
initramfs-linux-fallback.img
initramfs-linux.img
refind_linux.conf
vmlinuz-linux
When you’re missing the kernel executable vmlinuz-linux or
any of the initramfs-* something went wrong. Try to reinstall
the kernel using:
# pacman -S linux
When you reboot now, you’ll get a similar menu as in the image above, but you’ll see only the Linux menu option, we’re going to add Windows later.
Setup networking using DHCP
I’m using DHCP to automatically configure my network. When you
don’t use DHCP you can set your IP manually but that’s out of the
scope of this document. To enable DHCP for a network interface, we’ll
check which one is currently in use. To do this we use the ip addr
command. Find the interface that you want to setup; this is most likely
the one which comes directly after the link/loopback interface with
a link designation like link/ether
 # ip addr

 3: eno1: <BROADCAST,MULTICAST,UP,LOWER_UP> mtu 1500 qdisc fq_codel state UP group default qlen 1000
    link/ether 00:d8:61:4f:ba:df brd ff:ff:ff:ff:ff:ff
    inet 192.168.0.178/24 brd 192.168.0.255 scope global noprefixroute eno1
       valid_lft forever preferred_lft forever
    inet6 fe80::5c2d:3270:4:9ca8/64 scope link
       valid_lft forever preferred_lft forever
In the example above, the name of our network interface is
eno1. Now, that you know the name of the network interface we
can enable DHCP on it. Note that below we use dhcpcd and
not dhcp.
# systemctl enable dhcpcd@eno1
Reboot
Remove the USB stick and exit the chroot environment, then
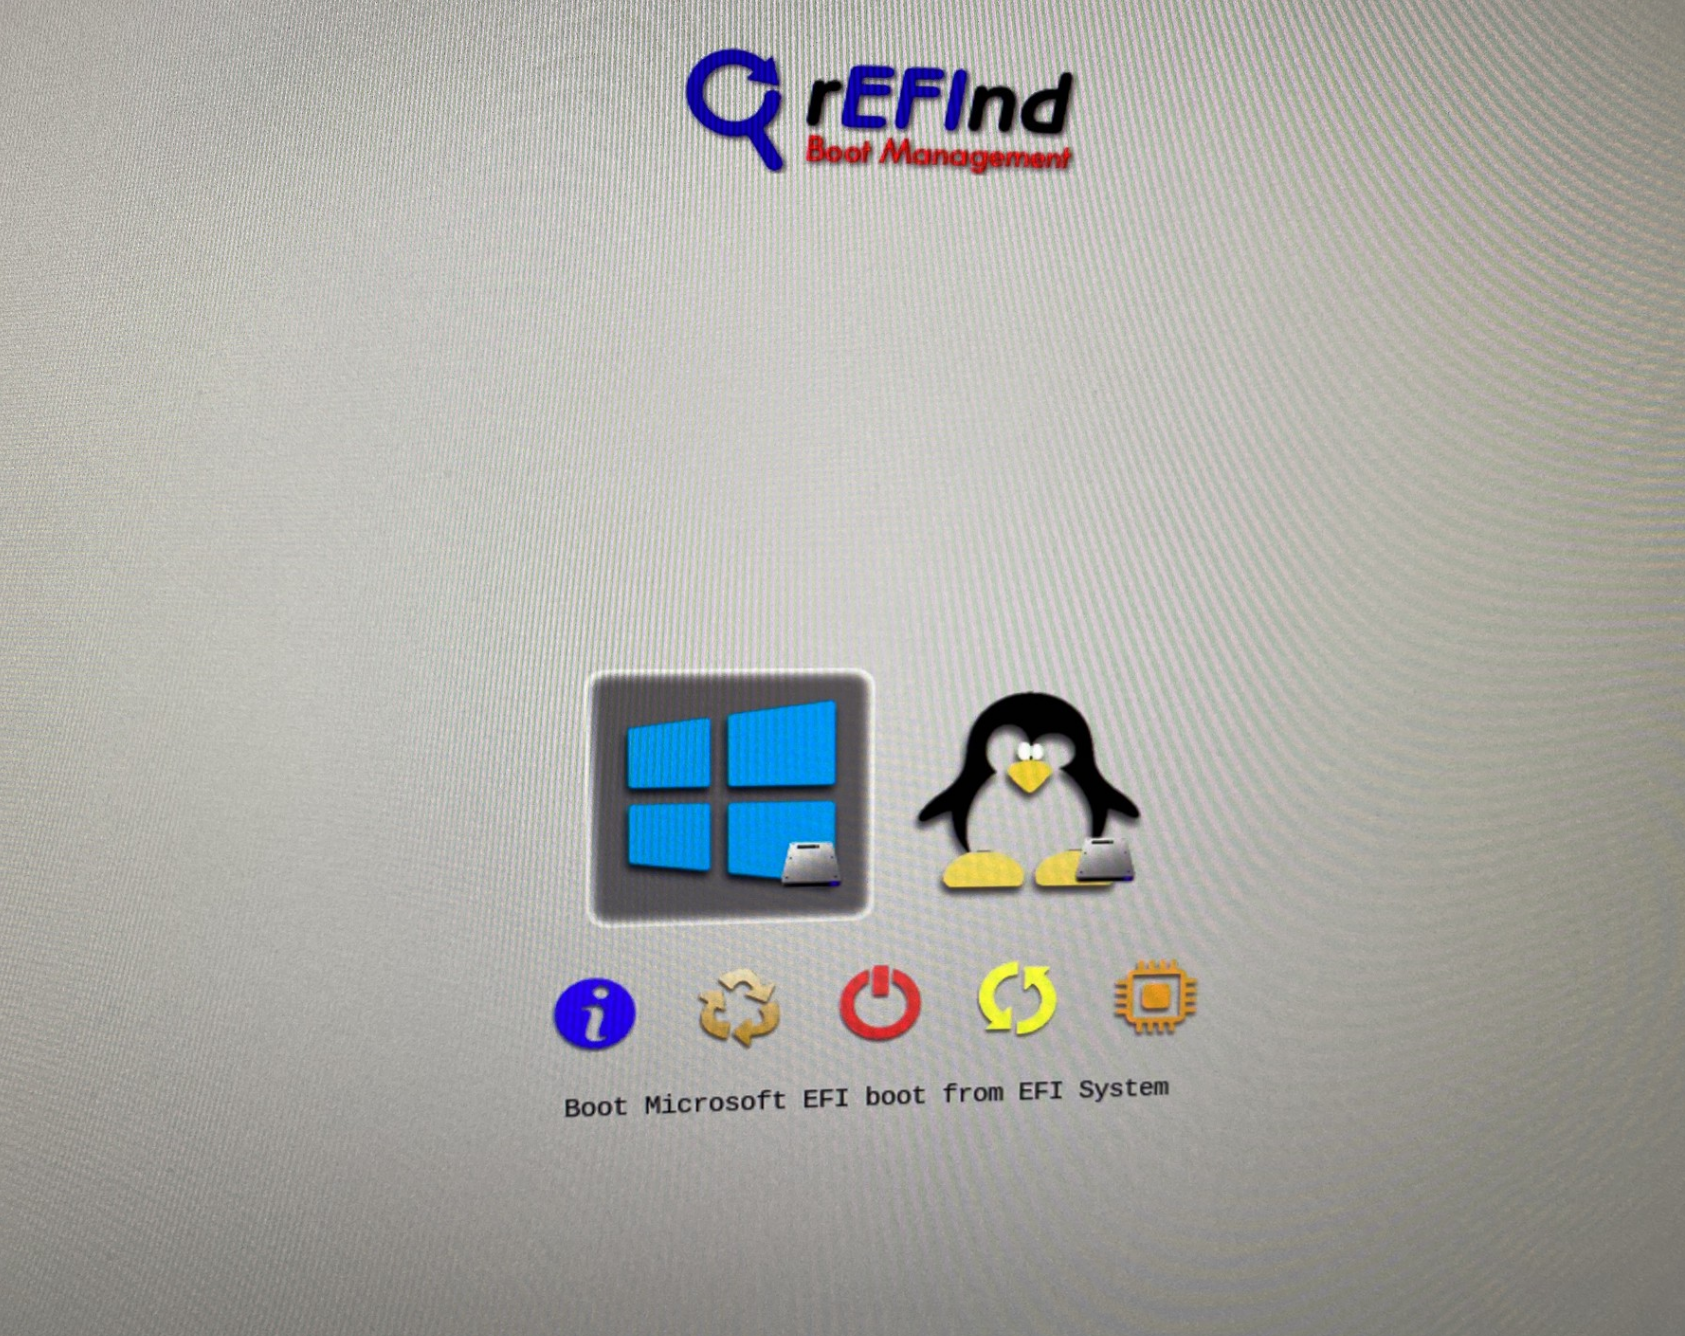
execute reboot. When your PC restarts you should see the rEFInd
boot menu that you need to start Linux.
# exit
# reboot
When you don’t get the rEFInd menu something went wrong. See the
next section which allows you to go back into your just installed
Arch Linux. When you do get the rEFInd boot menu: congrats, you
just installed Arch Linux successfully. Skip the next step and
continue with the Windows 10 Pro install.
Fixing errors when your boot menu is broken
Don’t worry, you don’t have to reinstall everything again. When
you don’t see the rEFInd boot menu after restarting you either
made an error while configuring rEFInd or creating the partitions.
When your partitions are incorrect, you might have to reinstall
Arch Linux again. When it’s something related to rEFInd, you
might be able to fix it by checking your configs again.
Here I’ll explain how you can go back into your just installed
Arch Linux so you’re able to verify some things and check the rEFInd
configuration.
- Put the Arch Linux bootable USB installer in your PC.
- Boot from the Arch Linux USB (see above how to do this).
-
Mount your installed Arch Linux and chroot into it. Make sure
to use the correct partitions that you used when partitioning
your filesystem.# mount /dev/sdb2 /mnt # mount /dev/sdb1 /mnt/boot # arch-chroot /mnt -
Now you’re back into your install and you can fix it!
Install Windows 10 Pro
At this point you should be able to access the rEFInd boot menu
when you boot your PC. Now you instert the bootable Windows 10
Pro USB stick into your PC, remove the Arch Linux installer USB
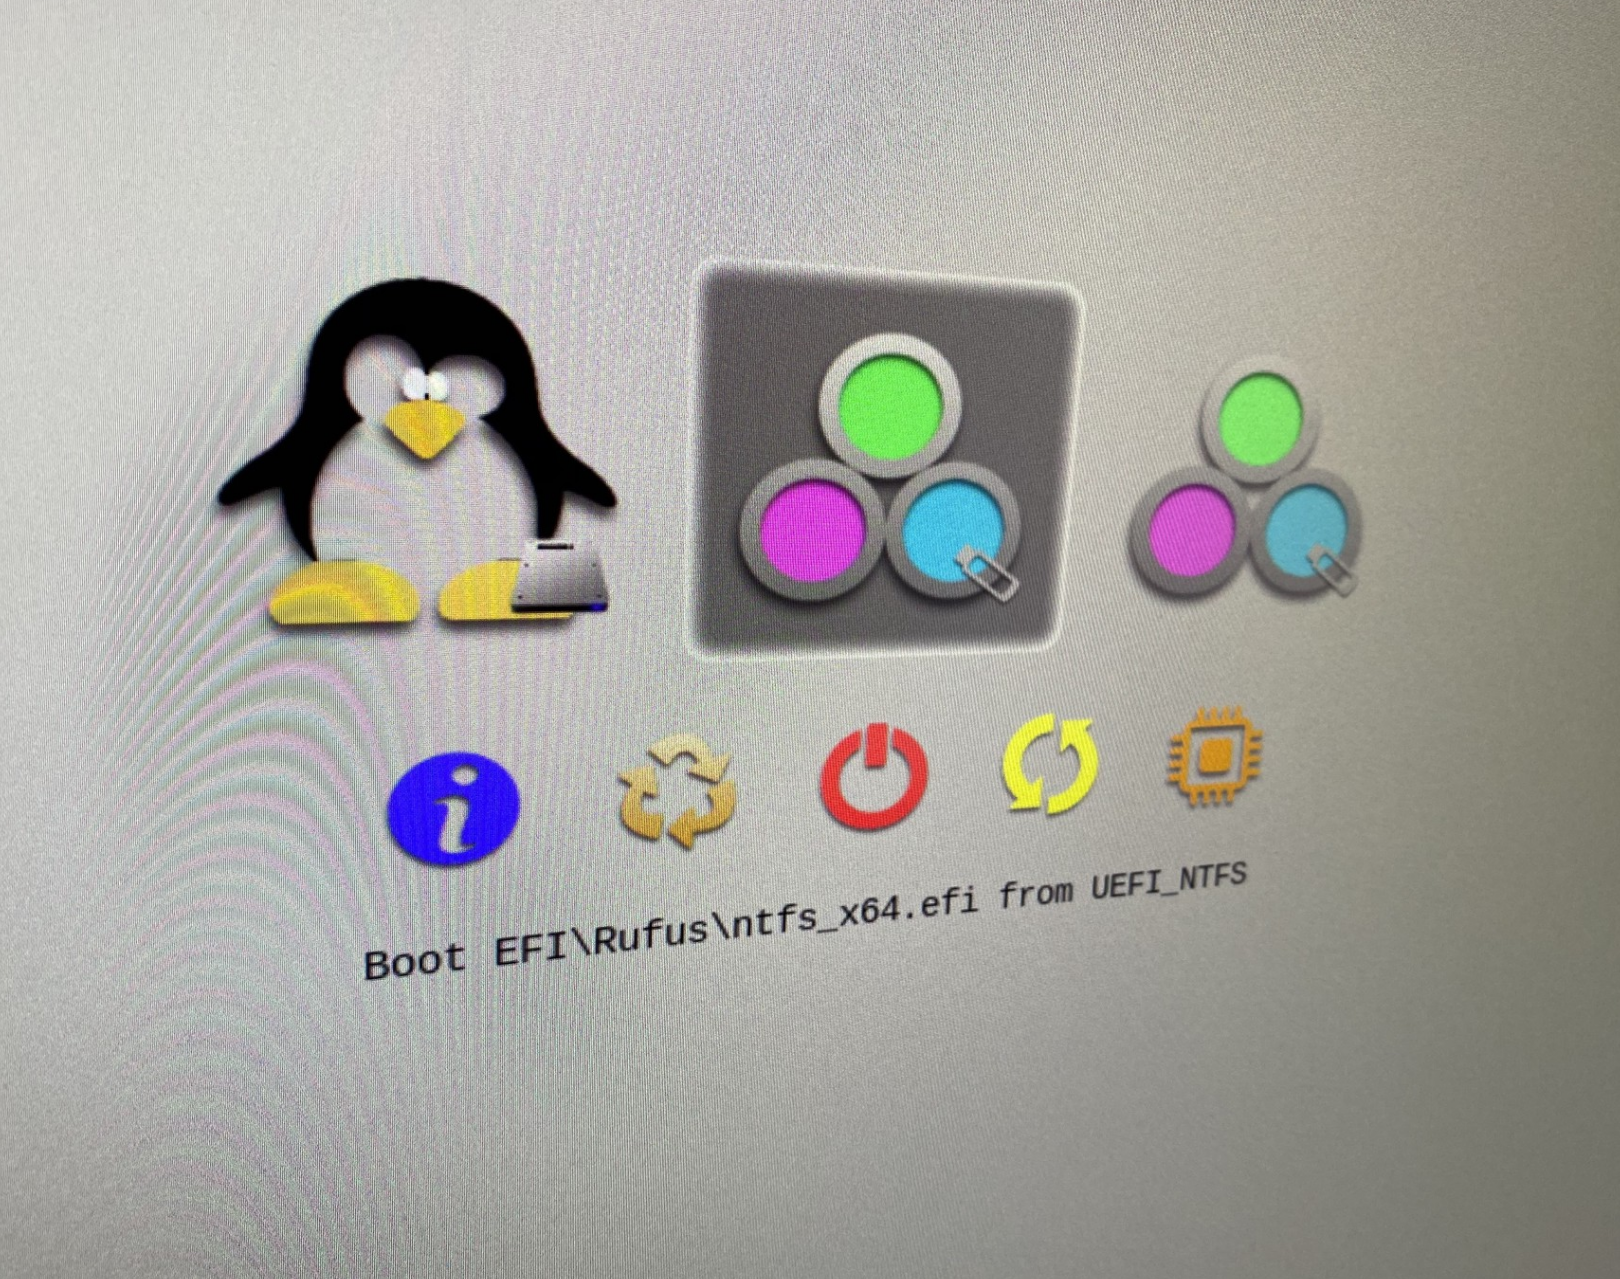
and reboot. After the reboot, rEFInd will show you a couple of
extra options. I got two extra options for the Windows
installer. I selected the menu option with Boot
EFI\Rufus\ntfs_x64.efi from UEFI_NTFS
Installing Windows 10 is a pretty trivial and straightforward
process. The only thing which might be worth mentioning is the
partitioning step. When the installer starts, one of the first
screens will ask if you want to repair an existing installation
or do a advanced full install. Choose the advanced option and
when you’re asked to select the partition make sure to select the
one that you prepared when partitioning for Arch Linux.
Select the correct partition, press Next and follow the
screens from the installer. Once Windows has been installed
remove the USB key and restart. rEFInd will contain an extra
option for Windows 10 Pro.
Windows removed rEFInd: how to reinstall rEFInd?
It might happen that the Windows installer removed the rEFInd
boot menu and forced it’s own boot manager to be the default one.
This means that when we reboot we won’t get the rEFInd boot menu
anymore. You can fix this issue by reinstalling rEFInd.
- First boot into your Arch Linux installation as described above
in the Boot from the Arch Linux USB. - Next run
refind-installagain - Remove the USB stick
- Reboot
This should bring back the rEFInd boot menu and it will have two
options now, one for Windows 10 Pro and one for Arch Linux. Congratulations
you have successfully installed Arch Linux and Windows 10 Pro as a
dual boot on your PC with the rEFInd boot menu.
Now that you’ve got a nice setup, you might want to
create a self-hosted Unifi NVR

NAT Types
This is so exciting, in this article I dive into some of the different ways a NAT device translates addresses which is important for peer-to-peer connections.

Building Cabinets
In this post I dive into the design and construction of a cabinet with an interact LED strip. I also explain how I dynamically change the colors of the LEDs over TCP/UDP.

Compiling GStreamer from source on Windows
How to compile GStreamer on Windows from Source using Visual Studio 2019 and the meson build system.

Debugging CMake Issues
In this post I explain a process you can follow to debug issues with CMake by focusing on a specific target and making the output verbose.

Dual Boot Arch Linux and Windows 10
How to install Arch Linux and Windows 10 Pro as dual boot. A step by step tutorial how to create bootable installers, partition and setup a dual boot menu.

Mindset Updated Edition, Carol S. Dweck (Book Notes)
Paragraphs I marked from the book «Mindset» from Carol S. Dweck.
How to setup a self-hosted Unifi NVR with Arch Linux
A step by step HOW-TO that explain show to setup a Unifi Video Controller with an NFS share with Arch Linux.

Blender 2.8 How to use Transparent Textures
Follow this node setup when you want to use an image with transparency as a «sticker».
Compiling FFmpeg with X264 on Windows 10 using MSVC
A couple of steps to compile FFmpeg on Windows using MSVC.

Blender 2.8 OpenGL Buffer Exporter
The following Blender script creates a [name].h and [name].cpp for the selected object and stores the positions, normals and UVs.

Blender 2.8 Baking lightmaps
Light maps are a cheap way to add a lot of realism to you static scenes and have been used forever.

Blender 2.8 Tips and Tricks
Use Environment Map only for reflections; create a floor plane for a Product Render, diffuse texture for roughness and more!

Setting up a Bluetooth Headset on Arch Linux
Learn how to setup a Sennheiser PXC 550 Bluetooth headset on Arch Linux.

Compiling x264 on Windows with MSVC
Compile the excellent x264 source on Windows using MSYS2 and MSVC.

C/C++ Snippets
Is a number divisible by four?

Reading Chunks from a Buffer
Some thoughts on reading bytes from a file; handy for reading NALs.

Handy Bash Commands
Bash scripts: removing white space, lowercase filenames, backup using tar, etc.

Building a zero copy parser
Simple solution to parse data in a pretty performant way. Used this for a RTSP protocol parser.

Kalman Filter
A very simple yet powerful filter which works great when you have to smooth noisy data. Used for the Nike Rise 2.0 project.

Saving pixel data using libpng
Do you have raw RGBA data that you want to save? Use this snippet to save it into a PNG file.

Compile Apache, PHP and MySQL on Mac 10.10
Setup you own PHP, MySQL and Apache and with virtual document roots.

Fast Pixel Transfers with Pixel Buffer Objects
Using Pixel Buffer Objects (PBO) for fast asynchronous data transfers and OpenGL.

High Resolution Timer function in C/C++
Wait…… wait.. fast high resolution timer funtions (Windows, Linux, Mac)

Rendering text with Pango, Cairo and Freetype
My never ending obsession with font rendering. A complex beast to do well. Use Pango and FreeType for the heavy lifting.

Fast OpenGL blur shader
Make things look blurry … and fast using this OpenGL blur shader.

Spherical Environment Mapping with OpenGL
An old trick to get great lighting effects using Environment Maps and OpenGL.

Using OpenSSL with memory BIOs
OpenSSL is a great library with lots of abstractions. In this post I discuss how to break some of these abstractions and use your own memory buffers.

Attributeless Vertex Shader with OpenGL
A simple way to render a fullscreen quad without a vertex buffer with OpenGL.

Circular Image Selector
Some thoughts on a different way to select images from a huge collection in a compact UI.

Decoding H264 and YUV420P playback
Using libav to demux and playback with OpenGL.

Fast Fourier Transform
Analyse your audio using the Fastest Fourier Transform in the West.

OpenGL Rim Shader
Pretty glowy edges using a GLSL rim shader.

Rendering The Depth Buffer
Render the non-linear OpenGL Depth Buffer.

Delaunay Triangulation
Do you need to triangulate some shape: use the “Triangle” library.

RapidXML
RapidXML is a versatile and fast XML parser with a simple API. Check out these examples.
Git Snippets
Some simple GIT snippets; added here to remind myself.

Basic Shading With OpenGL
A couple of basic GLSL shaders with explanation.

Open Source Libraries For Creative Coding
Collection of great open source libraries for you creative programming projects.

Bouncing particle effect
Snippet that can be used to create a bouncy particle effect; basic, effective, simple but nice.

OpenGL Instanced Rendering
Want to render thousands and thousands of objects? Use OpenGL instanced rendering. The solution…the only solution.

Mapping a texture on a disc
Ever heard about projective interpolation related to texture mapping? Learn about this intertesting issue with OpenGL and texture mapping.

Download HTML page using CURL
When you want a quick solution to perform a HTTP(S) request CURL is always a quick an simple solution. Check out this example code.

Height Field Simulation on GPU
Although not a Navier-Stokes implementation … still a very nice and enjoyable effect.

OpenCV
Optical Flow: when doing anything with tracking you’ve probably heard of it. See this simple example code using OpenCV and OpenGL.

Some notes on OpenGL
FBOs and Depth Testing, using different Attachment Points, a YUV420p shader, …

Math
Meaning of the Dot Product in 3D graphics, calculating a perpendicular vector using Sam Hocevar’s solution, orientation matrix and more.

Gists to remember
Some gists that I want to remember, often use, etc…

Reverse SSH
Do you want to login, into a remote PC but the remote PC is behind a firewall? Then use this simple reverse SSH trick which doesn’t require changing your firewall rules.

Working Set
Having issues with your compiler? Or during linking? Check these common issues and their solutions. I also list several tools that you can use to get a some useful info.

Consumer + Producer model with libuv
Example of a common Multi Threaded Consumer/Producer Model using LibUV.

Parsing binary data
Learn about the basic of a binary protocol and how to create one easily yourself.
C++ file operation snippets
Reading a file into a string, vector, checking the file size, change to a position, etc. A collection of C++ file operation snippets.

Importance of blur with image gradients
Do you want to experiment with OpenGL and aligning Brush Strokes along Image Gradients? Then check out this post about the importance of blurring.

Real-time oil painting with openGL
Code snippet for fake «oil painting» effect with OpenGL using instanced rendering.

x264 encoder
Basic example on how to use libx264 to encode image data using libav

Generative helix with openGL
Screenshots of a project I worked on with that generates a DNA helix.

Mini test with vector field
Screenshots while experimenting with a vector field; nothing much to see here.

Protractor gesture recognizer
Testing the amazing One Dollar $1 gesture recognizer. The simplest and very good gesture recognizer.

Hair simulation
Example code that implements the «Fast Simulation of Inextensible Hair and Fur» paper from M. Müller, T.Y. Kim and N.Chentanez.

Some glitch screenshots
Glitch screenshots.

Working on video installation
Screenshots of some experiments of a video installation.

Generative meshes
I enjoy creating physics based simulations and render them on high res. Here are some experiments I did a time ago.

Converting video/audio using avconv
Examples that show you how to use avconv to manipulate video and audio files.

Auto start terminal app on mac
Automatically start you application whe Mac boots and make sure that it restarts your app when it exists. Handy for interactive installations.

Export blender object to simple file format
Export the selected object in Blender into a .h and .cpp file that prepresents the buffer.