
10.01.2023, 16:10. Показов 7603. Ответов 6
Я только сейчас нашёл этот форум, еле нашёл как создать тему. Я тут первый раз. Поэтому если буду делать что-то не так, пожалуйста не удаляйте. Мне действительно нужна помощь.
Про то что нельзя прикреплять фотографии, я уже прочитал. И это печально. Надеюсь по словам люди поймут.
Вопрос, что такое INetCache и почему туда копируются мои фотографии?
Я стал перекидывать файлы на планшет Хуавель. ( На компе Виндовс 10) При перекидывании почему-то соединение сбрасывалось, и переходило в режим «Только зарядка». Мне приходилось заново подключать и копировать. Это было только при перекидывании.
Потом я стал открывать фотографии на этом устройстве через компьютер, начинал листать, а там дальше шли не те фотографии которые должны дальше идти. Я мышкой веду вверх, там показывается какие файлы в папке, но там вообще другие фотографии. Там одна или две фотографии которые были на Планшете, а остальные — это какие-то текстуры игры про танки, причём старые. (Я в неё когда-то играл).
Я через свойства нахожу путь к файлу, а это вообще другой путь, в диск C, куда-то в систему. Там же какие-то белые файлы, значки Флеша, фотографии текстур игры, и рядом две моих фотографии которые там не должны быть. Да, они были на Планшете, но и там они были. При удалении с планшета. там они оставались.
Я в этом пути иду назад, оказывается к этой папке можно попасть только через сам путь. То есть самим зайдя в те папки, попасть туда нельзя.
Я открываю другие фотографии, там меня тоже перенаправляет в эту неизвестную системную папку, и их я 4 насчитал. Дальше не продолжал, вдруг что. Их там можно удалять, а при открытии этих же или других фотографии на Планшете, они снова там появляются, либо там где были, либо там же уже но в другой папке, с другим названием.
Что это такое?
Я перерыл интернет, всё что я нашёл, это то что это относится к браузеру Enternet Explorer. Я не знаю есть ли он у меня. комп новый, 2021-го года, была проблема с диском C (SSD), грузился на 100%, были ошибки чтения, знакомый исправил.
В этот раз при загрузке компьютера я долгое время лицезрел чёрный экран и мышку, последнее время иногда такое есть.
Я нашёл откуда взялись эти фотографии текстур игры, они были в папке которую я когда-то качал. Это не официальная копия старой игры, криво сделанная кем-то, я скачать по настольгировать и забыл про неё. Она на Флеше. Иногда Флеш открывается и говорит что он теперь не поддерживается с 2020-го года, и мне конец если я его не удалю.
Так вот. Меня всё это напрягает. Тут замешены одновременно и Интернет Эксплорер, и Флеш. Оба они перестали поддерживается, а значит есть риск что в них могут быть какие-то уязвимости. Хакеры, вирусы, все дела. Я в этом не сильно разбираюсь.
Вот пути файлов, куда сами копировались мои фотографии: C:\Users\admin\AppData\Local\Microsoft\W indows\INetCache\IE\0Y86WCW8
C:\Users\admin\AppData\Local\Microsoft\W indows\INetCache\IE\JOJXAWNH
C:\Users\admin\AppData\Local\Microsoft\W indows\INetCache\IE\XVHLAGKL
C:\Users\admin\AppData\Local\Microsoft\W indows\INetCache\IE\3ZOUGVLH
Хорошо что вроде как фотографии туда копировались только когда я их открывал. И я смог их удалить. А то неизвестно сколько подобных файлов существует, и сколько моих фотографий туда утекло и что с ними может потом стать. Как минимум я не хочу чтобы мои фотографии находились там не зная где.
Ещё добавлю, что это происходило только когда открывал фото с планшета. На дисках компьютера всё было норм, листал в пределах нужной папки.
Может это проблема с файловой системой Винды или программой которая открывает изображения (FastStone Image Viewer).
Однажды я пытался удалить один файл, а вместо него удалялся файл в котором он находится с другими файлами. Какая-то котовасия с файлами у меня же была.
Что мне с этим всем делать?
*7-day Free Trial w/Credit card, no charge upfront or if you cancel up to 2 days before expiration; Subscription price varies per region w/ auto renewal unless you timely cancel; notification before you are billed; 30-day money-back guarantee; Read full terms and more information about free remover.
INetCache appears to be one of the “special” folders in Windows. INetCache malware is a variant of the Trojan Horse family who can hack into the folder that contains files – such as images, HTML pages, executable and script files – that Internet Explorer has downloaded from websites visited by the user.

It is important to be observant and aware of the current condition of your computer system as there are many malicious software threats out there that are particularly good at staying hidden once inside a given machine and showing as few infection symptoms as possible. Case in point, the recently reported malicious program named CryptoStealBTC in INetCache folder is a good example of a malware program that could be especially difficult to detect even with a reliable antivirus program at the user’s disposal. This is because INetCache CryptoStealBTC is a Trojan Horse representative – it is a silent and very harmful threat that doesn’t typically reveal its presence in the machine in any way, at least not until it is already too late to do anything about its presence in the computer. However, seeing as how you are on this page, we assume that you at the very least have some suspicion that this insidious malware may have infiltrated your machine’s system. In this case, you are already a bit closer to solving the INetCache-related issue as most users don’t even get to find out about the infection on time.
Now, if you really think that INetCache Trojan may currently be messing with the computer’s system, you must not waste any time – read the rest of this article and take a careful look at the instructions we have inserted below. They will help you with the detection and the elimination of the harmful Trojan but you must really make sure to follow them meticulously, without omitting anything. It is also advisable to use the added help of the removal program you will find linked below as it may not always be enough to use the manual steps. Also, should you face any difficulties during the removal process, do not hesitate to contact us through the comments section.
The INetCache CryptoStealBTC Trojan
One major problem related to the INetCache CryptoStealBTC Trojan is the overall versatility of the abilities of most Trojan Horse representatives. The INetCache CryptoStealBTC trojan is no exception – it may be able to steal data from your machine and gain access to your online accounts as well as give the hackers behind it unauthorized access to your computer system.
Once such access is established, there is no telling what may follow. Sometimes, other malicious programs may also enter your computer with the help of infections like INetCache. Some popular examples you’ve probably already heard of are Spyware, Rootkits and, of course, the infamous Ransomware cryptoviruses. Unfortunately, since this particular Trojan is new and it is still not fully researched, we do not know its exact goal once it attacks a given computer. In fact, its goals may differ in each separate case. Regardless of that, one thing is certain and that is the fact you really cannot allow this nefarious piece of code to stay in your computer and operate undisturbed. Use our guide and maybe the security tool we’ve linked there and be sure to rid your machine of the insidious Trojan Horse.
SUMMARY:
| Name | INetCache |
| Type | Trojan |
| Danger Level | High (Trojans are often used as a backdoor for Ransomware) |
| Symptoms | The threats of this type are likely to cause crashes and system slow-downs. |
| Distribution Method | The most typical ways of spreading Trojan infections is through spam and mavlertisements. |
| Detection Tool |
Some threats reinstall themselves if you don’t delete their core files. We recommend downloading SpyHunter to remove harmful programs for you. This may save you hours and ensure you don’t harm your system by deleting the wrong files. |
Remove INetCache CryptoStealBTC Trojan
If you are looking for a way to remove INetCache you can try this:
- Click on the Start button in the bottom left corner of your Windows OS.
- Go to Control Panel -> Programs and Features -> Uninstall a Program.
- Search for INetCache and any other unfamiliar programs.
- Uninstall INetCache as well as other suspicious programs.
Note that this might not get rid of INetCache completely. For more detailed removal instructions follow the guide below.
If you have a Windows virus, continue with the guide below.
If you have a Mac virus, please use our How to remove Ads on Mac guide.
If you have an Android virus, please use our Android Malware Removal guide.
If you have an iPhone virus, please use our iPhone Virus Removal guide
Some of the steps will likely require you to exit the page. Bookmark it for later reference.
Reboot in Safe Mode (use this guide if you don’t know how to do it).
WARNING! READ CAREFULLY BEFORE PROCEEDING!
Press CTRL + SHIFT + ESC at the same time and go to the Processes Tab. Try to determine which processes are dangerous.

Right click on each of them and select Open File Location. Then scan the files with our free online virus scanner:
Each file will be scanned with up to 64 antivirus programs to ensure maximum accuracy
This scanner is free and will always remain free for our website’s users.
This file is not matched with any known malware in the database. You can either do a full real-time scan of the file or skip it to upload a new file. Doing a full scan with 64 antivirus programs can take up to 3-4 minutes per file.
Drag and Drop File Here To Scan
Analyzing 0 s
Each file will be scanned with up to 64 antivirus programs to ensure maximum accuracy
This scanner is based on VirusTotal’s API. By submitting data to it, you agree to their Terms of Service and Privacy Policy, and to the sharing of your sample submission with the security community. Please do not submit files with personal information if you do not want them to be shared.
After you open their folder, end the processes that are infected, then delete their folders.
Note: If you are sure something is part of the infection – delete it, even if the scanner doesn’t flag it. No anti-virus program can detect all infections.
Hold together the Start Key and R. Type appwiz.cpl –> OK.

You are now in the Control Panel. Look for suspicious entries. Uninstall it/them. If you see a screen like this when you click Uninstall, choose NO:
Type msconfig in the search field and hit enter. A window will pop-up:
Startup —> Uncheck entries that have “Unknown” as Manufacturer or otherwise look suspicious.
- Remember this step – if you have reason to believe a bigger threat (like ransomware) is on your PC, check everything here.
Hold the Start Key and R – copy + paste the following and click OK:
notepad %windir%/system32/Drivers/etc/hosts
A new file will open. If you are hacked, there will be a bunch of other IPs connected to you at the bottom. Look at the image below:
If there are suspicious IPs below “Localhost” – write to us in the comments.
Type Regedit in the windows search field and press Enter.
Once inside, press CTRL and F together and type the virus’s Name. Right click and delete any entries you find with a similar name. If they don’t show up this way, go manually to these directories and delete/uninstall them:
- HKEY_CURRENT_USER—-Software—–Random Directory. It could be any one of them – ask us if you can’t discern which ones are malicious.
HKEY_CURRENT_USER—-Software—Microsoft—-Windows—CurrentVersion—Run– Random
HKEY_CURRENT_USER—-Software—Microsoft—Internet Explorer—-Main—- Random
If the guide doesn’t help, download the anti-virus program we recommended or try our free online virus scanner. Also, you can always ask us in the comments for help!
Download Windows Speedup Tool to fix errors and make PC run faster
In this post, we will talk about the location of the Temporary Internet Files Cache folder in Windows 11/10.
Temporary Internet or Cache files help your browser load websites faster by storing copies of web pages, images, and other content.
Where does Microsoft Edge store Cache in Windows 11/10?
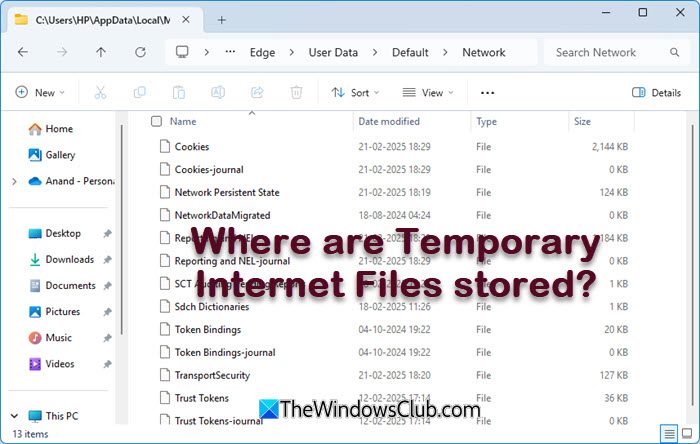
Microsoft Edge browser stores the Temporary Internet files and cache in the following location:
C:\Users\<username>\AppData\Local\Microsoft\Edge\User Data\Default\Cache
If you have only one Edge profile, you will find all the downloaded files in:
%localappdata%\Microsoft\Edge\User Data\Default\Cache\Cache_Data
Where does Edge store Cookies in Windows 11?
Microsoft Edge browser stores Cookies in Windows 11/10 in the following folder location:
%LOCALAPPDATA%\Microsoft\Edge\User Data\Default\Network
Temporary Internet Cache Folder Location for Chrome, Firefox, Opera
Google Chrome:
C:\Users\<username>\AppData\Local\Google\Chrome\User Data\Default\Cache
Mozilla Firefox:
C:\Users\<username>\AppData\Local\Mozilla\Firefox\Profiles\abcd.default\cache
Opera:
C:\Users\<username>\AppData\Local\Opera\Opera\cache
Microsoft decided to give the status of a Protected System Folder
The ‘Temporary Internet Files’ folder (Cache) is, a hotbed and a breeding ground for Viruses, Trojan Downloaders, and other malware downloaded from the Internet. Apart from your ‘Windows’ folder, this is one folder where one can expect to find most such malware files.
Browsing the Internet can expose one to certain security risks. You could end up with malware on your PC or have a Trojan downloader surreptitiously download an unwanted program, or you could even find your browser hijacked! By clicking a link, innocently, in an e-mail or even mistyping a web address, you can find your browser visiting a ‘hostile’ site.
To mitigate these threats, the browser runs in Protected Mode. The Cache is now considered as a virtual folder with the same low privilege.
Generally speaking, in Windows, processes run with integrity levels as defined by MIC (Mandatory Integrity Control) Feature. ‘Protected Mode’ runs as a ‘Low Privilege’ process. This prevents the browser from writing to areas of the file system or the Registry that require a higher privilege! What then happens, is that Windows creates a set of folders and files, for use with Protected Mode’.
These folders and files share the same Low Privilege level. These 4 ‘low privilege’ folders, in the course of daily operation, are Cache, Cookies, History & Temp.
- %LocalAppData%\Microsoft\Windows\Temporary Internet Files\Low
- %AppData%\Microsoft\Windows\Cookies\Low
- %LocalAppData%\Microsoft\Windows\History\Low
- %LocalAppData%\Temp\Low
Windows 11/10/8/7 also creates Virtual Folders to store files that the browser tries to save in protected locations. So, instead of causing an ‘add-on’ to fail when it tries to write a data file to the Windows folder or Program Files, Windows redirects the write operation to a virtual equivalent. Thus, the program continues to operate, believing that it wrote the files to the system location; little realizing that the data actually got written in a virtualized hidden folder, that mirrors the actual path and is stored under the ‘Temporary Internet Files’ folder.
In a similar fashion, if there is any attempt to write to the registry, it is redirected to a Low-integrity area of the registry.
Internet Explorer cache location
In Windows 11/10/8.1/8 the Internet Cache or Temporary Internet Files were stored by Internet Explorer in this folder:
C:\Users\<username>\AppData\Local\Microsoft\Windows\INetCache
In Windows Vista, and in Windows 7, it was located at:
C:\Users\<username>\AppData\Local\Microsoft\Windows\Temporary Internet Files
Assuming that your Windows is installed on the C drive. To see it, not only do you have to check Show hidden files & folders option in the Folder Options, but also uncheck Hide protected operating system files/folders option.
Managing the Internet Cache
To manage the Internet Cache, open Internet Options > Tools > Internet Options > General Tab > Browsing History.

Choose the Size you want for your Cache here. You can also see the Downloaded programs here, by clicking ‘View Objects’. Rather than un-hiding folder, etc, from the explorer’s Folder Options, you can see the contents of the Temporary Internet Files folder, simply by clicking on ‘View Files’. If you want to move the cache to another location, click on ‘Move Folder’ to do so. You will be prompted to set a new location.
Control how the browser should use the Cache
You have 4 options:
- Every Time I Visit The Webpage: This ensures that the information you see is always current, but it can slow your browsing a bit.
- Every Time I Start: This will cause the browser to check for a newer version, one time, per session. A check is made the first time you visit a page, but not again until you restart the browser.
- Automatically: This is the default option. Here the browser sees how often pages are actually updated. If a page is not updated frequently, the browser reduces the frequency with which it checks that page.
- Never: With this option, the browser never checks for newer files and always displays what is in the cache.
Note: Even after you Refresh a page, you get the impression that your browser appears to be reading from the cache, like say reading yesterday’s news, when it should be downloading afresh, simply hold down the Shift key and then click to Hard Refresh.
It’s always a good idea to clean up your cache once in a while depending on your browsing habits. Make it a weekly or at least a monthly habit. You may use the Disk Cleanup Utility to do it.
TIP: You can go here to find out why Windows Temporary Files are created in Windows OS.
Anand Khanse is the Admin of TheWindowsClub.com, a 10-year Microsoft MVP (2006-16) & a Windows Insider MVP (2016-2022). Please read the entire post & the comments first, create a System Restore Point before making any changes to your system & be careful about any 3rd-party offers while installing freeware.

INetCache Folder Trojan is a hazardous backdoor Trojan that has been installed without your knowledge. You might obtain this threat by downloading free software, music, video, game or porn from spam domains. INetCache Folder Trojan has been reported as a high-level risky infection. The security notification comes up each time you start desktop. It won’t go away. The virus is able to damage windows files and key registries. The infected computer might start behaving strangely when infected. INetCache Folder Trojan virus is used as a tool to steal your personal information and send back to its owner. Thus, cyber criminal would be allowed in the background to invade users’ money. In order to keep your computer safe, you should get rid of INetCache Folder Trojan infection as quickly as possible.
INetCache Folder Trojan does harms to your computer
- Your computer acts wired and slowly
- INetCache Folder Trojan modifies computer default settings
- A number of temp files have been created in the background
- It locks up browsers and causes unwanted redirection
- Additional threats could be injected out of permission
- INetCache Folder Trojan is capable of violate your sensitive information
How to Remove INetCache Folder Trojan? (Windows + Mac OS)
Section A – INetCache Folder Trojan Removal Steps For Windows OS
(NOTE – Please bookmark this page first, because some steps will require you to restart your web browser or computer.)
Step 1. End malicious process run by INetCache Folder Trojan and related malware.
1. Hit Ctrl + Shift + Esc keys at the same time to open Windows Task Manager:

2. Find malicious process related with INetCache Folder Trojan or malware, and then right-click on it and click End Process or End Task.

Step 2. Uninstall malicious programs related with INetCache Folder Trojan.
Press “Win + R ” keys together to open the Run screen;

Type control panel in the Run window and click OK button;

In Control Panel, click Uninstall a program under Programs;

Look for malicious app related with INetCache Folder Trojan; Right-click on the malicious program and click Uninstall.

Step 3. Delete extension installed by INetCache Folder Trojan and related malware.
Chrome
On Chrome
Click the Chrome menu button >> Click Tools >> Select Extensions:

Find extension that may be related with INetCache Folder Trojan or potential threat >> Click the trash can icon to delete them.

Microsoft Edge
On Microsoft Edge
Start Edge: Click the More (…) button ahe tog right corner and click Extensions:

Select the extensions you want to remove and click Remove:


Firefox
On Firefox
Click the menu button and choose Add-ons. The Add-ons Manager tab will open.

In the Add-ons Manager tab, select the Extensions panel >> find extension that may be related with INetCache Folder Trojan or potential threat >> Click Remove button.

IE
On Internet Explorer
Open the IE, click the Tools button , and then click Manage add-ons.

Choose Toolbars and Extensions on left side of the window >> Find extension that may be related with INetCache Folder Trojan or potential threat>> Click Disable button

Step 4. Remove malicious files created by INetCache Folder Trojan or related malware.
1. Hit Windows + R keys at the same time to open Run window and input a regedit and click OK:

2. In the Registry Editor, hit Windows key + F key together to open Find window → Enter virus name → Press Enter key to start search.

3. When the search is completed, right click the folders related with INetCache Folder Trojan and click Delete button:

Please Read This Before You Remove Registry Files
PLEASE Be Carefully, Do Not Delete Healthy Registry Entries, Or Your Computer May Be Damaged.
If you are not able to determine which regsitry files are malicious, we recommend downloading SpyHunter Anti-malware to scan entire system and find out all malicious files. It can avoid mistakes and may reduce the cleanup time from hours to minutes.
Download SpyHunter For Windows (Free Trial)
Free Remover allows you, subject to a 48-hour waiting period, one remediation and removal for results found. Read our EULA, Privacy Policy, Cookie Policy . See more Free SpyHunter Remover details.
Step 5. Reset Web Browsers to remove Hijackers Brought by INetCache Folder Trojan.
Chrome
Reset Chrome:
- Click the Chrome menu button, represented by three horizontal lines;
- Click Settings when the drop-down menu appears;
- In the Settings screen, scroll to the bottom of the page and click on the “Advanced” link;
- Click on the “Reset settings to their original defaults” button.
- A confirmation dialog appears, click on the “Reset Settings” button.
Edge
Reset Microsoft Edge:
- Click on Microsoft Edge’s main menu button, represented by three horizontal dots;
- Click on “Settings“ button when the drop-down menu appears;
- Click on “Reset Settings”On the left side of the window;
- Click on “Restore settings to their default values”
- Click on the “Reset” button in the new confirmation window that opens.
Firefox
Reset Firefox:
- Click the menu button of firefox, represented by three horizontal lines;
- Click on “Help“ button when the drop-down menu appears;
- Click on “Troubleshooting Information“ from the Help menu;
- Click the “Refresh Firefox” button in the upper-right corner of the “Troubleshooting Information” page.
- Click on the “Refresh Firefox” button in the new confirmation window that opens.
IE
Reset IE :
- Open Internet Explorer, click on the gear icon in the upper-right part of your browser, then select “Internet Options“.
- Now select the “Advanced” tab, then click on the “Reset” button
- In the “Reset Internet Explorer settings” section, select the “Delete personal settings” checkbox, then click on the “Reset” button.
NOTE – If the steps above doesn’t help, please rescan entire infected PC with Spyhunter anti-malware and let it help you fix all problems.
Section B – INetCache Folder Trojan Removal Steps For Mac OS
Step 1 – Remove nasty extension and browser hijacker related with INetCache Folder Trojan or malware.
Chrome
– Click the setting button “≡” at the top right of the browser window, choose “More Tools” and choose “Extensions“.

– Click the “trash can icon” button to remove extension related with INetCache Folder Trojan or malware:

Safari
Safari:
– Choose Safari > Preferences

– On the ‘Extensions’ tab, find out the extension related with adware or hijacker and click Uninstall or Disable

Firefox
Mozilla Firefox:
– Click the settings button (three horizontal bars) in the top-right corner and then select ‘Add-ons’.

– Click “Extensions” tab under Add-on Manager page to view the extensions.
– Find the suspicious add-on you want to disable and click its “Disable” button.
– If you want to delete an extension entirely, click “Remove.”

Malicious browser extensions hijack your Google Search and redirect you to unwanted websites. To get rid of related search hijacker, you need to delete core files of INetCache Folder Trojan and related malware. We recommend downloading SpyHunter Mac Antimalware to remove all malicious apps and hijacker for you. This may save you hours and ensure you don’t make mistakes that harm your system
Download SpyHunter For Mac (Free Trial)
Free Remover allows you, subject to a 48-hour waiting period, one remediation and removal for results found. Read our EULA, Privacy Policy, Cookie Policy . See more Free SpyHunter Remover details.
Step 2 – Uninstall harmful Apps related with INetCache Folder Trojan or malware
– Open Finder at the Dock

– Select Applications and find out suspicious apps related with INetCache Folder Trojan , then right click on the app and click Move to Trash:

– Right click on Trash icon to select Empty Trash

Step 3 – Remove malicious files generated by INetCache Folder Trojan or malware from your Mac
Malware geneates lots of malicious files and folders on infected Mac, to avoid INetCache Folder Trojan reinstalling itself, you need to find out and remove all malicious files:
1. Click the Finder icon from the menu bar >> choose “Go” then click on “Go to Folder“:

2. In the Go to Folder… bar, type “/Library/LaunchAgents” and click Go:

3. In LaunchAgents folder, search for any recently-added suspicious files and move them to the Trash.

Here are some examples of files generated by malware:
“installmac.AppRemoval.plist”, “com.genieo.completer.download.plist” “com.genieoinnovation.macextension.plist” “com.genieo.engine.plist” “com.adobe.fpsaud.plist” , “myppes.download.plist”, “mykotlerino.ltvbit.plist”
4.Repeat the process on the following folders:
~/Library/LaunchAgents

/Library/Application Support

/Library/LaunchDaemons

Step 4 – Download SpyHunter Antimalware For Mac to Scan For Malicious Apps and Files.
Lots of Malware keep generating malicious files on infected computer deeply, thus it’s quite difficult for common computer users to find out and remove all harmful items related with INetCache Folder Trojan. Meanwhile, there will be possibility that users remove core system files by mistake and then the entire computer will be harmed seriously.
To avoid the risks, We recommend all users downloading SpyHunter Antimalware For Mac, a professional automatic malware removal tool which keeps your Mac away from virus and malware attack and avoid online spam and phishing websites and protect your privacy and files well.
1. Click Download button here to download SpyHunter For Mac:
Download SpyHunter For Mac (Free Trial)
(Free Remover allows you, subject to a 48-hour waiting period, one remediation and removal for results found. Read itsEULA, Privacy Policy See more Free SpyHunter Remover details.)
2. Double-click SpyHunter-1.2-15-7043-Installer.dmg to install Spyhunter For Mac:
3. Once SpyHunter For Mac is installed, run a scan and register its full version to remove all malicious objects on your Mac.

4. In case INetCache Folder Trojan is still infecting your Mac, Submit a Support Ticket and the support agent will conact to help you.

Содержание
- inetcache что за папка
- Можно ли удалить папку MSOCache?
- Что делать, если папка MSOCache занимает много места и её нельзя удалять?
- Не удаляются временные файлы интернета в Windows 10
- Ответы (3)
- AppData – что лежит в этом таинственном каталоге и как избавиться от всего ненужного в нем
- AppData – что лежит в этом таинственном каталоге и как избавиться от всего ненужного в нем
- Виджеты на рабочий стол
- В Экселе не двигается курсор по ячейкам: в чем может быть проблема?
- Не работает правая кнопка мыши в Excel: где кроется проблема?
- Не работает фильтр в Excel: загвоздка, на которую мы часто не обращаем внимания
- Не отображаются листы в Excel: как вернуть вкладки без танцев с бубнами
inetcache что за папка
Я использую Windows 10 и вам нужно обновить пакетный файл, чтобы очистить содержимое папки в папке «C: Users myUserName AppData Local Microsoft Windows INetCache». Это папка, в которой хранится кеш для Internet Explorer.
Я бы подумал, что команда была просто следующей:
DEL / S / F / QC: Users myUserName AppData Local Microsoft Windows INetCache
Эта команда выполняется без проблем, но когда я просматриваю содержимое папки через Проводник Windows, у нее все еще есть вещи. Я говорю «материал», потому что, хотя он похож на кучу файлов, они не ведут себя как обычные файлы. Например, я не могу видеть эти файлы, когда я использую «dir» в командной строке независимо от того, какие флаги я использую. И когда я просматриваю свойства этих файлов, с ними практически не связана какая-либо информация.
Почему моя команда DEL не очищает эти файлы?
Снимок экрана с»files» все еще присутствует в папке INetCache
Снимок экрана свойств одного из этих файлов
MSOCache — это папка, которая находится в корневом каталоге системы и связана с Microsoft Office. В некоторых случаях папка может занимать гигабайты пространства и по умолчанию она скрыта. Папка MSOCache создается Microsoft Office во время установки и впоследствии используется программой как «Локальный источник установки». Папка MSOCache предоставляет и хранит необходимые файлы для восстановления и обновления самой программы Office. Она может быть полезна во время различных сбоев или выпусков новых версий.
Можно ли удалить папку MSOCache?
Не рекомендую удалять эту папку, потому что программа Office может не исправить и не восстановить те ошибки, которые у вас могут возникнуть. К примеру, когда вы удалите эту папку, то Office может попросить вас вставить диск, для того, чтобы он взял оттуда исходные и нужные ему файлы для восстановления. Если вы больше не пользуйтесь Microsoft Office, то эту папку можно смело удалять, но лучше удалить саму программу Microsoft Office через инсталлятор.
Что делать, если папка MSOCache занимает много места и её нельзя удалять?
Просто переместить на другой локальный диск не получится, папка потеряет функциональность и привязанные к ней путь, но возможно, только нужно сделать «символическую ссылку». Первым делом сделайте резервную копию этой папки и спрячьте ее на время, просто скопируйте её на флешку и другое безопасное место.
Нажмите правой кнопкой мыши по папке MSOCache и выберите вырезать.
Далее вставьте папку MSOCache в нужное вам место. К примеру я буду ставить в корень локального диска E.
Далее откройте командную строку от имени администратора и введите команду:
- mklink /D «C:MSOCache» «E:MSOCache»
- Где mklink /D создает символическую ссылку нашей папки C:MSOCache на наше новое место E:MSOCache.
- Теперь данные будут храниться на диске Е, но диске C будет создана папка ярлык. Ее не нужно удалять.
Если у вас не получилось, то у вас должна быть резервная копия, а если получилось и все работает, то можете её удалит.
Думаю, каждый из вас неоднократно встречал в сети советы очистить кэш браузера. Вполне вероятно, что многие следуют этим советам. Но далеко не каждый знает, что же это такое на самом деле: кэш браузера; и для чего его нужно чистить? Сегодня подробно об этом расскажу.
Что такое кэш браузера?
Когда в интернете мы открываем и просматриваем веб-страницы сайтов, наш браузер при этом автоматически сохраняет определенные данные с этих страниц на жесткий диск нашего компьютера. Сюда относятся различные элементы дизайна, изображения и картинки, просмотренные видеоролики и т.д. Необходимо это для того, чтобы при следующем обращении к этой веб-странице часть информации загружалась непосредственно с нашего жесткого диска, а не заново с сервера. Это значительно ускоряет время загрузки страниц!
Благодаря тому, что браузер при повторной загрузке страницы какого-либо сайта берет большинство данных из кэша, а не грузит каждый раз все заново – то происходит еще и экономия входящего интернет трафика.
Для чего нужно чистить кэш браузера?
Кэш браузера необходимо периодически очищать. Для этого есть минимум пару причин.
Во-первых, если вы активно посещаете различные сайты в интернете, то на жестком диске скапливается большое количество файлов кэша. Общий размер этих файлов может достигать нескольких гигабайт (правда в некоторых браузерах можно задать фиксированный размер кэша в настройках).
Вторая причина – более важная. Со временем, некоторые сайты могут начать отображаться некорректно. Например, на сайте поменялся дизайн, а ваш браузер продолжает использовать устаревшие данные из своего кэша.
Где хранится кэш браузера?
Каждый браузер хранит свой кэш в определенной папке на жестком диске компьютера. В операционных системах Windows 7, 8 и 10 кэш всех популярных браузеров по умолчанию сохраняется по пути C:UsersИмя пользователяAppDataLocal каждый в своей папке.
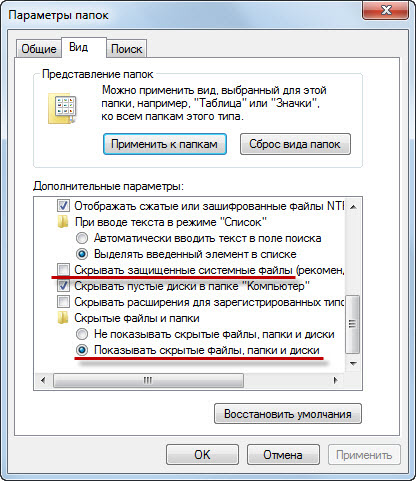
Изначально папка AppData является скрытой, поэтому чтобы войти в нее и увидеть содержимое – необходимо включить в системе отображение скрытых и системных файлов. В Windows 7 для этого в проводнике зайдите в строке меню во вкладку “Сервис” – “Параметры папок” – “Вид”. Здесь снимите галку с пункта “Скрывать защищенные системные файлы” и поставьте маркер в положение “Показывать скрытые файлы, папки и диски”:
Итак, популярные браузеры хранят свой кэш в следующих папках:
Google Chrome
C:UsersИмя пользователяAppDataLocalGoogleChromeUser DataDefaultCache
C:UsersИмя пользователяAppDataLocalGoogleChromeUser DataProfile 1Cache
Mozilla Firefox
C:UsersИмя пользователяAppDataLocalMozillaFirefoxProfilesназвание профиля.defaultcache2entries
Opera
C:UsersИмя пользователяAppDataLocalOpera SoftwareOpera StableCache
Яндекс Браузер
C:UsersИмя пользователяAppDataLocalYandexYandexBrowserUser DataDefaultCache
Internet Explorer
C:UsersИмя пользователяAppDataLocalMicrosoftWindowsTemporary Internet Files
C:UsersИмя пользователяAppDataLocalMicrosoftWindowsINetCache
Как очистить кэш браузера?
Очистить кэш браузера на компьютере очень просто, и времени это займет совсем немного. Находясь в любом браузере, зажмите на клавиатуре три клавиши: Ctrl+Shift+Delete. Дальше выскочит окошко, в котором вам останется только выбрать что именно и за какой период очищать. Тоже самое только со скриншотами я описал в отдельной статье “Как быстро очистить кэш и куки в любом браузере”.
Замечу следующее: после очистки кэша, первое время веб-страницы сайтов будут загружаться чуть медленнее. Причина в том, что все эти страницы будут грузиться прямо с веб-сервера, а кэш-файлы будут создаваться на вашем жестком диске заново.
Чтобы очистить кэш сразу во всех установленных на компьютере браузерах, можно воспользоваться хорошей бесплатной программой CCleaner.
Не удаляются временные файлы интернета в Windows 10
Не удаляются временные файлы интернета в Windows 10.
Вот пример скриншотов:
3) После удаления временные файлы Интернета так и Не удалились
Ответы (3)
Попробуйте выполнить сброс Internet Explorer, может так получится почистить временные файлы. Попробуйте выполнить диагностику целостности системных компонентов в командной строке от имени администратора:
DISM /Online /Cleanup-Image /RestoreHealth
После выполнения каждой команды перезагрузите ПК. Попробуйте снова выполнить очистку диска.
2 польз. нашли этот ответ полезным
Был ли этот ответ полезным?
К сожалению, это не помогло.
Отлично! Благодарим за отзыв.
Насколько Вы удовлетворены этим ответом?
Благодарим за отзыв, он поможет улучшить наш сайт.
Насколько Вы удовлетворены этим ответом?
Благодарим за отзыв.
Здравствуйте. Спасибо, что ответели.
Сделал как Вы и посоветовали.
1) Сброс Internet Explorer НЕ ПОМОГ.
2) Команда sfc/scannow помогла найти повреждённый файл в системе. НО ИСПРАВИТЬ НЕ УДАЛОСЬ.
3) Команда DISM /Online /Cleanup-Image /RestoreHealth НЕ ПОМОГЛА.
4) Пришлось переустановить Windows 10 с сохранением личных файлов и приложений.
После этого, большая часть ВРЕМЕННЫХ ФАЙЛОВ ИНТЕРНЕТА удалилась. Но 199Мб так и не удаляются. ( раньше было 1.24Гб)
5) Повторил команду sfc/scannow . Теперь уже команда помогла найти повреждённый файл в системе и благополучно исправить его.
Но 199Мб так и не удаляются. Причём написанно 199Мб можно удалить, нажимаешь просмотреть файлы — ПУТЬ ( C:\Users\Alexander\AppData\Local\Microsoft\Windows\INetCache\IE ) , А ПАПКА то » IE » ПУСТА ( на скриншоте видно).
6) И в новом Microsoft Edge такая же история:
Пуск/Параметры/Система/Хранилище/Этот Компьютер/Временные файлы/Удаление временных файлов.
НЕ ВСЕ временных файлов Интернета УДАЛЯЮТСЯ (928 Мб так и не удаляются).
7) Я думаю, что дело в том , что низы не могут , а верхи не хотят.
СИСТЕМА СЕБЯ ВО МНОГИХ МЕСТАХ ДУБЛИРУЕТ. А ЗАЧЕМ?
УДАЛЕНИЕ ВРЕМЕННЫХ ФАЙЛОВ ИНТЕРНЕТА в Internet Explorer 10 (Проводник/ Этот Компьютер/Свойства Локального диска/Очистка диска/ Временные файлы Интепрнета/Просмотр файлов — Путь C:\Users\Alexander\AppData\Local\Microsoft\Windows\INetCache\IE , показывает, что ПАПКА то » IE » ПУСТА ( а на скриншоте видно, что 1.24 Гб есть))
и в Microsoft Edge (Пуск/Параметры/Система/Хранилище/Этот Компьютер/Временные файлы/Удаление временных файлов), а 928Мб так и не удаляются!
AppData – что лежит в этом таинственном каталоге и как избавиться от всего ненужного в нем
AppData – что лежит в этом таинственном каталоге и как избавиться от всего ненужного в нем
Виджеты на рабочий стол
В Экселе не двигается курсор по ячейкам: в чем может быть проблема?
Не работает правая кнопка мыши в Excel: где кроется проблема?
Не работает фильтр в Excel: загвоздка, на которую мы часто не обращаем внимания
Не отображаются листы в Excel: как вернуть вкладки без танцев с бубнами
Операционная система Windows скрывает в себе множество тайн, но некоторые из них более интересны, чем другие, и если вы возьметесь их распутывать, то можете получить неоспоримую пользу.
Возьмем, к примеру, каталог, который впервые появился в Windows Vista и о существовании которого мало кто подозревает. Причина заключается в том, что он скрыт от глаз пользователей, так как в нем хранится исключительно важная системная информация. Однако понимание его природы может помочь вам сэкономить драгоценное дисковое пространство на вашем основном разделе и, возможно, повысить производительность всей системы.
AppData (или Application Data) – это скрытая (по умолчанию) системная папка, подкаталог папки Users с личными файлами всех зарегистрированных пользователей. Папка содержит всю информацию, порожденную установленными программами на компьютере и невидима для пользователей, потому что (по крайней мере, в теории) хранящиеся в ней файлы не должны представлять для них никакого интереса.
Тем не менее, реальность часто расходится с первоначальным замыслом Microsoft. При продолжительном и активном использовании Windows без переустановки системы размер этой папки будет стремительно расти, и вскоре вы можете столкнуться с недостатком свободного пространства на системном разделе – особенно если вы используете SSD-устройство относительно скромного объема, на котором каждый мегабайт имеет значение.
Давайте подробно рассмотрим структуру AppData и выясним, какие из файлов, хранящихся в этой папке, имеют критическое значение, а какие нет.
Как уже упоминалось, AppData по умолчанию скрыта, поэтому, чтобы добраться до нее, вы должны будете изменить некоторые системные настройки Windows. Для этого откройте «Панель управления» и перейдите в раздел «Оформление и персонализация». Затем откройте диалоговое окно «Параметры папок» и на вкладке «Вид» в списке параметров найдите опцию «Скрытые файлы и папки». Теперь просто измените настройки по умолчанию («Не показывать скрытые файлы, папки и диски») на «Показывать скрытые файлы, папки и диски».
Это сделает видимой не только AppData, но и ряд других системных каталогов и файлов, а также файлы и папки, которые были скрыты вами.
AppData находится в папке C:\Users, но обратите внимание, что каждый зарегистрированный в системе пользователь имеет свой собственный каталог AppData, так что ищите папку в директории с вашим именем пользователя.
По умолчанию в этом каталоге находятся три подкаталога: Local, LocalLow и Roaming. Каждый из них хранит данные различных профилей.
Local содержит файлы, созданные в процессе работы установленных программ. Эта информация строго специфична для конкретного пользователя компьютера и не может быть перемещена на новую машину. Здесь вы найдете и папку с именем Microsoft, содержащую историю всей активности Windows.
В Local находится и папка с временными файлами (Temp), созданными во время работы различных приложений. Ее содержимое (временные файлы) можно удалить полностью, так как очень часто эти записи являются ненужными и только занимают место на диске.
Папка Roaming хранит определенные пользовательские файлы, которые могут быть перенесены с компьютера на компьютер.
Папка LocalLow предназначена в основном для буферных данных, генерируемых Internet Explorer, Java и программами от Adobe.
Очень часто в этих подкаталогах AppData накапливается довольно много софтверных «отходов», которые со временем могут разрастись до невероятных размеров. Для очистки системы от всех этих мусорных файлов вовсе не обязательно лезть в глубины AppData. До папки с временными файлами, подлежащими удалению, можно добраться и более простым способом.
Если в адресной строке проводника написать shell:history и нажать Enter, вы мгновенно окажитесь в папке с историей Internet Explorer. shell:cache открывает директорию с офлайн буфером браузера, shell:cookies показывает все записанные файлы «куки», а с shell:sendto вы можете удалять и добавлять ярлыки в меню «Отправить».
Если вы хотите изучить более подробно содержимое папки AppData, то неоценимую пользу в этом вам может принести небольшой, но мощный инструмент WinDirStat . Он быстро просканирует ваш жесткий диск, а затем визуализирует распределение записанных на нем файлов в весьма привлекательном графическом виде, так что вы сможете легко ориентироваться, если один или большая группа однотипных файлов занимает слишком много места.
Ну а самый простой и лучший способ очистки не только AppData, но и всего ненужного на жестком диске, по-прежнему заключается в периодическом сканировании системы чудесным инструментом CCleaner от Piriform.