
Многие пользователи задаются вопросом: можно ли использовать iMac как внешний монитор? Ответ зависит от модели компьютера и используемой операционной системы. Некоторые старые iMac поддерживают режим Target Display Mode, позволяющий использовать их в качестве дисплея для других устройств, но современные модели уже лишены этой функции. В этой статье мы разберём, какие iMac можно использовать как монитор, как подключить их к Mac и Windows, а также какие существуют альтернативные способы.
Какие модели iMac можно использовать как монитор?
Режим Target Display Mode – что это и как работает
Target Display Mode (TDM) – это специальный режим, позволяющий использовать iMac как монитор при подключении к другому Mac через Thunderbolt 2 или Mini DisplayPort. Однако он поддерживается только на моделях iMac с 2009 по 2014 год.
Какие модели iMac поддерживают TDM
- iMac 27″ (Late 2009 – Mid 2014)
- iMac 21,5″ (Mid 2011 – Mid 2013)
Почему современные iMac (2015 и новее) не поддерживают TDM
Apple отказалась от этого режима из-за технических и маркетинговых причин:
- Новые iMac с Retina-дисплеями (5K и 4K) требуют мощного видеосигнала, который невозможно передать через Thunderbolt 2.
- В iMac 2015+ изменена архитектура дисплея, которая не позволяет ему работать как внешний монитор.
Совместимость iMac с macOS и Windows
Подключение iMac как второго монитора возможно только с macOS, если модель поддерживает Target Display Mode. Windows не поддерживает прямое подключение iMac как монитора, но есть обходные пути с использованием стороннего программного обеспечения.
Как подключить iMac как монитор для MacBook или Mac mini
Подключение через Target Display Mode (iMac 2009–2014)
Если у вас iMac, поддерживающий TDM, выполните следующие шаги:
- Подключите iMac к другому Mac с помощью Mini DisplayPort или Thunderbolt 2 (в зависимости от модели).
- Включите iMac и войдите в macOS.
- Нажмите Cmd + F2 (или Cmd + Fn + F2) на клавиатуре iMac, чтобы активировать режим Target Display Mode.
- Теперь iMac должен работать как внешний монитор.
Важно:
- Не работает с Thunderbolt 3/USB-C без адаптера.
- TDM недоступен на macOS Monterey и новее.
Использование iMac как монитора для новых Mac (2015 и новее)
Если ваш iMac 2015 года или новее, подключить его как монитор напрямую невозможно. Однако есть альтернативные способы через сторонние приложения.
Программы для использования iMac как монитора:
- Luna Display – аппаратное решение с USB-C или HDMI-адаптером.
- Duet Display – подключение через кабель или Wi-Fi.
- Astropad – для художников и дизайнеров.
Минусы:
- Не поддерживает 4K и 5K разрешение на полной мощности.
- Возможны задержки при беспроводном соединении.
Можно ли использовать iMac как монитор для Windows?
Прямое подключение – возможно ли это?
Подключить iMac к Windows через HDMI или DisplayPort невозможно, так как iMac не поддерживает видеовход – он работает только на вывод изображения.
Обходные пути – использование стороннего программного обеспечения
Можно использовать специальные программы, передающие изображение по сети:
Популярные решения:
- Luna Display (адаптер для Windows)
- Duet Display (через USB или Wi-Fi)
- Deskreen (бесплатное приложение для трансляции экрана по Wi-Fi)
Недостатки:
- Возможны задержки и снижение качества изображения.
- Невозможно передавать 4K-картинку без проводного соединения.
Как использовать iMac как второй монитор по сети
Подключение через Sidecar (для iPad, аналогично с iMac)
Apple разработала Sidecar – функцию, позволяющую использовать iPad как второй монитор. Однако этот метод не работает для iMac, но похожие решения существуют.
Использование AirPlay для дублирования экрана
- Если ваш Mac поддерживает AirPlay, можно транслировать экран на iMac (некоторые модели 2017+ поддерживают AirPlay-приёмник).
- Работает только для macOS Monterey и новее.
Приложения для передачи изображения по Wi-Fi
Если нужно использовать старый iMac как внешний монитор по сети, можно попробовать следующие приложения:
- Luna Display – передаёт картинку по сети или через USB-адаптер.
- Duet Display – подключение через Wi-Fi или USB.
- Deskreen – бесплатное ПО для дублирования экрана на любое устройство.
Старый iMac как монитор – стоит ли использовать?
Какие модели iMac устарели и не подходят для работы как монитор?
- iMac 2008 года и старше – не поддерживают TDM.
- iMac 2015 года и новее – не поддерживают видеовход.
Альтернативные способы использования старого iMac
Если ваш iMac не подходит в качестве монитора, его можно использовать иначе:
- Установить Windows или Linux – превратить в рабочую станцию.
- Использовать как медиаплеер для просмотра фильмов.
- Превратить в домашний сервер для хранения файлов.
Заключение – стоит ли использовать iMac как монитор?
Какие iMac можно использовать как монитор?
- iMac 2009–2014 – поддерживают Target Display Mode.
- iMac 2017+ с AirPlay – можно использовать для беспроводного дублирования экрана.
Какие iMac не подходят?
- iMac 2015 года и новее – не поддерживают Target Display Mode.
- iMac 2008 и старше – устаревшие модели без поддержки внешнего подключения.
Лучшие альтернативные способы
- Для Mac → Luna Display, Duet Display, AirPlay.
- Для Windows → Luna Display для Windows, Deskreen.
- Другие варианты → Установить другую ОС, использовать как медиаплеер.
Вывод: если у вас iMac 2009–2014 годов, его можно легко использовать как монитор. Если модель новее, придётся использовать сторонние программы или найти альтернативное применение.
Как использовать iMac в качестве второго монитора для ПК с Windows [решено]
Наличие iMac даст вам достойный дисплей с его лучшими функциями, такими как сетчатка 4K, которая улучшит ваш рабочий процесс. И теперь можно используйте iMac в качестве монитора для ПК с Windows! Установив iMac в качестве дополнительного монитора, вы сможете наслаждаться просмотром фильмов, играть в любимые игры и даже эффективно работать. Вы также можете спросить: «Есть ли другие требования для подключения iMac?» или «Совместима ли моя версия iMac с ролью дополнительного монитора?» Итак, эта статья ответит на ваши вопросы и подробно расскажет о шагах по как использовать iMac в качестве монитора для ПК. Продолжайте читать и узнайте больше советов для сделать iMac монитором вашего ПК.
Как использовать iMac в качестве второго монитора для ПК с Windows
До настройка iMac в качестве дополнительного монитора для ПК, есть еще некоторые требования, на которые нужно обратить внимание. Обычно вам необходимо убедиться, что ваш iMac и ПК с Windows соответствуют следующим двум требованиям:
◆ О версии для iMac. Чтобы использовать iMac в качестве монитора для ПК, вы должны использовать версию iMac конца 2014 года, которая поставляется с функциями порта Mini Display и Thunderbolt. Другими версиями iMac могут быть также версии 2009 или середины 2010 года с размером 27 дюймов (конечно, с портом Mini Port Display), версии 2011 и 2014 годов с портом Thunderbolt.
◆ Еще одно требование к вашему ПК. Он должен иметь порт Mini Display или Thunderbolt. Но если на вашем ПК их нет, вы можете использовать порт HDMI или Display с совместимым адаптером, чтобы сделать iMac монитором.
Примечание
Если вы не уверены в версии iMac, ее легко найти. Просто нажмите кнопку «Apple» в верхней части экрана iMac и нажмите кнопку «Об этом Mac». Нажмите кнопку «Обзор» и найдите год, помимо модели и версии iMac.
Если вы убедились, что ваш iMac является одной из указанных версий, вы можете прочитать следующее руководство по как настроить iMac в качестве второго монитора ПК:
Шаг 1.Сначала вам нужно подключить iMac к ПК с помощью кабеля Thunderbolt или кабеля Mini Display. Убедитесь, что iMac и ваш компьютер выключены.
Шаг 2.Подключите кабель к порту Thunderbolt, HDMI или порту дисплея на ПК. Другой конец кабеля подключите к порту Mini Display Port или Thunderbolt на iMac. Если вы используете адаптер, вам необходимо сначала подключить кабель к адаптеру. Мужской конец должен идти к мини-дисплею или порту Thunderbolt iMac.
Шаг 3.Когда все будет расставлено по местам, вы можете включить ПК и iMac и нажать клавиши «Command+F2» или «Command+Fn+F2» на клавиатуре iMac, чтобы активировать целевой режим отображения. Подождите, пока экран ПК не отобразится на экране iMac. Теперь вы можете использовать iMac в качестве монитора для ПК и изменить выходное разрешение на более высокое.
Если вам все еще трудно настроить iMac в качестве монитора для ПК, вот другие советы, которые помогут вам решить ваши проблемы. Узнайте больше о других важных вещах, которые вы должны знать:
-
Что такое целевой режим отображения и почему он важен для iMac?
Режим целевого дисплея позволяет отображать экран iMac на другом экране. Это важно, так как он позволяет обмениваться файлами и, конечно же, подключать iMac к ПК. Таким образом, это одна из самых важных вещей, когда вам нужно сделать ваш iMac дополнительным монитором для ПК.
-
Как превратить старый iMac во второй монитор Mac?
Включите Target Display Mode на клавиатуре. Убедитесь, что iMac также поддерживает режим целевого дисплея и у вас есть кабель Thunderbolt. С ними легко продолжить настройку:
Шаг 1.Выключите iMac и Mac и подключите кабель Thunderbolt к их портам.
Шаг 2.Включите устройства, нажмите клавиши «Command+F2» на клавиатуре iMac, чтобы активировать целевой режим отображения. Затем iMac отобразит экран Mac.
-
Почему мой ПК не может использовать iMac с экраном 5k?
iMac имеет разрешение 2560×1440 и еще 5120×2880 (5K). Если вы собираетесь выбрать 2560 × 1440, убедитесь, что на ПК установлено то же разрешение, что и на iMac. Когда вы не можете использовать экран iMac 5K в качестве монитора для ПК с Windows, это в основном из-за несовместимости с ПК.
-
Как отключить iMac от второго монитора для ПК?
Если вы хотите отключить iMac, просто выйдите из режима целевого дисплея, нажав клавиши «Cmd + F2» на клавиатуре. Или вы можете отключиться другим способом: выключите устройства, а затем отсоедините кабель MiniPort или Thunderbolt. Режим целевого отображения также будет автоматически отключен.
Бонусные советы: лучший рекордер экрана для любого монитора на Windows/Mac

Если вы обнаружите, что ваш проигрыватель Windows Media не поддерживается для запись экрана на ПК с Windows После Вас использовать iMac в качестве монитора для ПК, вы можете просто положиться на упомянутый экранный рекордер.
Заключение
Чтобы покончить с этим взрывом, имея iMac в качестве дополнительного монитора ПК не является невозможным, если у вас есть правильные требования для его подключения. А если вы хотите снимать видео высокого качества на экране iMac, вы можете использовать AnyRec Screen Recorder для записи как с мониторов iMac, так и с вашего ПК. Если вы выполните шаги, чтобы сделайте свой iMac вторым монитором ПК, добро пожаловать, чтобы сообщить нам хорошие новости.
Статьи по Теме
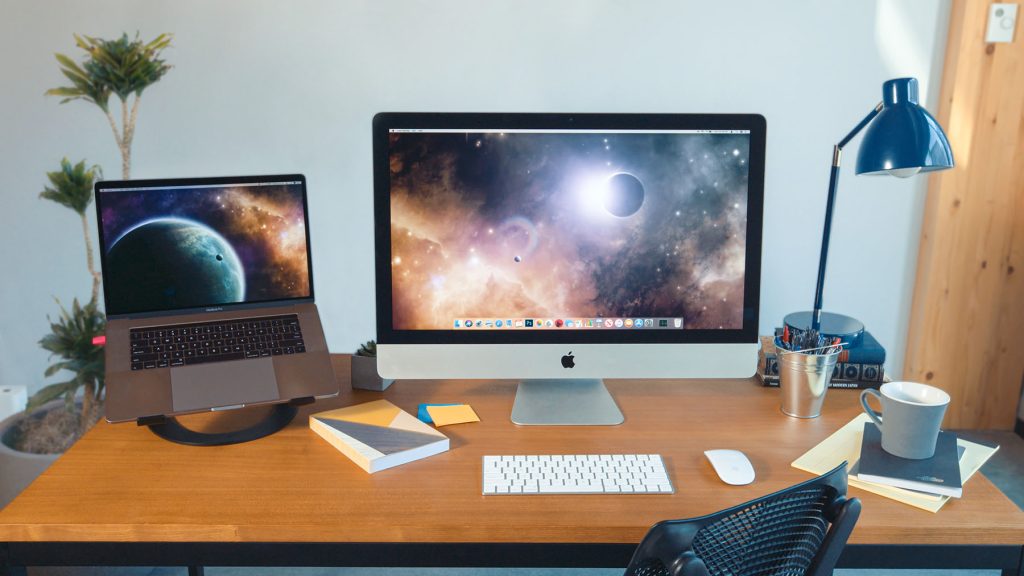
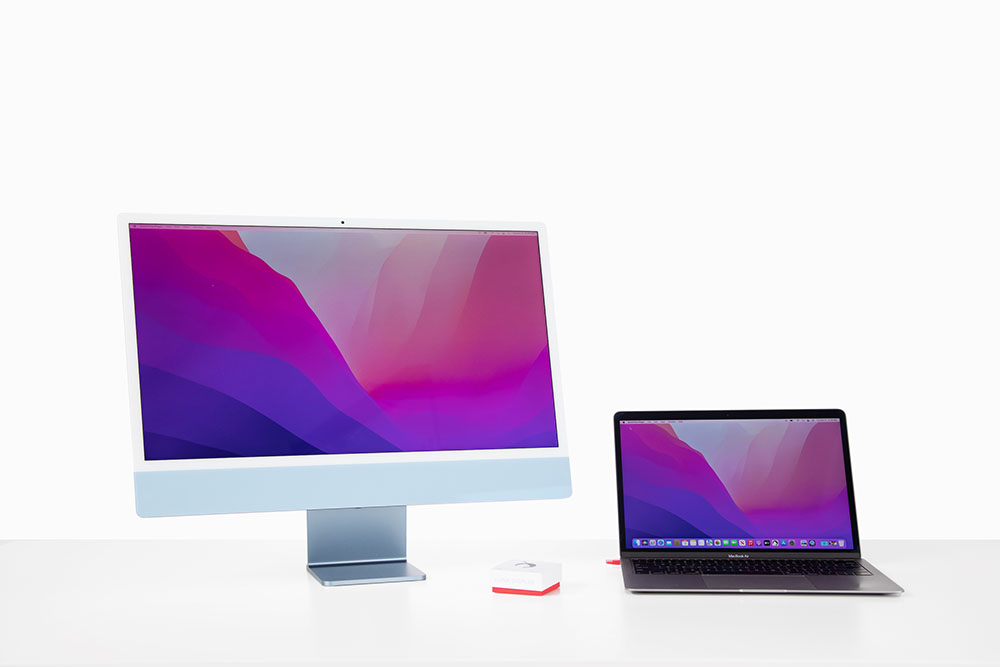
Looking for a way to use your iMac as a monitor for your Mac or PC? Look no further, this guide walks step by step through how to use your gorgeous 5k iMac display for your Mac or PC.
While there are multiple ways to configure your iMac as a monitor, this guide will walk you through my recommended setup with Luna Display which I use every day with my 2015 iMac and M1 MacBook Pro. Let’s get started!
Table of Contents
- Recommended Setup: Why Luna Display
- Target Display Mode: Why It No Longer Works
- Essentials for Setup: What You Need to Begin
- Setting Up Your iMac as a Display: Key Steps
- Understanding Limitations: Navigating Luna Display’s Limits
- Boosting Performance: Tips for Optimal Use
- Solving Problems: Effective Troubleshooting Strategies
Recommended Setup: Why Luna Display
You should know there are a few other options for connecting your iMac as a monitor, but they have limitations:
- Target Display Mode – This only works on mid 2014 or earlier iMacs, so chances are your iMac doesn’t support it. Plus it uses an older Thunderbolt connector which is incompatible with newer Macs.
- Airplay to Mac – As of macOS Monterey, Apple introduced Airplay to Mac support for using another Mac as a screen. However it suffers from two major limitations: it maxes out as 4K and it doesn’t support PC. Plus it doesn’t work with older iMacs.
- Duet Display – Works with Mac or PC to use the iMac as a display, but it doesn’t have support for 5K or USB connectivity and it requires an ongoing subscription.
Luna Display supports the full 5K iMac resolutions, works with Mac or PC, and can connect over USB, Wifi, Ethernet or Thunderbolt. Plus we’ve gone out of our way to make it work on iMacs going back to 2011!
In full disclosure, we are the creators of Luna Display, but we added iMac support for a reason – nothing existed for using an iMac display at full 5K resolution! At Astropad, we like to solve problems we have ourselves, and Luna Display is no exception.
Target Display Mode: Why It No Longer Works
As mentioned above, if you look at other guides on using your iMac as a monitor, they recommend Target Display Mode – but in 2025 that’s outdated advice. Target Display Mode was a mode on early 2010 era iMacs activated via the keyboard that turned them into monitors when connected via Thunderbolt cables.
It’s now outdated advice for a few reasons:
- Target Display Mode only works on mid 2014 or earlier iMacs. Most people don’t have iMacs this old.
- Target Display Mode uses an old version of Thunderbolt that isn’t compatible with modern Macs
- Finally, even if you get all of that to work, Target Display Mode is limited to a low resolution of 2560×1440.
For all of those reasons, Target Display Mode is no longer an option. Instead try Luna Display connected to your Mac or PC to use your iMac at full 5K resolution. Read on for the key equipment you need to get started.
Essentials for Setup: What You Need to Begin
- A primary Mac or Windows PC to connect the iMac to
- iMac running MacOS 10.15 or later for USB connection mentioned in this guide (10.13 if you would prefer to use Ethernet or Thunderbolt)
- Luna Display USB-C
- Optional but highly recommended for performance:
- For Macs: USB-C to USB-A cable
- For PCs: Ethernet cable
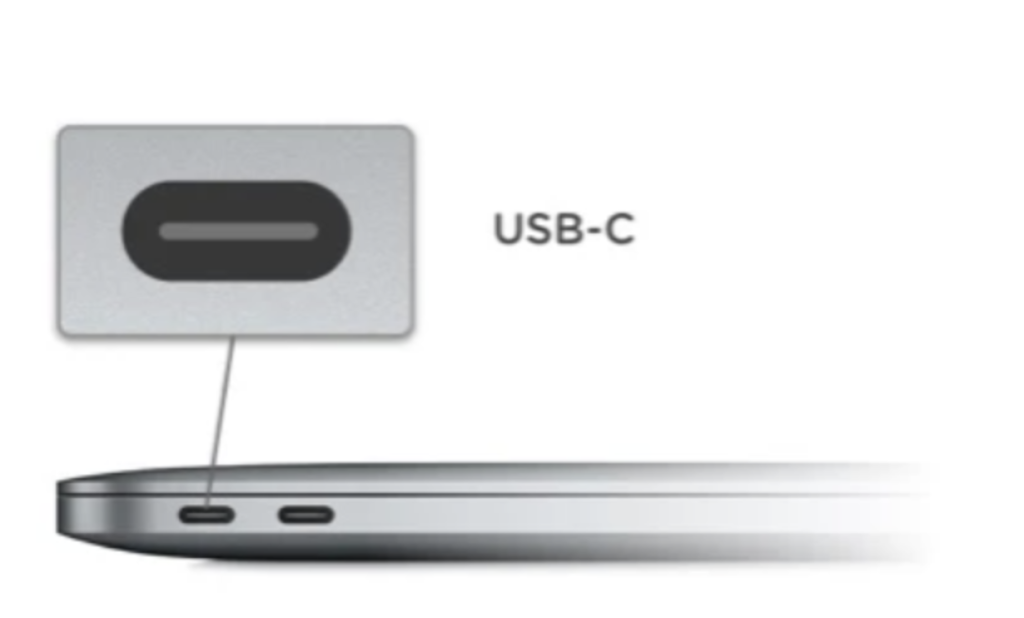
For this guide, I’m assuming you have a primary Mac or Windows computer that has at least one USB-C port available. Most modern computers have USB-C so that’s why I recommend it.
Older Macs or PCs may require Mini DisplayPort or HDMI connectors, which are supported by Luna Display but aren’t discussed in this guide.
Setting Up Your iMac as a Display: Key Steps
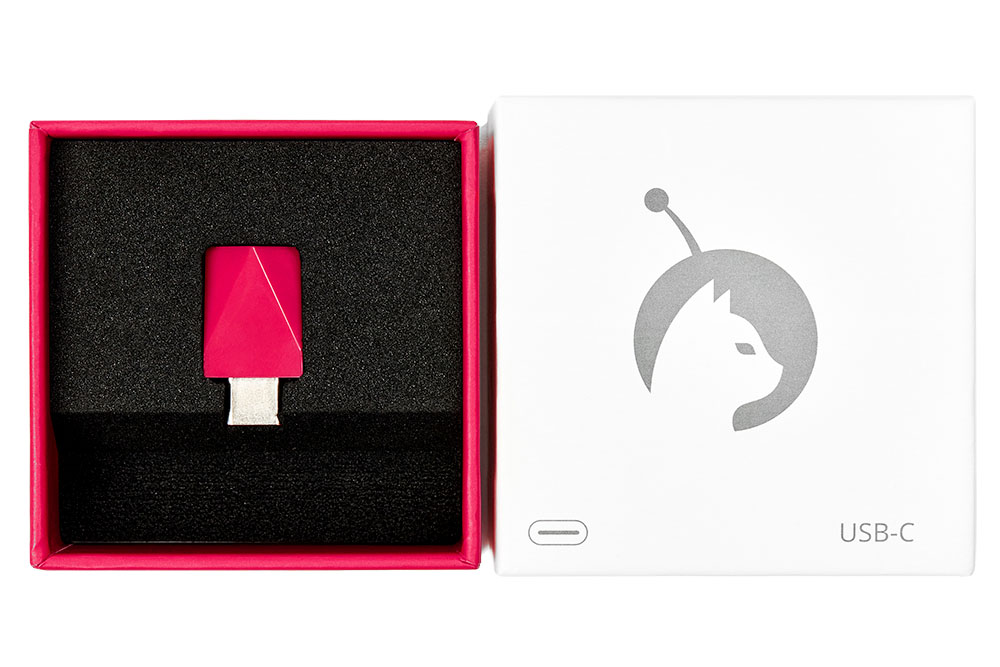
Step 1: Plug in your Luna Display
Once you have your Luna Display, you’ll need to take the dongle and plug it into your primary Mac or PC. By primary, I mean the computer you’d like to attach the iMac to as a display.
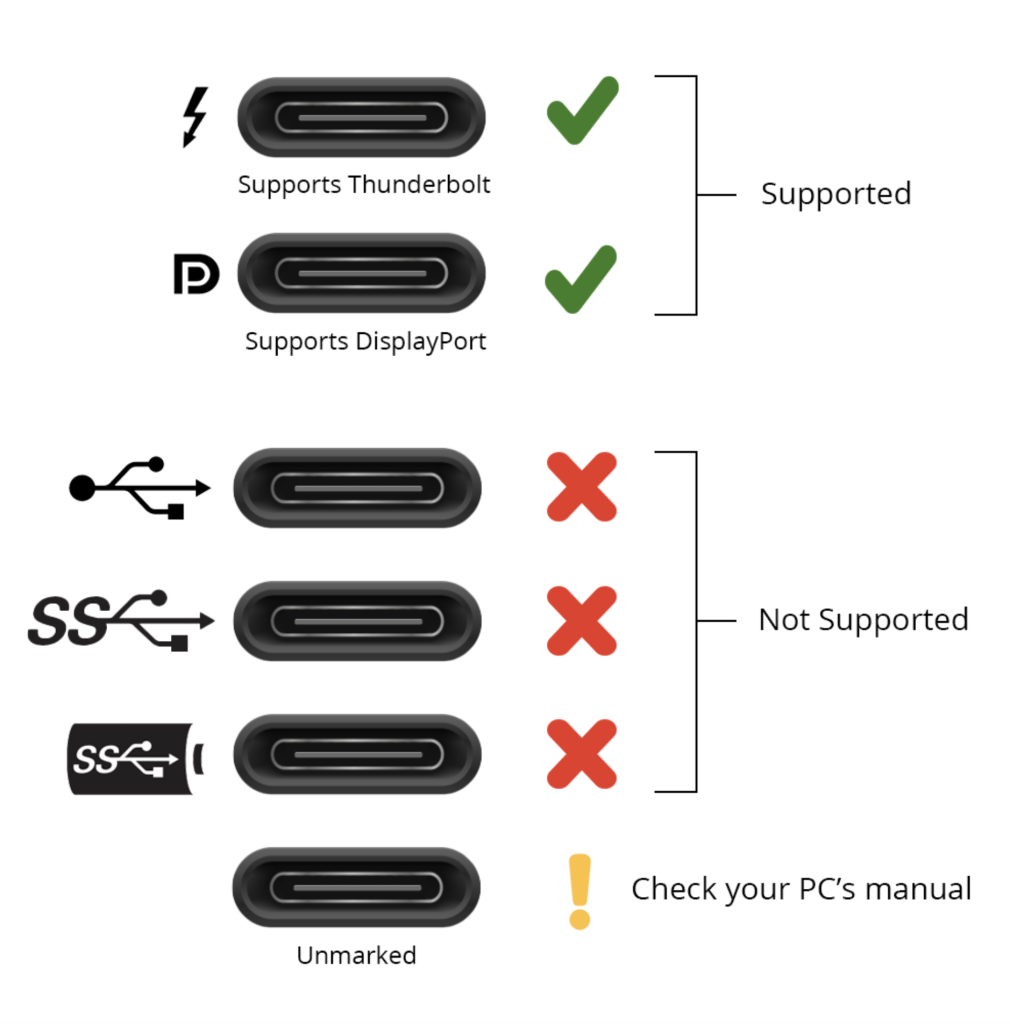
The Luna Display dongle must be plugged into a USB-C port that supports Thunderbolt or DisplayPort. While most Mac USB-C ports offer this compatibility, there are exceptions with the M-series Mac Mini and Mac Studio. On these devices, only the USB-C ports on the back support Thunderbolt or DisplayPort, whereas the front ports do not. For PCs, the situation is less straightforward. To ensure compatibility on a PC, make sure to plug the dongle into a USB-C port labeled with a Thunderbolt or DisplayPort icon. See the chart below for examples.
Supported USB-C ports
Step 2: Connect your iMac to your computer using a cable
While Luna Display does support Wi-Fi connections, I strongly encourage you to use a cable connection when using the iMac as a display. Driving the 5K iMac as a monitor requires a lot of bandwidth, so you’ll get the most reliable and consistent performance when wired.
My recommended setup depends on whether you have a Mac or PC.
Connecting your iMac using a cable to another Mac
I recommend connecting your iMac to your primary Mac using a USB cable – it’s what I use everyday. Unless you have a recent iMac, you’ll want to buy a USB-C to USB-A cable, this is the cable I use with my 2015 iMac and 2021 M1 MacBook Pro.
If your iMac is recent and has USB-C, than you’ll want to get a USB-C to USB-C cable. Most people reading this guide will have older iMacs and need the USB-C to USB-A cable instead.
Once you have your cable, you’ll plug into the back of your iMac and the other end will go into your primary Mac’s USB port.
Connecting your iMac using a cable to PC
Unfortunately, we aren’t able to provide the same robust USB cable support on Windows. Instead I recommend using an ethernet cable for best performance. Any ethernet crossover compatible cable should work just fine, here’s an inexpensive cable from Amazon I like.
You’ll plug the ethernet cable into the iMacs ethernet port and then plug the other end directly into your PC’s ethernet port.
Step 3: Download and launch the software
All the necessary hardware is plugged in now, so the final step is to load up the necessary software on your computers:
Luna Display
On your primary Mac or PC, download and open the primary Luna Display app
Luna Secondary
Next, on your iMac, download and launch the Luna Secondary app. Downloads are available here.
Step 4: Use your iMac as a monitor!
At this point, your iMac and primary computer should automatically detect each other and the iMac should be configured as a monitor!
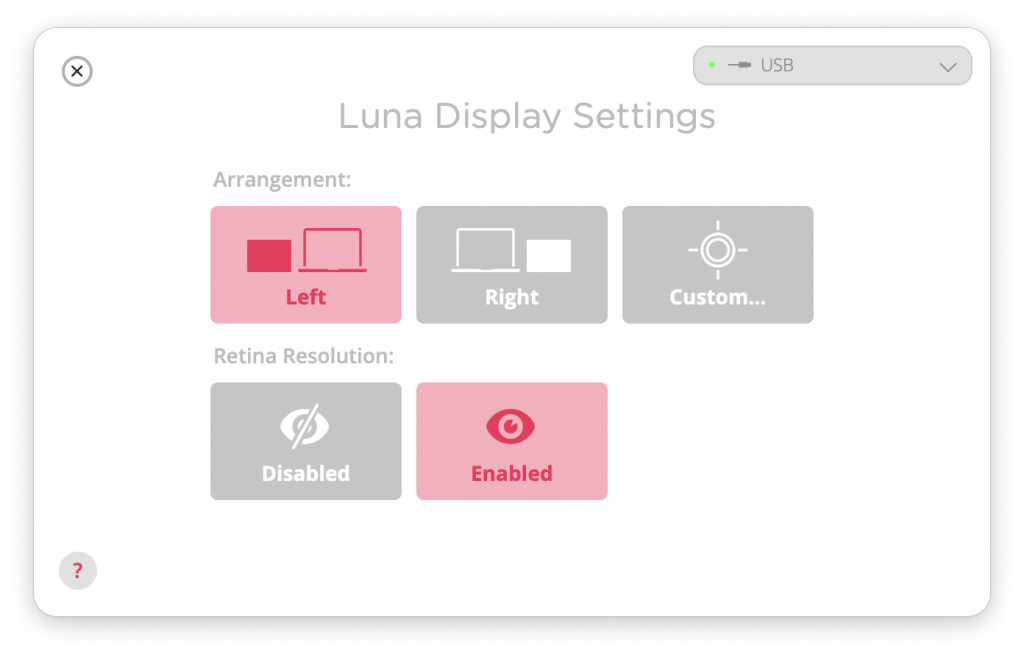
There are a few more settings you should configure. In particular, I highly recommend enabling Retina Resolution so you get a crisp picture!
That’s it! 😄 You’re all done. Go ahead and enjoy that crisp, beautiful 5K iMac as a display for your Mac or PC!
If you need extra help tuning the performance of or just need some general troubleshooting tips, check out the FAQs below.
Get your Luna today!
Understanding Limitations: Navigating Luna Display’s Boundaries
Like any product, Luna Display does have limitations and it’s not recommended for high-motion content. For example, I wouldn’t recommend using Luna Display for gaming or video editing.
Since Luna Display is squeezing a 5K display through a USB cable, when lots of motion occurs on-screen (like from video playback or moving a window quickly) the screen can temporarily become pixelated before it renders in at full resolution. Personally, this doesn’t bother me, as I use my iMac for things like audio players, chat windows, and documentation.
Read on for more tips on how to further maximize the performance…
Boosting Performance: Tips for Optimal Use
Note: Some of these performance tips only apply when used with a Mac. We hope to bring these settings to our PC software in the near future.
If you aren’t getting the desired performance out of your iMac as a monitor, there are a few preferences you can tweak.
What you tweak depends on whether you prefer a crisp display with slower motion or faster motion with a slightly pixelated display.
- For the absolute fastest motion you’ll want to adjust the resolution.
- For the absolute clearest display, adjust the refresh rate.
Finally, if none of that is to your liking, you can override the Luna Display software using manual rate control.
Adjusting resolution
The best way to adjust the resolution on your Luna Display is by using the “Retina Resolution” toggle that shows after connection. Try turning retina resolution off to get a more pixelation, but much faster response on your iMac.
Adjusting refresh rate
Only available on the primary Mac app
To adjust the refresh rate in the primary Luna Display app go to the menu File > Settings
A new settings window will appear, click “Luna Display” at the top of the window:
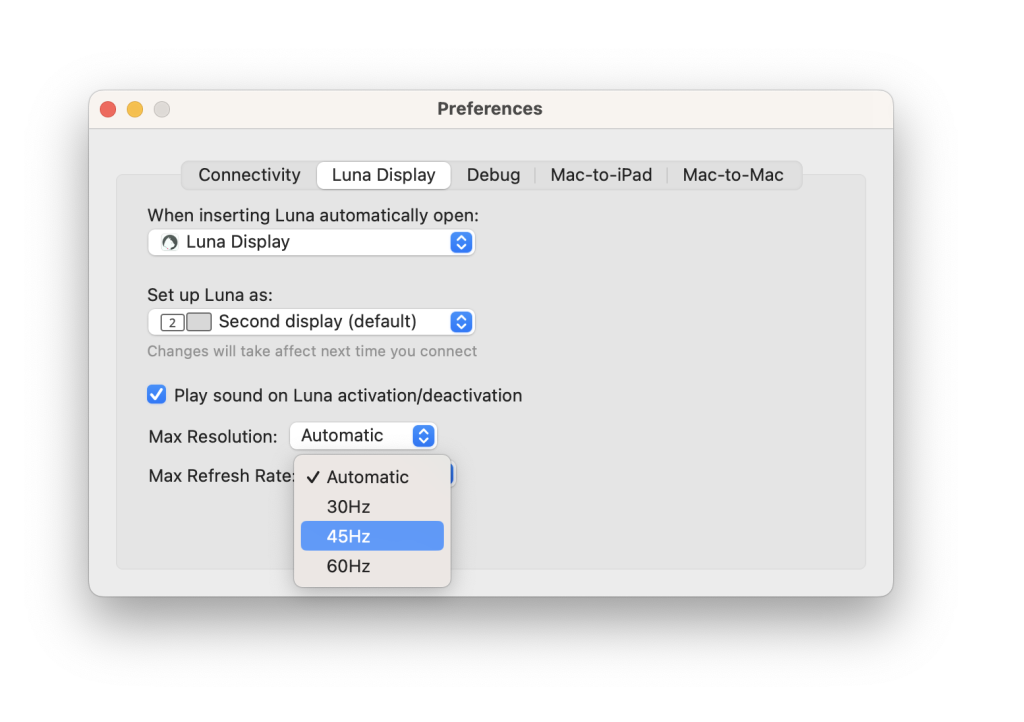
At the bottom, you’ll see a pop-up menu to adjust the Max Refresh Rate. By default, it’s set to 60Hz. Try setting it to 45Hz or 30Hz for a clearer but slower-to-update display. After adjusting this setting you’ll need to quit the Luna app and relaunch.
Adjusting rate control
Only available on the primary Mac app
This is the most advanced option and is best used on a wired connection. To access the rate control override, hold down the Option key and while doing so go to the menu File > Settings in the primary Luna Display app.
You’ll see a settings window appear with “Debug” option at the top.
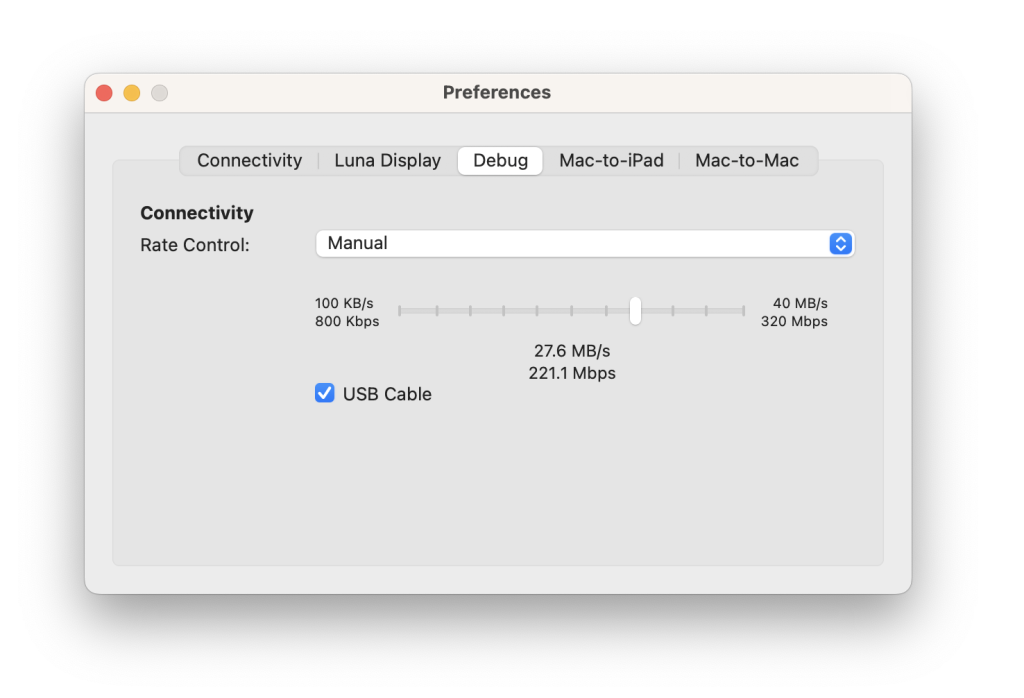
Within the Debug settings, you can change rate control to “Manual” and then drag the slider to the right to increase the amount of bandwidth that is used. This updates live, so you can use your iMac monitor and adjusting the setting until you reach a setting that feels right.
As you increase the bandwidth, it will cause the picture to be clearer but updates may be slower to render in depending on your connection and computer.
Solving Problems: Effective Troubleshooting Strategies
Be sure to check out our extensive help section for detailed troubleshooting information.
Ever since it was released in August 1998, the iMac becomes one of the most popular desktop computers worldwide, and it evolved into many different forms. In 2009, a new version of the iMac is introduced to users, and it’s the first device with Target Display Mode. This new feature enables people to use the iMac as a monitor to display another device.
«Can you use iMac as a monitor for MacBook?» Many people are curious about this question. Yes, you can use the iMac as a monitor for a PC as long as the iMac offers a target display mode and the Thunderbolt port or the Mini DisplayPort. Then, you can follow the steps in this post to connect and use an old iMac as a monitor.
How to use iMac as a monitor for PCs:
- 1. Turn off your PC and iMac.
- 2. Plug the end of a cable into the Thunderbolt port or the Mini DisplayPort of the iMac, and then plug the other end of the cable into the Thunderbolt or Display port on your PC. (Don’t use the adapter)
- 3. Connect the PC with the adapter using an HDMI cable. Then, connect the male end of the adapter to your iMac.(Use the adapter)
- 4. Turn on your iMac and PC.
- 5. Press the «Cmd» + «F2» on the iMac keyboard to trigger Target Display Mode. It’s also possible to press «Cmd» + «Fn» + «F2» instead.
- 6. Wait for a few seconds, and then you will see the PC screen mirrored on the iMac screen.
- 7. Don’t forget to adjust the screen resolution for optimal display quality. To match the relatively old iMac models, it’s advisable to select the 2560 x 1440 resolution on your PC.
Requirements for Using iMac as Monitor
To use an iMac as the monitor for a PC, the first step is to check if the system and version of your device are available. As to the operating system, the iMac should use macOS High Sierra or an earlier version. Besides, the iMac you want to use as the monitor should have a bi-directional Mini DisplayPort or a Thunderbolt port that enables your iMac to get the data input and work as a monitor for another device. There are mainly several types of iMac you can choose from.
- 1. 27-inch iMacs that were released in late 2009 and mid-2010. The port type of those devices is the Mini Display Port.
- 2. iMacs that were released in mid-2011 and 2014. The port type of those devices is the Thunderbolt port.
Other iMacs also have the ports mentioned above. For instance, the 5K retina iMac that was released in 2014 has the Thunderbolt port. But it cannot work as a monitor for PC as it doesn’t support the Target Display Mode.
When it comes to the requirement for the PC, things are much simpler. You only need to make sure the computer you use features a Mini DisplayPort or a Thunderbolt port. Even if the computer doesn’t support those ports, you can use the HDMI to Mini Display adapter to make it accessible. Remember to prepare the corresponding cables to connect those devices.
How to Make the Connection
Firstly, you need to turn off your PC and iMac.
- If it’s unnecessary to use the adapter, you only need to plug the end of a cable into the Thunderbolt port or the Mini DisplayPort of the iMac, and then plug the other end of the cable into the Thunderbolt or Display port on your PC.
- If you need to use the adapter, connect the PC with the adapter using an HDMI cable. Then, connect the male end of the adapter to your iMac.

How to Use iMac as Monitor for PC
After all the devices are correctly connected, the next step is to activate the Target Display Mode on iMac and mirror the PC screen to iMac. This part will give you the best straightforward method of using iMac as monitor for PC. Follow it if it’s useful for you.
Tutorial of Using iMac as Monitor for PC:
Step 1. Turn on your iMac and PC.
Step 2. Press the «Cmd» + «F2» on the iMac keyboard to trigger Target Display Mode. It’s also possible to press «Cmd» + «Fn» + «F2» instead.
Step 3. Wait for a few seconds, and then you will see the PC screen mirrored on the iMac screen.
Step 4. Don’t forget to adjust the screen resolution for optimal display quality. To match the relatively old iMac models, it’s advisable to select the 2560 x 1440 resolution on your PC.
Bonus Tips: How to Record PC Screen Easily
What if you want to watch what is happening on the PC screen with your iMac, but the iMac you are using is unsuitable for the method above? There is an alternative way to do that, i.e., record the PC screen as a video and play the captured video on your iMac. And EaseUS RecExperts is what you need.
Unlike Using an iMac as a monitor for your PC, this lightweight screen recording software requires no complicated preparation. The only thing you need to do is to download and install this program from the official website.
It supports recording screens with your audio and webcam simultaneously, and this feature enables you to record many types of video. Besides that, you can adjust the output format in accordance with the formats the video player supports.
This is really helpful if you want to play the recorded video on iMac without converting the format. Also, it offers two recording modes to capture the full screen or only part of the screen to get a suitable resolution ratio.

Key Features:
- Record partial screen or record full screen on Windows 10
- Schedule recording tasks to start and end the recording automatically
- Support trimming recorded video and audio files with a built-in tool
- Add opening titles or closing credits to the recorded videos
- Record Zoom meetings without permission
This is a versatile screen recorder that provides you with various recording tools. If its features are what you need, don’t hesitate to click on this button below to download it for free.
Conclusion
«Can you use an iMac as a monitor?» This may be a problem that has troubled you for a long time. Luckily, this post solved it by offering you a detailed tutorial on how to use iMac as monitor for PC. You should pay attention to the model and system of the iMac, the way those devices get connected, and the method of activating the Target Display Mode.
What if your iMac doesn’t have a Mini DisplayPort/Thunderbolt port and doesn’t support the Target Display Mode? It’s optional to capture the PC screen as a video and play it on your iMac. EaseUS RecExperts is the most helpful tool that enables you to record high-quality videos with simple steps. Don’t miss it.