
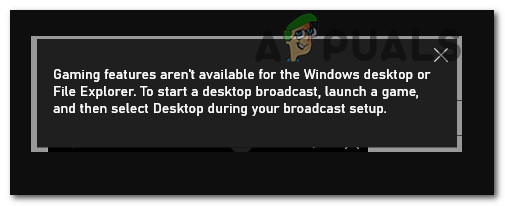
Some Windows users report a weird issue where the record option is greyed out after launching the Game Bar to record the gameplay. Upon clicking the button, affected users see the ‘Gaming features aren’t available for windows desktop or file explorer‘ error. This problem is confirmed to occur on both Windows 10 and Windows 11.
After we’ve looked into this issue carefully, we realized that several different underlying causes might be responsible for this particular error code. Here’s a short list of scenarios that might directly or indirectly produce the “Gaming features aren’t available for windows desktop or file explorer” error:
- Xbox Game Bar is disabled – The first thing you need to do when troubleshooting this particular issue is to check if the Xbox Game Bar functionality is not soft disabled. If the feature is indeed disabled, access the Xbox Game Bar settings inside the Windows Settings menu and enable the associated toggle.
- Xbox Game bar is disabled via Gpedit policy. If you previously meddled with local or network-wide policies made available via the Gpedit.msc utility, you should also investigate whether the ‘Enables or disables Windows Game Recording, and Broadcasting’ policy is not disabled. If it’s disabled, open the Gpedit utility and make sure this policy is set to ‘Enabled’ or ‘Not Configured.’
- Outdated Xbox Game bar version – As it turns out, Microsoft has already released a series of hotfixes aimed at making the Xbox Game bar more reliable. To ensure you’re taking advantage of all the stability brought about by the new version of the Xbox Game bar, access the Microsoft Store and force the Xbox Game bar to update by the Get Updates bar.
- Corrupted Xbox Game bar version – Under certain circumstances, you can expect to deal with this issue in a scenario where some system file corruption is affecting the game recording features. To get around this issue, try repairing the Xbox Game bar installation and move on to a reinstall procedure if the first one fails.
- Shortcut glitch – According to a lot of affected users, you might be able to jumpstart the Xbox Game bar recording without actually fixing the root cause of the issue by initiating the recording via Windows Store instead of from the dedicated Xbox Game bar.
- The Xbox Console Companion app is not installed – One dependency of the Xbox Game bar gameplay recording not explicitly mentioned in the error code is the Xbox Console Companion. If you don’t have this UWP app, download it from the Microsoft Store to fix the issue.
- Gameplay can’t be recorded in fullscreen mode – Keep in mind that with certain games, you will have an issue recording gameplay (with every recorder, not just the Game Bar) if the game runs in full-screen mode. To avoid this problem, reconfigure the game to run in windowed mode.
- Google Chrome conflict caused by background process – According to many users affected by this issue, you can also expect to deal with this problem when Chrome is not closed but is running in the background while this error occurs. To fix this particular issue, you can ensure that Chrome is not running in the background.
- Outdated Game Bar dependencies – It’s been confirmed that you can also encounter this particular issue in scenarios where specific dependencies that the Xbox Game Bar needs are outdated or not installed. As a good practice, you should carry on all pending Microsoft Store updates before accessing the Windows Update components and installing every hotfix, feature update & cumulative update.
- Virus infection – You shouldn’t disregard a potential malware infection as a plausible reason why you might experience this type of error. Our recommendation is to take the time to run a deep system-wide security scan to ensure your PC is not infected.
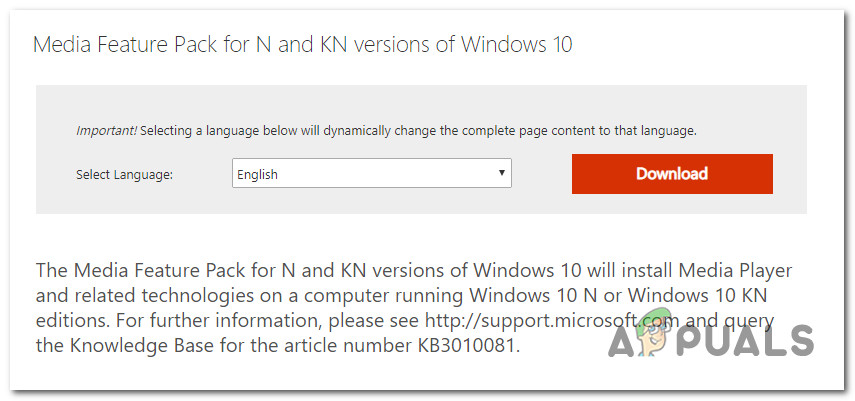
- Missing Windows Media Pack – If you’re on N or KN versions of Windows 10 or 11, there’s a big chance you’re experiencing this problem because you’re missing the Windows Media pack dependency. Fortunately, you can fix this issue quickly by manually installing the Windows Media pack.
Now that we covered every potential cause that will prevent you from recording your gameplay via the Xbox Game Bar, let’s go over every confirmed fix that other affected users have successfully used to get to the bottom of the issue and fix the ‘Gaming features aren’t available for windows desktop or file explorer’ error.
1. Enable the Xbox Game Bar
If the Xbox Game Bar isn’t working, the first thing to do is make sure it isn’t just soft deactivated. To turn it back on, open the Windows Settings menu and look for the Xbox Game Bar section.
Microsoft doesn’t do a good job of letting you know that the actual component you are trying to use is disabled from the Settings menu.
Fortunately, you can check this out manually and enable the Xbox Bar component (if necessary) by following the instructions below:
- Press Windows key + I to open the Settings menu on Windows 10 or 11.
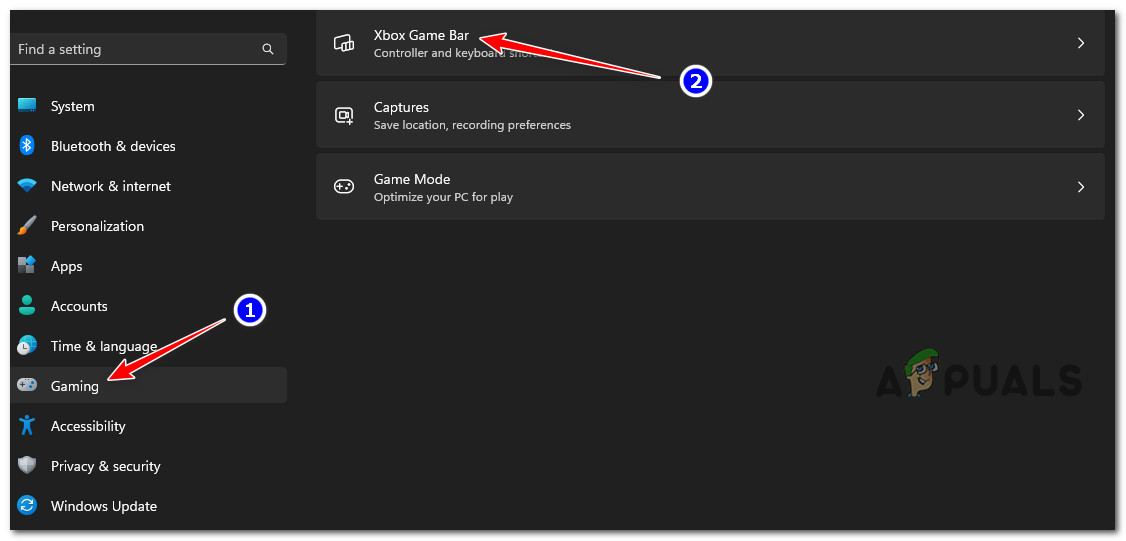
- Once you’re finally inside the Settings menu, click on the Gaming tab from the vertical menu on the left.
- Next, move over to the right-hand section of the screen and click on Xbox Game Bar from the list of items.

Access the Xbox Game Bar menu - Once inside the dedicated Xbox Game bar settings, set the associated toggle to On and reboot your PC to enforce the changes.
- Repeat the action previously causing the ‘Gaming features aren’t available for windows desktop or file explorer‘ error and see if the problem is now fixed.
If the problem is still not fixed, move to the following method below.
2. Enable Windows Game Recording Policy (if applicable)
If you’ve tinkered with the Gpedit.msc tool’s local or network-wide policies in the past, you may want to double-check that the ‘Enables or disables Windows Game Recording, and Broadcasting’ policy is, in fact, disabled.
Launch the Gpedit tool and verify that this policy is set to “Enabled” or “Not Configured” if it is not already.
IMPORTANT: This method is only applicable if you use an Enterprise or PRO version of Windows 10 or 11. By default, the Local Group Policy Editor tool is unavailable for the Home, N, KN, and Education versions. However, you can install it manually with a series of steps.
If you haven’t tried this fix yet and this method is applicable, follow the instructions below:
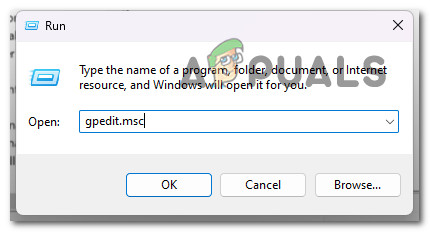
- Press the Windows key + R to open up a Run dialog box.
- Next, type ‘gepedit.msc’ inside the text box, then press Ctrl + Shift + Enter to open up the Local Group Policy Editor.

Open up the Gpedit utility. - When the User Account Control prompts you, click Yes to grant admin access.
- Once you’re finally inside the Local Group Policy Editor, use the vertical menu on the left to navigate to the following location:
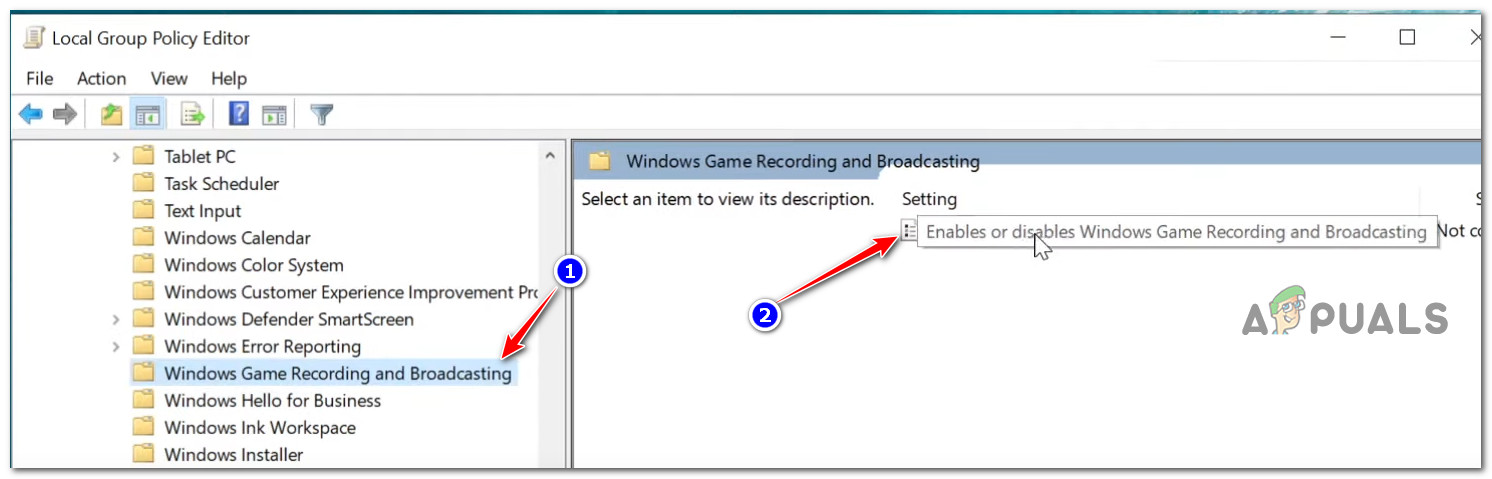
Computer Configuration > Windows Components > Windows Game Recording and Broadcasting
- Click on Windows Game Recording and Broadcasting once to select it, then move to the right-hand pane to click on Enables or Disables Windows Game Recording and Broadcasting policy.

Access the Windows Game Recording & Broadcasting - Once you’re inside the settings menu of the Enables or Disables Windows Game Recording and Broadcasting policy, set it to either Enabled or Not Configured before clicking Apply to save the changes.
- Reboot your PC to enforce the changes you just did and see if the error is now fixed
If you still cannot use the Xbox Game Bar component, move down to the following method below.
3. Update the Xbox Game Bar app
It has come to light that Microsoft has already disseminated several “hotfixes,” or emergency software updates, to improve the dependability of the Xbox Game bar.
You may ensure that you can make the most of the improved stability brought about by the latest version of the Xbox Game bar by visiting the Microsoft Store and using the Get Updates bar to force an update to be applied to the Xbox Game bar.
If you’re looking for specific instructions on how to do this, follow the steps below:
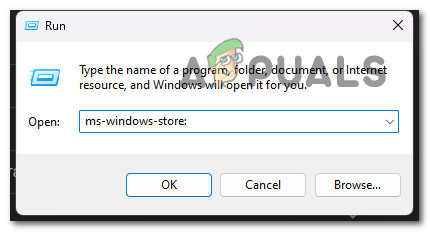
- Press the Windows key + R to open up a Run dialog box.
- Inside the dialog box that just appeared, type ‘ms-windows-store:’ and press Ctrl + Shift + Enter to open up the Microsoft (Windows) Store with admin access.
Access the Windows Store component - Click Yes to grant admin access at the User Account Control (UAC).
- Once inside the Microsoft Store, use the search function up top to search for the ‘xbox game bar’ and press Enter.
- On the dedicated directory of the Xbox Game Bar, see if there’s a pending update for the Xbox Game Bar component.
- If there is indeed an available update, follow the on-screen prompts to install it by following the on-screen instructions.
- Reboot your PC and see if the Xbox Game Bar is now functioning without issues.
If the problem is still not fixed, move to the following method below.
4. Repair or Reset the Xbox Game Bar
If none of those mentioned above solutions worked for you, you should start to suspect that the Xbox Game Bar component may be corrupted.
According to user complaints, this is a typical side effect when upgrading from an earlier Windows version to Windows 11.
For this sort of problem, Microsoft provides two mitigating alternatives. If the first approach doesn’t work, you may use the Settings app to fix the entire component or reset the Xbox Game Bar completely.
Start with a straightforward repair method, then move on to a reset if the Xbox Game Bar functionality is still inoperable.
For your convenience, we have put together a set of instructions (with images) to guide you through repairing and resetting the Xbox Game Bar component.
The steps are as follows:
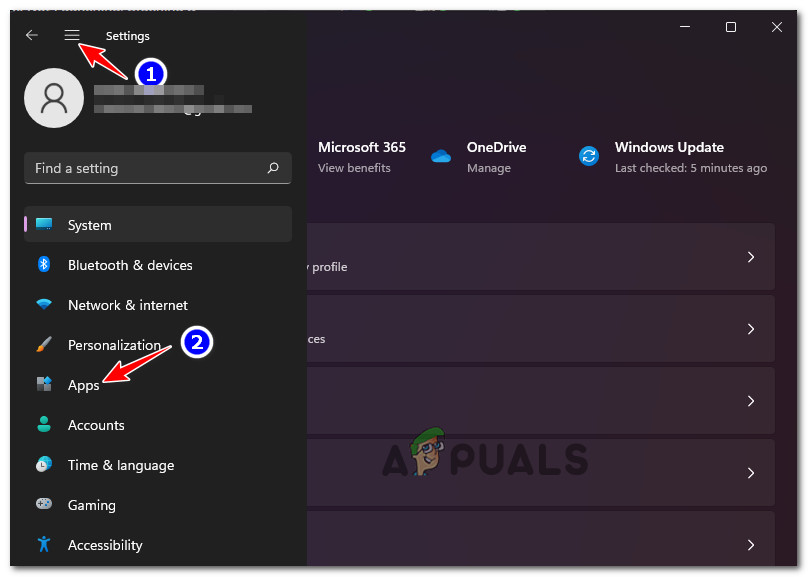
- To access the Settings panel on Windows 11, press Windows key + I.
- After entering the Settings menu, go to the Apps tab using the vertical menu on the left. When you enter the Settings window, if the vertical menu is hidden, click the action symbol at the top to reveal it.

Accessing the Apps tab - Access the Apps & Features menu from the Apps menu’s right-hand pane.
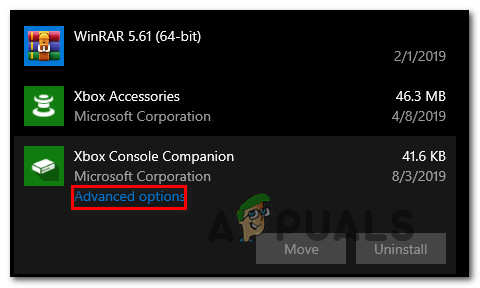
- To access the “Xbox Search Bar” after entering the Apps & Features menu, utilize the search feature under “App list.”
- Once you’ve found the item for Xbox Game Bar, click on the action symbol (three-dot icon) next to it, and then select Advanced Options from the context menu that appears.

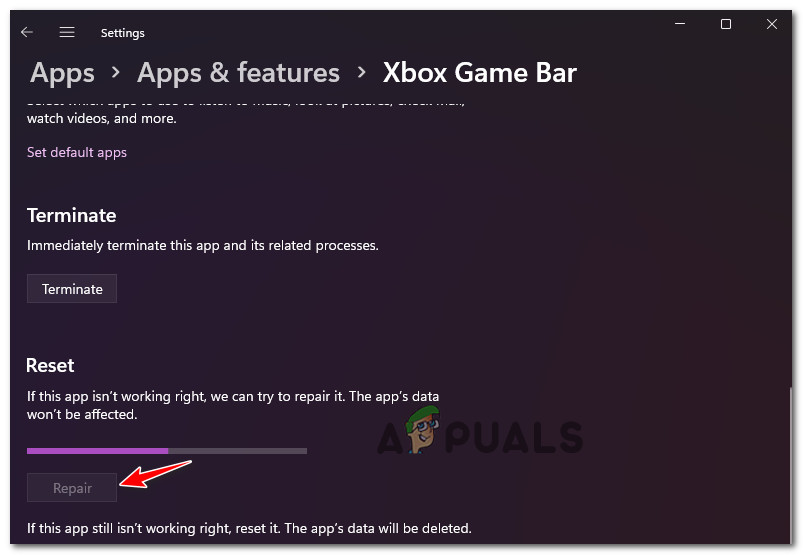
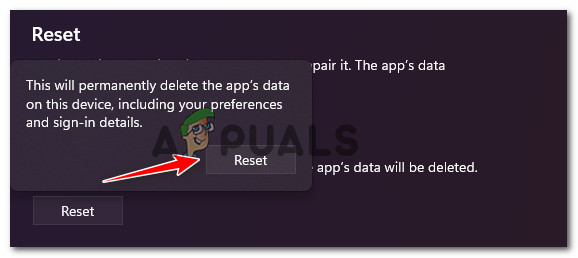
Access the Advanced Options menu - After entering the Xbox Game Bar’s Advanced Menu, select the Reset option and select repair.
- After the procedure, test if the issue has been resolved by launching the Xbox Game bar (Windows key + G).

Repairing the Xbox component - If the Xbox Game bar still won’t open, attempt the second mitigation strategy by clicking Reset in the same Advanced Options window.

Reset the Xbox game bar component - After the procedure is finished, try launching the Xbox Game Bar component once more to verify if the issue has been resolved.
Continue to the next possible repair below if your issue is still not resolved.
5. Reinstall the Xbox Game Bar
If the method above didn’t work in your case, there’s a good chance you’re dealing with persistent corruption affecting the Xbox Game Bar.
Several users dealing with the same kind of issue have confirmed that they managed to get around this issue by utilizing Powershell to effectively get rid of the entire Microsoft Xbox Gaming Overlay component to eliminate the potential corruption issue.
After you’ve done this, you can reinstall the recently uninstalled component via the same Powershell window.
Follow the instructions below for specific steps on how to do this:
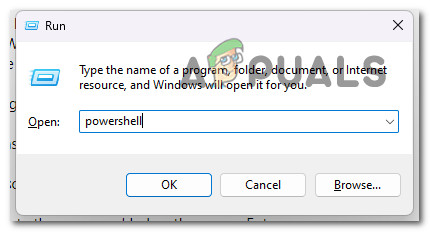
- Press the Windows key + R to open up a Run dialog box. Next, type ‘powershell’ inside the text box and press Ctrl + Shift + Enter to open Powershell with admin access.
Open an elevated PowerShell terminal. - Click Yes to grant admin access when prompted by the User Account Control (UAC).
- Once you’re inside the elevated Powershell window, type or paste the following command and press Enter to uninstall the Microsoft Xbox Gaming Overlay effectively:
get-appxpackage *Microsoft.XboxGamingOverlay* | remove-appxpackage
- Once the first command has been processed successfully, run the following command to reinstall the component that you just removed:
Get-AppXPackage *Microsoft.XboxGamingOverlay* -AllUsers | Foreach {Add-AppxPackage -DisableDevelopmentMode -Register "$($_.InstallLocation)\AppXManifest.xml"} - Reboot your PC and see if the problem is now fixed.
If the problem still occurs and you can’t record your gameplay via the Xbox Game bar, move down to the following method below.
6. Initiate the recording from Windows Store
Initiating the recording from the Windows Store rather than from the dedicated Xbox Game bar may allow you to circumvent the need to resolve the underlying cause of the problem and get the Xbox Game bar recording back up and running. This is the consensus of many users who have been adversely affected.
If you aren’t bothered by the fact that this is only a workaround and doesn’t fix the root cause of the issue, follow the instructions below to initiate a recording from the Windows Store:
- Press the Windows key + R to open up a Run dialog box.
- Inside the dialog box that just appeared, type ‘ms-windows-store:’ and press Ctrl + Shift + Enter to open up the Microsoft (Windows) Store with admin access.
Access the Windows Store component - Click Yes to grant admin access at the User Account Control (UAC).
- Once inside the Microsoft Store, use the search function up top to search for the ‘xbox game bar’ and press Enter.
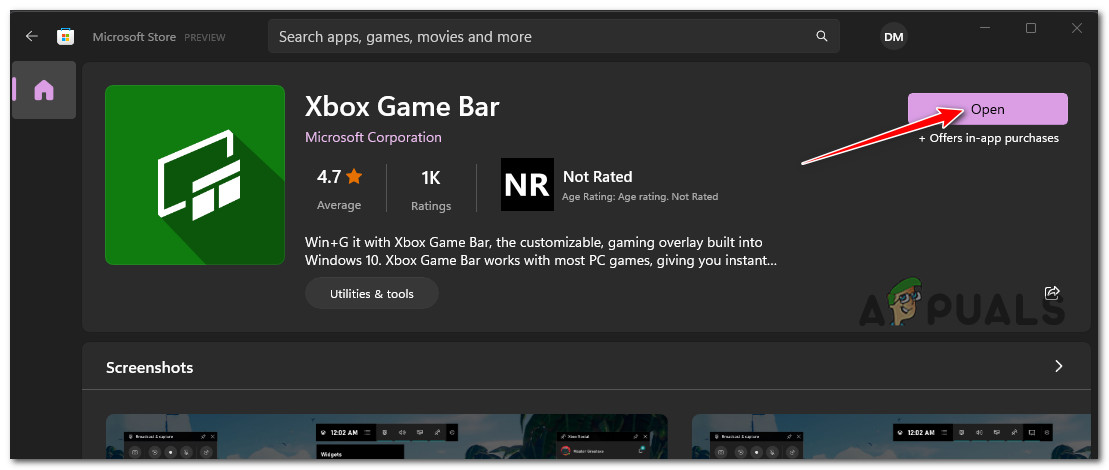
- On the dedicated directory of the Xbox Game Bar, click on the Open button to try to open the Xbox Game bar from a different location.

Open up the Xbox Game bar via Microsoft Store. - Try to initiate the recording and see if the problem is now fixed.
If the same problem is still occurring, move to the following method below.
7. Install the Xbox Console Companion app
The Xbox Console Companion is a requirement for the Xbox Game bar gameplay recording, even though this need is not listed explicitly in the error code. If you do not already have this Universal Windows Platform software installed on your device, you will need to go to the Microsoft Store and download it to resolve the issue.
If the Xbox Console Companion app is not installed on your Windows PC yet, follow the instructions below to install it:
- Press the Windows key + R to open up a Run dialog box.
- Inside the dialog box that just appeared, type ‘ms-windows-store:’ and press Ctrl + Shift + Enter to open up the Microsoft (Windows) Store with admin access.
Access the Windows Store component - Click Yes to grant admin access at the User Account Control (UAC).
- Once inside the Microsoft Store, use the search function up top to search for ‘xbox console companion‘ and press Enter.
- From the dedicated Xbox Console Companion app listing, click on Get and wait until the component gets installed.
- Reboot your PC and see if the problem is now fixed.
If you’re still experiencing the ‘Gaming features aren’t available for windows desktop or file explorer’ error, move down to the following method below.
8. Force the game to run in windowed mode
It is important to remember that if the game is played in full-screen mode, any recorders, not only the Game Bar, will encounter difficulties while attempting to record gameplay for specific titles. Adjusting the game’s settings to run in windowed mode will allow you to sidestep this issue.
Follow the instructions below to force any game to run in windowed mode and resolve the ‘Gaming features aren’t available for windows desktop or file explorer’ error:
- Please right-click on the game executable (not the shortcut) and follow these steps to configure it to always run in windowed mode.
- Once you’ve completed step 1, please right-click on the game executable and make sure you launch it with admin access.
- Open the Xbox Game bar via the previously established setup now that the game runs in windowed mode and see if you can initiate the recording.
If the same issue is still occurring, move to the following method below.
9. Prevent Chrome from running in the background (if applicable)
It has been reported by a significant number of people who have been afflicted by this issue that you may also anticipate having to deal with this issue in circumstances in which Chrome is not closed but is operating in the background while this mistake is taking place.
To resolve this specific problem, you must verify that Chrome is not operating in the background while you are working on it.
To do this, access your tray bar icon and check if you can spot the Chrome icon. If you can see it, right-click on it and choose Exit from the context menu.
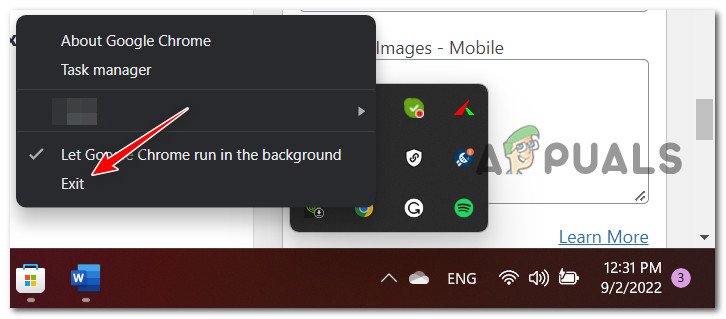
Once you’ve done this, attempt to re-record gameplay and see if the problem is now fixed.
10. Update all Microsoft Store apps
You may also run into this problem when some dependencies that the Xbox Game Bar requires are either out of current or not installed. Before making another attempt to start the Game Bar feature, it is recommended that you finish installing any outstanding updates from the Microsoft Store first.
If you’re not sure if you have any pending UWP updates, follow the instructions below for specific instructions on how to do this:
- Press the Windows key + R to open up a Run dialog box.
- Inside the dialog box that just appeared, type ‘ms-windows-store:’ and press Ctrl + Shift + Enter to open up the Microsoft (Windows) Store with admin access.
Access the Windows Store component - Click Yes to grant admin access at the User Account Control (UAC).
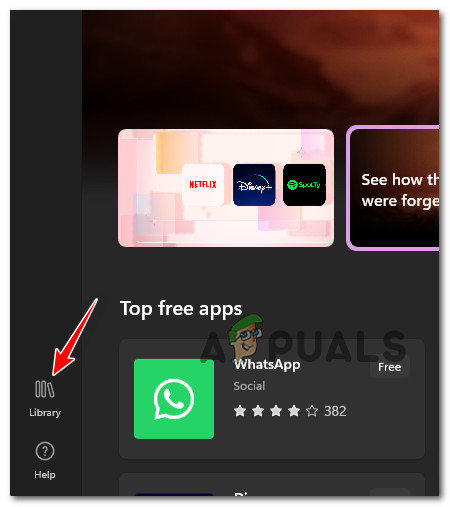
- Once inside the Microsoft Store component, click on Library from the screen’s bottom-left corner.

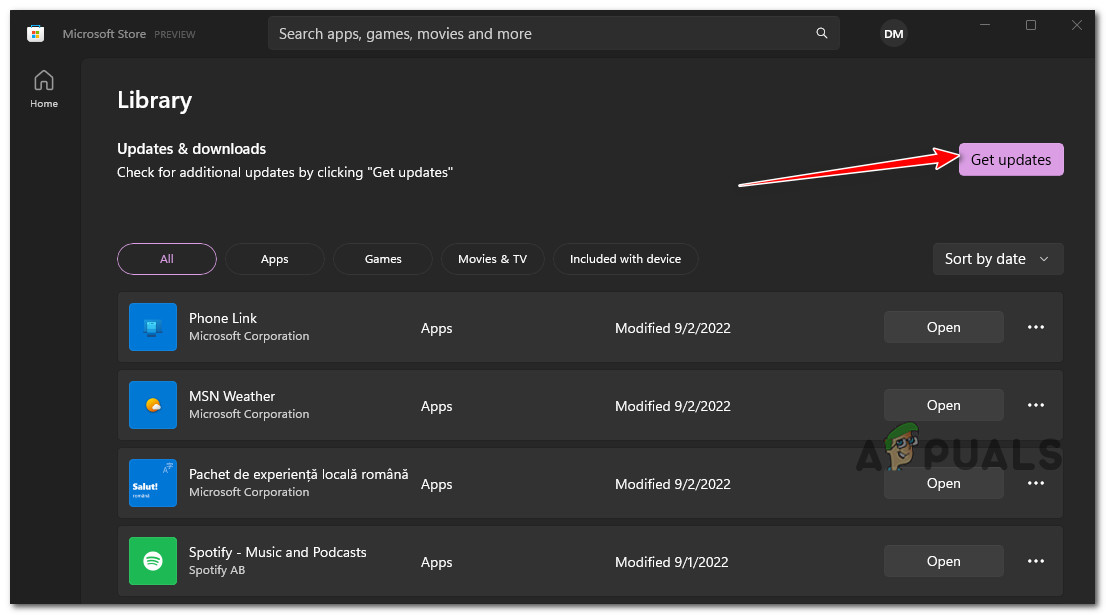
Access the Library screen - Once inside the Library screen, click on the Get updates menu.

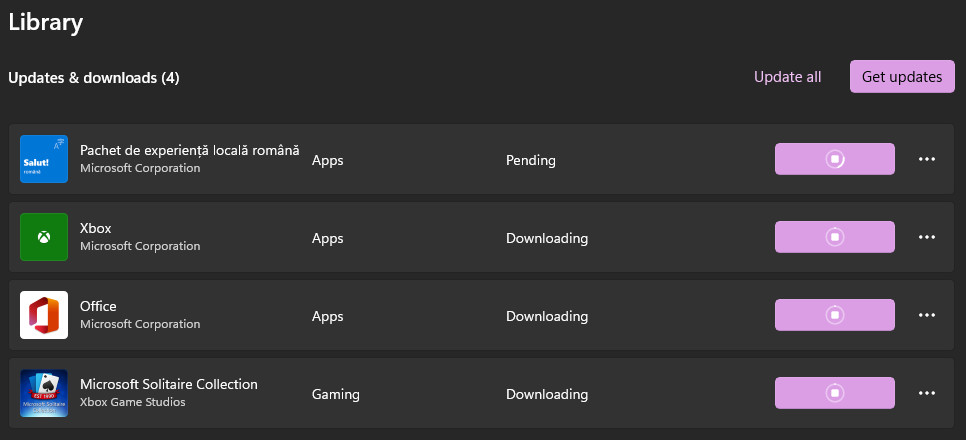
Access the Get Updates screen - Once the scan is performed, wait until every pending update is installed and confirm manually if prompted.

Install all pending UWP updates - Once every pending UWP update is installed, reboot your PC and see if the issue is resolved once the next startup is complete.
If you cannot open the game bar functionality, move to the following method below.
11. Update to the latest available Windows Build
It is crucial to verify that you have all of the pending updates installed if you are using Windows 10 or Windows 11. This will guarantee that you have all the necessary dependencies for Game Bar to operate correctly on your computer.
Note: It has been brought to our attention that Microsoft has issued several hotfixes to improve the consistency of gameplay recording on Windows 11.
Suppose you believe that the following scenario may apply to your situation. In that case, you should follow the on-screen instructions to install any outstanding updates for Windows 10 or Windows 11 on your computer:
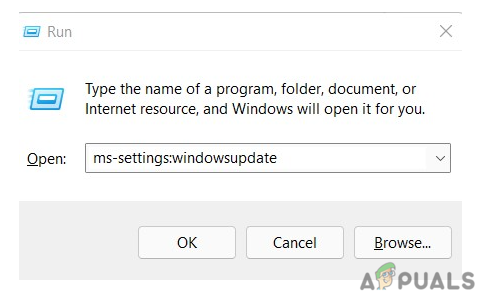
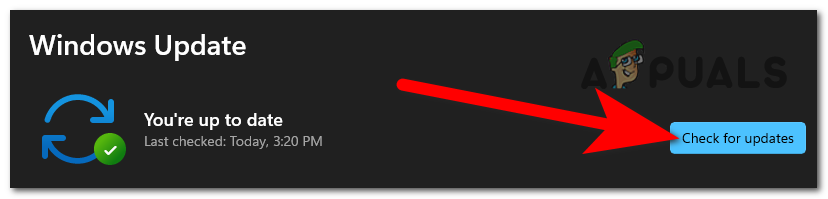
- To begin, open a Run dialog box by hitting the Windows key + R key. Next, access the Windows Update tab of the Settings program by typing “ms-settings:windowsupdate” and pressing the Enter key on your keyboard.

Access the Windows Update component - When you’re on the Windows update screen, click the button that says Check for updates. The following procedures should be followed to ensure that every available Windows update is applied when it is next scheduled.

Check for updates Note: It is essential to apply all available updates, including cumulative and security updates; do not limit yourself to only installing updates that have been rated as either Critical or Important.
- If there are a large number of updates that need to be done, you will be required to restart your computer before each update is performed. If this happens to you, you will need to do a restart as directed, but you must also ensure that you are brought back to this screen on the subsequent startup so that you may complete the installation of the remaining updates.
- After completing each outstanding update, restart your computer and see if the problem is now fixed.
If you still see the error message “Gaming functions aren’t accessible for Windows desktop or file explorer,” continue reading below for another potential solution.
12. Eliminate the virus infection
You must not exclude the possibility that you have been infected by malware as a possible explanation for why you have encountered this kind of problem. To ensure that your computer does not have a virus or other type of malware, we strongly advise you to take the time to do a comprehensive security scan throughout the whole system.
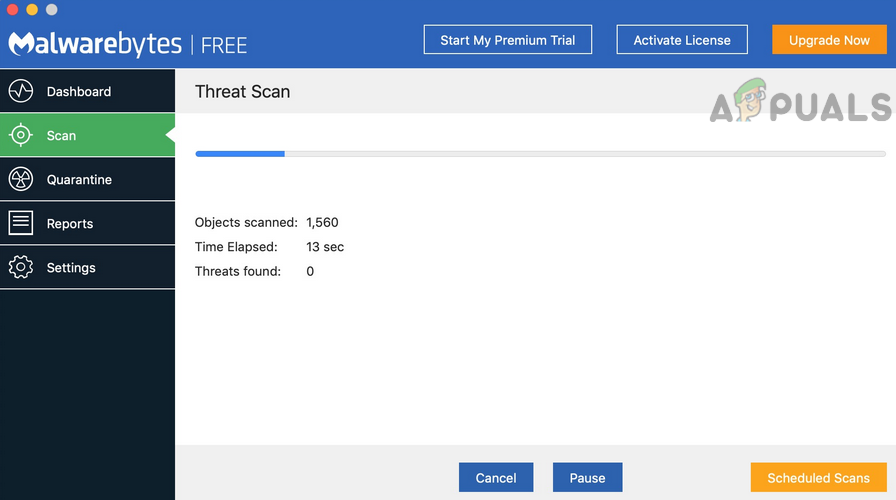
To exclude the possibility of a virus infection, do a comprehensive scan of the computer using a robust application such as Malwarebytes. This will ensure that a virus does not cause the problem.
Note: It’s possible that this issue is being caused by malicious software that has gained access to your system and is using up all of your CPU resources. You may fix the problem by eradicating the malware infection with Malwarebytes’ full scan, which you can do by following the instructions below.
Conducting a thorough scan with a reputable anti-malware product is the best way to establish beyond a reasonable doubt that this is not the situation. Numerous approaches may be taken to do this. Still, we recommend using Malwarebytes because it is one of the most powerful security scanners and works just as effectively against adware as against malware.
Follow these instructions to run a comprehensive scan using Malwarebytes.
If you continue to have the same problem even after you deploy a Malwarebytes scan, you should go on to the following technique listed below.
13. Install Missing Windows Media Pack (only for N & KN versions)
You are likely seeing this issue if you are running the N or KN version of Windows 10 or Windows 11. This is because you do not have the Windows Media pack requirement installed on your system.
You will be relieved that manually installing the Windows Media pack is a simple solution to this problem.
It’s also possible that the Windows Media Feature Pack isn’t installed, which would explain this issue. This pack is required to perform game-requiring tasks via the Game Bar successfully.
Note: The Media Feature pack is missing from the KN and N versions of Windows.
To resolve this issue, you must navigate to the Apps & Programs menu and manually install the feature by selecting the Optional Feature option from inside that menu.
To accomplish this, please refer to the following instructions:
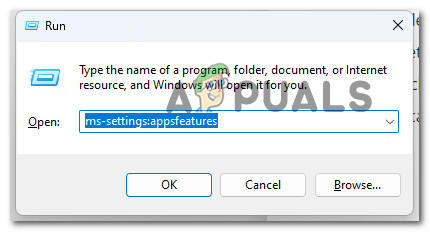
- To enter the Apps & features menu, use the Windows key + R to bring up the Run dialog box, then type “ms-settings:appsfeatures” in the box that appears.
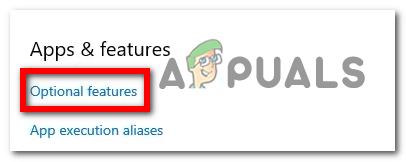
Access the App features section - Navigate to the Apps & features menu, and then inside that menu, select the Optional features option.

Access the Optional Updates - Next, select the Add feature option from the drop-down menu. When the menu displays on your screen, look for the Media Feature Pack, select it, and then click on the install button to begin the feature’s download and installation.

Access the Media Feature pack - After that, restart your personal computer and wait for it to power back up.
- Once you have passed the screen that welcomes you to the game, check whether the issues are still present.
Issue: Hello. I tried to record my screen using the Xbox Game Bar. However, when I open it the record option is unavailable. What could be the problem?
Solved Answer
The Xbox Game Bar is a gaming overlay built into Windows 10 and Windows 11. With a simple keyboard shortcut – Windows key + G, users get access to many widgets that let them capture game clips, take screenshots, monitor and manage performance, communicate with friends, and so on, without having to exit the game they are playing.
However, some users have difficulties with one particular function of Game Bar – screen capturing. People say that when they open Game Bar and want to press the record button, it is grey, which means it is unavailable for use. It is unknown why exactly this issue appears, there are multiple possibilities.
The Gaming features may be unavailable because of missing Windows updates, disabled Game Mode, and Game DVR. In this guide, you will find 6 steps that could help you fix the Gaming features aren’t available for Windows desktop or File Explorer error.
Manual troubleshooting can be a lengthy process, so you can also try to scan your machine with a maintenance tool like FortectMac Washing Machine X9. This powerful software can fix various system errors, BSODs,[1] corrupted files, and registry[2] issues. Otherwise, follow the step-by-step instructions below.

Solution 1. Install Available Updates
- Right-click on Start and pick Settings
- Go to the Update & Security section
- Click Check for updates

- You might see the View optional updates option – click it
- Select everything you want and then pick Download and install
Solution 2. Add the Windows Media Pack
Fix it now!
Fix it now!
To repair damaged system, you will have a 24hr Free Trial and the ability to purchase the licensed version of the Fortect Mac Washing Machine X9.
- Open the Windows Media Pack page
- Click the Download button

- Select an installation pack for either 32 or 64-bit Windows, and press the Next button
- Then open the downloaded installer to install the media pack
Solution 3. Enable Game DVR
- Go to the Game Bar Settings
- Click on the Capturing tab
- Toggle on Record in the background while I’m playing a game

Solution 4. Turn on Game Mode
Fix it now!
Fix it now!
To repair damaged system, you will have a 24hr Free Trial and the ability to purchase the licensed version of the Fortect Mac Washing Machine X9.
- Go to Windows Settings and click on Gaming
- Go to the Game Mode tab and toggle Game Mode on

Solution 5. Open Game Bar from the Windows Store
- Open Game Bar from Windows Store. Make sure that the recording button is activated.

- Click on the screen to hide the Game bar tools
- Navigate to the window you want to capture
- Hit the Windows key + G to reopen Game Bar. Make sure that the recording button is still activated.
- Make a video
Solution 6. Reinstall Xbox Game Bar
Fix it now!
Fix it now!
To repair damaged system, you will have a 24hr Free Trial and the ability to purchase the licensed version of the Fortect Mac Washing Machine X9.
- Press Windows key + X
- Click and Run Windows PowerShell as an Administrator
- Copy and paste the command below then press Enter:
get-appxpackage *Microsoft.XboxGamingOverlay* | remove-appxpackage

- Go to the Microsoft Store and download Xbox Game Bar
Repair your Errors automatically
ugetfix.com team is trying to do its best to help users find the best solutions for eliminating their errors. If you don’t want to struggle with manual repair techniques, please use the automatic software. All recommended products have been tested and approved by our professionals. Tools that you can use to fix your error are listed bellow:
do it now!
Download Fix
Happiness
Guarantee
do it now!
Download Fix
Happiness
Guarantee
Compatible with Microsoft Windows
Compatible with OS X
Still having problems?
If you failed to fix your error using FortectMac Washing Machine X9, reach our support team for help. Please, let us know all details that you think we should know about your problem.
Fortect will diagnose your damaged PC. It will scan all System Files that have been damaged by security threats. Mac Washing Machine X9 will diagnose your damaged computer. It will scan all System Files and Registry Keys that have been damaged by security threats. To repair damaged system, you will have a 24hr Free Trial and the ability to purchase the licensed version of the Fortect malware removal tool. To repair damaged system, you have to purchase the licensed version of Mac Washing Machine X9 malware removal tool.
Protect your online privacy with a VPN client
A VPN is crucial when it comes to user privacy. Online trackers such as cookies can not only be used by social media platforms and other websites but also your Internet Service Provider and the government. Even if you apply the most secure settings via your web browser, you can still be tracked via apps that are connected to the internet. Besides, privacy-focused browsers like Tor is are not an optimal choice due to diminished connection speeds. The best solution for your ultimate privacy is Private Internet Access – be anonymous and secure online.
Data recovery tools can prevent permanent file loss
Data recovery software is one of the options that could help you recover your files. Once you delete a file, it does not vanish into thin air – it remains on your system as long as no new data is written on top of it. Data Recovery Pro is recovery software that searchers for working copies of deleted files within your hard drive. By using the tool, you can prevent loss of valuable documents, school work, personal pictures, and other crucial files.
Сторонние программы используют для записи видео с экрана монитора компьютера под управлением Windows 10. Вопрос заключается в том, а зачем они? Встроенные средства системы уже позволяют записывать игровой процесс. Дополнительно можно использовать настройки Radeon или панель управления NVIDIA.
Эта статья расскажет, как записать видео с экрана компьютера на ОС Windows 10. Например, обновлённый игровой режим записывает только контент в приложениях. В ближайшем будущем можно будет записать и видео с рабочего стола. Для записи видео с рабочего стола можно воспользоваться софтом Radeon Adrenalin или Geforce Experience.
Игровой режим
В последних версиях операционной системы был доработан и обновлён игровой режим. Ещё с первых версий операционной системы в пользователей была возможность записать видео игрового процесса. Об игровом режиме можно спорить много. В некоторых играх он действительно добавляет пару кадров.
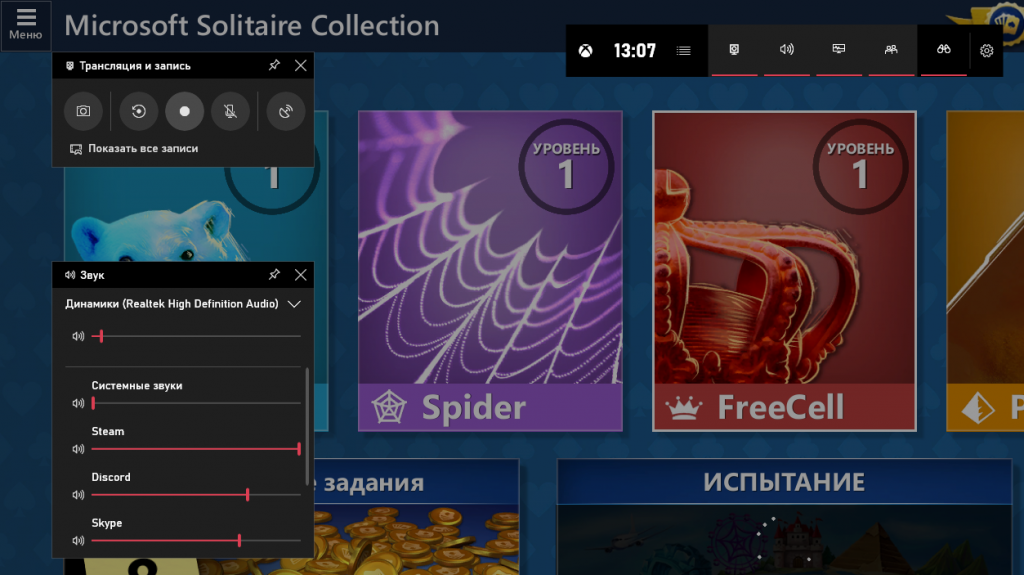
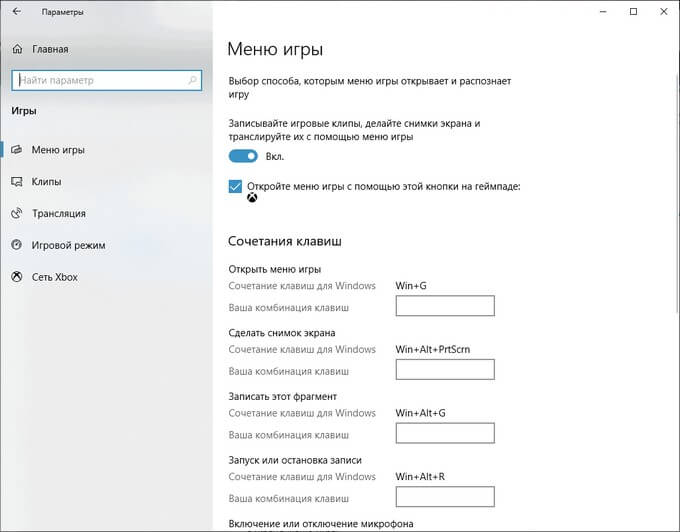
Перейдите в расположение Параметры > Игры > Игровой режим. Перетяните ползунок Режим игры в положение Включено.
В разделе Меню игры значение пункта Записывайте игровые клипы, делайте снимки экрана и транслируйте их с помощью меню игры установите на Включено.

Важно! Игровые функции недоступны для рабочего стола или проводника Windows. Только в играх или приложениях можно записывать видео. Функциональность прямой трансляции можно использовать для игр и рабочего стола.
Теперь собственно и можно перейти к записи видео с экрана компьютера под управлением Windows 10. Пользователю достаточно запустить любую игру или даже браузер, после чего нажать комбинацию клавиш Win+G.
В открывшемся поверх приложения интерфейсе игрового режима нажмите кнопку Начать запись. Дополнительно начать запись видео с экрана можно воспользовавшись сочетанием клавиш Win+Alt+R.
Посмотреть все записанные моменты можно прямо в интерфейсе игрового режима. Достаточно нажать Win+R, и выбрать пункт Показать все записи. Все сохранённые клипы располагаются по пути: C:\ Пользователи\ Имя_пользователя\ Видео \Клипы.
Теперь можно выбрать лучший видеоредактор для Windows 10. Хотя даже встроенными средствами можно обрезать видео на компьютере Windows 10. Хорошо, что Майкрософт дорабатывает и расширяет функциональность операционной системы.
Настройки Radeon
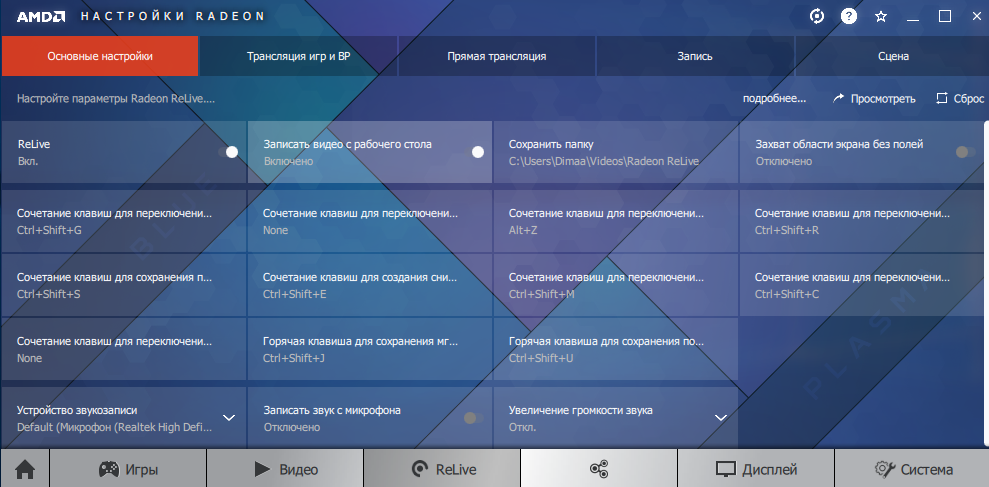
Счастливые обладатели графики от красных имеют возможность записывать видео с экрана рабочего стола в настройках Radeon. Вам не нужно искать дополнительные программы поскольку стандартный софт неудобный.
Перейдите в расположение Настройки > Общее. В разделе Запись включите Запись видео с рабочего стола. В настройках AMD Radeon Software Adrenalin 2020 Edition сразу же настройте качество видео и звука.
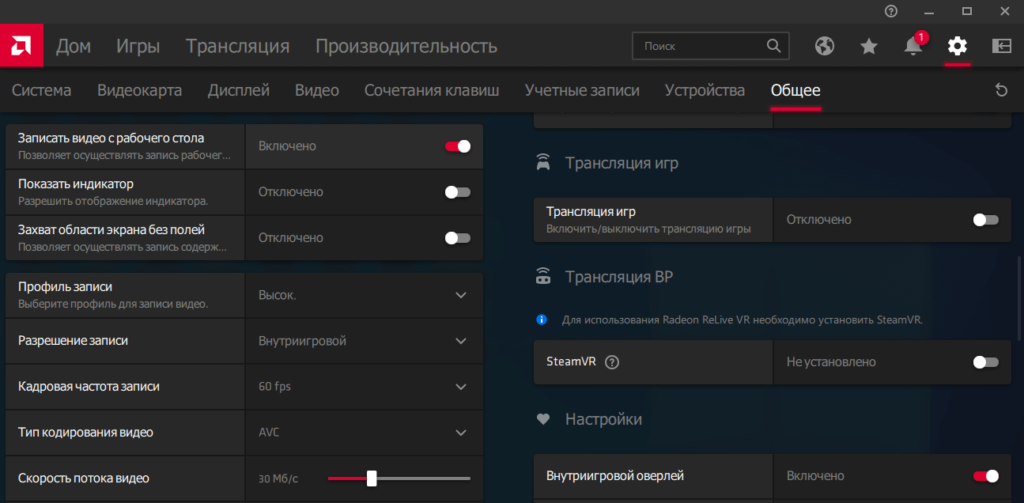
Теперь можно запустить запись видео воспользовавшись сочетанием Ctrl+Shift+E. И всё без необходимости установки дополнительных программ. Для остановки записи повторно нажимайте сочетание клавиш.
В предыдущей версии драйвера AMD нужно было перейти в раздел Relive. Значение пункта Запись видео с рабочего стола изменить на Включено. И настроить другие параметры записи, начиная от кадровой часты и включительно к скорости передачи звука.
Для начала записи достаточно было нажать сочетание клавиш Ctrl+Shift+R. Завершение записи экрана происходит после повторного нажатия вышеуказанных клавиш. Все сохранённые клипы можно найти по пути: C:\ Пользователи\ Имя_пользователя\ Видео \Radeon ReLive.
Geforce Experience
В процессе установки драйверов графики от зелёных пользователям предлагается установить Geforce Experience. В последнее время его функциональность значительно расширила возможности NVIDIA. Согласитесь, панель управления NVIDIA уже, как несколько лет морально устарела.
Непосредственно в игре (или же даже на рабочем столе) откройте меню нажав сочетание Alt+Z. Дальше достаточно нажать кнопку Запись, или же воспользоваться комбинацией клавиш Alt+F9.

Для остановки записи повторно нажимаем используемое сочетание клавиш, которые включают запись. По умолчанию все клипы сохраняются в папке с названием игры по пути: C:\ Пользователи\ Имя_пользователя\ Видео.
Заключение
- Записать видео с рабочего стола можно, используя AMD Radeon Software или Geforce Experience. Записывает всё, что Вы захотите и в любом качестве. Присутствует тонкая настройка как графики, так и звука.
- Можно воспользоваться и сторонними программами для записи видео с экрана ПК. Конечно же, есть множество интересных и удобных программ, которые отлично себя зарекомендовали.
- Уже на сегодня классический игровой режим хорошо себя зарекомендовал. Именно его использую постоянно для сохранения последних минут игрового процесса и непосредственно записи экрана
(8 оценок, среднее: 3,00 из 5)
Администратор и основатель проекта Windd.pro. Интересуюсь всеми новыми технологиями. Знаю толк в правильной сборке ПК. Участник программы предварительной оценки Windows Insider Preview. Могу с лёгкостью подобрать комплектующие с учётом соотношения цены — качества. Мой Компьютер: AMD Ryzen 5 3600 | MSI B450 Gaming Plus MAX | ASUS STRIX RX580 8GB GAMING | V-COLOR 16GB Skywalker PRISM RGB (2х8GB).
Как записать видео с экрана компьютера Windows 10
Сторонние программы используют для записи видео с экрана монитора компьютера под управлением Windows 10. Вопрос заключается в том, а зачем они? Встроенные средства системы уже позволяют записывать игровой процесс. Дополнительно можно использовать настройки Radeon или панель управления NVIDIA.
Эта статья расскажет, как записать видео с экрана компьютера на ОС Windows 10. Например, обновлённый игровой режим записывает только контент в приложениях. В ближайшем будущем можно будет записать и видео с рабочего стола. Для записи видео с рабочего стола можно воспользоваться софтом Radeon Adrenalin или Geforce Experience.
Запись видео с экрана монитора Windows 10
Игровой режим
В последних версиях операционной системы был доработан и обновлён игровой режим. Ещё с первых версий операционной системы в пользователей была возможность записать видео игрового процесса. Об игровом режиме можно спорить много. В некоторых играх он действительно добавляет пару кадров.
Перейдите в расположение Параметры > Игры > Игровой режим. Перетяните ползунок Режим игры в положение Включено.
В разделе Меню игры значение пункта Записывайте игровые клипы, делайте снимки экрана и транслируйте их с помощью меню игры установите на Включено.

Важно! Игровые функции недоступны для рабочего стола или проводника Windows. Только в играх или приложениях можно записывать видео. Функциональность прямой трансляции можно использовать для игр и рабочего стола.
Теперь собственно и можно перейти к записи видео с экрана компьютера под управлением Windows 10. Пользователю достаточно запустить любую игру или даже браузер, после чего нажать комбинацию клавиш Win+G.
В открывшемся поверх приложения интерфейсе игрового режима нажмите кнопку Начать запись. Дополнительно начать запись видео с экрана можно воспользовавшись сочетанием клавиш Win+Alt+R.

Посмотреть все записанные моменты можно прямо в интерфейсе игрового режима. Достаточно нажать Win+R, и выбрать пункт Показать все записи. Все сохранённые клипы располагаются по пути: C:\ Пользователи\ Имя_пользователя\ Видео \Клипы.
Теперь можно выбрать лучший видеоредактор для Windows 10. Хотя даже встроенными средствами можно обрезать видео на компьютере Windows 10. Хорошо, что Майкрософт дорабатывает и расширяет функциональность операционной системы.
Настройки Radeon
Счастливые обладатели графики от красных имеют возможность записывать видео с экрана рабочего стола в настройках Radeon. Вам не нужно искать дополнительные программы поскольку стандартный софт неудобный.
Перейдите в расположение Настройки > Общее. В разделе Запись включите Запись видео с рабочего стола. В настройках AMD Radeon Software Adrenalin 2020 Edition сразу же настройте качество видео и звука.

Теперь можно запустить запись видео воспользовавшись сочетанием Ctrl+Shift+E. И всё без необходимости установки дополнительных программ. Для остановки записи повторно нажимайте сочетание клавиш.
В предыдущей версии драйвера AMD нужно было перейти в раздел Relive. Значение пункта Запись видео с рабочего стола изменить на Включено. И настроить другие параметры записи, начиная от кадровой часты и включительно к скорости передачи звука.

Для начала записи достаточно было нажать сочетание клавиш Ctrl+Shift+R. Завершение записи экрана происходит после повторного нажатия вышеуказанных клавиш. Все сохранённые клипы можно найти по пути: C:\ Пользователи\ Имя_пользователя\ Видео \Radeon ReLive.
Geforce Experience
В процессе установки драйверов графики от зелёных пользователям предлагается установить Geforce Experience. В последнее время его функциональность значительно расширила возможности NVIDIA. Согласитесь, панель управления NVIDIA уже, как несколько лет морально устарела.
Непосредственно в игре (или же даже на рабочем столе) откройте меню нажав сочетание Alt+Z. Дальше достаточно нажать кнопку Запись, или же воспользоваться комбинацией клавиш Alt+F9.
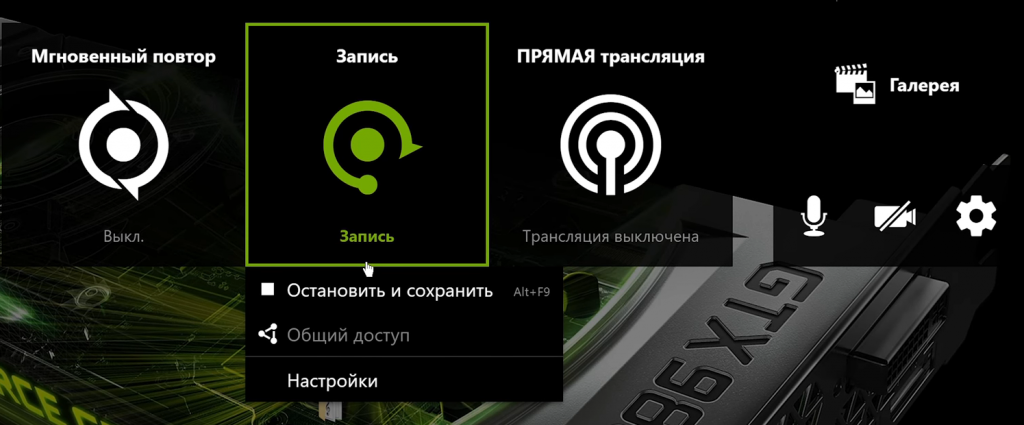
Для остановки записи повторно нажимаем используемое сочетание клавиш, которые включают запись. По умолчанию все клипы сохраняются в папке с названием игры по пути: C:\ Пользователи\ Имя_пользователя\ Видео.
Источник
Windows 10 Xbox Game bar не работает или не открывается
Как вы, возможно, уже знаете, Microsoft добавила в приложение для Windows 10 Xbox новую функцию под названием «Игровая панель» и поставляется в комплекте с приложением Xbox. Игровая панель Xbox появляется каждый раз, когда запускается игра, и предназначена для того, чтобы пользователи могли снимать видео и снимки игры. Это похоже на то, что люди могут делать на Xbox One, и знаете что? Оно работает. Не говоря уже о том, что игровая панель не запускается автоматически для конкретной игры, пользователи могут добавить эту игру через область настроек.
Xbox Game Bar не работает
Теперь мы можем понять, почему некоторым людям нравится использовать панель «Игры», поэтому, когда начали появляться сообщения о невозможности запуска программного обеспечения, нам пришлось искать способ исправления ошибок здесь и там.
Посмотрите в области настроек
Теперь вы увидите что-то вроде « Посетите настройки Windows, чтобы изменить настройки игрового видеорегистратора». Нажмите на нее и дождитесь запуска приложения «Настройки». Выберите Игровая панель и убедитесь, что возможность записывать игровые клипы и делать снимки экрана включена.
Включить игровую панель через редактор реестра
Следующий шаг – перейти к следующему ключу.
Наконец, сохраните и перезапустите Windows 10.
Настройки горячих клавиш приложения Xbox
Если нет, просто сделайте это сами и двигайтесь оттуда.
Сбросить приложение Xbox
Если игровая панель Xbox не работает, то вы можете сбросить приложение и посмотреть. Вы сможете сделать это через Настройки> Приложения> Xbox> Расширенные настройки> Сброс.
Переустановите приложение Xbox
Нажмите Windows Key + S, затем введите Powershell в поле поиска. Щелкните правой кнопкой мыши программу, как только она появится, и откройте ее как администратор. Выполните следующую команду:
Это должно удалить приложение Xbox с вашего компьютера с Windows 10.
Чтобы вернуть его, запустите Microsoft Store, найдите его, затем загрузите и установите.
Источник
Запись игр и многое другое в одно мгновение – особенности игровой панели
Game Bar – это программа, включенная в Windows 10, которая позволяет делать снимки экрана, записывать и транслировать видеоигры. Здесь вы также можете включить игровой режим, чтобы быстро применить группу настроек, специально разработанных для того, чтобы сделать любой игровой процесс более быстрым, плавным и надежным.
Многие пользователи играют в игры через приложение Xbox Live, и поэтому игровую панель иногда называют «игровым видеорегистратором Xbox».
Инструкции в этой статье относится к Windows 10.
Включить и настроить игровую панель
Игровая панель должна быть включена для игры (или любого приложения), прежде чем вы сможете использовать доступные на ней функции.
Чтобы включить игровую панель:
Как настроить игровую панель
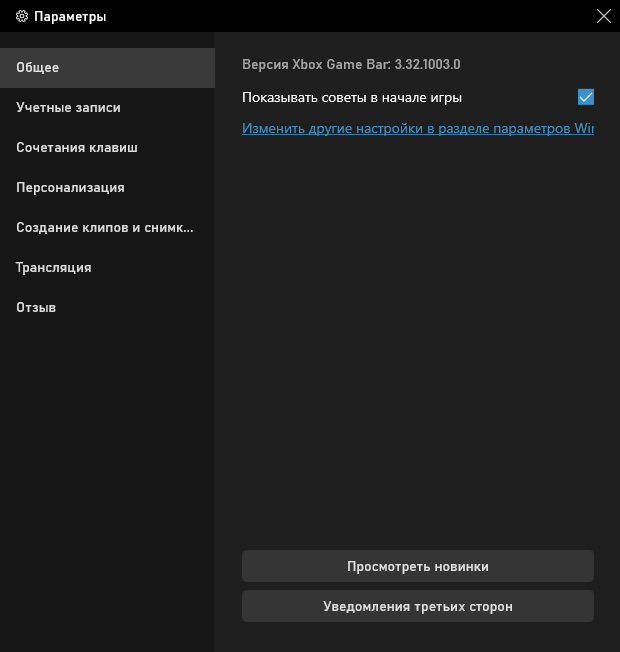
Игровая панель Windows 10 предлагает довольно много настроек, которые позволяют вам персонализировать её в соответствии с вашими потребностями, и они разделены на три вкладки: Общие, Трансляция и Аудио.
Вкладка «Общие» предлагает большинство параметров, в том числе включение игрового режима для активной игры. При выборе этого параметра система будет выделять дополнительные ресурсы для игры (например, память и мощность процессора) для более плавного игрового процесса. Также есть возможность включить фоновую запись. С этой опцией вы можете использовать функцию «Записать это» на игровой панели. Эта функция фиксирует последние 30 секунд игры, что является отличным решением для записи неожиданного и «исторического» игрового момента.
Вкладка «Трансляция» позволяет включать или отключать микрофон или камеру во время трансляции. Вкладка «Аудио» позволяет настроить качество звука, выбрать использование микрофона (или нет) и многое другое.
Запись в игровой панели
Вероятно, наиболее популярным вариантом является функция игрового видеорегистратора, которая позволяет записывать игровой процесс. Эта функция работает аналогично традиционному телевизионному цифровому видеорегистратору.
Чтобы записать игру, используйте функцию записи:
Трансляция, скриншоты и многое другое
Помимо функции записи экрана, есть также возможность создавать снимки экрана и транслировать игровой процесс. Сделанные снимки экрана доступны в приложении Xbox, а также в папке «Видео» → «Снимки». Трансляция немного сложнее, но если вы хотите изучить её, щелкните значок «Трансляции» и следуйте инструкциям, чтобы настроить параметры и запустить прямой эфир.
Горячие клавиши игровой панели
Существуют различные комбинации клавиш, которые вы можете использовать во время игры, чтобы записывать клипы и создавать снимки экрана:
Запись вне игр
Хотя название «Игровая панель» подразумевает, что Game Bar предназначен только для записи и трансляции компьютерных игр, это не так.
Вы можете использовать Game Bar для захвата:
Источник
Как включить и открыть Xbox Game Bar в Windows 10
Содержание
Как включить игровую панель Xbox в Windows 10
Панель Xbox Game по умолчанию включена в Windows 10. Однако, если вы хотите убедиться, в том, что она включена выполните следующие действия:
Как открыть игровую панель Xbox в Windows 10
Чтобы открыть Xbox Game Bar, запустите свою любимую игру и нажмите клавиши Win + G на клавиатуре. Если вы изменили комбинацию клавиш по умолчанию для панели Xbox Game, вместо этого нажимайте заданные вами клавиши. Обратите внимание, что вы можете запустить панель Xbox Game в любое время, даже во время игры.
Не работает Xbox Game Bar (Win+G)
У пользователей иногда возникает проблема, Xbox Game Bar не открывается даже после многократного нажатия сочетаний клавиш Win + G. Ниже приведем решения, которые помогут исправить ситуацию когда Xbox Game Bar не работает или не открывается.
Решение 1. Установка пакета дополнительных компонентов мультимедиа
Если игровая панель по-прежнему не открывается после нажатия Win + G или не работает, попробуйте следующий способ.
Решение 2. Редактируем реестр
Предупреждение! Прежде чем вносить какие-либо изменения в редактор реестра, убедитесь, что вы создали резервную копию данных реестра. Это поможет вам восстановить любые данные, которые могут быть потеряны в процессе редактирования.
Решение 3. Используем Windows PowerShell
# Get all the provisioned packages
$Packages = (get-item ‘HKLM:\Software\Microsoft\Windows\CurrentVersion\Appx\AppxAllUserStore\Applications’) | Get-ChildItem
Решение 4. Сбрасываем настройки приложения Xbox Game Bar
Внимание! Повторите действия выше и для приложения Компаньон консоли XboX, произведите его сброс в настройки по умолчанию.
Хотя описанные выше методы должны решить, проблемму Xbox Game Bar не открывается или не запускается, но если вы все еще сталкиваетесь с данной ошибкой, удалите приложение Xbox, а затем переустановите его снова.
Если и это не работает, скорее всего, ваш брандмауэр Windows или стороннее антивирусное программное обеспечение на вашем ПК с Windows 10 блокирует работу приложения Xbox и его компоненты. Эта проблема возникает, когда брандмауэр блокирует исполняемые файлы этого приложения. В таком случае вы должны добавить приложение Xbox в доверенную зону брандмауэра или другого антивирусного программного обеспечения.
Добавить комментарий
Используя наш веб-сайт, вы соглашаетесь на использование файлов cookie.
Подробнее
Cookies are short reports that are sent and stored on the hard drive of the user’s computer through your browser when it connects to a web. Cookies can be used to collect and store user data while connected to provide you the requested services and sometimes tend not to keep. Cookies can be themselves or others.
There are several types of cookies:
So when you access our website, in compliance with Article 22 of Law 34/2002 of the Information Society Services, in the analytical cookies treatment, we have requested your consent to their use. All of this is to improve our services. We use Google Analytics to collect anonymous statistical information such as the number of visitors to our site. Cookies added by Google Analytics are governed by the privacy policies of Google Analytics. If you want you can disable cookies from Google Analytics.
However, please note that you can enable or disable cookies by following the instructions of your browser.
Источник
Запись видео с экрана Windows 10 — 3 способа
Многие пользователи сталкиваются с необходимостью записать видео с экрана Windows 10, которое можно выполнить тем или иным способом. С экрана записывают видео для YouTube, презентации или доклады, трансляцию обучающего видео, работу в программе, запись игры и т. д.
В большинстве случаев, запись видео экрана Windows происходит с помощью стороннего программного обеспечения: специализированных программ для захвата экрана монитора. Имеются онлайн сервисы, помогающие записывать видео ролики с экрана компьютера.
Описанные способы предполагают установку специального приложения на ПК, с помощью которого выполняется запись происходящего на экране, а затем сохранение видео в файл. Возникает закономерный вопрос, можно ли сделать запись видео с экрана компьютера в Windows без помощи стороннего ПО?
В операционной системе Windows 10 имеется встроенная функция: экранный рекордер, который предназначен для записи игр. В систему предустановлено приложение Xbox Game Bar, с помощью которого можно записать видео с игры на экране компьютера.
Существуют другие варианты записать видео с экрана компьютера Windows 10: для этого, необходимо воспользоваться инструментами из программного обеспечения для видеокарт NVIDIA и AMD, установленных на компьютере.
Конечно, в специализированных программах, как правило, имеется больший функционал, но в некоторых случаях, пользователь может обойтись без посторонних приложений для записи экрана компьютера.
Как записать видео с экрана Windows средством системы
В Windows 10 имеется приложение Xbox Game Bar, которое записывает с экрана в играх и других приложениях, открытых на полный экран. Запись Рабочего стола и Проводника не доступны.
Запись видео с экрана Windows 10 работает на компьютерах, видеоадаптеры которых поддерживают технологии:
Опции записи настраиваются из параметров операционной системы и самого приложения. Прежде всего, необходимо убедиться, что функция записи игр включена в параметрах операционной системы.
Выполните следующие действия:
В этом разделе находятся опции для изменения сочетаний «горячих» клавиш, если вам понадобится изменить настройки по умолчанию.
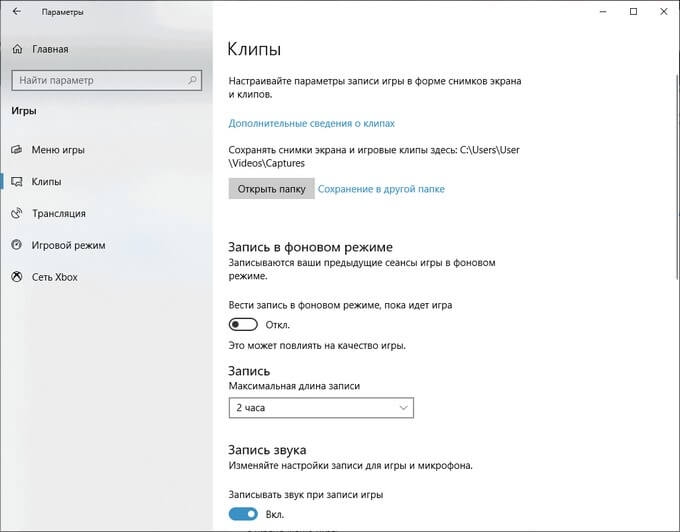
Во вкладках «Клипы», «Трансляция», «Игровой режим» и «Сеть Xbox» настраиваются другие параметры: запись в фоновом режиме, запись звука, длина записи, качество записи видео и т. д.
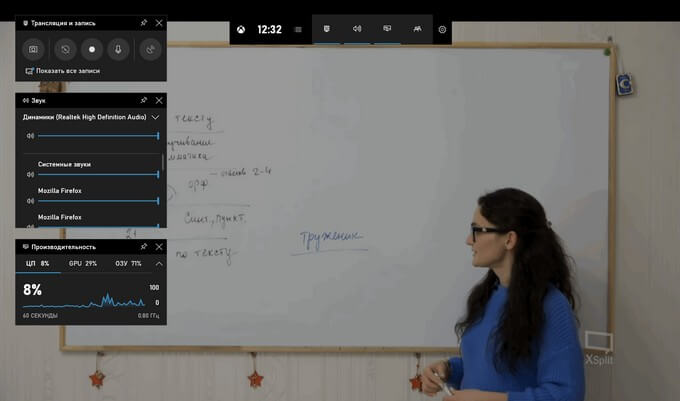
На панели «Трансляция и запись» также доступны кнопки для выполнения других действий, вызываемых клавишами:
Во время записи на экране отображается небольшая панель, откуда можно оперативно поменять некоторые параметры: отключить микрофон или завершить захват экрана.
По умолчанию, записи захвата экрана и созданные скриншоты сохраняются в папке «Клипы», которая находится в папке «Видео». Видеоролики сохраняются в формате «MP4», а снимки экрана в формате «PNG».
Пользователь может посмотреть все записанные клипы из окна игрового режима, после нажатия на кнопку «Показать все записи».
Как записать видео с экрана компьютера Windows в NVIDIA GeForce Experience
В приложении NVIDIA GeForce Experience, распространяемом вместе с видеодрайверами компании NVIDIA, имеется функция записи экрана. Это приложение, кроме игр, может записать происходящее на Рабочем столе или в любых открытых программах.
Пройдите следующие шаги:

На панели имеются инструменты для выполнения необходимых действий, которым соответствуют сочетания клавиш на клавиатуре:
Функции «Фоторежим» и «Фильтр» используются только в поддерживаемых играх.

Записи видео файлов сохраняются в формате «MP4», а снимки экрана в формате «PNG». Они находятся в системной папке «Видео» профиля пользователя. Сохраненные медиа файлы можно посмотреть в «Галерее» из окна программы GeForce Experience.
Запись видео с экрана в AMD Radeon ReLive
В драйверах видеокарт компании AMD имеется программное обеспечение Radeon ReLive, с помощью которого можно записывать видео в играх и с Рабочего стола компьютера.
Функция ReLive не работает на видеоплатах с размером памяти меньше 2 ГБ, необходимо наличие блока кодирования видео AMD Video Coding Engine (VCE).
Необходимо проделать следующие действия:

По умолчанию, записанные файлы сохраняются в папке «Radeon ReLive», находящейся в папке «Видео».
Выводы статьи
В некоторых случаях, пользователь может записать видео с экрана в операционной системе Windows 10 без помощи дополнительных программ. Инструменты для захвата видео имеются в настройках системного приложения Xbox Game Bar, и в программном обеспечении для графических карт NVIDIA и AMD.
Источник
Запись экрана в Windows 10/11 — это полезный способ поделиться контентом или сделать обучающие видеоролики, особенно среди пользователей, которые хотели бы делиться контентом с другими через различные платформы социальных сетей. Для записи экрана вам понадобится специальный программный инструмент. Какой из представленных на рынке инструментов для записи экрана в Windows 10/11 лучший? Как записать экран в Windows 10/11? В данной статье показано 3 простых способа бесплатно записать изображение с экрана в Windows 10/11. Один из наиболее удобных способов — использовать встроенный в Windows 10/11 инструмент для захвата экрана. Другой способ — использовать профессиональная программа записи видео с экрана в Windows 10/11 в различных форматах, соотношениях и качестве. Последний способ — использование онлайн-инструмента для записи экрана.

- Содержание
-
Запись экрана Windows 10/11 с помощью встроенного инструмента захвата экрана
-
Запись экрана Windows 10/11 с помощью бесплатной программы для записи экрана
-
Запись экрана Windows 10/11 с помощью онлайн-сервиса
Запись экрана Windows 10/11 с помощью встроенного инструмента захвата экрана
Установив операционную систему Windows 10/11 многие пользователи долгое время даже не подозревают, что в ней есть встроенный инструмент для захвата экрана — Xbox Game Bar. Как следует из названия, он в первую очередь предназначен для геймеров, которые записывают игровой процесс. Тем не менее, его удобно использовать для записи экрана, и он хорошо работает с большинством приложений. Давайте посмотрим, как найти встроенный инструмент для захвата экрана и как с его помощью записывать экран в Windows 10/11.
Найдите и включите Xbox Game Bar
1. Нажмите кнопку «Пуск» внизу и значок шестеренки, чтобы открыть настройки.
2. Выберите Игры. Затем по умолчанию загружается раздел Xbox Game Bar. Справа есть переключатель, который включает или выключает панель. Если отображается значение «Выкл.», Щелкните переключатель и включите инструмент захвата видео. Затем вы можете начать записывать свой экран в Windows 10/11.

Как записать экран в Windows 10/11 с помощью встроенного инструмента для захвата видео? Подробные шаги показаны ниже.
Шаги по записи экрана со звуком в Windows 10/11
Инструмент записи экрана может работать в обычных приложениях, но все же имеет некоторые недостатки. Не все действия в Windows 10/11 могут быть записаны данным инструментом. Рабочий стол, проводник не может быть записан. Поэтому, прежде чем начать, нажмите сочетание клавиш, чтобы открыть панель Xbox Game, не забудьте сначала открыть приложение, которое вы хотите записать. В противном случае ПО сообщит, что игровые функции недоступны для рабочего стола Windows или проводника. Затем вы можете выполнить шаги, чтобы мгновенно записать экран Windows 10/11.
Шаг 1.Нажмите сочетание клавиш Windows + G, чтобы открыть средство записи экрана, встроенное в Window 10.
Шаг 2.Нажмите кнопку «Начать запись» (или нажмите сочетание клавиш Windows + Alt + R), чтобы начать запись экрана в Windows 10/11. Вы можете нажать кнопку «Настройка» и изменить настройки по умолчанию, например, выбрать запись звука или нет.

Шаг 3.В правом верхнем углу экрана компьютера вы можете увидеть статус захвата, который показывает время записи. Чтобы завершить запись, просто нажмите зеленую кнопку.
Чтобы просмотреть записанное видео, нажмите клавиши Windows + G и откройте панель Xbox Game. Откройте меню виджетов, выберите «Галерея», и вы сможете смотреть все записанные видео. Эти видео сохраняются как файлы MP4. Еще один способ найти записанные видео в Windows 10/11 — перейти во вложенную папку Capture/Записи в папке Videos/Видео.

Минусы:
-
Невозможно записать полноэкранный режим или указать разрешение для захвата.
-
Невозможно поставить на паузу во время записи.
-
Ограниченные возможности редактирования видео.
-
Иногда игровые функции, недоступные для рабочего стола Windows.
Запись экрана Windows 10/11 с помощью бесплатной программы для записи экрана
Чтобы помочь вам записывать экран и звук в Windows 10/11 с дополнительными возможностями, мы рекомендуем профессиональное бесплатное средство записи экрана для Windows 10/11 и других операционных систем Windows — iTop Screen Recorder. Разработанный для записи экрана в Windows, включая Vista, 7, 8, 8.1 10 и 11, он предлагает высококачественные услуги для записи видео с высокой четкостью изображения без задержек в кадре. В отличие от встроенного в Windows 10/11 инструмента захвата экрана, он позволяет записывать любую область экрана в соответствии с вашими требованиями. Вы можете записывать HD-видео, без водяных знаков, без ограничения по времени.
Записывайте видео & аудио с экрана бесплатно
- Записывайте высококачественное видео с экрана вашего ПК, а также звук с системы или устройства ввода синхронно с видео.
- Упростите количество шагов и кликов мыши, для более комфортного использования. Управляйте всем процессом записи без усилий.
- Поддержка вывода в несколько форматов и преобразование с использованием новейших технологий сжатия. Лучшее качество и меньший размер.
Основные характеристики iTop Screen Recorder:
Запись экрана со звуком. Откройте приложение, и вы сможете выбрать запись системных звуков, микрофона и щелчков мыши. Все звуки можно полностью записать.
Гибкий захват экрана для записи видео. Программа записи экрана предлагает 4 варианта выбора области экрана для записи: полный экран, конкретная область, фиксированное соотношение (4: 3 и 16: 9).
Поддержка различных форматов вывода и конвертации. После записи вы можете сохранить видео в более чем 12 форматах, совместимых с основными цифровыми устройствами. Аудио можно сохранять в MP3, AAC и других форматах. Более того, он помогает вам конвертировать видео в любой формат по вашему желанию.
Редактируйте видео после записи. У iTop Screen Recorder больше функций, чем просто запись. После завершения записи вы можете нажать кнопку «Редактировать», чтобы отредактировать видео с помощью мощных функций редактирования и мгновенно сохранить его. Каждый кадр — это то, что вы хотите.
Незамедлительно загружайте видео в социальные сети. Щелкните видео правой кнопкой мыши и выберите параметр «Загрузить». Вы можете загрузить видео из программы записи экрана на популярные социальные сети: YouTube, Instagram, Facebook, Google Drive и Dropbox.
Далее мы покажем вам, как записать ваш экран в Windows 10/11 с помощью iTop Screen Record, шаг за шагом.
Шаг 1. Загрузите бесплатно iTop Screen Recorder для Windows 10/11 или других версий Windows, и установите его прямо сейчас.
Шаг 2. Откройте рекордер и настройте предпочтения. Для получения дополнительных настроек нажмите «Настройки записи», чтобы выбрать размер, формат, частоту кадров и качество видео. Вы также можете установить аудиоформат и частоту кадров.

Шаг 3. Начните запись экрана в Windows 10/11, нажав красную кнопку записи (Или нажмите горячую клавишу F9, чтобы начать запись.). Запись начнется моментально. Нажмите F10, чтобы приостановить запись, и F9, чтобы закончить ее.

Шаг 4. Когда вы заканчиваете запись, видео сохраняется автоматически. В списке видео вы можете просмотреть все записанные видео и отредактировать видео, щелкнув значок редактирования.

Что делать, если вы не используете операционную систему Windows? Прочтите другую статью, чтобы узнать, как записать экран на Mac?
Запись экрана Windows 10/11 с помощью онлайн-сервиса
Если вы не хотите загружать какое-либо программное обеспечение, мы рекомендуем iTop Online Screen Recorder. Этот онлайн-сервис прост в использовании и удовлетворит ваши основные потребности в записи экрана Windows 10/11. Всего за 5 простых шагов вы сможете записывать видео с экрана windows 10/11 без каких-либо ограничений!
Шаг 1. Откройте сайт iTop Online Screen Recorder
Шаг 2. Нажмите кнопку «Начать запись».

Шаг 3. Выберите окно для записи экрана Windows 10/11.

Шаг 4. Нажмите кнопку Стоп, чтобы остановить запись.

После записи вы можете загрузить записанное видео на ПК.
Вывод
Windows 10/11 — широко используемая операционная система от Microsoft. Для записи экрана в Windows 10/11 удобен собственный инструмент для захвата экрана. Но если вы ищете программы записи экрана для качественного захвата, iTop Screen Recorder — ваш лучший выбор. Он работает со всеми версиями Windows и помогает записывать видео высокого качества без затрат. Попробуйте бесплатно прямо сейчас, чтобы начать запись экрана в Windows 10/11 и делиться контентом с большим количеством людей.
Записывайте видео & аудио с экрана бесплатно
- Записывайте высококачественное видео с экрана вашего ПК, а также звук с системы или устройства ввода синхронно с видео.
- Упростите количество шагов и кликов мыши, для более комфортного использования. Управляйте всем процессом записи без усилий.
- Поддержка вывода в несколько форматов и преобразование с использованием новейших технологий сжатия. Лучшее качество и меньший размер.

Nadia Isaev
Nadia Isaev — отличный редактор в команде iTop с богатым опытом работы в области программного обеспечения и информационных технологий. Он предоставит читателям самую свежую и точную информацию о компьютерах и программном обеспечении и ответит на все ваши вопросы о записи экрана.