
Распределенное обучение с TensorFlow и Python
AI_Generated 05.05.2025
В машинном обучении размер имеет значение. С ростом сложности моделей и объема данных одиночный процессор или даже мощная видеокарта уже не справляются с задачей обучения за разумное время. Когда. . .
CRUD API на C# и GraphQL
stackOverflow 05.05.2025
В бэкенд-разработке постоянно возникают новые технологии, призванные решить актуальные проблемы и упростить жизнь программистам. Одной из таких технологий стал GraphQL — язык запросов для API,. . .
Распознавание голоса и речи на C#
UnmanagedCoder 05.05.2025
Интеграция голосового управления в приложения на C# стала намного доступнее благодаря развитию специализированных библиотек и API. При этом многие разработчики до сих пор считают голосовое управление. . .
Реализация своих итераторов в C++
NullReferenced 05.05.2025
Итераторы в C++ — это абстракция, которая связывает весь экосистему Стандартной Библиотеки Шаблонов (STL) в единое целое, позволяя алгоритмам работать с разнородными структурами данных без знания их. . .
Разработка собственного фреймворка для тестирования в C#
UnmanagedCoder 04.05.2025
C# довольно богат готовыми решениями – NUnit, xUnit, MSTest уже давно стали своеобразными динозаврами индустрии. Однако, как и любой динозавр, они не всегда могут протиснуться в узкие коридоры. . .
Распределенная трассировка в Java с помощью OpenTelemetry
Javaican 04.05.2025
Микросервисная архитектура стала краеугольным камнем современной разработки, но вместе с ней пришла и головная боль, знакомая многим — отслеживание прохождения запросов через лабиринт взаимосвязанных. . .
Шаблоны обнаружения сервисов в Kubernetes
Mr. Docker 04.05.2025
Современные Kubernetes-инфраструктуры сталкиваются с серьёзными вызовами. Развертывание в нескольких регионах и облаках одновременно, необходимость обеспечения низкой задержки для глобально. . .
Создаем SPA на C# и Blazor
stackOverflow 04.05.2025
Мир веб-разработки за последние десять лет претерпел коллосальные изменения. Переход от традиционных многостраничных сайтов к одностраничным приложениям (Single Page Applications, SPA) — это. . .
Реализация шаблонов проектирования GoF на C++
NullReferenced 04.05.2025
«Банда четырёх» (Gang of Four или GoF) — Эрих Гамма, Ричард Хелм, Ральф Джонсон и Джон Влиссидес — в 1994 году сформировали канон шаблонов, который выдержал проверку временем. И хотя C++ претерпел. . .
C# и сети: Сокеты, gRPC и SignalR
UnmanagedCoder 04.05.2025
Сетевые технологии не стоят на месте, а вместе с ними эволюционируют и инструменты разработки. В . NET появилось множество решений — от низкоуровневых сокетов, позволяющих управлять каждым байтом. . .
Encountering a blue screen of death error related to igdkmd64.sys might lead you to assume that the issue lies with your driver. While this can be true in many cases, it’s not always the sole cause. Other factors, such as corrupt RAM, damaged hard disks, or the presence of malware, can also trigger the igdkmd64.sys error message.
Don’t worry. Although there are different reasons why you are seeing the blue screen of death error code igdkmd64.sys, you can readily fix it on your own. Below are some troubleshooting options that can resolve your igdkmd64.sys problems.
Option 1: Update All Your Device Drivers.
It is likely that igdkmd64.sys Windows 10/11 errors are showing because of corrupt or outdated drivers, so you might need to update your device drivers.
However, finding a driver that is compatible with your hardware is not an easy task. No matter how experienced you are at downloading and installing drivers manually, the entire process can be irritating and time-consuming. Even worse, installing an incompatible driver may only cause more problems to surface.
Because we know that this task can be complex, we suggest using a driver updater tool like Auslogics Driver Updater to automate the entire process. This tool will create a backup of your current device drivers and update all your device drivers in just one click.
Option 2. Fix Any Faulty Registry Entries.
Another reason why the igdkmd64.sys error is showing is a faulty registry entry. The installation of a third-party app or program, or malware, may have corrupted your system registry and caused the error to occur. Therefore, any invalid registry entry has to be fixed.
If you are not a computer service professional, we do not recommend manually making changes to the registry. Simply misplace one comma in the registry and your computer may not function anymore.
Because of the risks involved, it is best that you use a trusted third-party registry cleaner to scan your registry. With such tools, you can automate the entire process of finding invalid registry entries and broken links. Before a scan is done, a backup is created first, allowing you to undo any changes in one click and protecting you in the face of botched computer operations.
Option 3: Perform a Complete PC Scan.
A virus, malware, or system junk may be causing the igdkmd64.sys errors to occur because these malicious files have the ability to corrupt, damage, and even delete any system related files.
If you already have an antivirus program installed on your computer, then great. All you have to do is run a quick scan and you should be able to identify any malicious files. But if you don’t have one, now is the right time to download.
Outbyte PC Repair is one reliable PC cleaner we recommend. This tool can detect all sorts of system junk, including web browser cache and unused error logs, keeping your computer running fast and smoothly.
Option 4: Restore Your System’s Default Settings.
Sometimes, simply restoring your system’s default settings can fix any errors, including the igdkmd64.sys blue screen of death error. To restore your system’s default settings, simply follow these steps:
- Open the Start menu.
- In the search bar, input System Restore and press Enter.
- Choose System Restore in the search results.
- If asked, enter your administrator password.
- Follow the on-screen instructions provided by the System Restore Wizard.
- Restart your computer.
Option 5: Run a System File Check.
Did you know that your Windows computer has a built-in tool that lets you scan your computer for any corrupt system files? It’s called the System File Checker. If this utility detects a problem with your system files, it will automatically attempt to replace the erroneous file.
How do you run the System File Checker? Follow these steps:
- Open the Start menu.
- In the search bar, input command.
- While pressing the Ctrl and Shift keys, hit Enter.
- A permission dialog box will pop up. Click Yes.
- A window with a blinking cursor will open. In the text field, input the sfc /scannow command and press Enter.
- The System File Checker should start scanning your system for any problematic file. This may take some time, so you have to be very patient.
Option 6: Install Any Available Windows Updates.
Microsoft is always working to update and improve its system files, including igdkmd64.sys. That means your blue screen of death problems could be resolved by simply updating your Windows with the most recent patch or Service Pack.
To check for any available Windows updates, do the following:
- Open the Start menu.
- In the search bar, input update and hit Enter.
- Select Windows Update.
- The Windows Update dialog box will open. If any updates are available, just click the Install Updates button.
Option 7: Check If Your Hard Drive Is Corrupted.
In some cases, igdkmd64.sys errors are caused by corrupted hard drives. Over time, your computer might have developed problems on the hard drive because of unintended or repeated misuse, including improper shutdowns, power outages, and forced-closing programs.
Fortunately, Microsoft already has a utility conveniently installed on your system. It’s called Check Disk, and it works to scan and repair any hard drive errors. To run this tool, follow the steps below:
- Open the Start menu.
- In the search bar, input command.
- While holding the Ctrl and Shift keys, press Enter.
- A dialog box will pop up. Click Yes.
- A new window with a blinking cursor will open. In the text field, input chkdsk /f and press Enter.
- The Check Disk utility should now start scanning your hard drive for any problems. Once it detects a problem, follow the on-screen instructions provided to fix them.
Option 8: Reinstall Windows.
If all else fails, reinstalling Windows is your last resort. Doing this will erase all files on your hard drive, allowing you to begin again with a fresh, error-free system.
We must emphasize, though, that reinstalling Windows requires technical knowledge. One mistake and you could lose all your important data. To avoid data loss, you need to back up all your files and documents.
Summary
The igdkmd64.sys blue screen of death error is most likely caused by a conflict within system drivers, making it easy to troubleshoot. Then again, we cannot erase the possibility that it’s also caused by problems with malware or third-party apps. One thing is for sure, though, and that is we’ve provided sound ways to help address your igdkmd64.sys errors.
Let us know which of the methods above worked for you. Share it with us in the comments section.
Give us some love and rate our post!
Fix igdkmd64.sys Blue Screen of Death Error: igdkmd64.sys is a software component of Intel Graphic Card drivers for Windows and intel provides this kernel mode graphics driver on an OEM basis to laptop manufacturers. IGDKMd64 stands for Intel Graphics Driver Kernel Mode 64-bit. Several different problems involve this driver which causes the Blue Screen of Death (BSOD) have been reported including VIDEO_TDR_ERROR, igdkmd64.sys, and nvlddmkm.sys.

TDR stands for Timeout, Detection, and Recovery and when attempting to reset the display drivers and recover from a timeout you will see VIDEO_TDR_ERROR (igdkmd64.sys) error. Unfortunately, this error can’t be solved by merely deleting the igdkmd64.sys, in fact, you can’t even delete or edit this file as its one of the critical system files of Microsoft system. SYS is a file extension for system file device driver used by Microsoft Windows and it also holds the system settings for drivers which are required by Windows to talk to your hardware and devices.
Table of Contents
It’s recommended to create a restore point just in case something goes wrong. Also before proceeding make sure you are not overclocking your PC or GPU and if you are, then stop it immediately to Fix igdkmd64.sys Blue Screen of Death Error.
Method 1: Roll back Intel Graphic Card Drivers
1.Press Windows Key + R then type “devmgmt.msc” (without quotes) and hit enter to open Device Manager.

2.Expand Display adapters then right-click on Intel(R) HD Graphics and select Properties.

3.Now switch to Driver tab then click on Roll Back Driver and press Ok to save settings.

4.Reboot your PC to save changes.
5.If the problem is still not resolved or the Roll Back Driver option was grayed out then continue.
6.Again right-click on the Intel(R) HD Graphics but this time select uninstall.

7.If ask for confirmation select Ok and restart your PC to save changes.
8.When the PC restart it will automatically load the default drivers of Intel Graphic Card.
Method 2: Run System File Checker (SFC) and Check Disk (CHKDSK)
1.Press Windows Key + X then click on Command Prompt(Admin).
2.Now type the following in the cmd and hit enter:
Sfc /scannow
sfc /scannow /offbootdir=c:\ /offwindir=c:\windows

3.Wait for the above process to finish and once done restart your PC.
4.Next, run CHKDSK from here How To Fix File System Errors with Check Disk Utility(CHKDSK).
5.Let the above process complete and again reboot your PC to save changes.
Method 3: Change the Intel graphics settings
1.Right-click in the empty area on the Desktop and select Graphic Properties.
2.Next, in Intel HD Graphics Contol Panel click on 3D.

3.Make sure the settings in 3D are set to:
Set Application Optimal Mode to Enable.
Set Multi-Sample Anti-Aliasing to Use Application Settings.
Set Conservative Morphological Anti-Aliasing to Turn Off.

4.Go back to the main menu and click on Video.
5.Again make sure that the settings in the video are set to:
Standard Color Correction to Application Settings.
Input Range to Application Settings.

6.Restart after any changes and see if you’re able to Fix igdkmd64.sys Blue Screen of Death Error.
Method 4: Make sure Windows is up to date
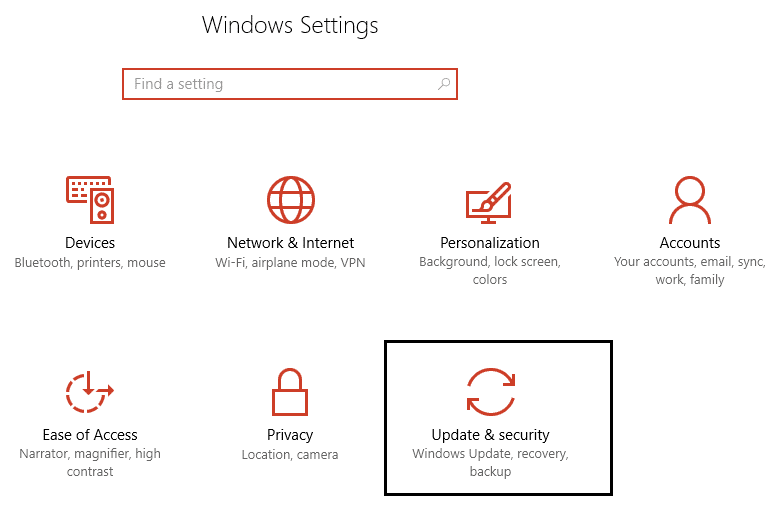
1.Press Windows Key + I to open Windows Settings then select Update & Security.
2.Next, under Update status click on ‘Check for updates.‘

3.If updates are found make sure to install them.
4.Finally, reboot your system to save changes.
This method may be able to Fix igdkmd64.sys Blue Screen of Death Error because when Windows is updated, all the drivers are also updated which seems to fix the issue in this particular case.
Method 5: Disable Intel’s integrated GPU
Note: This method only applies to user’s which have a discrete graphic card such as NVIDIA, AMD etc.
1.Press Windows Key + R then type “devmgmt.msc” (without quotes) and hit enter to open Device Manager.
2.Expand Display adapters then right-click on Intel(R) HD Graphics and select Disable.

3.Restart your PC to save changes and your system will automatically switch to your discrete graphic card for display purpose which will definitel fix this issue.
That’s it you have successfully Fix igdkmd64.sys Blue Screen of Death Error but if you still have any questions regarding this post feel free to ask them in the comment’s section.
The dreaded Blue Screen of Death (BSoD) is a sight no computer user wants to see. It signifies a critical error that has caused your system to crash and requires immediate attention. One common cause of BSoD errors is the igdkmd64.sys file. In this article, we will explore what igdkmd64.sys is, why it can lead to BSoD errors, and how you can fix them.

What is igdkmd64.sys?
igdkmd64.sys is a system file associated with Intel Graphics Kernel Mode Driver. It is responsible for managing the communication between your computer’s hardware and the operating system, specifically related to Intel integrated graphics. This driver is crucial for the proper functioning of your graphics card and allows you to display images and videos on your screen.
Why does igdkmd64.sys cause BSoD errors?
While igdkmd64.sys is an essential system file, it can sometimes become corrupted or incompatible with your system, leading to BSoD errors. Several factors can contribute to these errors:
- Outdated or incompatible graphics drivers: If you have an outdated or incompatible version of the Intel Graphics Kernel Mode Driver installed, it can conflict with your system and trigger BSoD errors.
- Hardware conflicts: In some cases, conflicts between your graphics card and other hardware components can cause the igdkmd64.sys file to crash, resulting in a BSoD.
- Malware or virus infections: Malicious software can corrupt system files, including igdkmd64.sys, leading to BSoD errors.
- Overheating: If your computer’s graphics card is overheating, it can cause instability in the system and trigger BSoD errors.
How to fix igdkmd64.sys BSoD errors?
Now that we understand the potential causes of igdkmd64.sys BSoD errors, let’s explore some effective solutions to fix them:
1. Run the DISM and SFC scans
DISM (Deployment Image Servicing and Management) and SFC (System File Checker) are built-in Windows tools that can repair corrupted or missing system files and restore the health of your computer. Both DISM and SFC scans can be run from an elevated command prompt (with administrative privileges). Here are the steps to do so:
- To open the Command Prompt as an administrator in Windows, type “cmd” in the search bar and then right-click on the Command Prompt result and select “Run as administrator” as shown in the image below.

- To run a DISM scan, type the following command and press Enter:
dism /online /cleanup-image /restorehealth
This will check your Windows component store for corruption and automatically fix any problems it finds. This process may take several minutes or longer depending on your system
- To run an SFC scan, type in the Command Prompt the following command and press Enter:
sfc /scannow
This will scan all protected system files and replace any corrupted or missing ones with a cached copy. Wait for the scan to complete. It may take some time depending on your system configuration.
- After both scans are completed, you should restart your computer to apply any changes. Check to see if the issue is solved.


2. Check for faulty software.
If there is a specific program that is causing this issue, try uninstalling and then reinstalling it (eg. Microsoft DirectX, Microsoft Visual C++ Redistributable, NET Framework) to check if it will solve the problem.
Windows 11Windows 10Windows 8Windows 7
-
First, open Windows Settings by pressing Windows+I on your keyboard. You can also right-click your Start button and select “Settings” from the list.

-
When Settings opens, click “Apps” in the sidebar, then select “Apps & Features”.

-
In Apps & Features settings, scroll down to the app list and search for the program you want to uninstall. When you find the program, click the three dots button beside it and select “Uninstall” in the menu that appears.

-
In the next message box, confirm the uninstall process by clicking on Uninstall, then follow the prompts to uninstall the program.


- Press the Windows key + I on your keyboard to open the Settings app. You can also ope the Settings app by clicking the Start button on the taskbar, then select “Settings” (gear icon).

-
When the “Windows Settings” window opens, click on “Apps“. By default, it should open “Apps and Features” but if it doesn’t, select it from the list on the left.

-
In Apps & Features settings, scroll down to the app list and search for the program you want to uninstall. When you find the program, click on it and select “Uninstall” in the menu that appears.

-
In the next message box, confirm the uninstall process by clicking on Uninstall, then follow the prompts to uninstall the program.


-
Right-click on the Start button in the taskbar, then select “Programs and Features”. This will take you directly to your list of installed programs.

-
The “Programs and Features” screen will be displayed with a list of all the programs installed on your computer. Scroll through the list until you find the program, then click to highlight it, then click the “Uninstall” button.

- In the next message box, confirm the uninstall process by clicking on Yes, then follow the prompts to uninstall program.


3. Scan for your computer for malware
Malware can damage your system files and registry entries and cause various errors. We will now, download and run a scan with Malwarebytes to check if you’re device is clean.
Malwarebytes is one of the most popular and most used anti-malware software for Windows, and for good reasons. It is able to destroy many types of malware that other software tends to miss, without costing you absolutely nothing. When it comes to cleaning up an infected device, Malwarebytes has always been free and we recommend it as an essential tool in the fight against malware.
-
You can download Malwarebytes by clicking the link below.
-
When Malwarebytes has finished downloading, double-click on the MBSetup file to install Malwarebytes on your computer. In most cases, downloaded files are saved to the Downloads folder.

You may be presented with a User Account Control pop-up asking if you want to allow Malwarebytes to make changes to your device. If this happens, you should click “Yes” to continue with the Malwarebytes installation.

-
When the Malwarebytes installation begins, you will see the Malwarebytes setup wizard which will guide you through the installation process. The Malwarebytes installer will first ask you what type of computer are you installing this program on, click either Personal Computer or Work Computer.

On the next screen, click “Install” to install Malwarebytes on your computer.

When your Malwarebytes installation completes, the program opens the Welcome to Malwarebytes screen.
-
Malwarebytes is now installed on your computer, to start a scan click on the “Scan” button. Malwarebytes will automatically update the antivirus database and start scanning your computer for malicious programs.

-
Malwarebytes will now scan your computer for browser hijackers and other malicious programs. This process can take a few minutes, so we suggest you do something else and periodically check on the status of the scan to see when it is finished.

-
When the Malwarebytes scan is finished scanning it will show a screen that displays any malware, adware, or potentially unwanted programs that it has detected. To remove the malicious programs that Malwarebytes has found, click on the “Quarantine” button.

-
Malwarebytes will now remove all the malicious files and registry keys that it has found. To complete the malware removal process, Malwarebytes may ask you to restart your computer.


4. Check for updates
Make sure your operating system, drivers, and other software are up to date. If the errors started happening after an update, you can uninstall that specific update patch.
To check for Windows updates, follow the below steps:
- Press the Windows key + I to open the Settings menu. Click the “Windows Update” tab on the left side of the screen.
For Windows 10 users, the Windows Update menu can be found in Settings > Update & Security > Windows Update. - Click the “Check for updates” button. This will initiate a scan for updates. If any updates are available, they will be downloaded and installed automatically.

- If you want to check for updates for other software, you can do so by opening the software and looking for a “Check for updates” option in the menu. You can also check the software’s website for updates.

5. Disable any unnecessary startup programs
Startup programs are applications that automatically launch when you start your computer. While some of these programs may be necessary for your system to function properly, others may be unnecessary and can cause errors.
- Open the Task Manager by pressing the Ctrl + Shift + Esc keys on your keyboard simultaneously.

- In the Task Manager, go to the “Startup” tab and disable any programs that you do not need to start automatically when you turn on your computer.
Keep in mind that some startup programs may be essential to the functioning of your system, so be careful not to disable any important programs.


6. Run a memory test
A faulty RAM module can cause random crashes. Run a memory test to check for any issues with your RAM. To run a memory test, follow these steps:
- Press the Windows key + R to open the Run dialog.
- Type “mdsched.exe” into the Run dialog and press Enter. This will launch the Windows Memory Diagnostic tool.

- You will be asked whether you want to restart your PC and run the test immediately or schedule the test to run the next time you start your PC. Choose the option you prefer and click “OK”.

If you choose to run the test immediately, your PC will restart and the test will begin. The test will run automatically and may take several minutes to complete.
- If the test finds any errors, it will display a message indicating the type and location of the error. You may need to replace your RAM if the test finds any errors.
- If the test completes without finding any errors, it will display a message indicating that the test has completed successfully.


7.Check your hardware
Start by inspecting your computer’s hardware components for any signs of damage or failure. Ensure that all connections are secure and that there are no loose cables. If you suspect a faulty component, consider consulting a professional or replacing it if necessary.
Next, check your RAM, hard drive, graphics card, and any other hardware components using the Windows Device Manager.
-
To access the Device Manager, type “devmgmt.msc” into the search bar on the Start menu and select “Device Manager” from the list of results.

-
In the Device Manager, you can view a list of all the hardware devices connected to your computer and check for any errors or issues. If you see a yellow exclamation point next to a device, it may indicate a problem with that device. You can right-click on the device and select “Update driver” or “Troubleshoot” to try and fix any issues.


8. Try a system restore.
If you have a restore point saved, you can try using it to revert your system to a previous state. This may fix the issue if it was caused by a recent change. To do a system restore follow these steps:
- Press the Windows key + S to open the Search menu.
- Type “system restore” into the search bar and click the “Create a restore point” result.

- Click the “System Restore” button.

- In the System Restore window, click “Next.”

- Select a restore point from the list and click “Next.” A restore point is a saved state of your system that you can use to revert your system to a previous state. Make sure to select a restore point that was created before you started experiencing problems.
- Click “Finish” to begin the restore process. Your PC will restart and the restore process will begin. This may take several minutes to complete.

- When the restore is complete, your PC will restart again. You may need to adjust your settings and reinstall any software that was installed after the restore point was created.


9. Reset your PC
One of the most drastic solutions is to reset your PC to its default configuration. This can be considered the nuclear option for fixing errors because it will wipe out all the third-party software you installed on your computer. However, this option can also be effective if none of the other methods work for you.
Before you reset your PC, make sure you back up your important data and files. You can also choose to keep your personal files in the Reset this PC tool, but it is better to have a separate backup just in case something goes wrong.
To reset your PC, follow these steps:
- Open Settings by pressing Windows + I keys.
- Click on System and then on Recovery.

- Under Reset this PC section, click on Reset PC button.
- Choose whether you want to keep your files or remove everything.
- Follow the on-screen instructions to complete the process.


After resetting your PC, you should be able to run your applications without getting any errors. However, keep in mind that this solution will also remove any custom settings and preferences you had on your computer. You will need to reinstall and configure your programs again after resetting.
Summary
igdkmd64.sys BSoD errors can be frustrating and disruptive, but with the right approach, they can be resolved. In this article, we explored what igdkmd64.sys is, why it can cause BSoD errors, and how to fix them. Remember to keep your graphics drivers up to date, scan for malware regularly, check for hardware conflicts, and ensure proper cooling to minimize the chances of encountering igdkmd64.sys BSoD errors. By following these steps, you can keep your system stable and enjoy a smooth computing experience.
Here are 10 basic security tips to help you avoid malware and protect your device:
Use a good antivirus and keep it up-to-date.
It’s essential to use a good quality antivirus and keep it up-to-date to stay ahead of the latest cyber threats. We are huge fans of Malwarebytes Premium and use it on all of our devices, including Windows and Mac computers as well as our mobile devices. Malwarebytes sits beside your traditional antivirus, filling in any gaps in its defenses, and providing extra protection against sneakier security threats.
Keep software and operating systems up-to-date.
Keep your operating system and apps up to date. Whenever an update is released for your device, download and install it right away. These updates often include security fixes, vulnerability patches, and other necessary maintenance.
Be careful when installing programs and apps.
Pay close attention to installation screens and license agreements when installing software. Custom or advanced installation options will often disclose any third-party software that is also being installed. Take great care in every stage of the process and make sure you know what it is you’re agreeing to before you click «Next.»
Install an ad blocker.
Use a browser-based content blocker, like AdGuard. Content blockers help stop malicious ads, Trojans, phishing, and other undesirable content that an antivirus product alone may not stop.
Be careful what you download.
A top goal of cybercriminals is to trick you into downloading malware—programs or apps that carry malware or try to steal information. This malware can be disguised as an app: anything from a popular game to something that checks traffic or the weather.
Be alert for people trying to trick you.
Whether it’s your email, phone, messenger, or other applications, always be alert and on guard for someone trying to trick you into clicking on links or replying to messages. Remember that it’s easy to spoof phone numbers, so a familiar name or number doesn’t make messages more trustworthy.
Back up your data.
Back up your data frequently and check that your backup data can be restored. You can do this manually on an external HDD/USB stick, or automatically using backup software. This is also the best way to counter ransomware. Never connect the backup drive to a computer if you suspect that the computer is infected with malware.
Choose strong passwords.
Use strong and unique passwords for each of your accounts. Avoid using personal information or easily guessable words in your passwords. Enable two-factor authentication (2FA) on your accounts whenever possible.
Be careful where you click.
Be cautious when clicking on links or downloading attachments from unknown sources. These could potentially contain malware or phishing scams.
Don’t use pirated software.
Avoid using Peer-to-Peer (P2P) file-sharing programs, keygens, cracks, and other pirated software that can often compromise your data, privacy, or both.
To avoid potential dangers on the internet, it’s important to follow these 10 basic safety rules. By doing so, you can protect yourself from many of the unpleasant surprises that can arise when using the web.
How to fix «error code igdkmdn64.sys»
Sometimes «error code igdkmdn64.sys» may happen when your computer’s system becomes overloaded or important system files go missing, get accidentally deleted or corrupted. These types of issues occur on computers that do not undergo proper regular maintenance, which may lead to critical issues and system malfunctions. .sys issues may be fixed with special software that repairs system elements and tunes up system settings to restore stability.
The article provides details on the issue meaning, causes and ways to repair the malfunction.
-
1
Ways to repair «error code igdkmdn64.sys» -
2
Meaning of «error code igdkmdn64.sys» -
3
Causes of «error code igdkmdn64.sys»
Ways to repair «error code igdkmdn64.sys»
Fixing «error code igdkmdn64.sys» manually is a task that should only be undertaken by advanced users as it involves working with system files and may interfere with Windows operation. For non-advanced users, special software is recommended to repair Windows malfunctions, which does not require any special skills from the user.
The following steps may fix the issue:
-
Download Outbyte PC Repair application
Special offer. See more information about Outbyte; uninstall instructions; EULA; Privacy Policy.
- Install and launch the application
- Click the ‘Scan Now’ button to detect issues and malfunctions
- Click the ‘Repair All’ button to fix them
The same application can be used to run preventative measures to reduce the chance of this or other system issues appearing in the future.
Meaning of «error code igdkmdn64.sys»
.sys issues are malfunctions with cabinet files that are used to maintain archive integrity in Microsoft Windows. When a .sys issue occurs on your computer, you are generally notified via a pop-up style warning message what kind of .sys issue you’re having. Normally, such issues are attributed to specific types of archives or system area, which may be mentioned in the warning message.
No matter what .sys issue you are experiencing, the result can be a slow PC that may freeze or crash, and an overall decline in user experience.
Common causes of «error code igdkmdn64.sys»
.sys issues may occur for a variety of reasons. One of the most common causes is the .sys file being overridden or shared with an older version of a program across other applications, or archives being corrupted.
Another possibility would be the installation or un-installation of a program conducted incorrectly, or the compression process going wrong.
Ignoring igdkmdn64.sys malfunction may eventually lead to PC slowdown or a full system crash, so fixing the issue is important to maintaining optimal computer performance.
Special Offer
Outbyte PC Repair
Windows 11, 10, 8, 7
Trusted and Monitored
The following steps should fix the igdkmdn64.sys issue:
-
Step 1.
Download Outbyte PC Repair application
See more information about Outbyte; uninstall instructions; EULA; Privacy Policy.
-
Step 2.
Install and launch the application -
Step 3.
Click the Scan Now button to detect issues and abnormalities -
Step 4.
Click the Repair All button to fix the issues
| Compatibility | Win 11, 10, 8, 7 |
| Download Size | 21.2 MB |
| Requirements | 300 MHz Processor, 256 MB RAM, 50 MB HDD space |
Limitations: trial version offers an unlimited number of scans, backups and restores of your Windows system elements for free. Registration for the full version starts from USD 29.95.