
Windows 10 May 2019 Update introduces a new visual theme called Light Mode. It changes the appearance of elements in the Windows user interface from black and other colors to white. In other words, Light Mode “blooms” Windows 10. It can look very good and some people will prefer it more then the Dark Mode in Windows 10. If you want to know more about Windows 10 Light Mode, how it looks and what effect it has on the interface , how to start or stop it, read this guide:
What is the Light Mode for Windows 10?
Light Mode is a new option found in the latest versions of Windows 10, starting with May 2019 Update. Allows you to change the look of the Windows 10 user interface and applications by changing the default color to white.
What changes are visible when you turn on Light Mode?
In Windows 10, when you turn on Light Mode, most applications found in the operating system change their appearance in white. The most obvious changes are:
• The background color used in applications changes to white or gray
• The background color used in the menus changes to white or gray
• The default text displayed in applications changes to gray or white
Which applications support Windows 10 Light Mode?
The most obvious elements in the user interface that changes to Light Mode are the Taskbar, Start Menu, and Action Center in Windows 10.
The Light Mode works for many Microsoft applications in Windows 10, such as Mail and Calendar, Microsoft Store, Photos, Calculator, and more.
Microsoft Edge does not change because the default theme in this web browser is the Light Mode. A strange thing is that Cortana’s virtual assistant still uses Dark Mode, even if you turn on the Light Mode.
How to Turn on the Light Mode in Windows 10
Open the Settings app in Windows 10. The fastest way is to either click on its Start Menu button or press the Windows + I keys on the keyboard. In the Settings app, click Personalize.
On the left side of the window, go to Colors. On the right side, you’ll find the Choose color list and click on it.
In the list that opens, choose the Light Mode. You can see that this mode is immediately used for the taskbar, making it white. You can also turn on the Transparency effects switch.
If you scroll down, you can also choose the focus color used for the interface elements such as buttons, switches, title bars, window borders, etc. You can choose any color you want, preferably one that fits white.
You can now close the Settings app. The light mode is active and works according to your settings.
How to Disable the Light Mode in Windows 10
To turn off Light Mode, follow the same steps in the previous section of this guide. Then, in the Choose Color list, choose Customize.
Then, choose Dark in the “Choose default Windows mode” section. The default theme in Windows 10 is a mix between the Dark Mode for the operating system and the Light Mode for applications.
Then choose the effects of transparency and accent color, as you wish them to be. When done, close Settings and Light Mode is turned off.
Do you prefer to use Windows 10 in Luminous Mode?
The Light Mode can be a nice visual theme for Windows 10. Some like more than Dark Mode. You can try both of them to see which one you prefer.
As Brits are finally experiencing some summer weather, experts have shared a number of hacks to keep your home cool for free — and there’s no need to switch that fan on
This article contains affiliate links, we will receive a commission on any sales we generate from it. Learn more
With Britain sweltering in the summer sun, our homes are getting warmer too and you might be more likely to spot some unwelcome pests who are seeking shelter indoors.
As the long-awaited summer sizzles through August, Brits are frantically seeking advice on how to beat the heat and stay cool at home — especially during the night.
The warmer weather also sees a surge in pesky insects around the house, often due to windows being left open. But experts say we should actually keep them closed, and turn out the lights, in order to beat these summertime woes.
READ MORE: Call an electrician immediately if see this warning sign in your home
Rob Beswick, a home expert from CGC Interiors, has chipped in with his top tips to avoid switching on the fan and save on your electricity bill while staying cool this summer, reports the Express.
He said: «Getting a good sleep is imperative, and the natural temperature for the human body is around 18.3C and with summer temperatures reaching over 30C, your sleep is often disrupted.»
Block the sun with curtains and blinds
The most simple hack is keeping those sun rays at bay by closing your curtains and blinds when the sun is at its strongest during the day.
Rob recommended: «Drawing your curtains and closing your blinds will stop the sun from getting in and warming up the rooms in your house.»
Close the door
The home expert has warned Brits that leaving doors open in the summer can actually make your house hotter.
He advised: «Keeping the doors closed will prevent your house from filling with hot air and overheating. Open the doors once the sun has stopped shining to allow fresh air in.»
Switch lights off
In addition, experts from Garden Buildings Direct have revealed that turning off lights not only keeps your home cooler during the warmer months, but can also help to deter insects. They explained that reducing both indoor and outdoor lighting, especially overnight, can help decrease the number of insects around your home.
A spokesperson said: «Unfortunately with the warmer summer weather comes an increase of pests like flies, wasps and mosquitoes.»
They added: «Mosquitoes, moths, flies and other flying insects swarm towards bright lights because they rely on light to search for food and navigate.»
What’s more, switching off lights can also stop other creepy crawlies such as spiders from invading your home.
John Stewart from the technical team at Pelsis UK said: “While spiders themselves are not attracted to light sources, many of the insects they feed on are, which in turn draws them towards outdoor lighting.»
Keep windows shut

The experts at Garden Buildings Direct also advised keeping windows shut at night to stop winged insects from entering your home while you sleep.
They advised: «Keep windows shut at night if the lights are on to ensure these uninvited pests are not attracted into the home.»
Turn appliances off
In addition, the experts suggest turning off appliances to keep cool, with Rob recommending: «Your appliances generate heat, further adding to the temperature of your home.
«Make sure to turn off your lights if you’re not in the room, reduce the amount you use your oven and use your hairdryer less and allow your hair to air dry.»
If you want ideas and inspiration to plan your next UK adventure plus selected offers and competitions, sign up for our 2Chill weekly newsletter here
With the amount of time an average human spends looking at screens, light and dark modes have become of utmost importance. Windows 11 recently became the first Windows OS to ship with Dark mode and users have been using it around the world ever since.
While not perfect, Windows 11’s dark mode helps reduce eye strain, especially in dark environments. However, there might be times when you wish to increase legibility and view Windows in light mode instead.
You can do this from the Settings app however it ends up being a long and tedious process. If you’ve been looking for an easy way to switch between dark and light modes then here’s all you need to know about it.
Related: 4 Easy Ways to Customize and Change Icons in Windows 11
You can switch between the dark and light modes on Windows 11 using the methods below. We recommend you try using Windows 11’s native scheduling to switch between dark and light mode before trying one of the third-party alternatives.
You can also choose to create desktop shortcuts to switch between dark and light modes. Use either of the methods below depending on your preferences and current setup.
Method 1: Automate your appearance
You can schedule your dark mode on Windows 11 using the Task Scheduler. This way you won’t have to switch manually between modes. Your PC will automatically take care of this task in the background based on your set schedule. Follow the steps below to help you along with this process.
Step 1: Create a task to turn on light mode
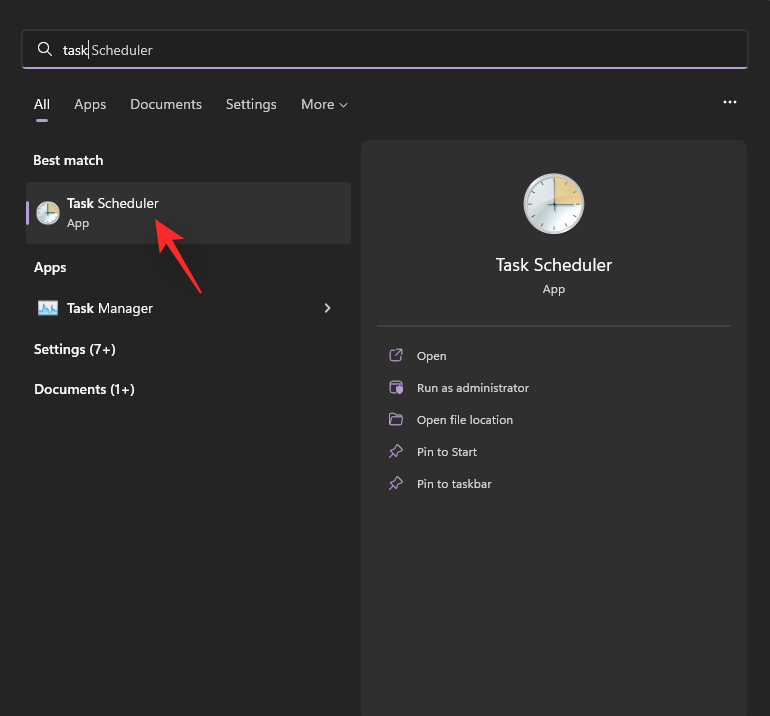
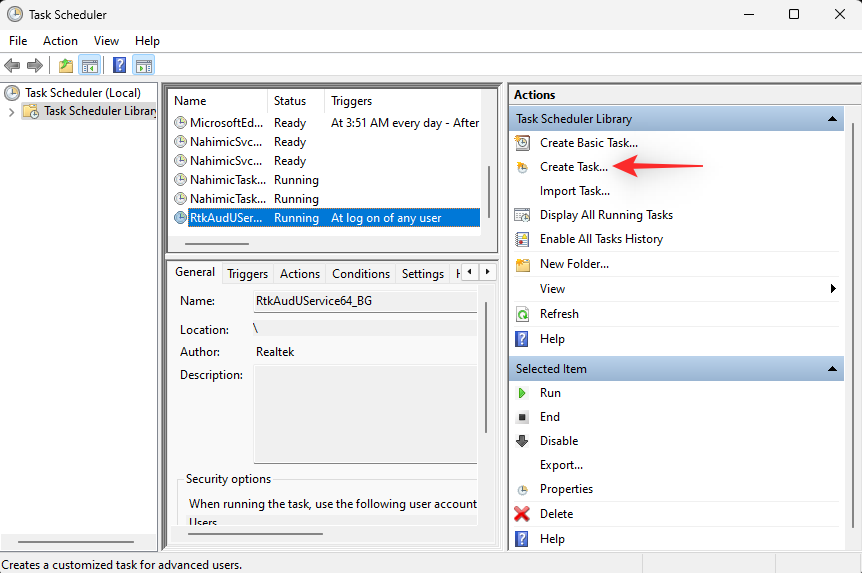
Open the Start menu, search for Task Scheduler and launch the same from your search results.
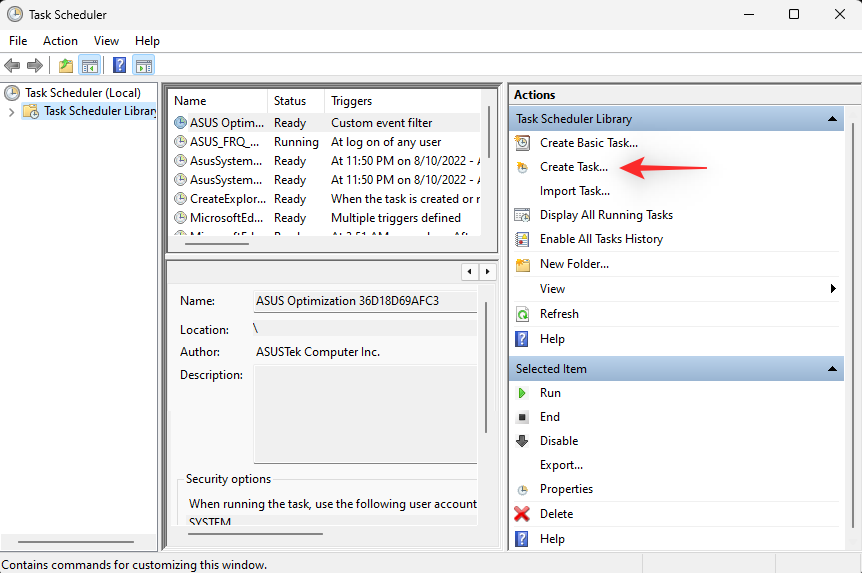
Now click Create Task on your right.
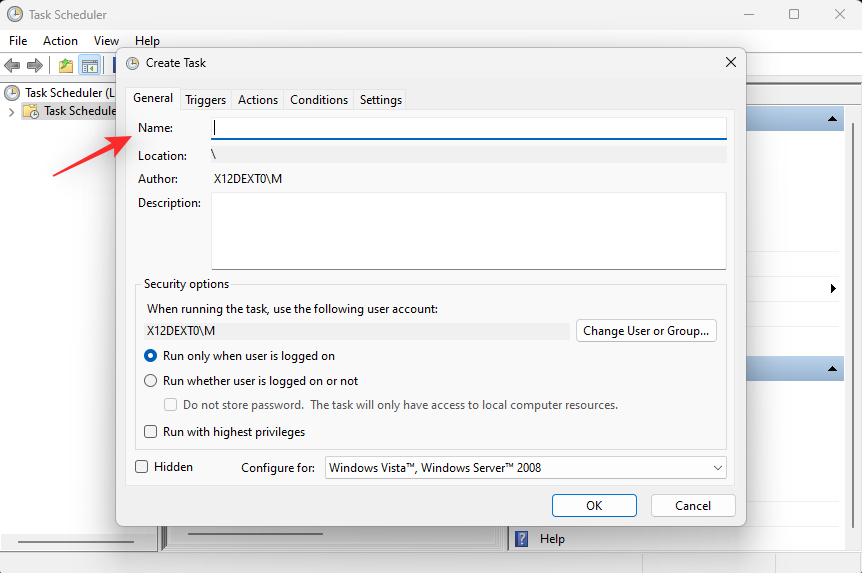
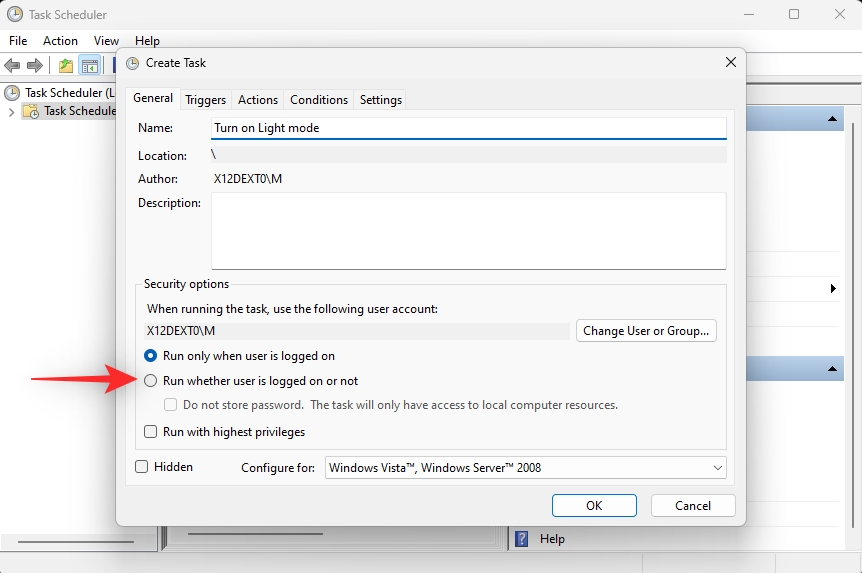
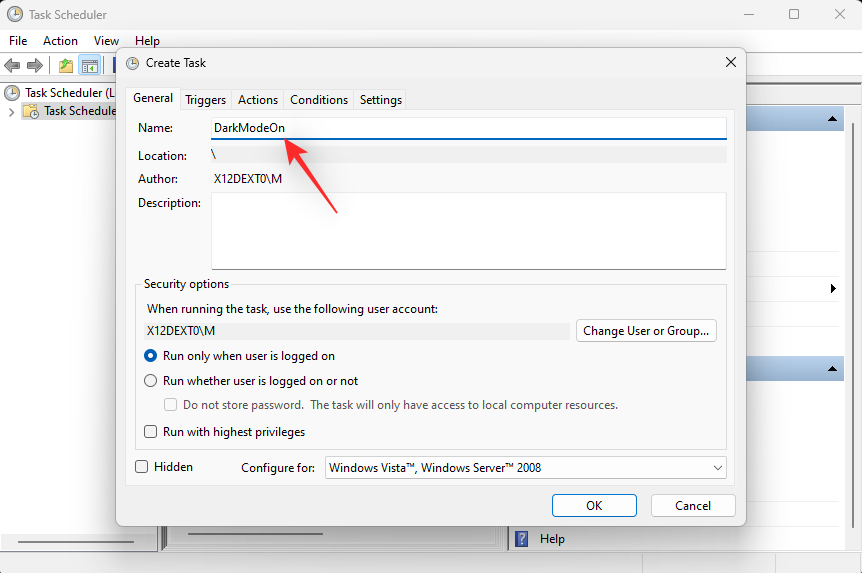
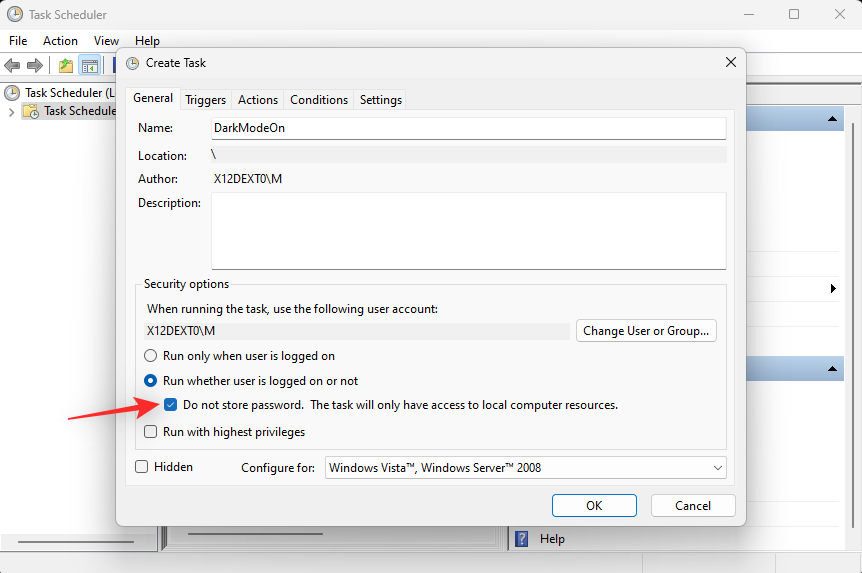
Enter an appropriate name for your task that helps you quickly identify it.
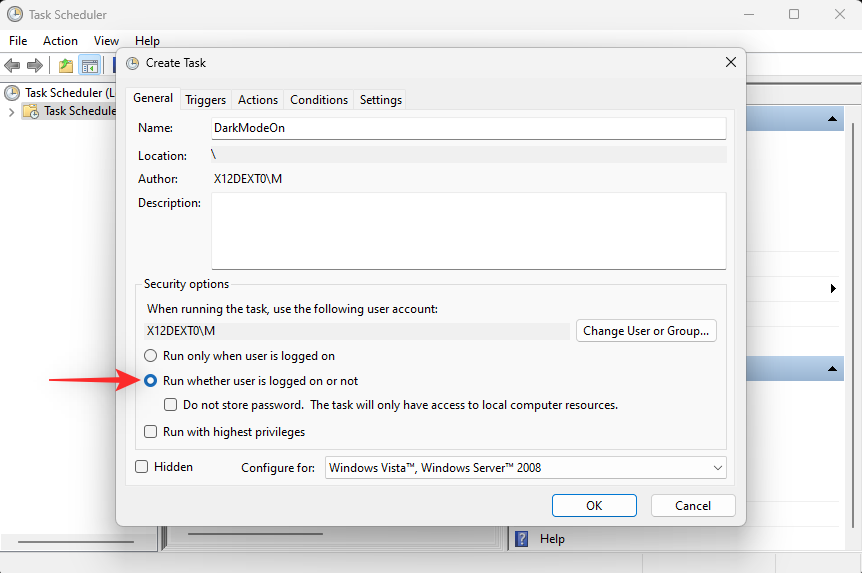
Click and select Run whether user is logged on or not.
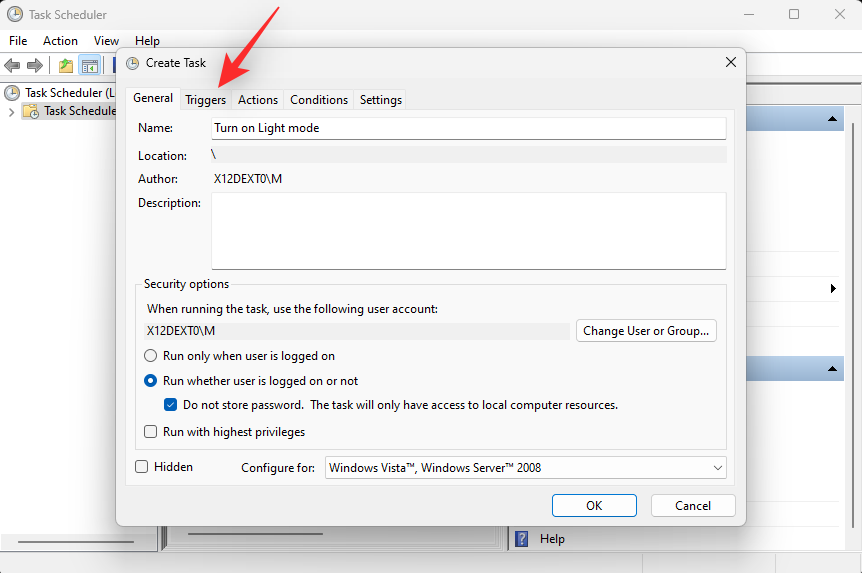
Check the box for Do not store password.

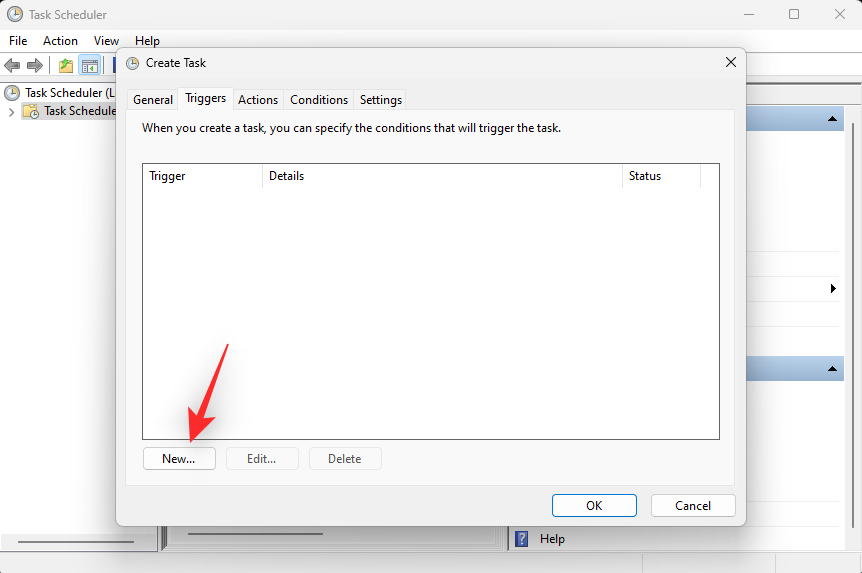
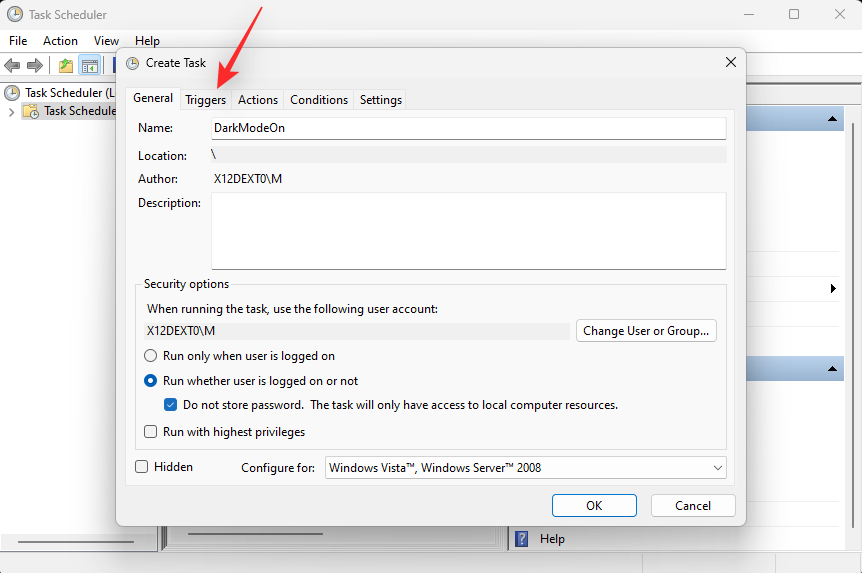
Now click and switch to the Triggers tab.
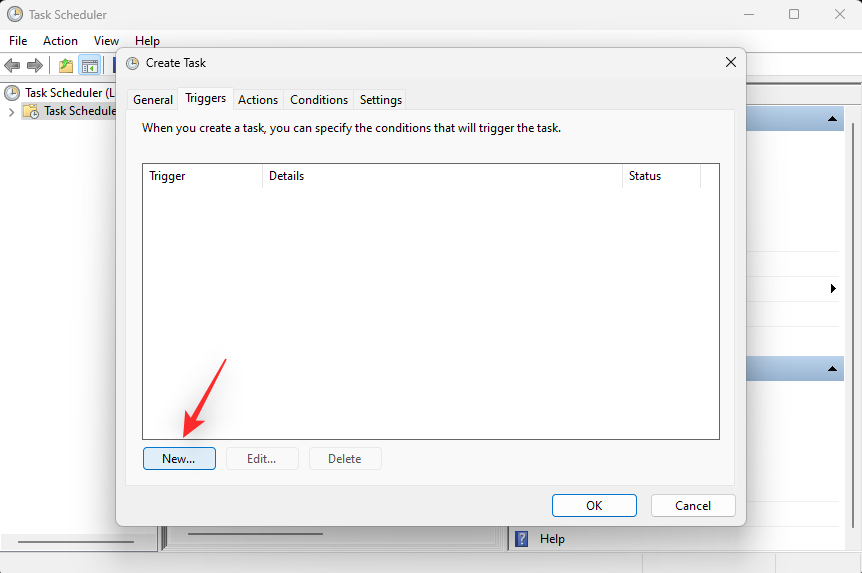
Click New.
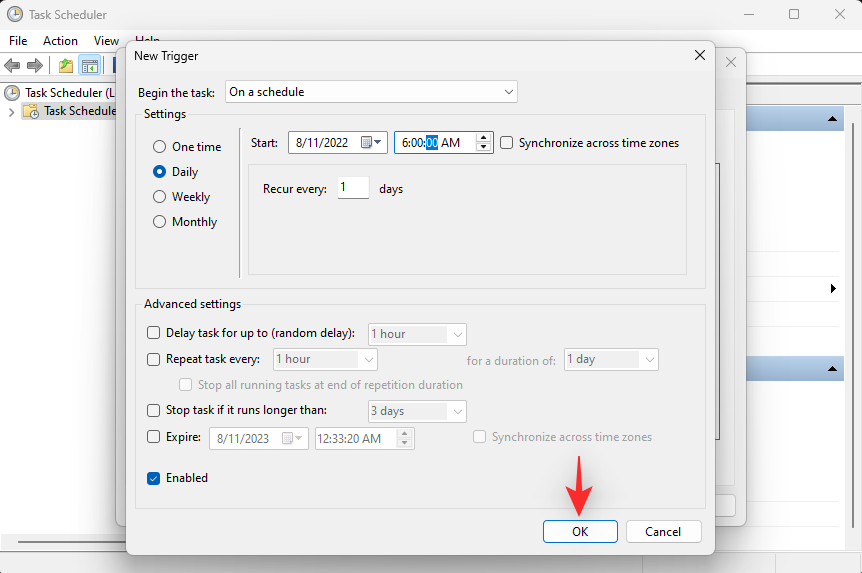
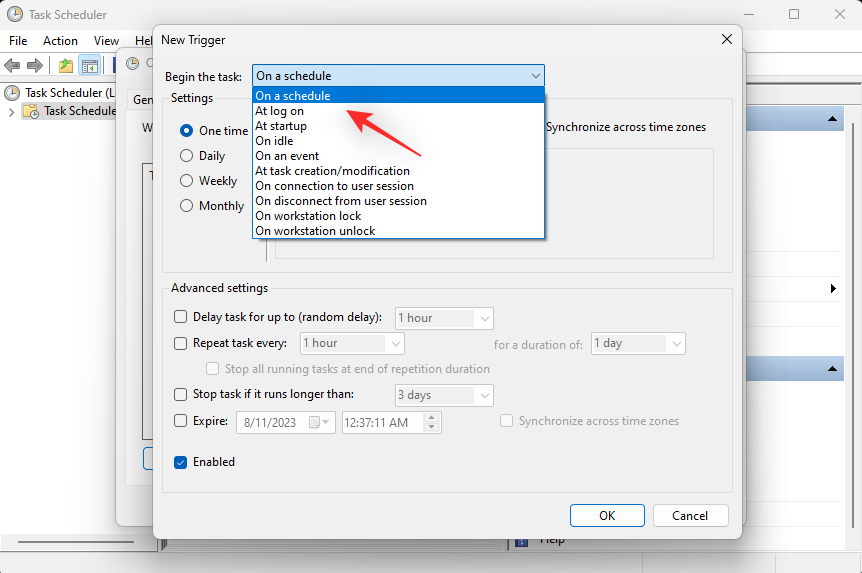
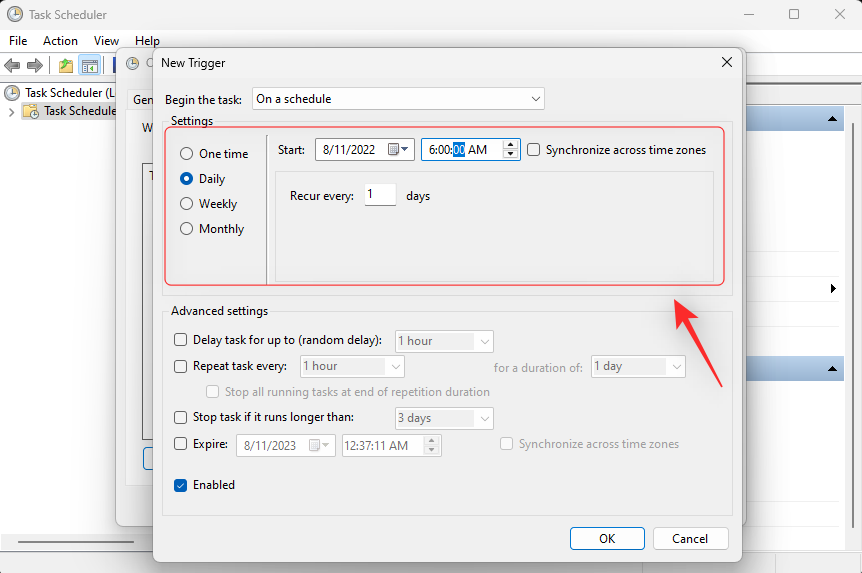
Click the drop-down menu for Begin the task and select On a schedule.

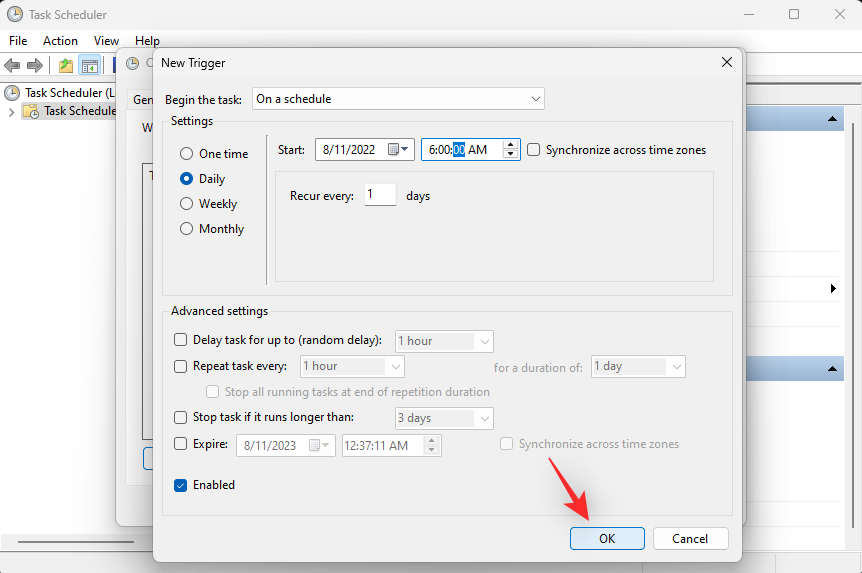
Now set a schedule depending on when you wish to turn on light mode. We will set a time of 6 AM each day to turn on light mode.
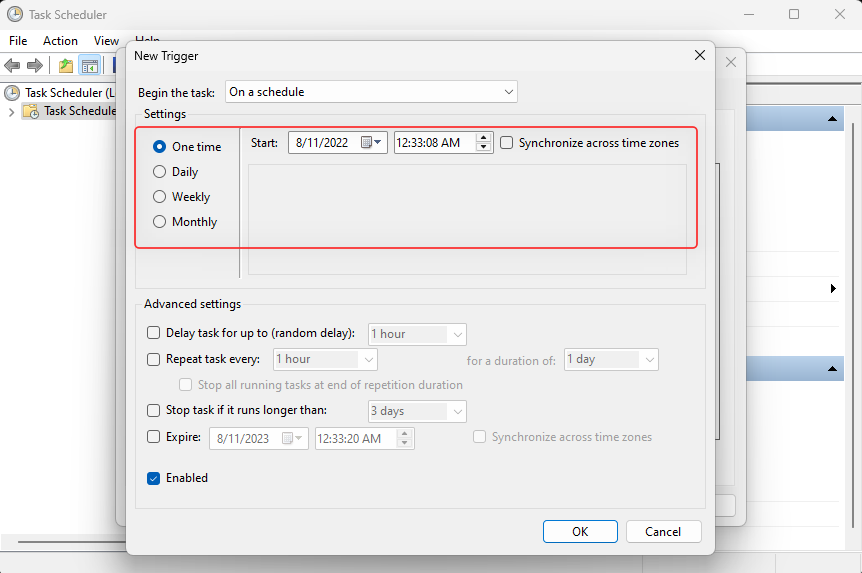
Click OK to confirm your choice.
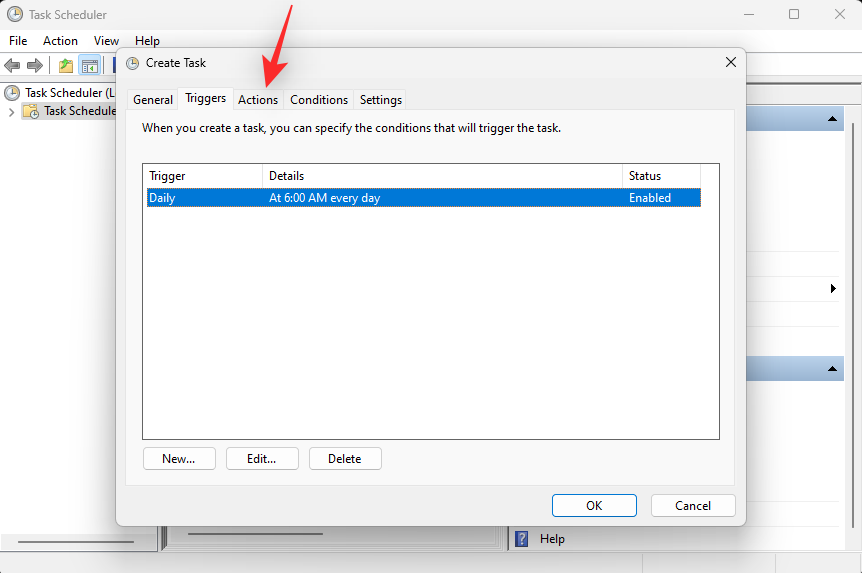
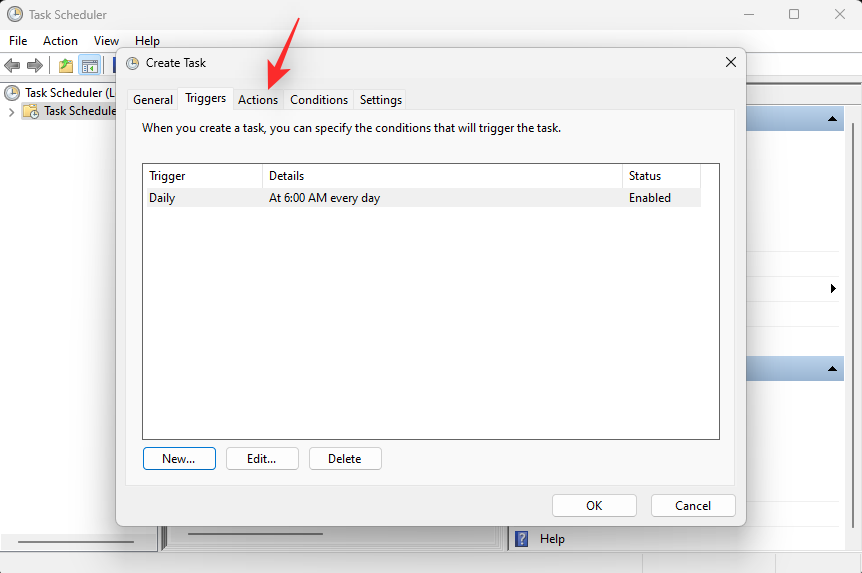
Now click and switch to the Actions tab.
Click New.

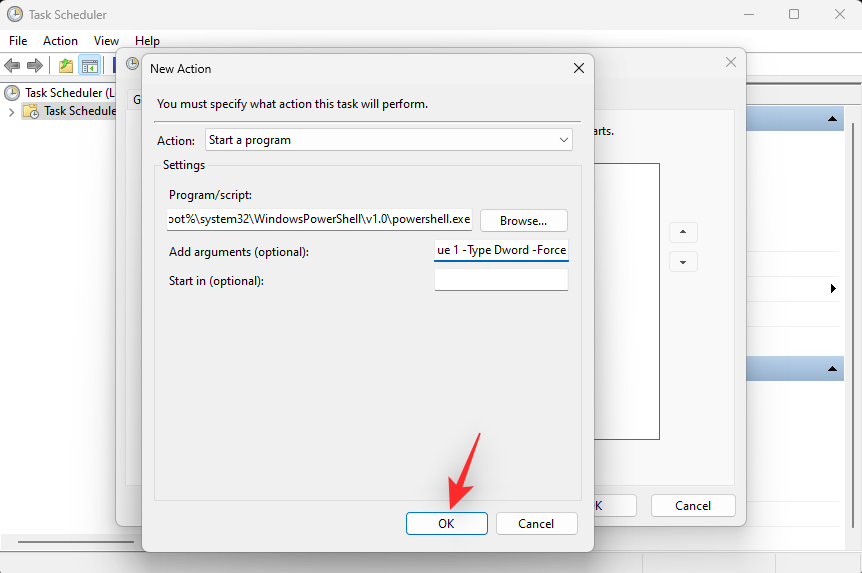
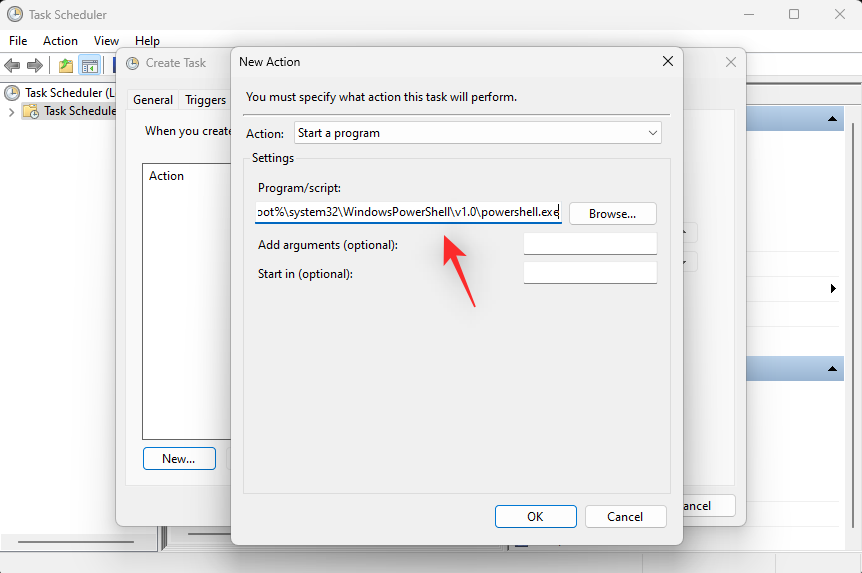
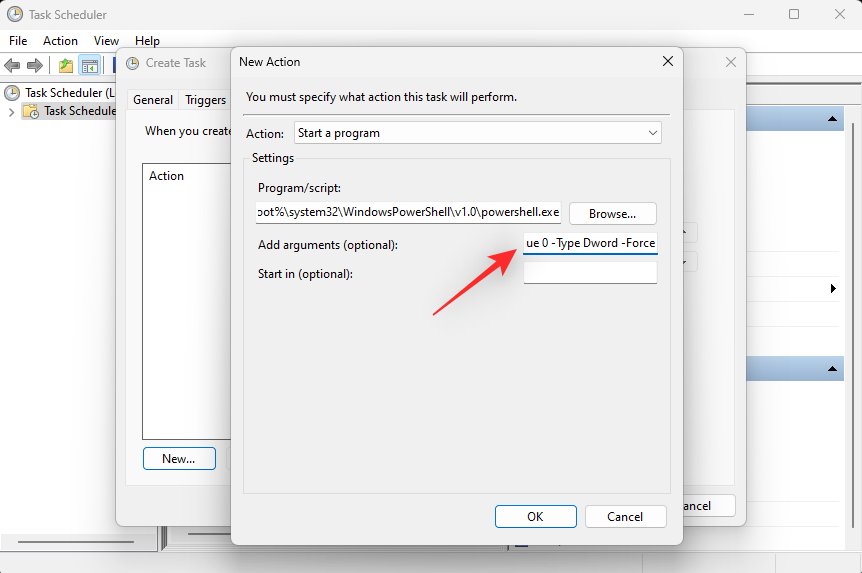
Click the drop-down menu for Action and select Start a program.
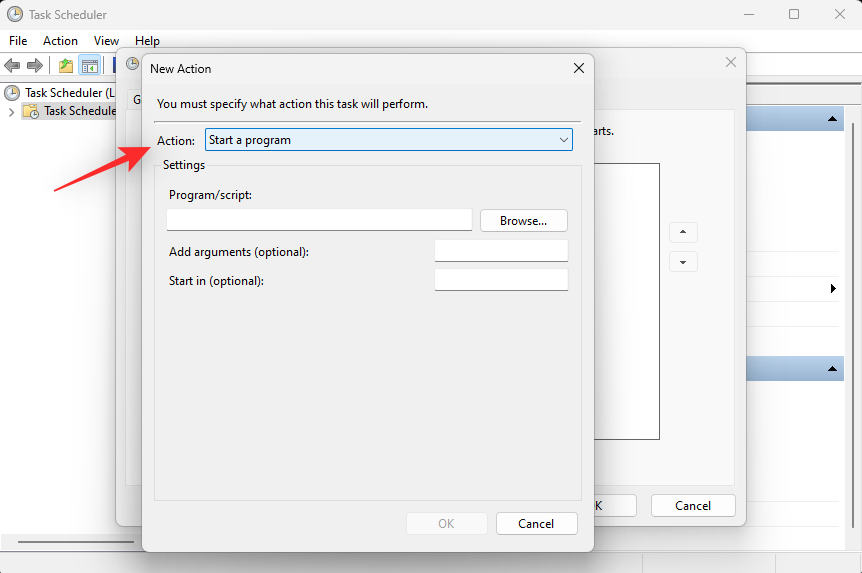
Now enter the following path for Program/script.
%SystemRoot%\system32\WindowsPowerShell\v1.0\powershell.exe

Copy paste the following in the text field for Add arguments (optional).
New-ItemProperty -Path HKCU:\SOFTWARE\Microsoft\Windows\CurrentVersion\Themes\Personalize -Name SystemUsesLightTheme -Value 1 -Type Dword -Force; New-ItemProperty -Path HKCU:\SOFTWARE\Microsoft\Windows\CurrentVersion\Themes\Personalize -Name AppsUseLightTheme -Value 1 -Type Dword -Force
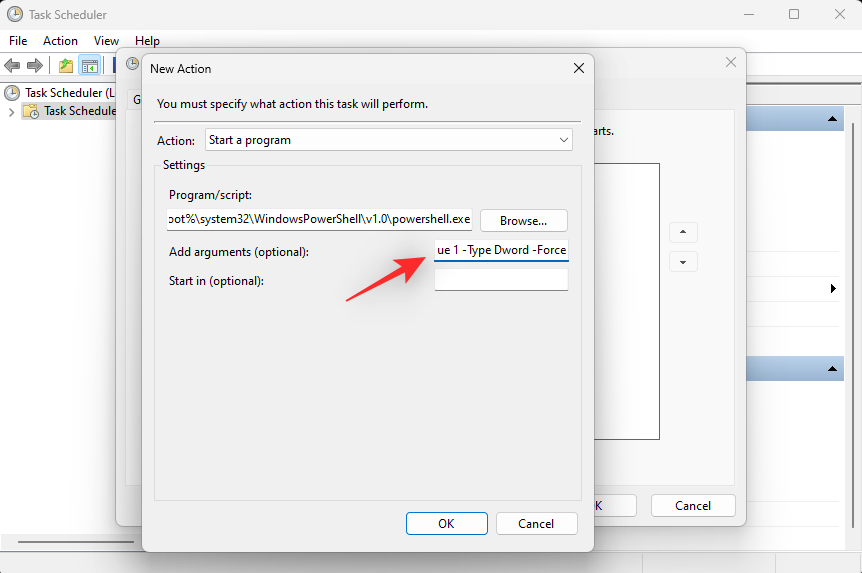
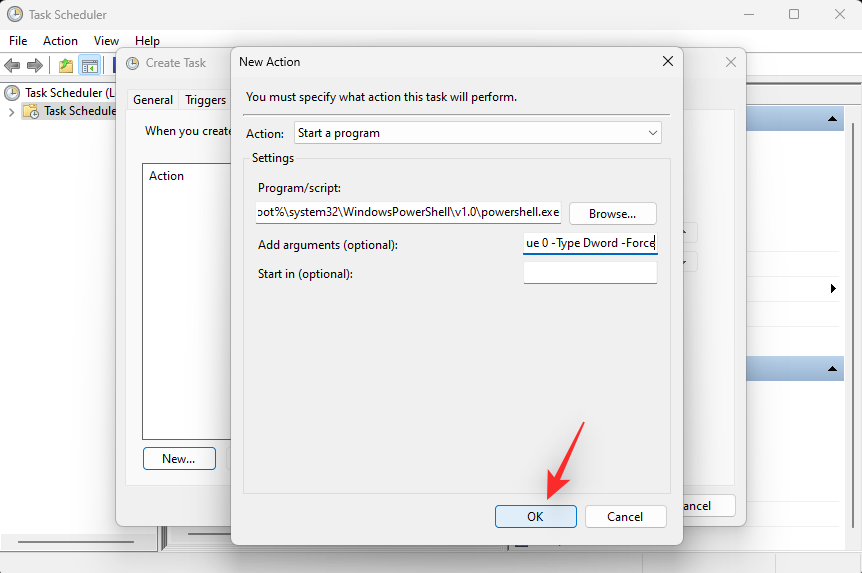
Click OK to save your newly added actions.
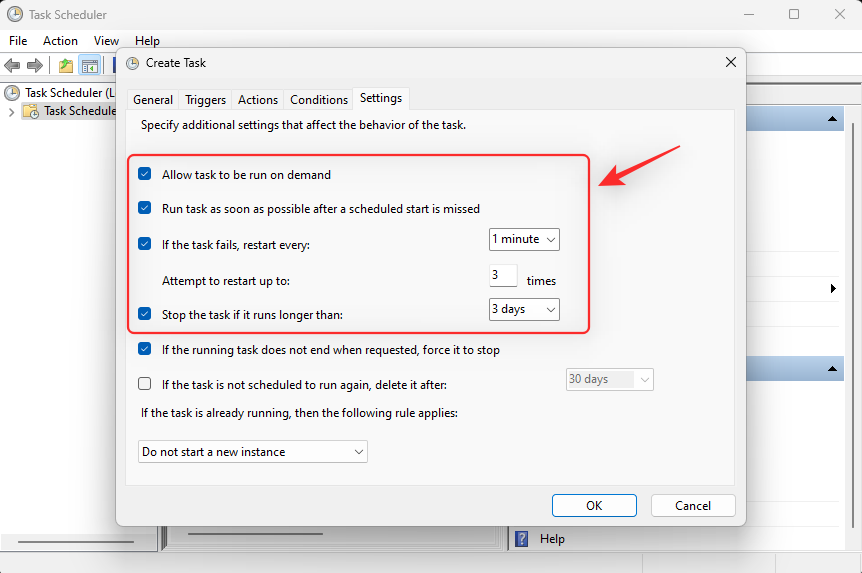
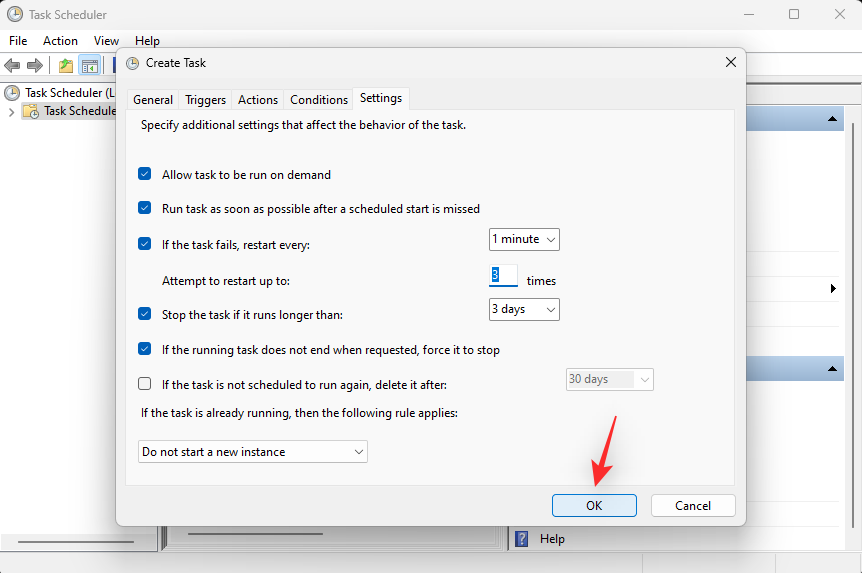
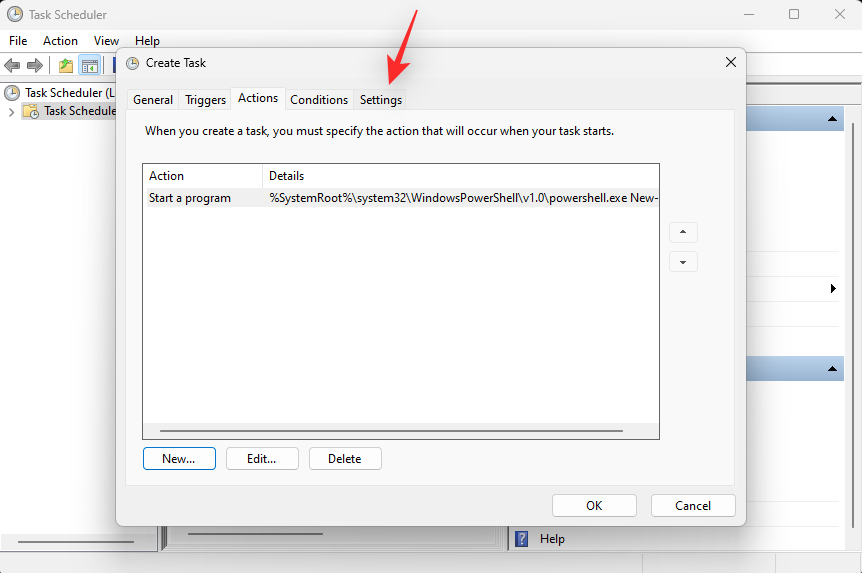
Click and switch to the Settings tab.

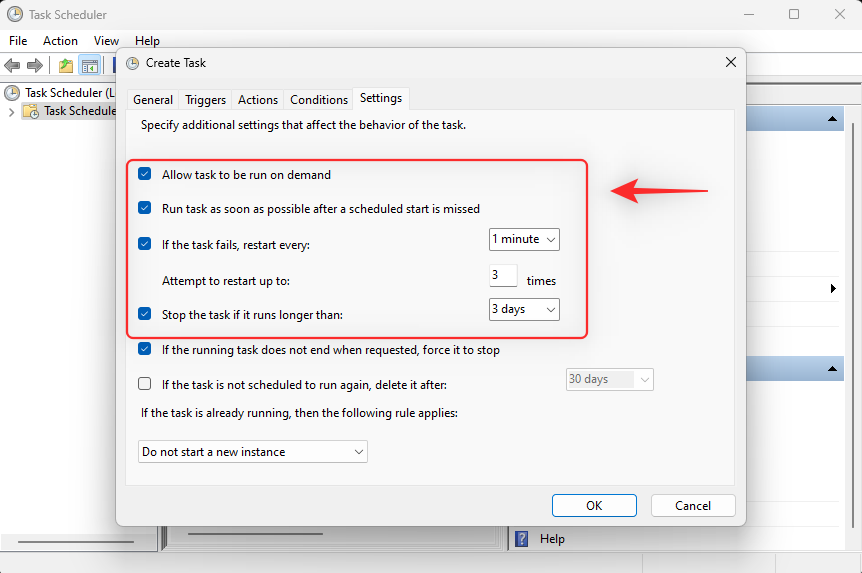
Now check the boxes for the following options.
- Allow task to be run on demand
- Run task as soon as possible after a scheduled start is missed
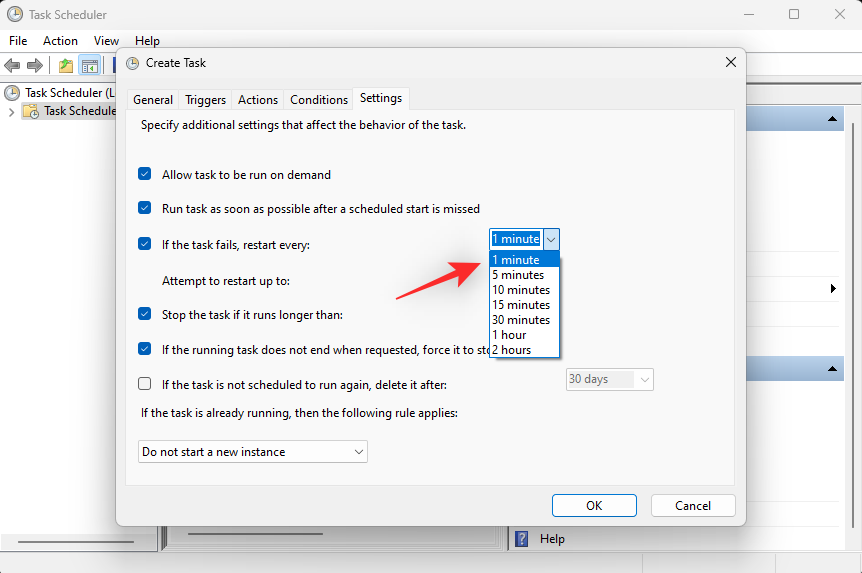
- If the task fails, restart every:
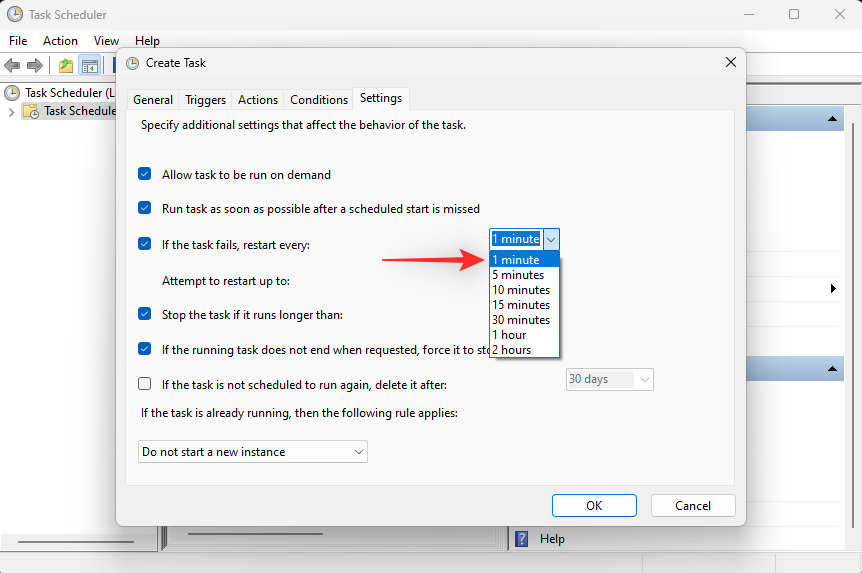
Once checked, click the drop-down menu for If the task fails, restart every: and select 1 minute.
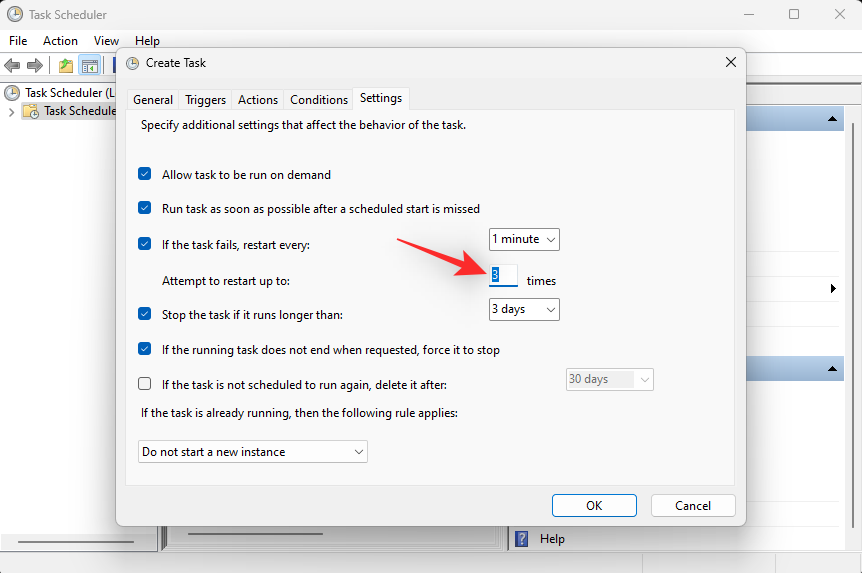
Similarly set 3 as the value for Attempt to restart up to.
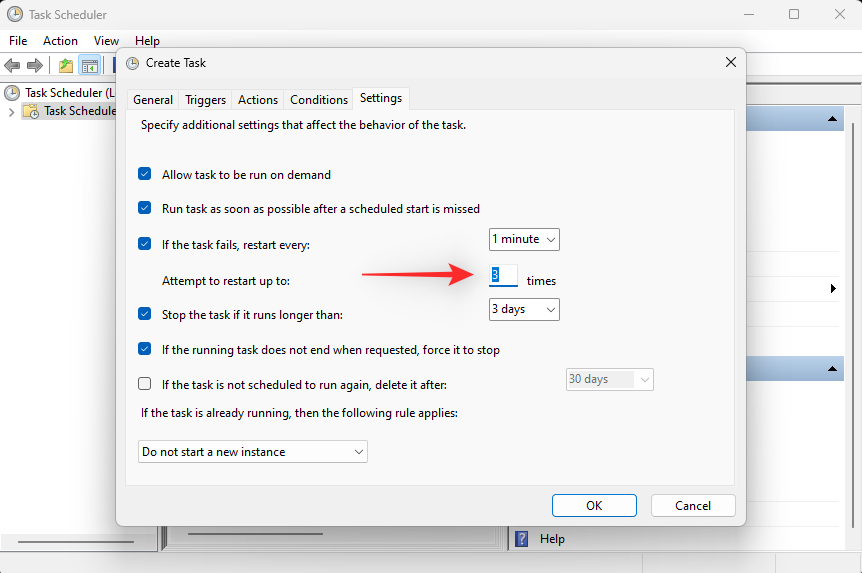
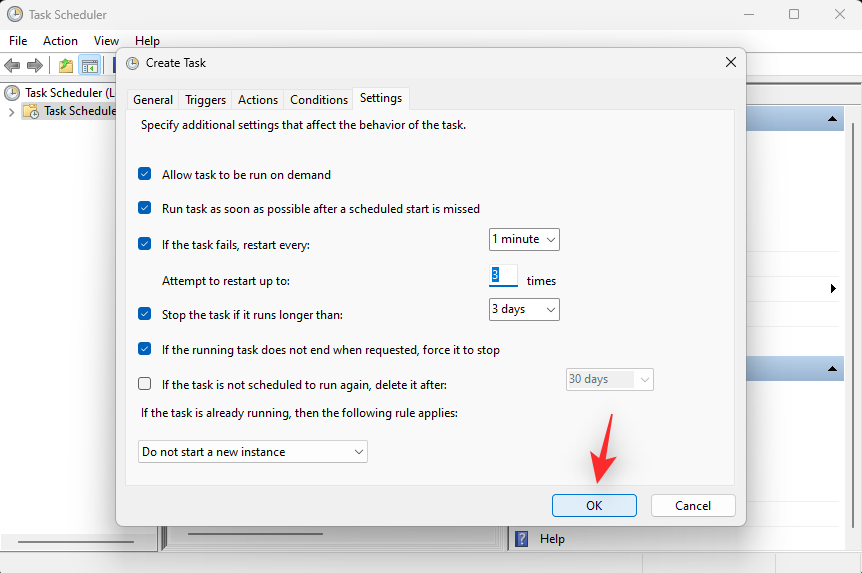
Click OK to save your changes.
And that’s it! Your new task will now be created. It will now automatically trigger and set light mode on your PC at the chosen time. You can now use the steps below to set up and schedule dark mode on your PC.
Related: What’s New in the Task Manager on Windows 11 22H2 Update
Step 2: Create a task to turn on dark mode
We will now create a task to turn on dark mode automatically on your system. Follow the steps below to help you along with the process.
Open the Start menu, search for Task Scheduler and launch the same from your search results.
Now click Create task.
Name your task based on your preferences. We recommend you choose a name that helps you identify it easily and quickly.
Click and select Run whether user is logged on or not.
Check the box for Do not store password.
Click and switch to the Triggers tab.
Now click New.
Click the drop-down menu for Begin the task and select On a schedule.
Now set an appropriate time to turn on dark mode depending on your light mode schedule. We will set a time of 6 PM to turn on dark mode.
Click OK once you’re done.
Now click and switch to the Actions tab.
Click New.

Click the drop-down menu for Action and select Start a program.

Now type in or copy-paste the path below under Program/script.
%SystemRoot%\system32\WindowsPowerShell\v1.0\powershell.exe
Type in the following beside Add arguments (optional).
New-ItemProperty -Path HKCU:\SOFTWARE\Microsoft\Windows\CurrentVersion\Themes\Personalize -Name SystemUsesLightTheme -Value 0 -Type Dword -Force; New-ItemProperty -Path HKCU:\SOFTWARE\Microsoft\Windows\CurrentVersion\Themes\Personalize -Name AppsUseLightTheme -Value 0 -Type Dword -Force
Click OK once you’re done.
Now click and switch to the Settings tab.
Check the box for the following options.
- Allow task to be run on demand
- Run task as soon as possible after a scheduled start is missed
- If the task fails, restart every:
Set the task to restart every 1 minute using the drop-down menu.
Now enter 3 beside Attempt to restart up to to restart the task up to 3 times if it fails to execute on your system.
Click OK.
Your new task will now be created and added to your task library. Your system will now automatically turn on dark mode based on your set schedule.
Method 2: Using Easy Dark mode (Keyboard shortcuts)
Easy Dark mode is a third-party app that helps you easily toggle the dark mode on your system. Follow the steps below to help you use Easy Dark mode on your system.
- Easy Dark mode | Download Link
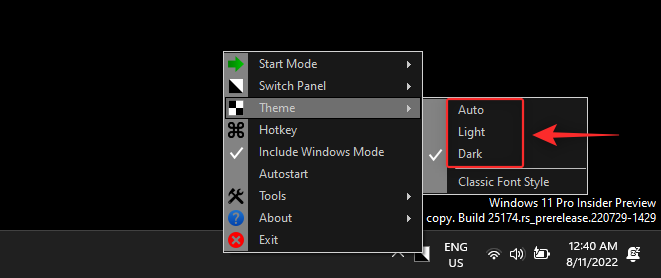
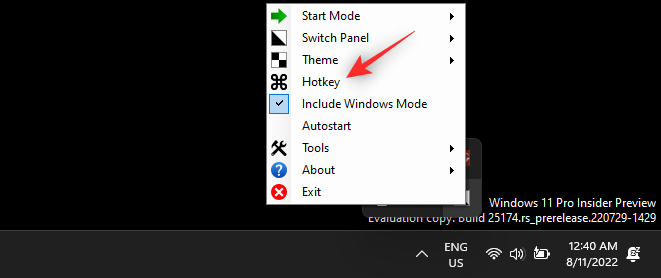
Download and run Easy Dark mode on your device using the link above. You will now get an icon for the same in your taskbar. Right-click the icon to access available options.

Hover over Theme and select Light or Dark depending on your preferences.
And that’s how you can use the icon in your taskbar to switch between light and dark mode on your system. You can even set dedicated hotkeys to help you switch between the two easily. Start by right-clicking the icon in your taskbar and selecting Hotkey.
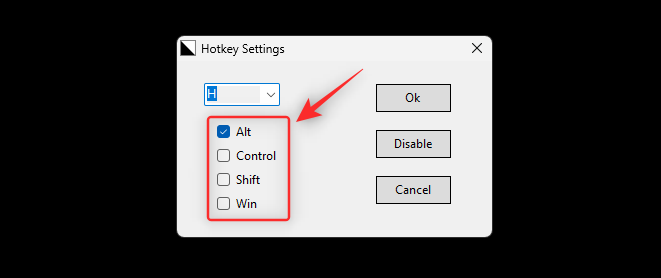
Check the box for all the modifier keys you wish to use for your keyboard shortcut. You have the following options to choose from:
- Alt
- Control
- Shift
- Win
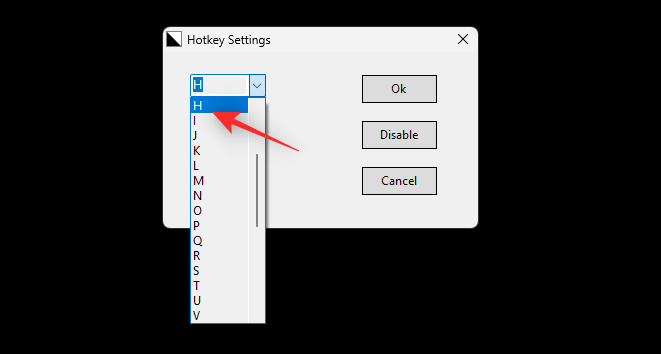
Now click the drop-down menu at the top and select a key that will be used in combination with the modifier key to toggle the dark and light mode on your system.
Click Ok once you’re done.
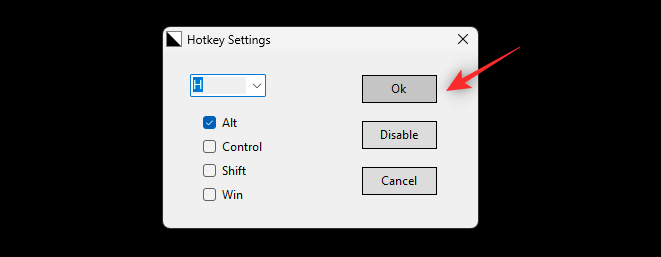
And that’s it! You can now use the hotkey set for your system to switch between dark mode and light mode easily.
Note: Some Windows 11 builds including insider builds might fail to reflect changes on your system immediately. In such cases, you will need to restart Windows Explorer to apply the necessary changes.
Method 3: Using Auto Dark mode (Keyboard shortcuts)
Auto Dark Mode is another third-party app that can help you switch easily between dark mode and light mode. Use the steps below to help you set up Auto Dark mode on your system.
- Auto Dark Mode | Download Link
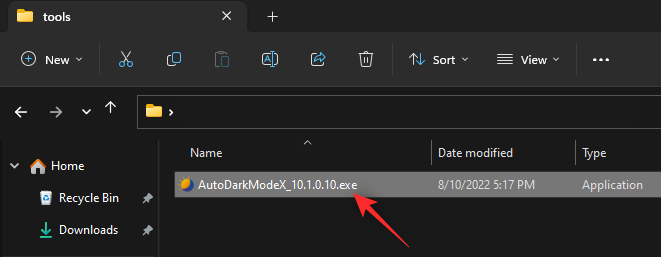
Download the latest release for Auto Dark Mode using the link above. Double click and launch the same using the .exe file.
Now follow the on-screen instructions to install the same to your PC based on your preferences.
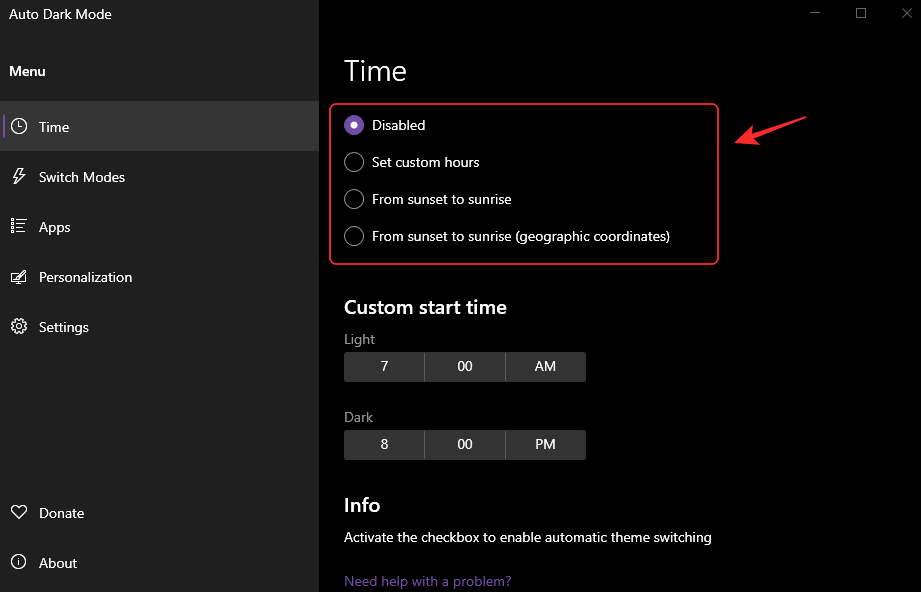
Auto Dark Mode should now automatically launch on your PC. You can now click Time and schedule dark mode on your PC if needed.
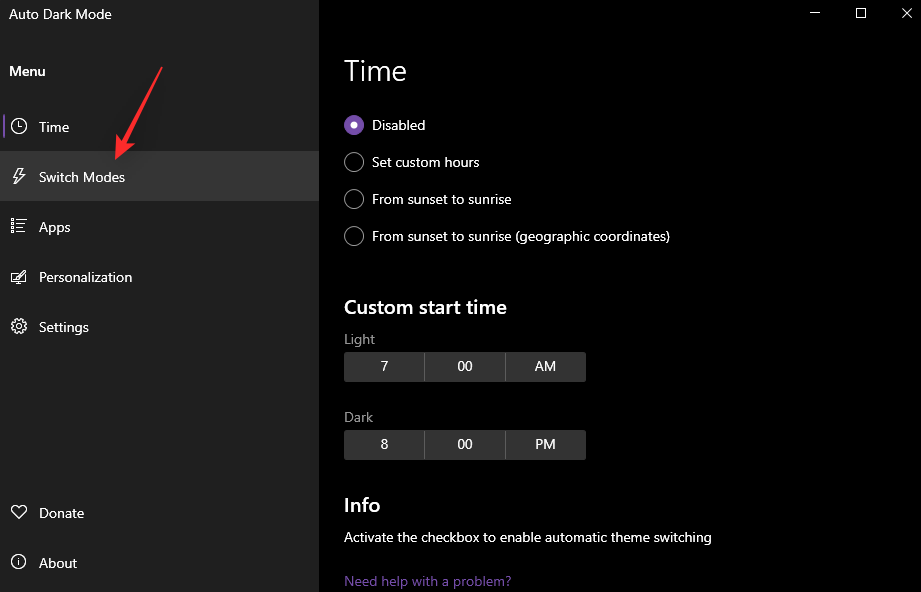
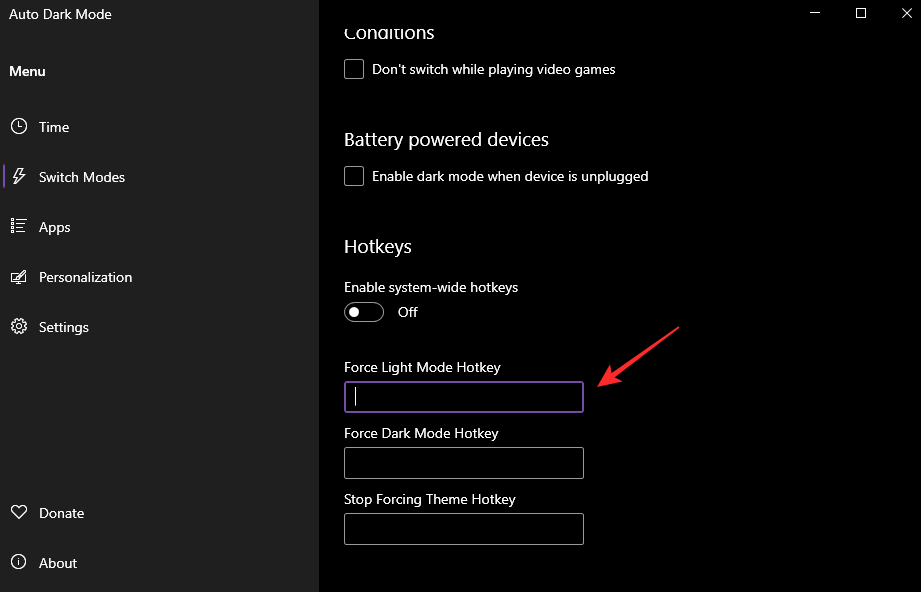
We can now set up our hotkeys to switch between dark mode and light mode. Click Switch Modes on your left.
Now click the text box under Force Light Mode Hotkey. Press the desired keys you wish to use to enable light mode.
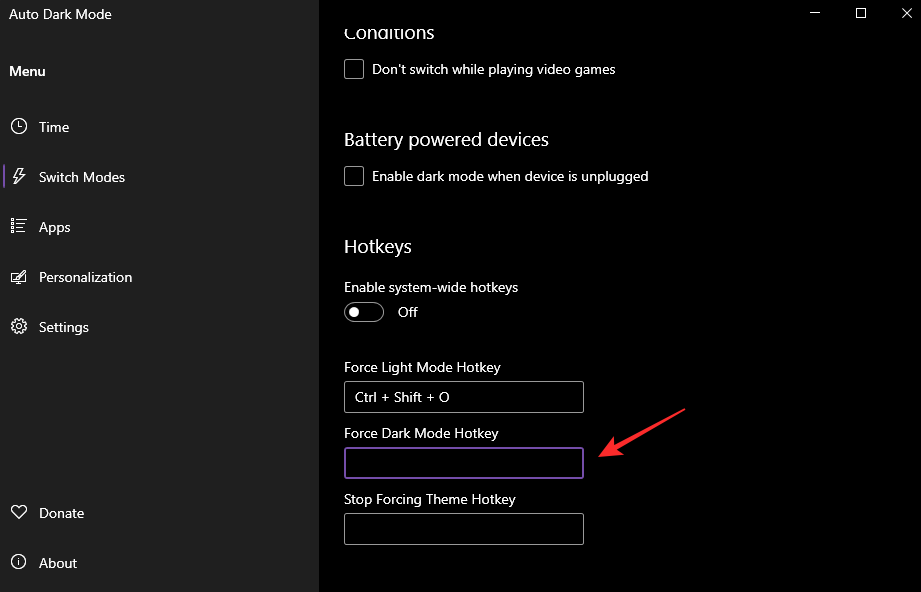
Similarly set your keyboard shortcut for Force Dark Mode Hotkey.
Click and enable the toggle for Enable system-wide hotkeys once you’re done.
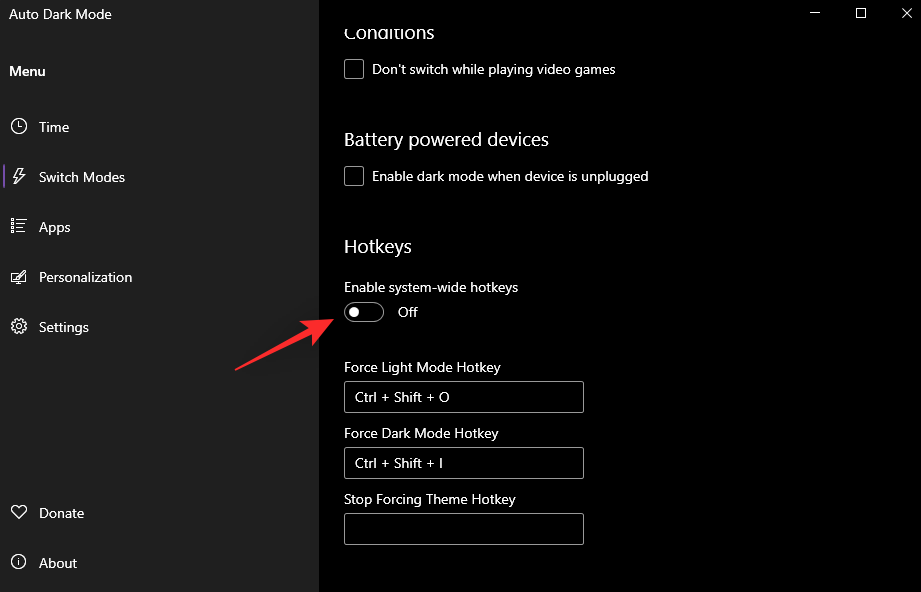
And that’s it! You can now switch between light and dark mode on your system using the dedicated hotkeys we set above.
Note: You might need to restart some apps for the changes to reflect on your screen.
Method 4: Manually create desktop shortcuts
You can also create desktop shortcuts that trigger tasks to toggle light and dark modes on your system. Use the steps below to help you along with the process.
Step 1: Create a task to turn on Light & Dark mode
You will first need to create dedicated tasks in the Task Scheduler that enable Light or Dark mode on your system. This process is similar to the one we used in the first method however, we won’t be scheduling our tasks this time. Use the steps below to help you along with the process.
Create a task to turn on light mode
Open the Start menu, search for Task Scheduler and launch the same from your search results.
Click Create Task on your right.
Enter a name for your task so that you can easily identify it later on. Ensure that it does not contain any spaces and you can remember it for a while.
Now click and select Run whether user is logged on or not.
Similarly, check the box for Do not store password.
Now click and switch to the Actions tab and click New.
Click the drop-down menu for Action at the top and select Start a program.
Now type in the following path under Program/script.
%SystemRoot%\system32\WindowsPowerShell\v1.0\powershell.exe
Type in the following beside Add arguments (optional).
New-ItemProperty -Path HKCU:\SOFTWARE\Microsoft\Windows\CurrentVersion\Themes\Personalize -Name SystemUsesLightTheme -Value 1 -Type Dword -Force; New-ItemProperty -Path HKCU:\SOFTWARE\Microsoft\Windows\CurrentVersion\Themes\Personalize -Name AppsUseLightTheme -Value 1 -Type Dword -Force
Click OK to save your changes.
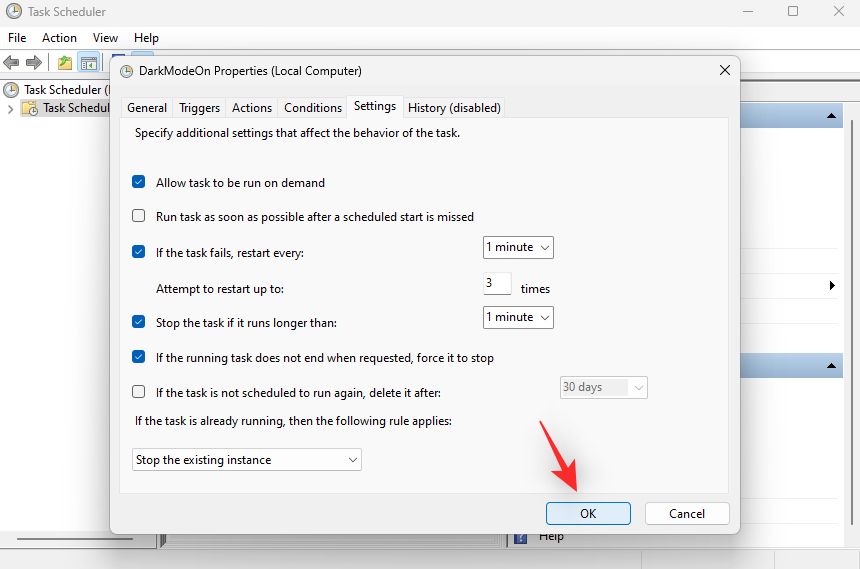
Now click and switch to the Settings tab.
Check the box for the following options.
- Allow task to be run on demand
- If the task fails, restart every:
- Stop the task if it runs longer than:
- If the running task does not end when requested, force it to stop
Click the drop-down menu for Stop the task if it runs longer than and type in 1 minute.
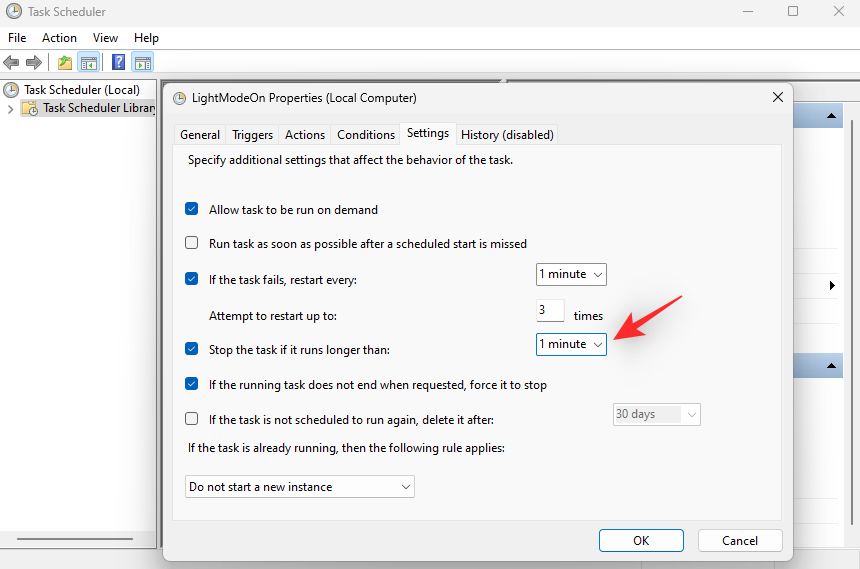
Now click the drop-down menu at the bottom and select Stop the existing instance. This will allow you to stop and restart the task again from your desktop shortcut itself.
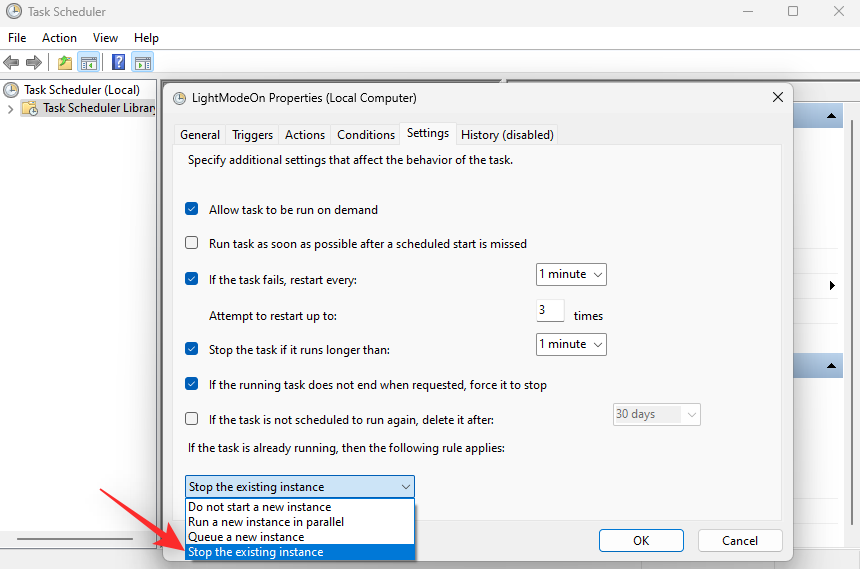
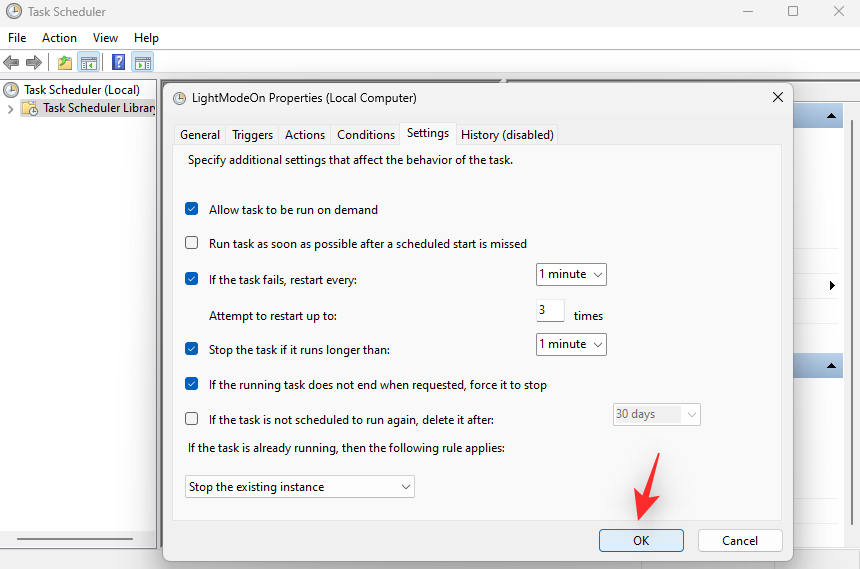
Click OK.
You will now have created your light mode task. You can now use the next section to set up your dark mode task.
Create a task to turn on dark mode
Open the Start menu, search for Task Scheduler and launch the same from your search results.
Now click Create task on your right.
Enter an appropriate name for your task at the top that can help you identify it later on. Do not use spaces when naming the task.
Click and select Run whether user is logged on or not.
Check the box for Do not store password.
Click and switch to the Actions tab at the top. Now click New.
Ensure Start a program is selected at the top. Now copy and paste the path below under Program/script.
%SystemRoot%\system32\WindowsPowerShell\v1.0\powershell.exe
Now add the following beside Add arguments (optional).
New-ItemProperty -Path HKCU:\SOFTWARE\Microsoft\Windows\CurrentVersion\Themes\Personalize -Name SystemUsesLightTheme -Value 0 -Type Dword -Force; New-ItemProperty -Path HKCU:\SOFTWARE\Microsoft\Windows\CurrentVersion\Themes\Personalize -Name AppsUseLightTheme -Value 0 -Type Dword -Force
Click OK to save your changes.
Now click and switch to the Settings tab.
Check the box for the following options. Once done, click the drop-down menu for If the task fails, restart every and select 1 minute.
- Allow task to be run on demand
- If the task fails, restart every:
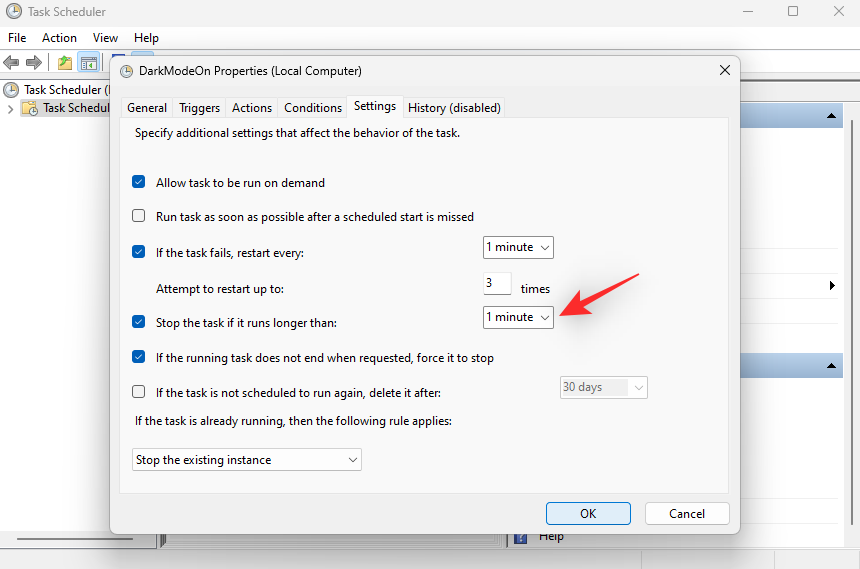
- Stop the task if it runs longer than:
- If the running task does not end when requested, force it to stop
Similarly, click the drop-down menu for Stop the task if it runs longer than and type in 1 minute.
Now click the drop-down menu at the bottom and select Stop the existing instance. This will allow you to stop and restart the task again from your desktop shortcut itself.
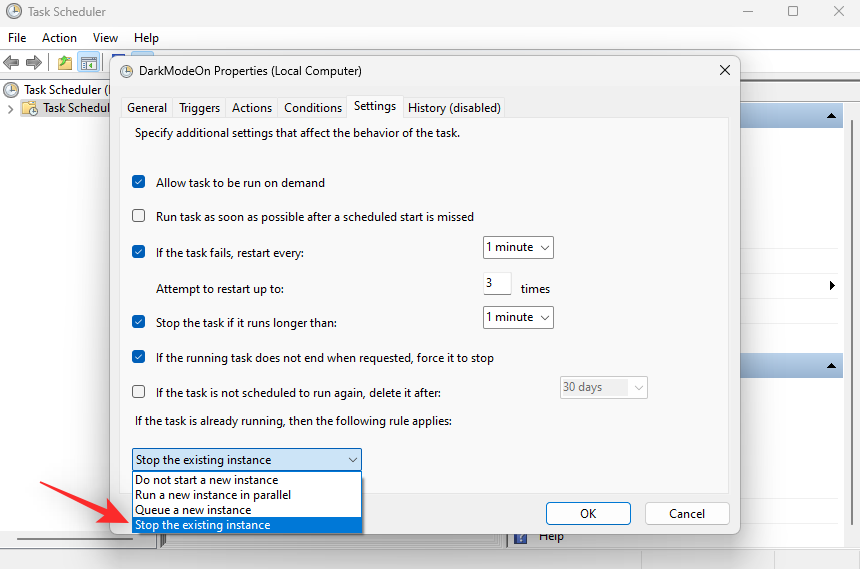
Click OK.
You will now have created a task to turn on dark mode. Use the next step to set up dedicated desktop shortcuts on your PC.
Step 2: Create a desktop shortcut to trigger the task
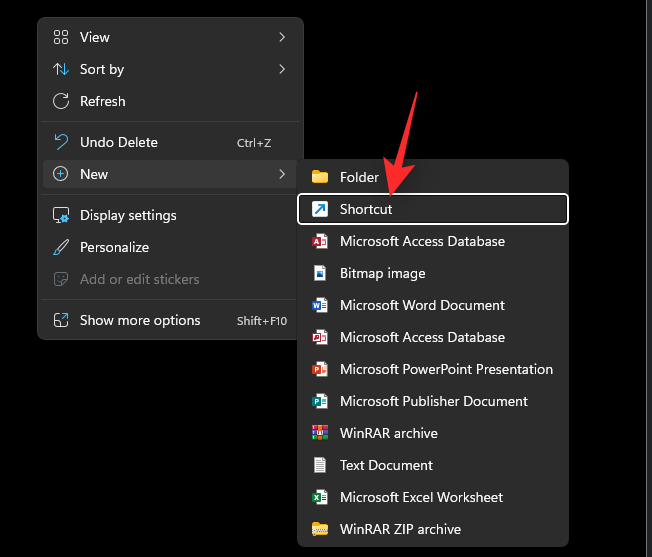
Right-click on an empty area on your desktop and hover over New.

Select Shortcut.
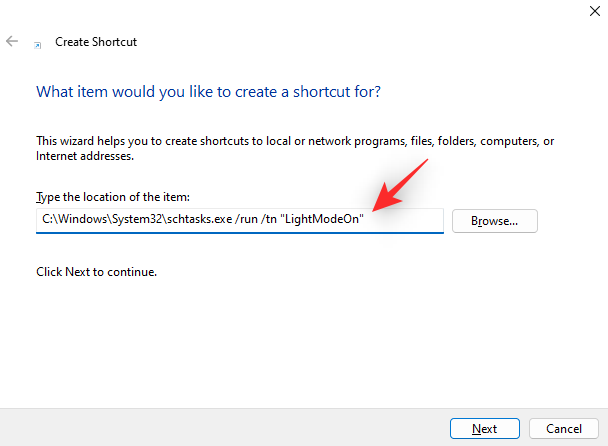
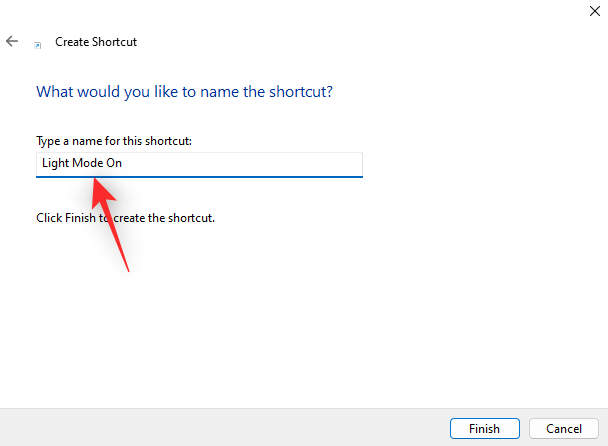
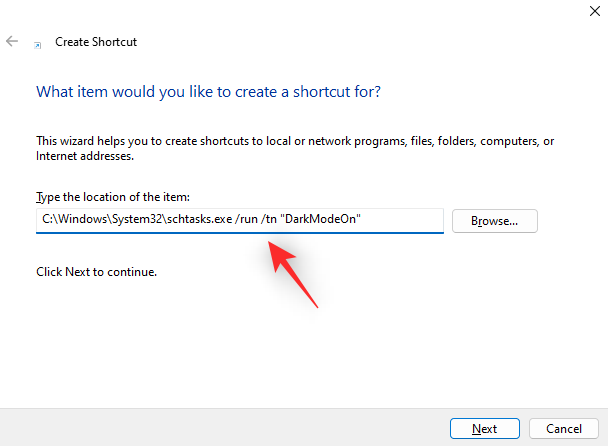
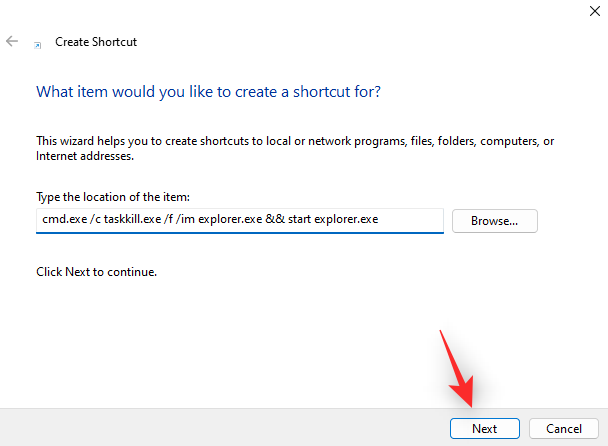
Now type in the following under Type the location of the item. Replace NAMEOFTASK with the name you set for your light mode task.
C:\Windows\System32\schtasks.exe /run /tn "NAMEOFTASK"
Note: Do not replace or remove the quotes (“”).
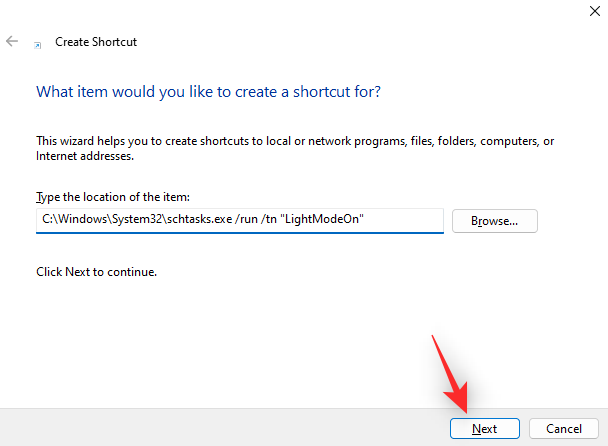
Click Next.
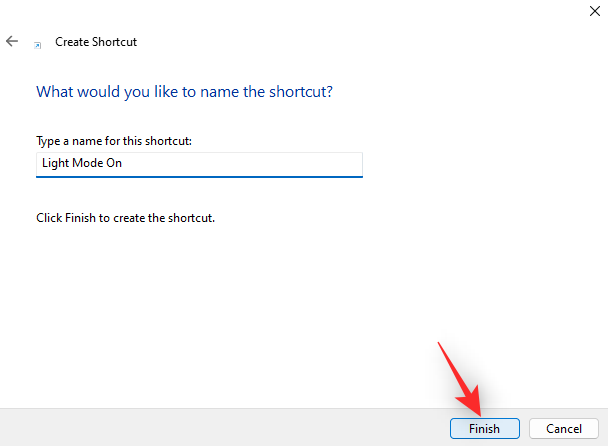
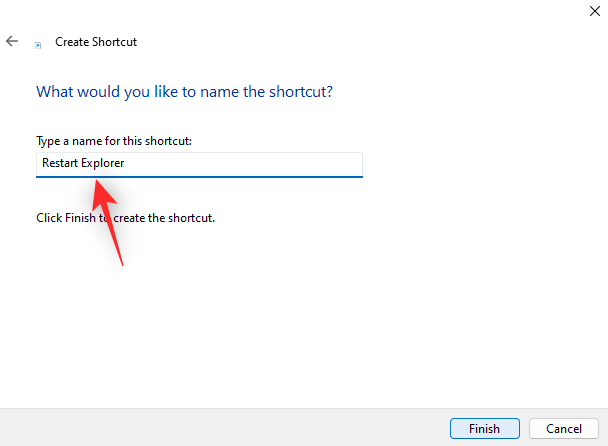
Choose and enter the desired name for your light mode shortcut.
Click Finish.
Now repeat the steps above to create a desktop shortcut for your dark mode task as well. replace NAMEOFTASK with the name of your dark mode task this time.
And that’s it! You will now have created desktop shortcuts to turn on light or dark mode on your system. Simply double-click either to enable dark or light mode on your system.
Step 3: Create a desktop shortcut to restart Windows explorer (optional)
In some cases, you might notice that changes to your theme do not take place immediately. This can be fixed by restarting open apps and restarting Windows explorer. You can choose to restart Windows Explorer from the task manager as usual. But if you plan to switch regularly, then having a desktop icon is a better option. Use the steps below to help you along with the process.
Right-click an empty area of your desktop and hover over New.
Now click and select Shortcut.
Type in the following under Type the location of the item.
cmd.exe /c taskkill.exe /f /im explorer.exe && start explorer.exe
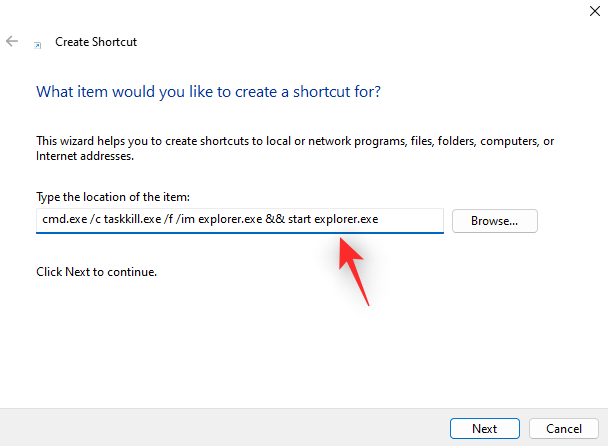
Click Next.
Now enter an appropriate name for your shortcut as needed.
Click Finish once you’re done.
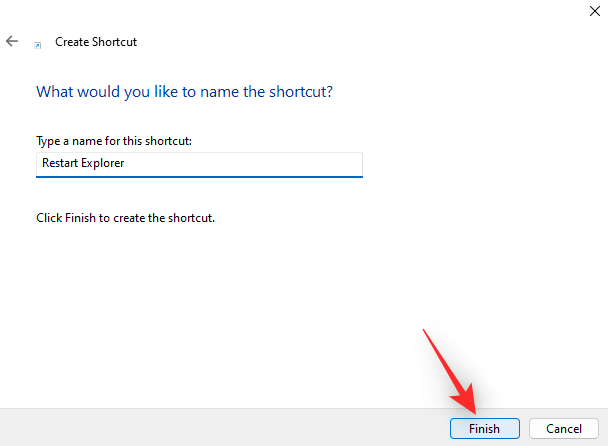
And that’s it! You will now have created a shortcut to restart Windows Explorer. You can now double-click this and restart Explorer automatically once you’ve changed your theme.
Method 5: Using PowerShell
You can also choose to turn on dark or light mode using PowerShell. Follow the steps below to help you along with the process.
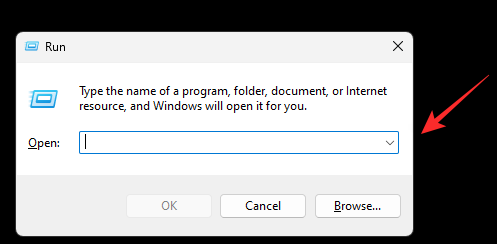
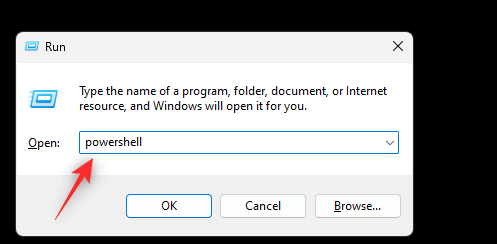
Press Windows + R to launch Run.
Type in the following and press Ctrl + Shift + Enter on your keyboard.
powershell
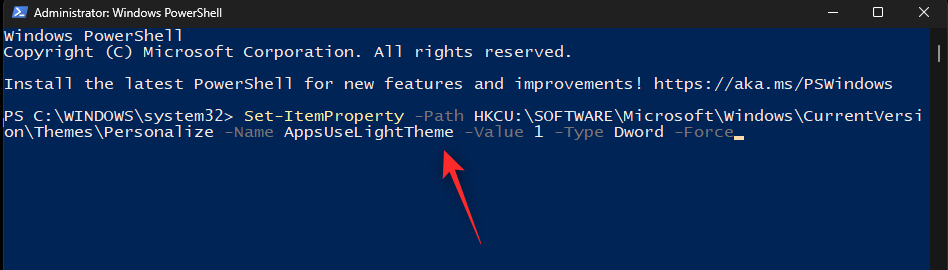
Now use the following command to turn on light mode for your apps.
Set-ItemProperty -Path HKCU:\SOFTWARE\Microsoft\Windows\CurrentVersion\Themes\Personalize -Name AppsUseLightTheme -Value 1 -Type Dword -Force
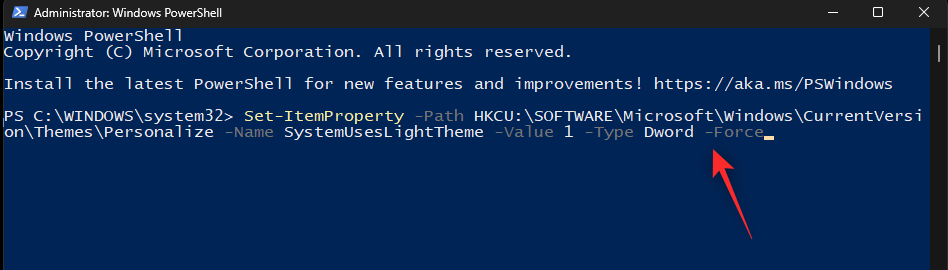
Subsequently, use the following command to turn on light mode for system apps and services.
Set-ItemProperty -Path HKCU:\SOFTWARE\Microsoft\Windows\CurrentVersion\Themes\Personalize -Name SystemUsesLightTheme -Value 1 -Type Dword -Force
You will now have switched to light mode on your PC. Similarly, if you wish to switch to dark mode, use the following commands mentioned below.
Set-ItemProperty -Path HKCU:\SOFTWARE\Microsoft\Windows\CurrentVersion\Themes\Personalize -Name AppsUseLightTheme -Value 0 -Type Dword -ForceSet-ItemProperty -Path HKCU:\SOFTWARE\Microsoft\Windows\CurrentVersion\Themes\Personalize -Name SystemUsesLightTheme -Value 0 -Type Dword -Force
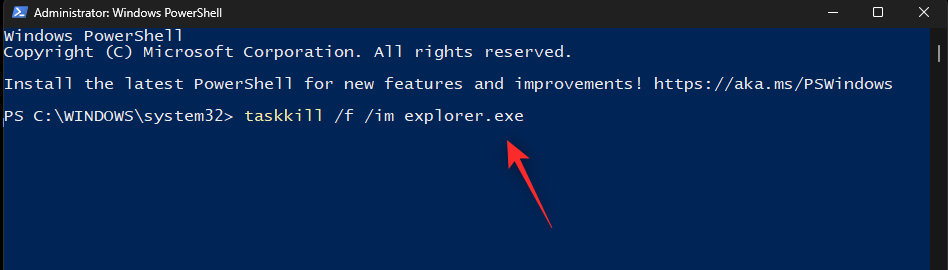
Now use the following command to kill Windows Explorer.
taskkill /f /im explorer.exe
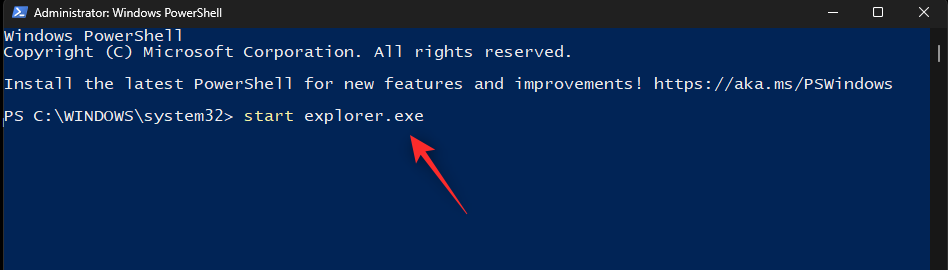
Use the following command to launch it again.
start explorer.exe
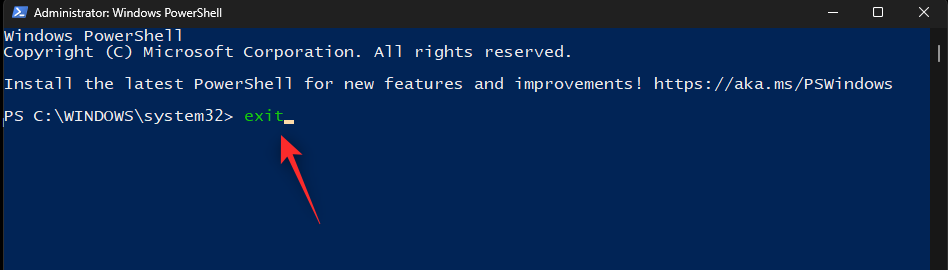
Once you’re done, use the following command to close PowerShell.
exit
And that’s how you can switch between light and dark modes using PowerShell on Windows 11.
Method 6: Using Registry Editor
Lastly, you can also switch between dark and light mode using the Registry Editor to edit appropriate values. These are the same values we modified in the task scheduler method above to automate this process. You can manually modify them and change your theme in Windows 11 using the Registry Editor. Follow the steps below to help you along with the process.
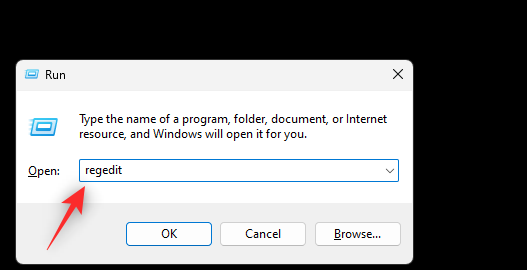
Press Windows + R to launch Run.
Now type in the following and press Enter.
regedit
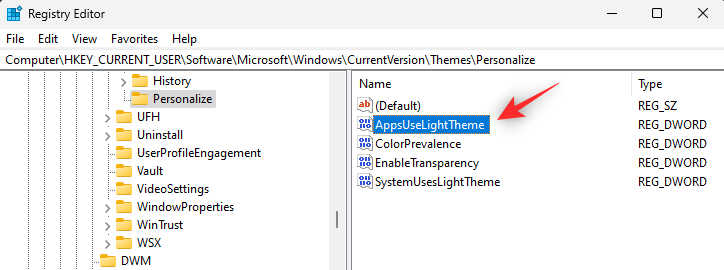
Registry Editor will now open on your PC. Copy paste the path below in the address bar at the top or navigate to the path using the left sidebar.
HKEY_CURRENT_USER\SOFTWARE\Microsoft\Windows\CurrentVersion\Themes\Personalize
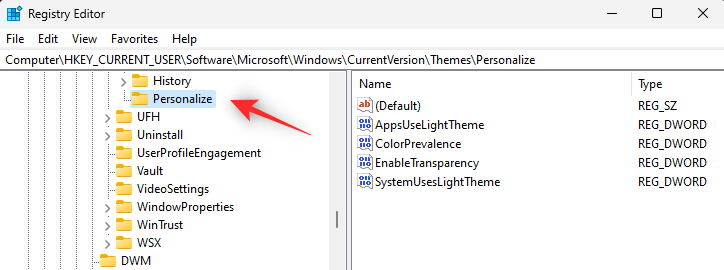
With Personalize selected on your left, double click AppsUseLightTheme on your right.
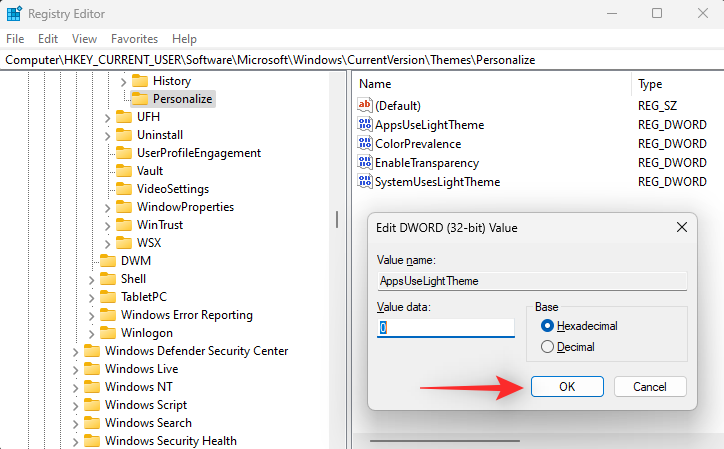
Set its Value data to one of the following values depending on whether you wish to use light mode or dark mode for apps.
- 1: For Light mode
- 2: For Dark mode
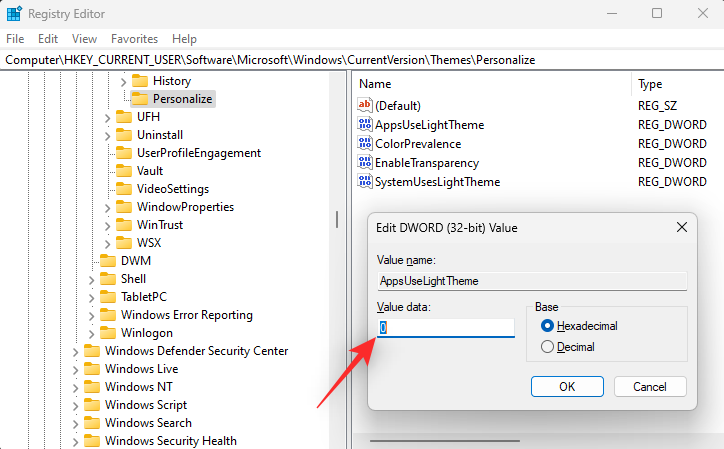
Click OK once done.
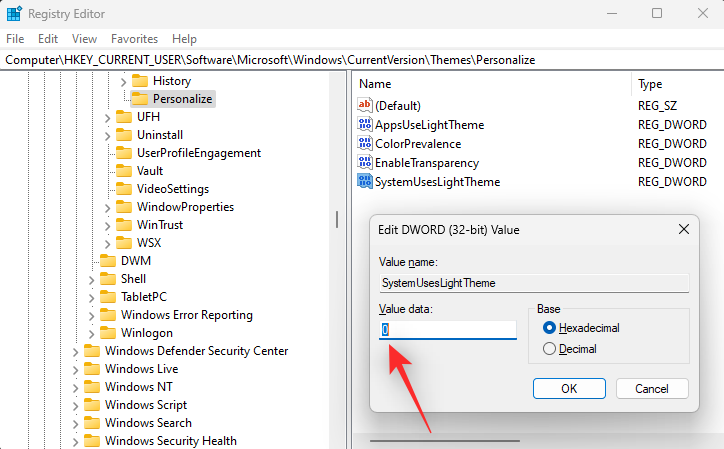
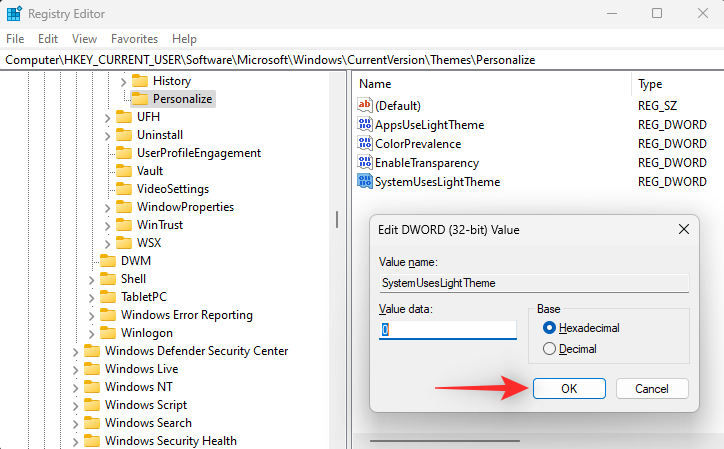
Similarly, double click SystemUsesLightTheme.
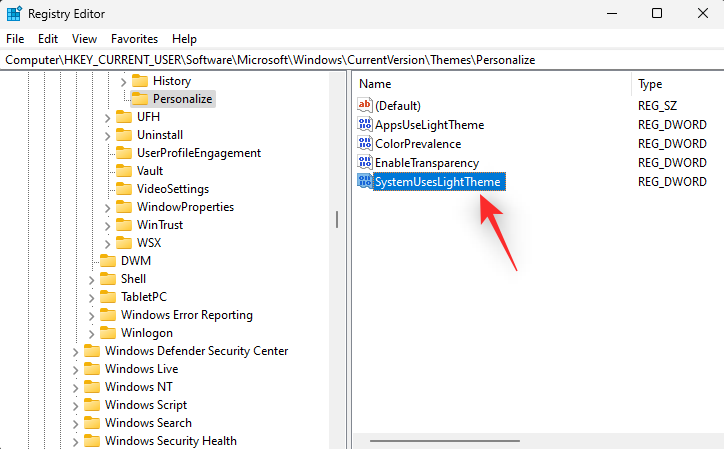
Set one of the following values depending on which theme you wish to use.
- 1: For Light mode
- 2: For Dark mode
Click OK.
Close the registry editor and you will now have switched between dark mode and light mode on your PC using the registry editor.
Note: You might need to restart open apps and restart explorer.exe for the changes to fully take effect on your PC.
We hope this post helped you easily switch between dark and light mode on your PC. If you face any issues or have any more questions, feel free to reach out to us using the comments below.
RELATED
- How to Enable Dark Mode on Windows 11
- How to Make Windows 11 Look Like Ubuntu
- How to Change Themes on Microsoft Edge
- How To Set A Dynamic Wallpaper For Windows 10
- How to Get and Customize the New Windows 10 Start Menu Redesign
Windows 10: Deskop automatically dimming after turning on/off night light
Discus and support Deskop automatically dimming after turning on/off night light in Windows 10 Software and Apps to solve the problem; Summary of issue:Someone tapped on a bunch of keys today on my keyboard, over on the right hand side prt sc, pg up, ins, del, etc. They don’t know…
Discussion in ‘Windows 10 Software and Apps’ started by TheFromanGuard, Dec 17, 2022.
-
Deskop automatically dimming after turning on/off night light
Summary of issue:Someone tapped on a bunch of keys today on my keyboard, over on the right hand side prt sc, pg up, ins, del, etc. They don’t know which keys they hit, but it dimmed the screen of my desktop down to what seems like minimum brightness. It seems like Automatic Dimming was activated, except I am on a desktop with no sensors.Symptoms:Both external monitors dimmed to minimum brightness.Things I’ve looked for in Settings:No physical monitor settings were changed, and the dimming is happening on both monitors.Device Manager and Power settings no longer have the ability to turn off a

-
Is there a way to automatically set night light at a specified time? Welcome to Ten Forums.
Yes there is, see Option Four, Step 6 this tutorial.
Turn On or Off Night Light in Windows 10
-
Night Light doesn’t automatically turn off in the morning Hi,
Tried out the methods in comments sections but problem still exists. Here, is what i have noticed.
SCENARIO 1.
Night light set ON time 2100 HRS and OFF at 2115 HRS.
1.if the computer is ON @ 2115 HRS night light turns off automatically. (correct)
2. If the computer is shutdown @2110 HRS and switched ON @ 2120 HRS. Night light is off at login. (correct)
2. if the computer was put to sleep @ 2110 HRS and resumed @ 2120 HRS, night light does not turn off. (incorrect).Basically night light dosen’t work properly after a sleep or hibernate happens.
-
Deskop automatically dimming after turning on/off night light
windows 10 night light when on cycles dimming
I have windows 1903 Build 18362.329 installed on my desktop and I’m using the windows night light in the settings. Lately (not sure just when it started) I’ve noticed that when it is on about every 2-5 minutes I notice my monitors will dim just enough to
be very noticeable and then brighten to the night light level. The dimming/brightening is a gradual process (about a 10-second cycle) and is very annoying. If the night light is NOT on then the monitors do not dim/brighten. As a test, I turned the night light
off and installed f.lux (it is now on) so far it has not dimmed/brightened and it has been at least 30 minutes since f.lux turned on.I’ve searched for a solution but so far I have not found a solution. Obviously I can stay with f.lux but I’m attempting to remove all software where windows provide the same function, assuming that the windows code is as good or better than the add-on.
My graphic card (NVIDIA GTX 470 Graphic Card) has the latest drivers from NVIDIA and were installed two days ago. Prior to the installation, I had the night light issue. I installed the latest drivers to see if that would resolve the issue.

Deskop automatically dimming after turning on/off night light
-
Deskop automatically dimming after turning on/off night light — Similar Threads — Deskop automatically dimming
-
Night light turning itself off after display turn off
in Windows 10 Gaming
Night light turning itself off after display turn off: Hello, I’m having problems with Night light turning itself off after the display has turned itself off because of inactivity.Razer Blade 14- Windows 11 Home, everything up to date.Monitors: Dell S2721DGF connected via HDMI @144Hz, Dell P2421 connected via DP @60HzSteps to… -
Deskop automatically dimming after turning on/off night light
in Windows 10 Customization
Deskop automatically dimming after turning on/off night light: Summary of issue:Someone tapped on a bunch of keys today on my keyboard, over on the right hand side prt sc, pg up, ins, del, etc. They don’t know which keys they hit, but it dimmed the screen of my desktop down to what seems like minimum brightness. It seems like Automatic… -
Deskop automatically dimming after turning on/off night light
in Windows 10 Gaming
Deskop automatically dimming after turning on/off night light: Summary of issue:Someone tapped on a bunch of keys today on my keyboard, over on the right hand side prt sc, pg up, ins, del, etc. They don’t know which keys they hit, but it dimmed the screen of my desktop down to what seems like minimum brightness. It seems like Automatic… -
Night Light not turning off
in Windows 10 Customization
Night Light not turning off: Just 2 days ago the night light setting is no longer working for me, i try to disable it from action center and from settings but it keeps closing the settings window and stays on, I have tried a lot of things to help but nothing has worked so far…. -
Night light turns on automatically after logging in
in Windows 10 Customization
Night light turns on automatically after logging in: I have tried everything from deleting the two registry keys to reinstalling the display drivers; nothing worked. It turns on by default just after I log in to my user account. The night light effect is on even after the button is turned off in the settings.Windows version:… -
Night light turning itself off after display turn off
in Windows 10 Customization
Night light turning itself off after display turn off: Hello, I’m having problems with Night light turning itself off after the display has turned itself off because of inactivity.MOBO: Asus X570-F latest BIOS, tried older versions
VGA: nVidia RTX2070 latest driver, tried older versions
OS: Windows 10 Pro 20H2, fully updated…. -
Night Light Turning Off
in Windows 10 Customization
Night Light Turning Off: I have a Surface Pro X and have been having this issue for a while now: When I turn on the Night Light and have the scheduled setting on, the night light «turns off» after my device goes to sleep for a bit and then wakes back up, even if it’s after sunset. When I swipe in… -
Night Light doesn’t automatically turn off in the morning
in Windows 10 Support
Night Light doesn’t automatically turn off in the morning: I have a Inspiron 5521 running the may19 update. Win10 is update to date in all aspects. when I open it up in the morning, the Night Light schedule seems to be ignored, and I have to manually turn it off every morning. I suspect it has something to do with coming out of… -
Night Light doesn’t automatically turn off in the morning
in Windows 10 Customization
Night Light doesn’t automatically turn off in the morning: The title says it all, really. I have a Surface Pro that when I open it up in the morning, the Night Light schedule seems to be ignored, and I have to manually turn it off every morning. I suspect it has something to do with coming out of Sleep, but I’d love some guidance….