
,
This guide contains instructions on how to change the screen resolution in a Hyper-V virtual machine when using the Enhanced Session Mode.
By default, when you start for first time a Hyper-V Virtual Machine, it prompts you to change the display resolution and to select the Local Resources that you want to use inside the VM machine, like Printers, Clipboard, Local Drives, etc..
But, if after choosing a display resolution you select to «Save my settings for future connections to this virtual machine», this dialog doesn’t appear anymore and there isn’t an option to revoke it. To bypass this problem, follow the instructions below.

How to Force Hyper-V to Show the Display Configuration & Local Resources dialog on Windows 10/11.
Step 1. Enable Enhanced Session Mode in Hyper-V Settings.
1. Power Off the virtual machine.
2. Open the Hyper-V settings.

3. Under Server: select Enhanced Session Mode Policy and then enable the Allow enhanced session mode* option on the right. Click Apply. *
* Note: If this option is already checked, uncheck it, click Apply and then re-check it again.

4. Under User: Select Enhanced Session Mode and then enable the Use enhanced session mode option.* When done, click Apply > OK.
* Note: If this option is already checked, uncheck it, click Apply and then re-check it again.

5. Now start the Virtual Machine and see if the Resolution dialog appears. If not, proceed to the next step.
Step 2. Force Hyper-V to show the Display Configuration dialog.
1. Right-click on the VM machine and click Start.

2. Wait a few seconds for the VM to start. Then right-click again on the VM machine and select Edit Session Settings.

3. Now the Display Configuration dialog will appear. Here you can setup again your preferred resolution for the VM or or select the local resources you want to use inside the virtual machine after clicking Show Options.

Bonus tip: If after performing the steps above, you are still unable to invoke the Screen Resolution/Local Resources prompt in Hyper-V, do the following:
1. Open Command Prompt or PowerShell as Administrator, and issue the following command:*
- VMConnect.exe ServerName VMName /edit
* Where: «ServerName» is the computer name of the Hyper-V Host Machine and «VMName» is the name of the Virtual Machine. e.g. If your Host machine is named «WINTIPS» and the VM machine is named «DESKTOP10», the command is:
- VMConnect.exe WINTIPS DESKTOP10 /edit

That’s it! Let me know if this guide has helped you by leaving your comment about your experience. Please like and share this guide to help others.
If this article was useful for you, please consider supporting us by making a donation. Even $1 can a make a huge difference for us in our effort to continue to help others while keeping this site free:
- Author
- Recent Posts
Konstantinos is the founder and administrator of Wintips.org. Since 1995 he works and provides IT support as a computer and network expert to individuals and large companies. He is specialized in solving problems related to Windows or other Microsoft products (Windows Server, Office, Microsoft 365, etc.).
In the era of virtualization, Microsoft Hyper-V stands out as a powerful tool for developers, businesses, and IT professionals, enabling users to create and manage virtual machines (VMs) efficiently. However, one of the lesser-discussed aspects of working with VMs is managing their display settings, particularly the resolution. Many users face challenges when they switch from their primary operating systems to virtual machines, especially if the display resolution doesn’t suit their work style, leading to productivity issues. This article will guide you through the steps to change the Hyper-V display resolution in both Windows 11 and 10, ensuring your virtual environment is configured for optimal usability.
Understanding Hyper-V and Display Settings
Hyper-V is a built-in virtual machine management tool in Windows 10 Pro, Education, and Enterprise editions, as well as Windows 11. It enables users to set up and run multiple operating systems on a single computer or server. Each of these operating systems runs in its own isolated environment, known as a virtual machine.
Display resolution refers to the clarity of the content displayed on a screen, usually described in terms of width x height (e.g., 1920×1080). A higher resolution means more pixels, which typically results in sharper images and more screen real estate for displaying applications and windows. When running a virtual machine, especially for those maintaining applications requiring specific graphic resolutions or those needing multiple application windows open at once, adjusting the display resolution can significantly enhance usability.
Steps to Change Hyper-V Display Resolution
Modifying the display resolution for Hyper-V can be accomplished through various methods depending on how you’ve set up your virtual machines. Below are different ways to change the display resolution for virtual machines in Hyper-V on Windows 11 and 10.
Method 1: Adjusting Display Settings in the Guest OS
-
Start Your Virtual Machine:
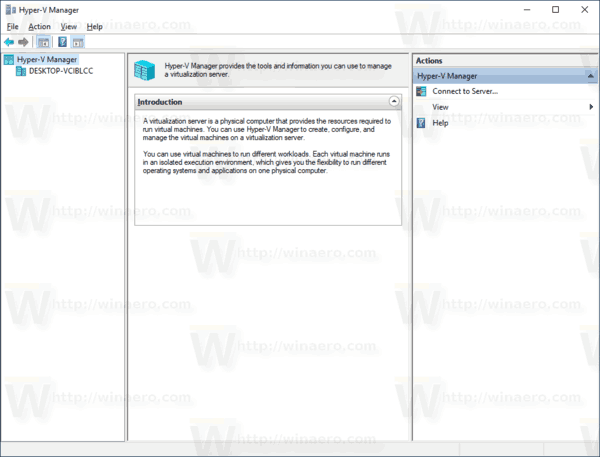
- Launch Hyper-V Manager. You can find it by searching in the Start menu.
- Select the virtual machine you want to change the resolution for and click on «Connect» in the Actions pane.
-
Access Display Settings:
- Once inside the VM, right-click on the desktop and select «Display Settings.”
- In the «Display» section, scroll down to find the «Scale and layout» area.
-
Changing the Resolution:
- Click the «Display resolution» dropdown. You should see a list of available resolutions for the guest OS. Select your desired resolution.
- Changes will take immediate effect.
-
Adjust Scaling (Optional):
- If you find the text or icons are too small or large, consider adjusting the scaling settings in the same Display Settings window.
-
Close the VM:
- After adjusting your resolution and scaling, close the VM. You can check how it appears when reconnecting to the VM.
Method 2: Using Hyper-V Enhanced Session Mode
Enhanced Session Mode is a feature in Hyper-V that allows for improved integration between the host and guest operating systems. With this mode enabled, you can adjust the display resolution more flexibly.
-
Enable Enhanced Session Mode:
- Open Hyper-V Manager.
- Click on the «Hyper-V Settings» in the Actions pane.
- Under «Server,» go to «Enhanced Session Mode Policy» and ensure it is enabled.
- Under «User,» ensure that «Use Enhanced Session Mode» is checked.
-
Start Your Virtual Machine:
- Start the VM and connect to it. You should see a prompt for connecting via Enhanced Session Mode.
-
Change Resolution:
- Once connected via Enhanced Session Mode, you should be able to dynamically resize the VM window. The display resolution should adjust automatically to fit the new window size.
- You can also access display settings inside the VM and select a fixed resolution from there.
Method 3: Using Windows Registry (Advanced Method)
If you’re comfortable with editing the Windows Registry, you can change the default resolution settings applied to all VMs.
-
Open the Registry Editor:
- Press
Win + Rto bring up the Run dialog box. - Type
regeditand press Enter. Confirm any UAC prompts.
- Press
-
Navigate to Hyper-V Settings:
- Navigate to the following path:
HKEY_CURRENT_USERSoftwareMicrosoftWindowsCurrentVersionUninstall - Look for the relevant subkeys associated with your Hyper-V setting.
- Navigate to the following path:
-
Modify Parameters:
- Locate the key for the VM you wish to modify. You may need to experiment as specific entry names can vary.
- You can add or change string values like
WidthandHeightwith your desired resolution in pixels. - Confirm your edits, then close the Registry Editor.
-
Restart your VM:
- Restart your VMs to apply the resolution changes.
Note: Be cautious when editing the Registry. Inappropriate changes can lead to system instability.
Method 4: Update Display Drivers (If Necessary)
Sometimes the display issues may not be directly related to the Hyper-V settings but rather outdated or incompatible video drivers.
-
Updating Display Drivers:
- On the host machine, right-click on the Start button and select «Device Manager.»
- Expand the «Display adapters» section, right-click on your display driver, and choose «Update Driver.»
- Select «Search automatically for updated driver software». Follow the prompts to install any available updates.
-
Restart Host Machine:
- After updating drivers, restart your PC and check the resolution settings again.
Method 5: Utilizing PowerShell Commands
For those who prefer command-line tools, PowerShell can be a time-efficient way to set display resolutions.
-
Open PowerShell:
- Click on the Start button, type
PowerShell, right-click on it, and select «Run as Administrator.»
- Click on the Start button, type
-
Command Entry:
- Use the following command to get the current VM display settings:
Get-VM | Select-Object Name, State, VMBus - To set the display, you can use:
Set-VMVideoDisplay -VMName "YourVMName" -HorizontalResolution 1920 -VerticalResolution 1080
- Use the following command to get the current VM display settings:
-
Confirm Changes:
- After running the command, confirm if the resolution has changed by reconnecting to your VM.
Troubleshooting Common Issues
1. Resolution Not Changing
- Ensure that the VM is running a compatible operating system that supports the desired resolution.
- Double-check the Enhanced Session Mode settings, as resolution adjustments won’t apply without this mode.
2. Limited Resolution Options
- If only limited resolution options are available, check if you need to install additional integration services in the guest OS.
- Make sure the correct display drivers are installed in the VM. If you are running a server OS like Windows Server, consider installing the latest Hyper-V integration components.
3. Black Bar or Distortion After Resolution Changes
- Reboot the VM after making changes. A simple restart often resolves graphical glitches.
- Ensure that the host machine’s display settings are correctly configured.
Conclusion
Changing the display resolution of Hyper-V virtual machines in Windows 10 and 11 can greatly enhance your user experience and productivity. Through various methods, from simple settings adjustments in the guest OS to advanced techniques using Registry edits and PowerShell commands, users can effectively tailor their virtual environments to meet their needs.
Understanding the aspect of virtual displays is essential in today’s hybrid work settings where remote access to virtual machines has become commonplace. By utilizing the methods outlined above, you can optimize your virtual workspace to facilitate a more enjoyable and efficient workflow. Keep an eye on updates from Microsoft and regularly check both guest and host machine settings to ensure a seamless experience.
Skip to content
Windows 10, Windows 8.1 and Windows 8 come with Client Hyper-V so you can run a supported guest operating system inside a Virtual Machine. Hyper-V is Microsoft’s native hypervisor for Windows. It was originally developed for Windows Server 2008 and then ported to Windows client OS. It has improved over time and is present in the latest Windows 10 release as well. Today, we will see how to change the Zoom Level of a virtual machine in Hyper-V and set custom display scaling (DPI) in Windows 10.
Note: Only Windows 10 Pro, Enterprise, and Education editions include the Hyper-V virtualization technology.
What is Hyper-V
Hyper-V is Microsoft’s very own virtualization solution that allows creating virtual machines on x86-64 systems running Windows. Hyper-V was first released alongside Windows Server 2008, and has been available without additional charge since Windows Server 2012 and Windows 8. Windows 8 was the first Windows client operating system to include hardware virtualization support natively. With Windows 8.1, Hyper-V has got a number of enhancements such as Enhanced Session Mode, enabling high fidelity graphics for connections to VMs using the RDP protocol, and USB redirection which is enabled from the host to VMs. Windows 10 brings further enhancements to the native hypervisor offering, including:
- Hot add and remove for memory and network adapters.
- Windows PowerShell Direct – the ability to run commands inside a virtual machine from the host operating system.
- Linux secure boot — Ubuntu 14.04 and later, and SUSE Linux Enterprise Server 12 OS offerings running on generation 2 virtual machines are now able to boot with the secure boot option enabled.
- Hyper-V Manager Down-level management — Hyper-V manager can manage computers running Hyper-V on Windows Server 2012, Windows Server 2012 R2 and Windows 8.1.
To be able to override default display scaling (DPI) for a Virtual Machine, you need to disable its Enhanced Session feature. For more details, please refer to the article
Enable or Disable Hyper-V Enhanced Session in Windows 10
Otherwise, the display of your virtual machine will be configured automatically.
To change DPI of a Hyper-V virtual machine, do the following.
- Turn off your virtual machine if it is running.
- Disable the Hyper-V Enhanced Session feature for this machine.
- Start your VM.
- Click on View in the menu bar, select the Zoom Level item, then select 100%, 125%, 150%, or 200% for the display scaling you want for the virtual machine.
-

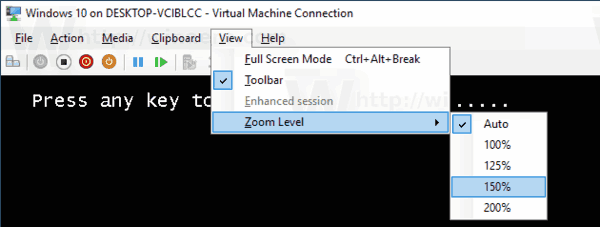
That’s it.
Support us
Winaero greatly relies on your support. You can help the site keep bringing you interesting and useful content and software by using these options:
If you like this article, please share it using the buttons below. It won’t take a lot from you, but it will help us grow. Thanks for your support!
Приветствую всех!
Есть Win10 Pro с Hyper-V, в Hyper-V стоит Linux Mint 19.04. Единственное доступное разрешение — 1152*864
Беглый гуглёж не дал результатов, этот совет результата не дал.
Как его изменить?
-
Вопрос задан
-
16622 просмотра
Для потомков.
Помог совет 20ivs, из комментариев
1. Открыть терминал
2. sudo nano /etc/default/grub
ищем строку, которая начинается с GRUB_CMDLINE_LINUX_DEFAULT и добавляем video=hyperv_fb:[разрешение экрана, которое нужно]. Например, мне нужно 1280×720, тогда строка будет выглядеть так: GRUB_CMDLINE_LINUX_DEFAULT=»quiet splash video=hyperv_fb:1280×720″
3. Сохраняем и закрываем редактор.
4. sudo update-grub
5. Перезагрузка виртуальной машины.
Пригласить эксперта
Войдите, чтобы написать ответ
-
Показать ещё
Загружается…
Минуточку внимания
2020-08-01 quick note: This blog post is resurrected from a December 2017 blog on the old blogs.technet.microsoft.com site (RIP), posted here with minimal edits.
I’ve recorded a variety of videos (especially for Windows AutoPilot, but prior to that for other Windows deployment scenarios) that involve capturing the initial phases of a Hyper-V VM’s boot process. Normally, these default to a resolution like 1024×768, although they can be changed to a better resolution (e.g. 1366×768 or 1920×1080) manually after Windows has started up. The end result is a rather “square” image:
But what if you want the entire video to be fixed at a particular resolution? If you are running Hyper-V on Windows 10 or Windows Server 2016, there is an easy way to do this using the Set-VMVideo PowerShell cmdlet. First, let’s try switching to 1366×768:
PS C:\> Set-VMVideo -VMName Demo -ResolutionType Single -HorizontalResolution 1366 -VerticalResolution 768
The result (effective the next time the VM starts up):
The “-ResolutionType Single” is required in this case to force the VM to a specific resolution by telling Windows that is the only supported video resolution. (And yes, OOBE does add black bars to left and right.)
You can also change to 1080p (1920×1080) the same way:
PS C:\> Set-VMVideo -VMName Demo -ResolutionType Single -HorizontalResolution 1920 -VerticalResolution 1080
with this result (yes, more and bigger black bars from OOBE):
You may still see the VM start up with a smaller resolution and then switching to a higher resolution a second or two later. There’s no easy way around that, but if you set the VM to be full screen (e.g. using a 1080p monitor) and then capture a video from that monitor, you don’t notice the switching.
If you want to change the VM back to its original, default behavior, you can:
PS C:\> Set-VMVideo -vmname Demo -ResolutionType Default