
Платформа виртуализации Hyper-V доступна не только в Windows Server, но и в десктопных редакциях Windows 10 и 11. С помощью встроенного гипервизора Hyper-V пользователи могут создавать и запускать виртуальные машины. В этой статье мы рассмотрим, как включить компоненты Hyper-V в Windows 10 и 11.
Компоненты роли виртуализации Hyper-V можно установить в Pro и Enterprise редакциях Windows 10 и 11. Сначала, нужно проверить, поддерживает ли ваш компьютер виртуализацию Hyper-V. Откройте командную строку с правами администратор и выполните:
systeminfo
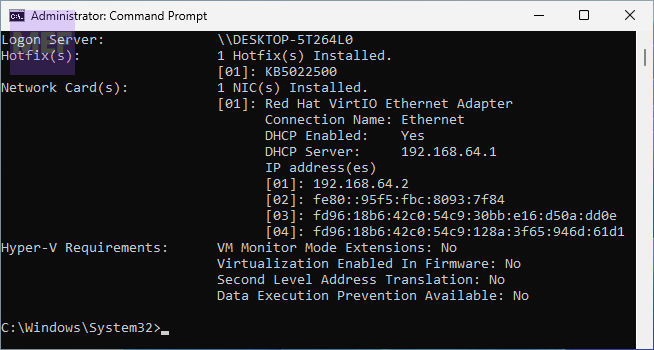
Промотайте в конец вывода и проверьте, что включены следующие компоненты в разделе Hyper-V Requirements:
VM Monitor Mode Extensions: Yes
Virtualization Enabled In Firmware: Yes
Second Level Address Translation: Yes
Data Execution Prevention Available: Yes

Если здесь указано Virtualization Enabled in Firmware: No, попробуйте включить аппаратную поддержку виртуализации в настройках BIOS/UEFI компьютера (может называться Intel VT-X или AMD-V).
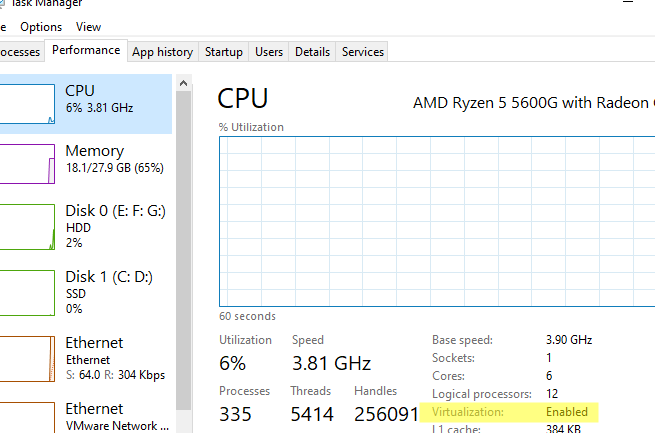
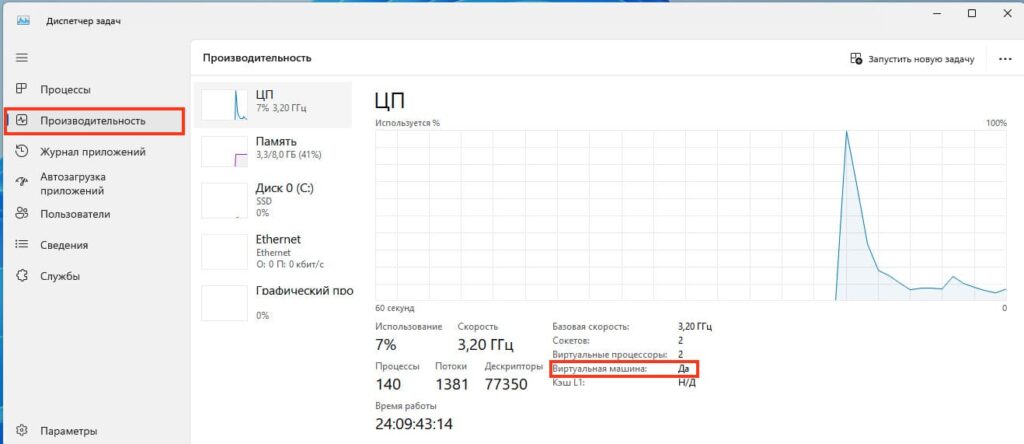
Также проверить совместимость вашего процессора можно на вкладке CPU в диспетчере задач Windows. Здесь должно быть указано
Virtualization: Enabled
.
Если тут указано
A hypervisor has been detected. Features required for Hyper-V will not be displayed
, значит компоненты Hyper-V уже установлены.
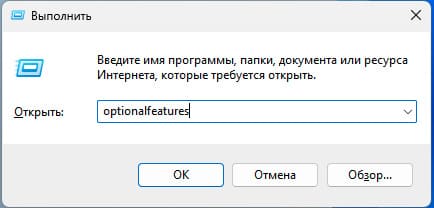
Включить роль Hyper-V в Windows 10 и 11 можно через панель управления компонентами Windows Features. Выполните команду
optionalfeatures
и выберите для установки компоненты Hyper-V Platform и Management Tools.
Также вы можете включить компоненты Hyper-V в Windows из командной строки. С помощью PowerShell команды:
Enable-WindowsOptionalFeature -Online -FeatureName Microsoft-Hyper-V -All
Или с помощью DISM:
dism.exe /Online /Enable-Feature:Microsoft-Hyper-V-All

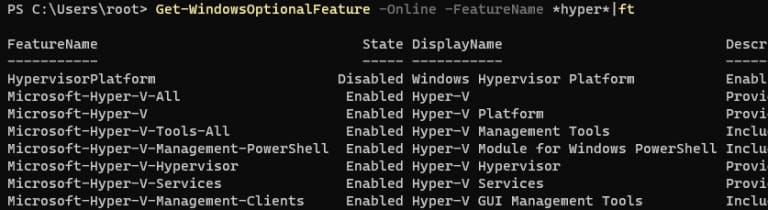
После завершения установки компонентов перезагрузите компьютер. Проверьте, что компоненты гипервизора установлены:
Get-WindowsOptionalFeature -Online -FeatureName *hyper*|ft

Включите автоматический запуск Hyper-V при загрузке:
bcdedit /set HypervisorLaunchType auto
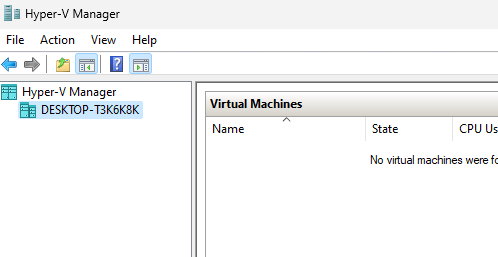
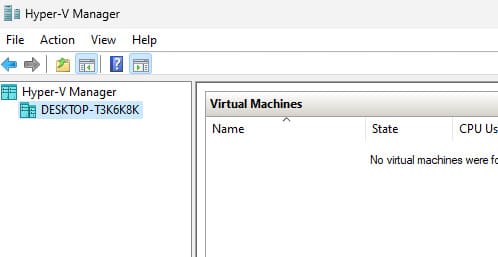
Для управления Hyper-V и виртуальными машинами используется графическая консоль Hyper-V Manager (
virtmgmt.msc
). Запустите ее и можете начать создавать виртуальные машины.
Также для управления гипервизором и ВМ можно использовать командлеты PowerShell из встроенного модуля Hyper-V.
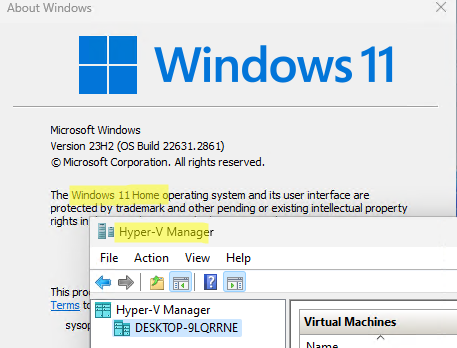
Компонент виртуализации Hyper-V отсутствует в домашних (Home) редакциях Windows 10 и 11. Однако есть небольшой трюк, который позволяет установить роль Hyper-V из зранилища компонентов WinSxS даже в Home редакции Windows.
Создайте на рабочем столе файл enable-hyperv.bat с кодом
pushd "%~dp0"
dir /b %SystemRoot%\servicing\Packages\*Hyper-V*.mum >hyper-v.txt
for /f %%i in ('findstr /i . hyper-v.txt 2^>nul') do dism /online /norestart /add-package:"%SystemRoot%\servicing\Packages\%%i"
del hyper-v.txt
 Dism /online /enable-feature /featurename:Microsoft-Hyper-V -All /LimitAccess /ALL
pause
Запустите BAT файл с правами администратора.
После завершения установки компонентов, перезагрузите компьютер. Проверьте, что виртуализация Hyper-V теперь доступна в вашей Home редакции Windows.
У меня появилась проблема после установки Docker.
Пытался понять в чем проблема, и пришёл к тому, что нет компонента Hyper-V.
По какой причине его нет и есть ли способ пофиксить это?
OC: win10 Pro


-
Вопрос задан
-
9699 просмотров
Комментировать
Подписаться
2
Средний
Комментировать
Решения вопроса 1
1. Docker Desktop умеет работать поверх WSL2, для которого не нужно включать hyper-v
2. Попробуй это:
Enable-WindowsOptionalFeature -Online -FeatureName Microsoft-Hyper-V -AllPS: win10 pro настоящая же? Не какая-нибудь сборка и не отредактированный реестр с домашней версии?
Пригласить эксперта
Ваш ответ на вопрос
Войдите, чтобы написать ответ
Похожие вопросы
-
Показать ещё
Загружается…
Минуточку внимания
Реклама
Have you ever experienced the issue of Hyper-V not appearing on Windows 11 or 10? This situation can prevent you from enabling the feature and using Hyper-V virtual machines correctly. Typically, the cause of this problem is the lack of meeting operating system or hardware requirements.
What are the Requirements to use Hyper-V on Windows?
The requirements for Hyper-V are as follows:
Software Requirements:
The Hyper-V role can only be enabled on Windows 11/10 Enterprise, Windows 11/10 Pro, and Windows 11/10 Education. If you are running Windows 11/10 Home, you will not be able to find the Hyper-V role in the system unless you use specific methods.
Hardware Requirements:
If you are already using the correct OS version, the reason for Hyper-V not appearing may be the failure to enable Virtualization Technology or the lack of a CPU that supports VM Monitor Mode Extension.
To solve the issue of Hyper-V not appearing, we will provide a checklist of what needs to be prepared beforehand and how to properly enable or install Hyper-V on Windows 10/11. Keep reading and try the solutions provided.
As stated above, the problem of Hyper-V not appearing is most likely due to not meeting the system or hardware requirements. To resolve this issue in Windows 11, please check the following list item by item, and then enable Hyper-V with the correct steps.
Checklist before Installing Hyper-V on Windows 11
1. Check CPU support for SLAT
Check if your PC has a 64-bit CPU that supports Second Level Address Translation (SLAT), such as modern Intel or AMD 64-bit processors.
2. Check if Visualization is Enabled in BIOS
It is necessary to enable visualization in the BIOS setup menu. Press F2 (or another specific key according to brands and models) to access BIOS and select Advanced > Virtualization.
Tip: Read our detailed guide on how to boot Windows into BIOS.
3. Upgrade to Windows 11 Pro or Above
If you are using a Windows version that does not support the Hyper-V feature, such as Windows 11 Home version, then Hyper-V will not appear. Upgrade your computer to Windows 11 Pro first.
4. Prepare Enough Memory Size
Prepare enough memory size for the expected VM workloads, at least 4 GB.
5. Verify Hardware Compatibility
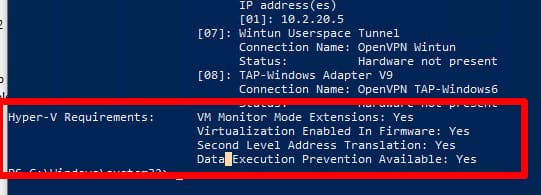
Verify the compatibility on Windows. Open the command prompt, type “systeminfo“, then check the “Hyper-V Requirements” section and its value “YES,” which means you can enable the Hyper-V role. If it shows “No,” please go back to check the requirements.
3 Ways to Enable Hyper-V on Windows 11
1. Enable Hyper-V on Windows 11 via Control Panel
On a computer that meets all the requirements, access Windows features to enable Hyper-V on Windows 11.
1. Launch Control Panel and open “Turn Windows features on or off” (or search for “Windows features” on the taskbar) to check if the Hyper-V option has been checked.
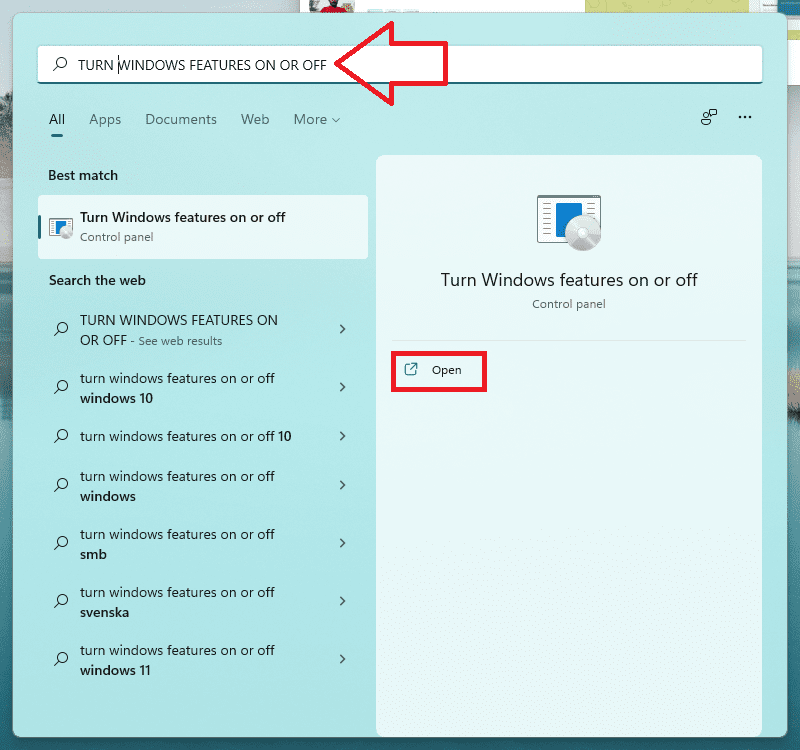
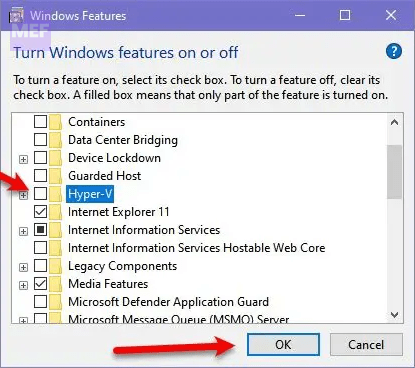
2. If it has not been checked, go to the opened Windows Features wizard, select all the Hyper-V features, and click OK. This process may take a while to apply the changes on Windows 11 Pro.
3. After completing the requested changes, reboot the PC by clicking “Restart now.” Then you can enable the Hyper-V Manager on Windows 11 Pro, allowing you to create and manage virtual machines efficiently.
2. Enable Hyper-V on Windows 11 with Windows PowerShell
You can also install Hyper-V with PowerShell command in Windows 11, try the following:
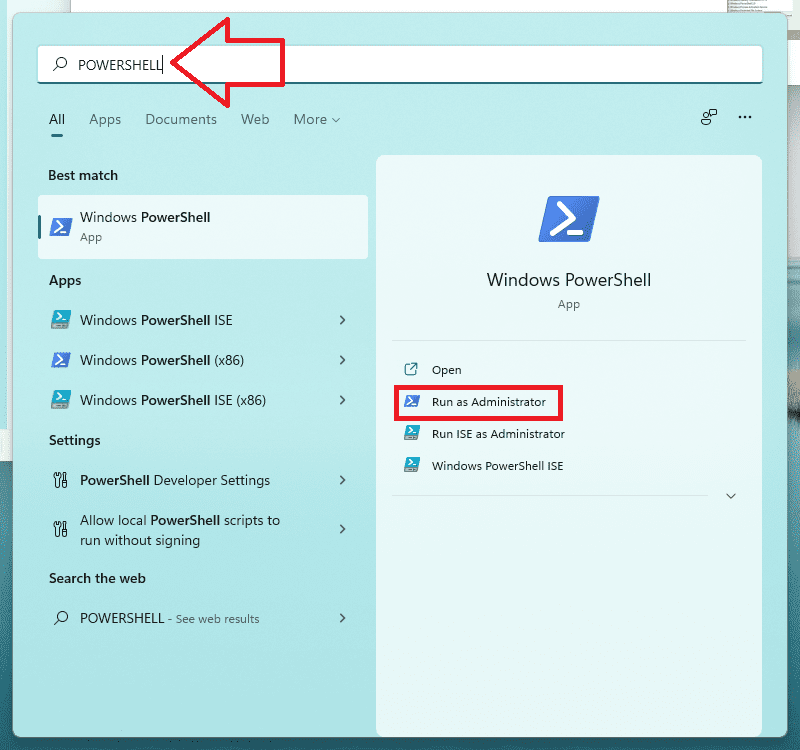
1. Press the Win key and type “PowerShell” to run it as an administrator.
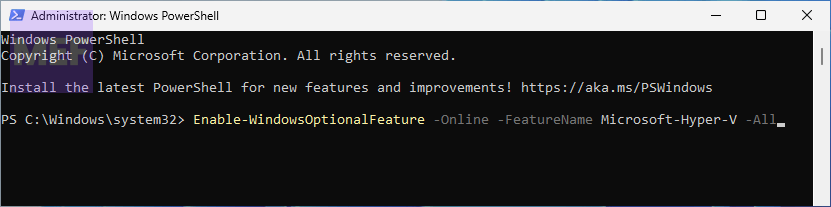
2. Type the command and press Enter to run the command:
Enable-WindowsOptionalFeature -Online -FeatureName Microsoft-Hyper-V -All
Wait for the process to complete.
3. Restart your computer.
3. Enable Hyper-V on Windows 11 using Command Line
Alternatively, you can also use the Command Line to enable Hyper-V on your Windows 11 computer. Here are the steps you need to follow:
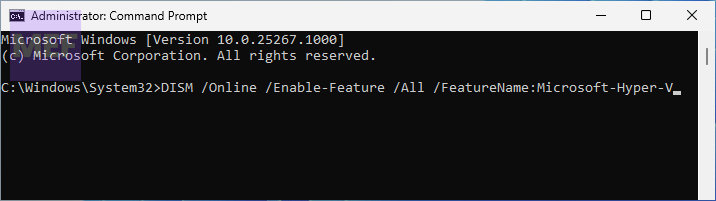
1. Press the “Win” key and search for “CMD“.
2. Right-click on “Command Prompt” and select “Run as administrator“.
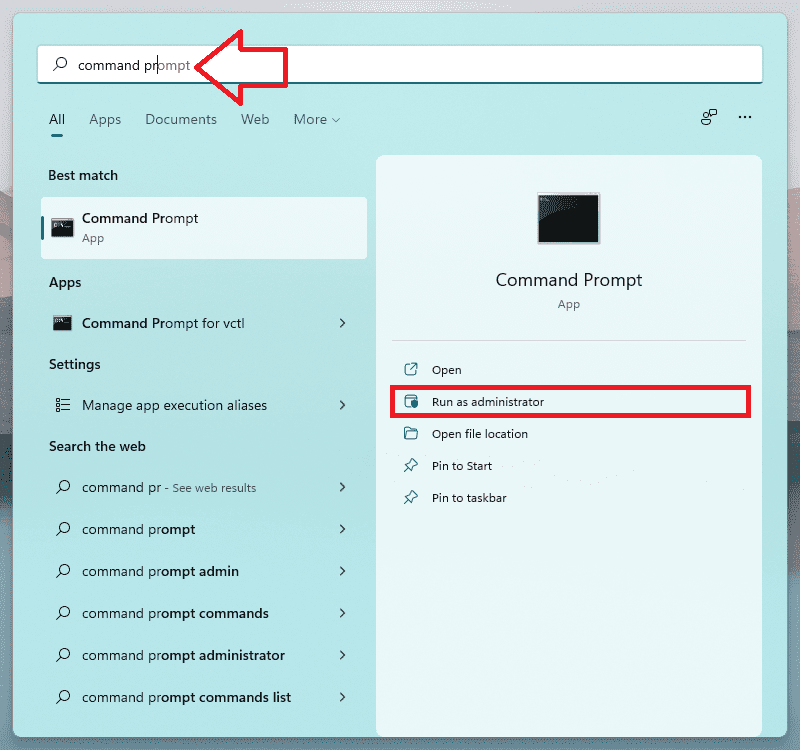
3. Type the following command and press “Enter“:
DISM /Online /Enable-Feature /All /FeatureName:Microsoft-Hyper-V
Wait for the installation to complete.
3. Restart your computer.
3 Ways to check if Hyper-V is enabled
Once you’ve enabled Hyper-V using any of the above methods, you may want to check whether it’s working correctly. Here are three ways to do that:
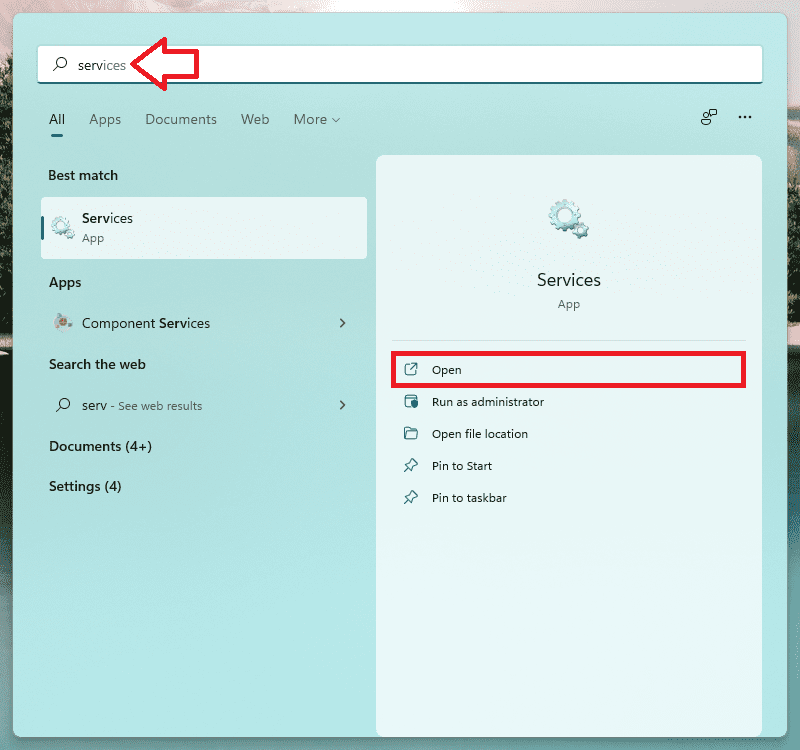
1. Check if the Hyper-V services are running
Press “Win + R” and type “services.msc” in the Run dialog box. In the Services window, check if all the services beginning with “Hyper-V” are “Running”.
2. Use PowerShell
Enter the following command to check the status: Get-WindowsOptionalFeature -Online -FeatureName Microsoft-Hyper-V If the “State” reads “Enabled”, then Hyper-V is enabled properly on your Windows 11 computer.
3. Use Windows Features
Open Windows Features to check the Hyper-V box or directly search for “Hyper-V Manager” to see if you can launch it now.
If, after all the troubleshooting and checking, your Hyper-V is still not started properly, it may be time to consider whether there is a problem with your installed operating system or some other relatively rare causes. In that case, you may need to turn to professionals for further help.
It’s evident that not all issues have a definitive solution, despite having enabled Hyper-V on your Windows 11/10 system with success. There are several unpredictable variables that can lead to the failure of virtual machines (VMs). That’s why it’s crucial to choose the appropriate tool to safeguard Hyper-V VMs in the event of significant data loss caused by system glitches or hardware malfunctions.
It’s essential to understand that merely enabling Hyper-V doesn’t guarantee that your virtual machines will function flawlessly. Technical problems such as system crashes, power failures, hardware damage, and software conflicts can disrupt the smooth functioning of VMs. These challenges can cause severe data loss and can even make it impossible to recover critical files and data.
Therefore, selecting a reliable and efficient tool that can protect Hyper-V VMs from such disasters is crucial. Such tools offer a comprehensive backup solution that enables you to create backup copies of your virtual machines at regular intervals. These backups can be restored in the event of system failure or data loss, ensuring that your critical data remains secure.
Windows 8 onwards, the Hyper-V hypervisor is part of Windows client Operating Systems. To compete with other free virtualization software such as VirtualBox, now you can have native virtualization software on your Windows 8.1 or Windows 10 computer. It enables us to install and play around with different types of guest OS virtual machines on a single Windows 8.1/10 desktop or laptop PC.
Though the latest Windows OS can have Hyper-V, it mainly depends on the physical hardware of your computer. The computer processor and motherboard should support a few required specific features. If any of the hardware features are not enabled or supported on your computer, then you will be getting the error “Hyper-V has not been installed on computer ‘localhost’ ” when you try to manage the local computer by Hyper-V manager.
The above error appeared when I tried to connect the local computer from the r-V manager.
Hardware Requirement to Run Hyper-V on Windows 10/8.1
The computer should support the 64-bit architecture with hardware Virtualization Technology (VT) enabled processor and SLAT (Second Level Address Translation) technology. Also, minimum 4GB RAM is required to install Hyper-V.
Luckily most of the recent desktop and laptop computers have these features, but sometimes you need to enable them from BIOS.
Read mode about Hyper-V requirements for Windows client OS.
You can use Coreinfo tool from Microsoft’s Sysinternals tools set from here.
Open the command prompt with administrative privilege (open as Administrator) and go to the extracted folder. Run the following command.
Coreinfo.exe -v

EPT on Intel and NP on AMD processor indicates the support of SLAT.
My scenario is different, though these features are enabled and supported on my hardware, still, I got the particular error and unable to install Hyper-V on my computer. It is because of the system type I was having, it was the 32bit version of Windows 8.1.
The only 64-bit version of Windows 8, 8.1 and Windows 10 can have the Hyper-V platform. Therefore from the 32-bit Windows versions, we can only manage other Hyper-V servers.
Having the 64bit version of Windows client OS is essential to install the Hyper-V platform on your computer.
This feature can be enabled under Programs features in Control panel. While making the selection you can easily understand whether your host computer can support the Hyper-V platform or not.
See the below example screens in each scenario.
.
Final Note
Hyper-V platform can be installed on your desktop or laptop computer if the hardware meets the requirements and you have the 64-bit version of Windows 10 or 8.1. Then you can easily install virtual machines and manage them from the same host computer.
The latest Windows 32-bit versions and 64-bit versions without hardware requirement will return the same error message “Hyper-V has not been installed on computer ‘localhost’”. After meeting the requirements and Hyper-V platform installed successfully, you do not need to connect the localhost from Hyper-V manager because it will appear automatically.
Платформа виртуализации Hyper-V доступна не только на серверных версиях Windows, но и в десктопных редакциях Windows 10 и 11. С помощью встроенного гипервизора Hyper-V можно создавать и управлять виртуальными машинами. В этой статье расскажем, как включить компоненты Hyper-V в Windows 10 и 11.
Приобрести оригинальные ключи активации Windows всегда можно у нас в каталоге:
Windows 11 — от 1690 ₽
Windows 10 — от 1490 ₽
Проверка совместимости с Hyper-V
Компоненты Hyper-V доступны в редакциях Pro и Enterprise Windows 10 и 11. Чтобы проверить, поддерживает ли ваш компьютер Hyper-V, выполните следующие шаги:
1. Откройте командную строку с правами администратора.
2. Введите команду:
systeminfo
3. Промотайте вывод до раздела Hyper-V Requirements и убедитесь, что все указанные параметры включены:
— VM Monitor Mode Extensions: Yes
— Virtualization Enabled In Firmware: Yes
— Second Level Address Translation: Yes
— Data Execution Prevention Available: Yes
Если параметр Virtualization Enabled In Firmware имеет значение No, необходимо включить виртуализацию в настройках BIOS/UEFI (параметр может называться Intel VT-X или AMD-V).
Также проверить совместимость вашего процессора можно на вкладке CPU в диспетчере задач Windows. Здесь должно быть указано Virtualization: Enabled .
Как включить Hyper-V в Windows через компоненты Windows
1. Нажмите Win + R и впишите команду optionalfeatures, после чего нажмите Enter. (Либо через Панель управления > Программы и компоненты > Включение и отключение компонентов Windows).
2. В списке найдите и выберите для установки компоненты Платформа Hyper-V и Средства управления Hyper-V.
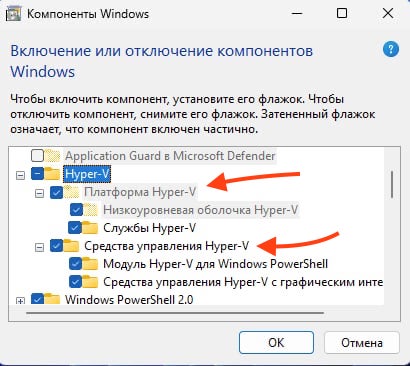
3. Нажмите ОК для установки и перезагрузите компьютер.
Включение Hyper-V через PowerShell
Чтобы включить Hyper-V с помощью командной строки или PowerShell, выполните следующие команды:
1. Откройте PowerShell от имени администратора.
2. Выполните команду:
Enable-WindowsOptionalFeature -Online -FeatureName Microsoft-Hyper-V -All
Или с помощью DISM:
dism.exe /Online /Enable-Feature:Microsoft-Hyper-V-All

3. Перезагрузите компьютер после установки.
Проверка установки Hyper-V
Чтобы убедиться, что компоненты Hyper-V успешно установлены, выполните следующую команду в PowerShell:
Get-WindowsOptionalFeature -Online -FeatureName *hyper*|ft
Также включите автоматический запуск Hyper-V при загрузке системы:
bcdedit /set HypervisorLaunchType auto
Управление Hyper-V
Для управления виртуальными машинами можно использовать графическую консоль Hyper-V Manager. Чтобы открыть её, выполните команду:
virtmgmt.msc
Также для управления виртуальными машинами можно использовать командлеты PowerShell из модуля Hyper-V.
Как включить Hyper-V в редакции Home
Hyper-V недоступен в редакциях Home, однако его можно установить через командную строку с использованием компонента WinSxS. Для этого выполните следующие шаги:
1. Создайте на рабочем столе файл enable-hyperv.bat и вставьте в него следующий код:
pushd "%~dp0"

dir /b %SystemRoot%\servicing\Packages\*Hyper-V*.mum >hyper-v.txt

for /f %%i in ('findstr /i . hyper-v.txt 2^>nul') do dism /online /norestart /add-package:"%SystemRoot%\servicing\Packages\%%i"

del hyper-v.txt
   Dism /online /enable-feature /featurename:Microsoft-Hyper-V -All /LimitAccess /ALL

pause
2. Запустите этот BAT файл с правами администратора.
3. После завершения процесса установки перезагрузите компьютер.
Теперь проверка виртуализации Hyper-V будет доступна даже в домашней редакции Windows 10 или 11.

Следуя этой инструкции, вы сможете успешно включить Hyper-V и начать использовать виртуальные машины в вашей системе.
Лицензионный ключ активации Windows от