
- About
- Blog
- Projects
- Help
-
Donate
Donate icon
An illustration of a heart shape - Contact
- Jobs
- Volunteer
- People
Item Preview
There Is No Preview Available For This Item
This item does not appear to have any files that can be experienced on Archive.org.
Please download files in this item to interact with them on your computer.
Show all files
software
Hyper-V Drivers/Tools for Windows XP and Server 2003
If you still need to virtualise Windows XP or 2003 in a Hyper-v use this ISO to get the best experience.
- Addeddate
- 2022-03-07 05:41:18
- Identifier
- hyper-v-vmguest-2003xp
- Scanner
- Internet Archive HTML5 Uploader 1.6.4
comment
Reviews
There are no reviews yet. Be the first one to
write a review.
3,609
Views
3
Favorites
DOWNLOAD OPTIONS
Uploaded by
perk0vic
on
SIMILAR ITEMS (based on metadata)
Установка на Hyper V Windows XP ничем не отличается от других только тем, что мы используем первое поколение виртуальных машин и в каких-то случаях требуется установка пакета интеграции Hyper V содержащие драйвера для старых ОС.
Есть небольшие требования к установке Windows XP на Hyper V:
- Мы должны использовать тип Generation 1 к установке виртуальной машины.
- Динамическая память должна быть отключена.
- Версия Windows XP Home не будет работать в рамках виртуальной машины. Нужно использовать версию Pro.
- В рамках установки нужно использовать 1 или 2 Гб оперативной памяти. После установки можно увеличить.
- Во время установки не используйте более 2 виртуальных процессоров.
- Для операционных систем выше Windows Server 2012 r2 и Windows 10 потребуется дополнительная настройка в виде установки драйверов.
Версии Windows 10 и 2016 не поставляются с нужными драйверами для мышки, аудио и сети. Что бы исправить эту ситуацию нужно устанавливать пакет интеграции Hyper V. О том как установить отсутствующие драйвера и службы интеграции Hyper V рассмотрим далее.
Если вы планируете что у виртуальной машины будет доступ к интернету нужно создать коммутатор. Более подробно о виртуальных коммутаторах Hyper V мы уже говорили. Для этого нужно открыть диспетчер коммутаторов:

Далее создать внешний виртуальный коммутатор:

Рекомендую установить название и оставить галочку на «Разрешить управляющей операционной системе предоставлять общий доступ к этому сетевому адаптеру» (иначе вы потеряете доступ к сети):

Может появится сообщение, которое предупредит, что соединение с интернетом может быть прервано. Это продлится несколько секунд, после чего начнем создание виртуальной машины Hyper V:

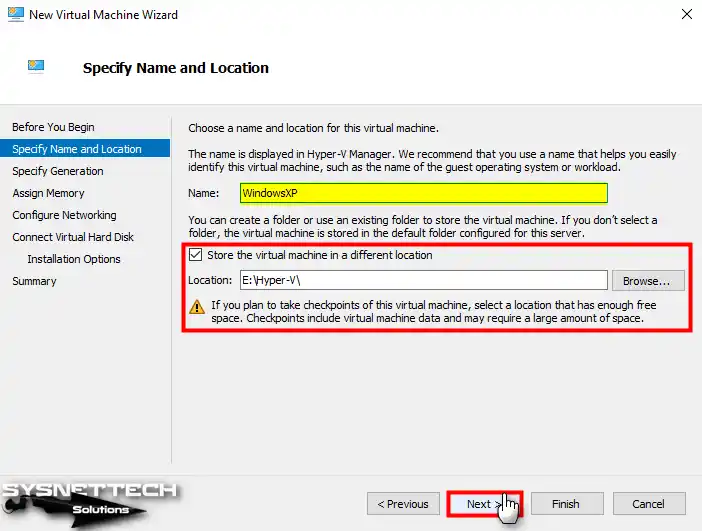
Мы увидим стартовое окно, его можно пропустить. В следующем окне стоит указать имя виртуальной машины и, если необходимо, изменить место где будут храниться конфигурация виртуальной машины (не диск):

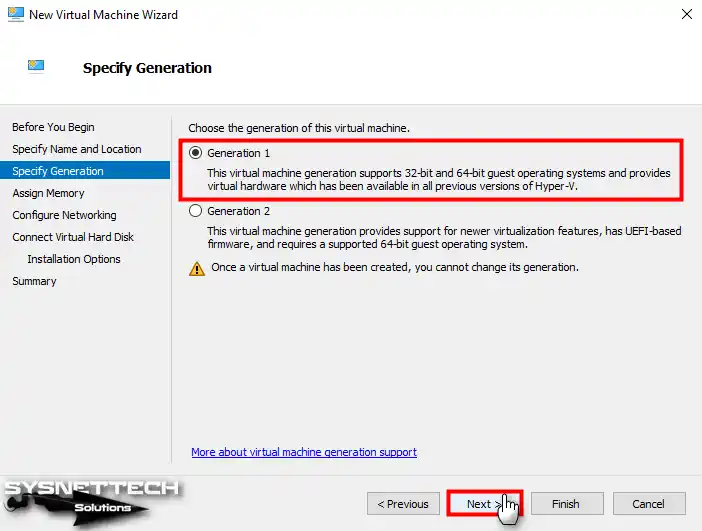
В этом окне выбирается тип виртуальной машины. Для Windows XP в Hyper V используется первый тип вне зависимости от разрядности операционной системы. Эта настройка выбирается единожды и в последующем ее нельзя изменить:

В этом окне выбирается размер оперативной памяти и возможность использования динамической памяти. Фиксированная память — эта та часть, которая будет зарезервирована виртуальной машиной. Динамическая память не поддерживается Windows XP и ее выбирать не стоит. Для Win XP в Hyper V вполне достаточно и 2ГБ оперативной памяти, но можно поставить и меньше:

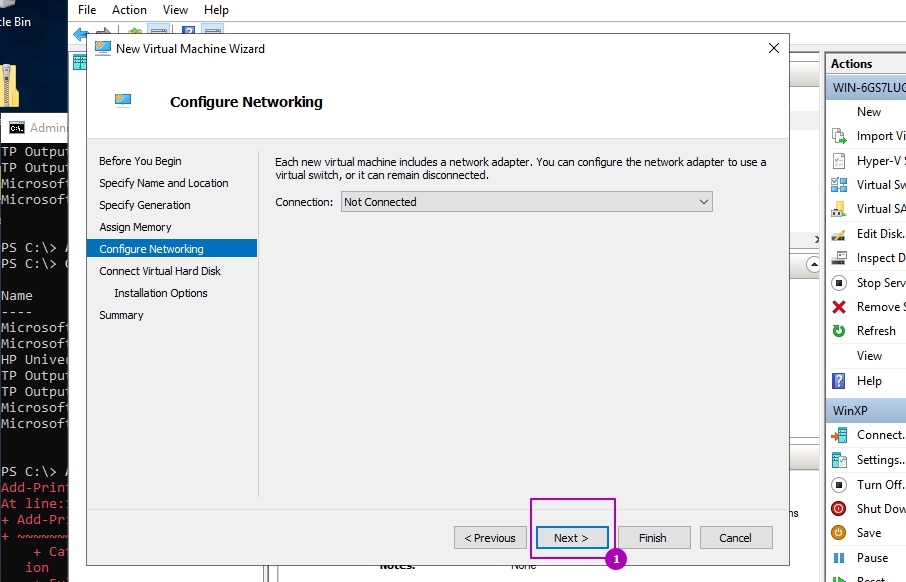
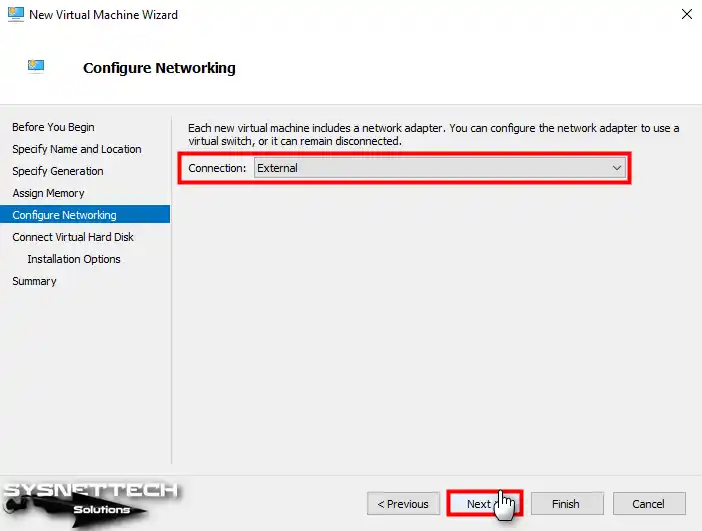
На этом шаге можно выбрать коммутатор, который мы создавали ранее. Этого не стоит делать так как в этом окне создается сетевой адаптер для виртуальных машин поколения 2, а нам нужен синтетический адаптер, который мы создадим позже:
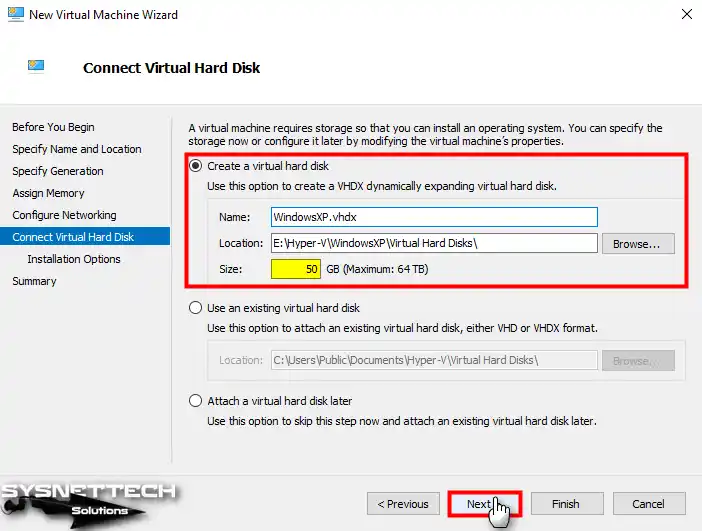
В окне создания дисков Hyper V выбирается имя виртуального диска, его местоположение и размер. Я бы советовал указать имя, что бы в дальнейшем не путаться, а так же указать размер. Для Windows XP достаточно 10 ГБ, если вы не планируете устанавливать на нее большие программы:

В этом окне выбирается образ для установки Windows XP:

В финальном окне и еще раз проверяем, что все данные введены верно и завершаем создание виртуальной машины:

Теперь создадим синтетический адаптер, с помощью которого мы сможем выходить в интернет с этой виртуальной машины. Откройте настройки виртуальной машины:

Во вкладке добавления устройств нужно выбрать синтетический адаптер и добавить его:

Выберем синтетический адаптер и подключим к созданному ранее коммутатору:

Запустим виртуальную машину и подключимся к ней для дальнейшей установки:

Установка Windows XP обычная и она не будет рассматриваться.
После установки, скорее всего вы столкнетесь с трудностями в виде отсутствия драйверов к мышке, аудио и сети если работаете на Windows 10 или Windows Server 2016. Дело в том, что ранее, в версии до Windows 8 и Windows Server 2012 r2 входил такой файл интеграции vmguest.iso, который содержал в себе драйвера для устройств. Он лежал по пути ‘C:\Windows\system32\’. В более новые версии Hyper V он не входит и есть два варианта обхода этой ситуации:
- Скачать ОС с Hyper V старых версий и достать этот файл с пакетом интеграции и драйверами оттуда
- Скачать vmguest.iso с нашего сайта.
Теперь мы должны вставить этот файл в привод:

Если в вашей версии Win XP стоит автозапуск файлов с DVD привода, то пакет интеграции установится автоматически и вы сможете нормально пользоваться ОС. Если автозапуск отключен, то откройте через горячие кнопки Win+E проводник и с помощью TAB выберете и запустите файлы с привода.
После установки сервисов интеграции у нас могут остаться несколько неопознанных устройств с отсутствующими драйверами:
- vmbus\{4487b255-b88c-403f-bb51-d1f69cf17f87}
- vmbus\{3375baf4-9e15-4b30-b765-67acb10d607b}
- vmbus\{99221fa0-24ad-11e2-be98-001aa01bbf6e}
- vmbus\{f8e65716-3cb3-4a06-9a60-1889c5cccab5}
Эти драйвера связаны с устройствами AVMA — возможностью автоматической активации, которая появилась в версиях 2012 R2 и соответственно не поддерживается в более ранних версиях.
Мы не можем использовать возможность копирования и вставки файлов через Hyper V с Win XP. Если есть необходимость копирования больших файлов используйте эти варианты:
- С помощью RDP подключения, которое позволяет переносить файлы через копировать/вставить
- Если не хотите нагружать сеть, то можете создать частный коммутатор и переносить данные через него. Это так же включает возможность использовать RDP.
- Выключайте виртуальную машину и монтируйте VHD файл через диспетчер дисков. Затем скопируйте данные и не забудьте размонтировать диск во избежании проблем с виртуальной машиной.
…
Теги:
#hyper-v
Provide feedback
Saved searches
Use saved searches to filter your results more quickly
Sign up
This article confidently delves into seamlessly running Windows XP on a state-of-the-art virtual machine using Microsoft Hyper-V virtualization software on the cutting-edge Windows 10 or 11 operating system.

How to Set Up Windows XP Pro x64 on Windows 10 OS using Hyper-V
After Microsoft released Windows XP on October 20, 2001, it started becoming a viral operating system among users. Since its release, it has been widely used in all workplaces and homes.
This operating system uses NT technology and micro-kernel architecture and has versions developed for various purposes. These versions are Professional, Home, Media Center (MCE), Tablet PC Edition, Starter Edition, and Home Edition (ULCPC – Ultra Low-Cost Personal Computer).
The Windows XP operating system, which has reached a large audience, is rarely used today. Since Microsoft ended support for this system on April 8, 2014, most users or institutions could not get new system updates, so they ended the use.
The XP system, which has received support for 12 years, will no longer accept new updates, as Microsoft stated in this article.
Despite the end of support for Windows XP, some system administrators may use this system for legacy applications or other scenarios in test environments. Instead of running XP on a physical PC, you can experience this system on a more powerful computer using a HyperV, VMware Workstation, or VirtualBox virtualization software.
How to Create a New Virtual Machine for Windows XP OS
After successfully establishing Hyper-V on your Windows 10 system, with the assurance of virtualization support, you can effortlessly generate a new virtual PC and install either Windows or Linux operating systems in this virtual environment.
Step 1
After running the Hyper-V Client software, creating a new External Switch using Virtual Switch Manager before operating system installation is recommended. Because the Default Switch, which is enabled by default by the program, uses the NAT connection to expose the VM to the host network, which can cause network problems in many cases.
To minimize network problems, you can use your host’s adapter with External Switch, and both get an IP address from the DHCP device in your local network and connect to the guest machine via remote desktop.
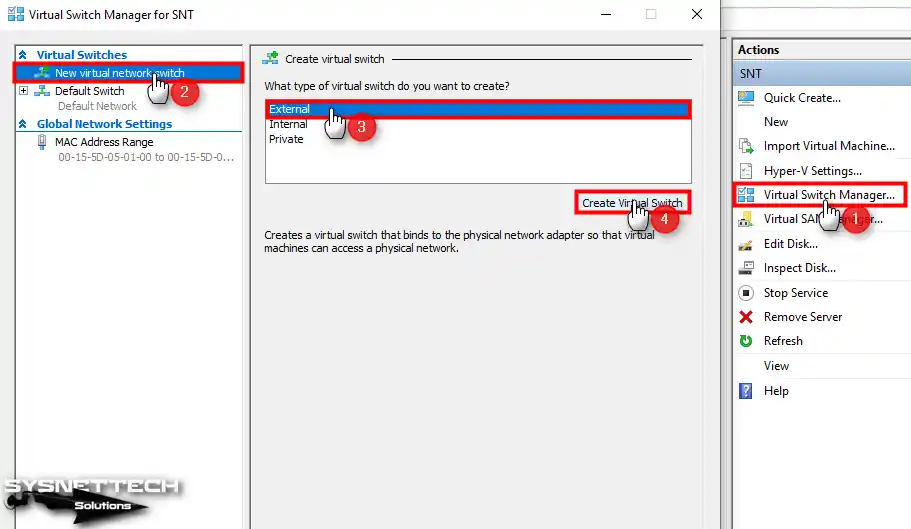
Step 2
After creating the External Switch, type a name according to your desire in the Name field, and then select the network adapter you use to access the Internet on your host in the External Network setting and click OK.

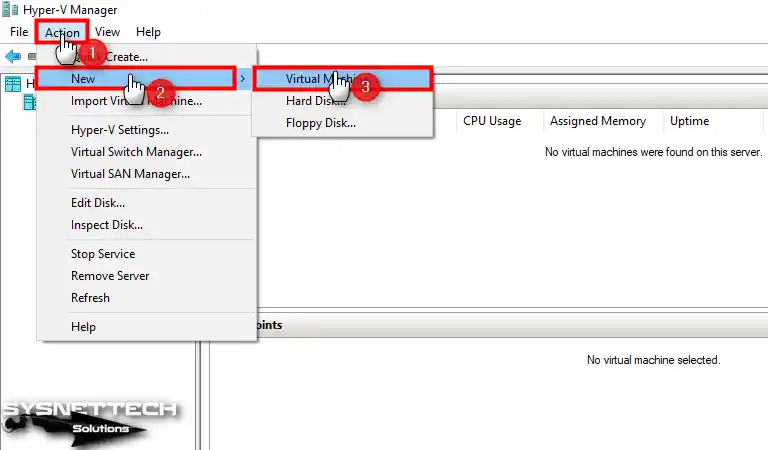
Step 3
After configuring the Virtual Switch, click Action / New / Virtual Machine from the program tool menu to start the virtual machine setup wizard.
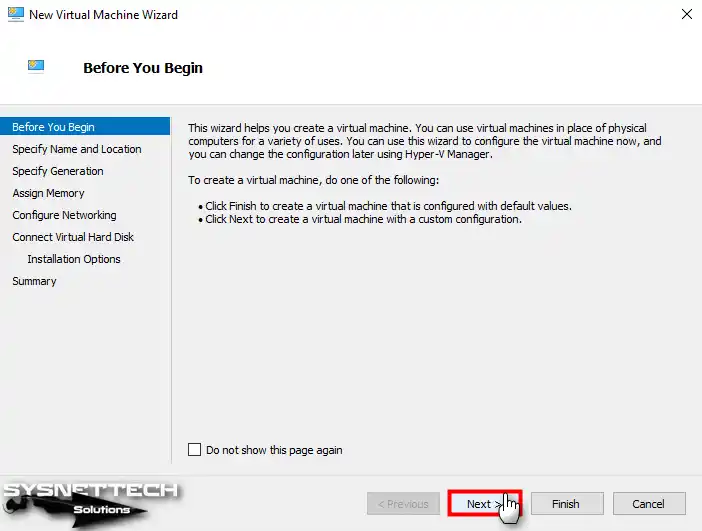
Step 4
You can quickly click Finish to create a virtual computer with the settings specified by the program in the VM wizard. Alternatively, you can continue by clicking the Next button to create a manual guest machine.
If you do not want this window to appear during the next VM creation, do not show this page again, and click Next.
Step 5
After typing the name of the operating system you will install on the guest machine, it is recommended that the installation location of the VM be configured on an external disk to fill the capacity of your host disk appropriately.
Step 6
When installing one of the old Windows operating systems, you need to choose Generation. You can select Generation 2 when you try to install a UEFI-supported OS. Still, if you install Windows XP, you should choose Generation 1, which supports BIOS firmware.
Step 7
Suppose you handle multiple VMs simultaneously using Hyper-V on your Windows system. In that case, you can create more efficient RAM resource management thanks to the Dynamic Memory feature. However, you are only going to use a single virtual computer. In that case, you can disable this feature and assign a specific RAM size to the VM for more performance gains.

Step 8
For the virtual machine’s network settings, select the External Switch you created using the Virtual Switch Manager tool.
Step 9
You must create a new virtual disk while preparing a new guest system. Leverage the “Use an existing virtual hard disk” option to incorporate a pre-installed virtual disk from a VM seamlessly. This straightforward approach allows you to effortlessly integrate the desired virtual disk into your virtual machine setup.
In addition, you can change the virtual disk size automatically, as determined by the program, from the Size section as you wish.
Step 10
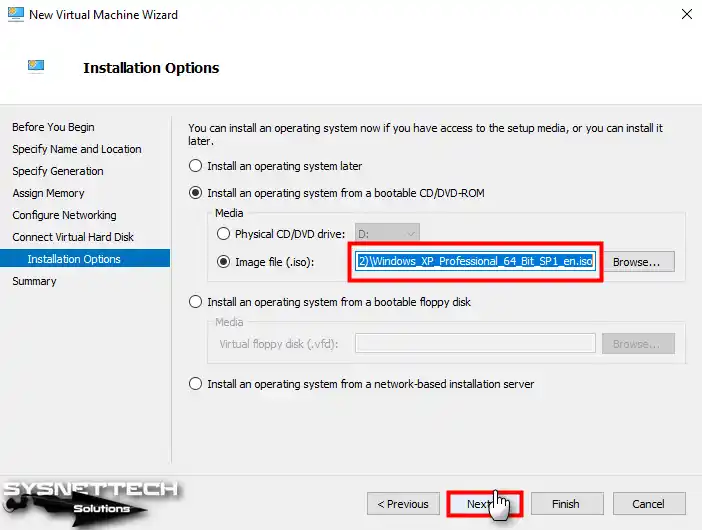
To seamlessly incorporate the Windows XP ISO file into your virtual machine, confidently opt for the “Bootable CD/DVD-ROM” option. Subsequently, select the “Image File (.iso)” format and conveniently specify the ISO file’s location by utilizing the Browse button.

Step 11
Opt for the Windows XP Professional 64 Bit SP1 ISO file you have securely downloaded to your computer by following. Assertively click on the Open button to proceed with the selection process.

Step 12
After checking the location of the Windows image file, proceed to the next step with Next.
Step 13
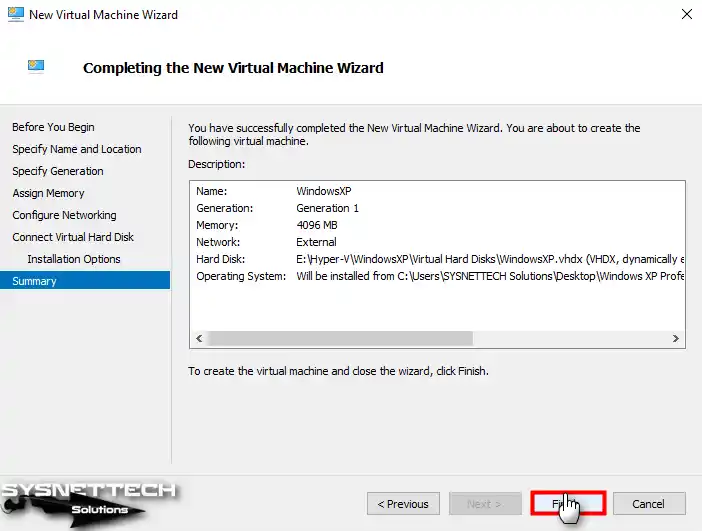
You can check the settings you have made in the Virtual PC in the Summary window. Should there be a specific setting within the virtual machine that you wish to modify, you can conveniently navigate back to the corresponding settings by confidently utilizing the Previous button. This allows you to access and adjust the desired configurations as needed effortlessly.
Step 14
After preparing the Windows XP virtual machine, open its settings and increase the number of virtual processors according to the power of your host computer’s processor hardware.

Step 15
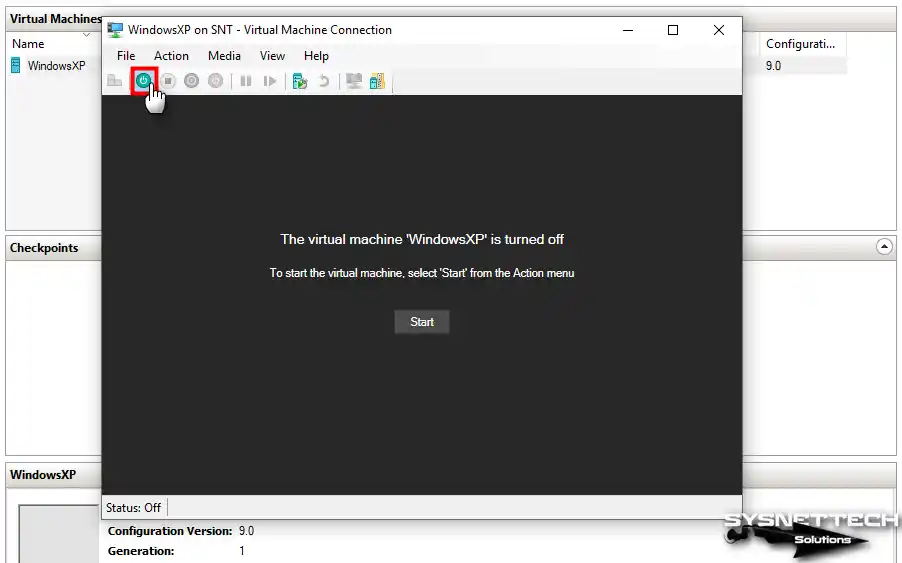
Finally, click the correct button / connect option on the virtual machine created in the Virtual Machines section, click the Start button in the window that opens as in the image below, and proceed to the Windows installation.
How to Install Windows XP
Once you have completed the necessary preparations and initiated the virtual PC for Windows XP installation via Hyper-V, you can confidently proceed with the subsequent steps, mirroring the installation process as you would on a physical computer.
Step 1
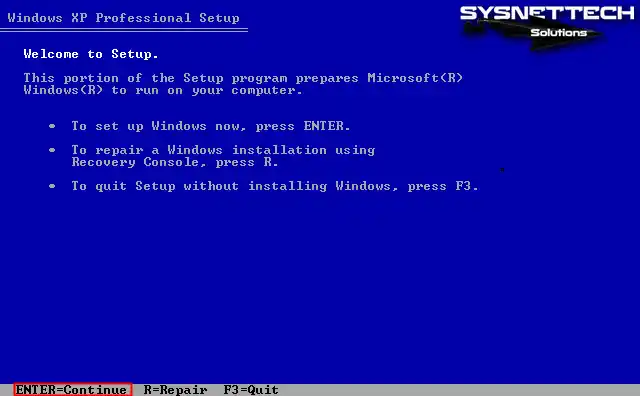
Press Enter on the Windows XP Professional Setup screen to start the installation immediately. Use Recovery Console by pressing R to repair your system.
Step 2
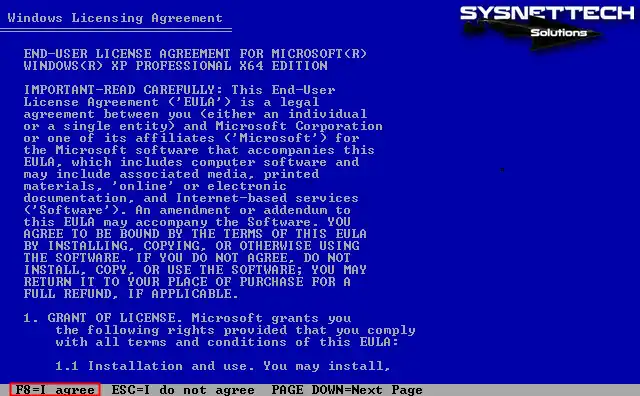
You can scroll down the page by pressing PAGE DOWN to read the full text of the Windows XP license agreement. After reading the license terms, press F8 to accept and continue.
Step 3
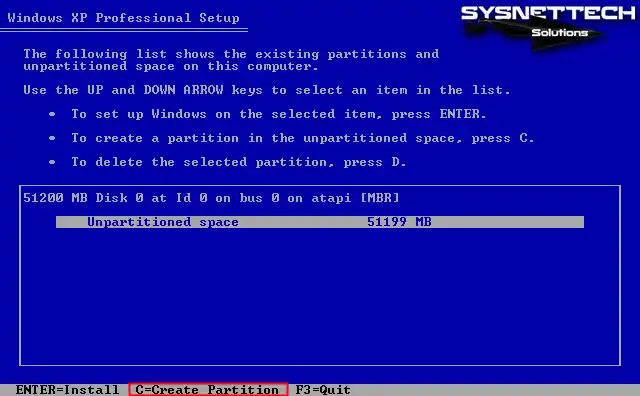
You can see the unallocated space in the disk configuration window. Press C to create a new partition on this disk space. Or, if you want the disk to be configured automatically by the installation wizard, press Enter directly and start the installation.
Step 4
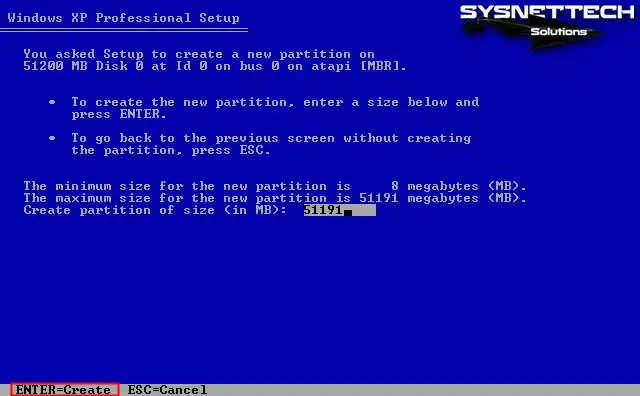
Press Enter to accept the automatically edited disk size and use all disk space.
Step 5
After creating the C drive on the virtual HDD, press Enter to start the Windows installation.

Step 6
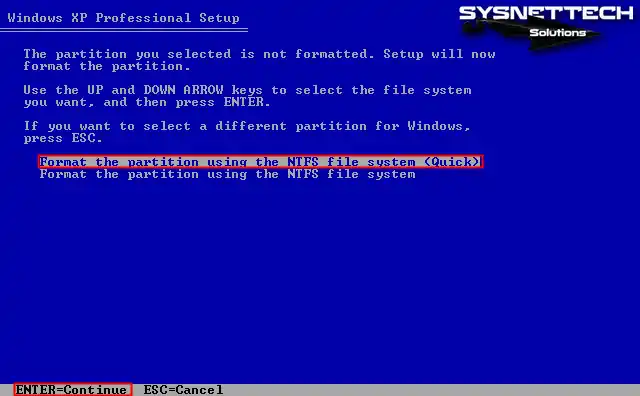
Before installation, format the virtual disk using the NTFS file system.
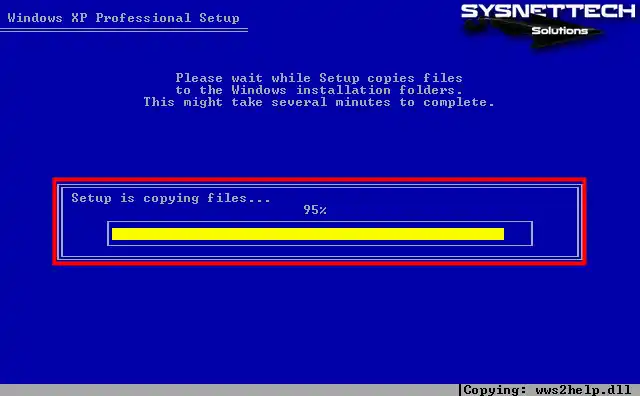
Step 7
After formatting the virtual disk, wait while the setup wizard copies the system files.
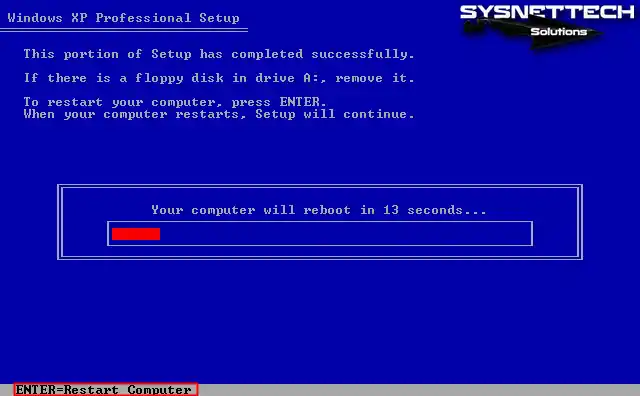
Step 8
After the first stage of Windows XP installation is completed, press Enter to reboot the guest machine.
Step 9
Wait while Microsoft Windows XP x64 Edition boots up.

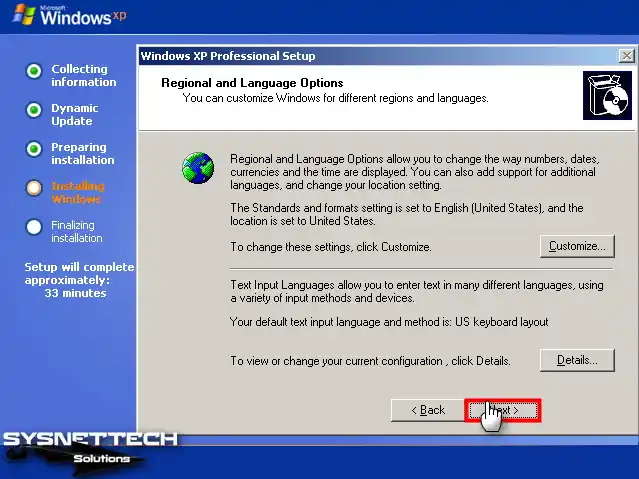
Step 10
Select your guest operating system’s display language and region setting in this window and continue.
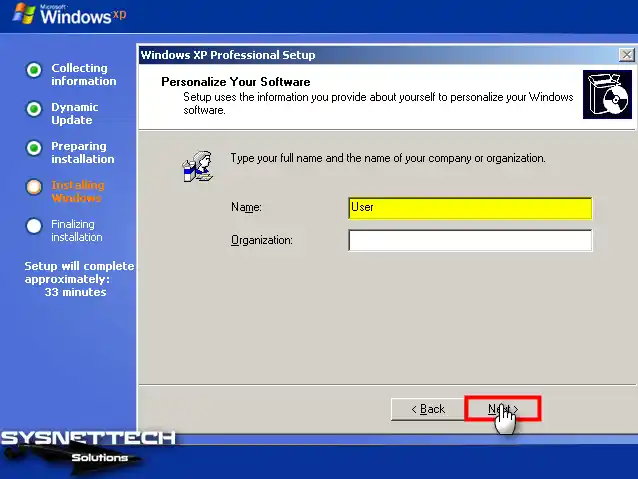
Step 11
Type a name for the user account of your virtual system. If you are using the VM in an organization, type the company name in the relevant section and click Next.
Step 12
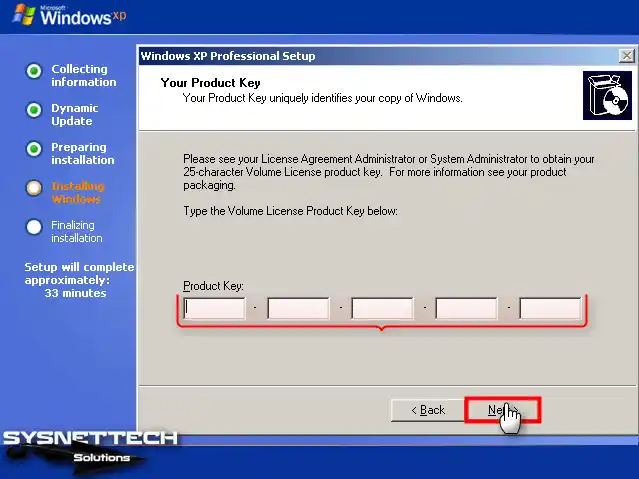
Type your 25-character Windows XP Pro product key and click Next.
Step 13
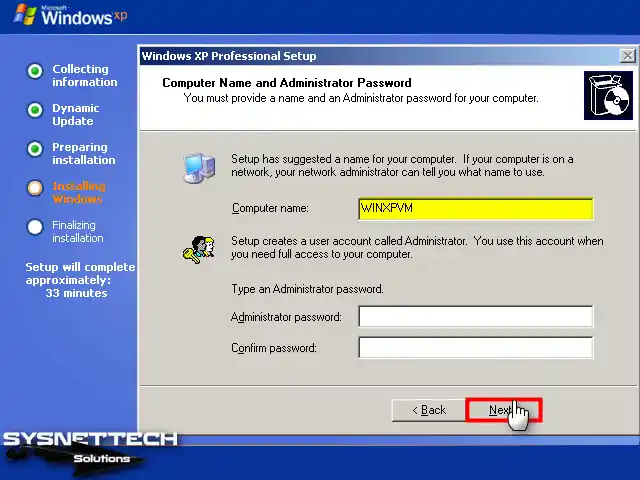
When prompted, input a different computer name that differentiates it from other virtual or physical computers in your network environment. Furthermore, if you desire to establish a password for the administrator account, securely enter your preferred new password and proceed by clicking on the Next button.
Step 14
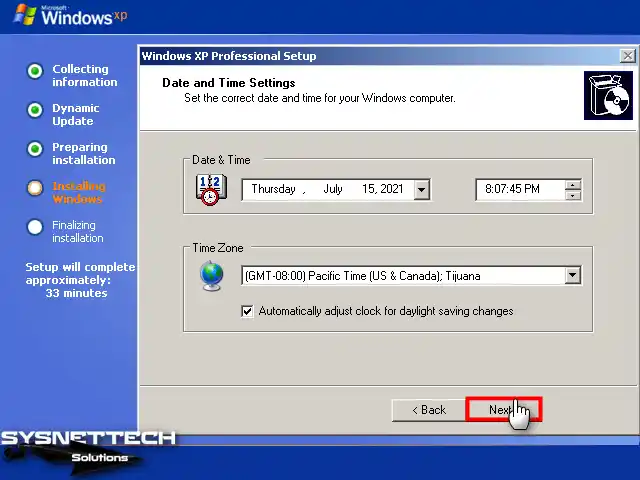
Configure your guest operating system’s date and time settings according to where you live and continue.
Step 15
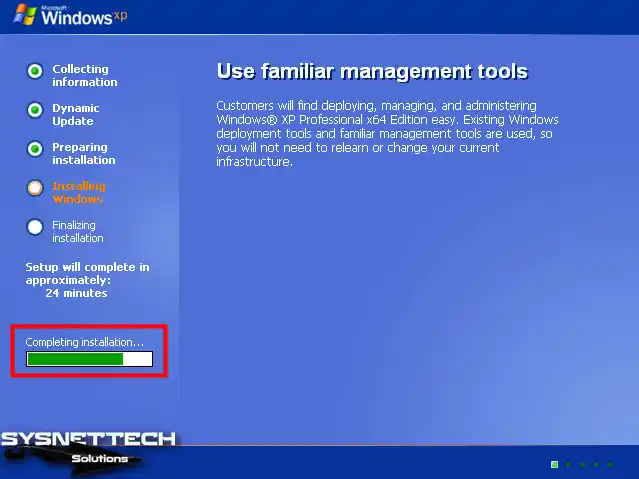
The installation will continue after editing system settings such as product key, region, and language settings.
Step 16
After the setup wizard has copied the Windows XP system files, wait while the computer settings are applied.
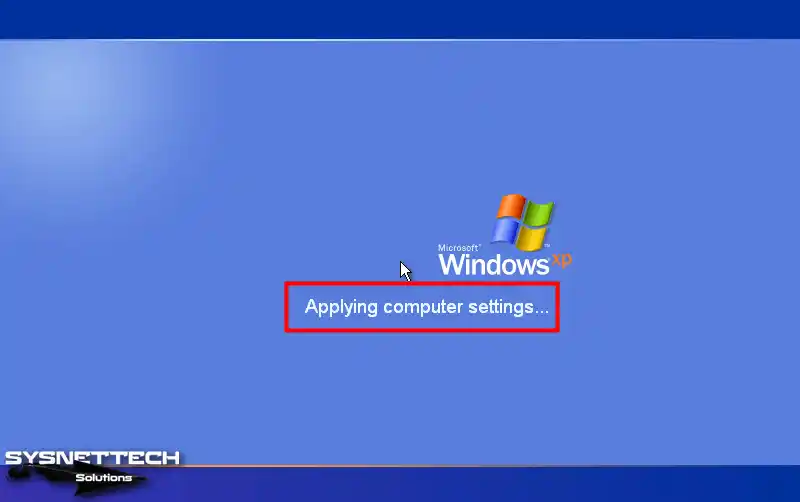
Step 17
After applying the computer settings, the Windows XP desktop will be ready.

How to Upgrade the Windows XP System SP1 to SP2
Once successfully establish Windows XP SP1 on the virtual device, you must upgrade your virtual system to Service Pack 2 (SP2) to install Integration Services. Nevertheless, if you have utilized an SP2 ISO, you can skip this stage, as it is optional.
Step 1
Click Media / DVD Drive / Insert Disk in the guest machine’s tool menu to add the SP2 Upgrade ISO file.
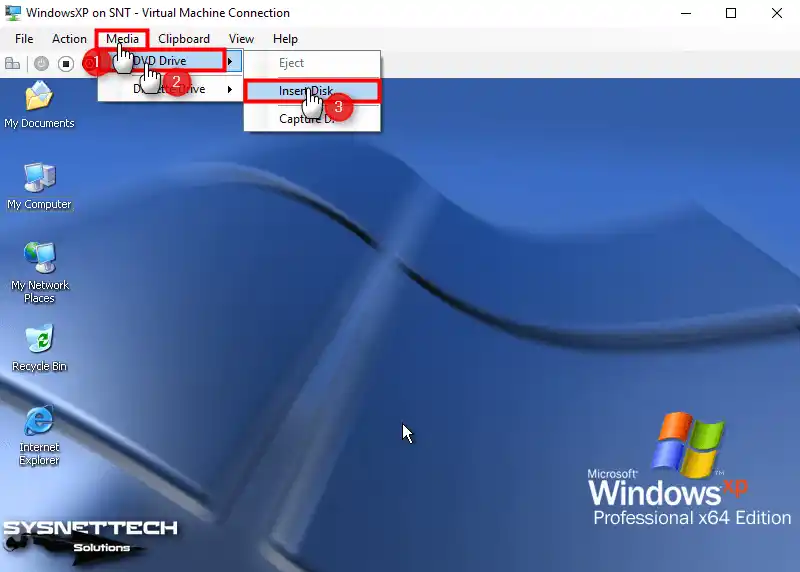
Step 2
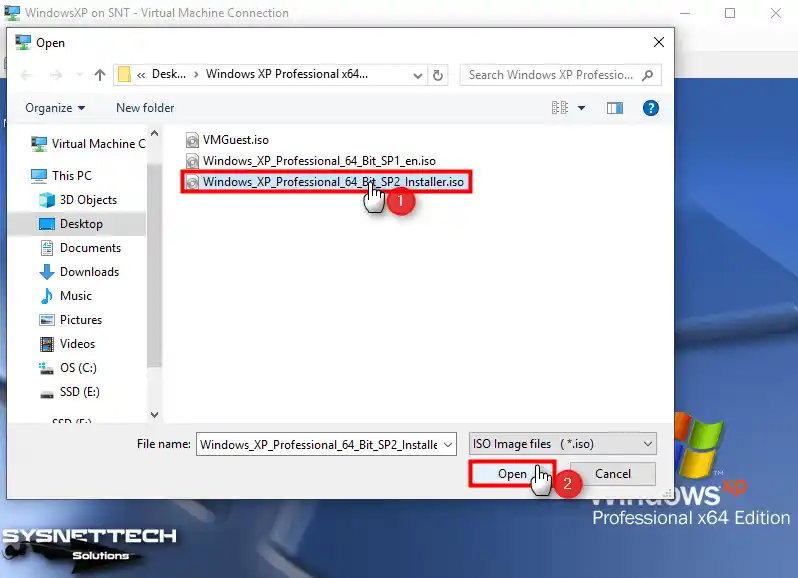
Select the Windows XP 64 Bit SP2 Installer ISO file you downloaded to your PC and click Open.
Step 3
Open My Computer and right-click/open on the CD content, then double-click the SRSP2 command script to run it.
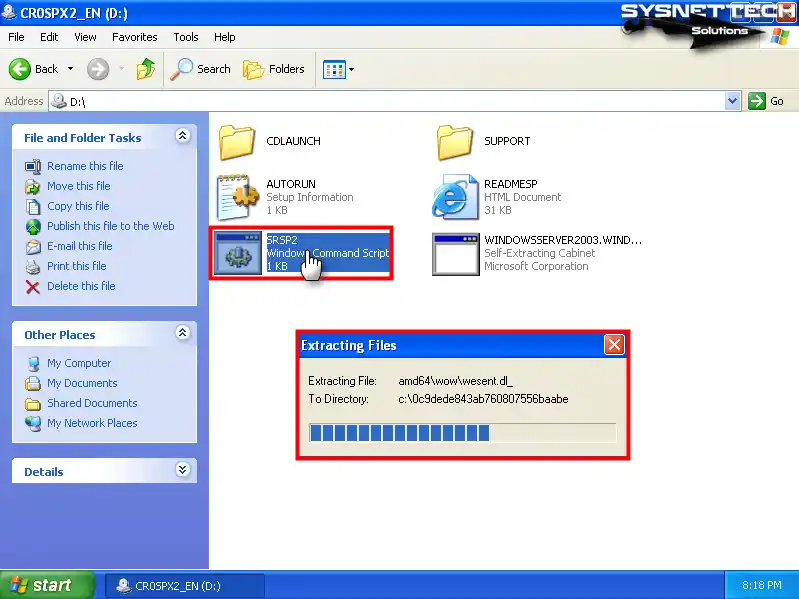
Step 4
After extracting the files, click Next in the Windows x64 Service Pack 2 wizard.
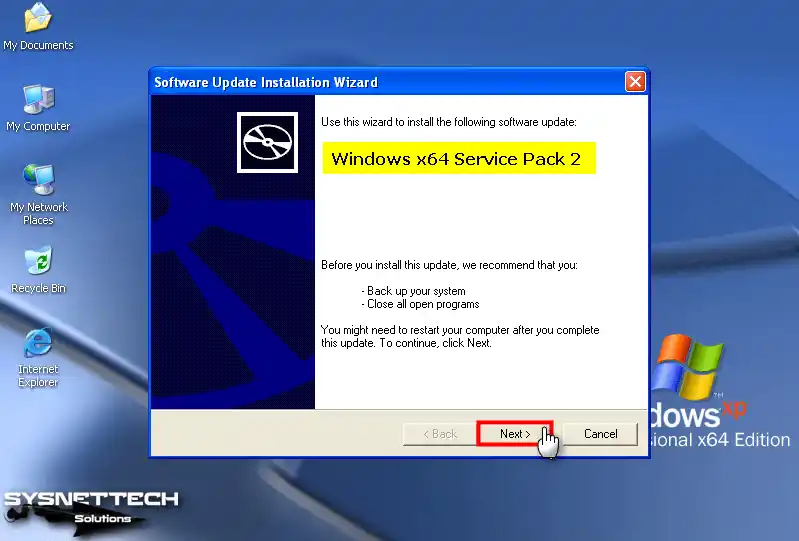
Step 5
Accept the Service Pack 2 (SP2) license agreement and click Next.

Step 6
Wait while Windows XP SP1 updates to SP2.

Step 7
After the system upgrade is complete, restart your guest operating system.

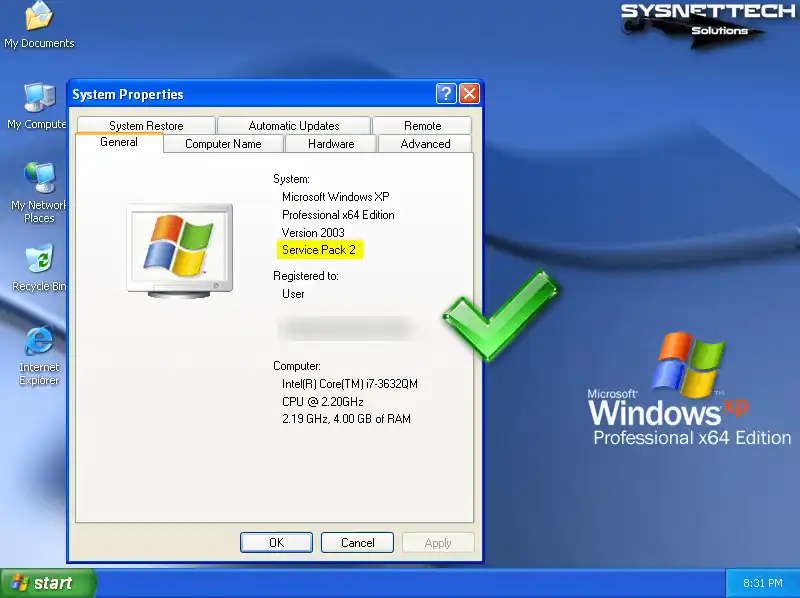
Step 8
After right-clicking on My Computer, click System Properties and check that Service Pack 2 is specified in the System section.
How to Install Hyper-V Integration Services
After you upgrade your Windows XP virtual system to SP2, you must install Integration Services to update or enable the VM’s display and network adapter.
First, download the Windows XP Integration Services (VMGuest.iso) ISO file to your computer, and then follow the installation steps.
Step 1
Right-click My Computer on the guest machine, then click Manage and check that the display adapter is not enabled and that the network adapter is not defined in the Device Manager interface in the Computer Management window.

Step 2
Add the Integration Services (VMGuest.iso) ISO file to the Windows XP virtual machine.

Step 3
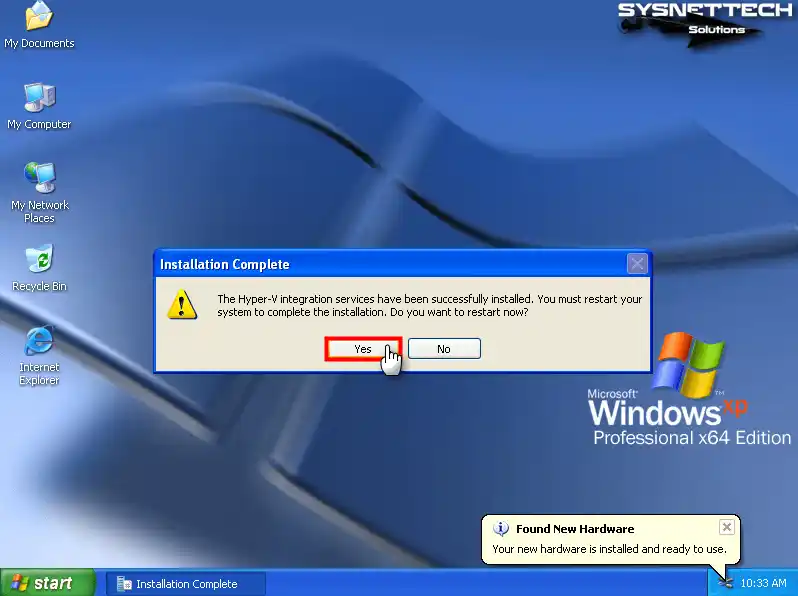
As soon as you add the VMGuest.iso file, Integration Services will be installed automatically on the virtual machine.

Step 4
After the Windows XP Integration Services installation is complete, restart your virtual system.
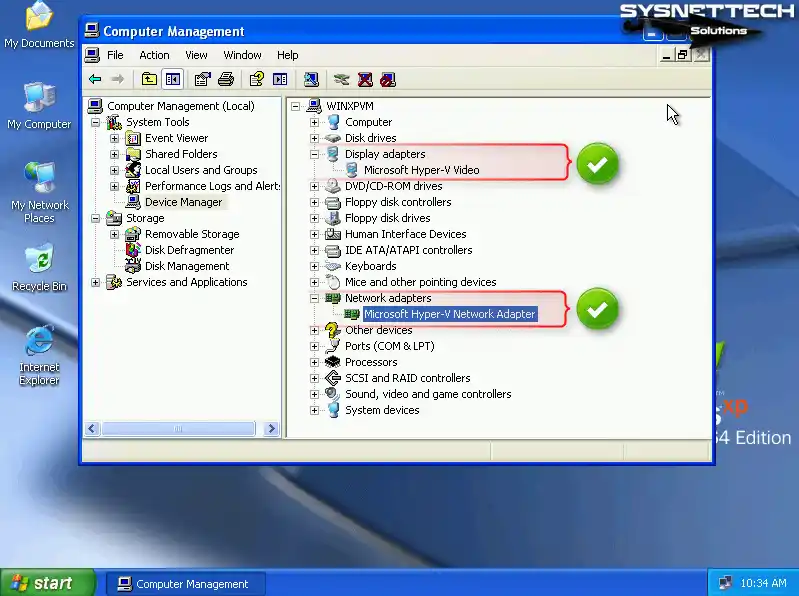
Step 5
Open Device Manager again and check that the display and network adapter is updated. With the Microsoft Hyper-V Network Adapter now enabled, you can seamlessly establish an Internet connection within the virtual appliance. This lets you connect and access online resources, ensuring a smooth and uninterrupted virtual experience.
How to Test Internet Connection
After enabling the Microsoft Hyper-V Network Adapter, you must check that the virtual system can access your local network and the Internet.
Step 1
In Windows XP virtual PC, press Windows Key + R to open Run, execute the CMD command, and ping Google servers by executing the ping 8.8.8.8 command and test network connectivity.
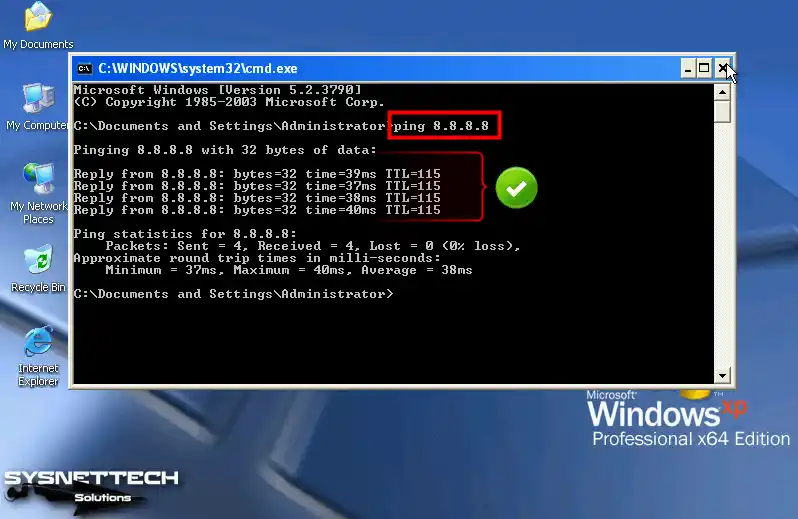
Step 2
If the ping to the Google servers is successful, open Internet Explorer and check the connection by visiting the search engine’s homepage.

How to Use the Virtual Machine in Full Resolution with Remote Desktop Connection
Even if you install Integration Services on the XP guest machine, you may not be able to use the VM in full-screen resolution. You can connect from the host to the VM using Remote Desktop Connection to use both the screen resolution and the audio device.
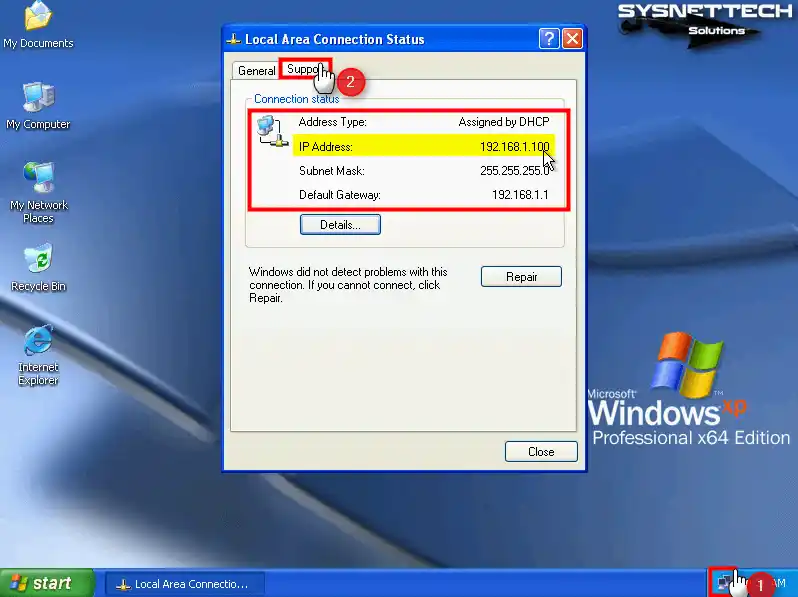
Step 1
To effortlessly establish a remote desktop connection with the VM, it is crucial to acquire the IP address of the guest machine. To accomplish this, confidently double-click the network icon in the lower right corner and inspect the IP address within the Support tab of the Local Area Connection Status window. This seamless process ensures you quickly obtain the necessary information to establish a remote desktop connection.
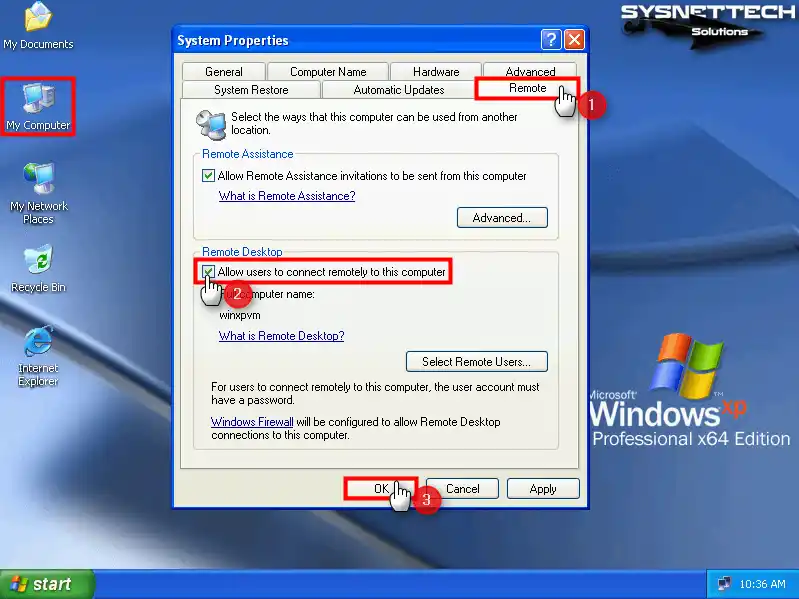
Step 2
Once you know the IP address of the virtual computer, you need to allow remote desktop connections. Proceed by right-clicking “My Computer” and navigating to the System Properties. Within the System Properties window, access the Remote tab. Next, under the Remote Desktop zone, determine the “Allow users to connect remotely” option. Finally, solidify your preference by hitting the OK button.
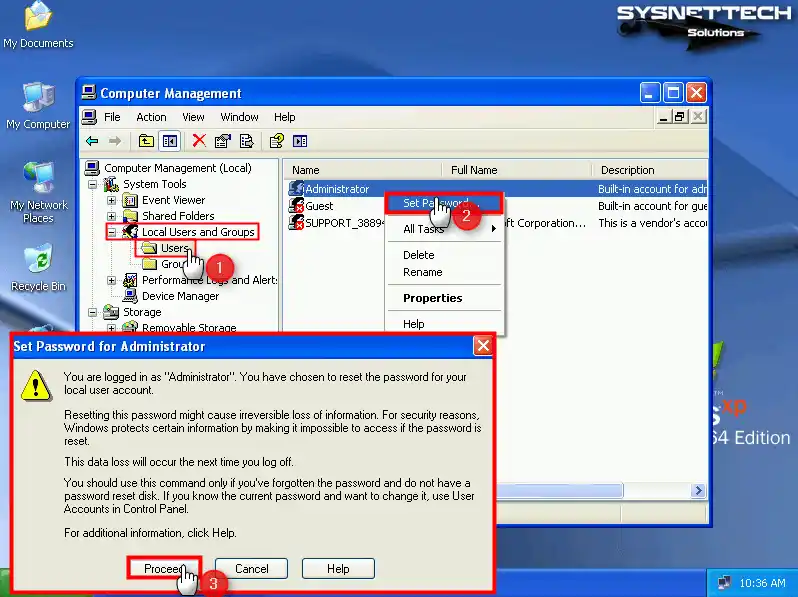
Step 3
After enabling remote desktop connection in Windows XP, you must create a password for the user account, as the password will be requested when connecting from the host to the VM.
Click Users under Local Users and Groups in the Computer Management window, right-click / Set Password on the Administrator account on the right, and click the Proceed button in the open window.
Step 4
Ensure you create a memorable password for your user account, followed by a decisive click on the OK button.

Step 5
Find and run the Remote Desktop Connection tool on your host operating system.

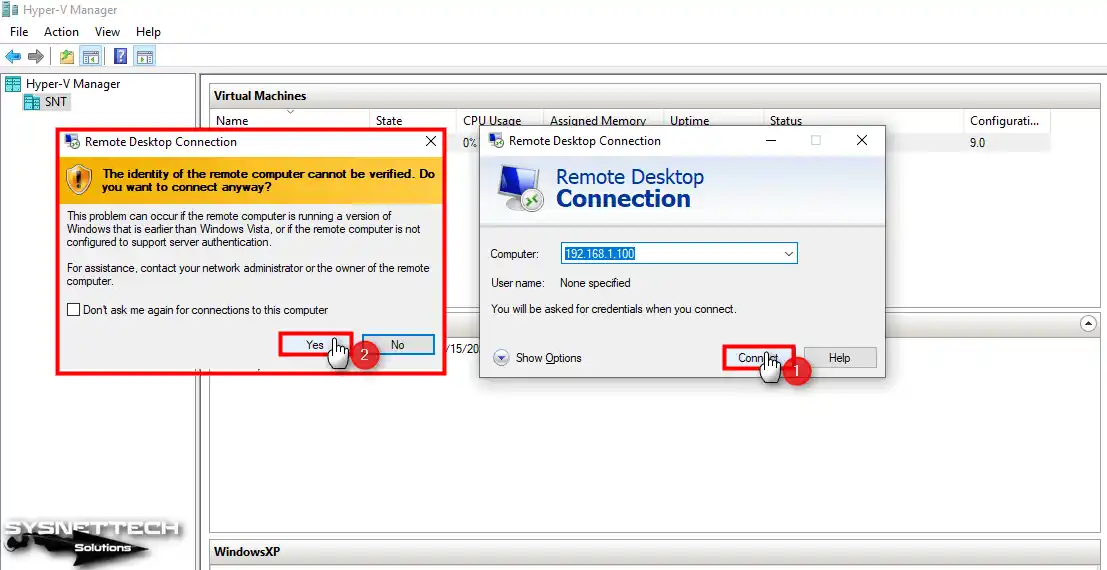
Step 6
Type the IP address of the virtual machine in the Computer section, and after clicking Connect, click Yes to skip the certificate warning.
Step 7
After connecting to the VM, type the user credentials of the virtual system and click OK.

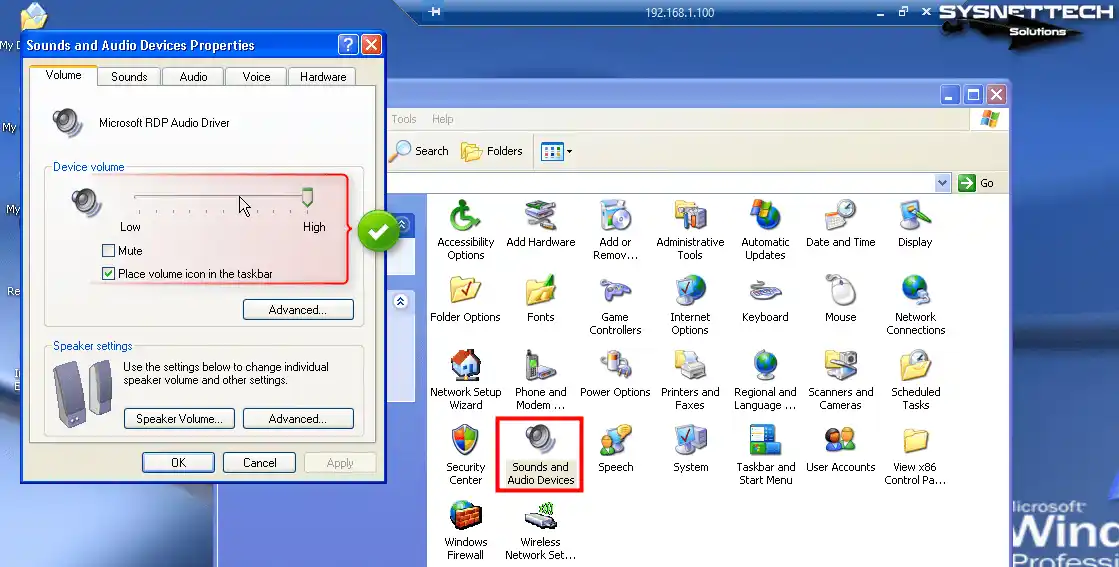
Step 8
You can now use the Windows XP virtual computer in full resolution and hear system sounds.
How to Use USB Flash Memory in Virtual Machine
For expedient file transfer between the host and the virtual machine, leveraging a USB flash drive on the remote machine is the most straightforward approach. This method allows you to efficiently share your files with the VM, enabling swift and seamless data transfer.
Step 1
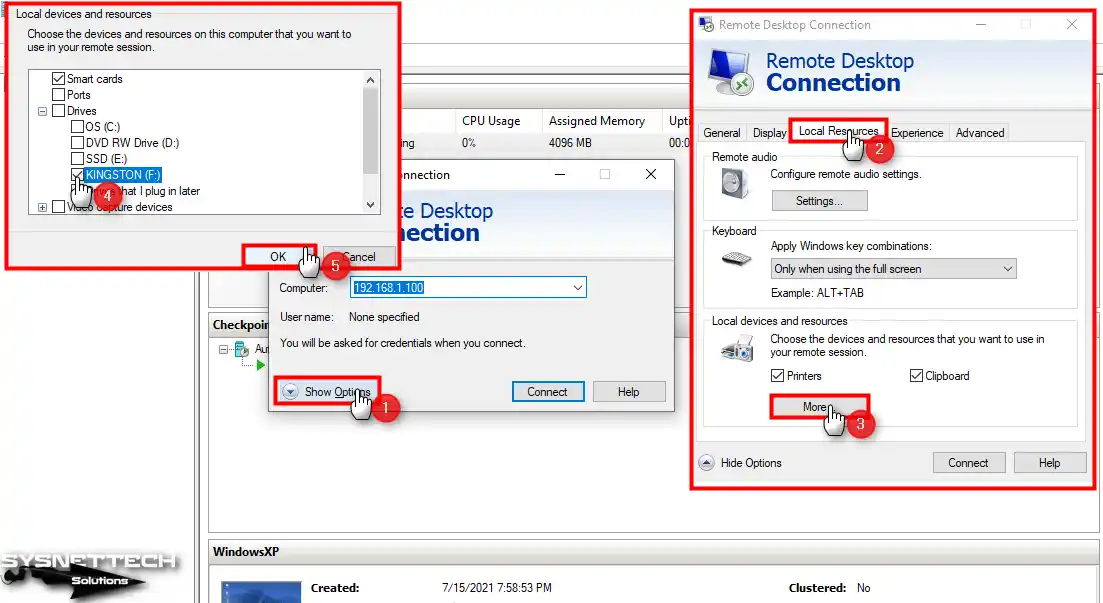
Open the remote desktop tool again. After clicking Show Options, click the Local Resources tab in the open window, then click More.
In the Local Devices and Resources list, under Drives, tick the flash memory you will use in the VM and click OK.
Step 2
When you tick the flash memory and try to connect to the VM, click Connect again in the Do you trust remote connection warning window.

Step 3
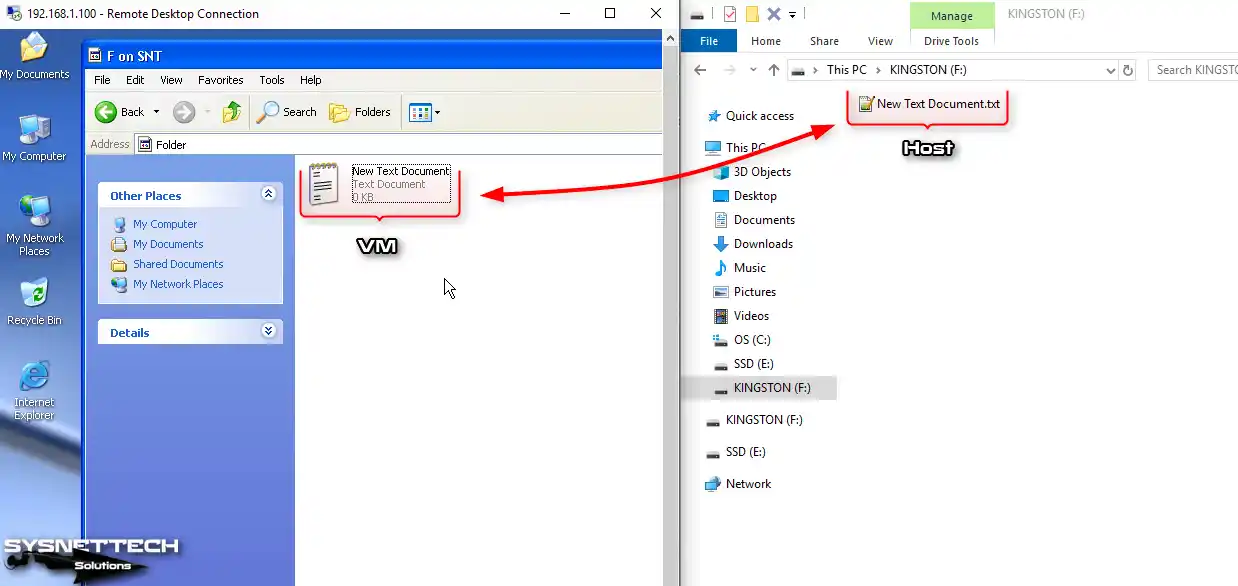
Open My Computer in the VM and check that your USB stick is active under Other.

Step 4
Enabling flash memory on the VM simplifies transferring files between the host and the virtual device. By taking advantage of this functionality, you can seamlessly and effortlessly transfer
Video
This post addresses an issue I came across recently where I virtualized a Windows XP machine and placed it on a hypervisor running Hyper-V Server 2016.
The problem is that Hyper-V 2016 does not provide “Integration Services” for Windows XP.
In earlier versions of Hyper-V, you can find the Integration Services .ISO at: C:\Windows\System32\vmguest.iso
The Steps
- Install Windows Server 2012 R2 on any physical hardware you can find. I used an old laptop that supports virtualization.
- You can download the 180-day evaluation from Microsoft here, which will work just great.
- You can also use Hyper-V Server 2012 R2 from Microsoft here.
- Install the Hyper-V role if you are not using Hyper-V Server 2012 R2.
- Fully update the OS via Windows Update.
- Browse to C:\Windows\System32 and copy vmguest.iso.
- Attach vmguest.iso to your Windows XP virtual machine‘s disk drive in Hyper-V Manager.
- Inside of your Windows XP VM, on your disk drive, run D:\support\x86\setup.exe
- You may have a different drive letter than D:, and you may also need to choose amd64 if you are running a 64-bit OS.
- After install is complete, reboot your Windows XP virtual machine.