
Applies ToWindows 10 Windows 8.1
Zipped (compressed) files take up less storage space and can be transferred to other computers more quickly than uncompressed files. In Windows, you work with zipped files and folders in the same way that you work with uncompressed files and folders. Combine several files into a single zipped folder to more easily share a group of files.
To zip (compress)
-
Locate the file or folder that you want to zip.
-
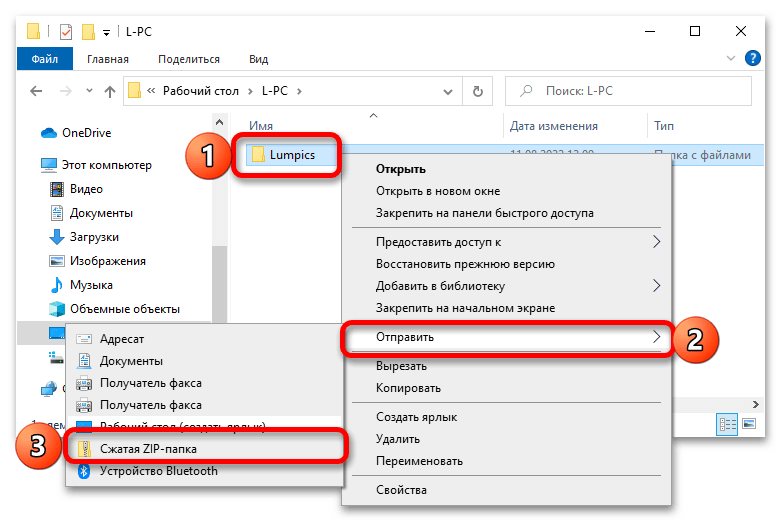
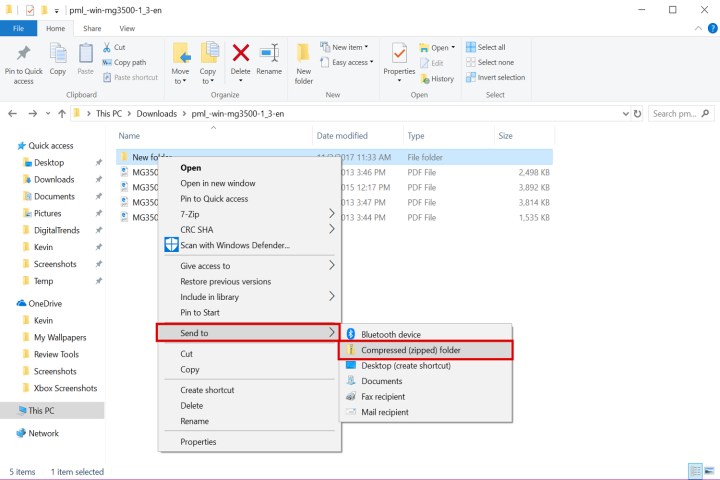
Press and hold (or right-click) the file or folder, select (or point to) Send to, and then select Compressed (zipped) folder.
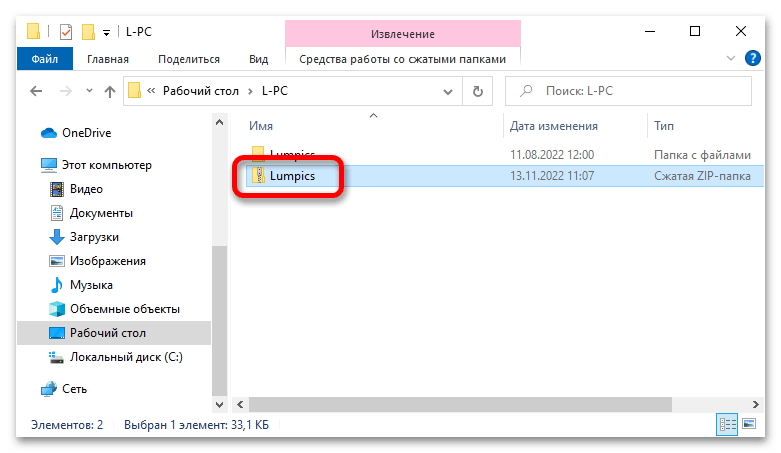
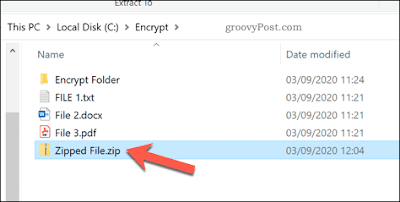
A new zipped folder with the same name is created in the same location. To rename it, press and hold (or right-click) the folder, select Rename, and then type the new name.
To unzip (extract)
-
Locate the zipped folder that you want to unzip (extract) files or folders from.
-
Do one of the following:
-
To unzip a single file or folder, open the zipped folder, then drag the file or folder from the zipped folder to a new location.
-
To unzip all the contents of the zipped folder, press and hold (or right-click) the folder, select Extract All…, and then follow the instructions.
-
Notes:
-
To add files or folders to a zipped folder you created earlier, drag them to the zipped folder.
-
If you add encrypted files to a zipped folder, they’ll be unencrypted when they’re unzipped, which might result in unintentional disclosure of personal or sensitive information. For that reason, we recommend that you avoid zipping encrypted files.
-
Some types of files, like JPEG images, are already highly compressed. If you zip several JPEG pictures into a folder, the total size of the folder will be about the same as the original collection of pictures.
Need more help?
Want more options?
Explore subscription benefits, browse training courses, learn how to secure your device, and more.
Все способы:
- Способ 1: Системные средства
- Способ 2: Сторонние программы
- Вариант 1: WinZip
- Вариант 2: 7-Zip
- Вариант 3: WinRAR
- Вопросы и ответы: 0
Способ 1: Системные средства
В Windows 10 есть стандартное средство создания архивов в формате ZIP, которое встроено в системный «Проводник».
Читайте также: Как открыть «Проводник» в Виндовс 10
- Через закрепленный ярлык на панели задач или с помощью сочетания клавиш «Win+E» откройте «Проводник» и перейдите к расположению папки или файлов, которые требуется добавить в архив. Выделите его/их нажатием левой кнопки мышки (ЛКМ), затем нажмите правую (ПКМ) и последовательно перейдите по следующим пунктам контекстного меню: «Отправить» — «Сжатая ZIP-папка».
- Архив указанного типа будет создан и сохранен в той же директории, где находился изначальный объект(ы). Его имя будет соответствовать изначальному названию папки или первому из файлов, но вполне легко меняется при необходимости.
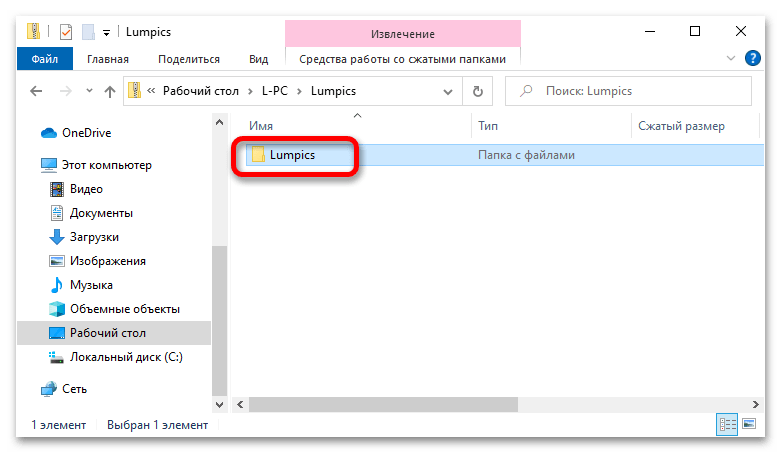
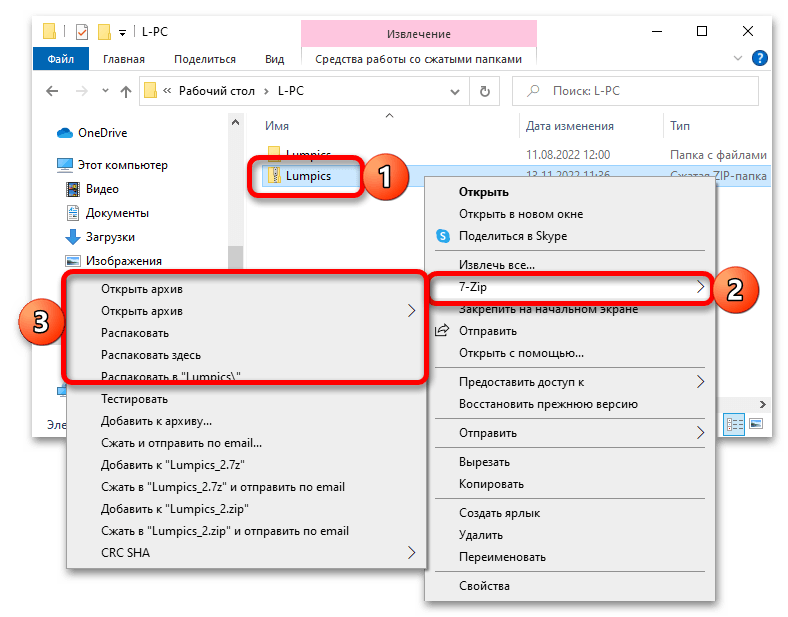
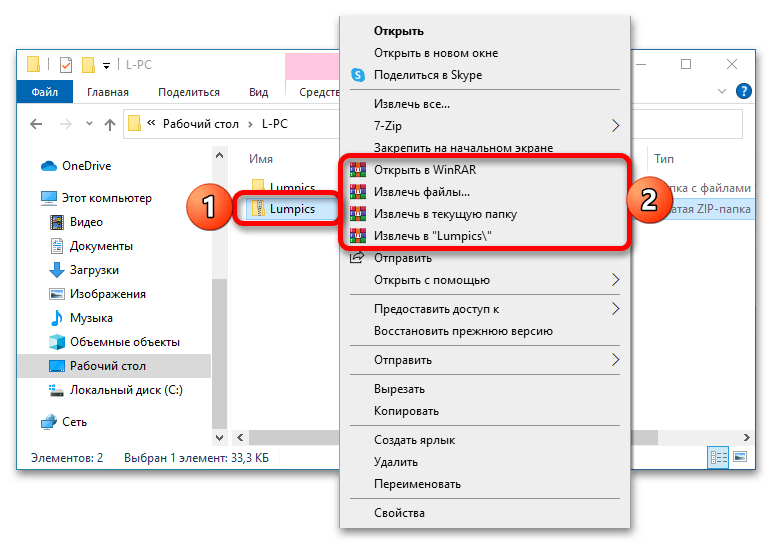
- Если потребуется получить доступ к содержимому ZIP, просто откройте его двойным кликом ЛКМ

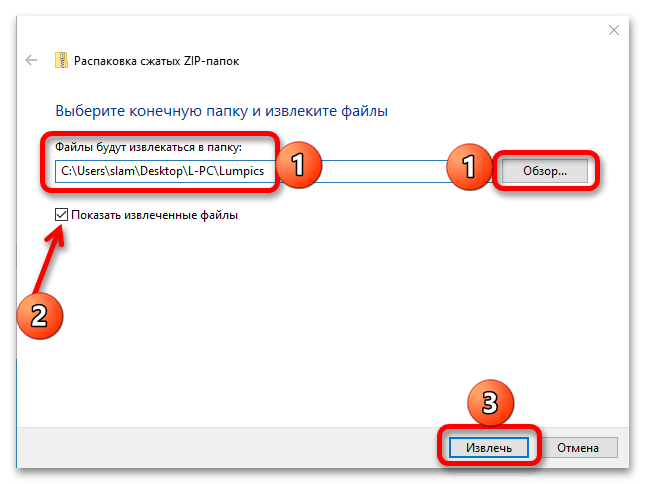
или вызовите на нем контекстное меню и выберите пункт «Извлечь все».
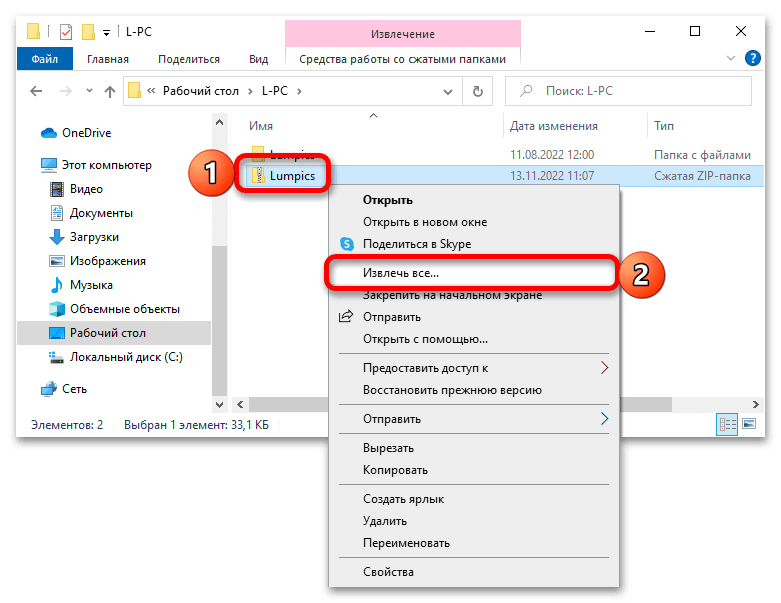
Во втором случае можно будет указать директорию для распаковки и определить, нужно ли показывать полученные в результате процедуры объекты.
Способ 2: Сторонние программы
Если возможности системного средства работы с ZIP-файлами покажутся вам недостаточными, рекомендуем воспользоваться одним из доступных приложений-архиваторов от сторонних разработчиков. Далее рассмотрим несколько представителей данного сегмента ПО.
Вариант 1: WinZip
Довольно популярное средство для сжатия и распаковки архивированных данных в различных форматах, которое хоть и является платным, но все же имеет 21-дневную пробную версию.
Скачать WinZip
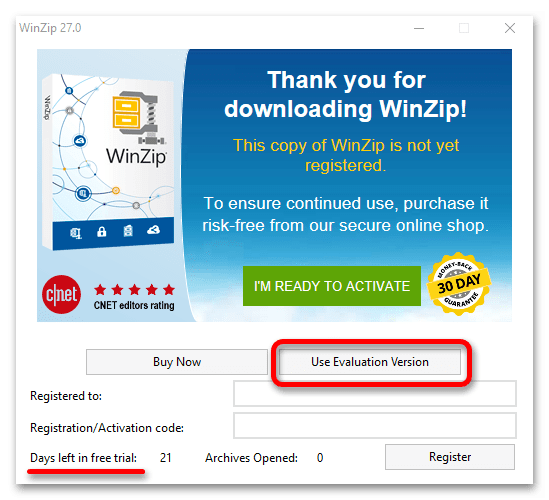
- Скачайте программу, установите ее на компьютер и запустите. В приветственном окне нажмите «Use Evaluation Version».
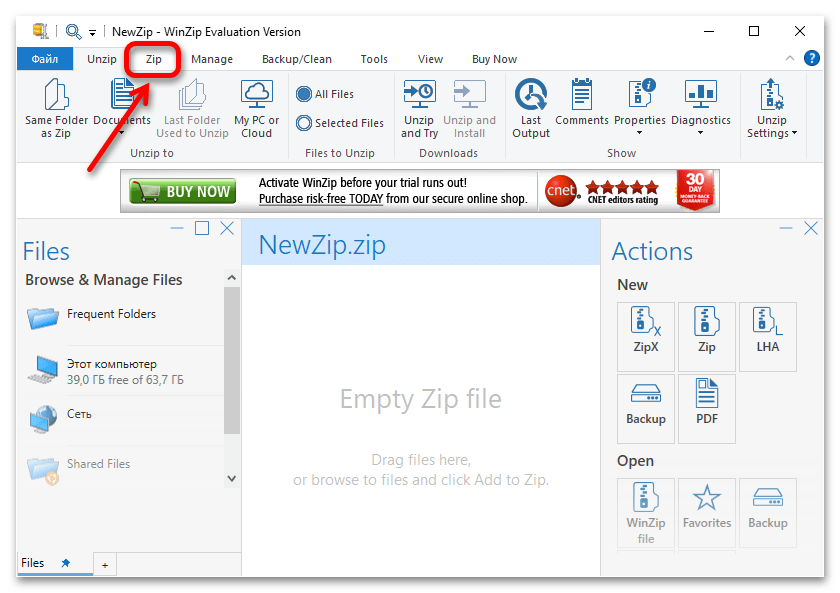
- Перейдите во вкладку «Zip», расположенную на верхней панели.
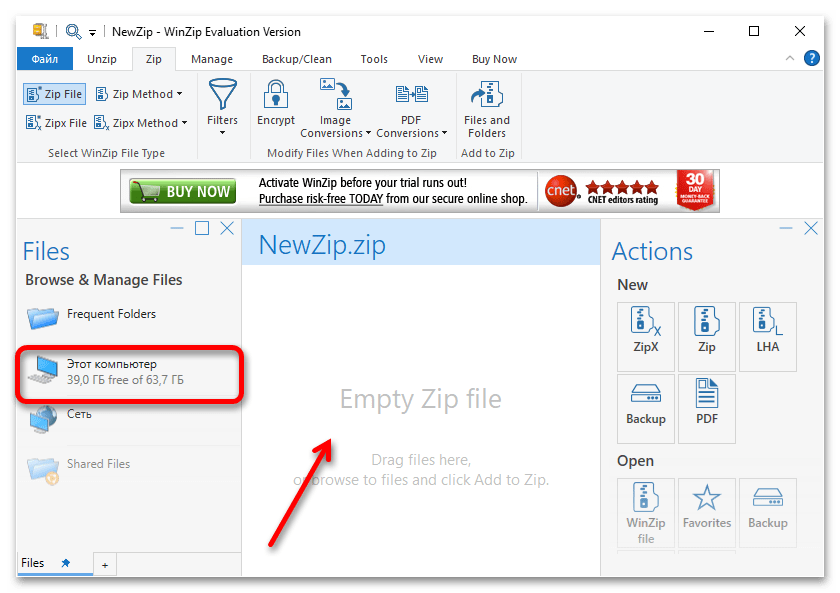
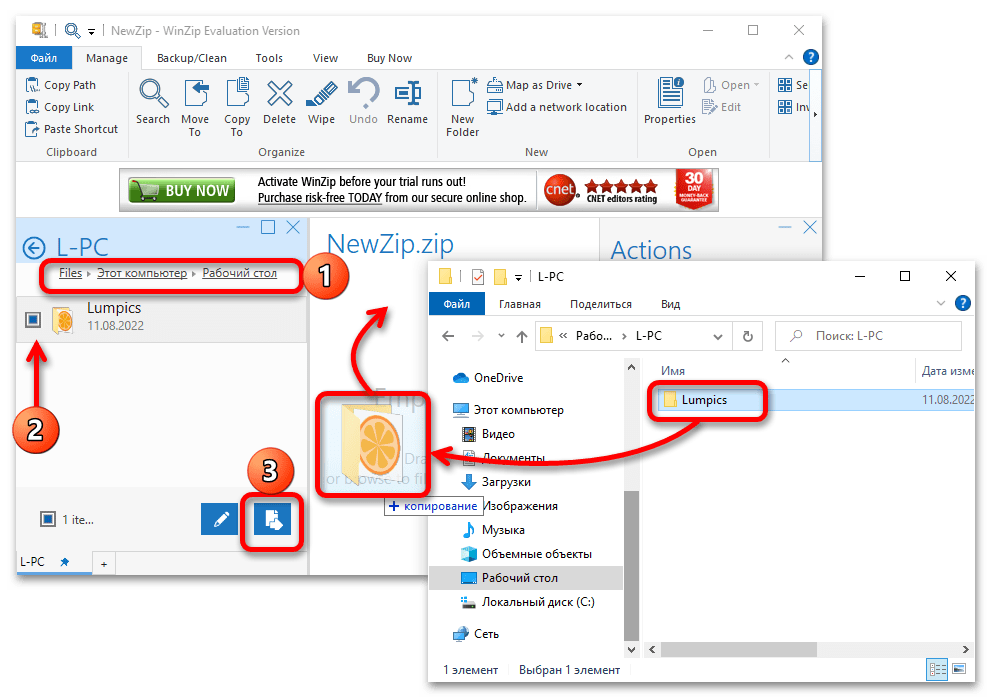
- Далее либо переместите нужную папку или файл(ы) в основную рабочую область WinZip,

либо перейдите к требуемому расположению с помощью находящегося слева файлового менеджера, выделите объект(ы), который планируете запаковать, и нажмите на кнопку перемещения (отмечена цифрой 3 на скриншоте).
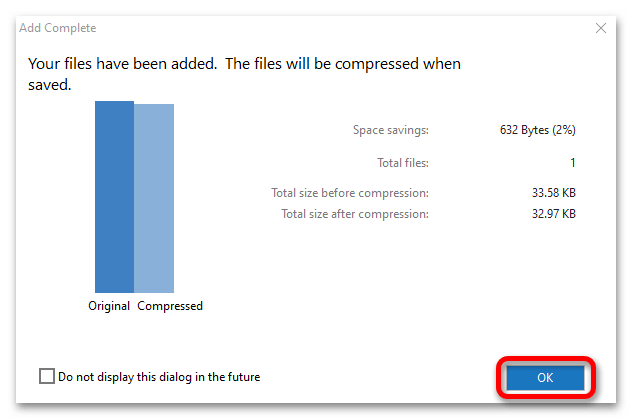
- Ознакомьтесь со сведениями о будущем архиве (количество файлов, процент сжатия, изначальный и итоговый размер и т. д.), после чего воспользуйтесь кнопкой «ОК» для закрытия окна.
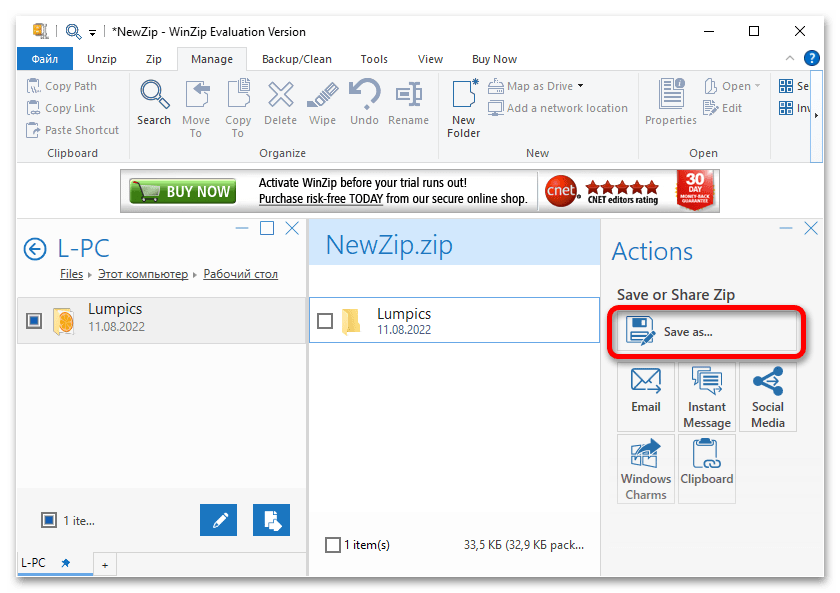
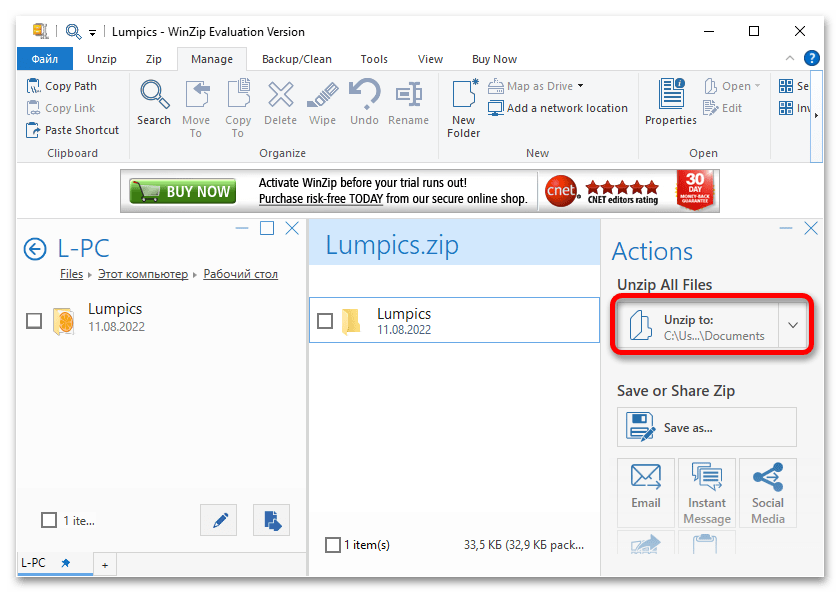
- Нажмите по элементу «Save as…», расположенному в блоке «Actions»,
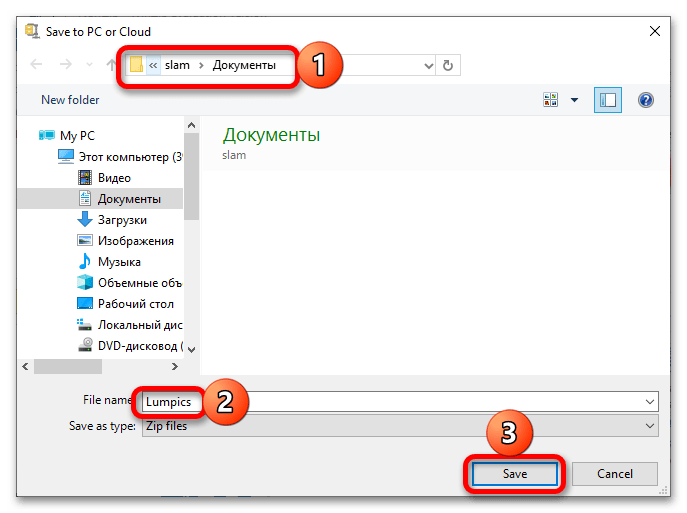
укажите место для сохранения ZIP-файла на диске ПК, по необходимости измените заданное ему по умолчанию имя и подтвердите выполнение данной процедуры (3).

Примечание: Не покидая интерфейс программы, можно распаковать только что созданный архив, например, чтобы перепроверить его содержимое.
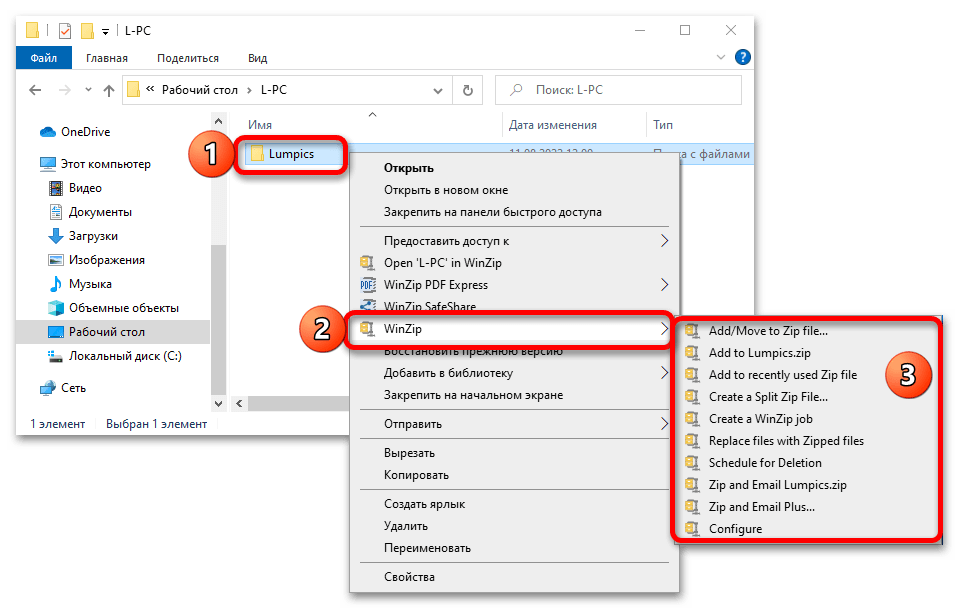
- WinZip доступен к использованию и без непосредственного запуска – для этого достаточно вызвать контекстное меню на объекте или объектах, которые вы планируете заархивировать, а затем воспользоваться соответствующими пунктами.
Очевидно, что извлечь содержимое ZIP-архива можно не только с помощью рассматриваемой программы, но и через стандартное для Windows средство, рассмотренное нами в первой части настоящей статьи. Это же справедливо и для защищенных паролем файлов (конечно, если кодовая комбинация изначально известна), но о такой возможности еще будет рассказано далее.
Вариант 2: 7-Zip
Еще одно востребованное средство сжатия и распаковки данных, которое в отличие от WinZip является бесплатным.
Скачать 7-Zip
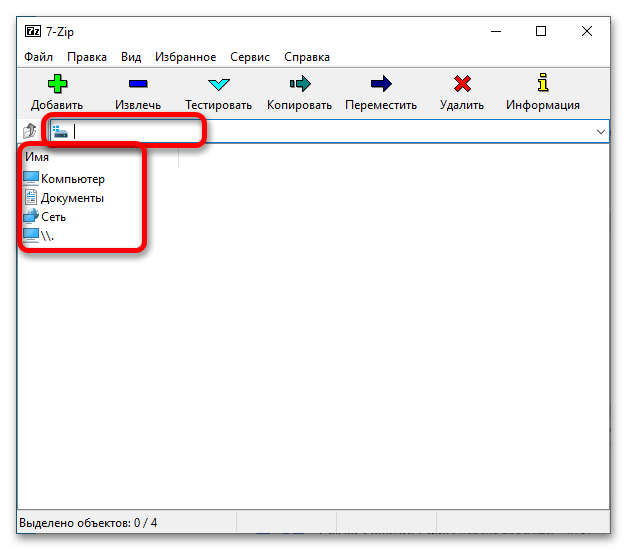
- Скачайте приложение-архиватор с официального сайта, установите его и запустите. Далее либо самостоятельно перейдите к расположению нужных файлов на диске с помощью представленного в главном окне аналога файлового менеджера, либо скопируйте путь из «Проводника» и вставьте его в адресную строку.
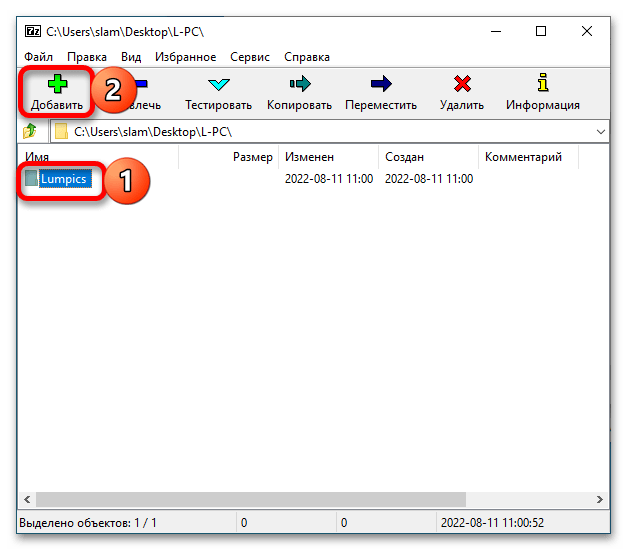
- Выделите объект(ы), который будет запаковываться в ZIP, и нажмите на кнопку «Добавить».
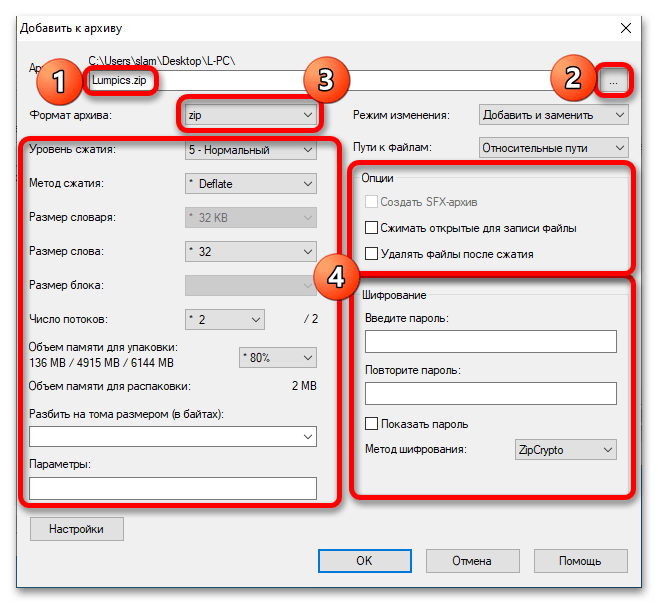
- Задайте желаемое имя будущему сжатому файлу (1), по необходимости укажите место для его сохранения на диске компьютера (2), обязательно выберите в выпадающем списке формат ZIP (3), а также по желанию определите дополнительные параметры (уровень и метод сжатия, шифрование (пароль) и другие).

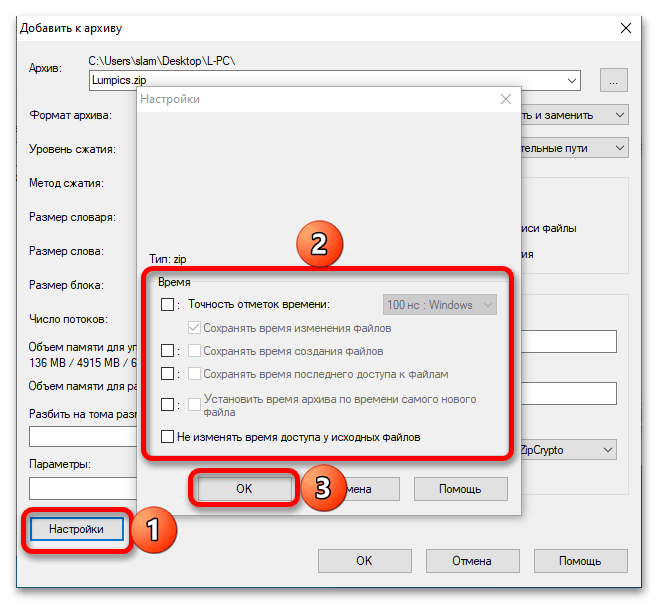
В случае необходимости также можете задать дополнительные «Настройки».
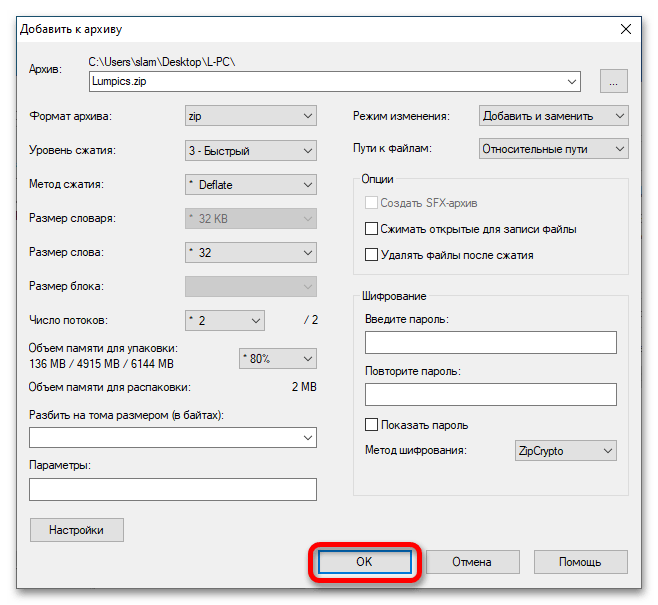
- После того как вы нажмете «ОК» в окне «Добавить к архиву», процедуру создания ZIP с предварительно заданными параметрам можно считать завершенной.

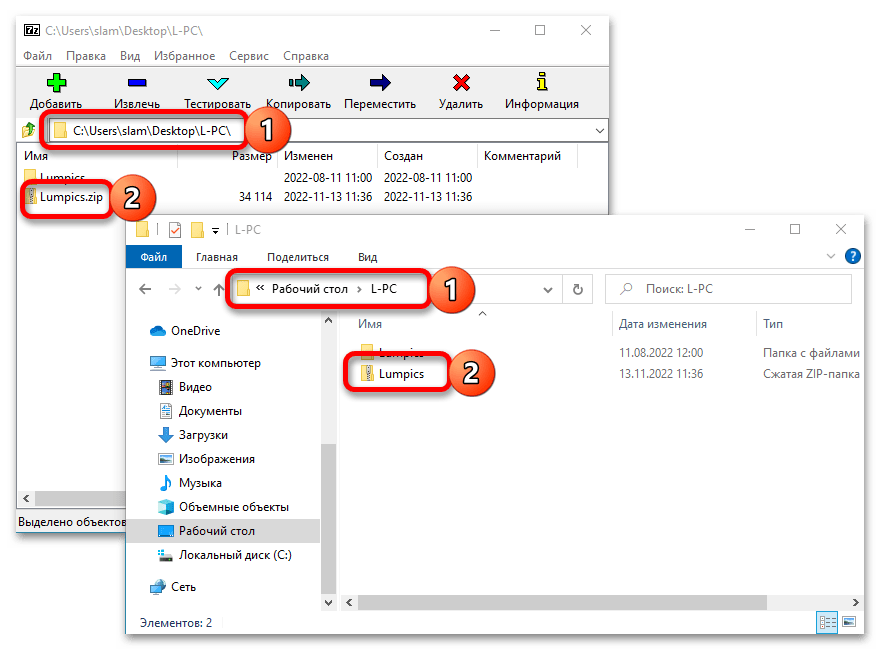
Файл данного типа появится в указанном на предыдущем шаге расположении.
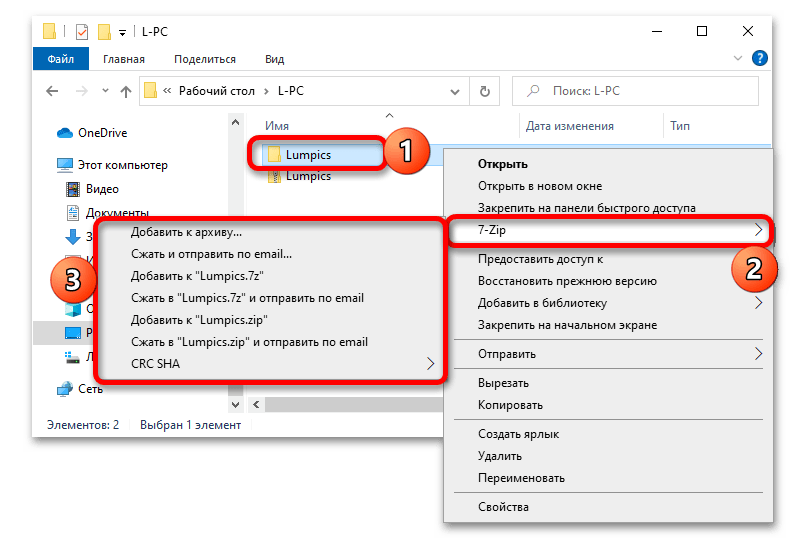
- Как и WinZip, 7-Zip можно пользоваться и напрямую через контекстное меню операционной системы.
В обоих случаях будет доступно как извлечение данных, так и создание сжатых файлов.
Вариант 3: WinRAR
WinRAR хорошо известен абсолютному большинству Windows-пользователей, и именно он в восприятии многих считается архиватором по умолчанию. И это при том, что программа платная, еще и весьма навязчивая в своих просьбах приобрести полную версию.
Скачать WinRAR
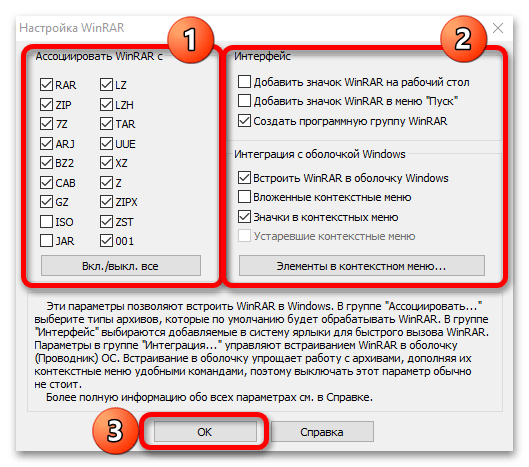
- Скачайте архиватор и осуществите его установку на компьютер. На одном из этапов будет предложено выполнить небольшую настройку – определить то, с какими форматами он будет ассоциирован, куда и будет ли добавлен значок (ярлык), а также отметить предпочтительные пункты контекстное меню, которые затем появятся в «Проводнике». Определившись с желаемыми параметрами, нажмите «ОК» и ожидайте завершения процедуры,

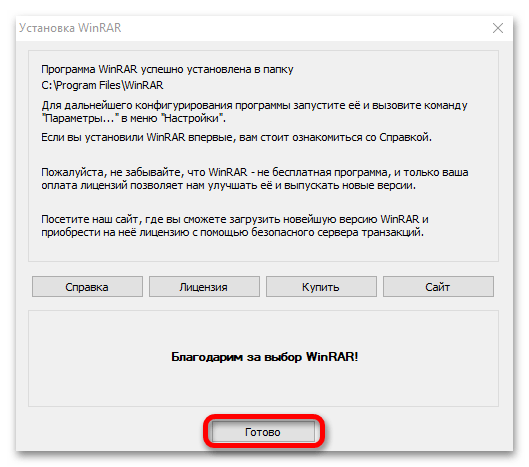
по итогу которой потребуется воспользоваться кнопкой «Готово» для закрытия окна.
- Установка WinRAR завершается открытием его папки на системном диске, отсюда же можно запустить архиватор, чтобы перейти к решению поставленной перед нами задачи.

Скорее всего, первое что вас встретит – предложение купить полную версию программы. Просто закройте это окно, но будьте готовы видеть его при каждом использовании.
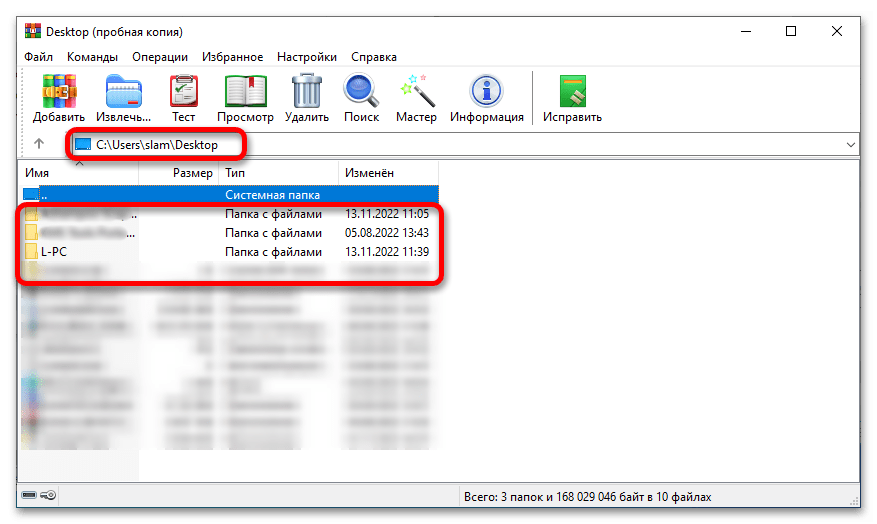
- Аналогично рассмотренному выше 7-Zip, с помощью представленного в основном окне файлового менеджера перейдите к расположению архивируемых данных или скопируйте путь к ним из «Проводника» и вставьте в адресную строку.
- Выделите объект(ы) и нажмите по расположенной на верхней панели кнопке «Добавить».
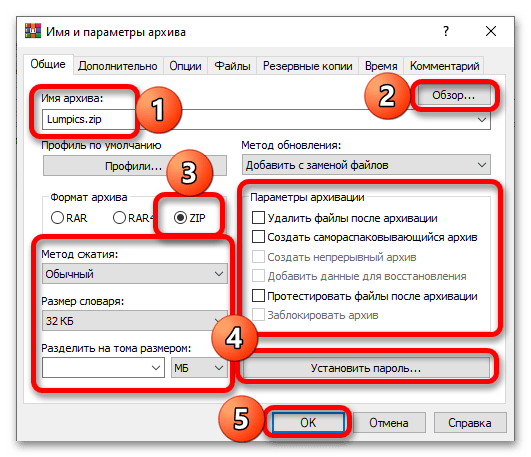
- Укажите основные параметры сжатия – задайте предпочтительное имя будущему файлу (1), укажите место для его сохранения на диске ПК (2), выберите формат ZIP (3), по желанию определите дополнительные параметры (4), включая установку пароля, после чего нажмите «ОК» для подтверждения.
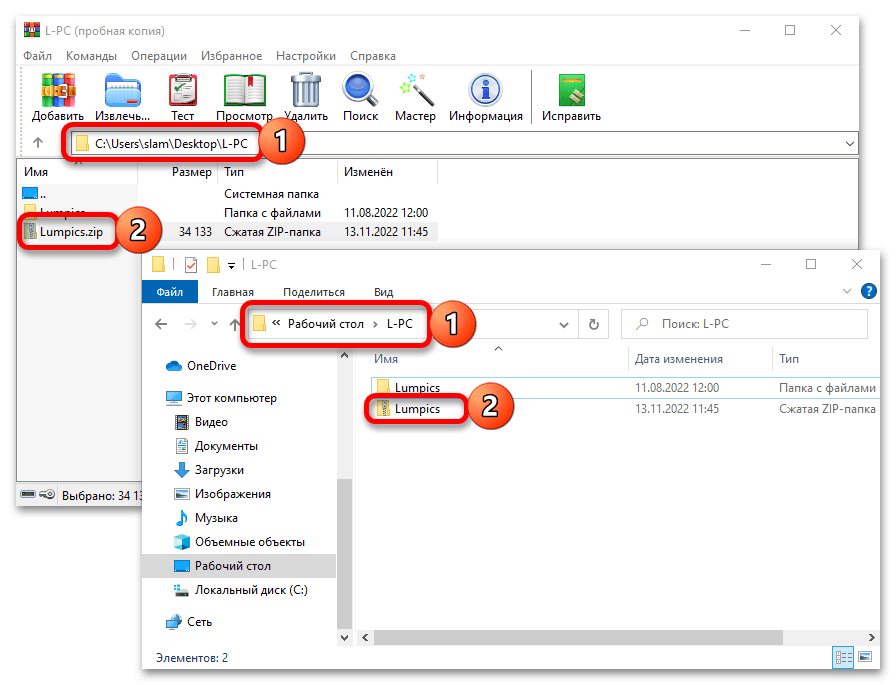
- Архив будет создан и появится в выбранном вами расположении в «Проводнике», а также отобразится в интерфейсе программы.
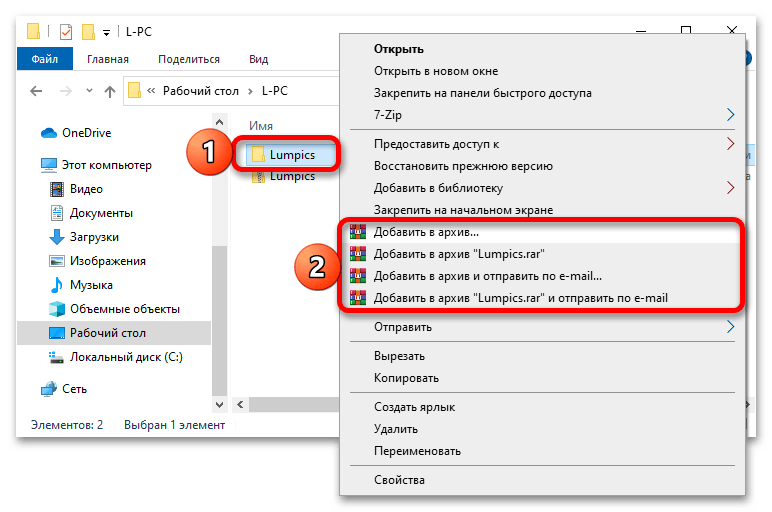
- Если на этапе установки WinRAR вы не отменяли заданные по умолчанию параметры, пользоваться им можно будет и через контекстное меню операционной системы –

как для сжатия данных, так и для их распаковки.


Наша группа в TelegramПолезные советы и помощь
Zipping files compresses them so they take up less space on your hard drive, and the smaller ZIP files can more quickly be shared with others or transferred to other computers. You can zip files and/or folders in Windows 10 directly from File Explorer—no third-party tools needed.
To zip one or more files or folders in Windows 10, the first step is to open up File Explorer. From there, all you have to do is select your files and use either the Send To menu or the Ribbon menu, whichever you prefer.
We’ll use the context menu to quickly zip files or folders.
1. Select the file(s) and/or folder(s) you want to compress. If you want to zip just one file or folder, skip to step 2. Otherwise, there are two ways to select multiple files and folders:
To select a consecutive group of files or folders, click the first item, then hold down the Shift key and click on the last item. The two files/folders you selected and everything in between will be selected.
To select non-consecutive files or folders, hold down the Ctrl key as you select the individual files and/or folders.
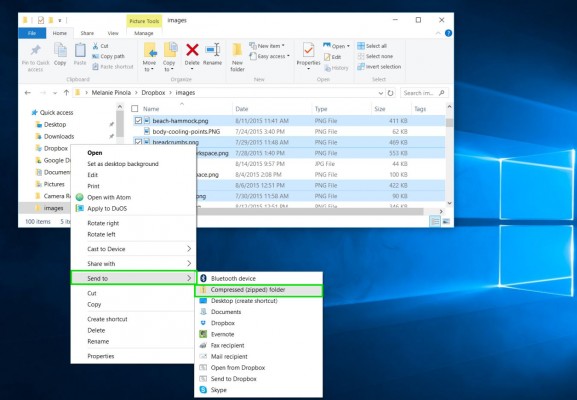
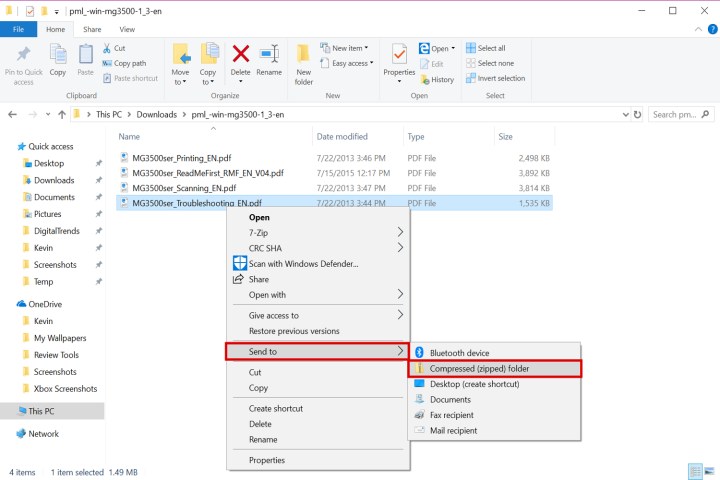
2. Right-click on the file or folder (or group of files or folders), then point to Send to and select Compressed (zipped) folder.
3. Name the ZIP file. Enter the name you want the zipped file to have or hit Enter to accept the suggested filename.
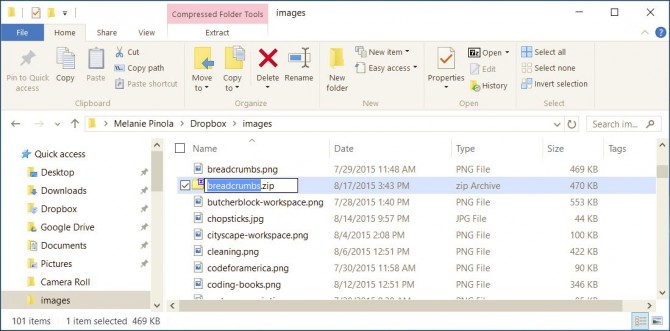
Tip: Windows automatically suggests a filename for the ZIP file based on the file you right-click on. In the example above, I right-clicked on the breadcrumbs.png file, so the suggested ZIP file is breadcrumbs.zip. When zipping multiple files, make sure you right-click on top of the one in the selection that you would want the ZIP file to have the same name.
Sign up to receive The Snapshot, a free special dispatch from Laptop Mag, in your inbox.
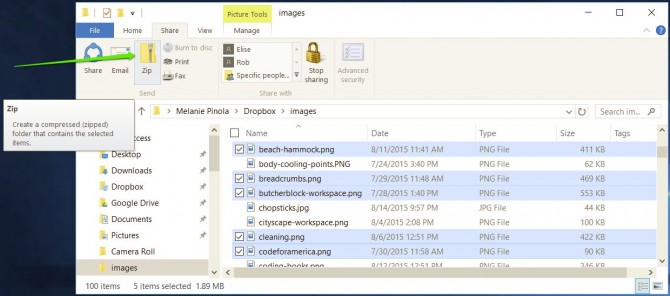
The File Explorer in Windows 10 has a Zip command in the Ribbon menu. This is convenient for 2-in-1 laptop owners who might prefer to tap to zip files rather than right-click. To use this:
1. Select your file(s) and/or folder(s) as in Step 1 in the Send To menu instructions above.
2. Navigate to the Share tab in File Explorer.
3. Click the Zip button.
The Ribbon menu method works in Windows 8.1, by the way, and the Send To menu works in previous versions of Windows as well.
Add a File or Folder to an Existing ZIP File
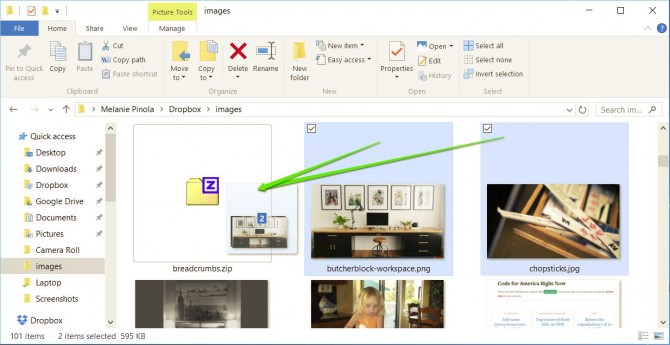
Finally, you can add files and folders to an existing ZIP file simply by selecting the ones you’d like to add then dragging them on top of the ZIP file.
Need more help getting organized? Here’s how to create a new folder in Windows 10.
Windows 10 Storage and Backup
- Previous Tip
- Next Tip
- Reclaim Hard Drive Space by Shrinking Windows 10
- Delete the Windows.old Folder in Windows 10
- How to Save Space By Cleaning Windows’ WinSxS Folder
- Back Up Files with the File History Feature
- Mount and Burn ISO Files
- Format a Hard Drive For Both Windows and Mac
- Zip a File or Folder in Windows 10
- Control Which OneDrive Files Are Available Offline
- Map OneDrive as a Network Drive
- Fetch Any File on a Remote Computer with OneDrive
- 3 Ways to Save Space
- Free Disk Space Automatically with Storage Sense
- All Windows 10 Tips
- How to Install Apps to an External Drive
Melanie was a writer at Laptop Mag. She wrote dozens of helpful how-to guides, covering both the software and the hardware side of things. Her work included topics like SSDs, RAM, Apple, Excel, OneDrive, and detailed guides for Windows users. Outside of all her useful advice, Melanie also penned a few reviews for Laptop Mag, including Android emulators that help you run apps on your PC.
It doesn’t take much for your hard drive to become cluttered or disorganized. With family photos, large documents, or other files, you can quickly run out of storage. A practical space-saving and organizing solution is to archive some of these files by “zipping” them.
Zipping a file isn’t unique to Windows 11. Many computer systems allow you to archive documents, but depending on the program you have, it might work differently.
ZIP a single file
If you have a single file that is taking up a lot of storage space, such as videos, this method may be for you. Zipping the file will reduce its overall size and make it easier to handle along with the rest of your data. Here’s how you can get started.
Step 1: Locate File Explorer on the Windows 11 or Windows 10 taskbar (the folder icon).
Step 2: Locate the file you want to compress.
Step 3: Right-click on the file.
Step 4: Select Compress to on the menu (Send To in Windows 10).
Step 5: Select ZIP in the next menu (Compressed (Zipped) Folder on Windows 10).
Step 6: Rename your new ZIP file, and press the Enter key.
ZIP multiple files

This method is useful for cramming multiple files in one neat package and can make sending large files easier as well as freeing up unused disk space that you can use more productively.
Step 1: Locate File Explorer on the Windows 11 taskbar (you can also press the Windows + E keyboard shortcut).
Step 2: Locate the files you want to add to a single ZIP file.
Step 3: Select all files by holding down the mouse button and dragging the pointer across the screen. Your mouse will create a blue selection box. All files within this box are highlighted with a light blue color.
Step 4: Release the mouse button and right-click on the light- highlighted files.
Step 5: Select Compress to on the menu.
Step 6: Select ZIP in the next menu.
Step 7: Rename your new ZIP file, and press the Enter key.
ZIP an entire folder
If you want to compress multiple files in a single folder, this is the method you choose. When unpacked, all files will unload in a folder created during the compression process.
Step 1: Locate File Explorer on the Windows 11 taskbar (the folder icon).
Step 2: Locate the folder you want to add to a single ZIP file.
Step 3: Right-click on the folder.
Step 4: Select Compress to on the menu.
Step 5: Select Zip in the next menu.
Step 6: Rename your new ZIP file and press the Enter key.
Unpack a ZIP file

The Windows file explorer has several tricks, and once you’ve learned how to zip a file up, you’ve only learned half of what you need because you have to know how to unzip files as well.
Windows 11 compiles files and zips them up using lossless compression algorithms. These algorithms will fully compress your files so you can easily store or email them; once the file is in its new destination, it can be decompressed back to its original size and quality. The original information is intact. This process requires the system to recognize patterns and recode them quickly within the file to limit repetitions. You can follow the steps below to unzip ZIP files safely:
Step 1: Click on File Explorer, also known as the folder icon, located on the Windows 11 taskbar.
Step 2: Find the file you want to zip.
Step 3: Right-click on said file.
Step 4: A menu will pop up. Select Extract All.
Step 5: Another window will appear. There, you will pick the location you want Windows 11 to unload the files in. Click Browse.
Step 5: After narrowing down the new location, click Select Folder.
Step 6: Finally, click Extract.
At that point, Windows 11 will do the work for you. The OS will scan the compressed file and restore each file to its original size. The decompressing actions will take several minutes to ensure the computer is correctly reading the files’ patterns. After a short wait, you will be able to open the file as if it were the original.
If you need to organize your files better, it’s worth learning how to partition your hard drive or SSD in Windows.
It doesn’t take much for your hard drive to become cluttered or disorganized. With family photos, large documents, or other files, you can quickly run out of storage. An effective space-saving and organizing solution is to archive some of these files by “zipping” them.
Zipping a file isn’t unique to Windows 10. A lot of computer systems allow you to archive documents, but depending on the program you have, it might work differently.
Using Windows File Explorer to Zip Files and Folders
A method for creating zip files has been included with Windows since Windows XP. It allows you to create archives containing files and folders, regardless of the file type, combining them in a single zip file. This feature can be used from your desktop or from within the Windows File Explorer.
This built-in method for creating and using zip files in Windows 10 is quite basic, however. There isn’t, for instance, any method to add passwords to your zip file, although it does allows you to open password-protected zip files.
Zip files created using Windows 10 don’t allow for strong encryption, either. Using this method wouldn’t be a good option if you want to create secure files, for instance.
1. Locate File Explorer on the Windows 10 taskbar (the folder icon).
2. Locate the file you want to compress.
3.
- Right-click on the file.
- Or select all files by holding down the mouse button and dragging the pointer across the screen. Your mouse will create a blue selection box. All files within this box are highlighted with a light blue color. If you want zip multiple files.
- Or Right-click on the folder. If you want zip multiple files in a single folder
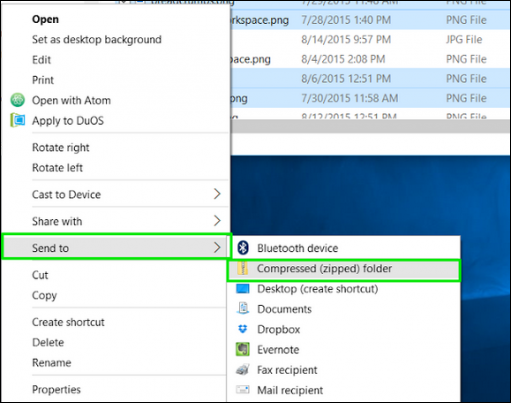
4. Select Send To on the menu.
5. Select Compressed (Zipped) Folder in the next menu.
6. Rename your new ZIP file, and press the Enter key.

7. To access the file, double-click it. This will allow you to view the contents of the zip file in Windows File Explorer.
You won’t notice much difference between a typical folder and an open zipped file in Windows File Explorer. Windows is designed to ensure that browsing a zip files looks much like any typical folder.
Unpack a ZIP file
Unpacking a ZIP file is just as important as knowing how to ZIP the file. In Windows 10, your actions follow a specific algorithm that scans your file, mitigates repetitive information, and establishes a brand new file that boasts a smaller size and a new extension. The following steps demonstrate how to accomplish this:
1. Locate File Explorer on the Windows 10 taskbar (the folder icon).
2. Locate the file you want to decompress.
3. Right-click on the file.
4. Select Extract All on the menu.
5. On the next pop-up screen, select where you want Windows 10 to unload the files by clicking the Browse button.
6.Once you choose a location, click the Select Folder button.
7. Finally, click the Extract button.

Video:
Using 7-Zip To Zip Files and Folders in Windows 10
As an alternative to the built-in Windows File Explorer method, you can use 7-Zip to create new zip files instead.
7-Zip allows you to create archive files in almost all available archival formats. It offers strong support for encryption, password protection, file compression, and more. It’s also free and open-source, so you don’t have to pay to use it.
To start using 7-Zip, download and install the 7-Zip software for Windows. Once installed, you can create a new zip file by selecting files and folders in Windows File Explorer or on your desktop, right-clicking the selected files, then pressing 7-Zip > Add to archive.

This will open the 7-Zip Add to Archive window, where you can customize your zipped file before it’s created. For instance, under Archive Format, you can select the standard ZIP file format, but you can also select TAR, WIM, and 7Z.
For the best support (allowing almost all devices to open it), select ZIP. Otherwise, select 7Z, as this offers the best options for compression, file encryption, and more.
If you select 7z, other users will need 7-Zip or another file client that supports these files to open it.

You can also use 7-Zip to create encrypted files.
To do this, provide a password under the Encryption section. Make sure that AES-256 is selected from the Encryption method drop-down menu.

If you want to reduce the file size, you can increase the compression of the archive file by selecting an option from the Compression level drop-down menu.
If you want no compression, select Store. For medium compression, select Normal. For maximum compression, select Ultra, but this will add additional time to the time taken to compress the file and open it afterward.

You’ll also need to give the file and name and select where you want to save it. Do this using the Archive box at the top.
Once you’re ready to create the file, press OK.

This will create the new archive file for you in the archive file format you selected.

If you use the 7Z format or another available format, opening the file will open the 7-Zip File Manager. If you use the ZIP format, you can open this in Windows File Explorer like any other zipped file. You can also open it using the 7-Zip File Manager.