
Screen recording can be an incredibly useful tool. If you’re a video creator, have plans to become one, or share gaming or demonstrational content, this could be something you use all the time. While taking a screenshot on Windows 11 couldn’t be easier, knowing how to record your screen on a desktop or laptop isn’t as obvious. Follow these steps to learn how to screen record on Windows 11.
How to screen record
Recording your screen in Windows 11 allows you to capture anything that’s taking place on the screen, just like you’d record something with a camera. You can record a process or just something funny you’d like to share with others or save for later. Thankfully, Windows 11 has a built-in application for recording your screen, but there are other methods as well.
Record any portion of your screen (or the whole screen) with Screen Recorder in Snipping Tool
Snipping Tool comes as part of Windows 11 and is also available via the Microsoft Store. Snipping Tool already allows you to take an image from your screen, but now it also allows you to select a portion of your screen and start video recording:
- To open Snipping Tool, simply search for it in the Start menu search box.
- In the top toolbar, press the Record button, then press New.
- Click to drag and drop a rectangle indicating the portion of the screen you would like to record.
- Press Start and you will see a 3-second countdown begin for your recording.
- After you finish, press Stop. Your recording can then be copied into memory, shared via the Share dialog, or Saved (by default, it will be saved in the Videos folder).
This is the easiest way to record your screen. However, there are some limitations currently that you should know about:
- Audio recording is not yet supported, nor is a “Spot Light” feature. However, you can edit the video in a program like Microsoft’s Clipchamp app.
- The only supported format currently is MP4.
- There is no keyboard shortcut to jump directly into Recording like there is for Snipping (CTRL+Shift+S).
Record in a snap with Xbox Game Bar
Xbox Game Bar is built right into Windows 11 as a native application, but it is also available as an add-on. The Game Bar has several features specifically related to gaming, like access to game-specific widgets and the ability to chat with friends while playing Xbox games. It also has a widget for capturing and recording your screen:
- To open the Xbox Game Bar, press Windows+G or search for it directly in the Start menu search box.
- Select the Camera icon to open a window for capturing your screen. From here, you can choose to record your screen as a video or a screenshot.
- If you’re taking a video, you might want to disable your microphone beforehand. Do this by clicking the Microphone icon and making sure it looks like it’s crossed through with a line before you proceed.
- When you’re ready to begin recording, click Record (the button with the solid white circle).
- When you’re finished, click Stop (the button with the solid white square located in the same place where the Record button used to be).
- To review your recording, select Show all captures at the bottom of the window.
How to screen record
Recording your screen in Windows 11 allows you to capture anything that’s taking place on the screen, just like you’d record something with a camera. You can record a process or just something funny you’d like to share with others or save for later. Thankfully, Windows 11 has a built-in application for recording your screen, but there are other methods as well.

Use an app or extension
Microsoft Store has a wealth of Windows 11 apps that allow you to stream movies, edit photos, play games, and more. Even though Snipping Tool and the Xbox Game Bar are already built in, you may prefer to use a different app to screen record. Thankfully, there are many, many free and paid options available. To start with a free option, you might try the Screen Recorder for Windows app or the Screen Recorder extension in Microsoft Edge.
Recording your screen on Windows 11 isn’t a tricky process once you know the basics. Whether you’re using a native application or downloading a different one you might prefer, Snipping Tool allows you to pick the exact area of your screen you want to record, while with other choices you’ll end up with a recording of your whole screen. And if you’re looking to edit these recordings, you’re in luck. Microsoft’s Clipchamp app can help you create the content of your dreams.
Download Article
Make high-quality screen recordings, with or without audio
Download Article
- Using the Xbox Game Bar
- Using Microsoft Clipchamp
- Using OBS Studio
- Video
- Q&A
|
|
|
|
If you want to record your Windows 10 screen, you have several free options. If you want to record a game or application window but not the entire screen, you can use the built-in screen recorder Xbox Game Bar. To record the whole screen, you can use free, easy-to-install software like Microsoft Clipchamp or OBS Studio. All these options allow you to screen record with audio, and you’ll even have the option to add your voice to the recording. Read on to learn the easiest ways to record your screen in Windows 10.
How to Record the Screen in Windows 10
Press the Windows Key + Alt + G to open Game Bar (comes with your system), then press Windows key + Alt + R to start recording. Click the square when you’re finished. To record your entire screen, use Microsoft Clipchamp or OBS Studio—both are free and easy to set up.
-

The Xbox Game Bar comes with your system. To open Game Bar, type game bar into the Windows search bar and click Game Bar, or use the keyboard shortcut Windows key + Alt + G.[1]
- While this tool won’t record the entire screen, it can come in handy if you want to record yourself playing a game or demonstrating something in an app.
- If Game Bar doesn’t open, it may be disabled. To enable it:
- Open the Start menu and select Settings.
- Select Gaming > Game Bar.
- Set «Enable Game Bar for things like recording game clips, chatting with friends, and receiving game invites» to On.[2]
-
If you’d like to fine-tune your screen recording option, you can do so in your Windows Settings. Here’s how:
- Open the Start menu and click Settings.
- Click Gaming.
- Click Game Bar in the left column.
- Scroll down on the right panel to adjust your audio and video preferences.
- Close the Settings window when you’re finished and return to the Xbox Game Bar.
Advertisement
-
A bar displaying your progress will appear at the top-right of the screen.
- Click the microphone icon on the bar to toggle voice recording on or off.
- To record a game or application you’re using full-screen, use Windows key + Alt + G to start and stop recording instead.[3]
-
It’s on an indicator that displays your progress. Your screen recording is now saved to a folder called Captures, which is inside your Videos folder.


Advertisement
-
This free Microsoft app makes it super easy to record your entire screen on Windows 10. This is a great option if you want to record the entire screen with audio, and you’ll even have the option of recording yourself on your webcam at the same time.
- Open the Microsoft Store app in your Start menu.
- Search for «Clipchamp.»
- Click Get and follow the on-screen instructions to install.
-
After signing in with your Microsoft account, you’ll see a purple button near the top of the right panel. If you don’t see it, scroll down a bit to «Your videos,» then click Create your first video here.
-
It’s the option with a video camera, and you’ll see it in the upper-left area of the window.
-
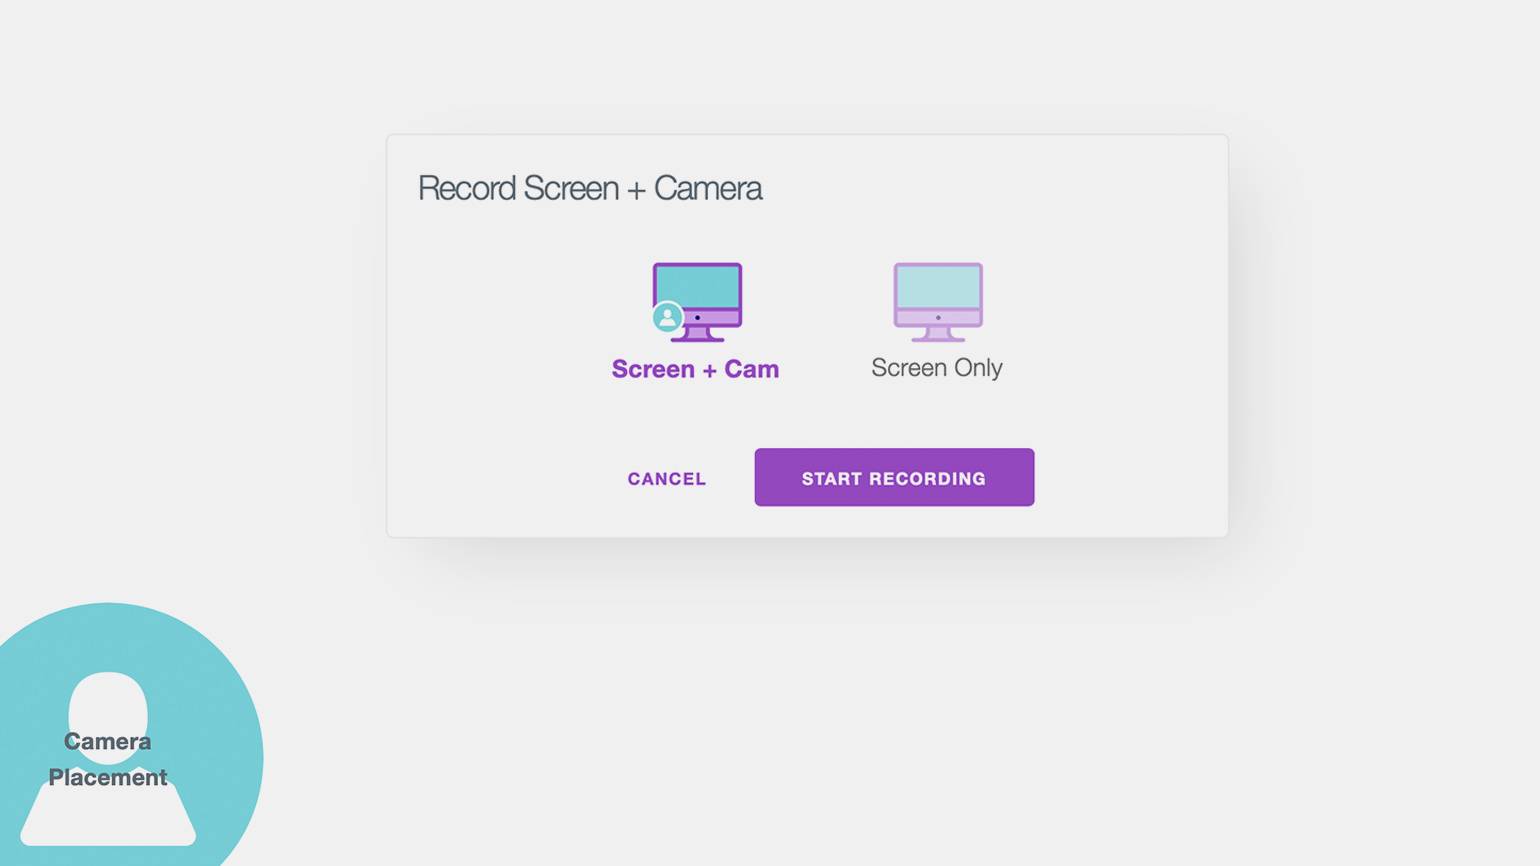
The recording options allow you to record both your screen and camera, just your camera, just your screen, or just audio.
- If you select just the Screen option, you can still record yourself speaking if you’d like. In addition to audio captured from the screen, you can connect an external microphone (such as the one in your headset) or use your computer’s built-in mic.
-
If you want to record with audio or use your webcam, give Clipchamp permission to access your camera and microphone by selecting Allow or Always allow.[4]
-
This opens a screen where you can select what you’d like to include in your screen recording.
-
Alternatively, you can record just a browser tab or a single window.
- If you are using multiple desktops and choose to record the entire screen, select the image of the desktop you want to record.
- If you want to record audio, toggle on the «Also share system audio» option.
-
You can record up to 30 minutes with Clipchamp.[5]
If you want to make a longer video, just record multiple videos. You can even use Clipchamp to combine the videos at the end to make one longer recording. -
This completes the screen recording and allows you to watch what you’ve recorded. If you’re unhappy with it, click Retaking recording to try again.
- If you want to keep your recording, click Save and edit.
-
You can now use Clipchamp’s editing tools to add text, create transitions, and more. To save your recording when you’re finished, click the purple Export button and choose a video quality. You can then give the video a name, click Save to your computer, and select a saving location.
- If you want to make a screen recording longer than 30 minutes, click Record & create again and record your next video. When you save that one, you’ll see both recordings in the media panel. You can easily drag the second recording to the timeline right after the first to make one long video.


Advertisement
-
You can use OBS to record the entire screen with audio, full-screen gameplay, individual windows, and even audio. Download this free screen recording and broadcasting software from https://obsproject.com.
- Once downloaded, double-click the file and follow the on-screen instructions to install it.
-
- If you are just using OBS Studio to record the screen, select Optimize just for recording, I will not be streaming. You can always opt to add streaming features later. Click Next to continue.
- OBS Studio will determine the best resolution and FPS for your recordings. Click Next to continue.
- Click Apply Settings when you’re finished.
-
A list of sources from which you can stream and record will appear.
-
This option allows you to record the entire screen. Alternatively, you can select Window Capture to record just one window, or Game Capture to record a full-screen game.
-
«Automatic» is fine for the Capture Method. If you have multiple displays, select the one you want to record from the «Display» menu. You can also choose whether to include your mouse cursor in the recording.
-
OBS Studio is set to record your system audio and your system microphone by default.[6]
If you don’t want to record system audio, click the mute button under «Desktop Audio.» If you don’t want the screen recording to record your voice or ambient sound around you, click the mute button next to «Mic/Aux.» -
Before you start recording, you can choose where to save the file, the type of file to create, and other details.
- Click Settings in the lower-right corner.
- Click the Output tab.
- Choose the saving location by clicking Browse next to «Recording Path.» By default, OBS Studio will save the recording in your Videos folder.
- Choose a file type (such as MP4 or MOV) from the «Recording Format» menu. The default is MKV.
- Click OK to return to OBS Studio.
-
This instantly begins recording your screen with your selected settings.
- Click Stop Recording when you’re finished. This saves the video at the location you selected.
- Want more tips for recording a screen’s sound and video on Windows? Check out what wikiHow users say on our How do I screen record sound and video on Windows? forum.


Advertisement
Add New Question
-
Question
How to face-cam on Windows 10?
AbigailMiller
Community Answer
If you mean to record your webcam on Windows 10, I’ll recommend some screen recorders. Firstly, OBS is a free and powerful recording tool that enables you to record your webcam. But it is not friendly to newbies. You can search for tutorials about OBS. Paid and affordable software, which is easier-to-use include Bandicam (it’s nice for gameplay recording), RecMaster (It has a simple main interface), Camtasia (many people know it). You can choose any of them according to your needs. They’re all great screen recorders.
Ask a Question
200 characters left
Include your email address to get a message when this question is answered.
Submit
Advertisement
Video
Thanks for submitting a tip for review!
About This Article
Thanks to all authors for creating a page that has been read 94,414 times.
Is this article up to date?
#Руководства
-
0
Возможно, даже не придётся ничего скачивать. Рассказали не только о сторонних программах и онлайн-сервисах, но и о встроенных возможностях ОС.
Иллюстрация: Катя Павловская для Skillbox Media
Редактор и иллюстратор. Перепробовал пару десятков профессий — от тестировщика до модели, но нашёл себя в удалёнке. Учится в Skillbox и делится в своих текстах новыми знаниями.
Функция записи экрана полезна не только стримерам и блогерам, которые проводят трансляции, но и другим пользователям. С помощью записи экрана можно, например, показать рабочие процессы, объяснить, как работает программа, сохранить полезный вебинар или видео с онлайн-встречи.
На клавиатуре некоторых ноутбуков есть специальная кнопка для записи видео с экрана — как правило, это игровые ноутбуки. Если такой кнопки нет, можно использовать встроенные инструменты операционной системы компьютера, сторонние программы или онлайн-сервисы. В статье подробно рассмотрим все эти способы.
- Встроенные средства для записи экрана на Windows
- Встроенные средства для записи экрана на macOS
- Программы и онлайн-сервисы для записи видео с экрана
Записать экран на компьютерах с Windows 10 можно без установки дополнительных программ — с помощью панели Xbox Game Bar или встроенных программ от производителей видеокарт NVIDIA или AMD. Давайте разбираться.
Чтобы начать запись, нажмите комбинацию клавиш Windows + Alt + R.
Для остановки записи снова нажмите это же сочетание клавиш или кликните по значку индикатора в углу экрана.
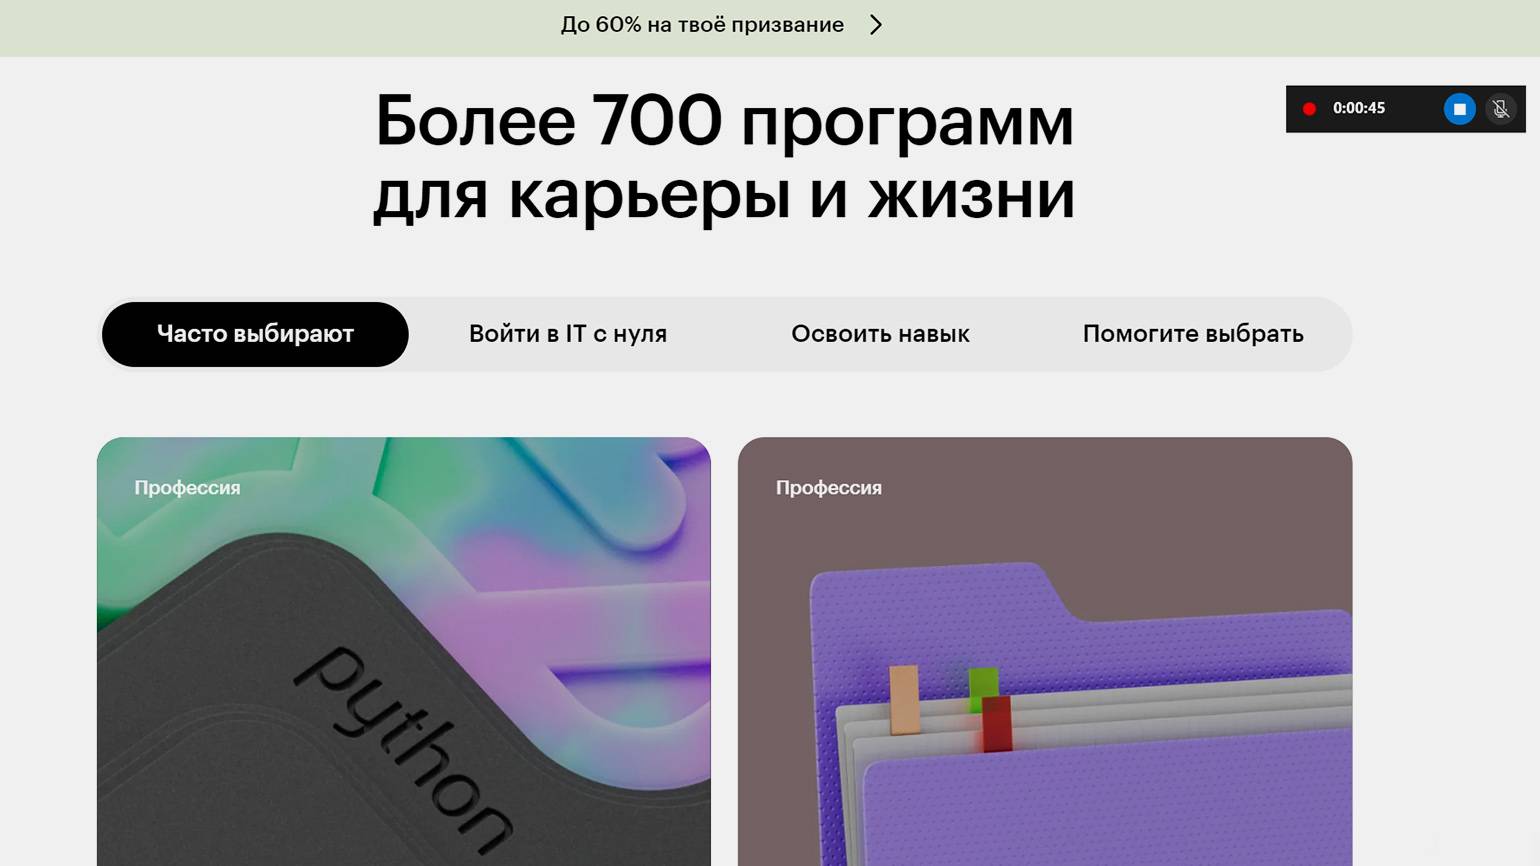
Скриншот: Xbox Game Bar / Skillbox Media
Когда запись завершится, откроется окно предпросмотра видео.
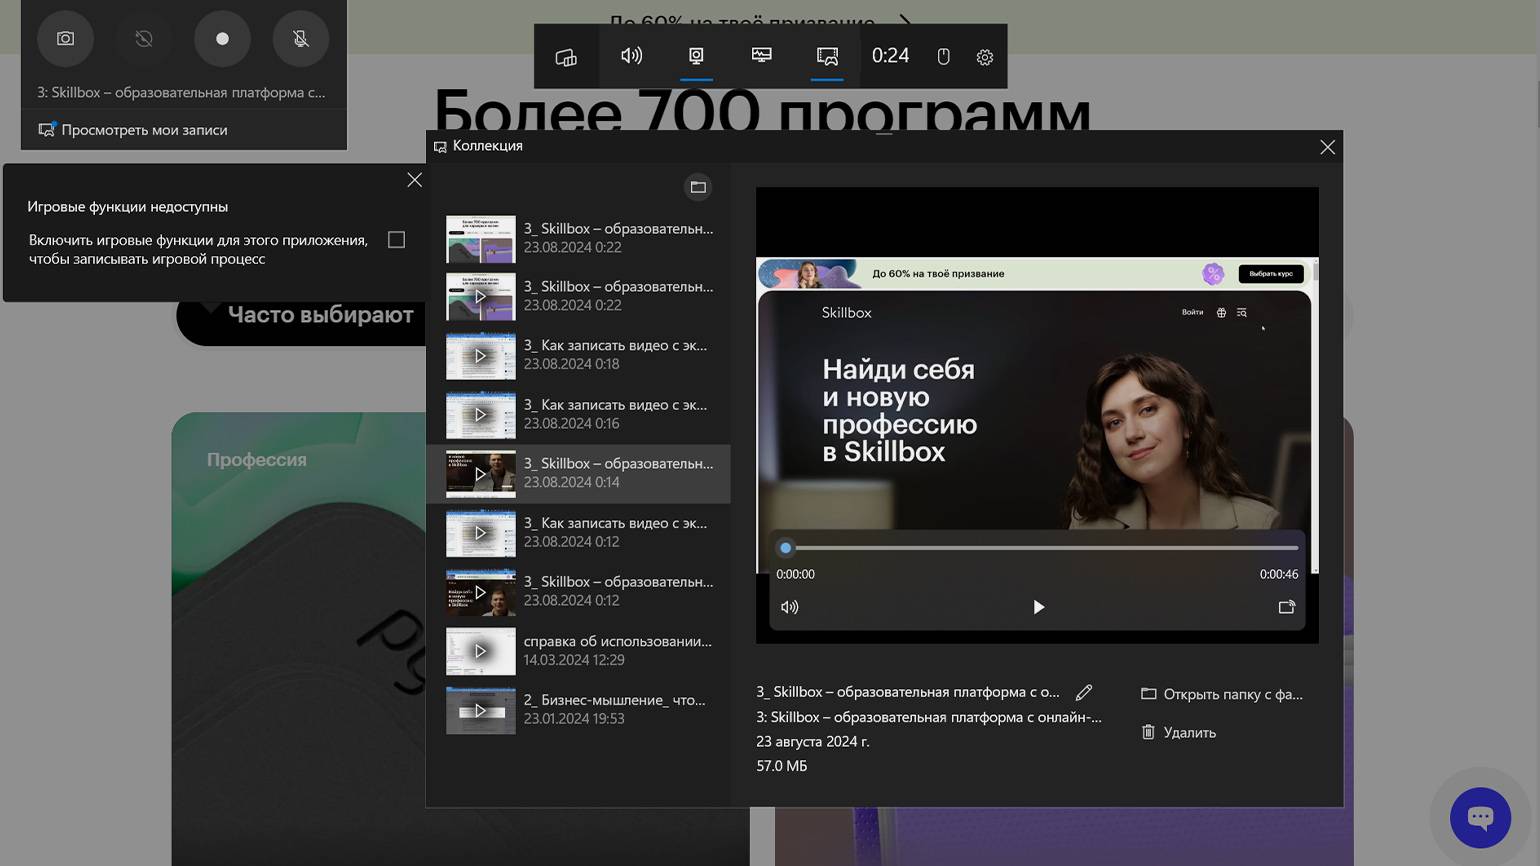
Скриншот: Xbox Game Bar / Skillbox Media
Чтобы настроить параметры записи, нажмите сочетание клавиш Windows + G.
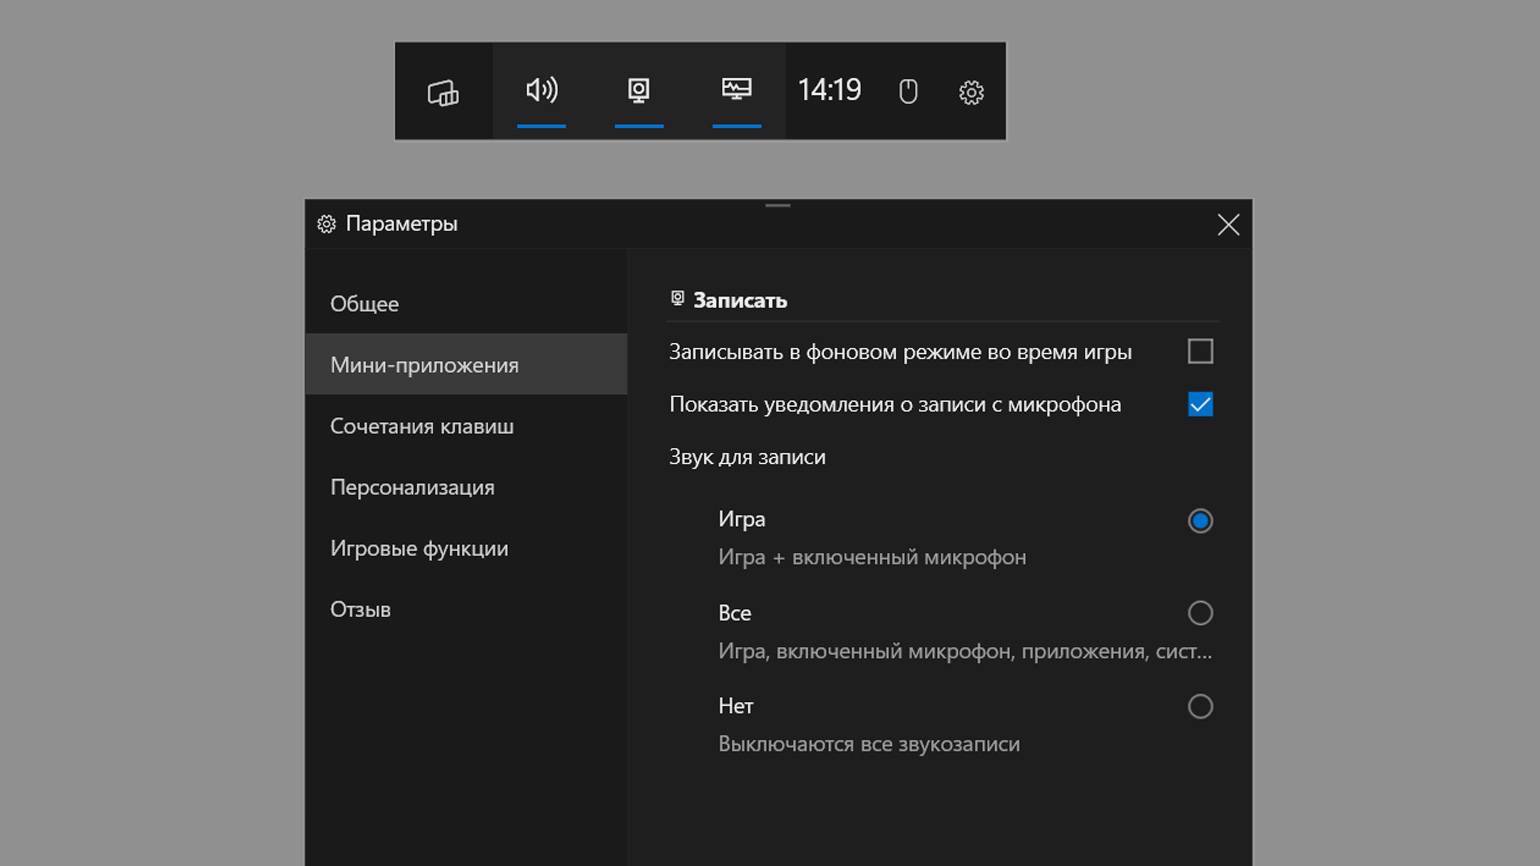
Скриншот: Windows / Skillbox Media
В более старых версиях Windows, таких как 7 или 8, этот способ не сработает — в них нет встроенных возможностей для записи экрана. Поэтому потребуется установить дополнительные программы — расскажем о них ниже.
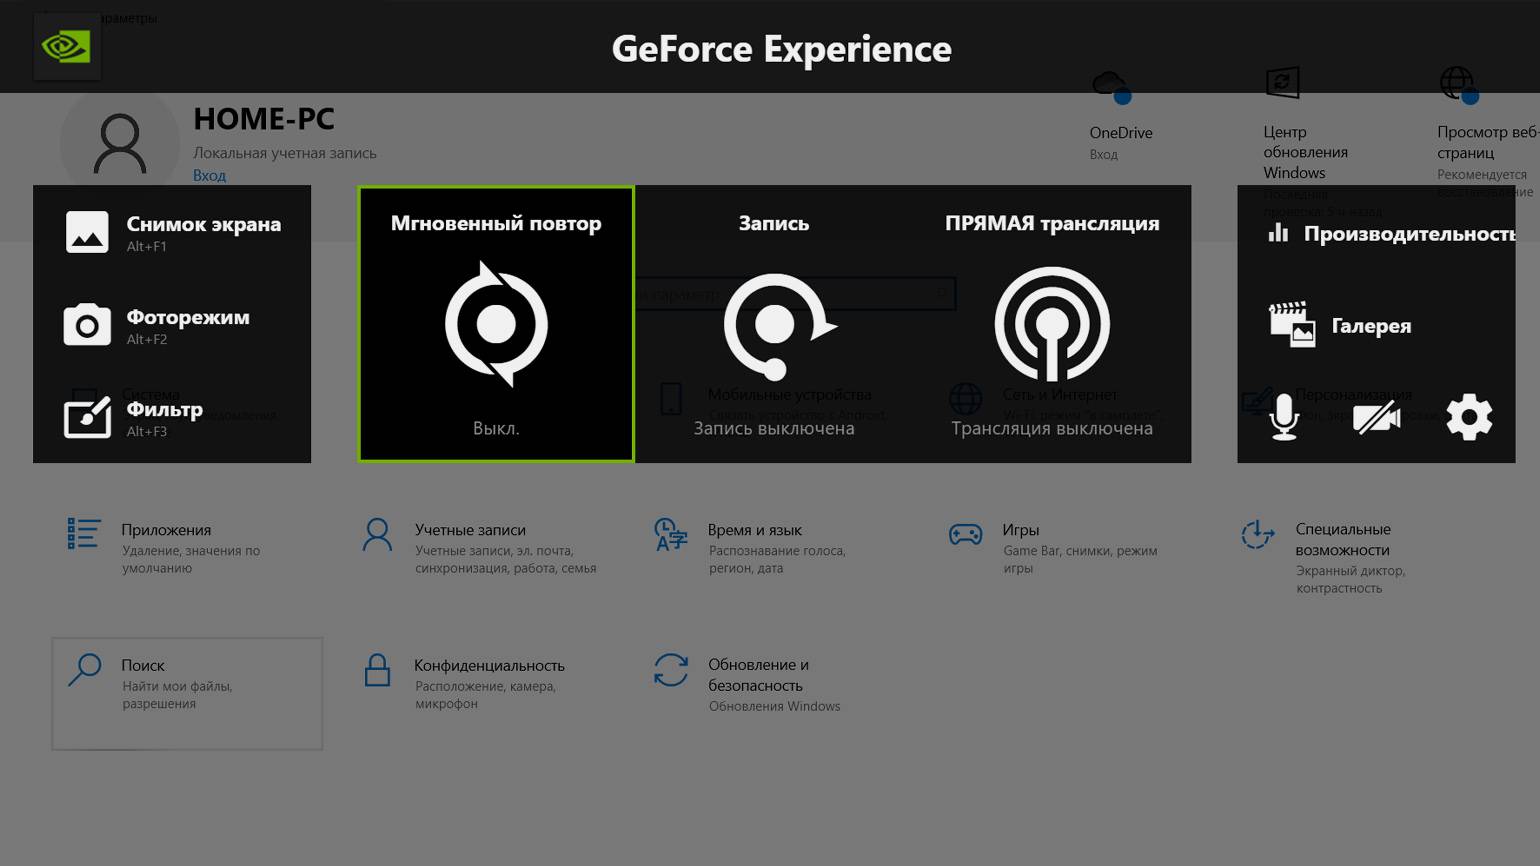
Если в вашем компьютере установлена видеокарта NVIDIA, вы можете записывать экран с помощью программы GeForce Experience.
Обычно эта программа предустановлена вместе с драйверами, но, если у вас её нет, можно скачать её отдельно с официального сайта. Будьте внимательны: не все модели видеокарт поддерживают GeForce Experience, поэтому перед скачиванием проверьте системные требования.
Откройте GeForce Experience и войдите в систему. Для этого можно использовать учётную запись NVIDIA либо авторизоваться через Google или «Фейсбук»*.
Для начала записи нажмите сочетание клавиш Alt + Z и выберите «Запись». Чтобы завершить запись, снова нажмите Alt + Z и выберите «Остановить и сохранить».
В программное обеспечение AMD для Windows входит программа Radeon ReLive, с помощью которой можно записывать происходящее на экране.
Щёлкните правой кнопкой мыши на рабочем столе и выберите «Настройки Radeon». Другой способ открыть программу — найти её в поиске. Перейдите на вкладку «Запись и трансляция».
При первом открытии программы вам предложат пройти несколько шагов для настройки её параметров. Обратите внимание на последний экран — здесь нужно активировать опцию «Записать видео с рабочего стола».
После завершения настройки нажмите комбинацию клавиш Alt + Z — откроется боковая панель. Чтобы начать запись экрана, кликните на «Запись видео» или используйте сочетание клавиш Ctrl + Shift + E.
Когда запись начнётся, в углу экрана появится индикатор. Кликнув по нему, вы сможете вернуться в окно управления записью и остановить её. На вкладке «Дом» можно просматривать сохранённые видео, делиться ими, редактировать их и удалять.
На компьютерах macOS записывать видео с экрана можно с помощью встроенного приложения QuickTime Player. Вот как это сделать.
Вызовите окно настроек. Нажмите сочетание клавиш Command + Shift + 5. В нижней части экрана появится окно настроек записи. В нём нужно выбрать область записи — весь экран или его часть, а также источник звука и другие параметры.
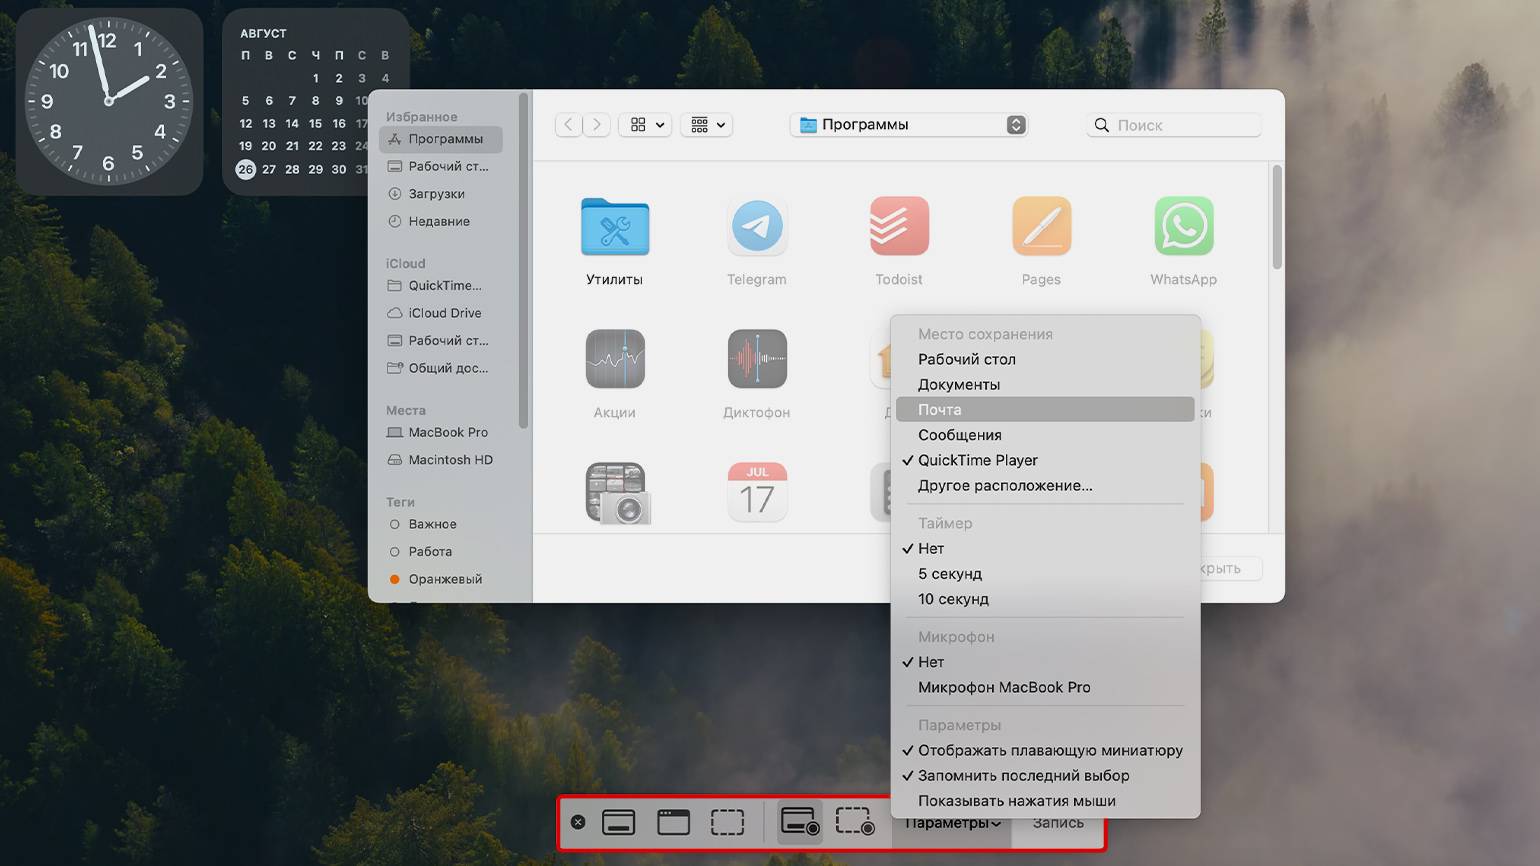
Скриншот: macOS / Skillbox Media
После этого нужно нажать кнопку «Запись» или клавишу Return (Enter).
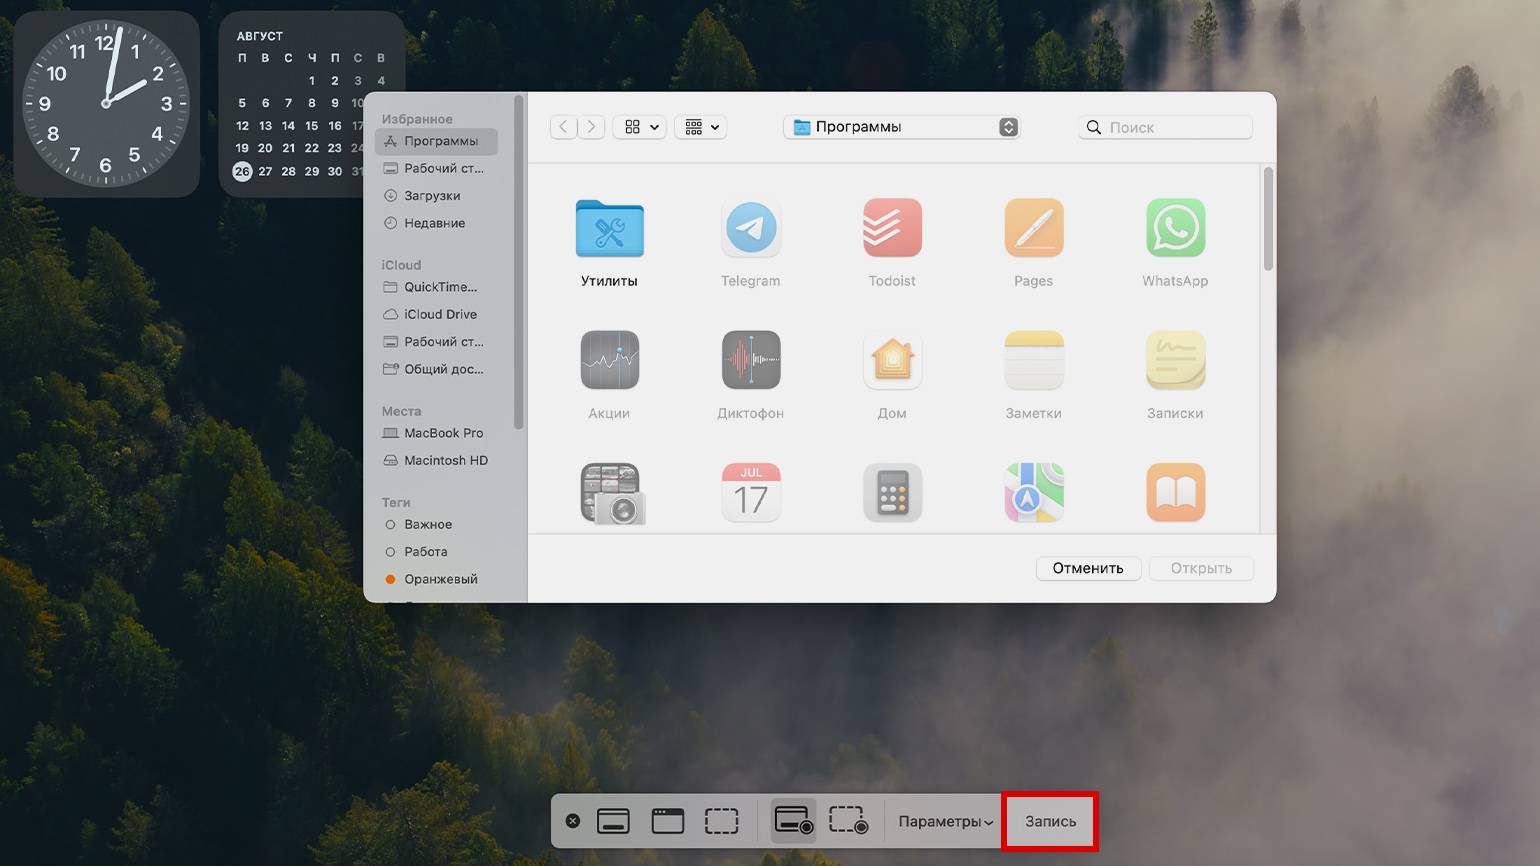
Скриншот: macOS / Skillbox Media
Запишите экран и завершите запись. Когда запись начнётся, на панели управления в верхней части экрана появится кнопка «Стоп». Кликните по ней, когда нужно будет завершить запись.
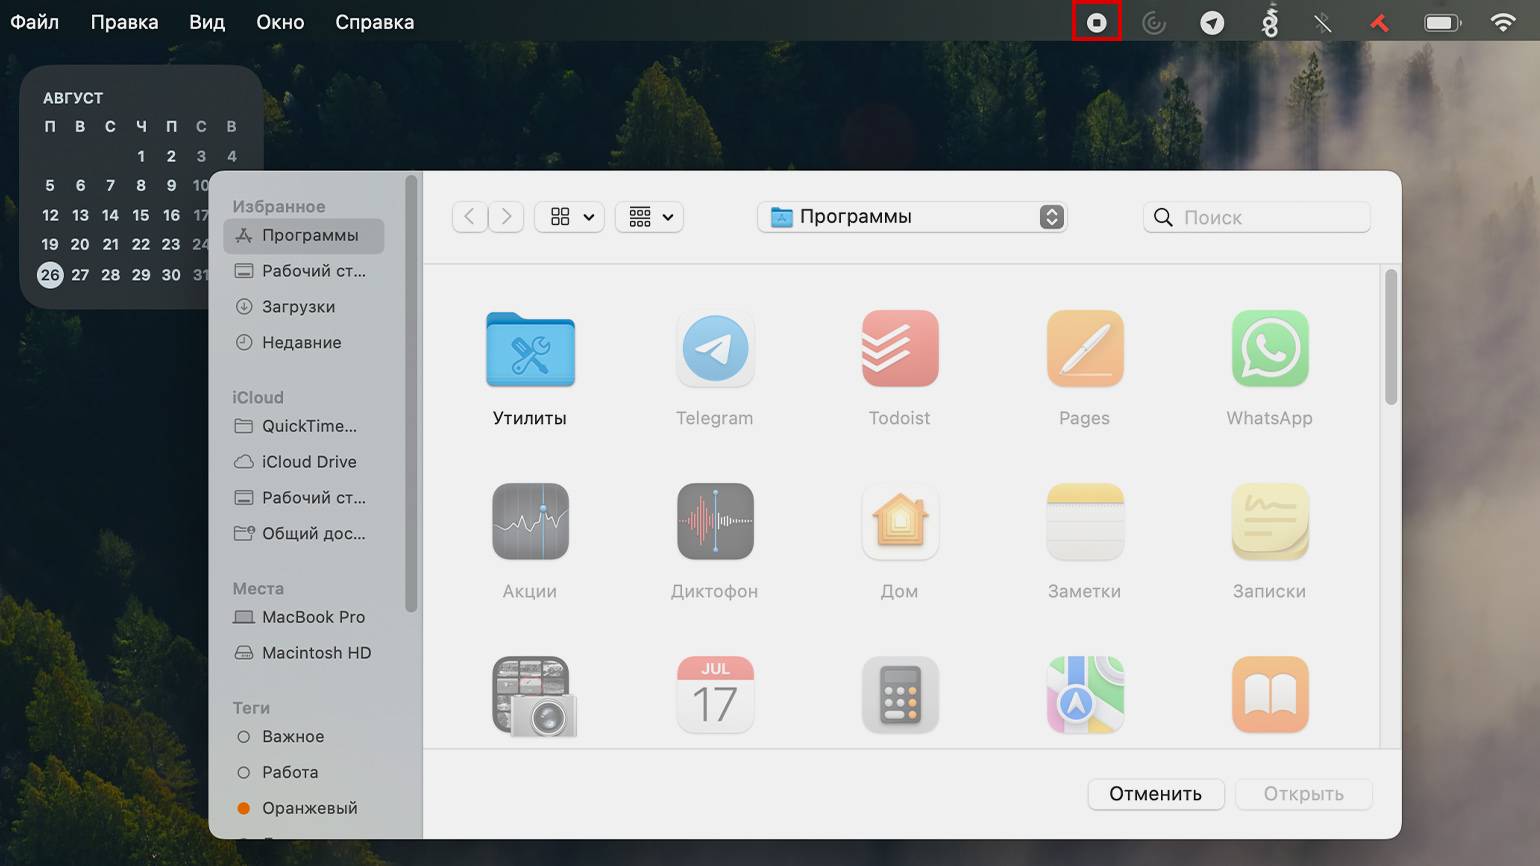
Скриншот: macOS / Skillbox Media
После завершения записи видео автоматически откроется в QuickTime Player. А файл с записью появится на рабочем столе.
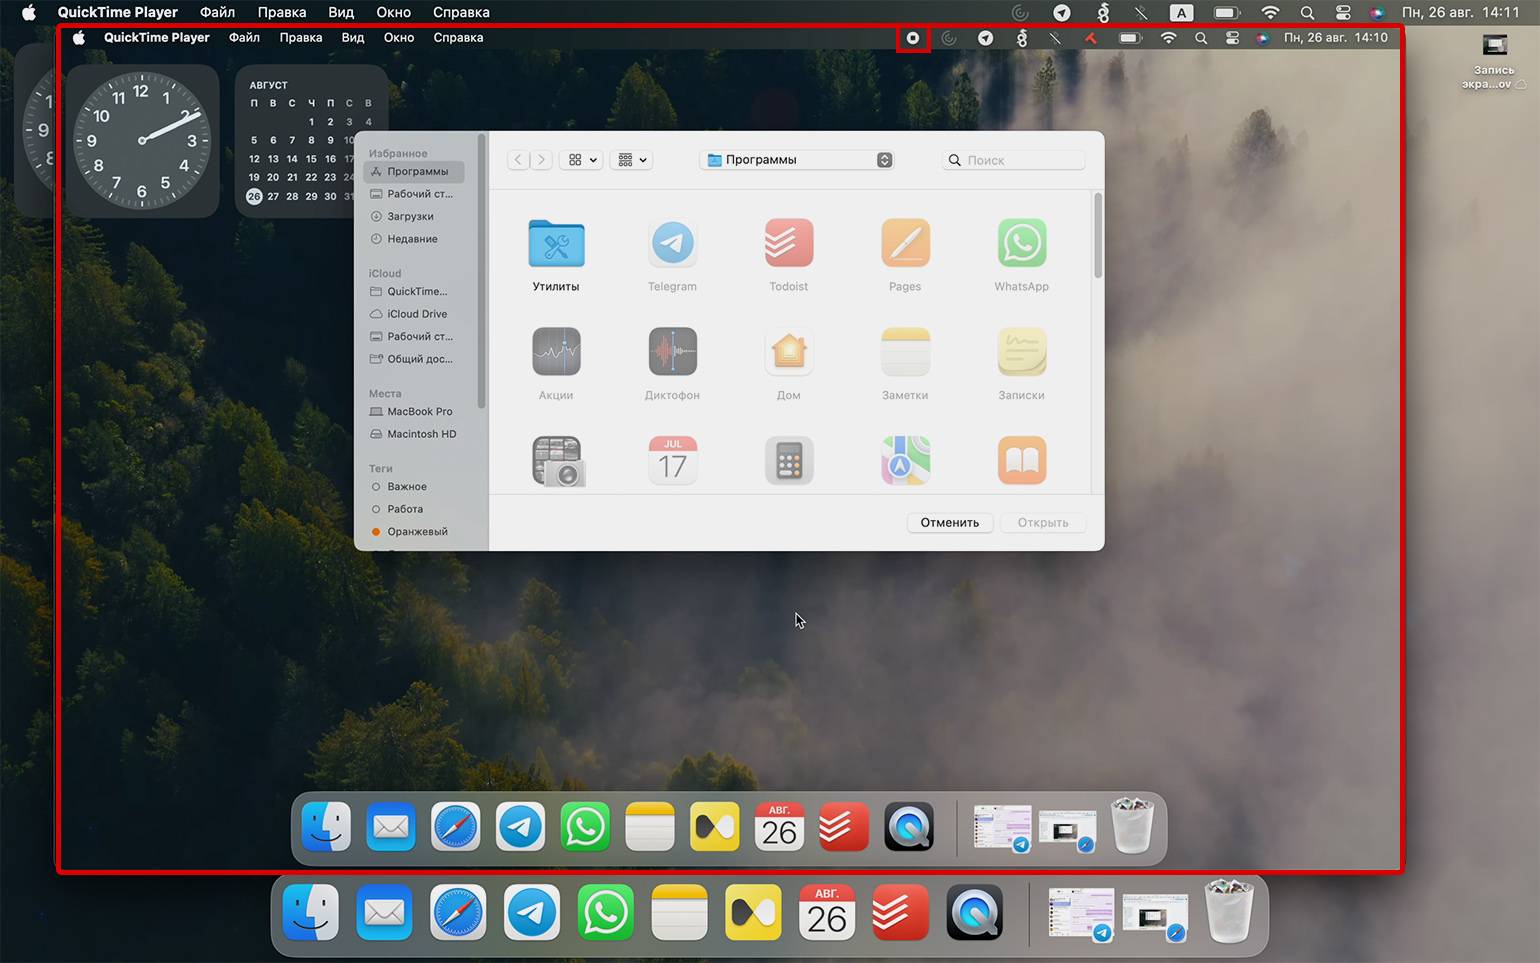
Скриншот: macOS / Skillbox Media
Также открыть программу можно другим способом — найти её в папке «Программы» в Finder или с помощью поисковика в LaunchPad. Но для этого нужно выполнить больше действий. Вызывать окно записи сочетанием клавиш Command + Shift + 5 проще.
Скриншот: macOS / Skillbox Media
Существует много сторонних программ, которые используют для записи видео с экрана компьютера. Расскажем о некоторых популярных.
Это бесплатная программа, которая больше известна как проигрыватель видео и музыки на компьютере. Принадлежит компании VideoLAN. Работает на Windows, Linux, macOS, Unix, iOS, Android.
VLC записывает видео в формате MP4. Поддерживает запись видео со звуком.
Чтобы записать видео, в верхнем меню программы нажмите «Медиа», а затем «Выбрать устройство захвата».
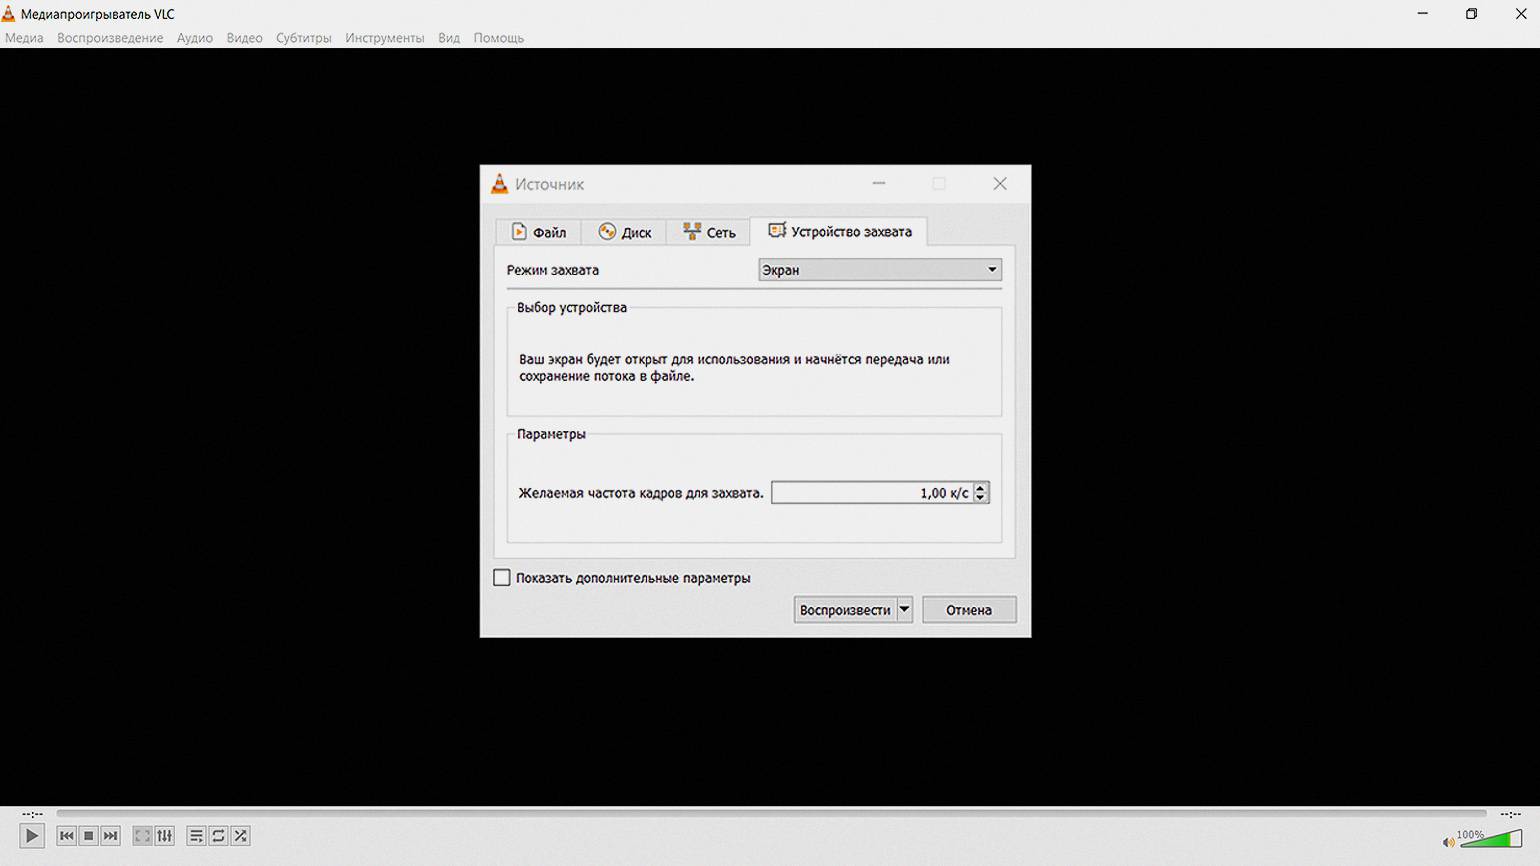
Скриншот: VLC Media Player / Skillbox Media
Ещё одна бесплатная программа для записи видео с экрана компьютера. Выпущена компанией RenderSoft Software. Работает только на Windows.
С помощью CamStudio можно записывать видео всего экрана, открытого окна или выделенной части экрана — со звуком или без. При записи стандартный курсор мыши можно заменить на анимированный.
Записанное видео сохраняется в формате AVI или MP4, также есть возможность конвертировать его в формат SWF.
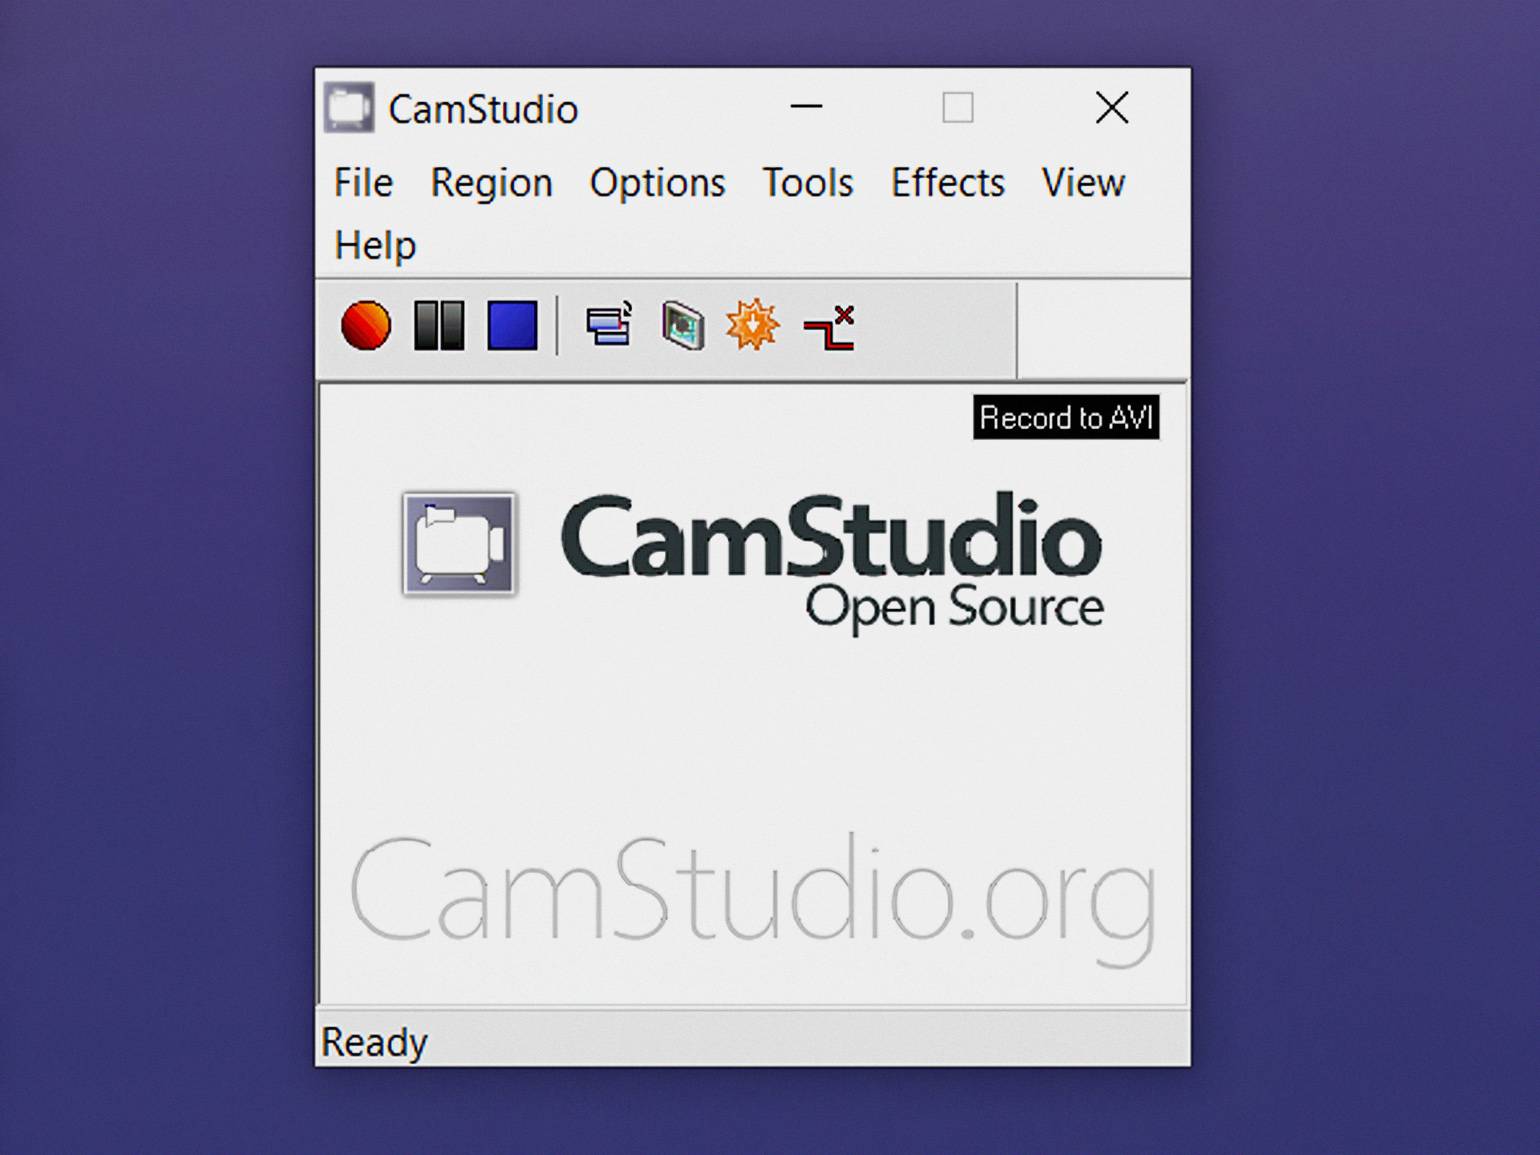
Скриншот: CamStudio / Skillbox Media
Эта программа для записи экрана тоже работает только на Windows. Принадлежит компании Bandicam Company.
Программа условно-бесплатная. При бесплатном использовании можно записать видео до 10 минут. На полученной записи программа разместит своё название в виде водяного знака.
Платная подписка — от 2,78 доллара в месяц при ежемесячной оплате. Купить программу можно с помощью карты Visa, Mastercard. Но российские карты для оплаты не поддерживаются.
С помощью Bandicam можно создавать рисунки на видео в режиме реального времени, добавлять на видеоролик запись с веб-камеры или закадровый голос, создавать видео с эффектом хромакея, а ещё добавлять анимацию щелчка мыши.
Полученное видео сохраняется в форматах AVI и MP4.
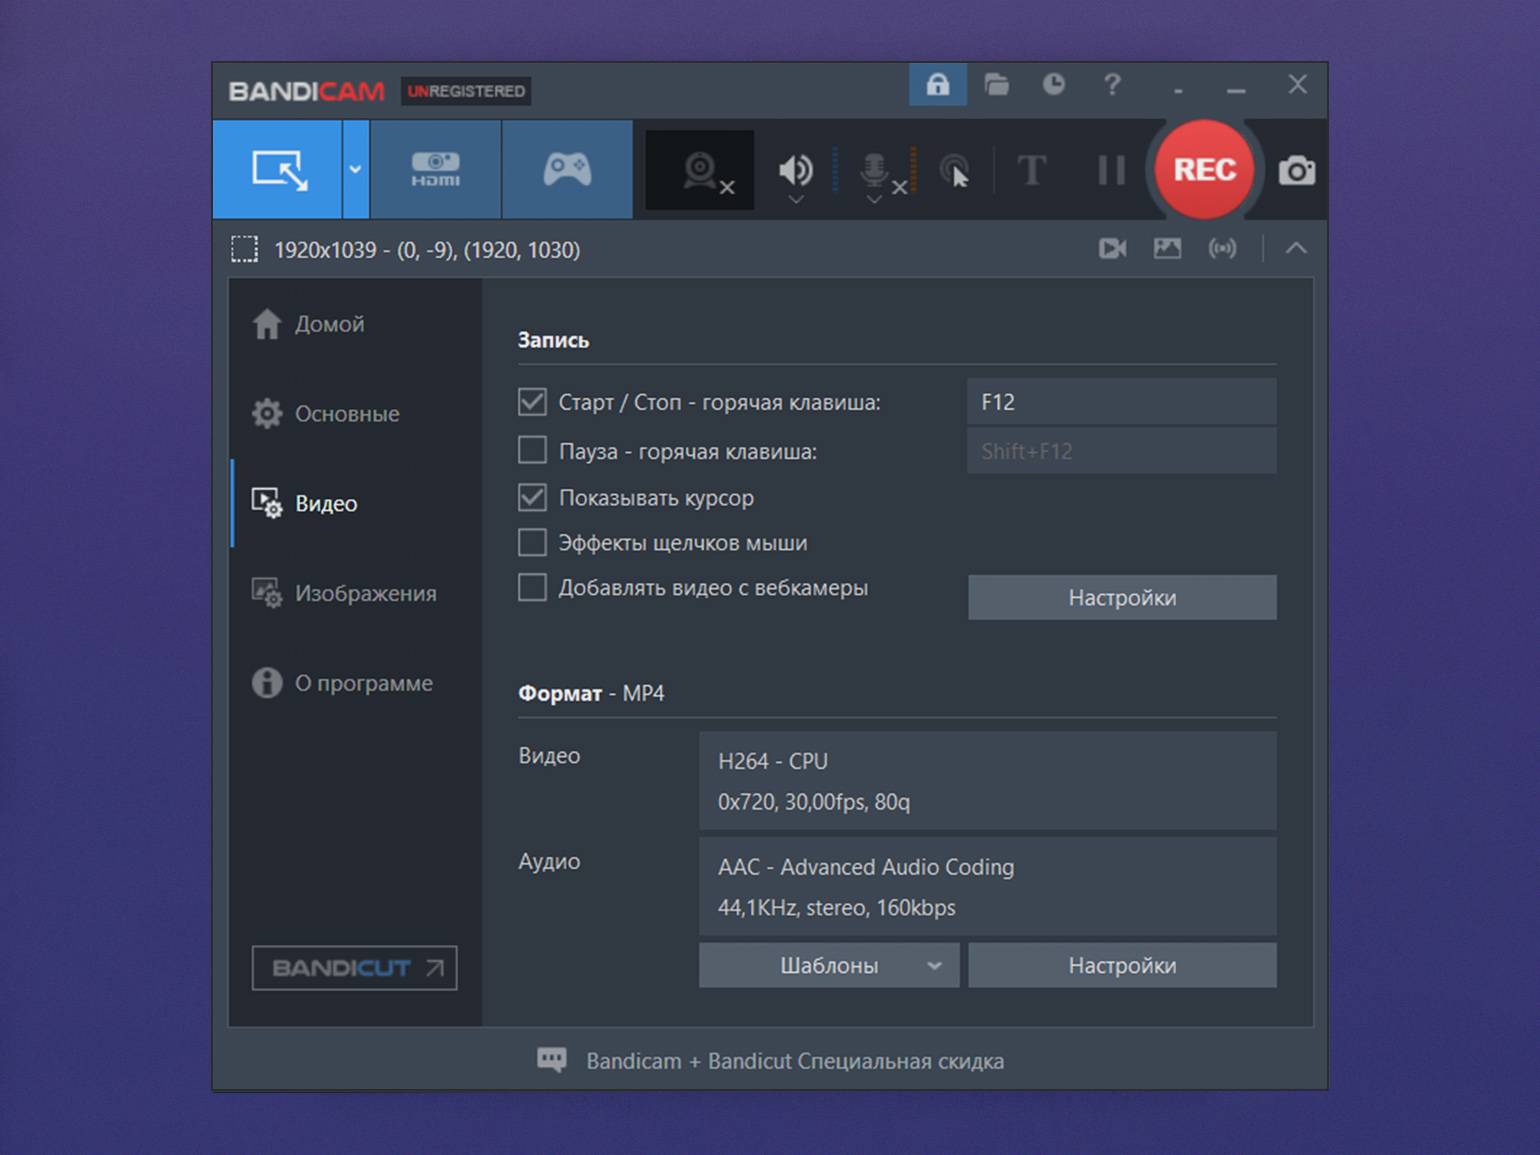
Скриншот: Bandicam / Skillbox Media
Бесплатная программа для стриминга и записи видео с экрана. Разработана независимым сообществом разработчиков OBS. Программа работает на Windows, macOS и Linux.
Программа позволяет записывать видео со звуком — при этом в настройках можно регулировать громкость разных источников звука. На видео можно накладывать фильтры.
Ещё в OBS Studio есть готовые предустановки для прямой трансляции на YouTube, в Twitch, «Инстаграме»*.
Записанное видео по умолчанию сохраняется в формате MKV. Можно выбрать и другие форматы — например, MP4 или MOV.
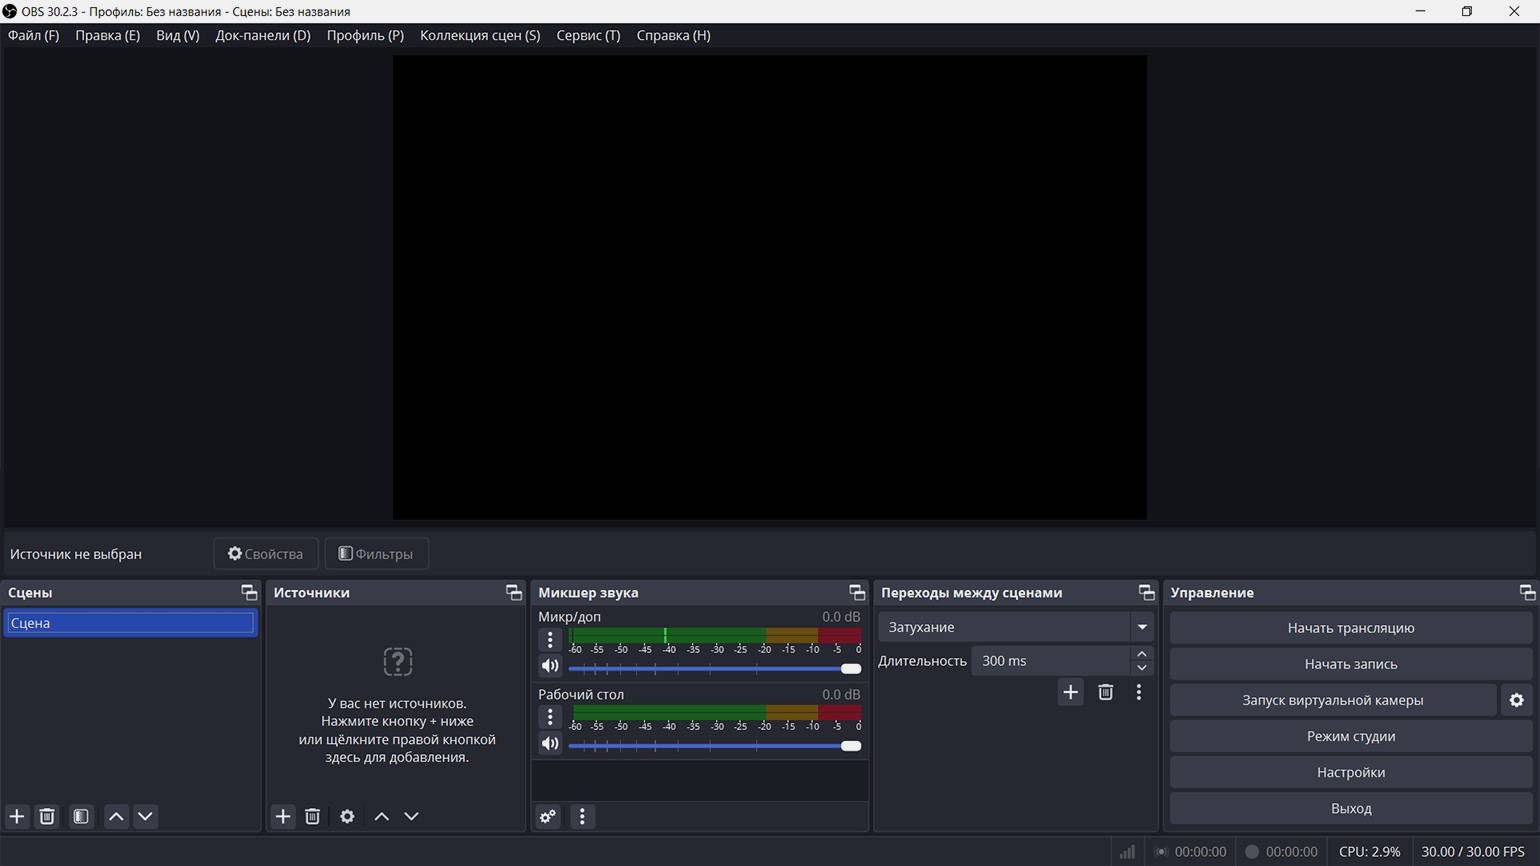
Скриншот: OBS Studio / Skillbox Media
Вот ещё три программы, которые можно использовать для записи видео с экрана компьютера:
- iSpring Free Cam российской компании «Ричмедиа». Предназначена для создания видеоуроков и презентаций. Можно выбрать отдельную область экрана для записи, записать голос с микрофона, а также системные звуки. Кроме того на записи можно подсветить курсор мыши и добавить звуковые эффекты. Программа бесплатная.
- iTop Screen Recorder китайского разработчика IObit. Подходит для создания видеоуроков и записи геймплея. Поддерживает веб-камеры. Программа бесплатная.
- Camtasia Studio компании TechSmith — программа для записи видео с экрана и видеоредактор в одном флаконе. Платная версия стоит от 179,88 доллара в год. Сервис не принимает карты российских банков. Есть бесплатный пробный период.
Если вы не хотите устанавливать дополнительные программы, можно воспользоваться онлайн-сервисами для записи экрана. Расскажем о трёх таких сервисах — все они бесплатные. С помощью них можно записывать экран не только компьютеров, но и смартфонов.
Snipclip Record
Сервис работает без рекламы, регистрации и не оставляет водяных знаков на записанных видео.
Чтобы записать экран, откройте сайт сервиса и нажмите на Start recording. Выберите источник записи — веб-камеру, экран или всё сразу — и определите область для записи. При необходимости откройте доступ к записи звука и кликните «Поделиться этим окном».
После окончания записи вы сможете скачать видео в формате WebM.
Аналогичный сервис для записи экрана через браузер. Перейдите на сайт программы и нажмите Record. Затем выберите источник записи, укажите область, которую нужно записать, и нажмите на Start Recording. Полученное видео также можно будет скачать себе на устройство.
Скриншот: RecordScreen / Skillbox Media
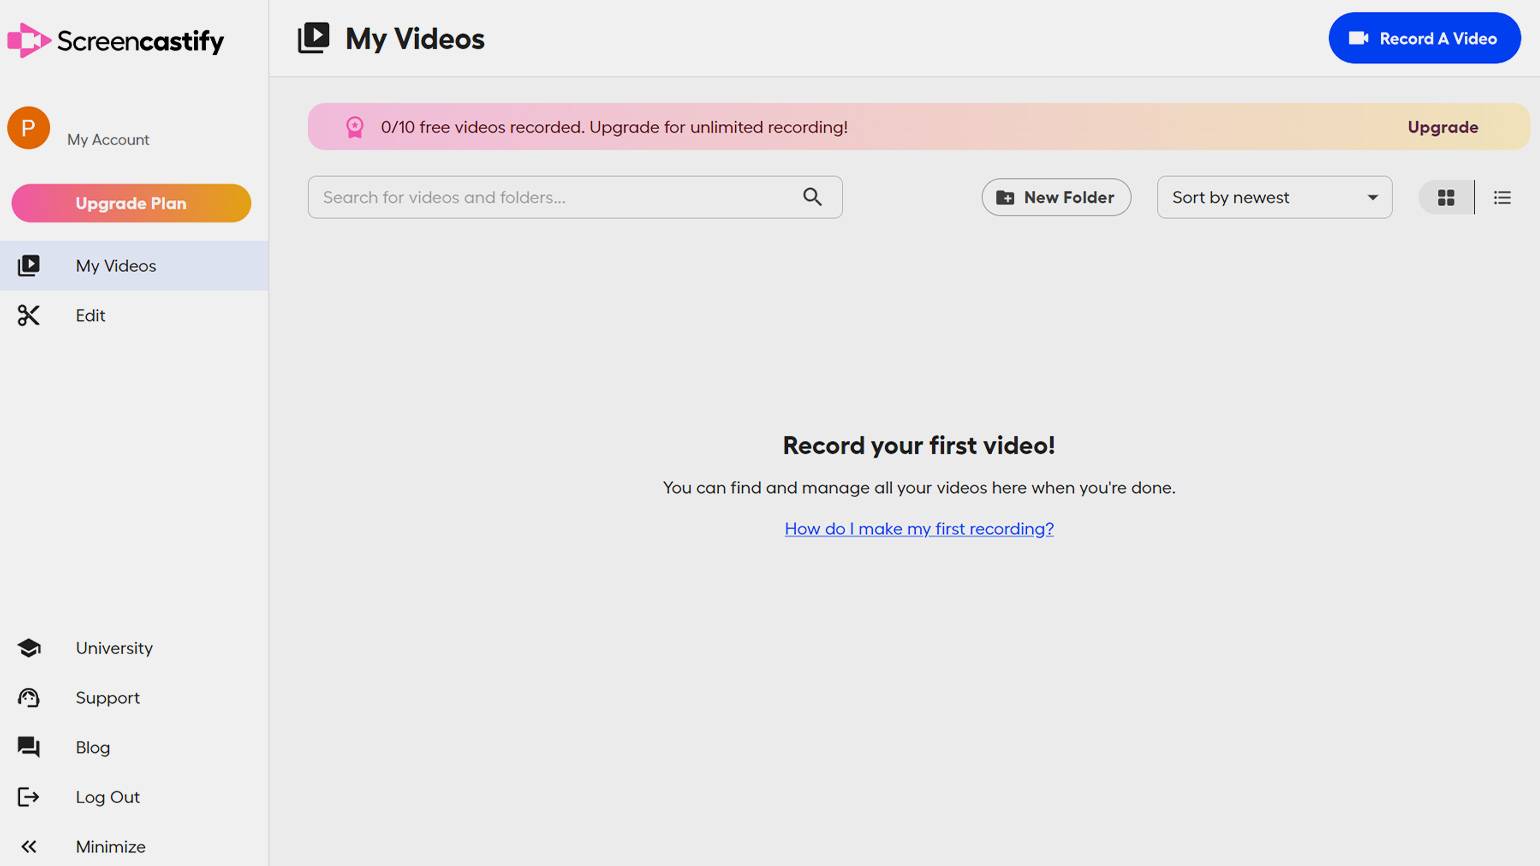
Расширение для браузера Chrome. От других сервисов для записи экрана отличается тем, что поддерживает запись в офлайн-режиме и автоматически сохраняет ролики на «Google Диск». Также можно сохранить полученное видео на своём устройстве или поделиться им в YouTube и соцсетях.
Чтобы использовать Screencastify, его нужно скачать и установить через магазин расширений Chrome. Перед первым использованием нужно войти в аккаунт Google и настроить параметры записи.
Для начала записи нажмите сочетание клавиш Alt + Shift + S, выберите источник записи и нажмите на Record.
Скриншот: Screencastify / Skillbox Media
Другие полезные материалы Skillbox Media
* Решением суда запрещена «деятельность компании Meta Platforms Inc. по реализации продуктов — социальных сетей Facebook и Instagram на территории Российской Федерации по основаниям осуществления экстремистской деятельности».
В какой профессии на удалёнке вы добьётесь успеха?
Пройдите бесплатный тест и узнайте ответ за 15 минут. А потом попробуйте свои силы в выбранной специальности.
Пройти тест →
Бесплатный тест: какая digital-профессия вам подходит?
Узнайте ответ за 15 минут и попробуйте свои силы в новой специальности.
Пройти тест →
Возможно, вам нужно записать на вашем ПК с Windows 11/10/8/7 презентацию для онлайн-занятий или собраний, или вы готовите что-то, чем хотите поделиться со своими зрителями. Независимо от причин, вы можете легко использовать встроенные рекордеры на ПК с Windows. Однако существуют некоторые ограничения по размеру захвата, настройкам вывода и т. д. Таким образом, вот 4 эффективных способа узнать, как записывать экран в Windows.
| Метод | Простота использования на основе пользовательского опыта |
| AnyRec Screen Recorder | Поставляются с простым интерфейсом с понятными опциями для записи и редактирования экрана. Это может быть подавляющим для абсолютных новичков, но это хорошо подходит почти для всех. |
| Панель игр Xbox | Он был разработан для простоты на компьютерах Windows. Он идеально подходит для захвата игрового процесса или быстрых записей экрана. |
| Ножницы | Чрезвычайно прост в использовании для создания первичных снимков экрана, хотя и обладает ограниченными функциональными возможностями, что делает его менее подходящим для сложных задач записи. |
| AnyRec Free Screen Recorder | Отличная бесплатная альтернатива онлайн-рекордера экрана, если вы предпочитаете ничего не устанавливать для записи Windows 11/10. Он также может производить высококачественный putput. |
Лучший способ записи экрана в Windows 11/10/8/7
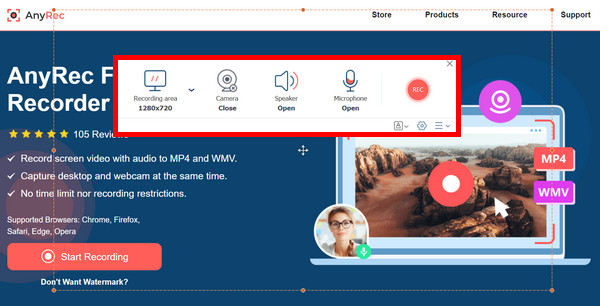
Начните это руководство с универсального инструмента записи экрана в Windows 11/10/8/7 под названием AnyRec Screen Recorder. Программа предназначена для захвата любой экранной активности с удобным интерфейсом и рядом функций. Независимо от того, создаете ли вы обучающие материалы, записываете игровой процесс или записываете онлайн-встречи, программа предлагает плавный процесс записи для всех. Вы можете получить желаемую область с помощью ее нескольких режимов записи, а также предпочитаемое вами качество с ее настраиваемыми параметрами записи видео и звука. Начните записывать экран на вашем ПК с Windows с высоким качеством прямо сейчас!

AnyRec Screen Recorder
Может записывать систему, звук, микрофон или и то, и другое во время записи экрана.
Сделайте снимок экрана Windows в различных разрешениях и с разной частотой кадров.
Редактируйте свои записи в программе с помощью триммера, резака и других инструментов.
Сохраняйте запись экрана в известных форматах, таких как AVI, WMV, MP4 и т. д.
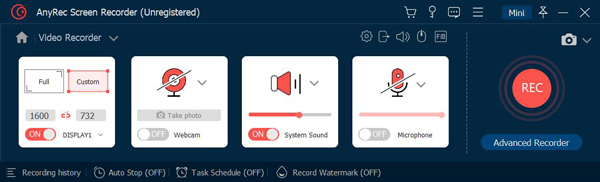
Шаг 1.После того как вы запустили AnyRec Screen Recorder, в главном окне отобразятся понятные параметры записи экрана. Выберите, записывать ли «Полный» или «Пользовательский».
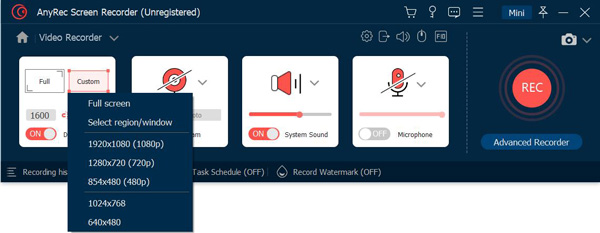
Шаг 2.Включите кнопку переключателя «Звук системы», чтобы записывать внутренний звук, кнопку «Микрофон», чтобы записывать свой голос, или обе кнопки, в зависимости от ваших требований к записи.
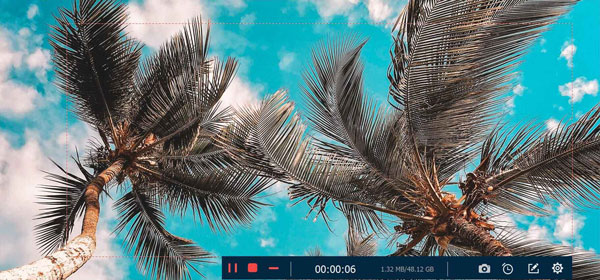
Шаг 3.После того, как все улажено, нажмите кнопку «REC», чтобы начать запись активности экрана Windows 11/10/8/7. Теперь вы можете добавлять аннотации и делать скриншоты.
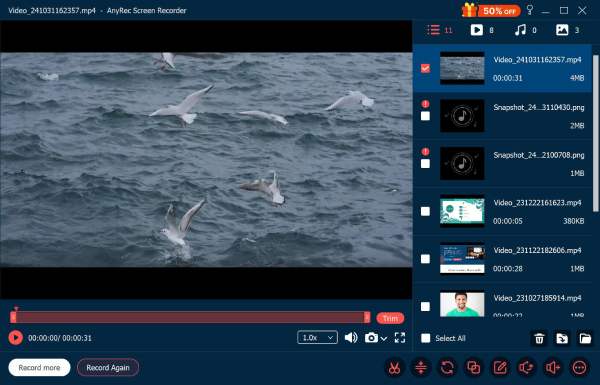
Шаг 4.Наконец, пришло время редактировать ваши записи! После окончания записи вы перейдете в окно «Предварительный просмотр», где вы сможете просмотреть и обрезать вашу запись перед ее сохранением.
Используйте Game Bar для захвата экрана Windows
Помимо упомянутого программного обеспечения, Windows 11/10 предоставляет встроенную функцию, с помощью которой вы можете легко понять, как записывать экран в Windows со звуком. Вы можете наслаждаться Xbox Game Bar, изначально разработанным для захвата игрового процесса, но идеально подходящим для записи любой экранной активности. Он действует как настраиваемый оверлейный рекордер, к которому вы можете получить доступ, не выходя из игры.
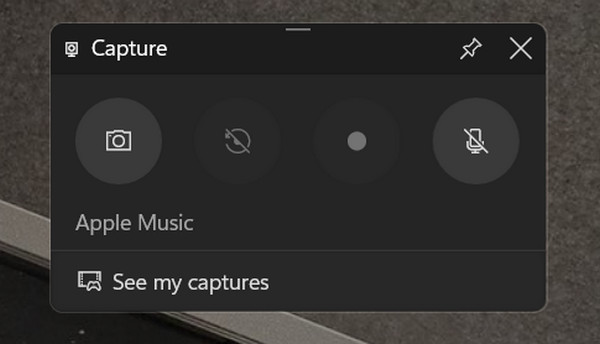
Шаг 1.Для запуска Панель игр Xbox, нажмите клавиши «Windows + G». Щелкните виджет «Захват» на плавающей панели, если окно «Захват» не открывается автоматически.
Шаг 2.Убедитесь, что нужное окно записи открыто. Щелкните значок «Микрофон», если вы хотите записать звук. Затем перейдите к кнопке «Красный круг», чтобы начать и закончить запись.
Примечание
Вы также можете использовать сочетания клавиш «Windows + Alt + R» для запуска и завершения процесса записи экрана на ПК с Windows 10/11.
Как использовать инструмент «Ножницы» в Windows 11/10
Если вы по-прежнему хотите больше встроенных опций на компьютерах с Windows 11/10, вы наверняка будете рады узнать о Ножницы! Это удобное приложение для систем Windows, которое позволяет вам записывать экран в Windows и делать снимки экрана определенных областей или всего экрана.
Шаг 1.Начните с открытия инструмента «Ножницы», что можно сделать двумя способами:
• Найдите его в строке поиска Windows, нажав меню «Пуск» или клавишу «Windows», а затем введите «Ножницы». Выберите его из лучших результатов.
• Используйте сочетание клавиш: «Windows + Shift + S» на клавиатуре. Это откроет небольшое меню захвата без запуска всего окна инструмента «Ножницы».
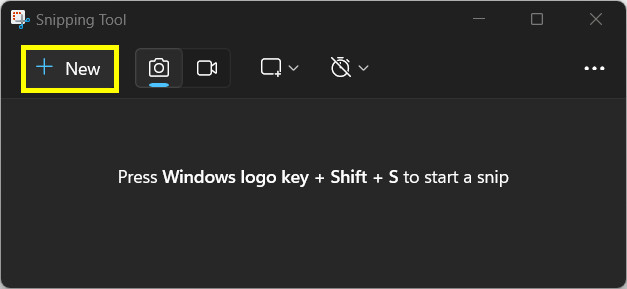
Шаг 2.Нажмите «маленькую стрелку вниз» рядом с кнопкой «Новый», затем выберите опцию «Запись экрана». Затем нажмите кнопку «Новый», чтобы начать запись Windows.
Шаг 3.Чтобы записывать звук с микрофона вместе с экраном Windows, не забудьте включить значок «Микрофон» на панели инструментов «Ножницы».
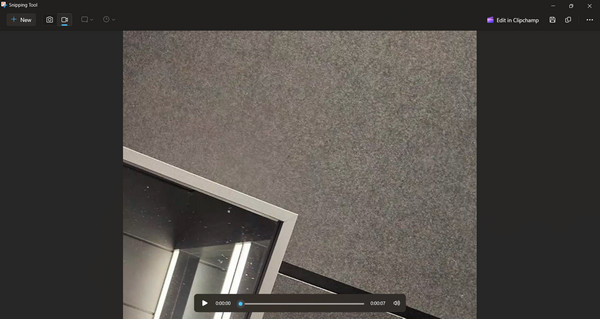
Шаг 4.Если вы закончили, нажмите кнопку «Стоп» или используйте клавишу «Esc» на клавиатуре, чтобы завершить сеанс. Теперь вы можете приступить к редактированию записи с помощью ручки, маркера или ластика инструмента.
Бесплатный онлайн-способ записи экрана на ПК с ОС Windows
Ищете простой способ записи экрана на Windows 11/10 без лишних трат и установки чего-либо? AnyRec Free Screen Recorder предоставляет многофункциональное решение, позволяющее вам без усилий захватывать активность на рабочем столе. С этим бесплатным онлайн-инструментом вы можете рассчитывать на удобный для пользователя макет и два популярных формата, MP4 и WMV, для совместимости с большинством проигрывателей и платформ. Кроме того, вы можете записывать внутренний и внешний звук при захвате экрана Windows, даже с помощью экрана веб-камеры.
AnyRec Screen Recorder
Поддерживаются различные режимы записи, такие как полноэкранный режим, пользовательский регион и т. д.
Может записывать экран и звук Windows 11/10 в течение неограниченного времени.
Позволяет отображать или скрывать плавающую панель инструментов во время записи Windows.
В комплекте инструменты для аннотирования в реальном времени при записи, например текста, фигур и т. д.
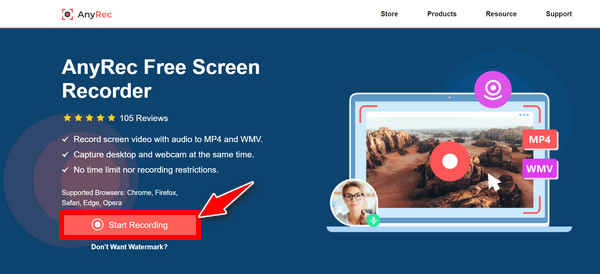
Шаг 1.На AnyRec Free Screen Recorder нажмите кнопку «Начать запись», чтобы начать операцию с выбором нужной области.
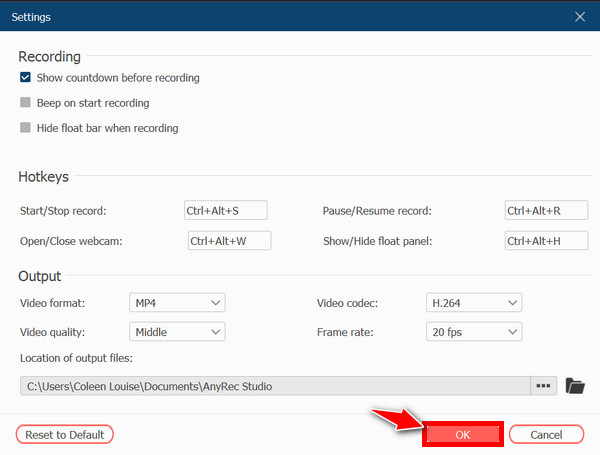
Шаг 2.При желании вы можете перейти к кнопке «Настройки», чтобы задать предпочитаемый формат, качество, кодек и т. д. Нажмите кнопку «ОК», чтобы применить изменения и записать в Windows.
Шаг 3.После этого нажмите кнопку «REC», чтобы начать захват экрана Windows. Через некоторое время нажмите кнопку «Stop», сохраните видео в выбранном вами формате или поделитесь им прямо сейчас.
Часто задаваемые вопросы о том, как записывать видео с экрана в Windows 11/10
-
Есть ли у встроенного средства записи экрана Windows 11/10 функции редактирования?
К сожалению, нет. Встроенные инструменты, такие как Xbox Game Bar и Snipping Tool, являются лишь базовыми инструментами записи. Если вам нужен полный набор функций редактирования, вам понадобится отдельное программное обеспечение для редактирования видео, чтобы обрезать и редактировать ваши записи, или сторонний рекордер экрана.
-
Как сделать запись экрана в Windows 7?
В отличие от Windows 11/10, если вы используете компьютер с Windows 7, вы не сможете найти встроенные инструменты, такие как Xbox Game Bar, для записи экрана. Таким образом, просто используйте AnyRec Screen Recorder или другие онлайн-инструменты для захвата старого Windows.
-
Как использовать инструмент «Ножницы» для создания снимков экрана Windows?
Внутри инструмента вы можете выбрать режим захвата из следующих вариантов: Rectangular Snip, Free-form Snip, Window Snip или Full-Screen Snip. Затем нажмите кнопку «New» сразу после этого, чтобы успешно сделать снимок экрана на экране Windows 11/10.
-
Можно ли записать системный звук вместе с экраном с помощью инструмента «Ножницы»?
К сожалению, нет. Snipping Tool может записывать только звук с вашего микрофона, а не системный звук с вашего компьютера. Для выполнения таких действий вам понадобится помощь других инструментов, таких как Xbox Game Bar, который также является встроенным инструментом в системах Windows 11/10.
Заключение
YЗахват экрана Windows 11/10 происходит так легко с решениями, представленными в этом посте сегодня. Вы можете быстро записать экран в Windows с помощью встроенных инструментов, таких как Xbox Game Bar и Snipping Tool. Однако эти два доступны только в Windows 10/11, так что как насчет захвата экранов более ранних версий Windows? Используйте AnyRec Screen Recorder решение для этого! Эта программа доступна в системах Windows, позволяя вам записывать экран одновременно с внутренним или внешним звуком, если вы хотите. Она также имеет много интересных инструментов помимо записи экрана.
Связанная статья
Print Screen has its own dedicated keyboard button on most Windows computers, but what about when a still image doesn’t cut it? After all, it would be really hard to make a tutorial, stream a game, or film a lesson if you couldn’t capture a screen recording.
Using an external camera is clunky and difficult, so instead, we have compiled a list of built-in methods and available third-party software that will do the trick instead. It may not be as simple as pressing the print screen key (PrtSc), but these tools are more than capable of doing the job.
Here’s a quick summary of our top methods:
| Method | Cost | Requirements | Best for |
| Windows Game Bar | Free | Intel Quick Sync H.260, Nvidia NVENC, or AMD VCE graphics | Simple recordings without special edits |
| MS Powerpoint | Varies | Office 2013 or later | Use in presentations, simple recordings |
| OBS Studio | Free | Download a software | Streaming |
| FlashBack Express/Pro | Freemium | Download a software | Recording & Editing |
| APowerSoft Online Screen Recorder | Freemium | Download a small launcher | Quick and convenient recordings |
Using an Apple Mac computer? Also read: How to Record Screen on Mac
Table of Contents
- Method 1: Windows Game Bar
- Method 2: Microsoft Powerpoint
- Method 3: OBS Studio
- Method 4: FlashBack Express
- Method 5: APowerSoft Online Screen Recorder
- Alternative Methods That Also Work
- 6. YouTube Live Streaming
- 7. Filmora Scrn
- 8. Camtasia
- 9. Snagit
- 10. CamStudio
- Conclusion
Method 1: Windows Game Bar
Windows 10 has a built-in screen recorder you can use without installing anything extra. However, it’s only available if you have a graphics card with Intel Quick Sync H.260 (2011 models or later), Nvidia NVENC (2012 models or later), or AMD VCE (2012 models or later except Oland), so if you’re having trouble, make sure your computer is up to spec.
For those who do have the proper hardware, here’s how to do it. Now, this feature is meant for gamers, but it can be used with any screen material.
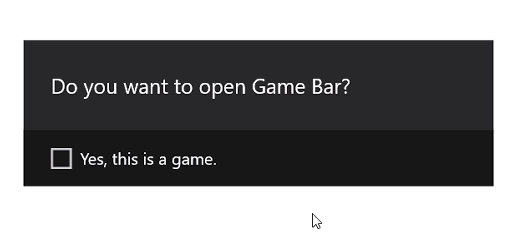
First, press the WINDOWS and G keys. Then, in the pop up choose “Yes, this is a game”.
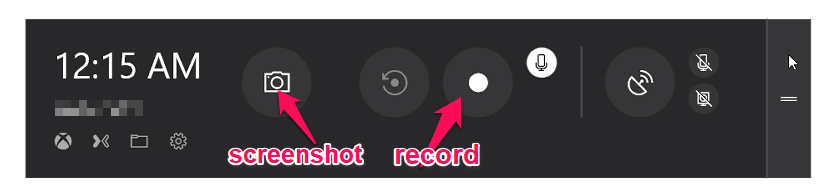
From there, recording is simple. You can use the red button on the bar to start and stop a recording, or use the settings menu to set an automatic cut off time for your recording.
Once you’re done, the file will be saved as an MP4 in your Videos\Captures folder. For more information on using the Game Bar for screen recording, you can check out this youtube video:
Method 2: Microsoft Powerpoint
Happen to have Office PowerPoint on your computer? Then you can use the program to create screencasts, not just presentations. Normally, this will embed the screen recording on a slide, but you can also choose to save it as a file. Here’s how to do it.
First, open Microsoft PowerPoint. Then choose the Insert tab and Screen Recording.
Next, choose which part of your screen you want to record with the Select Area tool. If you’re using Office 2016 or later, you can also use the hotkey WINDOWS + SHIFT + A. Click and drag the cross hairs to select your recording area. If you do not want to record audio, press WINDOWS + SHIFT + U to toggle it.
Once you’re ready, press the Record button.
The small control panel will disappear unless pinned, but you can make it reappear by moving your mouse to the top edge of the screen.
After you’re done, press the Record button again. The video will be automatically embedded in your slide, and you can choose FILE > SAVE AS to save your presentation. If you only want to save the video, choose FILE > SAVE MEDIA AS and then choose the destination folder and video name.
Note: If you are using PowerPoint 2013, you’ll need to follow some special instructions for recording and saving your video. You can find the official tutorial here.
Method 3: OBS Studio
If you’re not a fan of PowerPoint or want a dedicated tool for regular screen recording, OBS Studio is one of the best screen recording software. It’s open-source, doesn’t watermark or place time limits on your content, and offers many powerful editing features as well. It also supports live streaming at 60FPS and is a popular choice for this as well.
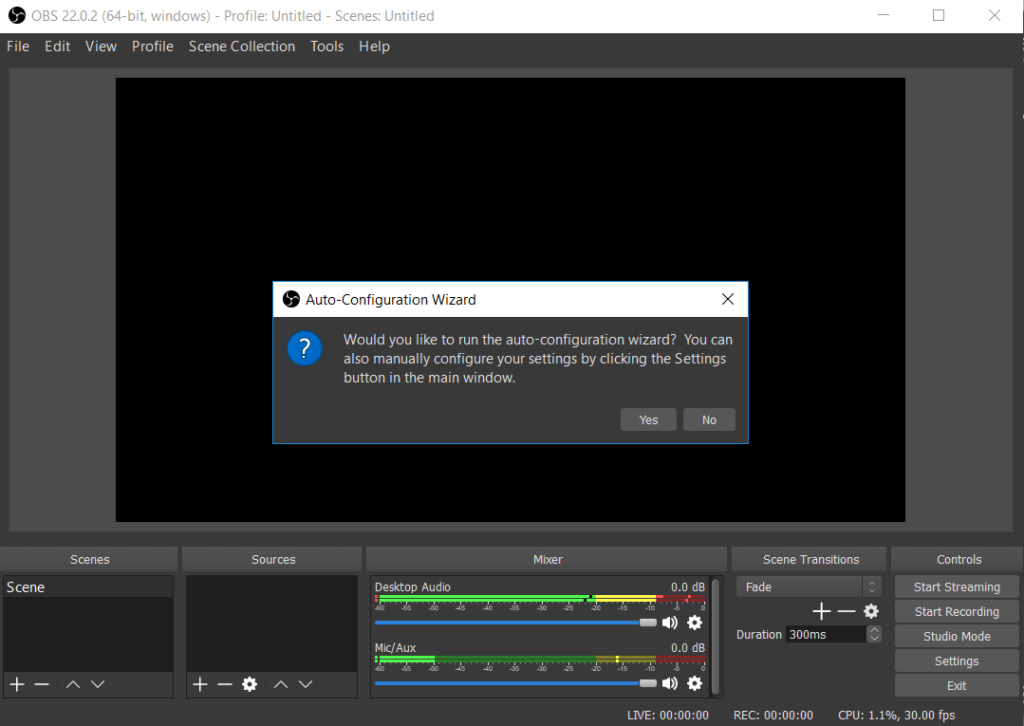
Before you get started, you’ll need to download OBS Studio from their website here. Since this is a very full-featured program, you’re going to want to run through some basic setup and settings before you get started.
This means you should check out all the settings such as enable/disable automatic recording, streaming setup, bitrate, audio sampling rate, hotkeys, and file naming format among others. What you choose for these will depend on where you plan to show your videos and the capabilities of your computer.
Alternatively, OBS studio does offer an auto-setup wizard that can choose some things for you.
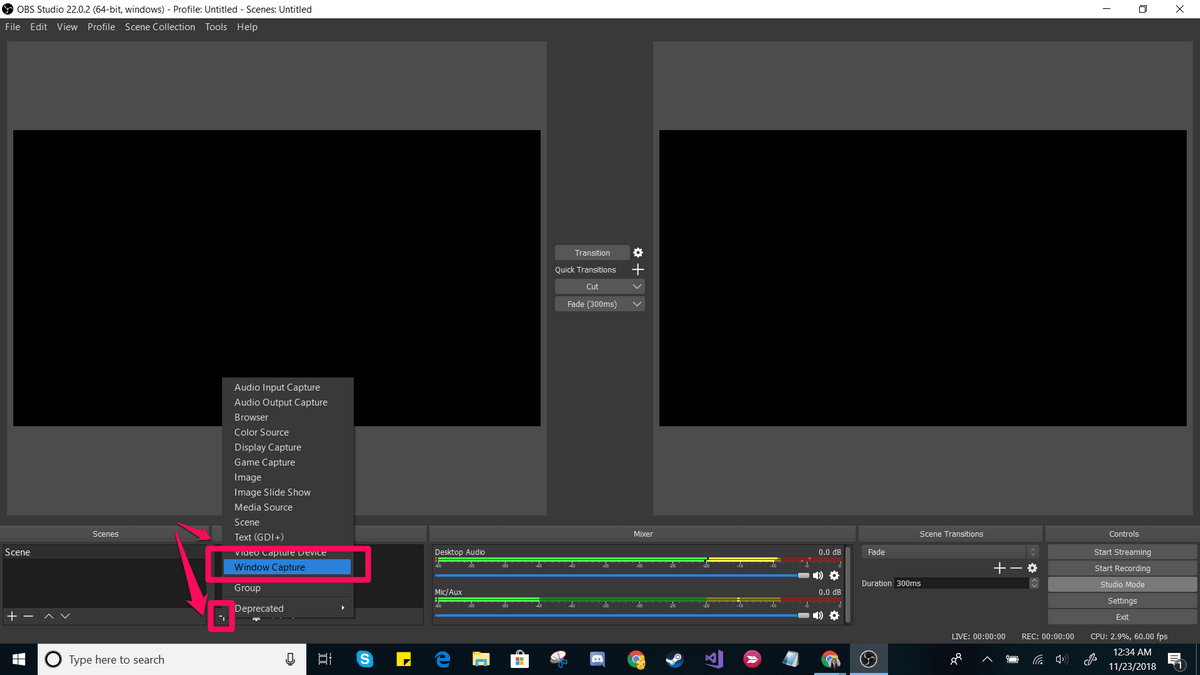
After all the setup, you can get started with a basic screen capture. First, put OBS in “Studio Mode” so that the left side says ‘preview’ and the right side says ‘live’.

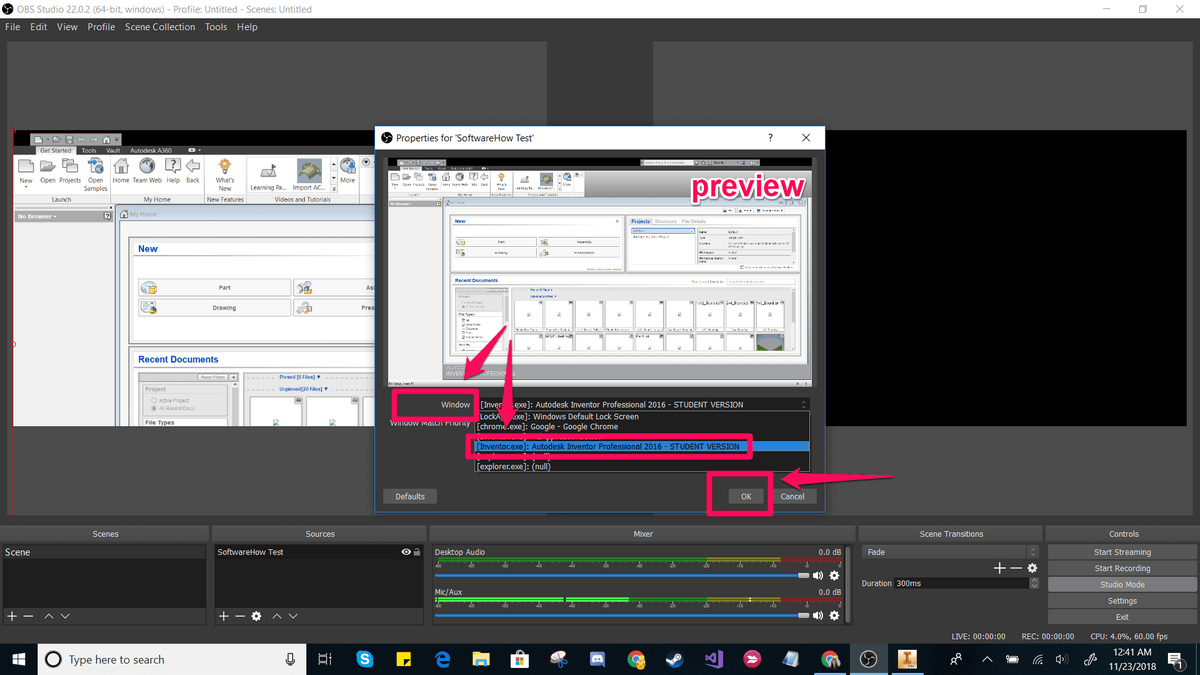
To set up a screen capture, choose Sources > + > Window Capture > Create New. In the drop down list that appears, choose the window you want to record.
This should place your window in the ‘preview’ panel. If it looks the way you want it to, click transition in the center of the screen. If it doesn’t, drag the red corners until the preview is adjusted to the size you would like.
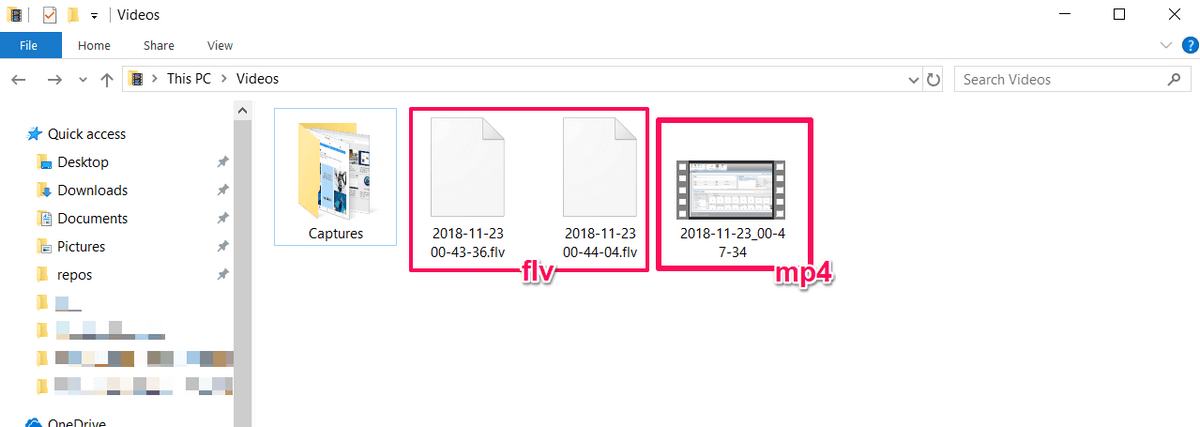
Then, click Start Recording and Stop Recording to create your video. By default, these are saved as flv files in the user/videos folder, but you can alter this path and save type in the settings.
OBS Studio is a very powerful software, and perhaps one of the best free programs for creating screen recordings or streaming. Its features extend far beyond the simple setup shown here.
Unfortunately, it doesn’t come with a lot of tutorial materials so you’re going to need to find most of your resources from the online community. Streamers may find that a good place to start is this tutorial from Youtube.
Method 4: FlashBack Express
If you’re looking for a dedicated software that can do both the recording and the editing, FlashBack might be a good choice. You can use their free version just for doing basic captures, but the paid option will allow you to make use of editing tools, save in a variety of formats, and add special content to your videos.
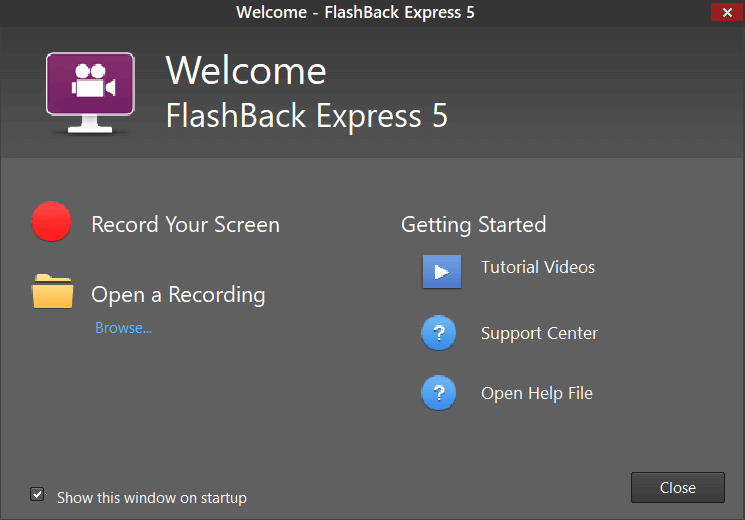
Here’s how to get started with FlashBack. First, download FlashBack from their site (choose “Express” if you want to start for free).
This will download an exe file. If this makes you uncomfortable, consider a different software. Next, click through the installation process. When you reach this startup screen, choose “Record Your Screen”.
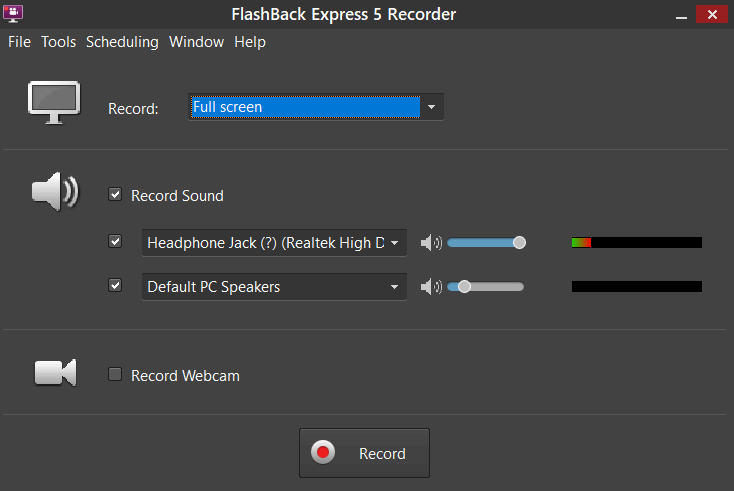
You’ll then have the option to change some settings for your recording, such as the audio source and capture size.
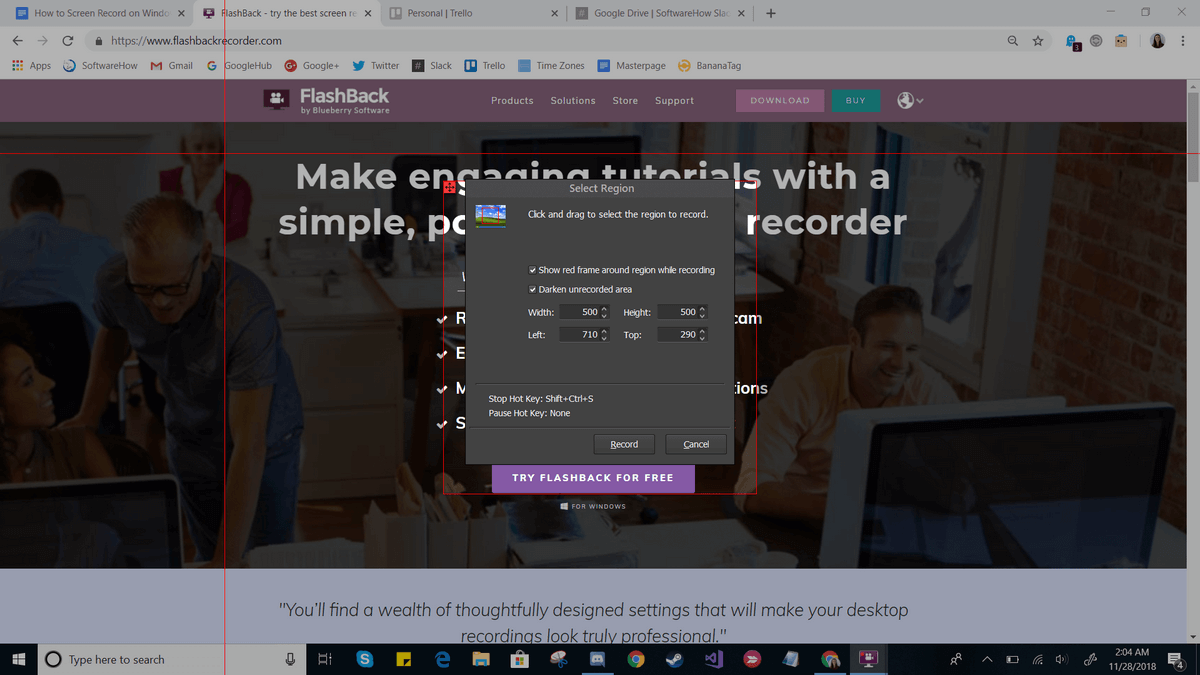
You can also decide whether to capture a window, a region, or the entire screen. If you select region, you’ll see some red cross hairs that you can drag to create a selection.
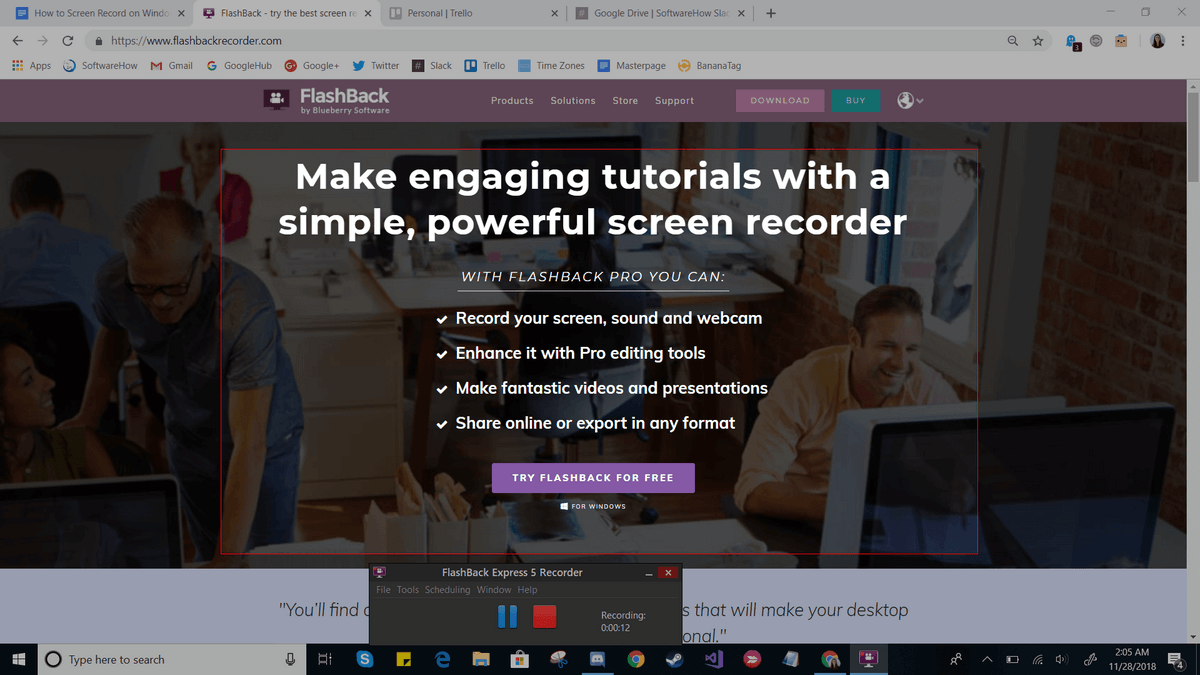
Then, press “Record” and do everything you need to. While recording, you should see a small bar on the bottom with “pause” and “stop” buttons. This bar can be hidden or shown at will.
Once you’re done, you’ll be asked to either review, discard, or save your recording. In Express, you will see a limited editor that will allow you to trim and crop the video as needed. Pro users will have a more full-featured video editor.
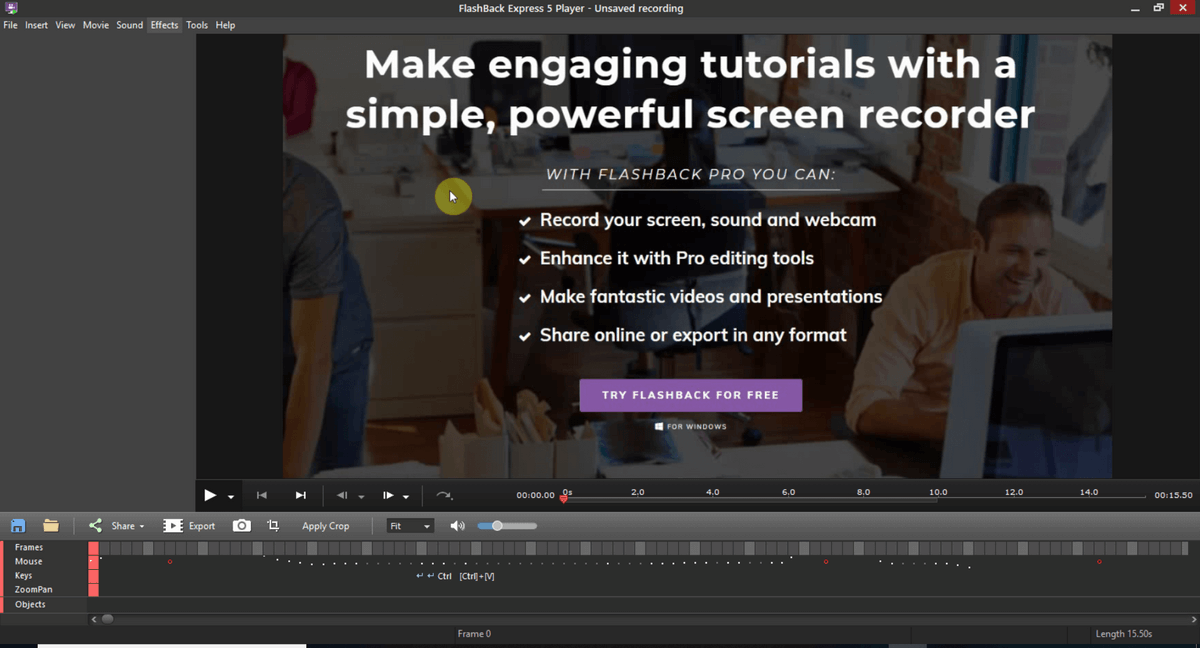
When you’re done editing, you can use the “Save” feature to save your video in a program-specific format. Or, you can use the export feature to save it as a normal file.
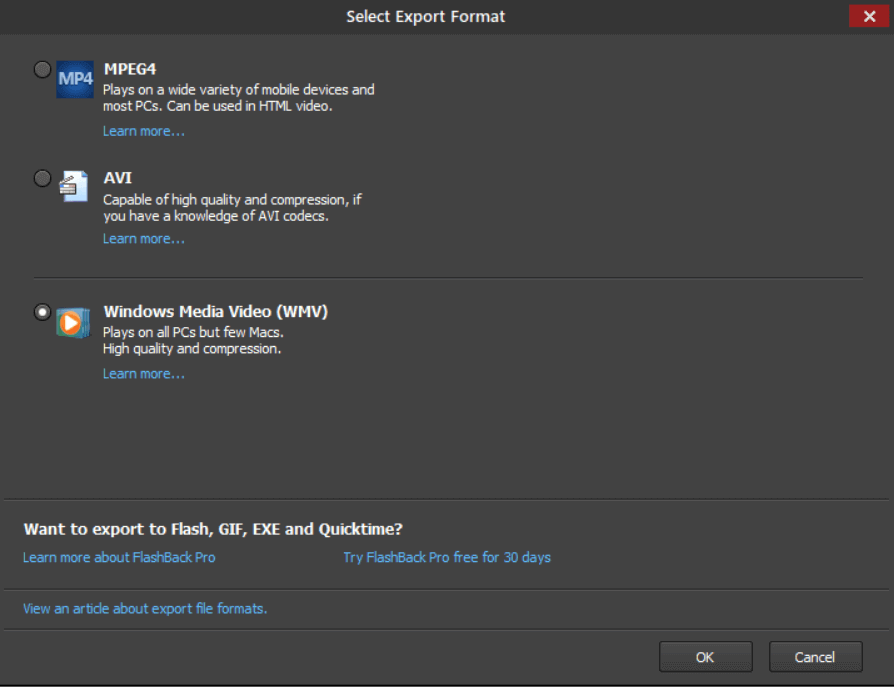
There are quite a few options, such as WMV, AVI, and MPEG4. Additionally, you can choose to export directly to YouTube instead by going to File > Share.
FlashBack Express is a simple solution with a lot of potential for screen recording and editing. It’s very easy to get started, and if you want to get more out of it you can buy a pro license just once (there’s no monthly subscription).
Method 5: APowerSoft Online Screen Recorder
If you prefer a web-based solution, APowerSoft offers an online recorder. The name though, appears to be a bit misleading – when attempting to try the software, we found that it does ask you to download a small package. However, the functionality comes completely from the website.
To use this tool, you’ll need to go to the APowerSoft Screen Recorder website. Then, just click the “Start Recording” button in the middle of the screen.
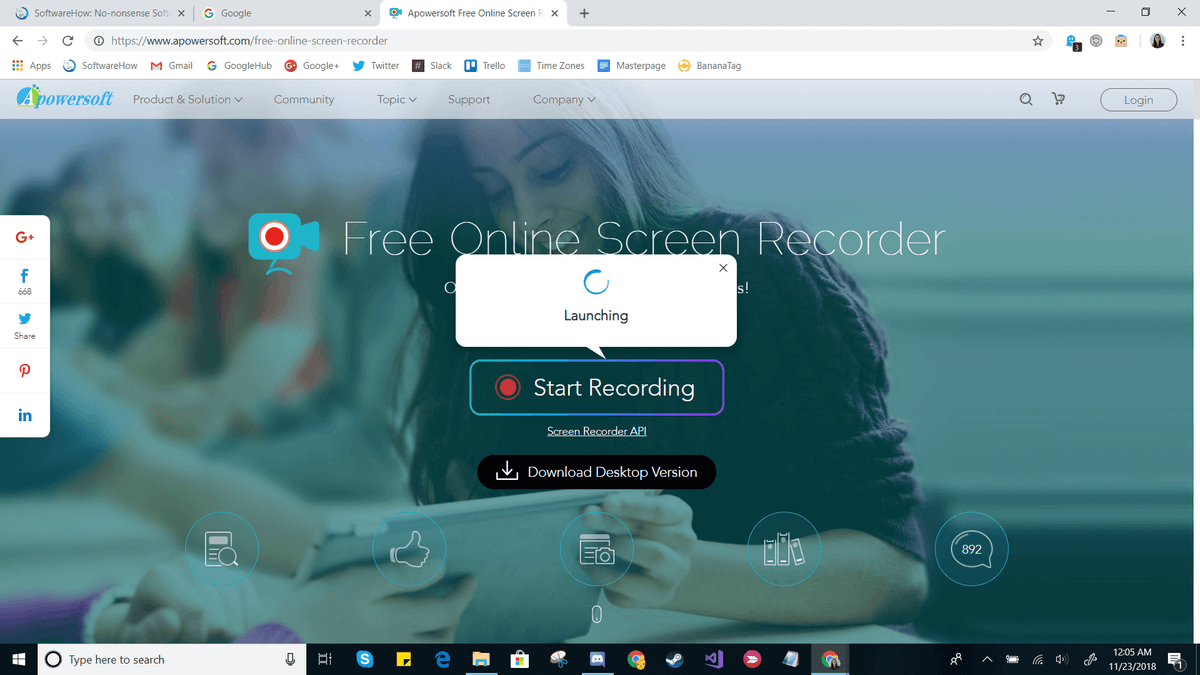
Agree to any prompts that appear, such as “Open APowerSoft Online Launcher”. If you choose not to create an account, you’ll also see the following warning before you get started:
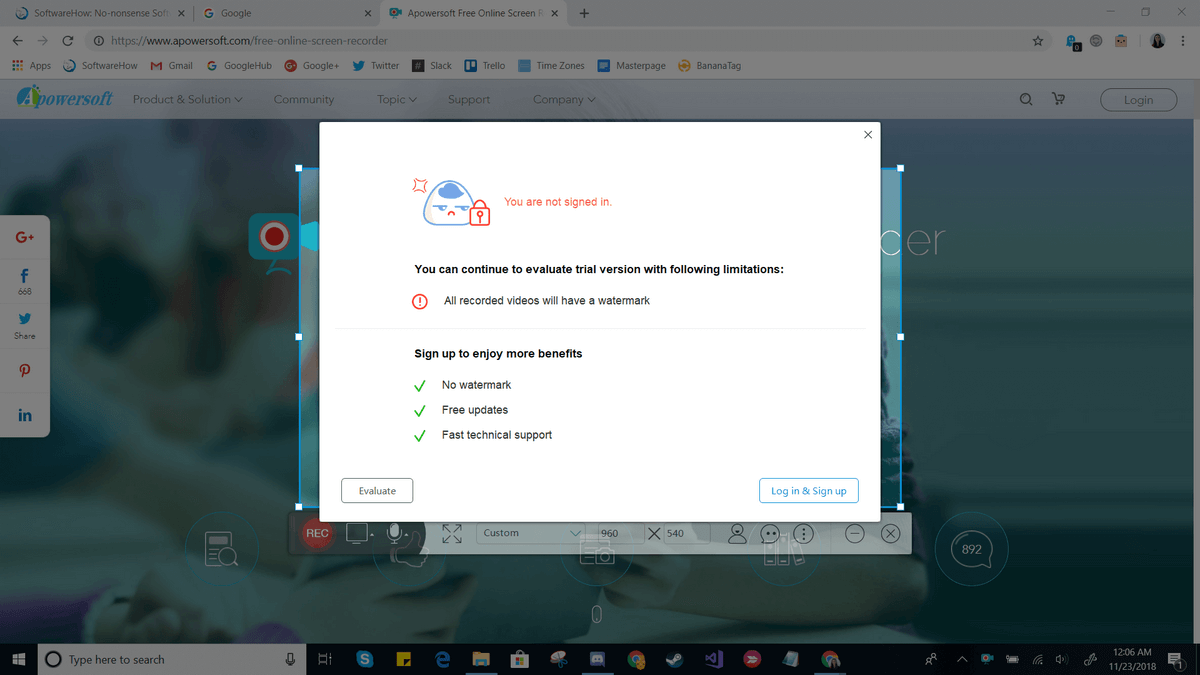
Creating an account is simple enough if you want to remove the watermark, but you can get started without one. Just click the “x” in the top right and you’ll see a new recording window appear. From here, you can resize your capture zone, move it around, or adjust special settings such as hide/show the toolbar, hotkeys, and etc.
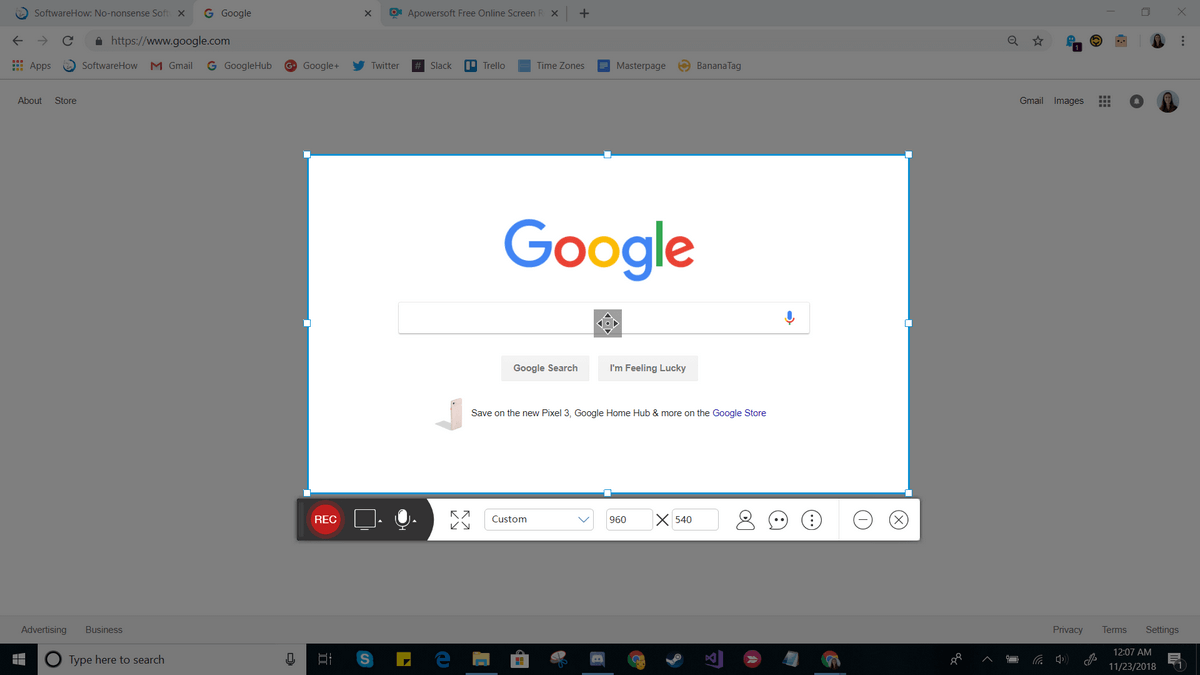
To start and stop recording, just press the red button. When you’re done, you’ll be shown your video clip.
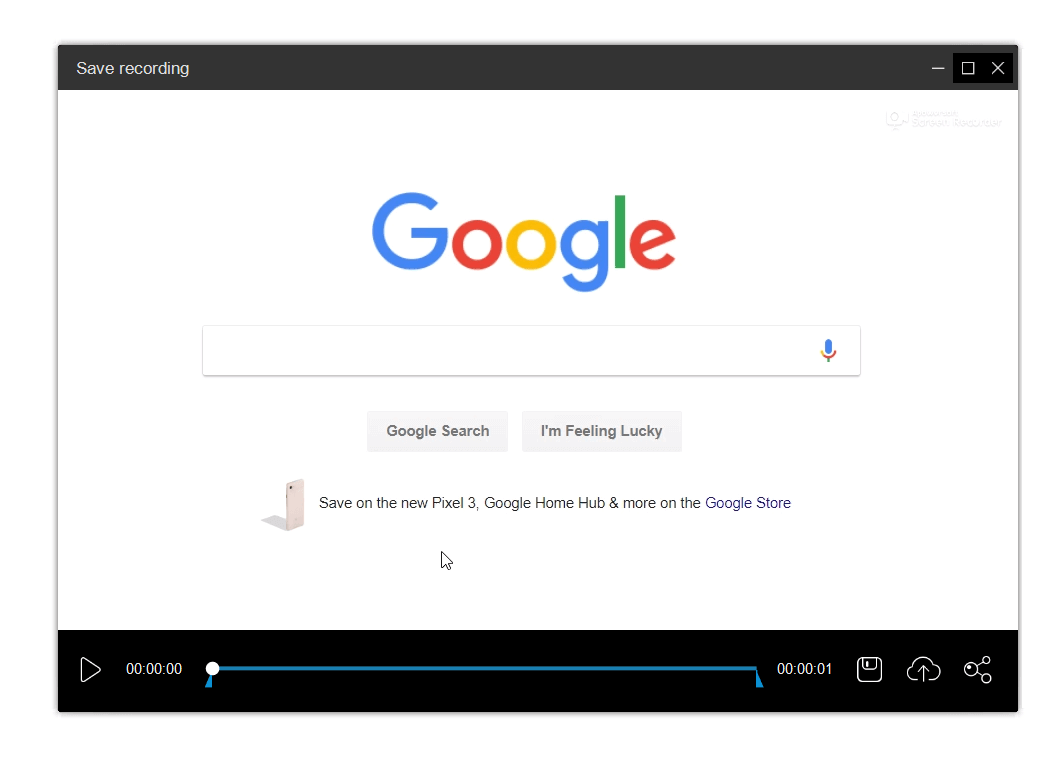
You can use the save icon to save your screencast as a video file or as a GIF, or use the share icon to upload it to YouTube, Vimeo, Drive, or Dropbox.
APowerSoft is a very lightweight program. It does give you some flexibility – for example, you can capture audio from the system, microphone, both or neither – but it is limited as far as editing capabilities unless you buy the paid version. You’d need to use a separate program on your computer if you plan to do any kind of edits.
On the other hand, the tool is very quick to use and could be great in a pinch or if you don’t need to make any fancy changes before sharing them.
Alternative Methods That Also Work
6. YouTube Live Streaming
If you have a YouTube channel, you can take advantage of the YouTube Creator Studio to film a screen recording. This requires using the live stream feature, so it’s not a great fit for everyone, but it could work out in some cases.
To get started with using YouTube for screencasting, check out this tutorial.
7. Filmora Scrn
Filmora Scrn is a dedicated screen recording software made by Wondershare. It offers dual camera recording (screen and webcam), plenty of export options, and editing tools.
Some people prefer it because the interface is a lot cleaner than some competing applications, but as this isn’t a free software, it’s not quite as accessible as some of the other methods listed here.
However, if you’re interested in an easy-to-use and specialized screen recording software, you can check out Filmora here.
8. Camtasia
Unlike many of the more specialized programs, Camtasia is a full-featured video editor first and a screen recording software second.
It offers the most editing and production capabilities, which makes it a great choice if you want to do more than just record your screen or plan to produce several kinds of videos. The interface is very clean and easy to use.
9. Snagit
Snagit is a program made by TechSmith, the same company that makes Camtasia. However, Snagit is not an all-in-one tool and instead is only meant for screen recording.
It offers some interesting features such as a magic selection tool that can automatically detect areas to record as well as an editing panel that will let you annotate your final videos.
10. CamStudio
CamStudio is a free software, but it’s an older and less well supported software compared to some alternatives.
The program is maintained primarily by one individual and definitely has a few bugs that are still being worked out, but if you’re interested in trying it’s worth giving a shot.
CamStudio may not be as “shiny” as some alternatives, but it is free and you should be interested in it.
Conclusion
That wraps up this guide. Whether you’re making videos for a small classroom, thousands of subscribers, or for your own enjoyment, learning how to record screens on Windows 10 can make a huge difference.
Depending on what features are important to you, there’s a variety of options that can meet your needs, and no reason why you shouldn’t succeed in making a great video.